Nordson EFD Ultimus I User manual

• Remove barrel holder sleeve from holder. ò
• Loosen the 6 mm screw from T-nut. ù
• Slide T-nut into left or right panel of workstation
slot, positioning as shown. ä
• Tighten 6 mm screw, securing holder to workstation
panel. ë
• Insert barrel holder sleeve. ö
• Loosen screw from wire hose holder T-nut. ü
• Slide T-nut into any workstation slot. Å
• Tighten screw to secure wire hose holder to
workstation. î
Easy 13-Step Setup
Follow these steps to get your Ultimus ready
for operation.
Ultimus™I–II High Precision
Fluid Dispensers
• Connect the power plug to the power pack. The unit is shipped
with a USA-compatible plug and three international plugs. Attach
the correct plug to match local power outlets.
• Connect the power cord to the back of the Ultimus.
• Connect the power cord to your local power source.
• Press the power button on the front panel.
• Unpack the unit.
• Now is a good time to activate your Five* Year No-Fault Warranty.
Register the warranty online at www.nordsonefd.com/warranty/five-no-fault..
*Two years in Asia
Unpack the Unit / Warranty
1
Install Barrel Holder
2
Connect Power
3
Electronic pdf files of Nordson EFD manuals are also available at www.nordsonefd.com.
ò
ù
î
ä
ö
ü
Å
ë
Quick Start Guide
Power cord

• Secure an EFD syringe barrel filled with your fluid to the adapter
assembly.
• Replace tip cap with an EFD precision dispense tip.
See the Operating Manual for syringe barrel filling techniques.
TIP
Attach Syringe Barrel & Tip
7
The Ultimus is normally operated using the foot pedal
provided.
• Plug the foot pedal into the back of the Ultimus.
Foot pedal
Connect Foot Pedal
4NOTE: Arrow on cord
connector faces up
Arrow on top
NOTE: Clean, dry, filtered factory air is required to meet warranty. If your air
supply is not filtered, order the 5-micron filter regulator (P/N 7002002).
• Push one end of the air input hose into the input fitting on the back of the
Ultimus.
• Connect the other end of the air input hose to your plant air supply.
For all Ultimus units: Set plant air supply within 5.5 to 7.0 bar (80 to 100 psi).
Input air
Connect Air Input
5
• Push in the EFD adapter assembly provided into the front of the Ultimus and
twist to lock.
Front panel output air
Connect Air Output
6

The Ultimus is shipped with default settings for the display of language (in
English), air pressure (psi), and vacuum (inH2O). Skip to step #10 if these
display settings are acceptable.
Otherwise, follow these steps to change the display settings:
• From the Home screen, press MENU.
• Press the down arrow to highlight Units of Pressure, Units of Vacuum, or
Language.
• Press SELECT.
• Press the down arrow to highlight your choice.
• Press SELECT again to make the change and return to the Home screen.
9
Select Display Settings
The Ultimus is shipped with all values set to zero. To set dispense time, follow
these steps:
• Begin in TIMED mode.
• Press the left / right arrows to select a single number in the time row.
• Press the up / down arrows to set the time.
10
Set Dispense Time
When powered on for the first time, the Ultimus Home screen displays in
TIMED mode. Otherwise, it displays in the mode last used.
• You can verify what mode you are in by checking the top left corner of the
display screen. It will be TIMED, TEACH, STEADY, or MEMORY.
• If needed, return to the Home screen from TEACH or STEADY mode by
pressing TIMED in the bottom right corner of the display.
• Return to the Home screen from MEMORY mode by pressing MENU, then
selecting TIMED.
Timed Mode
Select Timed Mode
8Menu
See the Ultimus Icon Guide, included with your dispensing system, if you are working in
Chinese, Japanese, or Korean. Sample icons:
(Timed) (Steady) (Teach) (Menu) (Select) (Home)
For Nordson EFD sales and service in over
40 countries, contact Nordson EFD or go to
www.nordsonefd.com.
Global
800-556-3484; +1-401-431-7000
Europe
00800 7001 7001
Asia
©2020 Nordson Corporation 7028812 v030320
Helpful Hints
• There are three core variables to the Ultimus: dispense time, pressure, and
vacuum. Adjust just one of these at a time, in small increments, to achieve your
ideal deposit.
• Another important variable is tip size. Choose the right tip for the deposit type.
Remember, smaller tips require more pressure and more time. Try different tips
without changing the time or pressure settings and observe the results.
• Tapered tips reduce the amount of air pressure needed to dispense thick
materials. They also help prevent drooling at the end of a dispense cycle.
• Use EFD SmoothFlow™pistons to prevent oozing. Pistons also make barrel
loading, dispensing, and fluid handling cleaner, safer, and more accurate.
• Avoid high pressure (example: 5.5 bar / 80 psi) with very short time settings (less
than 000.0100 seconds). The ideal setup matches air pressure and tip size to
produce a “workable” flow rate — no splashing but with a time setting that is not
extremely low.
• Longer dispense time settings generally provide the highest accuracy.
• Purge the dispense tip. From STEADY mode, press the foot pedal until
material flows from the tip.
• Return to TIMED mode.
• Press the foot pedal once to begin your next dispense cycle.
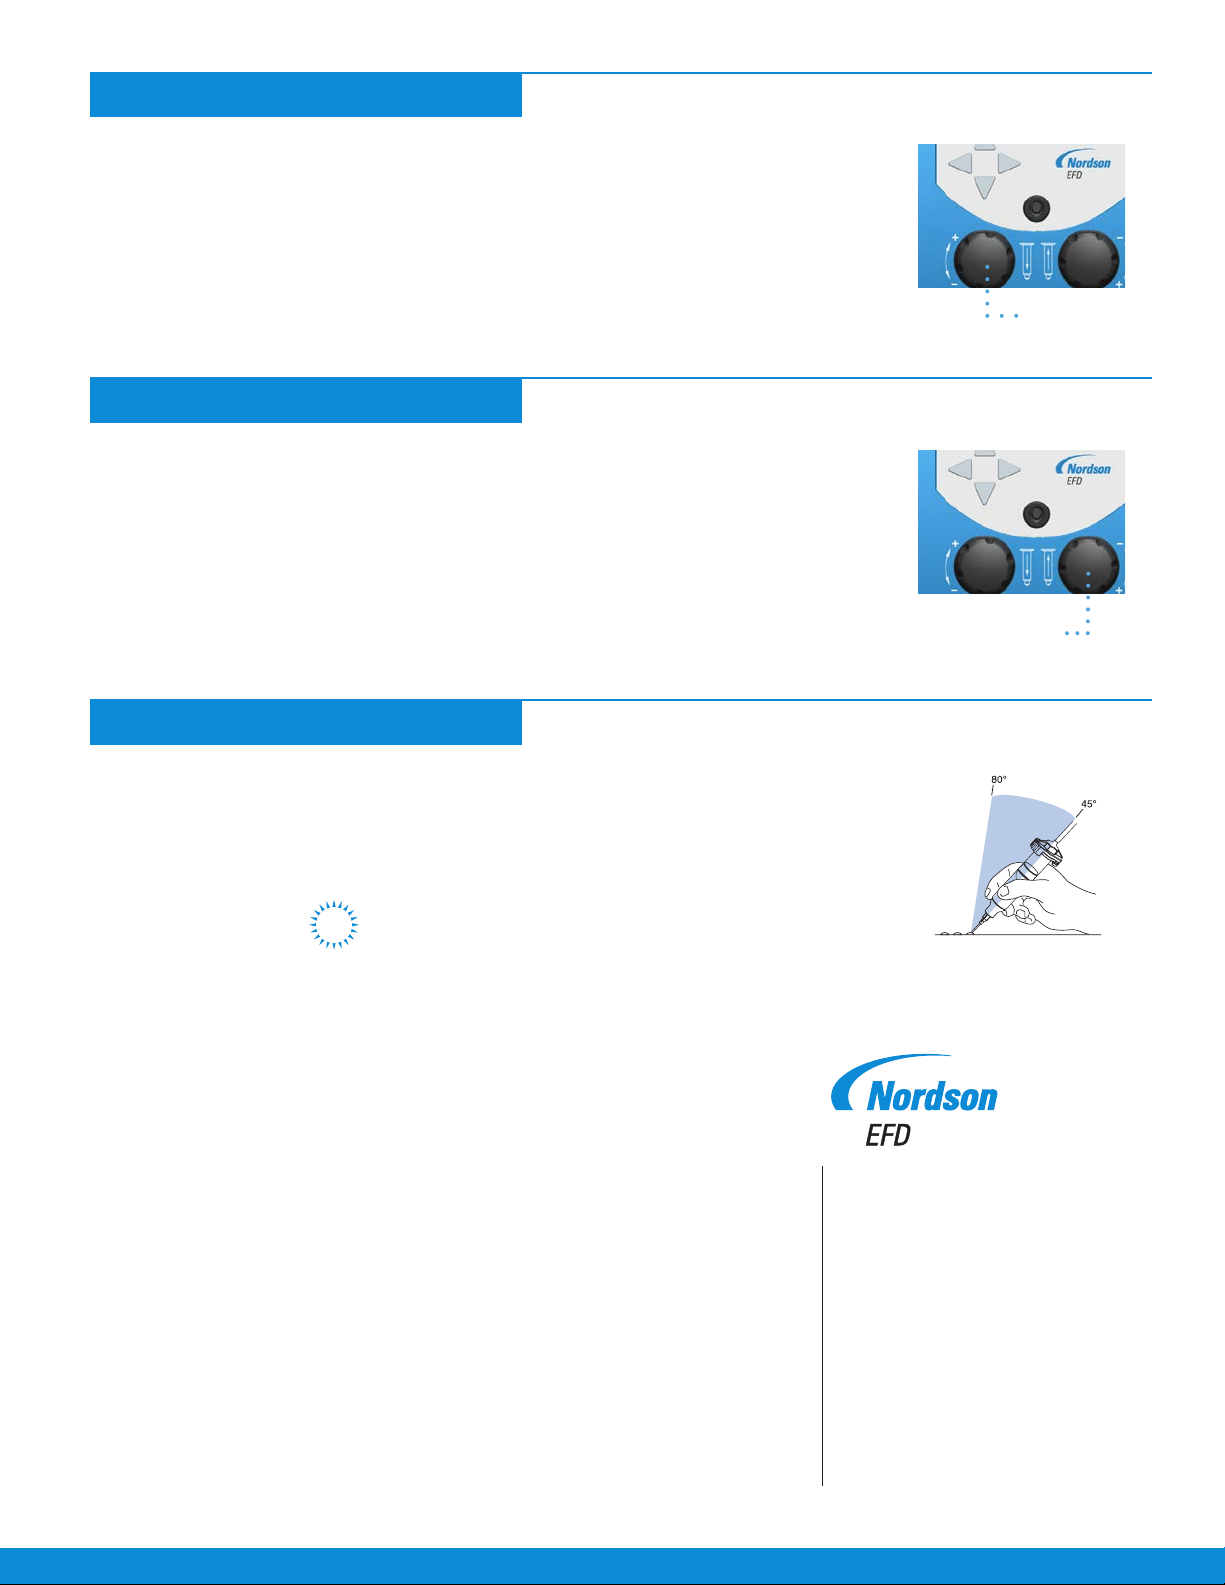
Hold the tip at a 45º angle to the work surface.
TIP
13
Dispense
During initial testing and setup we recommend that you keep the vacuum
setting at 0.0 inH2O. After initial testing, set vacuum by turning the vacuum
regulator (bottom right knob).
• Pull the vacuum regulator knob out to unlock it.
• Turn the regulator knob clockwise to reach the correct vacuum setting.
• Push the vacuum regulator knob in to lock the setting. Vacuum knob
12
Set Vacuum
Set air pressure by turning the air pressure regulator (bottom left knob).
• Pull the air pressure regulator knob out to unlock it.
• Turn the knob clockwise to increase the pressure or counterclockwise to
decrease the pressure.
• Push the air pressure regulator knob in to lock the setting.
Air pressure
knob
11
Set Air Pressure
This manual suits for next models
1
Other Nordson EFD Dispenser manuals

Nordson EFD
Nordson EFD Ultimus I User manual

Nordson EFD
Nordson EFD Ultimus IV Series User manual

Nordson EFD
Nordson EFD UltimusPlus I User manual

Nordson EFD
Nordson EFD 2K Pneumatic Dispense Gun User manual

Nordson EFD
Nordson EFD E2 User manual

Nordson EFD
Nordson EFD Performus I User manual

Nordson EFD
Nordson EFD HP Series User manual

Nordson EFD
Nordson EFD PROPlus Series User manual


