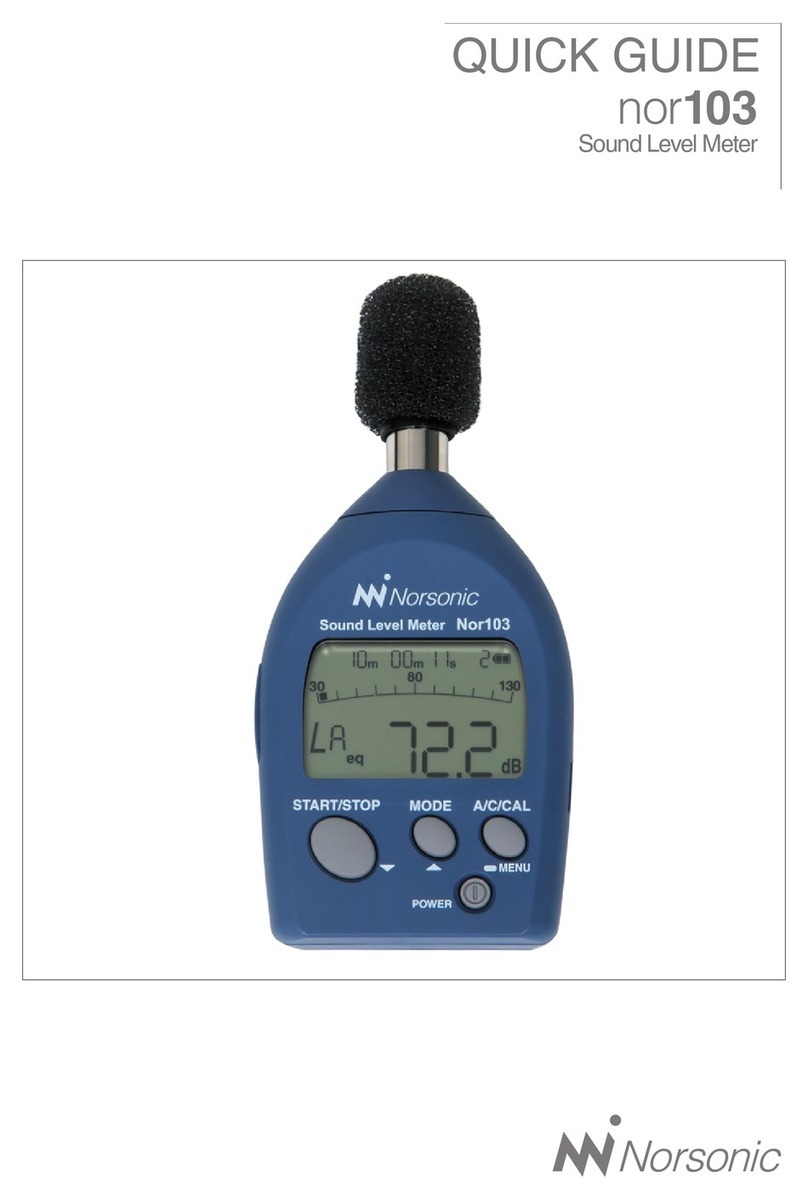
Norsonic nor103 User manual

nor103
SOUND LEVEL METER
INSTRUCTION
MANUAL
Nor103 is a small and versatile IEC Class 1 sound level meter. The
combination of a big graphical display and only three function buttons
makes this sound level meter easy to operate, even by non-acousticians.
It displays the current sound pressure level and calculates both sound exposure
level and the equivalent continuous sound level. After the measurement you it
gives you also the Fmax or Cpeak reported and stored. These are basic acoustic
figures that are widely used for general noise measurements and reporting.

Nor103 User Guide – January 2018
Im103_1Ed1R0En
Norsonic is a registered trademark of Norsonic AS. All other
brand or product names are trademarks or registered trade-
marks of their respective companies. Every effort has been
made to supply complete and accurate information. However,
Norsonic AS assumes no responsibility for the use of – nor
for the consequential damages of the use of – this informa-
tion and/or the instrumentation described herein. Furthermore
Norsonic AS assumes no responsibility for any infringement
of the intellectual property rights of third parties, wherever
applicable, which would result from such use. Norsonic AS
reserves the right to amend any of the information given in
this manual in order to take account of new developments.
If you wish to communicate with us, please feel welcome.
Our address is:
Norsonic AS, P.O. Box 24, N-3421 Lierskogen, Norway
Find us on the web: www.norsonic.com
Tel: +47 32 85 89 00,
Fax: +47 32 85 22 08
E-mail: [email protected]
Copyright © Norsonic AS 2017 All rights reserved

Finding the information you need
Thank you for choosing Norsonic! The sound level meter Nor103 have been
designed to give you many years of safe, reliable operation.
The User Guide has been divided into 7 chapters.
Depending on your requirements and your familiarity with sound measurements as
such, you may find that you use some parts of this manual often and others not at all.
The very first chapter acquaints you with the Nor103 and describes its features and
possibilities.
The next section provides a closer look at the instrument with a presentation of all major
parts and the keys of the keyboard.
Calibration is a vital point ensuring that your measurements are sufficiently correct for
the purpose. Therefore, a separate chapter has been devoted to this.
How to measure with the sound level meter is described in the following and outlines
the use of the instrument as a proper sound level meter.
Detailed specifications about the instrument is found in the chapter covering Technical
specifications.
Note that the instruction manual describes a fully equipped instrument. Your Nor103
may not have the additional cables and hence information related to this is not
relevant.
Our objective with this manual has been to address your goals and needs. Please let
us know how well we succeeded!

Overview
Precautions
• Operate the unit only as described in this manual.
• Do not drop the unit. Protect it from shocks and vibration.
• The permissible environmental temperature range for operation of the unit is -10 to
+50°C. Relative humidity must be between 10% and 90%.
• Do not use or store the unit in locations which may be subject to water, direct sun-
light, high temperatures or humidity. Also protect the unit from air with high salt or
sulphur content, gases or the influence of chemicals.
• Do not forget to turn the unit off after use. Remove the batteries if the unit is not to
be used for some time.
• When disconnecting cables, always hold the plug and do not pull the cable.
• To clean the unit, use only a dry cloth or a cloth lightly moistened with water. Do not
use chemical cleaning cloths, solvents or alcohol-based cleaners to prevent the
possibility of deformation and discoloring.
• Do not insert any objects such as pins, metal scraps, conducting plastic etc. into
any opening on the unit.
• Do not disassemble the unit or attempt internal alterations.
• In case of malfunction, do not attempt any repairs. Note the condition of the unit
clearly and contact the supplier.
• When disposing of the unit or the batteries, follow national and local regulations
regarding waste disposal.

Safety
In this manual, important safety instructions are specially marked as shown below.
To prevent the risk of death or injury to persons and severe damage to the unit or pe-
ripheral equipment, make sure that all instructions are fully understood and observed.
Important! Disregarding instructions printed here incurs the risk of damage to the
product.
NOTE! Mentioned about the tips to use this unit properly.
(This messages do not have to do with safety.)
This product can be used in any non hazardous areas
within the environmental conditions given in the technical
specification.
To conform to the EU requirement of the Directive
on Waste Electrical and Electronic Equipment, the
symbol mark on the right is shown on the instrument.


Contents
Chapter 1 Introducing the sound level meter Nor103 ............................1
Chapter 2 Taking a closer look at the instrument...................................3
Chapter 3 Calibrating the instrument......................................................9
Chapter 5 Making a measurement.......................................................11
Chapter 6 Memory handling.................................................................15
Chapter 7 Batteries...............................................................................17
Chapter 8 Technical specifications ......................................................19


1
Norsonic Nor103
Instruction Manual
Introducing the
sound level meter Nor103
The sound level meter Nor103 is a class 1 sound level meter and complies with
IEC61672-1 and is able to measure a number of acoustic parameters. The microphone
is a 1/2-inch electret condenser microphone. It has a wide 107 dB linearity range,
measuring sound levels between 30 and 137 dB, with no need to select the range.
The unit has an LCD panel and 4 operation keys. Optional AC output and DC output
connector is available on request.
It measures the following values:>
• SPL The Instantaneous Sound Pressure Level
• LMAX The Maximum Sound Pressure Level
• Leq The Integrated Equivalent SPL
• LEThe Sound Exposure Level
• LCPEAK The Maximum Peak Level (Peak range only)
The time-weighting can be Fast or Slow. While the measurement is running the
instantaneous SPL is available for inspection, but as soon as the measurement is
terminated the SPL becomes meaningless and therefore not listed in the result tables.
This unit has the following two level ranges.
Wide range: This measures the range between 30 and 137 dB and allows simultaneous
measurement of Lp, Leq, Lmax, and LE.
Peak range: Along with the processing results for wide range, this range also measures
LCpeak, but the lower limit for measurement becomes 65 dB.
No range setting. Only one level range with a dynamic range of 107 dB makes the
setup easy and ensures reliable measurements in all situations – especially
useful for unattended measurements. With its normal microphone this means a meas-
urement range covering levels from the self-noise of the microphone (typically less
than 30 dB A-weighted) to sound with peak values up to 137 dB.

2Chapter 1
Introducing the sound level meter Nor103
Storing and retrieving of results. The results from a measurement is automatically
stored in the non-volatile memory of the instrument. The information may later be dis-
played on the instrument screen or transferred to a PC via an optional special cable
and a software.
The main unit and preamplifier is one single unit so it is not possible to extend the
microphone.
Battery operation. The instrument is powered from two size AAA internal batteries
which typically last for eight hours.
Setting up is easy to do. After you’ve defined wide or peak range, the time constant
and duration of the measurement, you are ready to press the start key. The selection
last used is automatically selected when you power the instrument up again. During
the measurement you have instant access to all measurement values.
With the Nor103 you are able to do all basic noise measurements – community noise,
industrial hygiene, product control and more.
The Norsonic product range contains a wide range of equipment and accessories
for use with acoustic measurements and noise monitoring. We supply enclosures for
permanent monitoring installations, environmental cases for semi-permanent installa-
tions, microphones for applications in tough environments, cables, modems, weather
stations and post-processing software. A detailed presentation of this is available on
the Norsonic home page: www.norsonic.com.

3
Norsonic Nor103
Instruction Manual
Taking a closer look at the instrument
The Nor103 is delivered assembled and ready. We recommend that the microphone
is always mounted on the preamplifier as this will prevent dust and dirt to enter the
insulator around the sensitive signal terminal on the microphone.
Always keep the instrument turned off if you are required to unscrew or screw the
cartridge on the preamplifier. Screw only finger tight!
The instrument is powered from two AAA size batteries which are inserted as shown
on the figure.
Battery
contact
Battery
contact
Press and pull in the arrow direction
Insert two size AAA
(IEC R03, LR03) batteries
Remove the battery
compartment cover
Use of batteries
The sound level meter comes with two AAA batteries.
Battery lifetime is typically 8 hours (depends on use and brand of batteries).
The use of alkaline or lithium batteries is strongly recommended to avoid leakage.
Rechargeable batteries may also be used, but with reduced operating time.
If the instrument is stored for a prolonged period of time, we recommend removing the
batteries to avoid damage from leaky batteries.
Data are stored in a non-volatile memory and will retain its content independent of the
batteries.
Switch on and off the instrument
Press the POWER key in the lower right corner of the instrument to turn the power on.
A second operation, hold for 0,5 seconds or more, will switch the instrument off.

4Chapter 2
Taking a closer look at Nor103
Sleep mode
If powered and left unattended and unoperated with the measurement screen being
shown and no key is pressed for 10 minutes, the unit enters sleep mode and the sleep
mode screen appears. Power consumption is 30% of normal in sleep mode.
The unit will not enter sleep mode in the following situations, even if no key is pressed
for 10 minutes;
- If the processing screen, calibration screen, recall screen, or menu screen
is displayed.
- If a cable is connected to the external connector (any of the three types).
By pressing any key when instrument is in sleep mode will wake the unit up and return
to the measurement screen.
Front panel overview
Microphone/preamplifier
Microphone and preamplifier are integrated in a single enclosure. An extension cable
cannot be used.
START/STOP key
Press to start or stop processing. Also used to change setting values in the calibration
screen menu screen, and recall screen.
START/STOP MODE A/C/CAL
POWER
MENU
Microphone
Preamplifier
START/STOP key
MODE key
A/C/CAL key
POWER key

5
Norsonic Nor103
Instruction Manual
Important! Do not unscrew the microphone from the preamlifier.
MODE key
Changes the processing result display in the measurement screen and processing
screen. Also used to change setting values in the calibration screen, menu screen,
and recall screen.
A/C/CAl key
This key selects the frequency weighting characteristics, calibration screens and recall
screen. Pressing and holding this key in the measurement screen activates the menu
screen.
POWER key
Turns the unit on and off.
Side view
External connector
This connector is composed of a DC out connector, an AC out connector, and a PC
connector for calibration purpose and download of measurements. (The connector
can only be used for one purpose at a time.)
DC out connector
A DC signal corresponding to the sound level can be output from here. The signal
after frequency weighting, time weighting, and logarithmic compression is output here
(constant output when a DC output cable is connected). Connect the unit with the
optional DC output cable to external equipment.
DC out connector
AC out connector
PC connector
Strap mount
External connector

6Chapter 2
Taking a closer look at Nor103
AC out connector
An AC signal weighted with frequency weighting characteristic Z is output here (con-
stant output when an AC out cable is connected). Connect the unit with the optional
AC out cable to external equipment.
When 110 dB is displayed, output is 1 Vrms. (The upper limit of the output voltage is
1.8 Vrms)
+600 mVrms
- 400 mVrms
PC connector
Connect the unit with the optional PC adapter cable to computer and download stored
data in the instrument. Operation requires installation of software.
Note! All cables are optional and must be ordered separately.
Strap mount
Attach the hand strap here. Pass your wrist through this strap when holding the unit
when measuring.
Rear view
Tripod mounting thread
Mount the unit on a camera tripod with this thread.
Tripod mounting thread
Battery compartment

7
Norsonic Nor103
Instruction Manual
Attachments
Windscreen
We recommend using the windscreen to reduce wind noise and to protect the micro-
phone from dust.
Windscreen fall out prevention rubber prevents the windscreen from dropping off the
microphone.
IMPORTANT! The windscreen can easily drop off the unit, so we recommend
attaching the fall out pre- vention rubber. Be sure to follow the instructions in the
following diagram when attaching or detaching the fall out prevention rubber.
Turning it in the opposite direction may loosen the microphone and cause it to fall off.
Silicone cover
The silicone cover protects the unit from shocks and also makes it easier to grip when
held. Fit the cover to the unit with the windscreen removed, as shown in the following
illustrations.
Windscreen
Fall out prevention
rubber
Turn the fall out
prevention
rubber only in
this direction.
START/STOP MODE A/C/CAL
POWER
MENU
SOUND LEVEL METER
NL-27
START/STOP MODE A/C/CAL
POWER
MENU
START/STOP MODE A/C/CAL
POWER
MENU
Silicone cover
strap mount
NOTE! You cannot use external connector when the silicone cover is fitted. You
can attach the hand strap to the silicone cover strap mount.

8Chapter 2
Taking a closer look at Nor103
Hand strap
To help prevent dropping of the unit, pass your wrist through this strap when holding
the unit for measuring. Attach the hand strap as shown below.
Connecting external equipment
You can connect external equipment, such as a data recorder, level recorder, or
computer, to the external connector.
Connect as shown in the following diagram.
START/STOP MODE A/C/CAL
POWER
MENU
External connector
Data recorder
(Connect to the DC input connector) DC out cable
Nor4599
Data recorder,
analyzer
(Connect to the AC input connector)
A computer etc.
(Connect to the PC connector)
AC out cable
Nor4598
PC adapter
cable Nor4596
Strap mount Hand strap
When you have not fitted the silicone cover
POWER
When you have fitted the silicone cover
Silicone cover strap mount
NOTE! The connector has the ability to act as a DC out connector, an AC out
connector, or a USB connector, but it can perform only one of these functions at a
time.

9
Norsonic Nor103
Instruction Manual
Calibrating the instrument
Calibration is the normal way of ensuring that the sound level meter measures the level
with sufficient accuracy. For a proper calibration, you need a sound calibrator.
One may say that a sound calibrator is just as much a verification of proper operation
as it is a device of adjusting the sensitivity of sound measuring instruments.
Measuring microphones are very delicate devices designed to fulfil very rigid specifica-
tions. This makes them vulnerable and subject to damage unless proper care is taken.
When to calibrate
Calibration of the sound level meter should preferably take place before and after a
measurement session is commenced, or whenever required by applicable standards.
Furthermore, since the sound level meter automatically enters C-weighted mode, you
won’t have to bother with the calibrator frequency either if your calibrator apply a fre-
quency between 250 Hz and 1 kHz.
Carrying out the calibration
According to IEC 61672-1, a class 1 sound calibrator shall be used, such as the
Norsonic sound calibrator Nor1255 or Nor1256. (Class 1 sound calibrator as defined
by the International standard for sound calibrators: IEC 60942.)
Do as follows:
1. Access calibration mode. Press the A/C/CAL key until the acoustic calibration
screen is shown. “Aco” and “Cal” appear on the display. The frequency weight-
ing characteristic is fixed to C and the time weighting characteristic is fixed to F.
The display will look as shown on the figure.
NOTE! Do not calibrate the instrument before three minutes after switching the
instrument (SLM) on.

10 Chapter 3
Calibrating the instrument
2. Mount the calibrator. Mount the sound calibrator onto the microphone. Switch
on the sound calibrator and wait until the level has stabilized, according to man-
ufacturer’s product manual or at least for a minimum of 30 seconds.
3. Adjust the dB value. Press the START/STOP key (Down) or MODE key (Up)
to adjust the display volume to 94 dB if calibrator output is 94 dB or 114 dB if
calibrator output is 114 dB.
Know the output level of your sound calibrator.
Some sound calibrators have an output level of 94 dB, while others have an output
level of 114 dB. Norsonics Nor1256 will be able to give both signals.
Unless you know the output level of your sound calibrator you won’t be able to know
what level the measuring instrument is supposed to show. The output level is normally
stated on the sound calibrator or in its accompanying user documentation or calibra-
tion certificate.
NOTE! Be aware of the fact that instruments using free-field Microphones, like Nor103,
shall sometimes be adjusted to a value slightly lower than the output level of the sound
calibrator. For this half-inch cartridge this will typically amount to 0.2 dB lower for
calibrators producing a 1000 Hz calibration signal (e.g. the sound level meter should
then be set to 113.8 dB when using a 114 dB @ 1000 Hz sound calibrator).
The internal calibration (calibration with an electronic signal) can be chosen. Such
calibration is not according to standard IEC 61672-1, but to be considered a perfor-
mance check or self-test.
For adjusting the instrument with the built-in oscillator (1 kHz, sinusoidal wave), you
press the A/C/CAL key to switch to the internal calibration screen. “Int”, “Cal”, and
“94.0dB” will appear on the display.
The frequency weighting characteristic is fixed to C and the time weighting characteristic
is fixed to F. The display will look as shown on the figure.
Then just press the START/STOP key (Down) or MODE key (Up) to adjust the volume
to 94.0 dB.

11
Norsonic Nor103
Instruction Manual
Making a measurement
Measurement and processing screen
Measurement time
The measurement time set in the menu screen.
Elapsed time
The amount of time elapsed since processing started.
Address number
The address where the processing result is stored.
Battery indication
Indicates battery charge.
Processing
mark
Processing result
under range
indication
Sound level
under range
indication
Frequency weighting
characteristics
Processing
result symbol
Time weighting
characteristics
Level indication
Bar graph, level
range scale
Processing
result overload
indication
Sound level
overload
indication
Battery
indication
Address number
Elapsed time
Measurement time

12 Chapter 4
Making a measurement
Bar graph, level range scale
Shows the sound level in a bar graph.
Sound level overload indication
Shows that the sound level has exceeded the measurement range.
Processing result overload indication
Appears during processing when the sound level exceeds the measurement range,
and remains until the next process starts. Appears also when recalling a measurement.
Level indication
Shows the sound level (Lp) and each processing result (Leq, Lmax, LE, and LCpeak) as
digits. Switch the display with the MODE key. LCpeak is processed and shown only when
peak range is selected.
Time weighting characteristics
Shows the time weighting characteristics selected in the menu screen.
Processing result symbol
Shows the relevant symbol for the displayed processing result (Leq, Lmax, LE, or LCpeak).
Frequency weighting characteristics
Shows the weighting charateristics selected. Change with the A/C/CAL key.
Processing result under range indication
If the sound level falls below the measurable limit (-0.6 dB) during processing, this
appears until the next process starts (when a processing result is shown).
Sound level under range indication
Appears when the sound level falls below the measurable limit (-0.6 dB).
Processing mark
Flashes during processing.
Other manuals for nor103
1
Table of contents
Other Norsonic Measuring Instrument manuals

Norsonic
Norsonic NOR150 User manual

Norsonic
Norsonic nor121 User manual

Norsonic
Norsonic nor145 User manual

Norsonic
Norsonic nor118 User manual
Norsonic
Norsonic nor103 User manual
Norsonic
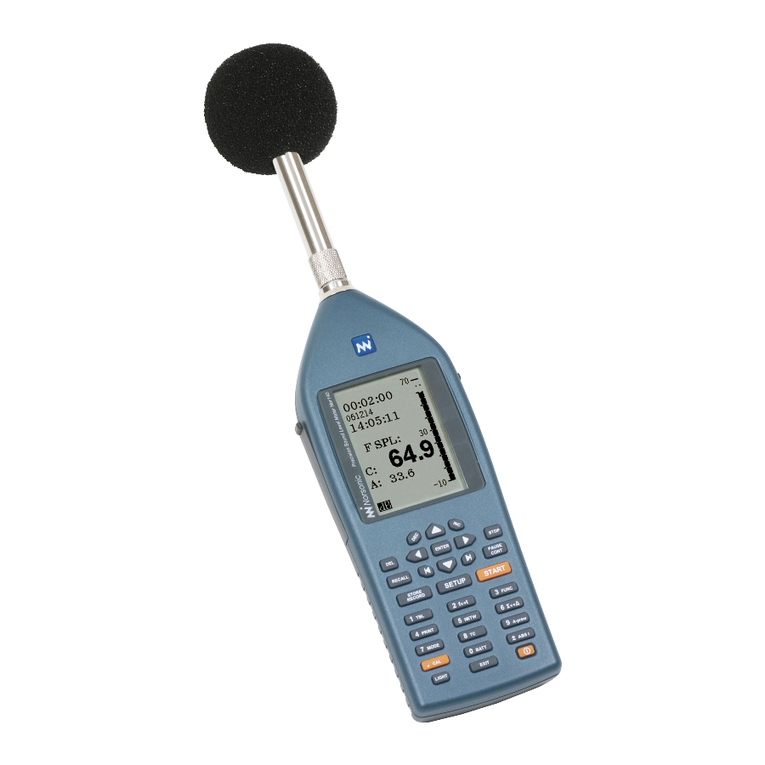
Norsonic nor140 User manual

Norsonic
Norsonic nor140 Operating and maintenance manual

Norsonic
Norsonic NOR150 User manual

Norsonic
Norsonic nor145 User manual

Norsonic
Norsonic Nor1545 Instruction Manual

