manuals.online logo
Brands
  1. Home
  2. •
  3. Brands
  4. •
  5. Nortel
  6. •
  7. Handset
  8. •
  9. Nortel 6120 User manual

Nortel 6120 User manual

Nortel #6120
WLAN (Wireless) Handset
User Guide Instructions
Rev. 3/12/09
Customer Service
Phone: 614-688-HELP • E-mail: units@osu.edu •Web: units.osu.edu
Nortel #6120
WLAN (Wireless) Handset
User Guide Instructions
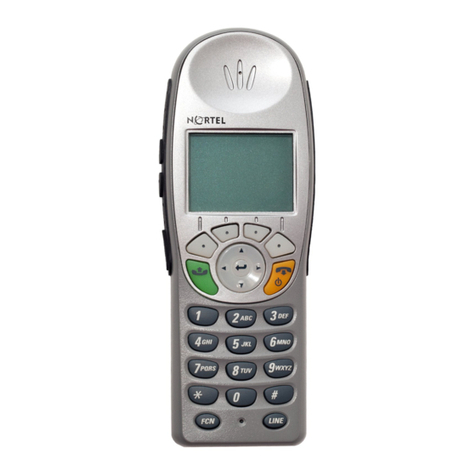
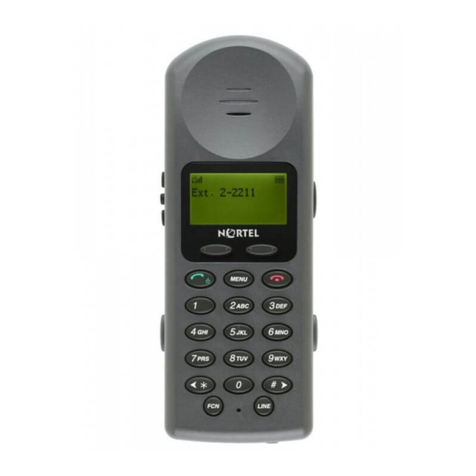
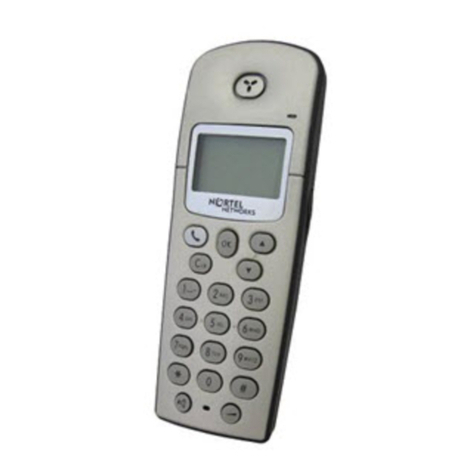
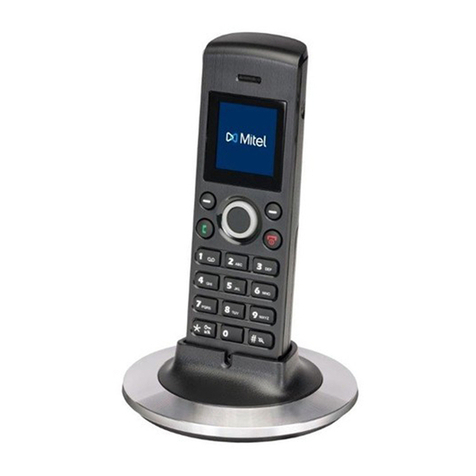
The Nortel 6120 is a fully functional handset specifically designed for today’s busy office. The Nortel 6120 uses radio wave
technology to send and receive voice and data transmissions. It is designed to operate much like a cell phone; however, the Nortel
6120 uses the private communication system installed in your facility and will not operate outside the area covered by this system.
NOTE: Some features listed below are optional and may not be on all 6120 handsets. These optional features, as well as others, can be
ordered from OIT and include additional monthly fees. Contact the Office of Information Technology (OIT) at 688-HELP for more information.
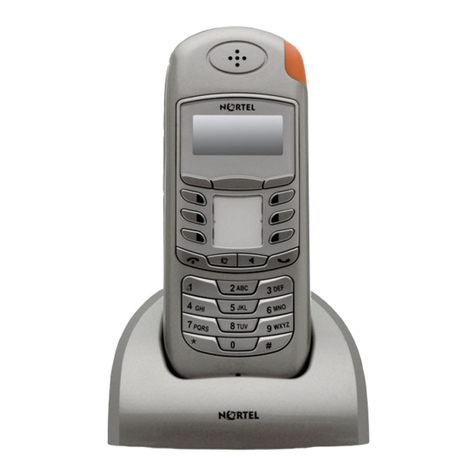
Charge Handset / Battery The 6120 handset comes with two batteries and a dual charger that requires an electrical outlet.
The dual charger allows you to charge the handset and the extra battery at the same time. The
extra battery snaps into the backside of the charger. The red LED displayed on the front of the
charger indicates the extra battery is charging. The extra battery is fully charged when the red
LED is not lit. A flashing red LED may indicate a battery failure. Contact OIT at 688-HELP if a
battery failure occurs.
The handset operates on battery power when not in the charger. A battery icon on the top right
portion of the handset’s display indicates whether the handset’s battery is low (partial to empty
battery icon) or fully charged (filled in battery icon). The handset may be charged when it is
turned on, off or even during an active call. To charge the handset during a call, you will need to
use the speakerphone mode, and the handset will need to be in the charger.
To charge the handset:
•Place the handset in the charger facing forward; the display will indicate the handset is
Charging
•When the handset is fully charged, the display will show Charge Complete
Turn Handset On / Off To turn the handset on:
•Press and hold the yellow END button until two-chirps sound. The handset will take a
moment to Initialize. The handset is ready for use when the display information (e.g.,
Ext. number, soft key options, etc.) reappears.
To turn the handset off:
•Press and hold the yellow END button until one-chirp sounds; the display will be empty
*NOTE: If you turn your handset off, any available firmware updates will download to the handset upon turning it back on. During the updates,
which may take several minutes to complete, the display will indicate “Updating Code…” Do not turn the handset off during the firmware updates.
Change Ring Settings This feature changes the type of notification you receive for incoming calls. The basic ring
setting options* are: Silent (display indication only), Vibrate, Loud (ring tone), Soft (ring tone)
and Custom (both vibrate and ring).
To change the ring setting*:
•Use the Nav keys to scroll left or right to the Prof soft key (if not visible on the display)
•Press the Prof soft key
•Use the Nav keys to scroll to the call notification option you want use (Silent, Vibrate,
Loud, Soft or Custom)
•Press the Enter key to select and use the highlighted option (e.g., Vibrate)
•The display will indicate the option selected (e.g., Profile: Vibrate)
*NOTE: You can further customize your ring settings in the handset’s Configuration (Cfg) Menu. Press the Cfg soft key. Scroll to the User Profiles
option and press the Enter button. Then, scroll to the ring setting option you want to customize and press the Enter button.
2
Change Ring Volume This feature changes the volume of the Loud or Soft ring tone, while the handset is ringing.
To change the ring volume:
•Press the Volume Up or Down buttons on the side of the handset during ringing
Silence Ring / Vibrate This feature lets you temporarily silence the ring or vibrate notification for an incoming call, prior
to the call being answered. Silencing the ring notification must be done on a per call basis, and
it does not disconnect the call.
To silence the ring notification:
•Press the yellow END button prior to the call being answered
Mute / Enable Microphone This feature temporarily disables the handset’s microphone so that callers cannot hear you.
To mute the microphone:
•While on a call, press the FCN button
•Press the Mute soft key; the handset’s display will show <Muted>
To enable the microphone:
•Press FCN button
•Press the Mute soft key
Activate / Deactivate
Speakerphone To activate the speakerphone during a call:
•Press the FCN button
•Press the Spkr soft key
To activate the speakerphone before placing a call:
•Press the Spkr soft key
To deactivate the speakerphone during a call:
•Press the FCN button
•Press the Spkr soft key
Change Call / Speaker Volume This feature increases or decreases the volume level of what you hear through either the
handset’s earpiece or speakerphone during a call.
To change the call / speaker volume:
•Press the Volume Up or Down buttons on the side of the handset during a call
Place / End Call To place a call:
•Press the green START button OR the Spkr soft key to get dial tone
•Dial the phone number*
To end a call:
•Press the yellow END button
*NOTE: To call campus numbers, dial the last five digits of the number. To call local numbers, dial “9” plus the seven- or ten-digit number. To call
domestic long distance numbers (without a university authorization code), dial “9 + 1” plus the ten-digit number.
Place / Retrieve
Call on Hold To place a call temporarily on hold:
•During the call, press the FCN button
•Select the Hold soft key; the display will show Call Held and the caller will hear silence*
To retrieve a held call:
•While the call is on hold, press LINE button
•Use the NAV keys to scroll to line where the call is on hold (indicated by a +symbol)
•Press the ENTER button and resume talking
3
Transfer Call This feature lets you transfer a call to another university phone number.
To transfer a call:
•During a call, press the 3wc soft key; you will hear 2-3 beeps and dial tone and the first
party is on hold
•Dial the five-digit university phone number you wish to transfer the call to
oIf you hear a busy signal or want to cancel the call transfer and return to the
caller, press the 3wc soft key twice
•Press the 3wc soft key again
•Press the END button to complete the call transfer and eliminate yourself from the call
Place Three-way Call This feature lets you place a three-way call with two other phone numbers. At least one of the
three parties on the three-way call must be using a university phone number*.
To place a three-way call:
•Dial the phone number of the first party
•Press the 3wc soft key; you will hear 2-3 beeps and dial tone and the first party is on
hold
•Dial the phone number of the third party
oIf you hear a busy signal or want to cancel the three-way and return to the
caller, press the 3wc soft key twice
•Press the 3wc soft key again to connect all three parties
*NOTE: To call campus numbers, dial the last five digits of the number. To call local numbers, dial “9” plus the seven- or ten-digit number. To call
domestic long distance numbers (without a university authorization code), dial “9 + 1” plus the ten-digit number.
Redial a Number This feature lets you redial a recently called phone number. The handset stores the last 10,
phone numbers called.*
To redial a number:
•Use the NAV keys to scroll left or right to the Redl soft key
•Press the Redl soft key
•Use the NAV keys to scroll up or down to the number you want to call
•Press the green START button, OR press the Spkr soft key
*NOTE: The phone will not store or redial long distance numbers that were placed using a university authorization code.
Message Waiting This optional feature is typically used with university voice mail*. Message waiting provides you
with a visual indicator when you have a new voice mail message and the ability to access and
play the message. An envelope icon in the display window is the visual indicatoron 6120 handsets.
To access and play a message when the handset displays the envelope icon:
•Press the green START button OR the Spkr soft key
•Press the *MsgW soft key; this will ring your voice mailbox
•Follow the voice mail system prompts to access and play your message
*NOTE: Voice mail is an optional feature. Voice mail service and detailed user instructions are available from OIT.
Call Pickup (CPU) This optional feature lets you answer another ringing campus phone within a predefined call
pickup group from your handset. The call pickup group is programmed by OIT.
To pickup another ringing campus phone in your predefined CPU group:
•Press the green START button, OR press the Spkr soft key
•Press the CPU soft key to pickup the ringing phone and begin speaking
4
Activate / Deactivate
Call Forwarding (CFI or CFU) This optional feature enables you to program and route all incoming calls to another number*.
To forward all calls to another phone number*:
•Press the green Start button OR the Spkr soft key; you will hear dial tone
•Using the keypad numbers, enter the *71 feature code; you will hear 2-3 beep tones
and then dial tone
•Enter the phone number* you want calls to forward to; you will hear several beeps or
busy tones
•Press the yellow END button; your handset is forwarded
To deactivate call forwarding:
•Press the green Start button OR the Spkr soft key; you will hear dial tone
•Using the keypad numbers, enter the *70 feature code; you will hear several beeps or
busy tones
•Press the yellow END button; call forwarding is now deactivated
To verify your handset is forwarded to another phone number*:
•Press the LINE button
•Your display will show either Forward (CFU) or GForwd Int (CFI)
•A +symbol is displayed in front of either word (e.g., +Forward or +GForwd Int)
indicating your handset is forwarded to another number.
•You may also call your handset to make sure it is forwarded to the correct number
*NOTE: Two call forwarding options are available: CFI and CFU. CFI allows you to forward all calls to another university phone number or university
voice mail only. CFU enables you to forward all calls to university voice mail, and any campus or off campus phone number. To forward your phone to
university voice mail or another campus phone number, enter the last five digits of the number. To forward your phone to an off campus, local number,
dial “9” plus the seven- or ten-digit number. To forward your phone to a domestic long distance number, dial “9 + 1” plus the ten-digit number.
Phone Book This feature lets you to store up to 20 phone numbers and names on your handset. Phone book
entries are stored on your handset and are not transferable to another 6120 handset.
To store a number in the phone book:
•Use the NAV keys to scroll left or right to the PhBk soft key
•Press the PhBk soft key
•Use the NAV keys to scroll to <new> and press the ENTER button
•Use the handset’s keypad to enter the phone number and then press the ENTER
button
•Use the handset’s keypad to enter the name and then press the ENTER button to
save the entry
oOptional step: To assign the entry to a keypad number for one-touch speed
dialing, press the Spdl soft key
oUse the NAV keys to scroll down to the keypad number (0-9) you want to
assign the entry to and press the ENTER button.
•Press the yellow END button to save the entry and exit the phone book
To dial from the phone book:
•Use the NAV keys to scroll left or right to the PhBk soft key
•Press the PhBk soft key
•Use the NAV keys to scroll down to the phone book entry you want to dial
•Press the green START button OR the Spkr soft key to dial the entry
Speed Dial This feature allows you to assign 10 of your phone book entries to one of the 10, keypad (0-9)
numbers on your handset for quick one-touch dialing. To use the speed dial option*, you first
need to assign each of your phone book entries to one of the ten, keypad numbers. (See the
Phone Book section.)
To speed dial call a phone book entry:
•While the handset is in an idle state, press and hold down the assigned keypad
number (0-9) of the phone book entry you want to dial.
•The handset’s display will show Calling… and the Name and Number being called
•Place the handset to your ear to complete the call
(Speed dial instructions continue on page 6.)
5
Speed Dial (continued) To speed dial call using the speakerphone:
•Press and hold down the assigned keypad number (0-9) of the phone book entry you
want to dial.
•The handset’s display will show Calling… and the Name and Number being called
•After the dialed phone number appears on the display, press the FCN button
•Press the Spkr soft key to complete the call using the speakerphone
*NOTE: You cannot use the speed dial option to transfer a call to another campus number.
Inbox / Outbox The inbox feature displays the phone numbers for the last 10 calls received. The outbox
feature displays the phone numbers for the last 10 calls placed. Phone numbers displayed
in the inbox and outbox can be Dialed, Viewed and Deleted. You can also Store inbox
and outbox numbers in your directory. (See the Directory section.)
To view and dial an inbox or outbox phone number:
•Press FCN button
•Use the NAV keys to scroll to either the inbox or outbox and press the ENTER button
•Use the NAV keys to scroll to a phone number entry and press the OK soft key
•Use the NAV keys to scroll to Dial
•The handset display will show Predial >number
oWhen dialing an off campus number from the inbox only: You need to press “9” to
dial a local number OR press “9+1” to dial a domestic long distance number
•Press the OK soft key to dial the number
To store an inbox or outbox phone number in the directory:
•Press FCN button
•Use the NAV keys to scroll to either the inbox or outbox and press the ENTER button
•Use the NAV keys to scroll to the phone number entry you want to store and press the
OK soft key
•Use the NAV keys to scroll to Store and press the OK soft key
•This opens the directory; follow the instructions in the directory section to complete
storing the phone number and name.
Directory This feature allows you to store up to 16 phone numbers and names. Directory entries are stored
in the telephone switch and not on the handset, which means your entries can easily be
transferred to another 6120 handset if your handset is replaced. Your directory entries are
specific to you and cannot be accessed by other 6120 handset users.
To store an entry in the directory:
•Press the FCN button
•Use the NAV keys to scroll to the Directory and press the Enter button
•Select New Entry by pressing the OK soft key
•Use the NAV keys to select Number and press the OK soft key
•Use the phone’s key pad to enter the number you want to store and then press the
OK soft key
•Use the Nav keys to select Surname and press the OK soft key
•Use the phone’s key pad to enter the last name and then press the OK soft key
•Use the NAV keys to select First Name and press the OK soft key
•Use the phone’s key pad to enter the first name and then press the OK soft key
•Use the NAV keys to scroll down to and select Save and then press the OK soft key
•Press the Yes soft key to save and store your entry
*NOTE: The Feature Key Format (Feature Ky Frmt) option is an advanced directory feature and not required when creating a directory entry. For
more information about this option, contact an OIT Account Manager at 688-HELP.
To dial a directory entry:
•Press the FCN button
•Use the NAV keys to scroll to the Directory and press the ENTER button
•Use the NAV keys to scroll to the Name you want to dial and press the OK soft key
•Use the NAV keys to scroll to and select DIAL
•Press OK soft key to dial the number
6

Other manuals for 6120

4

Other Nortel Handset manuals

Nortel Nortel DECT 4025 User manual
Nortel

Nortel Nortel DECT 4025 User manual

Nortel 2212 User manual

Nortel

Nortel 2212 User manual

Nortel 2210 User manual

Nortel

Nortel 2210 User manual

Nortel 4027 User manual

Nortel

Nortel 4027 User manual

Nortel 4065R User manual

Nortel

Nortel 4065R User manual

Nortel 6140 User manual

Nortel

Nortel 6140 User manual

Nortel DECT 4027 User manual

Nortel

Nortel DECT 4027 User manual

Nortel 743X User manual

Nortel

Nortel 743X User manual

Nortel C4050 User manual

Nortel

Nortel C4050 User manual

Nortel 6120 User manual

Nortel

Nortel 6120 User manual

Nortel T7406 Phone User manual

Nortel

Nortel T7406 Phone User manual

Nortel 1140 User manual

Nortel

Nortel 1140 User manual

Nortel T7406E Reference guide

Nortel

Nortel T7406E Reference guide

Nortel 4025 Reference guide

Nortel

Nortel 4025 Reference guide

Nortel 4146Ex User manual

Nortel

Nortel 4146Ex User manual

Nortel T7406E Operator's manual

Nortel

Nortel T7406E Operator's manual

Nortel Passport 7420 Dimensions

Nortel

Nortel Passport 7420 Dimensions

Nortel 2210 User manual

Nortel

Nortel 2210 User manual

Nortel C4030 User manual

Nortel

Nortel C4030 User manual

Nortel 6120 Installation and operating instructions

Nortel

Nortel 6120 Installation and operating instructions

Nortel Industrial Handset User manual

Nortel

Nortel Industrial Handset User manual

Nortel 4075 User manual

Nortel

Nortel 4075 User manual

Nortel 4065R User manual

Nortel

Nortel 4065R User manual

Nortel 4145Ex User manual

Nortel

Nortel 4145Ex User manual

Popular Handset manuals by other brands

Avaya 4027 user guide

Avaya

Avaya 4027 user guide

Polycom KIRK 4080 user guide

Polycom

Polycom KIRK 4080 user guide

GE 21095 user guide

GE

GE 21095 user guide

Yealink T42 user guide

Yealink

Yealink T42 user guide

V-tech I5808 - Cordless Extension Handset Operating	 instruction

V-tech

V-tech I5808 - Cordless Extension Handset Operating instruction

Samsung SMT-W5100E user guide

Samsung

Samsung SMT-W5100E user guide

Win W1500 user guide

Win

Win W1500 user guide

Motorola A920 reference guide

Motorola

Motorola A920 reference guide

SAGEMCOM Sixty Feel Good user guide

SAGEMCOM

SAGEMCOM Sixty Feel Good user guide

Linksys CIT200 - iPhone USB VoIP Wireless Phone user guide

Linksys

Linksys CIT200 - iPhone USB VoIP Wireless Phone user guide

SpectraLink 7722 quick start guide

SpectraLink

SpectraLink 7722 quick start guide

Plantronics HL 10 user guide

Plantronics

Plantronics HL 10 user guide

Clarity XLC 3.1 user guide

Clarity

Clarity XLC 3.1 user guide

AirCell ST 3100 user manual

AirCell

AirCell ST 3100 user manual

Siemens Gigaset AS180 manual

Siemens

Siemens Gigaset AS180 manual

Panasonic KX-TGJ320 installation manual

Panasonic

Panasonic KX-TGJ320 installation manual

Daikin GS02 operating manual

Daikin

Daikin GS02 operating manual

Avaya IP Office 20DT user guide

Avaya

Avaya IP Office 20DT user guide

manuals.online logo
manuals.online logoBrands
  • About & Mission
  • Contact us
  • Privacy Policy
  • Terms and Conditions

Copyright 2025 Manuals.Online. All Rights Reserved.