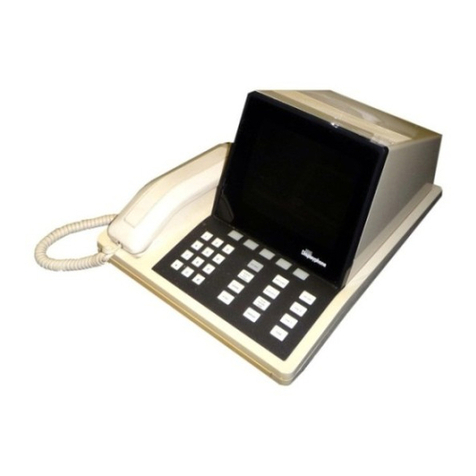
Northern Telecom DisplayPhone User manual

TCI Library
TCI Library: www.telephonecollectors.info

Congratulations, you are among the first to
experience one
of
the most advanced office
communications systems
yet
developed
...
DISPLAYPHONE.
DISPLAYPHONE is
an
integrated business tele-
phone and data terminal that offers convenience
features and capabilities far beyond anything that
has ever been available before in one unit.
As a business telephone it features on-hook dial-
ing, last
number
re-dial,
directory
memory, auto-
matic dialing, a recall worklist and handsfree
capabilities.
As a data terminal it can be used to access both
remote and local data services.
DISPLAYPHONE is capable
of
handling both
voice and data calls at the same time, so you can
talk to someone while accessing a data base and
viewing information on the screen. It also offers
other
services
...
a continuous day
/date
clock, a
telephone call
timer
and a reminder service that
brings messages to
your
attention.
DISPLAYPHONE
is
self-instructing through its
visual prompts and changing 'soft keys' that lead
the user from one operation to another.
To
derive
the most
benefit
from all of the many
features offered, this guide has been prepared in
sections which provide step-by-step instructions
for each operation.
It is recommended that you begin by setting up
your display
clock
and telephone directory, and
acquainting yourself with all
of
the
other
services
and features that are available. This will allow
more
efficient
use
of
the equipment
as
you work
with the telephone and data sections
of
the guide.
You
will find a
convenient
table
of
contents at the
beginning of each section to help you locate
instructions on how to perform specific functions.
If at any time you need help, call your
DISPLAYPHONE representative.
IMPORTANT
Before using DISPLAYPHONE it is necessary to set the signaling operation atthe appropriate mode.
Instructions for this setting can be found on page 11.
DISPLAYPHONEowners in the United States mustcomplywith the Federal Communication Commission's
rules and regulations.
Sec
page
38
ofthis manual for details.
---- - ----------
TCI Library
TCI Library: www.telephonecollectors.info

·--··
How to use your DISPLAYPHONE
Quick Response Guide
Components
Installation
...
as
aTelephone Set
...
as
a
Data
Terminal
...for Special Services
TCI Library
TCI Library: www.telephonecollectors.info

2
Until you
become
familiar
with
DISPLAYPHONE,
these
instructions
will
help
you
to
respond
to
the
DISPLAYPHONE
alerting
signals.
IFYOU SEE
OR
HEAR...
...
LINE
1 flashing and a
warble tone:
...
LINE
2 flashing and a
warble tone:
...
SERVICES
light flashing
with or without
a tone signal:
...
Date
and
Time
display
flashing
FOLLOW
THESE
STEPS:
You
have a call
on
line
1.
To
answer, lift
the
handset
or
talk
handsfree.
You
have a call on
line
2.
To
answer, press
LINE
2
key
and
lift
the
handset
or
talk
handsfree.
You
have a
reminder
message.
To
view
the
message, press
the
SERVICES
key
then
press
the
number
1
on
the
dial pad.
There
has
been
a
power
failure. Reset
the
Date and
Time
(see
page
36
for
instructions).
NOTE: If
power
has
been
off
for
more
than
three
days,
the
contents
of
DISPLAYPHONE
memory
may have
been
lost
or
distorted.
See
page
10
for
instructions
on
how
to
clear
memory
•••••••••••••••
-------------
Components
TCI Library
TCI Library: www.telephonecollectors.info

4
intensity
RS232C
Serial 110 Port
25-PIN CONNECTOR
IRS232C)
parallel
1/0
power
Keytone
Volume
Parallel
1/0
Port Power Alerting Volume
25-PIN CONNECTOR 9-pin Control
connector
Line 1
Line2
•••••••••••••••
5
KEYSET ADAPTER
(ORDEREDSEPARATELY) SERVICE
AND
FEATURE CONTROLS
Installation
TCI Library
TCI Library: www.telephonecollectors.info

6
HOW
TO
PAGE
-MAKE
CONNECTIONS.
·······················
.8
-CLEAR
THE MEMORY
.............
. .
........
10
-SET
THESIGNALING MODE
..
. .
.........................
11
-SET
THE
DATE
ANDTIME
......
. .
......................
12
Installation
TCI Library
TCI Library: www.telephonecollectors.info

8
MAKE CONNECTIONS
The
DISPLAYPHONE
must
be
at room
temperature
before
it
is installed.
Connect
the
DISPLAYPHONE
as follows (see
Figure
1 for
connection
details):
1)
Connect
the
Handset
to
the
jack
located on
the
left
side
of
the
DISPLAYPHONE.
2)
Connect
line
1 and
line
2
telephone
line
cords
to
your
telephone
system.
NOTE:
Line 1
can
be
used
only for voice communication. Line 2
can
be
used
for voice or data communication.
If
only one telephone line
is
available,
connect line 2
so
that data calls
can
be
made.
3)
Connect
the
power
supply. As
soon
as
power
is
applied,
your
DISPLAYPHONE
will
turn
on.
After
placing
the
9-pin
connector
into
the
back
of
the
DISPLAYPHONE,
tighten
the
two screws
on
the
connector
to
prevent
disconnection
of
power
to
the
unit.
NOTE:
DISPLAYPHONE will not work
as
atelephone if the power fails or
the unit
is
disconnected.
4)
Connect
the
printer
(if
provided)
to
the
PARALLEL
1/0
connector.
5)
Connect
the
local
computer
or
external
modem
(if provided)
to
the
SERIAL
1/0 connector.
Ill
I
111111111
FG.N:
, -CasA.A'PHONE
0:
iiOilS I
PRINTER
rR2J11
~
AC
OUTLET
POWER
SUPPLY
___
....,_
----
--•--
•-
---··--•
..
,
_______
,,
__
-•
--··-·
•-
n1<>
01
"'vour"\,.1<::
WALL JACKS
OR
L---l::===='...J KEYSET ADAPTER
(SUPPLIED
SEPARATELY)
TCI Library
TCI Library: www.telephonecollectors.info

10
HOW
TO CLEAR
THE
MEMORY
HOW
TO SET
THE
SIGNALING
MODE
It
is
important
that
this
procedure
be undertaken when first installing
OISPLAYPHONE. The
only
other
time
it
may be necessary to
clear
the
memory
is if
the
OISPLAYPHONE
has
been
without
power
for
longer
than
three
days.
The
memory
contents
may
be
lost
or
distorted.
If
you
see
unfamiliar
characters
in
your
Directory
or
Recall list, you
should
clear
the
memory.
1) Press
the
SERVICES key on
the
upper
keyboard.
2)
On
the
dial pad, press 0.
The
message 'PASSWORD'
will
appear
on
the
screen.
3) On
the
dial
pad, press 78.
The
following
message
will
appear
on
the
screen:
TESTING
RAM
..
RAM PASSED TO:
B7FFH
NEXTLOCATION
TEST VALUE =
00
VALUE
READ=
80
NOTE: If this message does
not
appear, repeat
the
previous steps. If
it
still
does
not
appear,
contact
your
DISPLAYPHONE representative for assistance_
4)
Press
the
SERVICES key to
clear
the screen.
The signaling
mode
determines
how
your
DISPLAYPHONE sends dial
signals to
telephone
company
equipment. The
mode
selected may be
either
DIGIPULSE*
or
DIGITONE* (tone signaling). The
mode
selected
depends
on
the
service provided by
your
telephone
company.
1) Press
the
SERVICES
key.
2) Press 4 on
the
dial pad. The DtSPLAYPHONE UTILITY display
will
appear on
the
screen.
3) Press 4 on
the
dial pad. The
SIGNALING
display
will
appear
on
the
screen
with
the
soft
key labels 'EXIT' and 'CHANGE'. The
soft
keys are
located on
the top
row
of
the
upper
keyboard. Labels on
the
last
line
of
the
screen indicate
the
function
they
perform at any
given
time.
4) Press
the
'CHANGE'
soft
key to change
the
signaling.
5) When you have selected the
correct
signal, press
the
'EXIT'
soft
key to
return to
the
DISPLAYPHONE UTILITY display.
*DIGITONE
and DIGlPULSE aretrademarks
of
Northern
Telecom Limited
TCI Library
TCI Library: www.telephonecollectors.info

12
HOW
TO
SET THE
DATE
AND
TIME The date and
time
are displayed in the upper right
corner
of the screen.
Your DISPLAYPHONE will keep accurate time up to one minute
per
month.
Should
a
power
failure occur,
the
date
and
time
will flash
to
indicate
they
are
incorrect
until
they
are
changed.
1)
Press the SERVICES key then press 4 on the dial pad to access
DISPLAYPHONE UTILITY index.
2) Press 1 on the dial pad to access the
DATE
and TIME display.
3) Enter the correct date and
time
and specify
AM
by pressing
'/!\
or
PM
by
pressing 'P'.
Soft
keys can be used
to
move left
or
right
if
required.
4) Press the 'EXIT' soft key to store the information. The screen will now
show
the
DISPLAYPHONE
UTILITY index.
HOWTO
...
PAGE
ANSWER A CALL.
.................
. .
...................
14
-Automatic
Line Select Feature. .
.............
14
MAKEACALL.........................
.
....................
14
-Manually.
. . . . . . . . . . . . . . . . . . .
.................
14
-With
Handset
On-Hook.
.
............................
14
-Using
Predial Feature. . . . . . . . . . .
15
-Using
the
Directory.
. . . . . . . . . . .
..............
15
-Using
a
Number
Stored
In
the
Recall List. . . . . . . . . . . . . . . . . . .
..
15
-Using
Last
Number
Redial..
. . . . . . . . . .
..
16
PUT A
CALLON
HOLD..
. . . . . . . . . . . . . . . . . .
...........
16
-Manually.....................
. . . . . . . . . . . .
16
-Automatically..
. . . . . . . . .
............
16
USE
THE
HANDSFREE
FEATURE. .. . .. . . . . . . . . . . . . .
..........
17
-
To
turn
The
Handsfree
Feature On. . . 17
-
To
Use
The
Muting
Feature...
. . . . . . . . . . . . . . . . . . . .
....
17
USE
THE
CALLTIMER. . . . . . . . . . . . . 17
-
To
Reset
The
Call Timer. . . . . . . . . . . .
..........
18
TERMINATE A CALL. . . . . . . . . . . . .
.....
18
-With
the
Handset.
. . . . . . . . . . . . . . . . . . . . .
18
-with
the
RELEASE
key. . . . . . . . . . . . . .
............
18
NOTE: For instructionson how to placea Data Call, refer to
the
section on how
to use your DISPLAYPHONE
as
a Data Terminal (page
21
).
...
as
aTelephone Set
TCI Library
TCI Library: www.telephonecollectors.info

14
15
HOW
TO
ANSWER
A CALL
AUTOMATIC
LINE
SELECT FEATURE
HOW
TO
MAKE
A CALL
...
...
MANUALLY
...WITH
HANDSET
ON-HOOK
...
USING
PREDIAL
FEATURE
...
USING
THE
DIRECTORY
...
USING
A
NUMBER
STORED
IN
THE RECALL LIST
To
answer
a call on
either
line
1
or
line
2:
1) Press
the
line
key
which
has
the
call
(the
light
beside
that
key will
be
flashing.
2)
The
DISPLAYPHONE
will
automatically
be
in
the
HANDSFREE
state
(see page
17
for
details
on
handsfree operation). For aprivate conversa-
tion, lift
the
handset
Line 1can be answered by
simply
lifting
the
handset
as
DISPLAYPHONE
will automatically
select
line 1
except
when line 2 is in use.
OISPLAYPHONE
has a
unique
touch-sensitive
dial
pad.
Sharp
objects
such as pens, should
not
be
used
to
dial
telephone
numbers
.
1) Pick up
the
handset. Press a LINE key to make
your
call.
2) Dial
the
number
on
the
dial
pad.
The
number
being
dialed
appears
in
the
upper
left
corner
of
the
screen.
This feature allows you
to
dial
without
having
to
lift
the
handset.
1) Press a
free
line.
2) Dial
the
telephone
number
3)
When
the
call
is
answered.
talk
handsfree
or
lift
the
handset.
The Predial feature allows you
to
check
telephone
numbers
for
errors
prior
to
making
calls.
1) Dial
the
number.
The
number
appears in
the
upper
left
corner
of
the
screen.
To
erase
the
entire
number, press
the
CLEAR
soft
key.
To
erase a
single
digit, press
the
DELETE
key on
the
upper
keyboard
2) Press a
free
line
key.
DISPLAYPHONE
automatically
dials
the
number.
3)
When
the
call is answered,
talk
to
the
person handsfree.
or
lift
the
handset.
After
having
entered
telephone
numbers
into
the
DISPLAYPHONE
direc-
tory(see
page
28
for
instructions
on
setting
up
the
directory),
you can
have a
number
dialed
automatically
by
pressing
only
four
keys.
1) Press
the
DIRECTORY key
on
the
upper
keyboard.
2) On
the
dial pad,
select
the
category
number
which
holds
the
number
of
the
person
you
want
to
call.
3)
On
the
dial pad,
select
the
number
corresponding
to
the
person you
want
to
call.
The
name
will
be
highlighted,
and
the
number
stored
with
the
name
will
appear
in
the
upper
left
corner.
4) Press a
free
line
key.
DISPLAYPHONE
automatically
dials
the
number
.
With
the
recall feature,
frequently-called
or
temporary
lists
of
telephone
numbers
can
be
stored in
the
Recall list.
Manually
dialed
numbers
or
numbers
dialed
from
the
Directory
may
be
stored
in
this
list
by
simply
pressing
the
KEEP
soft
key
when
it appears
during
dialing.
Once
stored,
numbers
can
be
found
quickly
and
automatically
dialed.
The
Recall list may
be
edited
to
enter
names
beside
manually
dialed
numbers
(see page
32
for
instructions).
cont
TCI Library
TCI Library: www.telephonecollectors.info

16
17
...
USING LAST
NUMBER REDIAL
HOWTOPUT
A CALL
ON
HOLD..
.•.MANUALLY
...AUTOMATICALLY
HOWTOUSE
HANDSFREE FEATURE
...
...
TO
TURN THE
HANDSFREE
FEATURE
ON
...
TO
USE THE
MUTING
FEATURE
THE CALLTIMER
1) Press
the
DIRECTORY
key.
The
Directory
Index
will
appear
on
the
screen
with
a RECALL soft key label in
the
bottom
left
corner.
2) Press
the
RECALL
soft
key
to
display
the
Recall list.
3) On
the
dial
pad, press
the
number
tor
the
name you
want
to
call.
The
name
will
be
highlighted,
and
the
number
stored
with
the
name
will
appear
in
the
upper
left
corner.
4) Press a
tree
line
key.
DISPLAYPHONE
automatically
dials
the
number
.
The
Last
Number
Redial feature allows you
to
automatically
call
the
last
number
dialed
on
either
line
1
or
line
2.
1) Press
the
REDIAL
key on
the
upper
keyboard.
The
last
number
dialed
will
appear
in the upper leftcorner
of
the screen.
2) Press a
free
line
key.
DISPLAYPHONE
automatically
dials
the
number.
DISPLAYPHONE
offers
two
ways
of
putting
a call on hold:
'manually'
or
automatically
.
Press
the
HOLD
key on
the
upper
keyboard.
The
light
beside
the
line
key
you
are
using will flash
to
indicate
that
the
line
is on hold. Return
to
the
call
by pressing
the
line
key.
While
a call is in progress, press
the
free
line
key.
The
line
you are leaving
will
automatically
be
placed
on
hold and
the
light
beside
that
line
key will
flash.
After
terminating
the
call,
return
to
the
line
on
hold
by
pressing
that
line
key.
To
put
the
second
call on
hold
and return
to
the
original
call,
simply
press
the
line
key
for
the
first
call.
The
hold
condition
automatically
transfers
to
the
other
line.
Your
DISPLAYPHONE
will
automatically
be
in
the
Handsfree
mode
of
operation
when
a call is
placed
with
the
handset on-hook.
The
light
beside
the
HANDSFREE
key
will
be
lit.
If
you
are
using
the
DISPLAYPHONE
handset and want
to
use
the
hands-
free
feature:
1) Press
the
HANDSFREE
key
then
place
the
handset
on-hook.
You
will
hear
the
other
party
through
the
speaker
and
the
other
party will
hear
you
when
you
talk at a
normal
level.
2)
Set
the
volume
to
a
comfortable
listening
level
by
adjusting
the
control
above
the
handset.
3)
To
return
to
a private
conversation,
simply
pick
up
the
handset.
The
HANDSFREE
light
will
go
out.
The
Muting
feature allows you
to
have a private
conversation
with
people
in
the
same
room
without
allowing
the
person at
the
other
end
of
the
line
to
hear
you.
1)
To
use
the
muting
feature, press
the
HANDSFREE
key.
The
HANDSFREE
light
will flash.
2)
To
turn
Muting
off, press
the
HANDSFREE
key again.
The call
timer
display is located
under
the
date and
time.
Your DISPLAY-
PHONE
has separate call
timers
for
line
1 and
line
2. The call
timer
auto-
matically
starts
about
8
seconds
after
the
last
digit
has
been
dialed.
You
may
reset
the
call
timer
to
00:00
at
any
time
during
the
call.
The
call
timer
display disappears
about
30
seconds
after
the
call has
been
terminated.
TCI Library
TCI Library: www.telephonecollectors.info

18
TO
RESET THE
CALL TIMER
...
HOW
TO TERMINATE
ACALL.
..
•..WITH THE
HANDSET
...
WITH THE
RELEASE KEY
....
Press the 'TIMER' soft
key.
The call
timer
will reset
to
00:00. If you have
one call on hold and another in progress, the call timer will reset for the
call in progress.
To
terminate a call when using
the
handset. simply hang up.
Calls may be terminated by pressing the RELEASE key on the upper
keyboard.
TCI Library
TCI Library: www.telephonecollectors.info

HOWTO
...
PAGE
SETUP
THE
DISPLAYPHONE
TERMINAL
PROFILE. . . . .
.. .. ..
. .
.. .. ..
. .
..
.......
20
-For
Manually
Dialed
Calls..
.
................................
20
MAKE
A DATA
CALL
.
.. ..
..
.
..
.............
.
-Manually........
. . . . . . . . . . . . . . . . . . . . . . . . .
......
.
-From
the
Directory
....................................
.
MAKE
A DATA
CALL
AND
A VOICE
CALL
AT
THE
SAME
TIME
........
.
HOW
TO
USE
THE
SEMI
AUTOMATIC
LDG-ON
FEATURE
.............
.
-
To
Store Log-on Codes. . . . . . . . . . . . . . . . . . . .
............
.
-To
Log
On
............
.
CHANGE
THE
SCREEN
WIDrH
...........................
.
USE
THE
SCREEN
KEY
.......
.
..
21
..
21
.
..
22
..
.
22
.
23
..
.
23
.
23
.
23
.
24
TERMINATE
A DATA
CALL
....
. .
..............
24
USE
THE
LOCAL DATA PORT
..
-
To
turn
the
Local Data Port
off
..
.
.........................
24
.. ..
. . .
..
.25
...
as
a
Data
Terminal
TCI Library
TCI Library: www.telephonecollectors.info

20
USING
DISPLAYPHONE
ASA
REMOTE
TERMINAL
USING
DISPLAYPHONE
AS
A LOCAL DATA
TERMINAL
HOW
TO
SETUP
DISPLAYPHONE
TERMINAL
PROFILE
...
...
FOR
MANUALLY
DIALED
DATA CALLS
DISPLAYPHONE
can be used as a
fully
operational
data
terminal
to
access
remote data
services
which
use a dial-up
telephone
network
and
support
asynchronous
300
Baud terminals. Data calls can
be
made
manually
or
from
the
Directory
only
on
line
2.
Your
DISPLAYPHONE
can also
be
used
as
a local data
terminal
by
connecting
the
local host
computer
to
the
RS
232C
SERIAL
1/0
connector
on
the
back of
your
unit
NOTE DISPLAYPHONE
cannot
be
used as a remote terminal and a local
terminal
at
the
same time.
Before
making a Data Call,
the
DISPLAYPHONE
terminal
profile
must
be
set
to
match
the
characteristics
of
the
data
service
being
accessed.
1)
Press
the
SERVICES
key.
The
SERVICES
index
will
appear
on
the
screen
2)
Access
DISPLAYPHONE
UTILITIES by
pressing.ton
the
dial
pad.
3) Access
MANUAL
CALL
PROFILE
by pressing 2 on
the
dial pad. The
page tor setting
up
the
Terminal Profile will
appear
on
the
screen
with
the
fo:low1ng soft key labels:
EXIT used to save
the
profile
data and
return
back to
the
DISPLAYPHONE UTILITY
index
ERASE
clears
the
field
1n
which
the
cursor
(the small square
block
on
the
screen)
is
currently
positioned.
TAB moves
the
cursor
right
one field
LEFT
moves
the
cursor
left
one character.
RIGHT
moves
the
cursor
right
one character.
TCI Library
TCI Library: www.telephonecollectors.info

21
HOW
TO
MAKE
A
DATA
CALL
...
MANUALLY
4) Using
the
soft
keys to move
the
cursor, set the page-width, page-mode,
duplex-type and parity.
WIDTH Press 4 for
40
character screen width
or
8
for
80
character.
MODE
Press P for page
mode
or
S
for
scroll mode.
DUPLEX Press F for full
duplex
operation
or
H for half duplex.
PARITY Press 0 for odd parity, E for even parity
or
M for mark parity.
5) Press the EXIT
soft
key to store
the
data. The DISPLAYPHONE UTILITY
list will appear on
the
screen.
6)
Press
the
SERVICES key to return to the SERVICES list.
This
profile
will be stored in DISPLAYPHONE'S
memory
and will
apply
to all manually dialed Data Calls and local data
port
operation until
the
profile
is changed.
1) Dial
the
number
for
the
data service. The soft key label 'DATA' will
appear on
the
bottom line
of
the
screen.
2)
Press
the
'DATA' soft
key.
3)
Press line 2
key.
The
message'
WAITING FOR CARRIER TONE ...·will
appear
on
the
screen after dialing is completed. When
the
host
com-
puter
answers
the
call, you will
hear
two
brief
tones
over
the
speaker
and the message will disappear.
4) Log-on to
your
host
computer
using
your
personal codes.
5)When
the
data session is finished. log
off
the
data service. DISPLAY-
PHONE
will release
the
line when
the
service disconnects. If faster
disconnection
is preferred, logoff, press
the
line
2 key then press
the
RELEASE
key.
TCI Library
TCI Library: www.telephonecollectors.info

22
...
FROM
THE
DIRECTORY
HOWTOMAKE
A DATA CALL
AND
A VOICE CALL
AT
THE
SAME
TIME
1) Press
the
DIRECTORY
key.
The
DIRECTORY
INDEX
will
appear
on
the
screen.
2)
On
the
dial pad, press
the
number
for
the
Directory
page
where
you
stored
the
data
service
number.
The
page will
appear
on
the
screen.
3} Press
the
number
for
the
data
service
you
want
to call.
The
telephone
number
will
appear
in
the
upper
left
corner
of
the
screen.
4} Press
LINE
2 key.
DISPLAYPHONE
automatically
dials
the
number.
'WAITING
FOR
CARRIER
TONE
...
'
will
appear
on
the
screen.
When
the
call is
connected,
you will
hear
two
brief
tones and
the
message will
disappear.
5) Log-on
to
the
host
computer
using
your
personal codes.
DISPLAYPHONE
allows a Data Call and a Voice Call
to
be
in progress
at
the
same time. Calls can
be
placed
and answered on
line
1
without
having
to
terminate
a Data Call on
line
2. Also, a Voice Call can
be
placed
or
answered,
put
on hold, and
then
a Data Call can
be
made.
1)
Make
a Data Call on
line
2.
2)
Once
connection
to
the
service
is made, press
the
LINE
1 key. The
light
beside
LINE
2 key will flash
indicating
the
'data
hold'
condition.
The
screen wi
II
clear.
3)
Make
a Voice Call on
line
1.
Note: A
voice
call can
be
answered
on
line
1,
while
a data session
fs
in
progress on
line
2,
by
simply
pressing
the
line
1 key.
The
'data hold" feature
prevents
the
line
from
being
disconnected.
4) Press
the
SCREEN
key on
the
upper
keyboard. The data display will
appear
on
the
screen and
the
call on
line
1 will remain
connected.
You
can
input
information
into
the
data
service
using
the
lower
keyboard and
talk
over
line
1
at
the
same time.
5)
To
terminate
the
call on
line
1,
press
the
RELEASE
key.
TCI Library
TCI Library: www.telephonecollectors.info

23
HOWTOUSETHE
SEMI-AUTOMATIC
LOG-ON FEATURE...
...
TO STORE
LOG-ON CODES
...
TO LOG
ON
HOW
TO
CHANGE
THE SCREEN WIDTH
6)
To
terminate
the
Data Call, log
off
the
data service.
DISPLAYPHONE
will
release
line
2
when
the
service
disconects. If faster
disconnection
is
preferred. logoff. press
the
line
2 key,
then
press
the
RELEASE
key.
This
feature can
only
be
used
for
data
service
numbers
stored
in
the
Directory.
When you store a
number
for a dial-up data service in
the
Directory, you
can also store
the
codes used to log-on.
Once
these codes are stored, the
semi-automatic
log-on feature is used
to
speed
up
the
connection.
For
security, private
codes
can
be
entered
manually
during
the
semi-automatic
log-on
procedure
.
1)
When
your
Data Call is
connected,
press
the
'LEARN'
soft
key.
The
soft
key labels 'EXIT', 'MANUAL.:, 'PAUSE' and 'CANCEL.: will appear.
2) Log-on
to
your
host
computer.
To
enter
private
information
during
the
log on procedure, press
the
'MANUAL.:
soft
key,
then
enter
the
informa-
tion. When you press
'RETURN'
on
the
lower
keyboard,
automatic
storage
of
the
log-on
codes
can resume.
3) Press
the
'EXIT' soft key
when
you
want
to
stop
storing
the
log-on
codes
.
1)
When
the
Data Call is
connected,
press
the
'AUTOTX'
soft
key.
2) Press
the
'SEND'
soft
key
every
time
the
data
service
requires
a
response
to
continue
with
the
log-on procedure.
The DATA
SCREEN
FORMAT feature allows you
to
select
a screen
width
of
40
or
80
characters/line
for
the
data session in progress.
Note
that
if
80
characters/line
is
selected,
the
screen
will
not
change
width
until
the
41st
character
is
received
for
display.
1)
While
a Data Call is in progress, press
the
SERVICES
key.
The
SERVICE
list will
appear
on
the
screen.
cont.
TCI Library
TCI Library: www.telephonecollectors.info

24
HOW
TO USE
THE
SCREEN KEY
HOW
TO TERMINATE
A
DATA
CALL
HOWTOUSETHE
LOCAL
DATA
PORT
2) On
the
dial pad, press 4
to
access
DISPLAYPHONE
UTILITY.
3) On
the
dial
pad, press 3
to
access DATA
SCREEN
FORMAT.
4) Press
the
'CHANGE'
soft
key
to
change
the
data screen
format
to
40
or
80
characters/line.
5) Press
the
'EXIT'
soft
key to
return
to
the
DISPLAYPHONE
utilities
list.
6) Press
the
SCREEN
key to return
to
the
data display.
With
DISPLAYPHONE
you can access
the
Directory,
Services
features
or
telephone
features
during
a data session.
When
a feature
is
selected,
the
data
service
information
on
the
screen
is
replaced
by
the
display
for
the
selected
feature.
To
return
to
the
data
service
display
simply
press
the
SCREEN
key.
To
terminate
a Data Call,
enter
the
appropriate
log-off
command
to
the
host
computer.
DISPLAYPHONE
will
automatically
release
the
line
when
the
host
computer
disconnects.
If
faster
disconnection
is required, log-off, press
line
2 key,
then
press
the
RELEASE
key.
With DISPLAYPHON
E,
you can
operate
with
a local
computer
connected
to
the
SERIAL
1/0
port
on
the
back
of
your
unit.
Connection
to
the
local
computer
is
controlled
through
the
LOCAL DATA PORT feature
which
allows
you
to
select
the
baud rate and
to
turn
the
port
on
or
oft.
Th9
TERMINAL
PROFILE
must
be
set
tor
operation
with
the
local computer.
1) Press
the
SERVICES
key.
2) Press 3 on
the
dial pad
to
acces
the
LOCAL DATA PORT feature.
3) Press
the
'BAUD'
soft
key
until
the
correct
transmit
and
receive
baud
rates
appear
on
the
screen.
DISPLAYPHONE
can
transmit
and
receive
at
75,
150,
300,
600
and
1200
baud.
•••••••••••••••
TCI Library
TCI Library: www.telephonecollectors.info

•••••••••••••••
25
TO
TURN
LOCAL
DATA PORT
OFF
...
4) Press
the
'ON/OFF'
soft
key
to
turn
the
local data
port
on.
5) Press
the
'EXIT'
soft
key.
The
RS232
DATA PORT
PROFILE
will
appear
on
the
screen
6)
Set
up
the
terminal
profile
as
required. (See page
20
for
instructions).
Press
the
'EXIT' softkey to lock in
the
information. The DISPLAYPHONE
UTILITY list will
appear
on
the
screen.
7) Press
the
SCREEN
key and
proceed
to use
DISPLAYPHONE
as a local
computer
terminal.
1) Log
off
the
local computer.
2) Press
the
SERVICES
key.
3) Press
the
·3· key
to
access
the
LOCAL DATA PORT display.
4) Press
the
'ON/OFF'
soft
key
to
turn
the
port
off.
5) Press
the
'EXIT' soft key.
TCI Library
TCI Library: www.telephonecollectors.info

·····----------
HOWTO
..•
PAGE
USE
THE
DIRECTORY. . . . . . . . . . . . . . . . . . . . . . . . . . . . . . . . .
...
28
-Setting
Up
Page
Titles.........
. . . . . . . . . . . . . . . . . . . . . . .
....
28
-Adding
entriesto
the
directory
for
Voice Calls. . .
..........
29
-Adding
entries to
the
Directory
for
Data Calls. .. .
.......
30
-Inserting Entries into
the
Directory. . . . . . . . . . . . . . . .
.........
31
-Changing
an
entry
in
the
directory......
.
.......................
31
-Deleting
an
Entry
from
the
Directory. .. . .
..
31
USE
THE
RECALL FEATURE. . . . . . . . . . . . . . . . . . 32
-Entering names into
the
Recall
List
. . . . . . . . .
..
32
-Deleting
single Items from
the
Recall
List........
. . . . .
...
33
-Clearing
the
Recall List. . . . . . . . . . . . . . . . . . . . . . . . . . . .
..
33
USE
THE
REMINDER
FEATURE. . . . . . . . . . . . . . .
......
34
-Storing
a Reminder
Message...
. . . . . . . . . . . . . . . . . .
..
34
-Viewing
a Reminder Message.. . . . . . . . . . . . . . . . . . . .
.....
35
-Clearing
Expired Messages
.....................................
35
-Clearing
Unwanted Messages. .
.............................
35
USE
THE
DOODLE
PAD.
.. . . . . . . . . . .
..
35
SET
THE
DATE
AND
TIME. .
......
36
USE
THE
PRINTER. .
-Page
Print.
......
.
-Remote
Print.
..
....
36
.
....
37
.
.......
37
.
..
for Special Services
TCI Library
TCI Library: www.telephonecollectors.info
Other manuals for DisplayPhone
1
Table of contents
Other Northern Telecom Telephone manuals
Northern Telecom
Northern Telecom M5212 ACD Operating and installation instructions
Northern Telecom
Northern Telecom IMAGINATION QSK450 Operating and installation instructions

Northern Telecom
Northern Telecom QSK 100 Instruction Manual
Northern Telecom
Northern Telecom DisplayPhone User manual
Northern Telecom
Northern Telecom M5317TX User manual

Northern Telecom
Northern Telecom 3X8 User guide
Northern Telecom
Northern Telecom DMS-100 Series Operating manual
Northern Telecom
Northern Telecom Meridian M3000 User manual

Northern Telecom
Northern Telecom Decorator Series Instruction manual
Northern Telecom
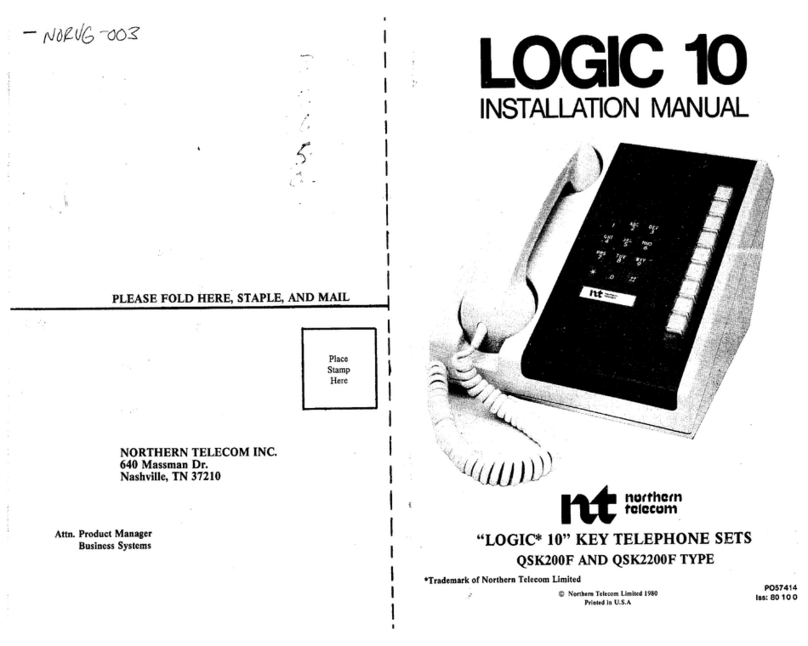
Northern Telecom Logic 10 User manual
