NOUVOLED LUSTROUS-FX 1910 User manual
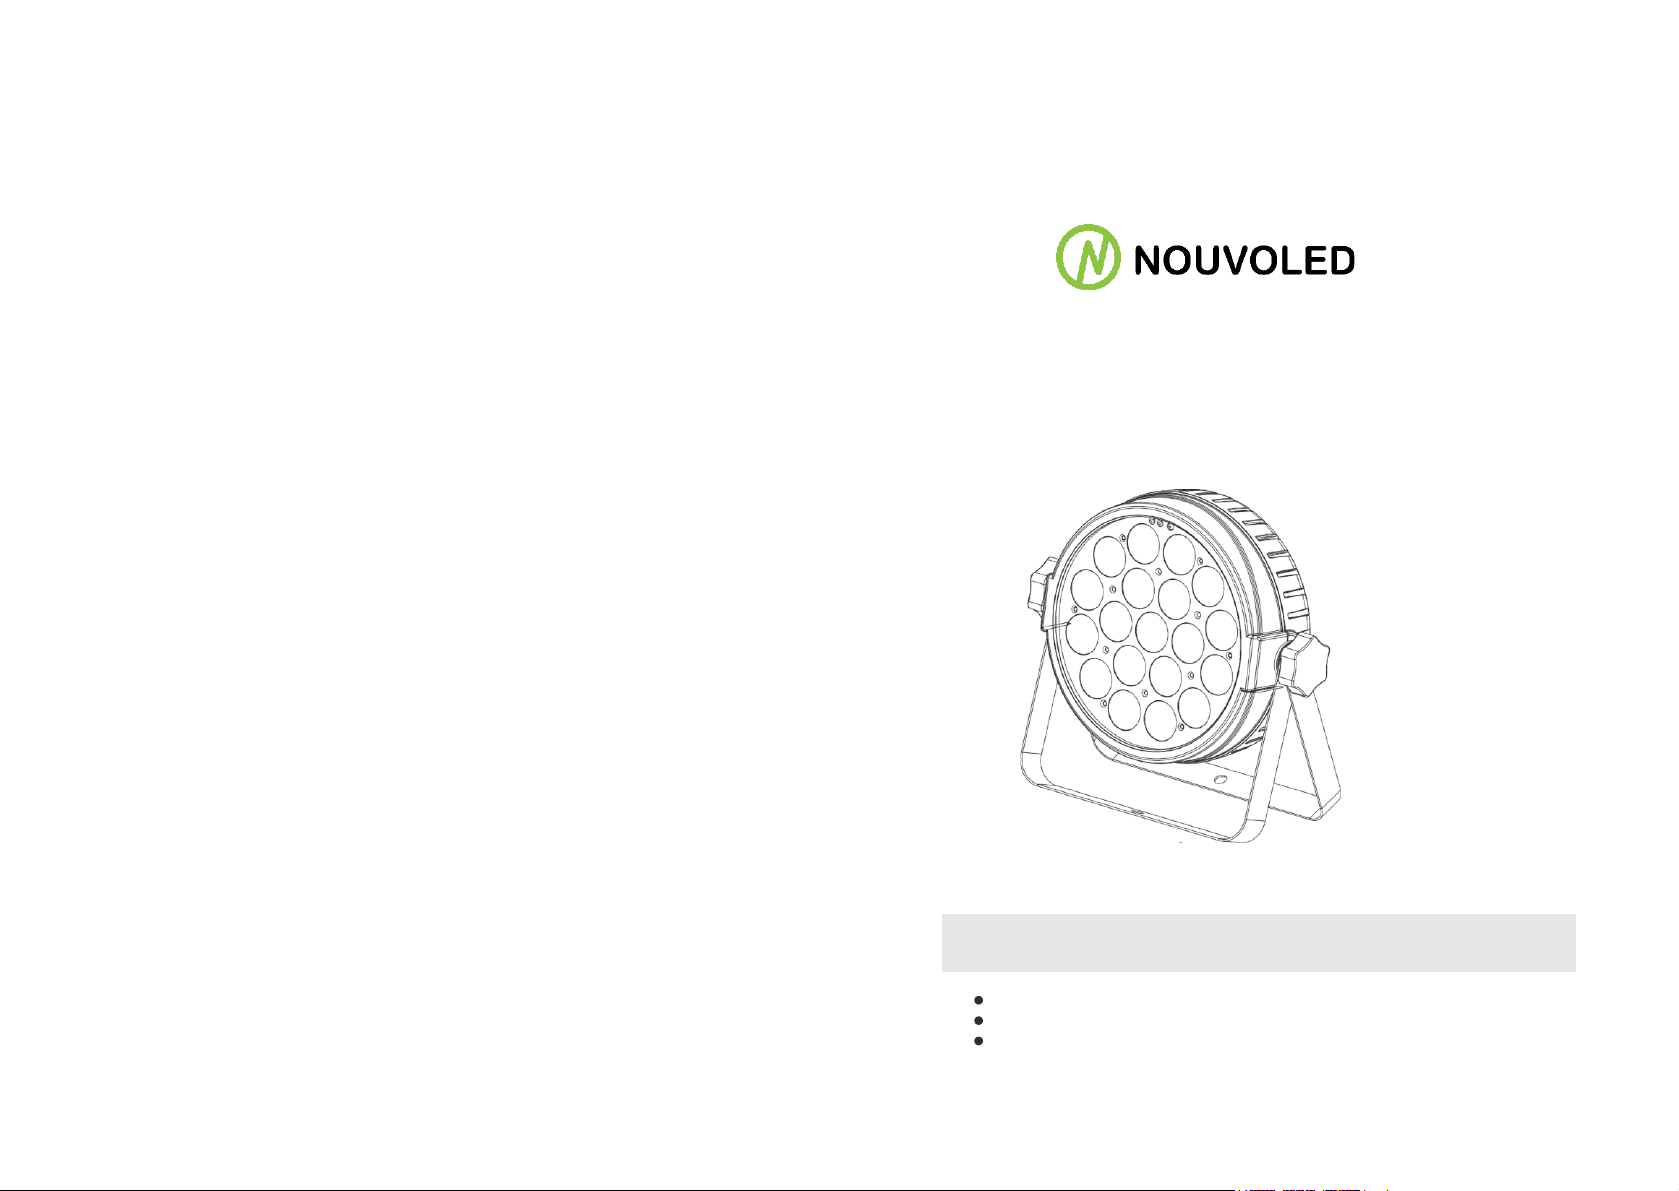
LUSTROUS-FX 1910
Version 1.0
USER MANUAL
Be sure to read the USER MANUAL carefully before using this product.
Be sure to keep the USER MANUAL properly for future needs.
Use this product correctly when you can fully understand the User Manual

LED PAR 19X10 Product Datasheet
LED PAR 19X10 Product Datasheet
01
10
1.
Safety instructions
10.Maintenance and cleaning
Thank you for choosing our LED PAR 19X10. FOR YOUR OWN SAFETY, PLEASE READ THIS
USER MANUAL CAREFULLY
BEFORE YOUR INITIAL START - UP!
This device has left our premises in absolutely perfect condition. In order to maintain this condition and to
ensure a safe operation, it is absolutely necessary for the user to follow the safety instructions and warning
notes written in this manual.
Important:
The manufacturer will not accept liability for any resulting damages caused by the non-observance of this
manual or any unauthorized modification to thedevice.
Please consider that damages caused by manual modifications to the device are not subject to warranty.
During the operation the housing becomes hot). Allow the fixture to cool approximately 20 minutes prior to
manipulate with it.
Make sure that the available voltage is not higher than stated on the rear panel.
WARNING! This unit does not contain an ON/OFF switch. Always disconnect power input cable to
completely remove power from unit when not in use or before cleaning or servicing the fixture.
Make sure that the power-cord is never crimped or damaged by sharp edges. Check the device and the
power-cord from time to time.
Always disconnect from the mains, when the device is not in use or before cleaning it. Only handle the
power-cord by the plug. Never pull out the plug by tugging the power cord.
This device falls under protection class I. Therefore, it is essential to connect the yellow/green conductor
to
earth.
The electric connection, repairs and servicing must be carried out by a qualified employee.
Do not connect this device to a dimmer pack.
Do not switch the fixture on and off in short intervals as this would reduce the lamp’s life.
During the initial start-up some smoke or smell may arise. This is a normal process and does not
necessarily mean that the device is defective.
Do not touch the device’s housing bare hands during its operation (housing becomes hot)!
For replacement use lamps and fuses of same type and rating only.
It is absolutely essential that the fixture is kept clean and that dust, dirt and smoke-fluid residues must not
build up on or within the fixture. Otherwise, the fixture ‘s light-output will be significantly reduced. Regular
cleaning will not only ensure the maximum light-output, but will also allow the fixture to function reliably
throughoutitslife. A soft lint-free cloth moistened with any good glass cleaning fluidisrecommended,
under no circumstances should alcohol or solvents be used!
The front objective lens will require weekly cleaning as smoke-fluid tends to building up residues, reducing
the light-output very quickly. The cooling-fans should be cleaned monthly.
The interior of the fixture should be cleaned at least annually using a vacuum-cleaner or an air-jet. Dichroic
colour filters, CMY lamellas, gobo and graphic wheels and the internal lenses should be cleaned
monthly. Remove dust and dirt from the fans and cooling vents using a soft brush and vacuum-cleaner.
Important! Check the air filters periodically and clean before they become clogged!
Clean two air filters placed in the fixture’s covers and two in the fixture base. Use a vacuum cleaner,
compressed air or you can wash them and put back dry.
After replacing the air filters, reset the elapsed time counter in the menu "Information" (Information--->Air
Filters--->Elapsed Time).
Replacing the fuse. Before replacing the fuse, unplug mains lead.
1)
Remove the fuse holder on the rear panel of the base with a fitting screwdriver from the housing (anti-
clockwise).
2)
Remove the old fuse from the fuse holder.
3)
Install the new fuse in the fuse holder (only the same type and rating).
4)
Replace the fuse holder in the housing and fix it.
CAUTION! EYE DAMAGES!
Avoidlooking directly into thelightsource
(meant especially for epileptics)!
DANGER!
Disconnect from the mains before starting any
maintenance work
CAUTION!
Keep this device away from rain and moisture!
Unplug mains lead before opening the housing!
CAUTION!
Be careful with your operations.
With a high voltage you can suffer a dangerous electric shock when touching the wires!
LED PAR 19X10 Product Datasheet
LED PAR 19X10 Product Datasheet
09
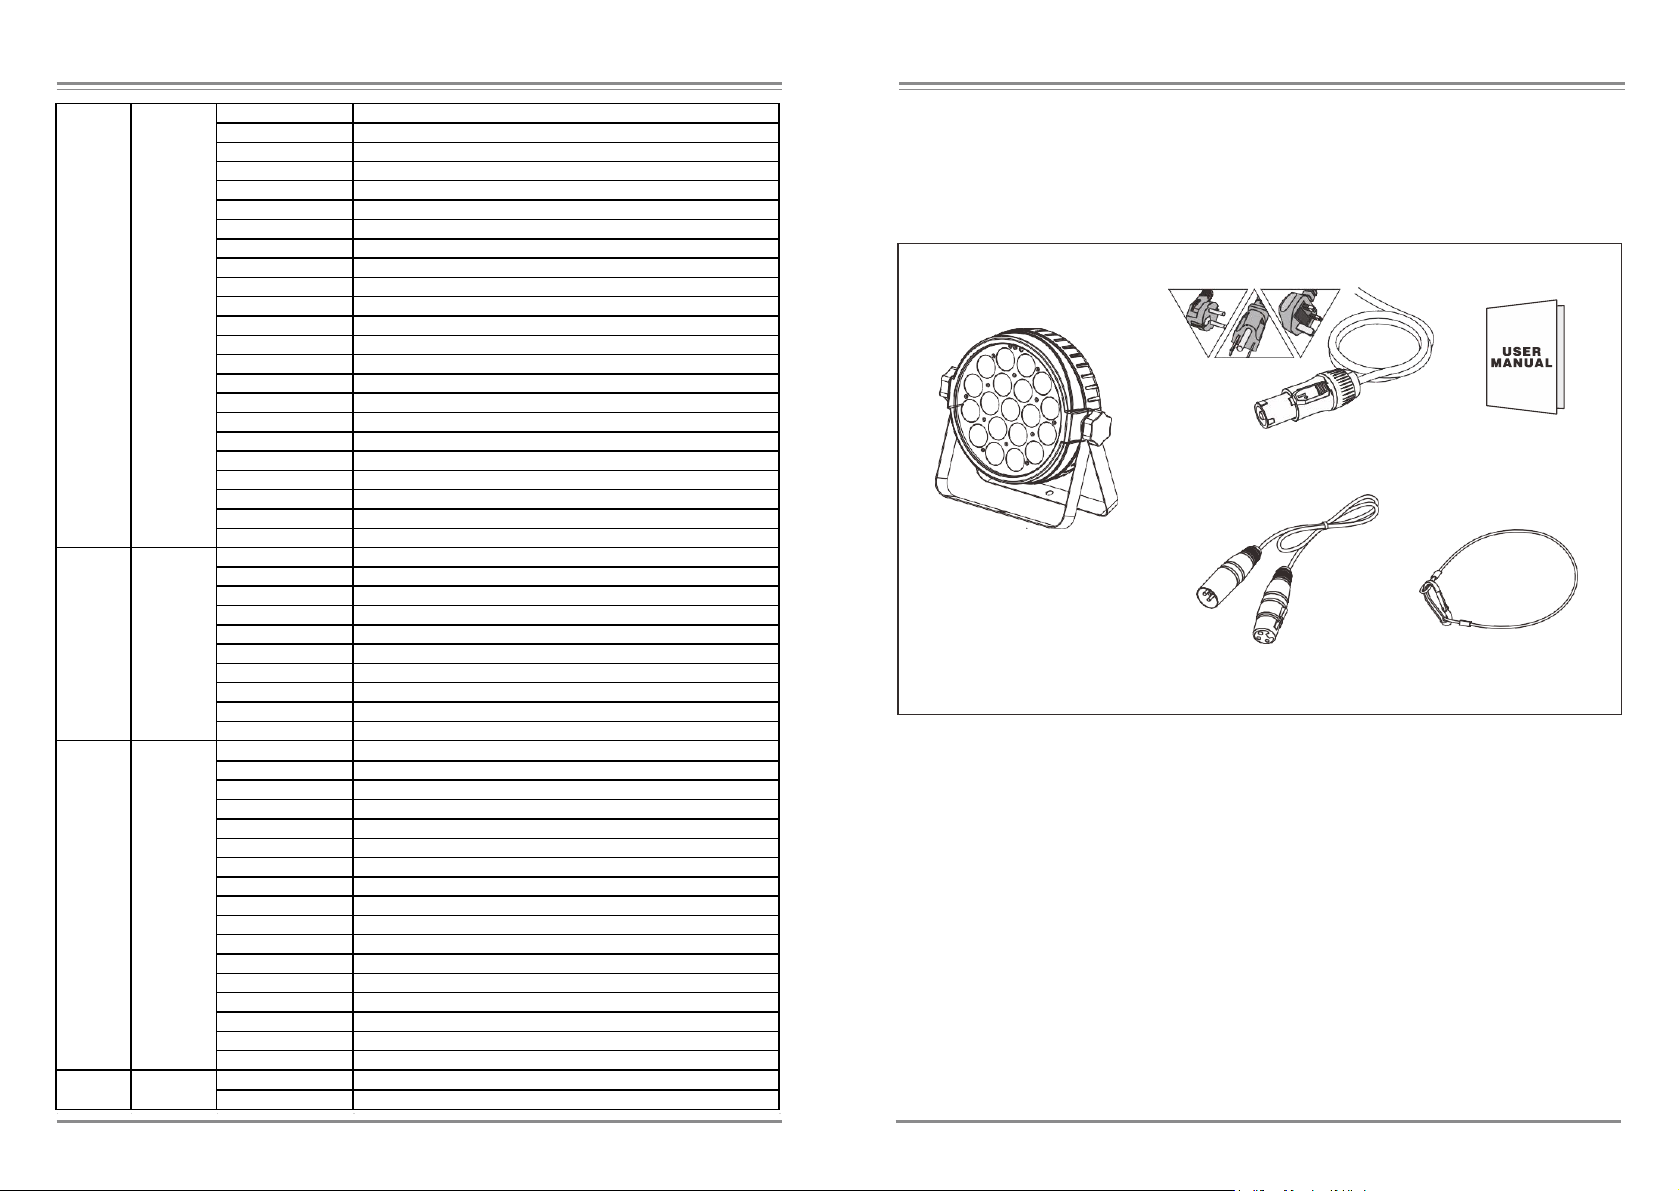
02
▲ Safety Cable*1
▲ Signal Cable *1
▲ PAR CAN *1
▲ User Manual*1
▲ Power Cable*1
USA Standard
EuroStandard UKStandard
2.
UNPACKING
LED PAR 19X10 adopts a 10W white LED lamp which features high brightness and stability.
Please carefully unpack it when you receive the fixture and check whether it is damaged during the
transportation. And please check whether the following items are included inside the box:
LED PAR 19X10 is made of a new type of high temperature strength of engineering plastics and
cast aluminum casing with nice outlook.The fixture is designed and manufactured strictly following CE
standards, complying with international standard DMX512 protocol. It’s available independently
controlled and linkable with each other for operation. And it is applicable for large-scale live
performances, theater, studio, nightclubs and discos.
This manual covers the important information on installation and applications. Meanwhile, please keep
this manual well for future needs.
19
7
Macro Color
0..15
No Function
16..31
Red
32..47
Green
48..63
Blue
64..79
White
80..95
Red + Green
96..111
Red + Blue
112..127
Red + White
128..143
Green + Blue
144..159
Green+ White
160..175
Blue + White
176..191
R +G+B
192..207
R+G+B+W
208..212
2700K
213..217
3200K
218..222
3500K
223..227
5000K
228..232
5500K
233..237
6000K
238..242
6500K
243..247
7000K
248..255
8000K
20
8
Color Temp
0..15
No Function
16..45
Below 3200K
46..75
3200K - 3500K
76..105
3500K - 5000K
106..135
5000K - 5500K
136..165
5500K - 6000K
166..195
6000K - 6500K
196..225
6500K - 7000K
226..255
7000K - 8000K
21
9
Macro RUN
0..15
No function
16..31
Macro Run 1
32..47
Macro Run 2
48..63
Macro Run 3
64..79
Macro Run 4
80..95
Macro Run 5
96..111
Macro Run 6
112..127
Macro Run 7
128..143
Macro Run 8
144..159
Macro Sound 1
160..175
Macro Sound 2
176..191
Macro Sound 3
192..207
Macro Sound 4
208..223
Macro Sound 5
224..239
Macro Sound 6
240..255
Macro Sound 7
22
10
Macro Speed
0..255
Macro Speed from Slow to Fast
LED PAR 19X10 Product Datasheet
LED PAR 19X10 Product Datasheet
03
08
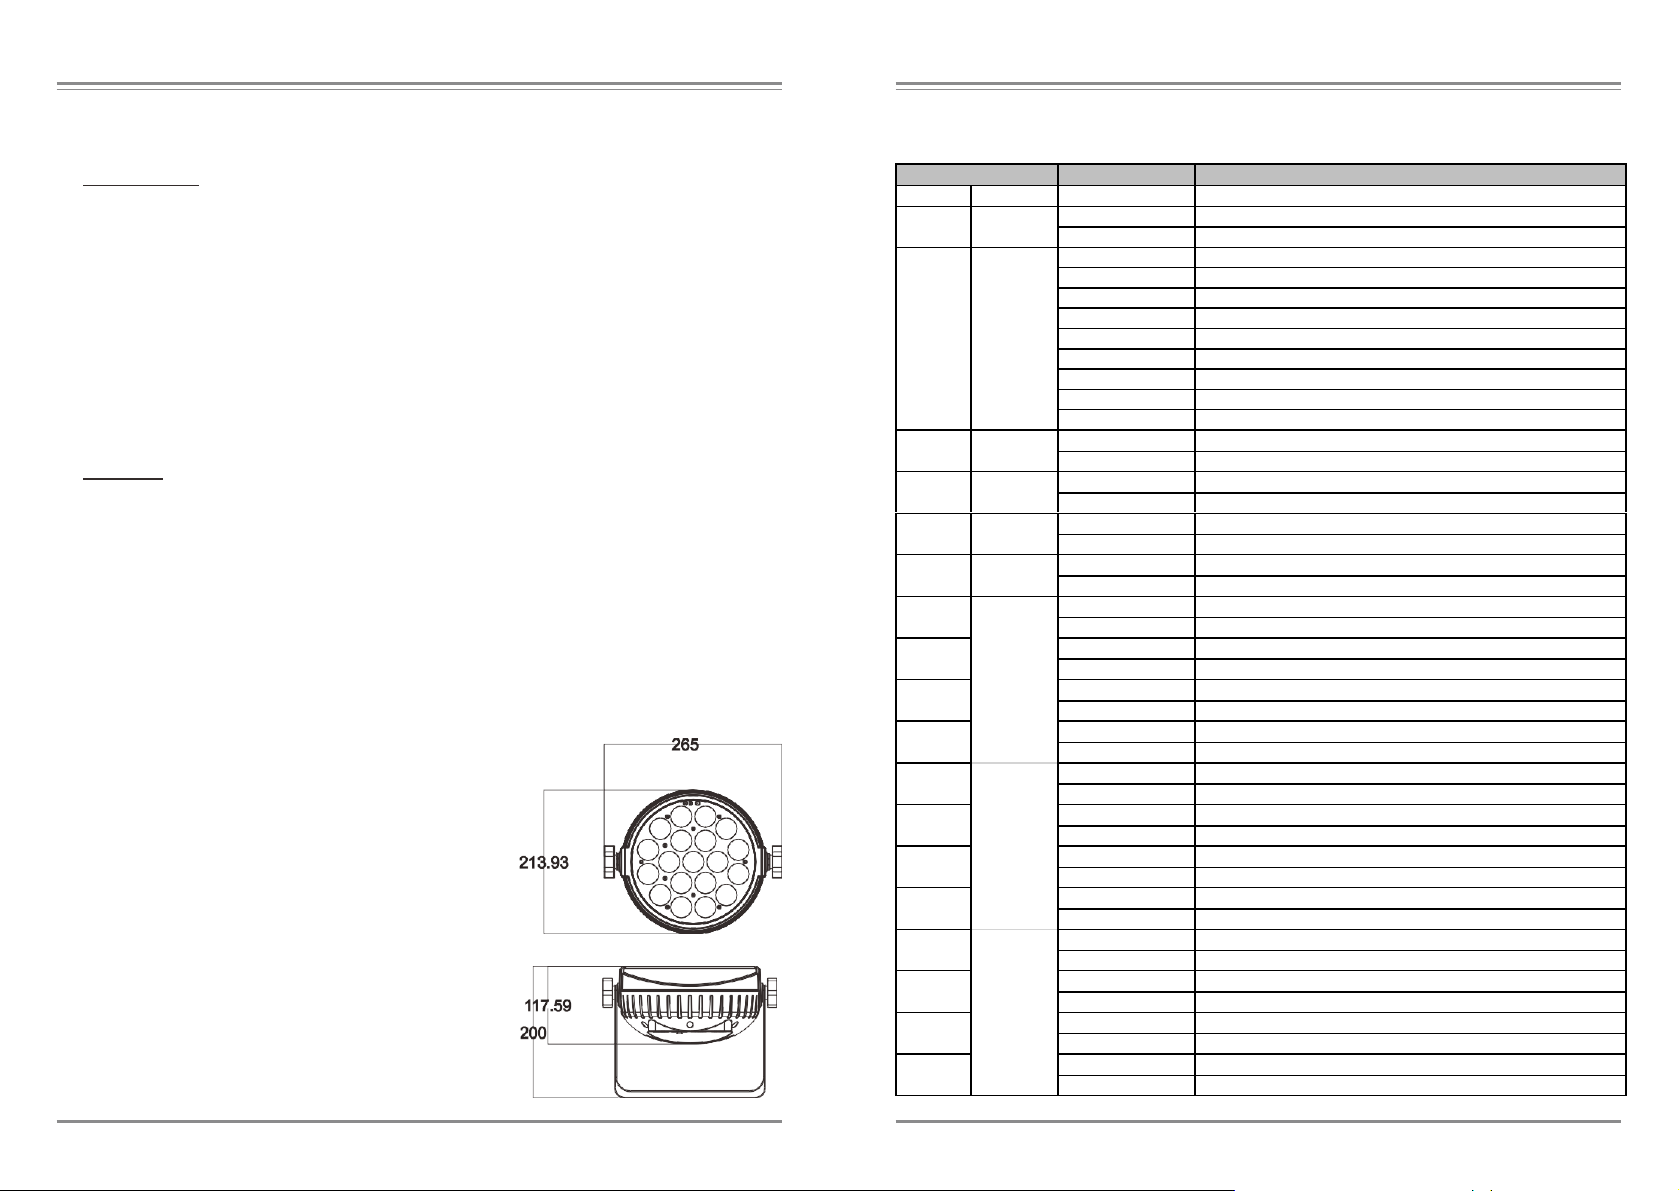
SPECIFICATIONS
3.
TECHNICAL INFORMATION
9.
DMX PROTOCOL
■
Powered by 19 x 10W 4-IN-1 RGBW LEDs
■
Input Voltage: AC90-260V 50-60Hz
■
Power Consumption: 200W
■
Circle Controllable
■
Control Signal: DMX512, master-slave and sound activated
■
Control Channel: 22/10 DMX Channels USITT DMX-512
■
Dimensions: 265(D)*117(W)*213(H)mm
■
Packing Dimensions: 280(D)*245(W)*150(H)mm
■
Net Weight: 1.914kgs
■
Gross Weight: 2.84kgs
FEATURES:
■
50,000 hours life span and low power consumption
■
Engineering grade nylon plastic, flame retardant and corrosion resistant
■
Cooling system
■
CTB and CTO,linear colour temperature 2800K-8000Kchangeable
■
16.7million additive RGBW colors whit full saturation control
■
Built-in programs that could be called up via a DMX controller
■
25t/s strobe effect and pulse strobe effect
■
0-100% electronic dimming
■
4-button LED display on rear panel
■
POWERCON connector IN/OUT
■
3-Pin XLR connectors IN/OUT
■
Overheat protection
■
-35°C ~ 45°C max ambient temperature
Mode/Channel
Value
Function
CH22
CH10
1
1
Dimmer
0..255
Dimmer 0%...100%
2
2
Shutter
0..31
Shutter closed
32..63
shutter open
64..95
Strobe effect slow to fast
96..127
shutter open
128..159
Pulse-effect in sequences slow to fast
160..191
shutter open
192..223
Random strobe effect slow to fast
224..255
shutter open
3
3
Red
0..255
0-100% Red dimmer from dark to bright
4
4
Green
0..255
0-100% Green dimmer from dark to bright
5
5
Blue
0..255
0-100% Blue dimmer from dark to bright
6
6
White
0..255
0-100% White dimmer from dark to bright
7
Red1
0..255
0-100% Red1 dimmer from dark to bright
8
Green1
0..255
0-100% Green1 dimmer from dark to bright
9
Blue1
0..255
0-100% Blue1 dimmer from dark to bright
10
White1
0..255
0-100% White1 dimmer from dark to bright
11
Red2
0..255
0-100% Red2 dimmer from dark to bright
12
Green2
0..255
0-100% Green2 dimmer from dark to bright
13
Blue2
0..255
0-100% Blue2 dimmer from dark to bright
14
White2
0..255
0-100% White2 dimmer from dark to bright
15
Red3
0..255
0-100% Red3 dimmer from dark to bright
16
Green3
0..255
0-100% Green3 dimmer from dark to bright
17
Blue3
0..255
0-100% Blue3 dimmer from dark to bright
18
White3
0..255
0-100% White3 dimmer from dark to bright

LED PAR 19X10 Product Datasheet
LED PAR 19X10 Product Datasheet
07
04
8.
MENU OPERATIONS
4.PHOTOMETRICS DIAGRAM
Distance 1m 3m 5m 7m
26°
(LUX)
R
G
B
W
RGBW
6910
7400
8900
8800
31000
700
900
1060
1030
3600
260
310
360
350
1400
5.OPERATION INSTRUCTIONS
●LED PAR19X10 is for wash effect for on-site decoration purpose.
●
Don’t turn on the fixture if it’s been through severe temperature difference like after transportation
because it might damage the light due to the environment changes. So, make sure to operate the fixture
until it is in normal temperature.
●
This light should be kept away from strong shaking during any transportation or movement.
●
Don’t pull up the light by only the head, or it might cause damages to the mechanical parts.
●
Don’t expose the fixture in overheat, moisture or environment with too much dust when installing it. And
●
don’t lay any power cables on the floor. Or it might cause electronic shock to the people.
●
Make sure the installation place is in good safety condition before installing the fixture.
●
Make sure to put the safety chain and check whether the screws are screwed properly when installing
the fixture.
●
Make sure the lens is in good condition. It’s recommended to replace the units if there are any damages
or severe scratch.
●
Make sure the fixture is operated by qualified personnel who knows the fixture before using.
●
Keep the original packages if any second shipment is needed.
●
Don’t try to change the fixtures without any instruction by the manufacturer or the appointed repairing
agencies.
●
It is not in warranty range if there are any malfunctions from not following the user manual to operate or
any illegal operation, like shock short circuit, electronic shock,lamp broke, etc.
MODE
ADDR
VALU
A001~A XXX (AXXX)
SLAV
AUTO
IP1~8
ALON / (AU -A)
SP_1~ SP_5
(Speed)
MAST / (A U-M)
SP_1~ SP_5
(Speed)
SOUN
IP1~8
ALON (SO-A)
MAST (SO -M)
SET
MIC
M -XX
LODA
ON/ OFF
VER
V -2.0
CALI
Code Password:088)
CH0 3—CH 06
SSET
WD
DMX
MOD1
22CH
MOD2
10CH
REST
ON/ OFF
TEST
CXXX
000-255
TEMP
TXXX
LED PAR 19X10 Product Datasheet
LED PAR 19X10 Product Datasheet
05
06
Cautions:
6.
INSTALLATIONS
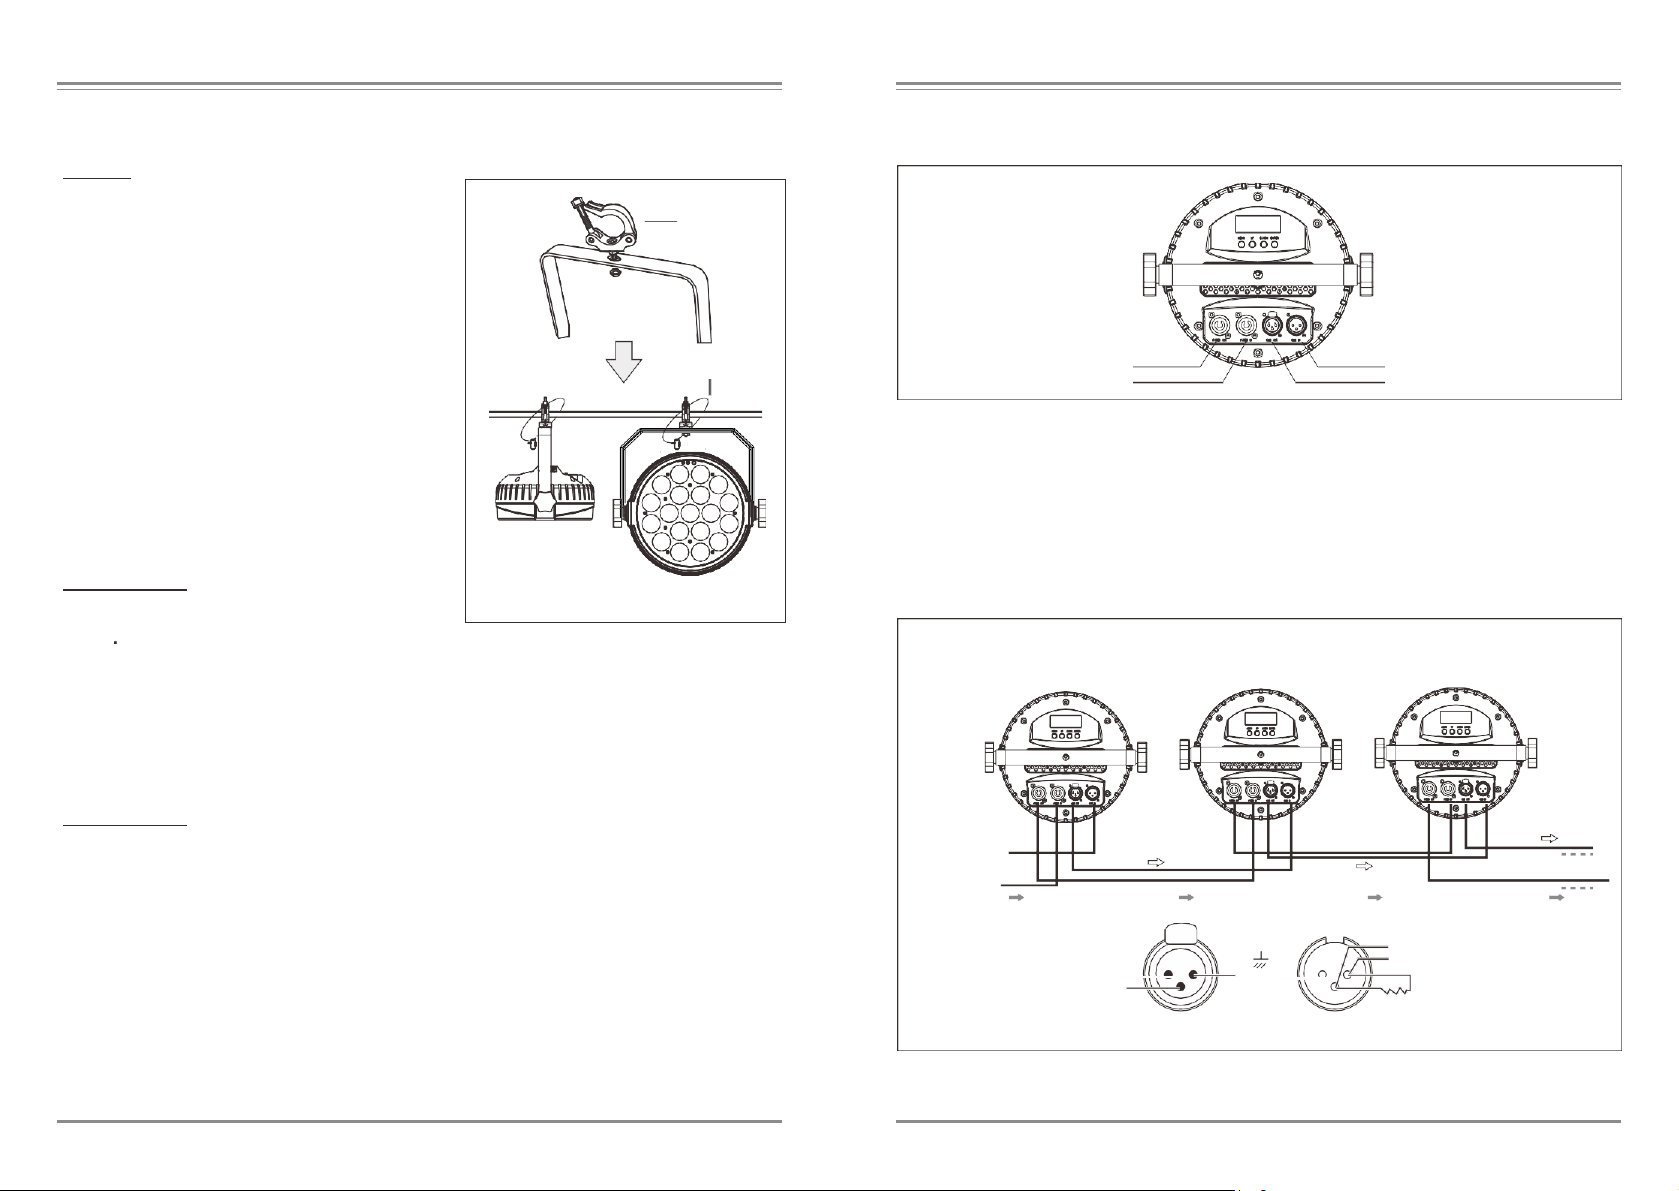
7.
CONTROL CONNECTION
For added protection mount the fixtures in areas
outside walking paths, seating areas, or in areas
where
the fixture might be reached by
unauthorized personnel.
Before mounting the fixture to any surface, make sure
that the installation area can hold a minimum point
load of 10 times the device’s weight.
Fixture installation must always be secured with a
secondary safety attachment, such as an appropriate
safety cable.
Never stand directly below the device when mounting,
removing, or servicing thefixture.
from a ceiling, or set ona flatlevel surface (see
illustration below). Be sure this fixture is kept at least
0.5m (1.5 f t)away from any flammable materials
(decoration etc.).
Always use and install the supplied safety cable as a
safety measure to prevent accidental damage and/or
injury in the event the clamp fails.
Mounting points:
Overhead mounting requires extensive experience,
including amongst others calculating working load
limits, a neknowledgeof the installation material
being used, and periodic safety inspection of all
installation material and the fixture. If you lack these
qualifications, do not attempt the installation yourself.
Improper installation can result in bodily injury.
Be sure to complete all rigging and installation
procedures before connecting the main power cord to
the appropriate wall outlet.
Clamp Mounting:
The LED PAR 19X10 provides a unique mounting bracket
assembly that integrates the bottom of the base, and
the safety cable rigging point in one unit (see the
illustration below). When mounting this fixture to truss
be sure to secure an appropriately rated clamp to the
included omega bracket using a M10 screw fitted
through the center hole of the handle. As an added
safety measure, be sure to attached at least one
properly rated safety cable to the fixture using one of
the safety cable rigging points integrated in the
base assembly.
Connect the provided XLR cable to the female 3-pin XLR output of your controller and the other side to the
male 3-pin XLR input of the moving head. Youcan chain multiple Moving head together through serial
linking. The cable needed should betwo core, screened cable with XLR input and output connectors.
Please refer to the diagram below. DMX-512 connection with DMX terminator.
For installations where the DMX cable has torun a long distance oris inanelectricallynoisy environment,
such as in a discotheque, it is recommended to use a DMX terminator. This helps in preventing corruption of
the digital control signal by electrical noise. The DMX terminator is simply an XLR plug with a3 resistor
connected between pins 2 and 3, which is then plugged into the output XLR socket of the last fixture in the
chain. Please see illustrations below.
DMX IN
DMX OUT
POWER OUT
POWER IN
DMX512 OUT DMX512 IN
Signal (-)
1 2 Signal (+)
Ground 3
120 Ω
2 1
Signal (-) 3
Signal (+)
DMX IN
POWER IN
Safety Clamp
Safety Cable
Table of contents
Other NOUVOLED Lighting Equipment manuals

NOUVOLED
NOUVOLED BLINDER 200 RGBW User manual

NOUVOLED
NOUVOLED VELA 440BSW User manual

NOUVOLED
NOUVOLED PLANO 300 TW User manual

NOUVOLED
NOUVOLED SOLAR PRO 300ZB TW User manual

NOUVOLED
NOUVOLED SOLAR PRO 200 CC User manual

NOUVOLED
NOUVOLED 4 100W TW Series User manual

NOUVOLED
NOUVOLED VIRGO150S User manual


