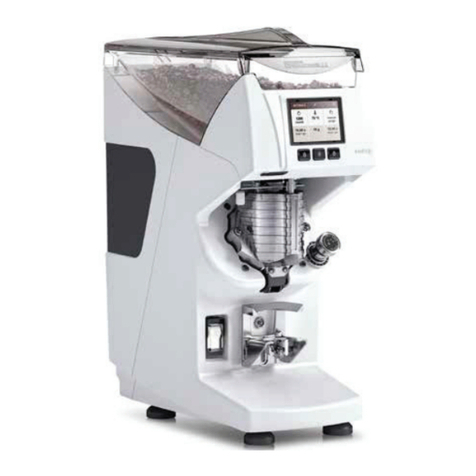
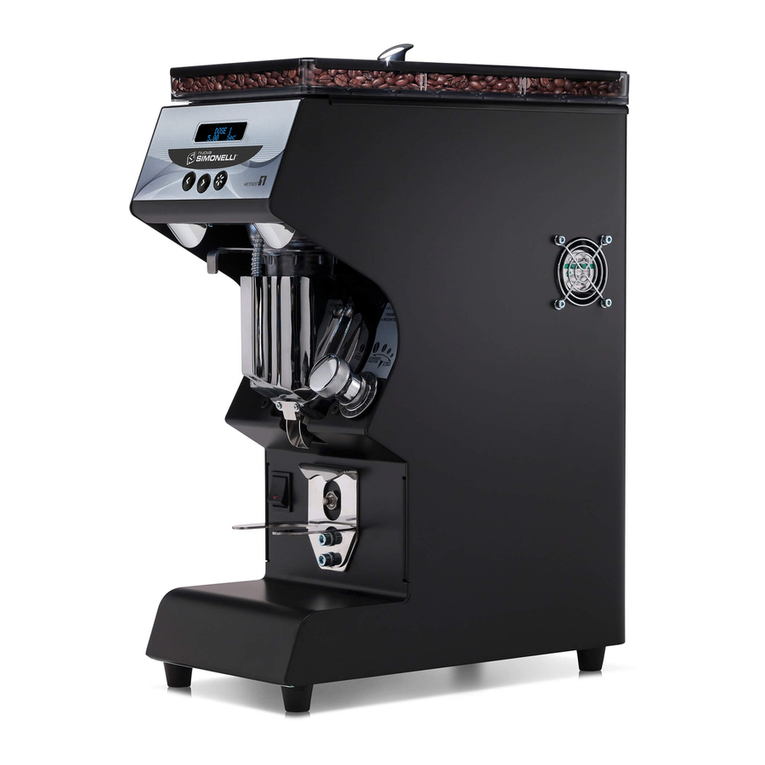
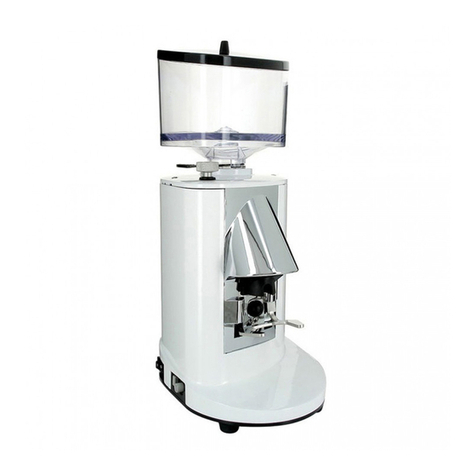
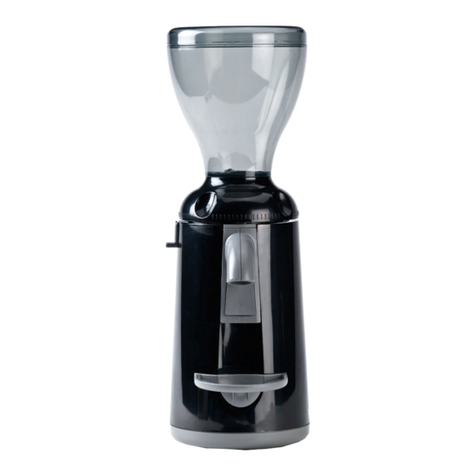
Nuova Simonelli MDXS ON DEMAND Instruction Manual

MDXS ON DEMAND
IT LIBRETTO ISTRUZIONI (Istruzioni Originali)
EN USER HANDBOOK (Translation of the Original Instructions)
FR MANUEL D’INSTRUCTIONS (Traduction des Instructions Originales)
DE GEBRAUCHANWEISUNGEN (Übersetzung der Originalanleitungen)
ES INSTRUCCIONES DE MANEJO (Traducción de las Instrucciones Originales)

INDICE / INDEX / ÍNDICE
AVVERTENZE E SICUREZZE
PRECAUTIONS AND SAFETY FEATURES
NOTES ET DISPOSITIFS DE SECURITE
WARNHINWEISE UND SICHERHEITSEINRICHTUNGEN
ADVERTENCIAS Y DISPOSITIVOS DE SEGURIDAD
INFORMAZIONI GENERALI / GENERAL INFORMATIONS / INFORMATIONS
GENERALES / INFORMAZIONI GENERALI / INFORMACIÓN GENERAL
DATI TECNICI /TECHNICAL DATA / DONNEES TECHNIQUES /
TECHNISCHE DATEN / DATOS TÉCNICOS
DESCRIZIONE DELL’APPARECCHIO /APPLIANCE DESCRIPTION/
DESCRIPTION DE L’APPAREIL / BESCHREIBUNG DES GERÄTS /
DESCRIPCIÓN DEL APARATO
BLOCCAGGIO CONTENITORE / LOCKING THE CONTAINER /
BLOCAGE RECIPIENT / VERRIEGELUNG DES BEHÄLTERS /
BLOQUEO DEL CONTENEDOR
ISTRUZIONI D’USO / INSTRUCTIONS FOR USE / INSTRUCTIONS D’EMPLOI /
BETRIEBSANLEITUNG / INSTRUCCIONES DE USO
PULIZIA E MANUTENZIONE / CLEANING AND MAINTENANCE /
NETTOYAGE ET ENTRETIEN / PULIZIA E MANUTENZIONE /
LIMPIEZA Y MANTENIMIENTO
RICERCA GUASTI / TROUBLESHOOTING / RECHERCHES PANNES /
STÖRUNGSSUCHE / LOCALIZACIÓN DE AVERÍAS
3
7
11
15
19
23
24
26
28
30
42
48

7
MDXS ON DEMAND
Machine design has taken into account all reasonable user safety precautions;
nevertheless, particular conditions of installation and/or handling may create
unforeseen situations beyond the installer’s control which will require case-by-
case evaluation of residual risks. We recommend keeping the following in mind:
• Always handle the machine with care to avoid the danger of its falling.
• The packing materials (carton, cellophane, staples, polystyrene, etc..) can cut,
wound or create hazards if used improperly or handled carelessly. Store such
materials out of reach of children and irresponsible persons.
• This symbol on the appliance or package means that the appliance
must not be considered as normal household refuse but that it
must instead be delivered to an appropriate collection centre for
the recycling of electric and electronic appliances. Make sure that
this appliance is disposed of correctly and you too will be making
your contribution to the prevention of negative eects on health
and the environment, which could otherwise be caused by inad-
equate disposal. Recycling materials helps to preserve our natural resources.
For more information about how to recycle this product, you can contact your
local council oice, local refuse disposal service or the retailer from whom you
purchased the appliance.
• Before carrying out any installation or adjustment process, be sure to have
read and thoroughly understood the warnings in this manual.
• The company cannot be held liable for any damage to people or property re-
sulting from failure to respect the instructions concerning safety, installation
and maintenance contained in this manual.
• The power cord of this appliance must never be replaced by the user. In the
event of damage, switch o the appliance and only contact professionally
qualified technicians for its replacement.
• Should you decide to no longer use this type of appliance, we recommend that
you make it inoperative: unplug the appliance from the mains socket and cut
o the power cord.
• All defects and/or anomalous machine behaviour should be reported immedi-
ately to authorized installation and/or maintenance personnel.
• Before connecting the machine, check that electrical power supply corre-
sponds to the specifications on the data plate.
• Should the machine plug not be compatible with your socket, have the plug
replaced with a suitable type by a qualified technician, who should also check
that the section of the wires supplying the power outlet is suitable for the ma-
chine power requirements.
• Avoid use of multiple-plug adapters and extension cords.
EN PRECAUTIONS AND SAFETY FEATURES
8MDXS ON DEMAND
• The ground wire must be connected; the electrical system must meet the
standards set by local safety laws and regulations.
• The machine must be installed only by authorized, qualified personnel.
• Check that the machine components have suered no damage during ship-
ping; in the case defects or anomalies are found, interrupt installation and re-
quest replacement.
• This grinder dispenser has been devised for professional use by trained per-
sonnel.
• The grinder/dispenser must be used only for the application for which it was
designed; that is, grinding roasted coee beans. Any other use must be consid-
ered improper and therefore dangerous.
• The manufacturer shall not be held responsible for damages deriving from im-
proper, erroneous or unreasonable use of the machine.
• The appliance must not be used by children or people with reduced, physical,
sensorial or mental abilities. It must also never be used by people without the
necessary skills and experience unless under supervision or during training.
Do not allow children to play with this equipment at any time.
• The machine is not designed for use in extreme environmental conditions and
in any case at temperatures outside the -5°C to +40°C range.
• The user must respect the general safety regulations in force in the country in
which the machine is installed as well as the rules of common sense, and shall
be responsible for ensuring that periodic machine maintenance is correctly
performed.
• The persons installing and using the machine and performing machine main-
tenance shall inform the manufacturer of any defects or damages due to wear
that might jeopardize the original safety features of the machine.
• The installer shall be responsible for checking that the machine is installed in
tolerable environmental conditions such as to not to create health or safety
hazards for those using the machine.
• Any responsibility deriving from components manufactured and installed on
the machine shall be assumed by the respective manufacturers; responsibility
attributable to the persons authorized to use the machine shall be assumed
by the customer.
• The machine is designed for 24-hour intermittent service. The machine com-
ponents are designed and built to ensure at least 1000 hours’ operation.
• Good cleaning and maintenance also contribute to determining long machine
life.
APPLICATIONS AND USE

9
MDXS ON DEMAND
BASIC SAFETY PRECAUTIONS
• Never touch the machine with damp or wet hands.
• Never use the machine when barefoot.
• Never attempt to unplug the machine by pulling the power cord or the ma-
chine itself.
• Do not expose the machine to atmospheric agents (sun rain, etc..).
• Never allow the machine to be used by children or by irresponsible persons.
• Always use the appliance on a flat, steady surface that is able to support its
weight.
• Always unplug the machine from the power supply before performing any
cleaning or maintenance operations.
• Do not use jets of water or detergents for cleaning.
• In the case of machine breakdown or malfunction switch the machine o and
do not tamper with it.
• For repairs contact only an authorized service center and request use of origi-
nal spare parts.
• Non-observance of the above precautions may make the machine unsafe for
future use.
• Do not leave the machine switched on when not in use. Unplug the machine
when not in use.
• Do not obstruct the ventilation and/or heat dissipation openings and/or slits
nor introduce water or any other liquids into same.
• Do not obstruct the ventilation and/or heat dissipation openings and/or slits
nor introduce water or any other liquids into same.
• Never insert spoons, forks or other utensils into the pouring lip (8), or into the
coee grain container (2) for any reason whatsoever while the appliance is op-
erating.
• Always switch o the appliance before removing blockages from the pouring
lip.
• Never place the appliance in water or other liquids.
• Should a foreign body stop the motor, switch the machine o immediately and
contact an authorized service center.
• Should a foreign body stop the motor, switch the machine o immediately and
contact an authorized service center.
WARNING
Those machines bearing the “EL. MOTOR WITH THERMAL PROTECTION”
indication are equipped with device which protects the motor from overheat-
ing. When this device is engaged, do not attempt to operate the machine: iso-
late the machine from the power supply and eliminate the cause of the trou-
ble before re-starting.

10 MDXS ON DEMAND
This manual is designed for use by the user of the machine and/or by those per-
forming maintenance on the machine and must be considered an integral part
of the machine itself.
This manual provides information concerning correct use and appropriate main-
tenance of the machine, as well as useful indications for ensuring user safety.
This manual must be preserved for the entire working life of the machine and
must be transferred, together with the machine, to future users or owners. The
information contained in this manual must not be construed as substituting the
safety prescriptions and the technical data regarding installation and operation
carried on the machine itself and on the packing materials.
This manual reflects the current state of machine technology and shall not be
considered obsolete solely because updated at a later date on the basis of ac-
quired experience.
The manufacturer reserves the right to make modifications to this manual with
no obligation to update previous versions except in exceptional cases.
Improper use of the machine or use in manners other than those described in
this manual shall invalidate the guarantee conditions and shall release the man-
ufacturer from all responsibility, the machine must be used only by adult, re-
sponsible persons.
This manual must be preserved with care: the manufacturer declines all respon-
sibility for damages to persons or things or to the machine itself deriving from
improper use or use in manners other than those described herein or in the case
the maintenance and safety precautions described herein are not respected.
IMPORTANT INFORMATION
PRESERVATION OF THE MANUAL
This manual must at all times be available to the machine user and/or the per-
sons performing maintenance on the machine, who must be provided with full
information regarding correct machine use and residual risks.
This manual must be preserved in a clean, dry place away from sources of heat.
This manual must be used in a manner such as not to damage any part of its
contents.
Do not remove, tear out or re-write any part of this manual for any reason.
In case of loss of this manual or for further information, please contact your area
retailer or the manufacturer.

23
MDXS ON DEMAND
IT
COSTRUTTORE:
SIMONELLI GROUP - Via E. Betti, 1 - Belforte del Chienti, Macerata (MC) - Italy
MACINADOSATORE MODELLO: MDXS ON DEMAND
EN
MANUFACTURER:
SIMONELLI GROUP - Via E. Betti, 1 - Belforte del Chienti, Macerata (MC) - Italy
COFFEE GRINDER MODEL: MDXS ON DEMAND
FR
FABRICANT:
SIMONELLI GROUP - Via E. Betti, 1 - Belforte del Chienti, Macerata (MC) - Italy
MOULIN-DOSEUR MODELE: MDXS ON DEMAND
DE
HERSTELLER:
SIMONELLI GROUP - Via E. Betti, 1 - Belforte del Chienti, Macerata (MC) - Italy
DOSIERMÜHLE MODELL: MDXS ON DEMAND
ES
FABRICANTE:
SIMONELLI GROUP - Via E. Betti, 1 - Belforte del Chienti, Macerata (MC) - Italy
MOLINILLO-DOSIFICADOR MODELO: MDXS ON DEMAND
1INFORMAZIONI GENERALI / GENERAL INFORMATIONS /
INFORMATIONS GENERALES / INFORMAZIONI GENERALI /
INFORMACIÓN GENERAL

24 MDXS ON DEMAND
IT
Per identificare l’apparecchio, leggere la sigla che appare subito dopo “MATRICOLA” impressa sulla
targhetta applicata sul presente manuale o sull’apparecchio stesso e scegliere la tensione corri-
spondente.
EN
In order to identify the appliance, read the code aer “MATRICOLA” (serial number) on the label
applied on this manual or on the appliance itself and select the corresponding voltage.
FR
Pour identifier l’appareil, lire le sigle qui apparaît tout de suite après “NUMERO DE SIRE” imprimé
sur l’étiquette appliquée dans ce manuel ou sur l’appareil et choisir le voltage correspondant.
DE
Zur Identifizierung des Geräts ist die Zeichenfolge abzulesen, die hinter “SERIENNUMMER” auf
dem in diesem Handbuch eingeklebten bzw. am Gerät selbst angebrachten Typenschild erscheint.
Die entsprechende Spannung wählen.
ES
Para identificar el aparato, leer el código que parece inmediatamente después de “NÚMERO DE
SERIE” estampillado en la placa aplicada en el presente manual o en el aparato en cuestión y elegir
la tensión correspondiente.
2DATI TECNICI / TECHNICAL DATA / DONNEES TECHNIQUES /
TECHNISCHE DATEN / DATOS TÉCNICOS

25
MDXS ON DEMAND
IT
MODELLO MDXS ON DEMAND
Voltaggio (V) 110 220 220/240
Frequenza (Hz) 60 60 50
Assorbimento (W) 960 630 575
Giri al minuto (rpm)* 1090 1080 900
Produttività (kg/h) 13 13 13
Peso a vuoto (kg) 12 12 12
Altezza (mm) 585 585 585
Larghezza (mm) 212 212 212
Profondità (mm) 290 290 290
EN
MODEL MDXS ON DEMAND
Voltage (V) 110 220 220/240
Frequency (Hz) 60 60 50
Power consumption (W)
960 630 575
RPM * 1090 1080 900
Productivity (kg/h) 13 13 13
Weight when empty (kg)
12 12 12
Height (mm) 585 585 585
Width (mm) 212 212 212
Depth (mm) 290 290 290
ES
MODELO MDXS ON DEMAND
Voltaje (V) 110 220 220/240
Frecuencia (Hz) 60 60 50
Absorción (W) 960 630 575
Rev. por min. (rpm)* 1090 1080 900
Productividad (kg/h) 13 13 13
Peso en vacío (kg) 12 12 12
Altura (mm) 585 585 585
Anchura (mm) 212 212 212
Profundidad (mm) 290 290 290
FR
MODELE MDXS ON DEMAND
Voltage (V) 110 220 220/240
Fréquence (Hz) 60 60 50
Absorption (W) 960 630 575
Tours/minute (rpm)* 1090 1080 900
Productivité (kg/h) 13 13 13
Poids à vide (kg) 12 12 12
Hauteur (mm) 585 585 585
Largeur (mm) 212 212 212
Profondeur (mm) 290 290 290
DE
MODELL MDXS ON DEMAND
Spannung (V) 110 220 220/240
Frequenz (Hz) 60 60 50
Leistungsaufnahme (W)
960 630 575
Drehgeschwindigkeit (rpm)*
1090 1080 900
Produktionsleistung (kg/h)
13 13 13
Leergewicht (kg) 12 12 12
Höhe (mm) 585 585 585
Breite (mm) 212 212 212
Tiefe (mm) 290 290 290
IT (*) Il valore indicato si riferisce ai giri eettivi
delle macine
EN (*) The value given is for the actual
revolutions of the burrs.
FR (*) La valeur indiquée se réfère aux tours
eectifs des meules
DE (*) Der angegebene Wert bezieht sich auf die
eektive Drehzahl der Mahlwerke
ES (*) El valor indicado se refiere a las
revoluciones reales de los molinillos

26 MDXS ON DEMAND
4.0 8.0
2
1
E
D
4
C
8
7
6
B
A
3
5
3DESCRIZIONE DELL’APPARECCHIO / APPLIANCE DESCRIPTION/
DESCRIPTION DE L’APPAREIL / BESCHREIBUNG DES GERÄTS /
DESCRIPCIÓN DEL APARATO
D5
D6
D7
D8
D1
D2
D3
D4

27
MDXS ON DEMAND
IT
1 Coperchio contenitore
2 Contenitore caè in grani
3 Linguetta contenitore caè
4 Pomello regolazione
macinatura
5 Interruttore ON/OFF
6 Forcella porta filtro
7 Pulsante attivazione
macinatura
8 Bocchetta di erogazione
A Display LCD
B Tasto decremento
C Tasto luminoso 1 caè
D Tasto luminoso 2 caè
E Tasto incremento
D1 Tempo erogazione 1 caè
D2 Icona erogazione 1 caè
D3 Lucchetto (progr. bloccata)
D4 Contatore dosi 1 caè
D5 Tempo erogazione 2 caè
D6 Erogazione continua
D7 Icona erogazione 2 caè
D8 Contatore dosi 2 caè
EN
1 Container cover
2 Coee bean container
3 Coee bean container tab
4 Grinding adjusting knob
5 ON/OFF switch
6 Filter holder fork
7 Grinding start key
8 Dispensing spout
A LCD Display
B Decreasing key
C Luminous key for 1 coee
D Luminous key for 2 coee
E Increasing key
D1 1 coee dispensing time
D2 1 coee dispensing icon
D3
Padlock (locked progr.)
D4 1 coee dose counter
D5 2 coee dispensing time
D6 Continuous dispensing
D7 2 coee dispensing icon
D8 2 coee dose counter
FR
1 Couvercle récipient
2 Récipient pour café en grains
3 Languette récipient pour
café en grains
4 Pommeau réglage mouture
5 Interrupteur ON/OFF
6 Fourche porte-filtre
7 Poussoir d’actionnement
mouture
8 Bouche de distribution
A Aicheur LCD
B Touche décrément
C Touche lumineuse 1 café
D Touche lumineuse 2 cafés
E Touche incrément
D1 Temps distribution 1 café
D2 Aicheur distribution 1 café
D3 Canevas (progr. bloquée)
D4 Compteur doses 1 café
D5 Temps distribution 1 cafés
D6 Distribution continu active
D7 Aicheur distribution 2 cafés
D8 Compteur doses 2 cafés
DE
1 Behälterdeckel
2 Kaeebohnenbehälter
3 Lasche Kaeebohnen-behälter
4 Handknopf Einstellung
Mahlfeinheit
5 Einschalter
6 Siebträgergabel
7 Mahl-Taste
8 Ausgabestutzen
A LCD-Display
B Taste Minus
C Leuchttaste 1 Tasse Kaee
D Leuchttaste 2 Tassen Kaee
E Taste Plus
D1 Ausgabezeit 1 Tasse Kaee
D2 Ikone 1 Tasse Kaee
D3
Vorhängeschloss (Progr. gesperrt)
D4 Dosierzähler 1 Kaee
D5 Ausgabezeit 1 Tassen Kaee
D6 Dauerbetrieb aktiv
D7 Ikone 1 Tassen Kaee
D8 Dosierzähler 2 Kaees
ES
1 Tapa contenedor
2 Contenedor café en grano
3 Lengüeta contenedor café
4 Pomo regulación molienda
5 Interruptor ON/OFF
6 Horquilla portafiltro
7 Botón activación molienda
8 Boquilla de erogación
A Display LCD
B Botón disminución
C Botón luminoso 1 café
D Botón luminoso 2 cafés
E Botón aumento
D1 Tiempo erogación 1 café
D2 Icono erogación 1 café
D3 Candado (progr. bloqueada)
D4 Contador dosis 1 café
D5 Tiempo erogación 2 cafés
D6 Erogación continua activa
D7 Icono erogación 2 cafés
D8 Contador dosis 2 cafés

28 MDXS ON DEMAND
IT
Prima di avviare il funziona-
mento, è necessario montare il
contenitore (2) del caè in grani.
EN
Before operating the appliance,
it is necessary to fit the coee
bean container (2).
Inserire il contenitore (2) nella
relativa sede, posizionandolo
con il foro in asse con la vite
posta nella parte posteriore
dell’apparecchio.
Insert the container (2) into its
seat, positioning it so that the
hole lines up with the screw on
the back part of the appliance.
Avvitare la vite di bloccaggio. Tighten the lock screw.
4BLOCCAGGIO CONTENITORE / LOCKING THE CONTAINER /
BLOCAGE RECIPIENT / VERRIEGELUNG DES BEHÄLTERS /
BLOQUEO DEL CONTENEDOR

29
MDXS ON DEMAND
FR
Avant de faire démarrer la ma-
chine, il est nécessaire d’instal-
ler le récipient (2) du café en
grains.
DE
Bevor das Gerät in Betrieb ge-
nommen werden kann, muss
der Kaeebohnenbehälter (2)
montiert werden.
ES
Antes de poner en marcha, es
necesario montar el contene-
dor (2) del café en grano.
Introduisez le récipient (2) dans
son siège, en le positionnant
avec le trou dans l’axe de la vis
située sur la partie arrière de
l’appareil.
Den Behälter (2) in seine Auf-
nahme einsetzen, wobei die
Önung mit der Schraube auf
der Rückseite des Geräts ge-
fluchtet sein muss.
Introducir el contenedor (2) en
su alojamiento, colocándolo
con el orificio alineado con el
tornillo ubicado en la parte tra-
sera del aparato.
Vissez la vis de blocage. Die Feststellschraube anziehen. Atornillar el tornillo de bloqueo.

30 MDXS ON DEMAND
5ISTRUZIONI D’USO / INSTRUCTIONS FOR USE /
INSTRUCTIONS D’EMPLOI / BETRIEBSANLEITUNG /
INSTRUCCIONES DE USO
IT
5.1
PREMESSA
Questo apparecchio è in grado
di fare dosi basate sul tempo
di macinatura. E’ necessario
altresì, mettere a punto la mac-
china prima di cominciare a la-
vorare, determinando anzi tutto
il tipo di miscela di caè (più o
meno tostata) e il grado di ma-
cinatura. Si procede poi, alla
programmazione del tempo di
macinatura per ciascun tasto
dose pesando il prodotto di ma-
cinatura.
EN
5.1
INTRODUCTION
This appliance can make doses
based on the grinding time.
It is furthermore necessary to
set up the appliance before op-
erating, by determining first of
all the coee blend type (more
roasted or less) and the degree
of grinding.
Grinding time is then set for
each dose key by weighting the
grinding product.
• Dopo aver eettuato il colle-
gamento elettrico, spingere
la linguetta (3) alla base del
contenitore caè in grani (2)
per chiuderlo.
• Togliere il coperchio (1) dal
contenitore (2) e riempirlo di
caè in grani.
• Portare l’interruttore (5) in
posizione di accensione.
• Tirare la linguetta (3) permet-
tendo il passaggio dei grani di
caè.
• Aer having plugged the ap-
pliance in, push the tab (3) at
the bottom of the coee bean
container (2) to close it.
• Remove the cover (1) from
the container (2) and fill it
with coee beans.
• Bring the switch (5) to on po-
sition.
• Pull the tab (3) permitting
passage of coee beans.

31
MDXS ON DEMAND
FR
5.1
INTRODUCTION
Cet appareil est en mesure de
préparer des doses basées sur
le temps de mouture.
Il est nécessaire de régler la ma-
chine avant de commencer à
travailler, en déterminant avant
tout le type de mélange de café
(plus ou moins grillé) et le degré
de mouture.
On procède ensuite à la pro-
grammation du temps de mou-
ture pour chaque touche dose en
pesant le produit de la mouture.
DE
5.1
EINFÜHRUNG
Dieses Gerät ist in der Lage, prä-
zise Dosismengen aufgrund der
Mahldauer herzustellen.
Bevor der Betrieb aufgenommen
wird, muss die Maschine jedoch
aufgrund der Beschaenheit der
Kaeemischung (mehr oder we-
niger starke Röstung) und des ge-
wünschten Feinheitsgrads einge-
stellt werden. Danach kann die
Mahldauer programmiert wer-
den, indem für jede Dosis- Taste
das Mahlgut gewogen wird.
ES
5.1
PREMISA
Este aparato es capaz de prepa-
rar dosis basadas en el tiempo
de molienda.
Así mismo, es necesario poner a
punto la máquina antes de em-
pezar el trabajo, determinando
el tipo de mezcla de café (más
o menos tostado) y el grado de
molienda.
A continuación, se pasa a la
programación del tiempo de
molienda para cada botón de
dosis pesando el producto que
se quiere moler.
• Après avoir eectué le bran-
chement électrique, poussez
la languette (3) à la base du
récipient de café en grains (2)
pour le fermer.
• Retirez le couvercle (1) du ré-
cipient (2) et le remplissez-le
avec du café en grains.
• Placez l’interrupteur (5) en
position de mise en marche.
• Tirez la languette (3) pour
permettre le passage des
grains de café.
• Nachdem das Gerät an das
Stromnetz angeschlossen
wurde, die Lasche (3) am Fuß
des Kaeebohnenbehälters
(2) drücken, um diesen zu
schließen.
• Den Deckel (1) vom Behälter
(2) abnehmen und Kaee-
bohnen einfüllen.
• Den Schalter (5) einschalten.
• Die Lasche (3) ziehen, um das
Durchrutschen von Kaee-
bohnen zu ermöglichen.
• Después de haber efectuado
la conexión eléctrica, empujar
la lengüeta (3) ubicada en la
base del contenedor de café
en grano (2) para cerrarlo.
• Retirar la tapa (1) del con-
tenedor (2) y rellenarlo con
café en grano.
• Colocar el interruptor (5) en
la posición de encendido.
• Tirar de la lengüeta (3) permi-
tiendo el paso de los granos
de café.

32 MDXS ON DEMAND
IT
Selezionare la dose singola o
doppia tramite i rispettivi pul-
santi (C) o (D). Appoggiare la
coppa portafiltro sulla forcella
(6) e inserirla a contrasto con la
ritenzione del portafiltro, spin-
gerla in avanti fino al contatto
con il pulsante (7) per far fuo-
riuscire il caè macinato dalla
bocchetta di erogazione (8).
L’erogazione cesserà trascorso
il tempo impostato nella pro-
grammazione.
EN
Select the single or double dose
through the corresponding keys
(C) or (D). Place the filter hold-
er onto the fork (6) and insert
it against the filter holder re-
straint, push it forward until it
touches the key (7) to dispense
the ground coee from the cor-
responding spout (8). Dispens-
ing stops once the preset time
has elapsed.
C D
5.2
REGOLAZIONE MACINATURA
Per regolare la macinatura, agi-
re sul pomello di regolazione
(4), ruotandolo in senso orario
per fare la polvere più fine o in
senso antiorario per aumen-
tarne la grana come riportato
sul pomello. La regolazione è
senza punti di fermo; deve es-
sere eettuata gradualmente,
macinando un po’ di caè ogni
2 tacche al massimo.
Se il pomello viene ruotato di
un giro a motore fermo, la mac-
china può bloccarsi.
5.2
GRINDING SETTING
Set grinding by means of the
adjusting knob (4), by rotating it
clockwise to make powder finer
or anticlockwise to increase the
size of its grain as shown on the
knob. Setting is stepless; it is
to be gradually performed, by
grinding some coee every two
notches maximum.
When knob is rotated of a turn
with stationary motor, the ap-
pliance may stop.

33
MDXS ON DEMAND
FR
Sélectionnez la dose indivi-
duelle ou double à travers les
poussoirs respectifs (C) ou (D).
Posez la coupe porte-filtre sur
la fourche (6) et introduisez-la
en contraste avec la retenue du
porte-filtre, poussez-la en avant
jusqu’au contact avec le pous-
soir (7) pour faire sortir le café
moulu de la bouche de distribu-
tion (8). La distribution cessera
au terme du temps programmé
dans la programmation.
DE
Anhand der entsprechenden
Tasten (C) oder (D) Einzel- oder
doppelte Dosis anwählen. Da-
nach den Siebträger an der
Gabel (6) auflegen und gegen
den Widerstand der Halterung
des Siebträgers nach bis zum
Anschlag an der Taste (7) nach
vorn drücken, so dass der ge-
mahlene Kaee aus dem Stut-
zen austritt (8). Die Abgabe von
Kaeepulver wird bei Ablauf
der programmierten Dauer un-
terbrochen.
ES
Seleccionar la dosis única o
doble mediante los correspon-
dientes botones (C) o (D). Apo-
yar la copa portafiltro sobre la
horquilla (6) y encajarla en el
retén del portafiltro, empujarla
hacia adelante hasta que entre
en contacto con el botón (7)
para hacer salir el café molido
por la boca de erogación (8).
La erogación cesará transcurri-
do el tiempo configurado en la
programación.
5.2
RÉGLAGE MOUTURE
Pour régler la mouture, agir sur
le pommeau de réglage (4), en
le tournant vers la droite pour
faire la poudre plus fine et vers
la gauche pour augmenter le
grain comme reporté sur le
pommeau. Le réglage est sans
cran d’arrêt; il doit être eectué
graduellement, en moulant un
peu de café tous les 2 crans au
maximum.
Si le pommeau est tourné d’un
tour avec le moteur arrêté, la
machine peut se bloquer.
5.2
EINSTELLUNG DER
MAHLFEINHEIT
Zur Einstellung der Mahlfeinheit
am entsprechenden Handknopf
(4) drehen. Durch Drehen im
Uhrzeigersinn wird das Mahlgut
feiner, bei Drehen gegen den
Uhrzeigersinn gröber, wie auch
auf dem Handknopf selbst mar-
kiert ist. Die Einstellung erfolgt
stufenlos. Es empfiehlt sich,
höchstens bei jeder 2. Kerbe et-
was Kaee zu mahlen.
Wenn der Drehknopf bei ste-
hendem Motor um eine Um-
drehung gedreht wird, kann die
Maschine blockieren.
5.2
REGULACIÓN MOLIENDA
Para regular la molienda, ma-
niobrar el pomo de regulación
(4), girándolo en sentido horario
para obtener un polvo más fino
o en sentido antihorario para
aumentar el tamaño como figu-
ra en el pomo. La regulación no
es mediante sistema de resorte;
deberá efectuarse gradualmen-
te, moliendo un poco de café
cada 2 muescas al máximo.
Si se gira completamente el
pomo con el motor parado, la
máquina podría bloquearse.

34 MDXS ON DEMAND
IT
5.3
REGOLAZIONE ALTEZZA
FORCELLA PORTA FILTRO
Con l’ausilio di un cacciaviti a
croce allentare la vite di fissag-
gio della forcella porta filtro (6).
È consigliabile non svitare com-
pletamente la vite.
Sollevare o abbassare la forcel-
la in modo da regolarla in base
alle dimensioni del portafiltro.
Una volta trovata la posizione
corretta, stringere la vite di fis-
saggio della forcella (6).
La macchina è dotata di dispo-
sitivo di ritenuta del portafiltro.
EN
5.3
FILTER HOLDER FORK
HEIGHT ADJUSTMENT
By using a crosshead screwdriv-
er, loosen the fastening screw of
the filter holder fork (6) It is rec-
ommended not to unscrew the
screw completely.
Raise or lower the fork in order
to adjust it according to filter
holder dimensions.
Once having reached the cor-
rect position, tighten the fork
fastening screw (6).
The appliance is equipped with
a filter holder retaining device.
5.4
PROGRAMMAZIONE
MACCHINA
5.4.1
ACCENSIONE MACCHINA
Alla 1° accensione, l’apparec-
chio risulterà predisposto nella
modalità impostata all’uscita
della fabbrica e comunque,
negli avvii successivi, si predi-
sporrà sempre come nell’ultima
modalità precedente lo spegni-
mento.
All’accensione della macchina
comparirà la seguente scher-
mata per 7,5 secondi.
5.4
APPLIANCE
SETTING
5.4.1
APPLIANCE SWITCH-ON
When switching the appliance
on for the first time, it is config-
ured in the mode set by the fac-
tory and anyway, in the follow-
ing uses, it will maintain the last
mode previous to switch o.
When switching the appliance
on, the following screen is
shown for 7.5 seconds.

35
MDXS ON DEMAND
FR
5.3
REGLAGE HAUTEUR
FOURCHE PORTE-FILTRE
A l’aide d’un tournevis en croix,
desserrer la vis de fixage de la
fourche porte-filtre (6). Il est
conseillé de ne pas dévisser en-
tièrement la vis.
Soulever ou baisser la fourche
de façon à la régler en fonction
des dimensions du porte-filtre.
Après avoir trouvé la position
correcte, serrer la vis de fixage
de la fourche (6).
La machine est munie d’un
dispositif de retenue du porte-
filtre.
DE
5.3
EINSTELLUNG DER HÖHE
DER SIEBTRÄGERGABEL
Mithilfe eines Kreuz-
schlitz-Schraubenziehers die
Befestigungsschraube der Sieb-
trägergabel lockern (6). Es emp-
fiehlt sich, die Schraube nicht
ganz herauszuschrauben.
Die Gabel höher oder tiefer stel-
len, bis sie den Abmessungen
des Siebträgers entspricht.
Nachdem die richtige Position
gefunden wurde, die Befesti-
gungsschraube der Gabel (6)
wieder festziehen. Die Maschine
ist mit einer Siebträger-Rück-
haltevorrichtung ausgestattet.
ES
5.3
REGULACIÓN ALTURA
HORQUILLA PORTAFILTRO
Con la ayuda de un destornilla-
dor de cruz, aflojar el tornillo de
fijación de la horquilla portafil-
tro (6). Se recomienda no desa-
tornillar totalmente el tornillo.
Levantar o bajar la horquilla
para ajustarla en función de las
dimensiones del portafiltro.
Una vez encontrada la posición
correcta, apretar el tornillo de
fijación de la horquilla (6).
La máquina está equipada con
un dispositivo de retén del por-
tafiltro.
5.4
PROGRAMMATION
MACHINE
5.4.1
MISE EN MARCHE MACHINE
Lors de sa première mise en
marche, l’appareil est prédispo-
sé dans la modalité programmée
en usine et, dans tous les cas,
lors des mises en marche succes-
sives, il se positionnera toujours
dans la dernière modalité qui
précède l’arrêt de la machine.
Lors de la mise en marche de la
machine, la page vidéo suivante
s’aiche pendant 7,5 secondes.
5.4
PROGRAMMIERUNG
DER MASCHINE
5.4.1
EINSCHALTEN DER MASCHINE
Beim 1. Einschalten läu die
Maschine mit der Betriebsart
an, die fabrikseitig eingestellt
wurde. Bei jedem späteren Ein-
schalten läu die Maschine im-
mer mit der Betriebsart an, auf
die sie im Moment des Abschal-
tens eingestellt war.
Beim Einschalten der Maschine
erscheint 7,5 Sekunden lang die
folgende Display-Anzeige.
5.4
PROGRAMACIÓN
MÁQUINA
5.4.1
ENCENDIDO MÁQUINA
Al encender por primera vez,
el equipo se encontrará en la
modalidad configurada de fá-
brica y, en todo caso, al poner
en marcha sucesivamente, se
colocará siempre en la última
modalidad anterior al apagado.
Al encender la máquina, apa-
recerá la siguiente pantalla por
7,5 segundos.

36 MDXS ON DEMAND
IT
5.4.2
EROGAZIONE E REGOLAZIONE
DOSI (DISPLAY)
Premendo il tasto una dose (C)
questo si illumina e la tazzina
si riempie (D2) durante l’eroga-
zione.
Premendo il pulsante avvio
macinatura (7) per più di 0,3
secondi si attiva l’erogazione e il
countdown fino a zero.
A erogazione ultimata, dopo 1
secondo, lo zero ritorna al valo-
re impostato.
Il contatore dosi singole viene
incrementato di 1.
Premendo il tasto due dosi (D)
questo si illumina e la tazzina
si riempie (D7) durante l’eroga-
zione.
Premendo il pulsante avvio
macinatura (7) per più di 0,3
secondi si attiva l’erogazione e il
countdown fino a zero.
A erogazione ultimata, dopo 1
secondo, lo zero ritorna al valo-
re impostato.
Il contatore dosi doppie viene
incrementato di 1.
Premendo i pulsanti incremen-
to (E) e decremento (B) si incre-
menta o decrementa il tempo di
erogazione della dose corrente-
mente selezionata.
EN
5.4.2
DOSE DISPENSING AND
SETTING (DISPLAY)
By pressing the key for one dose
(C) this lights up and the cup is
filled (D2) during dispensing.
By pressing the grinding start
key (7) for more than 0.3 sec-
onds, dispensing and count-
down until zero are activated.
Once dispensing is completed,
aer 1 second, the zero returns
to set value.
The single dose counter is in-
creased of 1.
By pressing the key for two dos-
es (D) this lights up and the cup
is filled (D7) during dispensing.
By pressing the grinding start
key (7) for more than 0.3 sec-
onds, dispensing and count-
down until zero are activated.
Once dispensing is completed,
aer 1 second, the zero returns
to set value.
The double dose counter is in-
creased of 1.
By pressing the increasing key
(E) and decreasing one (B) the
dispensing time of the proper-
ly selected dose is increased or
decreased.
C
E
D
B
Table of contents
Other Nuova Simonelli Coffee Grinder manuals

Nuova Simonelli
Nuova Simonelli MDH On-Demand Instruction Manual

Nuova Simonelli
Nuova Simonelli MDL Instruction Manual

Nuova Simonelli
Nuova Simonelli MDXS Instruction Manual

Nuova Simonelli
Nuova Simonelli AMM - AMMT Instruction Manual

Nuova Simonelli
Nuova Simonelli Mythos 1 220 Instruction Manual

Nuova Simonelli
Nuova Simonelli GRINTA AMM User manual

Nuova Simonelli
Nuova Simonelli MYTHOS 2 Instruction Manual

Nuova Simonelli
Nuova Simonelli MDU User manual