O2 Xda Serra User manual

I
II
Quick Start Guide
Xda Serra
o2.co.uk
Telefónica O2 Limited, 260 Bath Road, Slough, Berks, SL1 4DX.
Registered in England No.1743099. Registered office as above.
© Telefónica O2 UK Limited 2008. Correct at time of going to press (08/08).
O2CN611N 5450VCCP08/08 07/09
We’re better, connected

III
Contents
Welcome to the Xda Serra
Getting to know your
Xda Serra
What’s in the box 1
A tour of your Xda Serra 5
Inserting your SIM card 8
and battery
Charging the battery 9
To install a microSD card 10
Switching on your Xda Serra 11
Settings 11
Making your first call
Making your first call 13
Entering information 14
Single hand operation 14
Adding contacts 16
Contacting others
Sending text messages 17
Sending picture and 17
video messages
Bluetooth 18
Setting up Wi-Fi 20
Setting up an internet 21
email account
Browsing the internet 23
Personalising your Xda Serra
Changing phone settings 24
Photo and video 26
Synchronising music files 29
Listening to music 30
Getting organised
Synchronising your Xda Serra 31
with your PC
Keeping track of appointments 33
Keeping track of things to do 34
Copying files 35
Resetting your Xda Serra 36
Help and troubleshooting
Help online 37
Talk to us 37
Status indicators
Icons and meanings 39
Welcome to the Xda Serra
This Quick Start Guide will help you get your Xda Serra
up and running as smoothly as possible.
For a more complete guide to using your Xda Serra,
please see your Full User Manual PDF, which you’ll find
on your Applications CD included in this box.
The Applications CD also has some additional
programs on it that you can install.
We’re better, connected

1
2
Getting to know your Xda Serra
What’s in the box?
You will find the following items inside this box.
02 may change the contents of the Xda Serra box in the future.
The images here are purely to illustrate what’s in the box – the actual contents may look slightly different.
Xda Serra Battery Enhanced stereo headset AC adapter
USB sync cableTV Out cable
Extra stylus

3
4
Applications CD with Windows Mobile™
software
CD Contents include:
Applications
GPRS Monitor & Sprite Backup.
Getting Started
With Windows Mobile™ software.
Includes Microsoft® ActiveSync® 4.5,
Windows Mobile Device Center for
Vista and Microsoft® Outlook® 2007
(Evaluation copy)
Full User Manual
O2 00 140x118mm
5450 100
040808 Gwyn
5450 Serra Guide 040808 3mm
>>
Gk_YaIjWhj=k_Z[
NZWI[hhW
M[Ãh[X[jj[h"Yedd[Yj[Z
<kbbKi[hCWdkWb
NZWI[hhW
MWhhWdjo9WhZ
NZWI[hhW
M[Ãh[X[j j[h"Yedd[Yj[Z
O2 00 100x100mm
5450 100%
30.07.08 RC
5450 Xda Serra Touchflo 100x100.indd 01 08 08 3mm
JekY^<BE):
NZWI[hhW
M[Ãh[X[jj[h"Yedd[Yj[Z
This booklet,
your Quick Start Guide
Full User Manual available
on the Applications CD
Warranty card
TouchFLO™ 3D guide
7ffb_YWj_edi
<EGHBd c^idgHeg^i Z7VX`je#
=[jj_d]IjWhj[Z
L^i]L^cY dlhBdW^a Z hd[ilV gZ#>cXajY ZhB^Xgdh d[i
6Xi^kZHn cX)# *!L^cYdl hBdW^aZ9Zk ^XZ8ZciZg[d g
K^hiVV cYB^Xgdhd[ iDji add`'% %,:kVajVi^d cXden
<kbbKi[hCWdkWb
6aag^\]ihg ZhZgk ZY#Edgi ^dch
'%%,B^Xg dhd[i8d gedgVi^dc
NZWI[hhW
116x116
O2 00 150x150
5450
30 07 08 sean
5450 Xda Serra CD FACE.ai 5mm

5
6
Earpiece
Second
Camera
Touch
Screen
Hardware
Keyboard
Back Key
Navigation Control
Home
Talk/Send End Key
Speaker
Strap holder
Back Cover
Flash light
3.2 Megapixel
Camera
A tour of your Xda Serra

78
Inserting your SIM card and battery
Make sure your Xda Serra is turned off and remove the back cover before installing
your SIM card and battery. To do this, hold your Xda Serra with both hands with
the front panel facing down.
Then push down the back cover with your thumb and slide up to remove.
To insert the SIM card
Look for the SIM card slot, then place the SIM card with its gold contacts facing
down and its cut corner facing out from the card slot. Slide the SIM card
completely into the slot.
Volume Up
Volume Down
Stylus
ResetMicrophone
Power
Sync/Connection/
Earphone Jack/TV Out

10
To insert the battery
Line up the battery’s exposed copper contacts with the connectors inside the
battery compartment. Insert the contact’s side of the battery first and then gently
push the battery into place. Replace the back cover.
Charging the battery
Before you start using your Xda Serra, you’ll need to fully charge the battery.
Charge it by plugging in the AC adapter plug to an electrical outlet. Plug the USB
end to the sync connector port at the bottom of your Xda Serra. The battery will
be fully charged after about 3 hours of charging.
9
To install a microSD card
Insert the microSD™ card into the slot with its gold contacts facing down.
To remove the microSD card, press it to eject it from the slot.
Note: microSD card is not included in the box.

12
11
Switching on your Xda Serra
After inserting your SIM card and charging the battery, just press and hold the
Power button for a few seconds.
A Quick Start Wizard will guide you through the calibration of the screen
and the set up of regional settings, date, time and password. Simply follow
the onscreen instructions to finish the Quick Start Wizard. After the Quick
Start Wizard finishes, your Xda Serra will install the customisation settings,
then automatically restart.
Setting up your data connection settings
After your Xda Serra restarts, you’ll be asked if you want to automatically set up
its data connections. This means the Xda Serra will set up your 3G/GPRS and
the internet.
To automatically set up your data connection settings
1. When you see the Connection Setup message at the bottom of the screen,
tap Yes. Connection Setup then starts to set up your Xda Serra’s data
connection settings.
2. After the Connection Setup is complete, tap Restart.
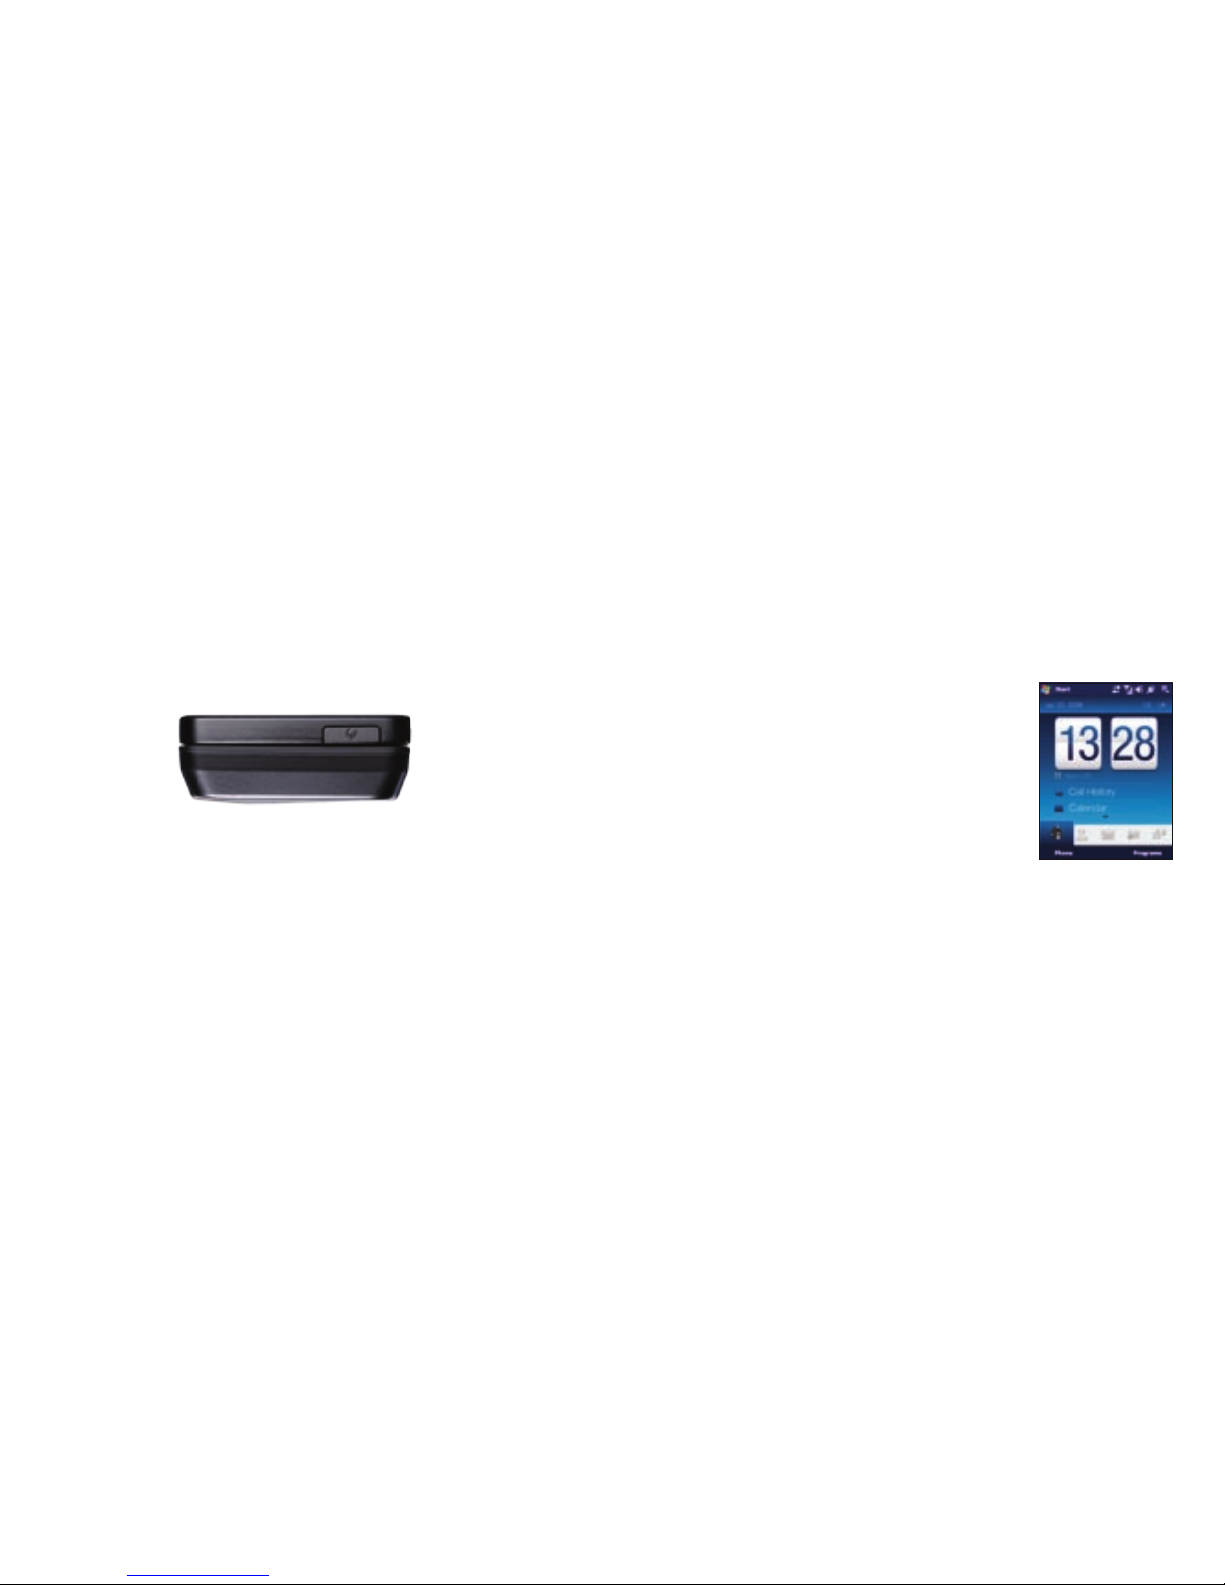
Your Home Screen
Once the Xda Serra restarts after setting up your
data connections, you’ll be taken to the Home screen.
The default home screen of the Xda Serra is the
TouchFLO™ 3D Home screen, which allows touch screen
access to functions such as contacts, text messages,
email, internet.
When you open the hardware keyboard while on
the Home screen, the Touch Access screen is shown.
This enables you to quickly start a task, such as write
an e-mail or SMS message, create a new appointment or open your web browser.
For more information about TouchFLO 3D, see your TouchFLO 3D Guide
and Full User Manual.

13
14
Making your first call
1. On the Home screen, tap Phone or press the Talk/Send button once.
2. Enter the phone number using the keypad.
Tip: If you tap in the wrong number, simply tap to delete each number one
by one. To delete the entire number, just tap and hold.
3. Press the Talk/Send button to make the call.
Tip: When calling someone, use the Volume Up/Down buttons on the side
of the Xda Serra to change the phone volume.
Your Xda Serra can also be used to make video calls – as long as you and the
person you want to call are using a 3G-enabled SIM card and are inside a 3G
coverage area.
To make a video call, simply dial the number of the
person you want to start a video call with and tap
Menu > Video Call.
Entering information
When you need to enter text, you can use the hardware keyboard or choose
one of the available onscreen methods.
Single hand operation
One hand and one touch make it quick and easy
to accomplish tasks on your Xda Serra. For example,
you can quickly browse through your photos by flicking
your finger up or down on the screen.
To use the hardware keyboard
Your Xda comes with a hardware QWERTY
keyboard, which is similar to a standard computer
keyboard.
To use the keyboard, slide the screen panel
to the right.

15
To use an onscreen input method
When you start a program or select a field that requires text or numbers,
the Input Panel icon appears on the menu bar.
Tap the Input Selector arrow (that appears next to the Input Panel icon) to open
a menu where you can select a text input method and customise input options.
Onscreen input methods
Full QWERTY Compact QWERTY Phone Keypad
To enter characters, simply tap on the keys on the keyboard. Depending on the
keyboard layout selected, you may need to tap the same key more than once to
get to the character that you want to enter.
Tip: When using T9 mode, tap Space to enter the first word in the predicted
word list.
For more information about the hardware keyboard and the available onscreen
input methods, see Chapter 4 of the Full User Manual.
Adding contacts
To add a contact to your Xda
1. On the Home screen, slide to the People tab and then tap All People.
2. Tap New.
3. Enter the contact information, then tap OK.
Copying your SIM card contacts to your Xda Serra
1. On the Home screen, tap Start > Programs > SIM Manager.
2. In SIM Manager, tap Menu > Select All.
3. Tap Menu > Save to Contacts.
16

Contacting others
Sending text messages
1. On the Home screen, slide to the Messages tab and tap
2. In To, enter the mobile phone number of the person you want to send
the message to.
Tip: You can also tap To to select a contact from your Contacts list.
3. Type your message and then tap Send.
Sending picture and video messages
1. On the Home screen, slide to the Messages tab and tap All Messages.
2. Tap Menu > New > MMS and then select a picture.
3. Enter the recipient’s mobile number or email address in To and enter
the Subject line.
4. Attach your picture or video message by tapping Insert picture/video,
Insert text here, and Insert audio.
5. Tap Send.
Bluetooth
You can pair your Xda Serra with other Bluetooth-enabled devices
or a Bluetooth headset if you have one.
To pair your Xda Serra with a Bluetooth device
1. On the Home screen, slide to the Settings tab and then tap
Menu > Bluetooth Devices > Devices tab.
2. Tap Add new device. Your Xda Serra tells you the names of other
Bluetooth devices within range.
3. Tap the device name in the box, then tap Next.
4. Choose a passcode to establish a secure connection. The passcode can
be up to 16 characters.
5. Tap Next.
6. Wait for the other device to accept the partnership. The owner of the
other device needs to enter the same passcode that you specified.
7. The name of the other device is then displayed. You can edit and enter
a new name for that device if you wish.
8. Select the check boxes of services you want to use from the other device,
then tap Finish.
1817

19 20
To pair your Xda Serra with a Bluetooth headset
1. Make sure that both your Xda Serra and your Bluetooth headset
are turned on, within close range and that the headset is visible.
See the manufacturer’s documentation to find out how to set the
headset in visible mode.
2. On the Home screen, slide to the Settings tab and then tap
Menu > Bluetooth Devices > Devices > Add new device.
3. Tap the name of the Bluetooth headset, then tap Next. Your Xda Serra
will automatically pair itself with the Bluetooth headset.
Windows Mobile will automatically try one of the preconfigured passcodes
(0000, 1111, 8888, 1234) to pair your Bluetooth headset with your Xda Serra.
If this fails, you have to enter the passcode delivered with your headset
manually. For more information about Bluetooth, please see Chapter 9
of the Full User Manual.
Setting up Wi-Fi
To connect to an open Wi-Fi network
1. On the Home screen, slide to the Settings tab.
2. On the Settings screen, tap Communications > Wi-Fi to turn on Wi-Fi.
3. The network names of the detected wireless networks are displayed on
a pop-up message window. Tap the open (unsecured) wireless network,
then tap OK.
To learn how to connect to a secured network, see Chapter 8 of the
Full User Manual.

2221
Setting up an internet email account
It’s really simple to set up a personal email account such as Gmail or Yahoo!
on your Xda Serra.
1. On the Home screen, slide to the Mail tab and tap
New account.
2. Enter the Email Address and Password of your
personal email account and select the Save password
checkbox. Tap Next.
3. After the Xda Serra finds the settings for the email
account, tap Next.
Note: If the settings are not found, your Xda will try
to retrieve the settings.
4. Enter Your name and the Account display name and then tap Next.
Note: The Account display name is the name you’ll see on the Mail tab
on the Home screen.
5. Select how often you want your Xda Serra to check for new messages
on the server in Automatic Send/Receive and then tap Finish.
6. Choose whether or not you want to download messages from the
email account.
Tip: An Unlimited Web Bolt On is a great way to get the best value when
downloading emails and browsing the internet.
To send email using your internet email account
1. On the Mail tab of the Home screen, tap the icon of your internet email
account you’ve just set up.
2. Tap
3. Enter the email address of the person you want to email in To and enter
a Subject line.
4. Type your email and then tap Send.
You can also synchronise your Xda Serra with your company’s Microsoft
Exchange Server to send and receive emails and have real time access to your
inbox, calendar and contacts. Please refer to the Full User Manual if you want
to access your company email using your Xda.

24
Browsing the internet
You can use your Xda Serra to go online with 3G or Wi-Fi.
Turn your Xda Serra sideways to browse the web in landscape mode.
To open Opera Mobile and browse the web
1. On the Home screen, slide to the Internet tab and then tap Browser.
2. On the Opera Mobile screen, tap the address bar.
3. Enter the URL address and tap.
Use the touch screen to search the web pages. For more details on how to use
Opera Mobile, see Chapter 8 of the Full User Manual.
Personalising your Xda Serra
Changing phone settings
You can customise your Xda settings to suit you.
To change the ringtone
1. On the Home screen, slide to the Settings tab and then tap Sound.
2. On the Sound screen, slide down to Ringtone and tap it.
3. On the Ringtones screen, tap the ringtone you want to use and tap Done.
To set an alarm
1. On the Home screen, slide to the Settings tab and then tap All Settings.
2. On the Systems tab, tap Clock & Alarms.
3. On the Alarms tab, select a checkbox and change the Description.
4. Tap the days you want the alarm to sound and then tap OK.
To secure your Xda Serra
You can enter a password to lock your Xda Serra if it hasn’t been used
for a while.
1. On the Home screen, slide to the Settings tab and then tap All Settings.
2. On the Personal tab, tap Lock.
3. Select the Prompt if device unused for check box and enter the time
you want.
4. Select the Password type.
5. Enter and confirm your password and then tap OK.
23

To activate your SIM card PIN
Activating your SIM card PIN requires you to choose a password before you can
use the phone features of your Xda Serra.
1. On the Home screen, slide to the Settings tab and
then tap All Settings.
2. On the Personal tab, tap Phone > PIN tab and
then choose the Require PIN when phone is used
check box.
3. Follow the onscreen instructions to set the
PIN number.
To change battery and backlight settings
You can save battery power by adjusting the battery and backlight settings.
1. On the Home screen, slide to the Settings tab and then tap All Settings.
2. On the System tab, tap Power.
3. On the Backlight tab, set the brightness of the backlight by dragging
Battery Power and External Power sliders.
4. On the Advanced tab, set when you want the backlight and Xda Serra
to turn off when using battery and external power. Tap OK.
Note: When the backlight turns off, it only turns off the screen. Your Xda Serra
is still ‘on.’ To turn the screen back on, press the power button.
Photo and video
Taking photos
Use your 3.2 megapixel camera to take photos and shoot videos.
To take a photo
1. On the Home screen, slide to the Photos and Videos tab and then tap
the camera icon . The screen automatically switches to landscape
mode when you open the camera programme.
2. Aim your Xda Serra at the subject.
3. Press Enter on the Navigation Control. This activates the auto-focus
feature of the camera. When the focus is set, the camera automatically
takes the shot.
25 26

28
Filming videos
1. On the Home screen, slide to the Photos and Videos tab and then tap
the video icon . The screen automatically switches to landscape mode
when you open the camera programme.
2. Aim your Xda Serra at the subject.
3. Press Enter on the Navigation Control. This activates the auto-focus
feature of the camera. When the focus is set, the camera automatically
starts capturing video.
4. Press Enter again to stop recording video.
To learn more about the other modes and functions of the camera,
please refer to the Full User Manual on your Applications CD.
27
Viewing Photo and Videos
Use the Album feature on your Xda Serra to browse photos and play back video.
Note: Album can display files in the BMP, GIF, PNG, JPG, Animated GIF, 3GP,
MP4, and WMV formats.
To view photos
1. On the Home screen, slide to the Photos and Videos tab and tap Album.
2. Tap an image to view it in full screen mode.
3. Use the touch screen to go to the next/previous image or to zoom in/out.
Slide your finger clockwise on an area to zoom in.
Slide your finger counter-clockwise to zoom out.
To rotate images
While viewing images, you can automatically rotate the image by simply turning
your Xda Serra sideways.
To playback video
Tap the screen to show the playback controls.
1. On the Home screen, slide to the Photos and Videos tab and tap Album.
2. Tap the video you want to playback.
For more information about Album, see Chapter 11 of the Full User Manual.

29
Synchronising music files
Synchronise music files on your PC and the internal storage of your Xda Serra
so you can listen to them when you’re on the move.
1. On your computer, open Windows Media® Player and then connect your
Xda Serra to your computer.
2. On the Device Setup dialog box, enter a name for your Xda Serra and
click Finish.
3. Click Stop Sync and then on the left panel of Windows Media® Player,
right-click the name of your Xda Serra and click Set Up Sync.
4. Select the music playlist(s) that you want to sync between your computer
and the internal storage and then click Add.
5. Click Finish.
Listening to music
After synchronising music files to your Xda Serra, you can use the Music tab
on the Home screen to play back music.
To listen to music
1. On the Home screen, slide to the Music tab and then tap Library.
2. Slide to the All Songs tab and then tap the song you want to play.
Touch and hold on this bar to display the Jog bar. Drag right or left on the
Jog bar to move forward or backward in the music.
For more information about the Music tab, see the TouchFLO 3D Guide
and Full User Manual.
30

3231
Getting organized
Synchronising your Xda Serra with your PC
Synchronise information and files between your PC and Xda Serra.
Note: See Chapter 5 of the Full User Manual to find out which information
and files you can synchronise.
Set up synchronisation software on your PC
Depending on the Operating System of your PC, you’ll need either Microsoft
ActiveSync® 4.5 (or later) or Windows Mobile® Device Center to synchronise
your Xda with your PC.
To synchronise your Xda Serra with a Windows XP PC
1. Install ActiveSync 4.5 on your PC from the Getting Started section of your
Applications CD.
2. Connect your Xda to your PC using the supplied USB cable.
The Synchronisation Setup Wizard automatically starts and guides you
to create a synchronisation partnership. Click Next.
3. Your Xda will ask you to choose a connection type – ActiveSync or Disk Drive.
You should select ActiveSync.
4. Clear the Synchronise directly with a server running Microsoft
Exchange check box and click Next. Select what you want to synchronise
and then click Next.
5. Select whether or not you want to allow wireless data connections
on your Xda Serra while it’s connected to your PC. Click Next.
6. Click Finish.
To synchronise your Xda Serra with a Windows Vista PC
1. Connect your Xda to your PC using the supplied USB cable. Windows
Mobile Device Center will open. On the screen, click Setup your device.
2. Your Xda will ask you to choose a connection type – ActiveSync or Disk
Drive. You should select ActiveSync.
3. Select the information you want to synchronise and click Next.
4. Enter a name for your Xda Serra and then click Setup.
For more information about synchronisation, see Chapter 5 of the
Full User Manual.
Viewing your Xda Serra on your TV
The TV Out function displays the Xda Serra’s screen contents and audio
to an external display with an RCA cable socket such as a television.
For more information about the Music tab, see Chapter 13 in the
Full User Manual.

3433
Keeping track of appointments
Use Calendar to help remind you of your upcoming appointments.
To enter an appointment into your Xda Serra
1. On the Home screen, tap Calendar.
2. On the Calendar screen, tap Menu > New Appointment.
3. Use the onscreen keyboard to enter the appointment details.
4. After entering the appointment details, tap OK.
The appointment will show on the Home screen.
Keeping track of things to do
Use Tasks to help you remember things you have to do.
To create a to-do list
1. Tap Start > Programs > Tasks.
2. On the Tasks screen, tap Tap here to add a new task and then enter
the task name.
3. Tap the Enter button on the onscreen keyboard.
Tip: You can also tap outside the field to enter the task.
See Chapter 12 of the Full User Manual to learn more about the advanced
features of Tasks.

35
36
Resetting your Xda Serra
1. Pull out the stylus.
2. Use the stylus to press the Reset button found at the opening of the stylus
compartment.
3. Your Xda Serra should restart and show you the Home screen.
You can also do a hard reset. After a hard reset, the Xda Serra is restored to
its default settings – the way it was when you first bought it and turned it on.
Only Windows Mobile® software and other pre-installed programs will remain.
To learn how to perform a hard reset, see Chapter 13 of the Full User Manual.
Copying files
You can install a microSD™ card into your Xda to have extra storage for files.
To copy files from the PC to your Xda Serra’s internal storage
1. Connect your Xda Serra to your PC using the USB cable in the box.
2. Your Xda will ask you to choose a connection type – ActiveSync or Disk Drive.
You should select Disk Drive.
3. Click File Management > Browse the contents of your Xda in
Windows Mobile Device Center or click Explore in ActiveSync on your PC.
This opens Windows Explorer on your PC and shows the contents of your
Xda Serra.
4. Browse the folders on your PC, right-click the file you want to copy and
then click Copy.
5. Go to My Windows-Based Mobile Device > Internal Storage and then
right-click on the screen and click Paste.
When you want to copy media files such as music and videos to your Xda Serra
from your PC, it’s recommended that you use Windows Media Player.
Table of contents
Other O2 Cell Phone manuals