O2 Xda Venn User manual

O2 ODM 00 –
GC 3mm
30 04 09 127x127 100
Client Amend Yes No
ARTWORK
O2 ODM 00 –
GC 3mm
30 04 09 127x127 100
No Artwork Simp Med Comp
o2.co.uk
Telefónica O2 UK Limited, 260 Bath Road, Slough, Berks, SL1 4DX.
Registered in England No.1743099. Registered office as above.
© Telefónica O2 UK Limited 2009. Correct at time of going to press (04/09).
O2CN887N 6149VCCP04/09 04/10
Quick Start Guide
Xda Venn
We’re better, connected
6149 Mustang Guide QSG.indd 1-2 1/5/09 09:45:41

C
O2 ODM 00 –
GC 3mm
30 04 09 127x127 100
Client Amend Yes No
ARTWORK
Welcome to the Xda Venn
This quick start guide will help you get your Xda Venn up and running
as smoothly as possible. This Smartphone makes life easier on the go,
with a keyboard in your palm, providing email and text at your fingertips.
With a dual slider keyboard, maximum microSD™ card capacity of 32GB,
talk time of up to five hours and standby time of up to 250 hours,
it’s all backed up and driven by a fast Qualcomm processor.
For a more complete guide to using your Xda Venn, please see the
full user manual which can be downloaded from the link provided
on the Getting Started CD.
Getting to know your Xda Venn
What’s in the box? 1
Inserting your microSD™ Card 4
Inserting your sim card 5
Inserting the battery 5
Charging the battery 6
Switching on your Xda Venn 6
Answering a phone call 6
Locking & unlocking the keypad 6
Backlight 6
Changing backlight settings 7
Opening your Xda Venn 8
Learning to navigate & type 9
QWERTY keypad 10
Home screen 11
Checking your wireless connection 11
Finding applications 13
Making your first call
Making a phone call 15
Setting up voicemail 15
Checking voicemail 15
Organising your contacts
Adding a contact 17
Adding a contact to speed dial 17
Adding a current caller to contacts 18
Copying contacts from the sim card 18
Using text & picture messaging
Sending a text or picture message 19
Receiving a text message 19
Taking & sending a picture 21
Taking & sending a video 22
Browsing the internet
Go to Web Pages 23
Bookmarking a page 24
Personalising your Xda Venn
Assigning a ringtone 25
Setting Up Bluetooth
Setting up Bluetooth 26
Contents
Check pagination
We’re better, connected
6149 Mustang Guide QSG.indd 3-4 1/5/09 09:45:44

1
O2 ODM 00 –
GC 3mm
30 04 09 127x127 100
Client Amend Yes No
ARTWORK
O2 ODM 00 –
GC 3mm
30 04 09 127x127 100
No Artwork Simp Med Comp
2
Getting to know your Xda Venn
How to get started:
• Carefully follow the step-by-step instructions in this guide to set up your Smartphone.
• Review the Full User Manual (by selecting the appropriate link) on the Getting Started
CD to learn about the full power of the Xda Venn.
What’s in the box?
Xda Venn
Full user manual access
available via the Getting
Started CD
Pouch to protect your
Xda Venn
Quick Start Guide Warranty card
Warranty Card
Xda Venn
We’re bet ter, connec ted
O2CN885N 6149VCCP04/0 9 04/10
USB cable
Moulded all-in-one
headsetBattery
AC travel charger
Getting Started CD
Getting Started
With Wind ows Mobile softw are. Includes Micro soft®
ActiveSy nc® 4.5, Window s Mobile Device Cente r for
Vista an d Microsoft® Ou tlook® 2007 (Evalua tion copy)
Full User Manual
All rights r eserved. Por tions ©
2008 Mi crosoft Corporat ion
Xda Venn
6149 Mustang Guide QSG.indd 1-2 1/5/09 09:46:05

O2 ODM 00 –
GC 3mm
30 04 09 127x127 100
Client Amend Yes No
ARTWORK
4
O2 ODM 00 –
GC 3mm
30 04 09 127x127 100
No Artwork Simp Med Comp
3
Volume down key
Quick list / REC key
Send key
Home key
Left soft key
Volume up key
Charging slot
Camera key
End key
Earpiece
Back/clear key
Right soft key
Navigation key
Inserting your microSD™ card
A microSD™ card is a removable memory card that will increase the storage capacity of
your Xda Venn by up to 32GB. To insert a microSD™ card into your Smartphone, first
remove the cover on the bottom where it reads microSD™. Then, insert the narrow end
of the microSD™ card into the slot, pushing it until it clicks, before replacing the cover.
To remove your microSD™ card, remove the cover and press in the card until it clicks.
You can pull the card out once it has popped up.
Note: microSD™ cards are sold separately and can be purchased online at shop.o2.co.uk
6149 Mustang Guide QSG.indd 3-4 1/5/09 09:46:16

5
O2 ODM 00 –
GC 3mm
30 04 09 127x127 100
Client Amend Yes No
ARTWORK
6
O2 ODM 00 –
GC 3mm
30 04 09 127x127 100
No Artwork Simp Med Comp
Charging the battery
To charge the battery, first plug the AC travel charger
into a standard AC wall outlet. Then plug the travel
charger into the jack on the top right side of your
Smartphone. Don’t forget to unplug the charger from
the power outlet when it’s finished charging.
Switching on your Xda Venn
Just press and hold the ON/End key for a few seconds. To switch off your Xda Venn,
again just press and hold the ON/End key for a few seconds.
Answering a phone call
Just press the SEND key.
Locking & unlocking the keypad
To lock your Xda Venn, just press the REC key on the bottom left hand side of your
device. From the Quick List, select Lock. To unlock, simply press the LEFT SOFT key,
followed by the * key.
Backlight
After 30 seconds your screen will dim to save battery power. To turn your screen on, just
press any key, or open one of the keypads.
Inserting your sim card
Before you start using your Xda Venn you’ll need to insert your sim card. This contains
your mobile phone number. Make sure the Xda Venn is turned off. Remove the back
cover by sliding it downwards to the bottom of the Smartphone and then lift it off.
Look for the sim card slot and place the sim card in it with the gold contacts facing
down and the cut-off corner matching the shape of the slot. Slide the sim card
completely into place.
Inserting the battery
To insert the battery, first line up the contacts on the battery with the contacts in the
back of your Smartphone. Then, just push the battery down until it locks into place
before replacing the cover.
6149 Mustang Guide QSG.indd 5-6 1/5/09 09:46:33

7
O2 ODM 00 –
GC 3mm
30 04 09 127x127 100
Client Amend Yes No
ARTWORK
O2 ODM 00 –
GC 3mm
30 04 09 127x127 100
No Artwork Simp Med Comp
8
Changing backlight settings
Press the LEFT SOFT key to enter the Start menu. Select Settings, then select Power
Management. Scroll down to Display time out, or Backlight time out on battery.
Press the LEFT or RIGHT side of the NAVIGATION key to change the Display Time
Out settings.
Opening your Xda Venn
To use the QWERTY keypad,
close the number pad, then hold
the phone horizontally and slide
the screen up.
To use the number keypad,
make sure the QWERTY keypad
is closed, then hold the phone
vertically and slide the screen up.
IMPORTANT: You cannot open
both keypads at the same time.
Attempting to do so will break
your Smartphone.
Left soft key
Number keypad
Right soft key
6149 Mustang Guide QSG.indd 7-8 1/5/09 09:46:42

9
O2 ODM 00 –
GC 3mm
30 04 09 127x127 100
Client Amend Yes No
ARTWORK
10
O2 ODM 00 –
GC 3mm
30 04 09 127x127 100
No Artwork Simp Med Comp
Learning to navigate & type
To move around the screen, press the NAVIGATION key up, down, left or right. Press
the center of the NAVIGATION key to select.
To return to the Home screen press the HOME key.
To return to the previous menu press the CLEAR/BACK key.
QWERTY keypad
When you are using the QWERTY keypad, the NAVIGATION key is landscape just like
the screen. To move around the screen, press the NAVIGATION key up, down, left or right.
Press the centre of the NAVIGATION key to select.
To select the bottom left and right items on the screen, use the LEFT and RIGHT SOFT keys.
To type a single uppercase letter, press the CAPS/SHIFT key, and then press the
corresponding key.
To enter a number or symbol, press the FN key, and then press the corresponding key.
Start menu
Use the LEFT SOFT key to access the Start Menu from the Home screen. The Start
menu displays the Recent Programs screen which displays the nine most recent
programs that have been used. Select the LEFT SOFT key again to display All
Programs; select again to see More Programs.
Left soft key
Function key
CAPS/Shift key
Right soft key
Navigaton key
Enter key
Back key
Home key Clear/back key
Navigation key
6149 Mustang Guide QSG.indd 9-10 1/5/09 09:46:54

11
O2 ODM 00 –
GC 3mm
30 04 09 127x127 100
Client Amend Yes No
ARTWORK
O2 ODM 00 –
GC 3mm
30 04 09 127x127 100
No Artwork Simp Med Comp
12
Home screen
The Home screen displays important information, such as future appointments, status
indicators, the current date, time and profile. The Home screen also provides shortcuts
to key tasks and applications. To use these shortcuts, scroll up/down and left/right
through the Home screen using the NAVIGATION key.
• To set the date and time, scroll up to and select the clock from the home screen.
• Access missed calls, new voicemails, new SMS and email from the quick list
on the homepage.
• View or make appointments.
• Access Profile, Wireless Manager, Ringtone, background image and Task Manager
for the homepage.
Checking your wireless connection
On the top right corner of the Home screen is the network coverage indicator.
• Full wireless 3G data coverage.
• Full wireless coverage (no data coverage).
Please refer to the Full User Manual to see the status indicators and their symbols.
6149 Mustang Guide QSG.indd 11-12 1/5/09 09:46:58

13
O2 ODM 00 –
GC 3mm
30 04 09 127x127 100
Client Amend Yes No
ARTWORK
O2 ODM 00 –
GC 3mm
30 04 09 127x127 100
No Artwork Simp Med Comp
14
Finding applications
Press the LEFT SOFT key to enter the start menu and view recent applications.
IMPORTANT: Only recently used applications appear on the first screen. To view a full
list, select “All programs”.
Select Internet Explorer to browse the web and WAP sites, and to download new
programs and files from the internet.
Select Calendar to view your calendar or add a new appointment.
Select Messaging to send and receive SMS and MMS text messages, and email.
Select Messenger to keep in contact with friends and family in real-time.
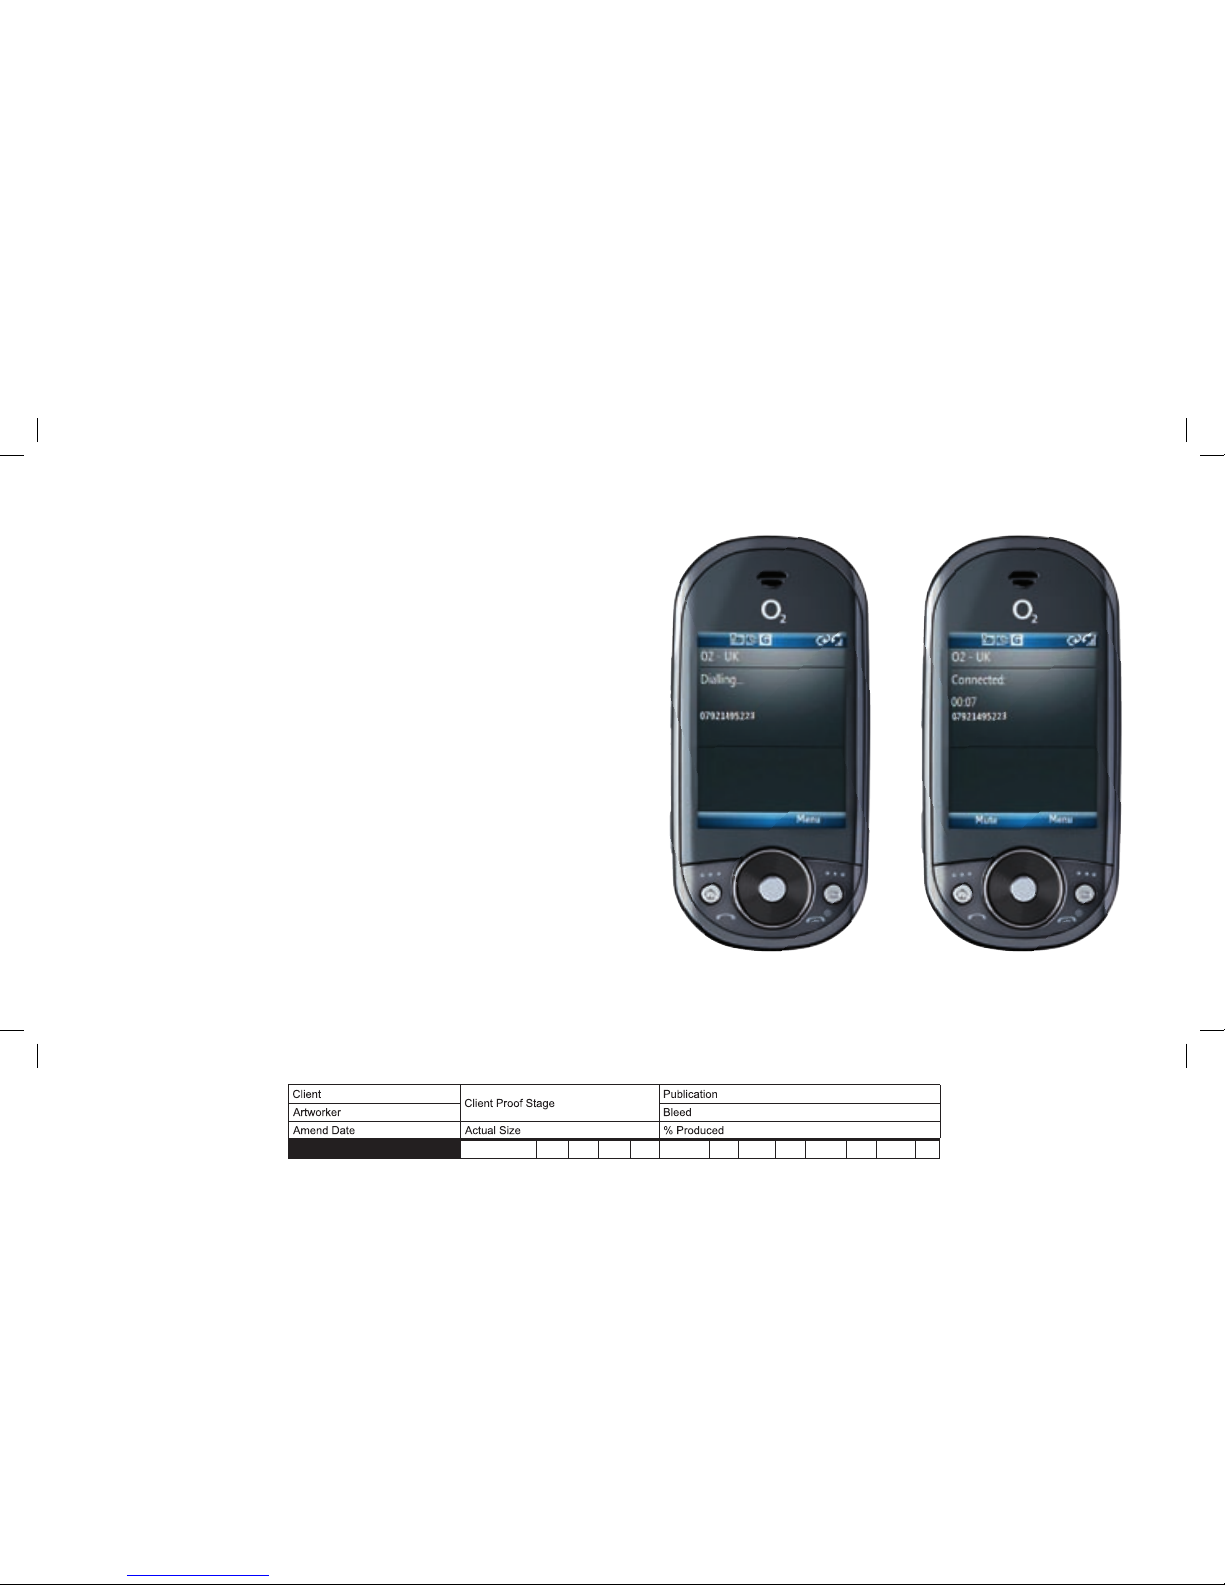
Select Call History to view all phone calls made, received and missed.
Select Organiser to view alarms, calculator, notepad, tasks, voice notes and the time
in various time zones around the world.
Select Settings to view the main list of options. You can also access additional options
from the menu in each application.
Select Office Mobile to view, edit, and open Microsoft Word® and Excel® documents,
as well as compressed files.
Select File Explorer to view the list of saved pictures, ringtones, videos, or templates.
Select Games to view a list of games, such as Bubble Breaker® and Solitaire®.
Select Applications to view a list of entertainment applications such as Camera,
Speed Dial, and Voice Command.
Select Contacts to view your contact list or add a new contact.
6149 Mustang Guide QSG.indd 13-14 1/5/09 09:47:02

O2 ODM 00 –
GC 3mm
30 04 09 127x127 100
Client Amend Yes No
ARTWORK
16
O2 ODM 00 –
GC 3mm
30 04 09 127x127 100
No Artwork Simp Med Comp
Making your first call
Making a phone call
On the Home screen, do one of the following:
1. Type a phone number using the number keypad.
2. Press the RIGHT SOFT key to enter the Contacts menu. Use the Navigation key to
highlight and select the contact you wish to call.
3. Slide out the QWERTY keypad and type part of a contact name. Using the
Navigation key, highlight and select the contact you wish to call.
Press the SEND key. To end the call, press the END key.
Note: to turn the speakerphone on or off during a call, press and hold the SEND key.
Setting up voicemail
1. Press and hold the 1 key on your Xda Venn to connect to the voicemail system.
2. Create your password.
3. Record your name.
4. Record a greeting.
Checking voicemail
1. Press and hold the 1 key.
2. Follow the voice prompts.
15
6149 Mustang Guide QSG.indd 15-16 1/5/09 09:47:07

17
O2 ODM 00 –
GC 3mm
30 04 09 127x127 100
Client Amend Yes No
ARTWORK
18
O2 ODM 00 –
GC 3mm
30 04 09 127x127 100
No Artwork Simp Med Comp
Organising your contacts
Adding a contact
1. On the Home screen, press the LEFT SOFT key to enter the Start menu.
2. Press the LEFT SOFT key to display All Programs.
3. Select Contacts.
4. Press the LEFT SOFT key to select New.
5. To save the information to your sim card, select Sim Contact. To save the information
to your phone memory, select Outlook Contact.
6. Type the contact information.
7. Select Done.
Adding a contact to speed dial
1. Press the RIGHT SOFT key to enter the Contact menu.
2. Highlight the contact you want to add to speed dial.
3. Press the centre of the NAVIGATION key to select.
4. Press the RIGHT SOFT key to select Menu.
5. Select Add to Speed Dial.
Adding a current caller to contacts
1. During a call press RIGHT SOFT key to select Menu.
2. Select Save to Contacts.
3. Select New Contact.
4. Type in caller information.
5. Press the LEFT SOFT key to select Save.
Copying contacts from the sim card
1. Press the RIGHT SOFT key to enter the Contact menu.
2. Select the Contact you want to save from your list.
3. Select Menu.
4. Select Save to Contacts.
5. Select Done.
Note: Use Sim Contact if you want the contact to be on your sim card, which carries
information between phones; however it only allows a limited amount of contact
information to be added. Use Microsoft Outlook Contact for the full set of contact
information and if you want to sync the contacts with Microsoft Outlook on
your computer.
6149 Mustang Guide QSG.indd 17-18 1/5/09 09:47:08

19
O2 ODM 00 –
GC 3mm
30 04 09 127x127 100
Client Amend Yes No
ARTWORK
O2 ODM 00 –
GC 3mm
30 04 09 127x127 100
No Artwork Simp Med Comp
20
Using text & picture messaging
Sending a text or picture message
1. On the Home screen, press the LEFT SOFT key to enter the Start menu.
2. Press the LEFT SOFT key to display All Programs.
3. Select Messaging.
4. Select Messages.
5. Press the RIGHT SOFT key to enter the menu.
6. Select New.
7. Choose Multimedia Message or Text Message.
8. In the To field, type a phone number, or press the centre of the NAVIGATION key to
select a contact.
9. Type a message. To add or attach a file, video or picture to the message, press the
RIGHT SOFT key to enter the menu. Select Add Item and select the type of item to
attach. Choose the desired item from the list.
10. Press the LEFT SOFT key to select Send.
Receiving a text message
1. On the Home screen, press the LEFT SOFT key to enter the Start menu.
2. Select Messaging then select Messages.
3. Scroll to a message then select.
4. To reply, enter your message then select Send.
5. To end a conversation, select Menu and then select Close.
6149 Mustang Guide QSG.indd 19-20 1/5/09 09:47:12

O2 ODM 00 –
GC 3mm
30 04 09 127x127 100
Client Amend Yes No
ARTWORK
22
O2 ODM 00 –
GC 3mm
30 04 09 127x127 100
No Artwork Simp Med Comp
Taking & sending a picture
1. Press and hold the CAMERA key on the bottom right hand side of your
Xda Venn.
2. Press the CAMERA key again to take a picture.
3. After the picture has been taken, press the RIGHT SOFT key to enter the menu,
and select Send Via MMS or Send Via Email.
4. Press LEFT SOFT key to select.
5. In the To field, type a phone number or the name of a saved contact (if sending
via MMS) or an email address (if sending via email).
6. Type a message (if you want to include one).
7. Select Send.
Note: To change to Video Mode, press the RIGHT SOFT key to enter the Menu,
and select Camcorder.
Taking & sending a video
1. Press and hold the CAMERA key on the bottom right hand side of your Xda Venn.
2. Press the RIGHT SOFT key to enter the menu, and select Camcorder.
3. Press the CAMERA key to start recording.
4. Press the CAMERA key again to stop recording.
5. Press the RIGHT SOFT key to enter the menu, and select Send Via MMS or Email.
6. In the To field, type a phone number or the name of a saved contact (if sending via
MMS) or an email address (if sending via email).
7. Type a message (if you want to include one).
8. Select Send.
Note: When taking, processing, or using the camera, obey all laws that may restrict your
use of the Xda Venn.
21
6149 Mustang Guide QSG.indd 21-22 1/5/09 09:47:14

23
O2 ODM 00 –
GC 3mm
30 04 09 127x127 100
Client Amend Yes No
ARTWORK
24
O2 ODM 00 –
GC 3mm
30 04 09 127x127 100
No Artwork Simp Med Comp
Browsing the internet
Use Internet Explorer® to access web sites.
Go to Web Pages
1. On the Home screen, press the LEFT SOFT key to display Recent Programs.
2. Select Internet Explorer. If Internet Explorer is not listed, then Press the
LEFT SOFT key to display All Programs.
3. Select Internet Explorer.
4. Press the RIGHT SOFT key to enter the menu.
5. Select Address Bar.
6. In the text field that appears, type the URL (e.g. www.o2.co.uk) that you wish to
go to.
7. Press the LEFT SOFT key to select Go.
Bookmarking a page
Make a note of your favourite and most visited websites.
1. On the Home screen, press the LEFT SOFT key to enter the Start menu.
2. Select Internet Explorer®.
3. Enter the web address into the Address field and press the NAVIGATION key.
4. Select Menu then select Add to Favorites.
5. Confirm or change the name and address, then select a folder.
6. Select Add to store the bookmark and return to the web page.
6149 Mustang Guide QSG.indd 23-24 1/5/09 09:47:15

25
O2 ODM 00 –
GC 3mm
30 04 09 127x127 100
Client Amend Yes No
ARTWORK
26
O2 ODM 00 –
GC 3mm
30 04 09 127x127 100
No Artwork Simp Med Comp
Personalising your Xda Venn
You can customise the settings your Smartphone to suit you.
Assigning a ringtone
1. On the Home screen, press the LEFT SOFT key
to enter the Start menu.
2. Select Settings.
3. Select Sounds.
4. Select the Ringtone menu. Press the
centre of the NAVIGATION key to open
and select a Ringtone.
5. Select Done.
Setting Up Bluetooth®
You can pair your Xda Venn with a Bluetooth® device.
1. On the Home screen, press the LEFT SOFT key to enter the Start menu.
2. Press the LEFT SOFT key to display All Programs.
3. Select Settings.
4. Select Connections.
5. Select Wireless Manager.
6. Select Bluetooth and press the centre of the NAVIGATION key to turn on.
7. To connect to a new Bluetooth® device:
• Select Menu.
• Select Bluetooth Settings.
• Select the type of Bluetooth® device you wish to connect to.
• Select Add to configure a new connection.
• Search for the device by selecting the LEFT SOFT key.
• Select the device you wish to connect to and confirm with the LEFT SOFT key.
• When prompted, type the passkey for the Bluetooth® enabled device on your Xda Venn,
and press OK.
• Once the Bluetooth® is paired with your Xda Venn, you are ready to use Bluetooth®.
6149 Mustang Guide QSG.indd 25-26 1/5/09 09:47:17

27
O2 ODM 00 –
GC 3mm
30 04 09 127x127 100
Client Amend Yes No
ARTWORK
28
8. To connect to an already paired Bluetooth® device:
• Select Menu.
• Select Bluetooth Settings.
• Select the type of Bluetooth® device you wish
to connect to.
• Select the name of the previously paired
Bluetooth® device.
• Once the Bluetooth® is paired with your Xda Venn,
you are ready to use Bluetooth®.
6149 Mustang Guide QSG.indd 27-28 1/5/09 09:47:23
Other manuals for Xda Venn
1
Table of contents
Other O2 Cell Phone manuals