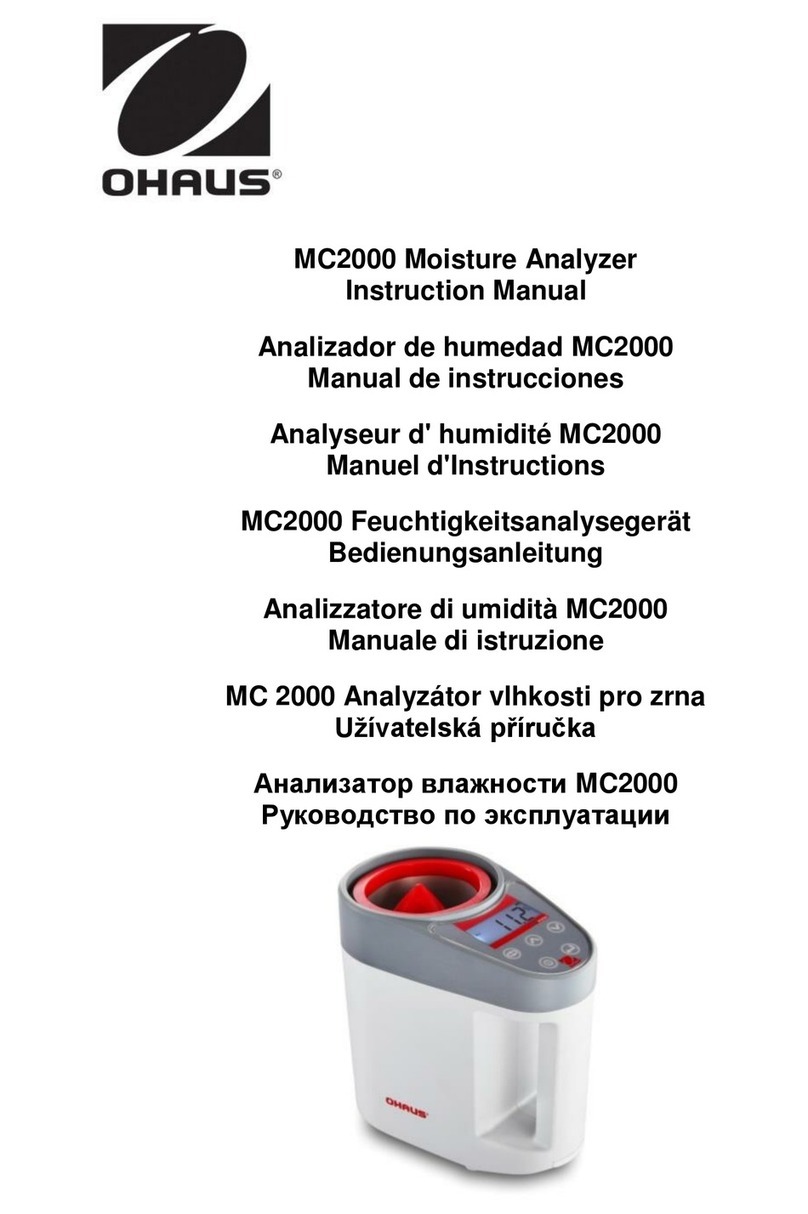
OHAUS MC2000 User manual

MC2000 Moisture Analyzer
Instruction Manual
Analizador de humedad MC2000
Manual de instrucciones
Analyseur d' humiditéMC2000
Manuel d'Instructions
MC2000 Feuchtigkeitsanalysegerät
Bedienungsanleitung
Analizzatore di umiditàMC2000
Manuale di istruzione
Manual_MC2000_V1

MC2000 Moisture Analyzer Series EN-1 EN-1

MC2000 Moisture Analyzer Series EN-1 EN-1
1. INTRODUCTION
1.1 Safety Precautions
For safe and dependable operation of this moisture Analyzer,
please comply with the following safety precautions:
Use the Analyzer exclusively for determination of
moisture in samples. Improper operation of the Analyzer
can endanger personnel and cause property damage.
If the Analyzer is used in a manner not specified in this
manual, the protection provided may be impaired.
Do not operate the Analyzer in hazardous, wet or
unstable environments.
Do not make any modifications to the Analyzer.
Please remove the batteries if the Analyzer will not be
used for extended periods.
Service should be performed only by authorized
personnel.
Please note that changes or modifications not expressly
approved by the party responsible for compliance could
void the user’s authority to operate the equipment.
2. INSTALLATION
2.1 Package Contents
Moisture Analyzer
Container
200g weight
Instruction Manual
Cover
Brush
4 AA Batteries
2.2 Selecting the Location
Operate the analyzer on a firm, level surface.
Avoid locations with rapid temperature changes, excessive humidity
and vibrations.
2.3 Installation
a. Remove the battery cover.
Battery Cover

EN-2 MC2000 Moisture Analyzer Series
b. Install the 4 batteries according to the “+/-”symbol on the battery cover.
c. Before measurement, please perform a weight calibration first. Please
see section 4.1 for details.
3. OPERATION
3.1 Controls
Button:
Name:
Functions:
Start / Stop
On (short press)
Off (long press)
Category / Setup
Factory Reset
Load category / Measurement (short press)
Category Setup (long press)
Factory Reset (long press)
Enter / Adjust
Enter / Accept / Mean value (short press)
Adjust (long press)
Up / Weight /
Calibration
Increase / Weight (short press)
Weight Calibration (long press)
Density (short press)
Down
Decrease / Temperature (short press)

MC2000 Moisture Analyzer Series EN-3 EN-3
3.2 Display
Category Code
Percent Moisture
Compensate
Density
Mean Value
Calibration
Category Setup
Temperature
Weight

EN-4 MC2000 Moisture Analyzer Series
3.3 Operation Modes
3.3.1 How to Perform a Test
1. Press the “Start”button and the instrument starts self-check.
2. Press the “Up“ and “Down”buttons to choose the category code of the
respective sample to be measured (refer to section 8, category code list,
for details)
3. Fill the sample grain into the empty container.
4. Remove the funnel from container.
5. Remove excess grain with cover.
6. Place the container over the moisture analyzer and press the release
button.
7. Without pressing any key, the analyzer will automatically start the
measurement and the moisture value will be displayed after about 5 seconds.
1. Please remove any dirt, sand or metal impurities from the
sample before starting the test.
2. In order to get accurate results, please ensure that the sample
and instrument are at the same temperature level.
3. In order to get accurate results, for large particle size sample
(for example corn), please test several times and get the
mean value.
4. In order to get accurate results, please clean the container
after each test. Especially for high moisture level
samples.
5. In order to get accurate results, please fill the whole container
with sample.
Fill the sample grain
(use full container)
Remove the funnel
Place the container
over the analyzer
Remove excess grain
with cover
Press the release button
Show results automatically

MC2000 Moisture Analyzer Series EN-5 EN-5
3.3.2 Standby Mode
When the instrument is installed batteries and the display is off, the device is
in Standby mode.
Start (Short press) Turns on the display, self-check and enters category
mode. The category code is showed on the display “C##”.
Stop (Long press) Re-enters standby mode. (off)
3.3.3 Category Mode
Category (Short press) Changes modes to load category, show “C##”on
display.
Up (Short press) Select the category code.
Down (Short press) Select the category code.
Category (Short press) Load category parameter and exit to measurement
mode.
3.3.4 Measurement Mode
Category (Short press) Changes modes to measurement, show “0.0%”on
display.
Up (Short press) Shows sample weight value (after moisture
measurement)
Up (Press twice) Shows the density of sample (after moisture
measurement)
Down (Short press) Shows the temperature value of sample (after
moisture measurement)
Enter (Short press) Shows mean moisture value and delete the
previous measurement result (after at least two measurements)
3.3.5 Adjust Mode
Adjust (Long press) Enters adjust mode.
Up (Short press) Increase adjust value.
Down (Short press) Decrease adjust value.
Category (Short press) Save and enter measurement mode.
Enter (Short press) Save and enter measurement mode.
4. ADJUST
4.1 Weight Calibration
Before using the analyzer for the first time, we recommend to calibrate it.
1. Put the instrument on a level surface, remove top cover and empty
the instrument.
2. Press “Category”button, changes mode to measurement
3. Long press the “Up”button until “0.0”is flashing.
4. Place a 200g calibration mass on the sensor (top of red cone).
5. Remove the mass when “200”is shown on the display.
6. Press the “Category”button to exit.

EN-6 MC2000 Moisture Analyzer Series
4.2 Adjustment
Because of different surroundings and weather, the results will have metrical
discrepancy. The adjustment function will help to reduce the deviation.
1. Long press the “Adjust”button to enter the adjust mode. The display
will show current moisture value. When the moisture value
disappears, release the “Adjust”button. The display will show
current adjust value, for example “0.0”
2. Press the “Up”and “Down”buttons to increase or decrease the
adjust value.
3. Press the “Adjust”or “Category”button to save the value and exit to
the measurement mode.
This function is designed only to adjust the metrical
discrepancy caused by surroundings and weather. Any
improper adjustment should be avoided.
4.3 Category Setup
To add a new category into memory. Prepare the samples of this new
category with 3 or 4 different moisture content levels.
1. Press the “Category”button, enter category mode.
2. Press “Up”or “Down”button to select desired category code to
setup.
3. Long press “category”button until display shows “-1-”, the
instrument is in the setup mode.
4. Test the sample with lowest moisture content level, press “Up”and
“Down”button to adjust the moisture result. Press “Enter”button to
save the result and the instrument will show “-2-”.
5. Test the sample with middle level of moisture content, press “Up”
and “Down” button to adjust the moisture result. Press “Enter” button
to save the result and the instrument will show “-3-”.
6. Test the sample with higher level of moisture content and if
necessary test the sample with highest level of moisture content.
Press the “category”button to exit setup mode.
7. Test these samples to verify this new category.
1. The test order to build up a new category is from
low moisture level standard sample to high level.
2. We recommend the difference of moisture level
between each standard sample to be around 5%.
And the whole moisture range of these standard
samples should be within the real object range.
MC2000 Moisture Analyzer Series EN-7 EN-7
5. FACTORY RESET
1. Enter category mode.
2. Long press “category”button, till display shows “-1-”and “C##”.
This function will delete all the adjustments and new categories
created by user.
6. MAINTENANCE
1. After each test, clean the container with a brush.
2. Please remove the batteries from analyzer in case of transit or storage.
7. SPECIFICATIONS
Model
MC2000
Moisture range (%)
3% - 45%
Readability (%)
0.1%
Repeatability (%)
0.2%
Capacity (g)
200
Temperature range
0℃-50℃
Display results
% Moisture, Weight, Density, Statistics
Power
4 AA Battery
8. CATEGORY CODE LIST
Code
Sample Name
Code
Sample Name
C01
Indica rice
C07
Rice
C02
Japonica rice
C08
Barley
C03
Wheat
C09
Peanut
C04
Corn
C10
Durra
C05
Rapeseed
C06
Soybean

EN-8 MC2000 Moisture Analyzer Series
9. COMPLIANCE
Compliance to the following standards is indicated by the corresponding mark
on the product.
Mark
Standard
This product conforms to the EMC Directive 2014/30/EU and the
Low Voltage Directive 2014/35/EU. The complete Declaration of
Conformity is available online at www.ohaus.com/ce.
EN 61326-1
ISO 9001 Registration
In 1994, OHAUS Corporation, USA, was awarded a certificate of registration
to ISO 9001 by Bureau Veritus Quality International (BVQI), confirming that
the OHAUS quality management system is compliant with the ISO 9001
standard’s requirements. On June 21, 2012, OHAUS Corporation, USA, was
re-registered to the ISO 9001:2008 standard.
FCC Note:
This equipment has been tested and found to comply with the limits for a
Class B digital device, pursuant to part 15 of the FCC Rules. These limits are
designed to provide reasonable protection against harmful interference in a
residential installation. This equipment generates, uses and can radiate radio
frequency energy and, if not installed and used in accordance with the
instructions, may cause harmful interference to radio communications.
However, there is no guarantee that interference will not occur in a particular
installation. If this equipment does cause harmful interference to radio or
television reception, which can be determined by turning the equipment off
and on, the user is encouraged to try to correct the interference by one or
more of the following measures:
- Reorient or relocate the receiving antenna.
- Increase the separation between the equipment and receiver.
- Connect the equipment into an outlet on a circuit different from that to which
the receiver is connected.
- Consult the dealer or an experienced radio/TV technician for help.

MC2000 Moisture Analyzer Series EN-9 EN-9
Disposal
In conformance with the European Directive 2002/96/EC on
Waste Electrical and Electronic Equipment (WEEE) this device
may not be disposed of in domestic waste. This also applies to
countries outside the EU, per their specific requirements.
Please dispose of this product in accordance with local
regulations at the collecting point specified for electrical and
electronic equipment.
If you have any questions, please contact the responsible
authority or the distributor from which you purchased this
device.
Should this device be passed on to other parties (for private or
professional use), the content of this regulation must also be
related.
For disposal instructions in Europe, refer to
www.ohaus.com/weee
Thank you for your contribution to environmental protection.

Analizador de humedad Serie MC2000 ES-1 ES-1

Analizador de humedad Serie MC2000 ES-1 ES-1
1. INTRODUCCIÓN
1.1 Precauciones de seguridad
Para un funcionamiento seguro y fiable de este analizador
de humedad, siga las precauciones de seguridad descritas a
continuación:
Utilice el analizador exclusivamente para la
determinación de humedad en muestras. La operación
incorrecta del analizador puede poner en peligro al
personal y causar daños a la propiedad.
Si el analizador se utiliza de una manera no
especificada en este manual, los mecanismos de
protección provistos en la unidad pueden ser
ineficaces.
No opere el analizador en entornos peligrosos,
húmedos o inestables.
No realice ninguna modificación en el analizador.
Retire las baterías si el analizador no se va a utilizar
por un periodo largo.
La reparación del equipo solo debe ser realizada por
personal autorizado.
Les rogamos que tengan en cuenta que cualquier
cambio o modificación que no haya sido aprobada por
la parte responsable del cumplimiento, anula la
capacidad del usuario de hacer un uso operativo del
equipo
2. INSTALACIÓN
2.1 Contenido del paquete
Analizador de humedad
Contenedor
Peso de 200 g
Manual de instrucciones
Tapa
Cepillo
4 baterías AA
2.2 Selección del lugar de instalación
Opere el analizador sobre una superficie firme y nivelada.
Evite los lugares con cambios bruscos de temperatura, humedad
excesiva y vibraciones.

ES-2 Analizador de humedad Serie MC2000
2.3 Instalación
a. Quite la tapa de la batería.
b. Instale las 4 baterías de acuerdo con el símbolo "+/-" en la tapa de la
batería.
c. Antes de realizar mediciones de humedad, realice primero una
calibración de peso. Consulte la sección 4.1 para obtener más detalles.
3. OPERACIÓN
3.1 Controles
Botón:
Nombre:
Funciones:
Iniciar/Detener
Encender (pulsación breve)
Apagar (pulsación larga)
Configuración de
categoría
Restablecer
valores de fábrica
Cargar categoría / Medición (pulsación breve)
Configuración de categoría (pulsación larga)
Restablecer valores de fábrica (pulsación larga)
Introducir / Ajustar
Introducir / Aceptar / valor medio (pulsación breve)
Ajustar (pulsación larga)
Arriba / Peso /
Calibración
Aumentar / Peso (pulsación breve)
Calibración de peso (pulsación larga)
Densidad (pulsación breve)
Abajo
Disminuir / Temperatura (pulsación breve)
tapa de la batería

Analizador de humedad Serie MC2000 ES-3 ES-3
3.2 Pantalla
Código de categoría
Porcentaje de humedad
Compensar
Densidad
Valor promedio
Calibración
Configuración de categoría
Temperatura
Peso

ES-4 Analizador de humedad Serie MC2000
3.3 Modos de operación
3.3.1 Cómo realizar una medición
1. Pulse el botón "Inicio" y el instrumento comienza la auto-verificación.
2. Pulse los botones "Arriba" y "Abajo" para elegir el código de categoría
de la muestra respectiva que se va a medir (consulte la lista de códigos
de categoría para obtener más detalles, sección 8)
3. Llene con la de muestra el contenedor vacío.
4. Retire el embudo del contenedor.
5. Despeje con la tapa el grano sobrante.
6. Coloque el contenedor sobre el analizador de humedad y luego pulse el
botón de liberación.
7. Sin pulsar ninguna tecla, el analizador comenzarála medición en forma
automática y el valor de la humedad se mostrarádespués de unos 5
segundos.
Rellene con la muestra de grano
(Utilice toda la capacidad del
contenedor)
Retire el embudo
Despeje con la tapa el
grano sobrante
Coloque el contenedor
sobre el analizador
Presione el botón
de liberación
El resultado se muestra
automáticamente

Analizador de humedad Serie MC2000 ES-5 ES-5
1. Elimine la suciedad, arena o impurezas metálicas de la
muestra antes de iniciar la medición.
2. Para obtener resultados precisos, compruebe que la
muestra y el instrumento se encuentren al mismo nivel
de temperatura.
3. Para obtener resultados precisos, en el caso de
muestras de partículas grandes (por ejemplo, maíz),
pruebe varias veces y obtenga el valor promedio.
4. Para obtener resultados precisos, limpie el contenedor
después de cada medición, especialmente para
muestras con alto contenido de humedad.
5. Con el fin de obtener resultados precisos por favor llene
todo el recipiente con la muestra.
3.3.2 Modo de espera
Cuando el instrumento funciona con baterías y la pantalla estáapagada, el
dispositivo estáen modo de espera.
Inicio (Pulsación breve) Se enciende la pantalla, comienza la auto-
verificación y entra en el modo Categoría. El código de categoría se
muestra en la pantalla "C##".
Detener (Pulsación larga) Vuelve a entrar al modo de spera (apagado).
3.3.3 Modo Categoría
Categoría (Pulsación breve) Cambie el modo para cargar la categoría,
muestra "C##" en la pantalla.
Arriba (Pulsación breve) Seleccione el código de categoría.
Abajo (Pulsación breve) Seleccione el código de categoría.
Categoría (Pulsación breve) Cargue el código de categoría y salga al
modo Medición.
3.3.4 Modo Medición
Categoría (Pulsación breve) Cambie el modo a Medición, se muestra
"C##" en la pantalla.
Arriba (Pulsación breve) Se muestra el valor de peso de la muestra
(después de la medición de humedad)
Arriba (Pulsar dos veces) Se muestra la densidad de la muestra
(después de la medición de humedad)
Abajo (Pulsación breve) Se muestra el valor de la temperatura de la
muestra (después de la medición de humedad)
Introducir (Pulsación breve) Se muestra el valor promedio de la humedad
y borra el resultado de la medición anterior (después de al
menos dos mediciones)

ES-6 Analizador de humedad Serie MC2000
3.3.5 Modo Ajuste
Ajuste (Pulsación larga) Entra al modo Ajuste.
Arriba (Pulsación breve) Aumenta el valor de ajuste.
Abajo (Pulsación breve) Disminuye el valor de ajuste.
Categoría (Pulsación breve) Guarda y entra al modo Medición.
Introducir (Pulsación breve) Guarda y entra al modo Medición.
4. AJUSTE
4.1 Calibración del peso
Antes de usar el analizador por primera vez, le recomendamos calibrarlo.
1. Coloque el instrumento sobre una superficie nivelada, Quite la
cubierta superior y vacíe el instrumento.
2. Pulse el botón "Categoría", cambia el modo a Medición
3. Mantenga pulsado el botón "Arriba" hasta que parpadee "0.0".
4. Coloque una masa de calibración de 200 g en el sensor (cúspide
del cono rojo).
5. Retire la masa cuando se muestre "200" en la pantalla.
6. Pulse el botón "Categoría" para salir.
4.2 Ajuste
Debido a los diferentes entornos y condiciones meteorológicas, los
resultados tendrán discrepancias métricas. La función de ajuste ayudaráa
reducir la desviación.
1. Mantenga pulsado el botón "Ajustar" para entrar al modo Ajuste. La
pantalla mostraráel valor de humedad actual. Cuando el valor de la
humedad desaparezca, suelte el botón "Ajustar". La pantalla
indicaráel valor de ajuste actual, por ejemplo, "0.0"
2. Pulse los botones "Arriba" y "Abajo" para aumentar o disminuir el
valor del ajuste.
3. Pulse el botón "Ajustar" o "Categoría" para guardar el valor y salir al
modo Medición.
Esta función se ha diseñado solo para ajustar la
discrepancia métrica causada por los diferentes entornos
y condiciones climáticas. Debe evitarse cualquier ajuste
inapropiado.
4.3 Configuración de categoría
Para agregar una nueva categoría de la memoria. Prepare las muestras de
esta nueva categoría con 3 o 4 diferentes niveles de contenido de humedad.
1. Pulse el botón "Categoría", entre al modo Categoría.
2. Pulse el botón "Arriba" o "Abajo" para seleccionar el código de
categoría que desea configurar.

Analizador de humedad Serie MC2000 ES-7 ES-7
3. Mantenga pulsado el botón "Categoría" hasta que la pantalla
muestre el valor "-1- ", el instrumento estáen el modo
Configuración.
4. Mida la muestra con el menor contenido de humedad, pulse
"Arriba" y "Abajo" para ajustar el resultado de humedad. Pulse el
botón "Introducir" para guardar el resultado, el instrumento mostrará
"-2-".
5. Mida la muestra con el contenido medio de humedad, pulse "Arriba"
y "Abajo" para ajustar el resultado de humedad. Pulse el botón
"Introducir" para guardar el resultado, el instrumento mostrará"-3-".
6. Mida la muestra con mayor nivel de humedad y si es necesario
pruebe la muestra con el mayor contenido de humedad de todas.
Pulse el botón "Categoría" para salir del modo Configuración.
7. Pruebe estas muestras para verificar esta nueva categoría.
1. El orden de medición para crear una
nueva categoría va desde una muestra
estándar con bajo nivel de humedad a
una de alto nivel de humedad.
2. Recomendamos que la diferencia de
humedad entre cada muestra estándar
sea de alrededor del 5 %. Además, todo
el rango de humedad de estas muestras
estándar debe estar dentro del rango
del objeto real.
5. RESTABLECER FACTORES DE FÁBRICA
1. Entre al modo Categoría.
2. Mantenga pulsado el botón "Categoría", hasta la pantalla muestre "-1-" y
"C##".
Esta función borrarátodos los ajustes y nuevas categorías
creadas por el usuario.
6. MANTENIMIENTO
1. Después de cada medición, limpie el contenedor con un cepillo.
2. Retire las baterías del analizador en caso de traslado o
almacenamiento del equipo.

ES-8 Analizador de humedad Serie MC2000
7. ESPECIFICACIONES
Modelo
MC2000
Rango de humedad (%)
3 a 45 %
Legibilidad ( %)
0,1 %
Repetibilidad (%)
0,2 %
Capacidad (g)
200
Rango de temperatura
0 a 50 ℃
Resultados en pantalla
% de humedad, peso, densidad, estadísticas
Alimentación
4 baterías AA
8. LISTA DE CÓDIGOS DE CATEGORIA
Código
Nombre de la
muestra
Código
Nombre de
la muestra
C01
Arroz1
C07
Maiz2
C02
Arroz2
C08
Cebada
C03
Trigo
C09
Maní
C04
Maíz1
C10
Sorgo
C05
Colza
C06
Soja
Other manuals for MC2000
2
Table of contents
Languages:
Other OHAUS Measuring Instrument manuals

OHAUS
OHAUS STARTER 300C User manual

OHAUS
OHAUS ST Series User manual

OHAUS
OHAUS ST3100M-B User manual

OHAUS
OHAUS ST400 User manual

OHAUS
OHAUS T51XW User manual

OHAUS
OHAUS starter 3100 User manual

OHAUS
OHAUS TD52 User manual

OHAUS
OHAUS CKW Use and care manual

OHAUS
OHAUS MB90 User manual

OHAUS
OHAUS TD52 User manual

OHAUS
OHAUS Defender 2000 Series User manual

OHAUS
OHAUS MB35 User manual

OHAUS
OHAUS ST20C-A User manual

OHAUS
OHAUS TD52 User manual

OHAUS
OHAUS T31P User manual

OHAUS
OHAUS CD-1 User manual

OHAUS
OHAUS MB35 User manual

OHAUS
OHAUS Defender 3000 User manual

OHAUS
OHAUS ST300D-G User manual

OHAUS
OHAUS i-DT33XW User manual