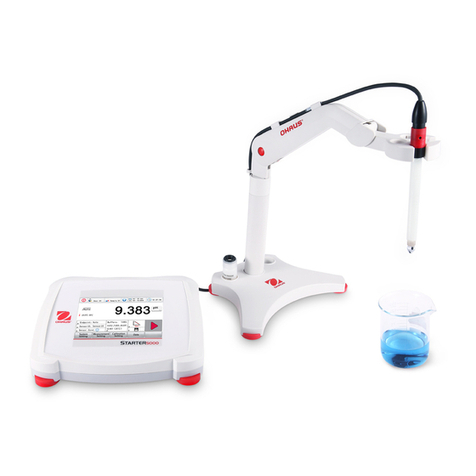
OHAUS ST300D-G User manual

STARTER 300C Portable Conductivity Meter EN-1
STARTER 300C
Portable Conductivity Meter
Instruction Manual
Manual de instrucciones del
Conductivímetro portátil
STARTER 300C
STARTER 300C
Appareil de mesure portable
de la conductivité
Manuel d’instructions
STARTER 300C
Medidor Portátil de
Condutividade
Manual de Instruções
www.calcert.com sales@calcert.com1.888.610.7664 0
5
10
15
20
25
30

STARTER 300C Portable Conductivity Meter EN-1
TABLE OF CONTENTS
1INTRODUCTION...................................................................1
1.1 Definition of Signal Warnings and Symbols ...................................... 1
1.2 Safety Precautions............................................................................ 2
1.3 Display and controls.......................................................................... 2
2INSTALLATION.....................................................................4
2.1 Package contents.............................................................................. 4
2.2 Installing the batteries ....................................................................... 5
2.3 Installing the electrode clip................................................................ 5
2.4 Installing the IP54 cover.................................................................... 5
2.5 Integrated stand for table top use ..................................................... 6
3SETUP...................................................................................6
3.1 Set temperature unit.......................................................................... 6
3.2 Set MTC temperature value.............................................................. 6
3.3 Set calibration standard .................................................................... 7
3.4 Set temperature correction coefficient .............................................. 7
3.5 Set TDS factor................................................................................... 7
4STARTER 300C OPERATION ..............................................8
4.1 Calibration ......................................................................................... 8
4.1.1 Selecting a standard................................................................... 8
4.1.2 Performing a calibration ............................................................. 8
4.2 Sample measurement....................................................................... 9
4.3 TDS measurement............................................................................ 9
4.4 Using the memory........................................................................... 13
4.4.1 Storing a reading...................................................................... 13
4.4.2 Recalling from memory ............................................................ 13
4.4.3 Clearing the memory................................................................ 13
5MAINTENANCE..................................................................14
5.1 Error message..................................................................................11
5.2 Meter maintenance...........................................................................11
5.3 Self diagnosis...................................................................................11
5.4 Recover factory settings...................................................................11
6TECHNICAL DATA.............................................................15
6.1 Specifications................................................................................ 15
6.2 Compliance ..................................................................................... 16
7APPENDIX ..........................................................................14
7.1 Conductivity standards.................................................................... 14
7.2 Examples of temperature coefficients (α-value).............................. 17
7.3 Conductivity to TDS conversion factors.......................................... 17
www.calcert.com sales@calcert.com1.888.610.7664 0
5
10
15
20
25
30

STARTER 300C Portable Conductivity Meter EN-1
1 INTRODUCTION
Thank you for choosing OHAUS. Please read the manual completely before using the STARTER
300C portable conductivity meter to avoid incorrect operation.
The STARTER 300C has an excellent performance/price ratio and is designed with many useful
features. Other accessories such as electrodes, conductivity standard solutions are also available.
Starter 300C offers many practical features such as:
xErgonomic, multifunctional design for ambidextrous measurements or table top use
xIntegrated labeling design for quick product identification
xIP54 protection against dust and water
xOhaus’ renowned user friendly software
1.1 Definition of Signal Warnings and Symbols
Safety notes are marked with signal words and warning symbols. These show safety issues and
warnings. Ignoring the safety notes may lead to personal injury, damage to the instrument,
malfunctions and false results.
Signal Words
WARNING For a hazardous situation with medium risk, possibly resulting in
injuries or death if not avoided.
CAUTION For a hazardous situation with low risk, resulting in damage to the
device or the property or in loss of data, or injuries if not avoided.
Attention For important information about the product.
Note For useful information about the product
Warning Symbols
General hazard
Explosion hazard
Corrosive hazard
±
Alternating current
¯
Direct current
www.calcert.com sales@calcert.com1.888.610.7664 0
5
10
15
20
25
30

EN-2 STARTER 300C Portable Conductivity Meter
1.2 Safety Precautions
CAUTION: Read all safety warnings before installing, making connections, or servicing this
equipment. Failure to comply with these warnings could result in personal injury and/or property
damage. Retain all instructions for future reference.
xUse the equipment only in dry locations.
xDry off any liquid spills immediately. The instrument is not watertight.
xWhen using chemicals and solvents, comply with the instructions of the chemical producer
and the general lab safety rules.
xUse only approved accessories and peripherals.
xOperate the equipment only under ambient conditions specified in these instructions.
xDo not operate the equipment in hazardous or unstable environments.
xService should only be performed by authorized personnel.
1.3 Display and controls
Displays
1
Endpoint stability icon ; Auto endpoint icon
2
Measurement icon - ; measurement or calibration is running
3
Calibration icon - ; calibration in progress
4
Setup icon - ; instrument is in the setup mode
5
Battery status icon shows the condition of the batteries - fully charged, half-charged or fully
discharged
6
TDS factor in the setup mode
7
Conductivity / TDS / Cell Constant
8
Standard / Memory number / Error index
9
Temperature during measurement or reference temperature in setup mode
1
2
3
4
5
6
8
9
7
www.calcert.com sales@calcert.com1.888.610.7664 0
5
10
15
20
25
30

STARTER 300C Portable Conductivity Meter EN-3
Controls
Button
Press & release
Press & hold
for 3 seconds
- Start or endpoint
measurement
- Confirm setting, store entered
value
- Turn auto endpoint on / off
,
- Start calibration
- Review the latest calibration
data: cell constant
- Meter on
- Back to measurement screen
- Meter off
- Store current reading to
memory
- Increase value during setting
-
Scroll up through the me
mory
- Recall stored data
- Switch between conductivity
and TDS measuring modes
- Decrease value during setting
-
Scroll down through the
memory
- Enter setup mode
- Start self-diagnosis
www.calcert.com sales@calcert.com1.888.610.7664 0
5
10
15
20
25
30

EN-4 STARTER 300C Portable Conductivity Meter
2 INSTALLATION
Carefully unpack the meter.
2.1 Package contents
The model ST300C-B (Basic Model)should have the following items
In addition to ST300C-B content, the ST300C Kit also includes the conductivity electrode
STCON3:
The best measurement range for STCON3 4-ring (4-pole) cond. electrode is 70 μS/cm-200mS/cm.
In this range the measurement accuracy can reach 0.5%.
If you use STCON3 to measure pure water in which conductivity value is below 70 μS/cm, the
measurement will be less accurate (approximately 1% to 5%).
Does not use STCON3 to measure conductivity value less than 2 μS/cm, the accuracy is > +/-5%.
Accessories:
Model
Description
P/N
STCON3
4-ring cond. electrode
(70 μS/cm
-200mS/cm, 0.5% accuracy
; )
( 2-70 μS/cm, 1-5% accuracy)
83033972
STCON7
Pure water cond. electrode
(0.02
μS/cm-200 μS /cm; 0.02 μS
/cm
accuracy)
30080693
Standard Conduct 10 μS/cm 250ml
30100441
Standard Conduct 84 μS/cm 250ml
30100442
Standard Conduct 1413 μS/cm 250ml
30100443
Standard Conduct12.88mS/cm 250ml
30100444
Portable Bag for portable meters
30031635
ST300C
-B
U
nits
STARTER 300
C meter
1
AAA battery
4
1413 μS/cm standard solution
1 bottle (about 20ml)
12.88 mS/cm standard solution
1 bottle (about 20ml)
Electrode Clip
1
IP54 electrode caps
1
set
Wrist Strap
1
STCON3
1
www.calcert.com sales@calcert.com1.888.610.7664 0
5
10
15
20
25
30

STARTER 300C Portable Conductivity Meter EN-5
2.2 Installing the batteries
1) Remove the battery cover screw using a coin or screwdriver and remove the battery cover
2) Insert the batteries in the battery compartment as shown
3) Replace the battery cover and tighten the battery cover screw
2.3 Installing the electrode clip
The electrode clip is an electrode holder that can be placed next to the display on either side of
the housing.
1) Attach the clip by inserting the tabs into the recess.
2) Slide the clip forward to lock in position. Slide the shaft of the conductivity electrode into the
clip from above.
2.4 Installing the IP54 cover
Use the small plastic tool as shown:
www.calcert.com sales@calcert.com1.888.610.7664 0
5
10
15
20
25
30

EN-6 STARTER 300C Portable pH Meter
2.5 Integrated stand for table top use
Starter 300C has an integrated table stand as shown, which can be pushed out to use the meter
on a lab bench or desk. To close the stand, push the middle edge of the stand toward the meter.
3 SETUP
3.1 Set temperature unit
xPower the meter on by pressing .
xPress and hold until the setup icon appears on the display and the current
temperature unit blinks. (°C or °F)
xUse or buttons to select the temperature unit.
xPress button- to confirm your setting.
Note: °C = 5/9 (°F -32)
Continue with MTC temperature value setting by following instructions or press button- to go
back to the measurement screen.
3.2 Set MTC temperature value
After the temperature unit setting, the meter goes to setup the MTC temperature value setting.
Use or buttons to adjust the value.
Press button- to confirm your setting.
Continue with calibration standard setting by following instructions or press button- to go
back to the measurement screen.
www.calcert.com sales@calcert.com1.888.610.7664 0
5
10
15
20
25
30

STARTER 300C Portable Conductivity Meter EN-7
3.3 Set calibration standard
After the MTC temperature value setting, the meter goes to setup the calibration standard.
Use or buttons to select the calibration standard.
Press button- to confirm your setting.
Continue with calibration standard setting by following instructions or press button- to go
back to the measurement screen.
3.4 Set temperature correction coefficient
After the calibration standard setup, the meter enters the temperature correction coefficient
setting. Use or buttons to increase or decrease the temperature correction value (0.00
to 10.00 %/°C). Press button- to confirm your setting. Continue with reference temperature
setting or press button- to go back to the measurement screen.
Note:
If you set the temperature correction coefficient value as 0 %/°C, it means there will be NO
Temperature Compensation for the conductivity measurement. The meter displays the real
conductivity value at current temperature.
3.5 Set TDS factor
After selecting the reference temperature, the current TDS factor blinks. Use or
buttons to increase or decrease the value. Press to confirm your setting. The meter will exit
automatically to the measurement screen.
www.calcert.com sales@calcert.com1.888.610.7664 0
5
10
15
20
25
30
EN-8 STARTER 300C Portable Conductivity Meter
4 STARTER 300C OPERATION
WARNING Do not operate the equipment in hazardous environments. The
equipment is not explosion protected.
WARNING When using chemicals and solvents, comply with the instructions of the
chemical producer and the general lab safety rules.
4.1 Calibration
4.1.1 Selecting a standard
Always begin by calibrating your conductivity electrode. When using the STARTER 300C
conductivity meter, you must select a standard for calibration. (See 3.3)
Press and hold the to enter setup mode and set calibration standard. Use or
buttons to select and press to confirm. Press to leave setup mode.
The four predefined calibration standards are:
10 μS/cm
84 μS/cm
1413 μS/cm
12.88 mS/cm
Tables for automatic temperature compensation are programmed in the meter for each standard
(see appendix 7.1).
4.1.2 Performing a calibration
When performing calibration, Ohaus recommends using Auto End Point Mode. After powering
the meter on, be sure the top of the screen shows to ensure the meter is in Auto End point
Mode.
Auto or Manual End point Mode:
oPress and hold to change the End Point Mode.
oWhen in Manual Mode, to manually reach a measurement or calibration value, you
need to press button- when reading is stable and displays : then the
sample reading or calibration value freezes, blinks 3 times and freezes on
the display.
oWhen in Auto End Point Mode, the meter determines when the reading is stable
then displays and locks the reading or calibration value automatically, the reading
freezes and blinks 3 times then disappears; blinks 3 times and freezes on
the display.
www.calcert.com sales@calcert.com1.888.610.7664 0
5
10
15
20
25
30
STARTER 300C Portable Conductivity Meter EN-9
Be sure the conductivity electrode is securely attached to the meter and place it in the defined
calibration standard, wait 10-15s, and press .
The calibration icon and the measurement icon appear on the display. The measurement
icon is blinking during calibration measurement. The meter reaches the end points according to
the preselected endpoint mode .
When the calibration is finished, the standard value is displayed and stored; the measurement
icon blinks 3 times and disappears. Then, the endpoint stability and auto endpoint icon
blinks 3 times and freezes on the display. If the calibration was ended manually (by pressing
), then only endpoint stability icon blinks 3 times and freezes on the display.
To finish the calibration and return to the sample measurement, press . The cell constant is
then shown on the display for 3 seconds.
To reject the calibration, press before the meter returns automatically to the measurement
screen.
Note:
To ensure the most accurate conductivity readings, you should verify your cell constant with a
standard solution before measurement and recalibrate if necessary. Always use fresh standards.
For STCON3 the normal cell constant range is 1.50 –2.00. (e.g. 1.71 /cm) if the cell constant is
outside the range due to an improper calibration, you may need to recover factory settings (see
5.4) , then repeat calibration.
4.2 Sample measurement
Place the conductivity electrode in the sample, wait 10-15 seconds, then press to start the
measurement. The measurement icon appears on the display. The measurement icon is
blinking during measurement and the display shows the conductivity value of the sample. When
measurement reading reaches endpoints (auto endpoint or manual endpoint); you can record the
endpoint reading result.
By pressing and holding , you can switch between the auto and manual endpoint modes.
Stability criterion for conductivity measurement: The sensor input signal of the meter may not
change by more than 0.4% from the measured average conductivity of the probe in 6 seconds.
4.3 TDS measurement
To perform a TDS measurement, follow the same procedure as for a conductivity measurement.
Press to switch between conductivity and TDS measurement mode.
www.calcert.com sales@calcert.com1.888.610.7664 0
5
10
15
20
25
30
EN-10 STARTER 300C 300C Portable Conductivity Meter
4.4 Using the memory
4.4.1 Storing a reading
The STARTER 300C can store up to 30 results. Press when the measurement has
endpointed. M01 indicates that one result has been stored.
If you press when M30 is displayed, FUL indicates the memory is full. To store further data
you will have to clear the memory (see section 4.4.3)
4.4.2 Recalling from memory
Press and hold to recall the stored values from memory when the current measurement has
endpointed.
Press or buttons to scroll through the stored results. R01 to R30 indicates which result
is being displayed. Press to exit.
4.4.3 Clearing the memory
Continue pressing or buttons to scroll through the stored results until MRCL appears.
Then press , CLr blinks. Press again to confirm the deletion or press to return to
the measurement mode without deleting the data.
www.calcert.com sales@calcert.com1.888.610.7664 0
5
10
15
20
25
30

STARTER 300C Portable Conductivity Meter EN-11
5MAINTENANCE
5.1 Error message
Error 0
Memory access error
Reset to factory settings
Error 1
Self-diagnosis failed
Repeat the self-diagnosis procedure and make
sure that you finish pressing all five keys within
two minutes.
Error 2
Measured values out of range
C:
> 199.9 mS/cm
TDS: < 0.1 mg/L or > 199.9 g/L
Check if the electrode is properly connected
and placed in the sample solution.
Error 3
Measured standard temperature
out of range (5 ... 35 °C)
Keep the standard temperature within the
range for calibration
Error 4
Measuring temperature out of
range (0 ... 100
°C)
Check if the electrode is properly connected
and keep the sample temperature within
the
range.
Error 9
The current data set has already
been stored once
A measurement can only be stored once.
Perform a new measurement to store a new
data set.
Any more problems, you can contact Ohaus sales rep.
5.2 Meter maintenance
Never unscrew the two halves of the housing!
The STARTER 300C does not require any maintenance other than replacement of depleted
batteries. To clean, use a damp cloth.
The housing is made of acrylonitrile butadiene styrene (ABS). This material is susceptible to
damage by some organic solvents, such as toluene, xylene and methyl ethyl ketone (MEK). Any
spillage should be immediately wiped off.
5.3 Self diagnosis
Press and hold and simultaneously until the meter displays the full screen. Each icon
blinks one after the other. This way you may check whether all icons are correctly shown. The
next step is to check that the keys are functioning correctly. This requires user interaction.
When b
b
blinks, five icons are displayed. Press the five keys in any order. Each time you press a
key an icon disappears from the screen, continue to press the other keys until all the icons have
disappeared. When the self-diagnosis has been completed successfully, PAS appears. If self-
diagnosis fails, error message Err 1 appears .
Note: You have to finish pressing all five keys within two minutes, otherwise Err 1 appears and
you will have to repeat the procedure.
5.4 Recover factory settings
When the meter is off, press and hold & & together for 3 seconds, the
screen displays “RST”and blinks, press to reset factory settings (MTC, slope and
offset, etc.).
Press to switch off the meter.
www.calcert.com sales@calcert.com1.888.610.7664 0
5
10
15
20
25
30

EN-12 STARTER 300C 300C Portable Conductivity Meter
6 TECHNICAL DATA
6.1 Specifications
Ambient conditions
xAltitude: Up to 2000 m
xSpecified Temperature range: 5°C to 40°C
xHumidity: maximum relative humidity 80 % for temperatures up to 30°C decreasing linearly to
50% relative humidity at 40°C
xInstallation category: N/A
xPollution degree: N/A
xOperability is assured at ambient temperatures between 5°C to 40°C
Model
ST300C
Measuring range
0.0 μS/cm…199.9 mS/cm
0.1 mg/l…199.9 g/l (TDS)
0 °C…100 °C
Resolution
Automatic range
0.1 °C
Error limits
± 0.5 % of the measured value
± 0.3 °C
Calibration
1 point
4 predefined standards
Memory
30 measurements
Current calibration
Power supply
4 xAAA(LR03) batteries
> 250 operating hours
Size/weight
90 W x 150 D x 35 H mm / 0.16 kg (without batteries)
Display
Liquid crystal
Input
Mini-Din
Temperature-compensation
Linear: 0.00 %/°C…10.00 %/°C
Reference temperature: 20 & 25 °C
IP protection
IP54
Housing
ABS
www.calcert.com sales@calcert.com1.888.610.7664 0
5
10
15
20
25
30

STARTER 300C Portable Conductivity Meter EN-13
6.2 Compliance
This product conforms to the EMC Directive 2004/108/EC and the Low Voltage
Directive 2006/95/EC.
In conformance with the European Directive 2002/96/EC on Waste Electrical
and Electronic Equipment (WEEE) this device may not be disposed of in
domestic waste. This also applies to countries outside the EU, per their specific
requirements. Please dispose of this product in accordance with local
regulations at the collecting point specified for electrical and electronic
equipment. If you have any questions, please contact the responsible authority
or the distributor from which you purchased this device. Should this device be
passed on to other parties (for private or professional use), the content of this
regulation must also be related.
FCC Note: This equipment has been tested and found to comply with the limits for a Class
A digital device, pursuant to part 15 of the FCC Rules. These limits are designed to provide
reasonable protection against harmful interference when the equipment is operated in a
commercial environment. This equipment generates, uses, and can radiate radio frequency
energy and, if not installed and used in accordance with the instruction manual, may cause
harmful interference to radio communications. Operation of this equipment in a residential
area is likely to cause harmful interference in which case the user will be required to correct
the interference at his own expense.
ISO 9001 Registration
In 1994, OHAUS Corporation, USA, was awarded a certificate of registration to ISO 9001 by
Bureau Veritus Quality International (BVQI), confirming that the OHAUS quality
management system is compliant with the ISO 9001 standards requirements. On June 21,
2012, OHAUS Corporation, USA, was re-registered to the ISO 9001:2008 standard.
www.calcert.com sales@calcert.com1.888.610.7664 0
5
10
15
20
25
30
EN-14 STARTER 300C Portable Conductivity Meter
7 APPENDIX
7.1 Conductivity standards
T(°C)
10 μS/cm
84 μS/cm
1413 μS/cm
12.88 mS/cm
5
6.1 μS/cm
53 μS/cm
896 μS/cm
8.22 mS/cm
10
7.0 μS/cm
60 μS/cm
1020 μS/cm
9.33 mS/cm
15
8.0 μS/cm
68 μS/cm
1147 μS/cm
10.48 mS/cm
20
9.0 μS/cm
76 μS/cm
1278 μS/cm
11.67 mS/cm
25
10.0 μS/cm
84 μS/cm
1413 μS/cm
12.88 mS/cm
30
11.0 μS/cm
92 μS/cm
1552 μS/cm
14.12 mS/cm
35
12.1 μS/cm
101 μS/cm
1667 μS/cm
15.39 mS/cm
7.2 Examples of temperature coefficients (α-value)
Substance at 25 °C
Concentration [%]
Temperature coefficient α[%/°C]
HCl
10
1.56
KCl
10
1.88
CH3COOH
10
1.69
NaCl
10
2.14
H2SO4
10
1.28
HF
1.5
7.20
α-coefficients of conductivity standards for a calculation to reference temperature of 25°C
Standard
Measurement
temp.: 15°C
Measurement
temp.: 20°C
Measurement
temp.: 30°C
Measurement
temp.: 35°C
84 μS/cm
1.95
1.95
1.95
2.01
1413 μS/cm
1.94
1.94
1.94
1.99
12.88 mS/cm
1.90
1.89
1.91
1.95
7.3 Conductivity to TDS conversion factors
Conductivity
At 25 °C
TDS KCl
TDS NaCl
ppm value
Factor
ppm value
Factor
84 μS
40.38
0.5048
38.04
0.4755
447 μS
225.6
0.5047
215.5
0.4822
1413 μS
744.7
0.527
702.1
0.4969
1500 μS
757.1
0.5047
737.1
0.4914
8974 μS
5101
0.5685
4487
0.5000
12.88 μS
7447
0.5782
7230
0.5613
15 μS
8759
0.5839
8532
0.5688
80 mS
52.168
0.6521
48.384
0.6048
www.calcert.com sales@calcert.com1.888.610.7664 0
5
10
15
20
25
30
STARTER 300C Portable Conductivity Meter EN-15
LIMITED WARRANTY
Ohaus products are warranted against defects in materials and workmanship from the date of
delivery through the duration of the warranty period. During the warranty period Ohaus will repair,
or, at its option, replace any component(s) that proves to be defective at no charge, provided that
the product is returned, freight prepaid, to Ohaus.
This warranty does not apply if the product has been damaged by accident or misuse, exposed to
radioactive or corrosive materials, has foreign material penetrating to the inside of the product, or
as a result of service or modification by other than Ohaus. In lieu of a properly returned warranty
registration card, the warranty period shall begin on the date of shipment to the authorized dealer.
No other express or implied warranty is given by Ohaus Corporation. Ohaus Corporation shall not
be liable for any consequential damages.
As warranty legislation differs from state to state and country to country, please contact Ohaus or
your local Ohaus dealer for further details.
www.calcert.com sales@calcert.com1.888.610.7664 0
5
10
15
20
25
30

STARTER 300C ES-1
Índice
1Introducción.........................................................................3
1.1 Definición de palabras de advertencia y símbolos de
advertencia................................................................................................... 3
1.2 Precauciones de seguridad ........................................................... 4
1.3 Pantalla y controles ........................................................................ 4
2Instalación............................................................................6
2.1 Contenido del paquete.................................................................... 6
2.2 Instalación de las pilas................................................................... 7
2.3 Instalación del clip para electrodo ................................................ 7
2.4 Instalación de la cubierta IP54....................................................... 7
2.5 Soporte integrado para sobremesa............................................... 8
3Ajuste....................................................................................8
3.1 Ajustar la unidad de referencia de la temperatura ...................... 8
3.2 Ajustar el valor de referencia de la temperatura.......................... 8
3.3 Ajustar el estándar de calibración................................................. 8
3.4 Ajustar el coeficiente de corrección de la temperatura .............. 8
3.5 Ajustar el factor de TDS.................................................................. 9
4Funcionamiento del STARTER 300C..................................9
4.1 Calibración....................................................................................... 9
4.1.1 Seleccionar un estándar ............................................................... 9
4.1.2 Cómo realizar una calibración....................................................... 9
4.2 Medición de la muestra ................................................................ 10
4.3 Medición de TDS ........................................................................... 10
4.4 Uso de la memoria ........................................................................ 10
4.4.1 Almacenar una lectura ................................................................ 10
4.4.2 Recuperar desde la memoria.......................................................11
4.4.3 Borrar el contenido de la memoria...............................................11
5Mantenimiento ...................................................................11
5.1 Mensajes de error...........................................................................11
5.2 Mantenimiento del conductivímetro.............................................11
5.3 Autodiagnóstico............................................................................ 12
5.4 Recuperar los valores de fábrica................................................. 12
6Datos técnicos...................................................................13
6.1 Especificaciones........................................................................... 13
7Conformidad ......................................................................14
8Apéndice ............................................................................15
8.1 Estándares de conductividad...................................................... 15
8.2 Ejemplos de coeficientes (valores α) de temperatura............... 15
8.3 Factores de conversión de la conductividad al TDS................. 15
www.calcert.com sales@calcert.com1.888.610.7664 0
5
10
15
20
25
30

STARTER 300C ES-3
1 Introducción
Gracias por comprar este conductivímetro de alta calidad de OHAUS. Para evitar el
funcionamiento incorrecto, lea el manual completamente antes de utilizar el conductivímetro
portátil STARTER 300C.
El STARTER 300C tiene una excelente relación calidad/precio y en su diseño incluye muchas
funciones útiles. Además, están también disponibles otros accesorios como electrodos o
soluciones estándar de conductividad.
En estos conductivímetros encontrará funcionalidades muy útiles. Algunas de las muchas
funciones son:
xDiseño ergonómico, funcional para mediciones ambidiestras para sobremesa
xSoporte para mesa integrado para usar en mostradores o en instalaciones
semipermanentes.
xDiseño de etiquetado integrado para identificación rápida del producto
xProtección IP54 frente al polvo y al agua
xSoftware accesible conocido de Ohaus
1.1 Definición de palabras de advertencia y símbolos de advertencia
Las indicaciones de seguridad están marcadas con palabras de advertencia y símbolos de
advertencia. Muestran cuestiones y advertencias de seguridad. Hacer caso omiso de las
indicaciones de seguridad puede provocar lesiones personales, daños en el equipo, fallos de
funcionamiento y resultados falsos.
Palabras de advertencia
ADVERTENCIA Para una situación de peligro con riesgo medio, que podría
ocasionar lesiones o la muerte si no se evita.
PRECAUCIÓN Para una situación de peligro con riesgo alto, que podría dañar el
dispositivo o la propiedad o la pérdida de datos, o lesiones si no se
evita.
Atención Para información importante sobre el producto.
Nota Para información útil sobre el producto
Símbolos de advertencia
Peligro
general
Peligro de explosión
Peligro de corrosión
±
Corriente alterna
¯
Corriente continua
www.calcert.com sales@calcert.com1.888.610.7664 0
5
10
15
20
25
30
ES-4 STARTER 300C
1.2 Precauciones de seguridad
PRECAUCIÓN: Lea todas las advertencias de seguridad antes de la instalación, conexión o
reparación del equipo. No cumplir con estas advertencias podría causar daños corporales y/o
daños en la propiedad. Guarde las instrucciones para futuras consultas.
xUtilice el equipo solo en ambientes secos.
xSeque inmediatamente cualquier líquido derramado. El instrumento no es hermético.
xCumpla las instrucciones del fabricante de productos químicos y las normas de seguridad
generales de laboratorio cuando utilice productos químicos y disolventes.
xUtilice solo los accesorios y periféricos aprobados.
xUtilice el equipo solo en las condiciones ambientales especificadas en estas instrucciones.
xNo utilice el equipo en entornos peligrosos o inestables.
xEl mantenimiento debe realizarse solamente por personal autorizado.
1.3 Pantalla y controles
Pantallas
1
Icono de estabilidad del punto final , icono de punto final automático
2
Icono de medición - , la medición o calibración se está ejecutando
3
Icono de calibración - , calibración en curso
4
Icono de ajuste - , el instrumento está en modo ajuste
5
El icono de estado de la pila muestra el estado de la pila, totalmente cargada, a media
carga o totalmente descargada
6
Factor de TDS (Total de Sólidos Disueltos) en modo ajuste
7
Conductividad/TDS/Constante celular
8
Estándar / Número de memoria / Índice de error
9
Temperatura durante la medición o temperatura de referencia en modo ajuste
1
2
3
4
5
6
8
9
7
www.calcert.com sales@calcert.com1.888.610.7664 0
5
10
15
20
25
30
This manual suits for next models
3
Table of contents
Languages:
Other OHAUS Measuring Instrument manuals

OHAUS
OHAUS CD-1 User manual

OHAUS
OHAUS STARTER 2100 User manual

OHAUS
OHAUS ST300-G User manual

OHAUS
OHAUS Defender 2000 Series User manual

OHAUS
OHAUS STARTER 5000 User manual

OHAUS
OHAUS ST20D User manual

OHAUS
OHAUS T71 Use and care manual

OHAUS
OHAUS STARTER 3100C User manual

OHAUS
OHAUS MB27 User manual

OHAUS
OHAUS TD52 User manual

OHAUS
OHAUS Defender i-DT61PW User manual

OHAUS
OHAUS MB120 User manual

OHAUS
OHAUS Defender 5000 TD52XW User manual

OHAUS
OHAUS ST20C-A User manual

OHAUS
OHAUS i-DT61XWE User manual

OHAUS
OHAUS 5000 User manual

OHAUS
OHAUS MB90 User manual

OHAUS
OHAUS a-AB33M1 User manual

OHAUS
OHAUS 2000 Series User manual

OHAUS
OHAUS MB90 User manual