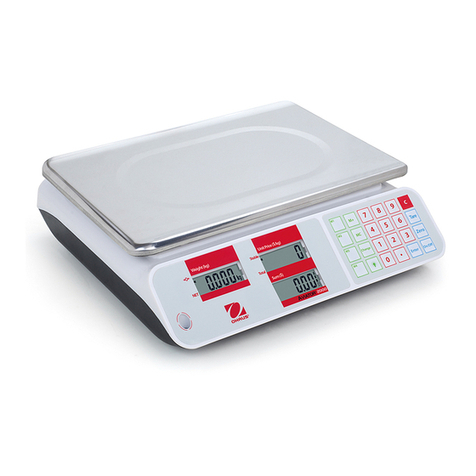
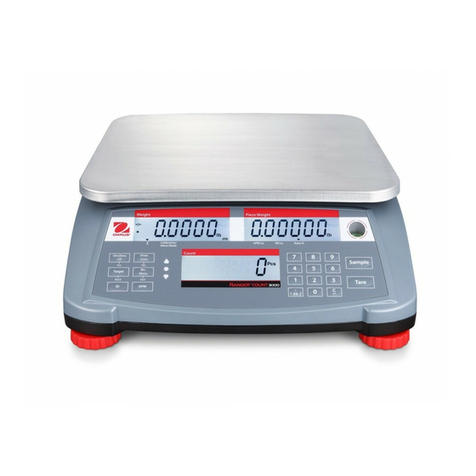
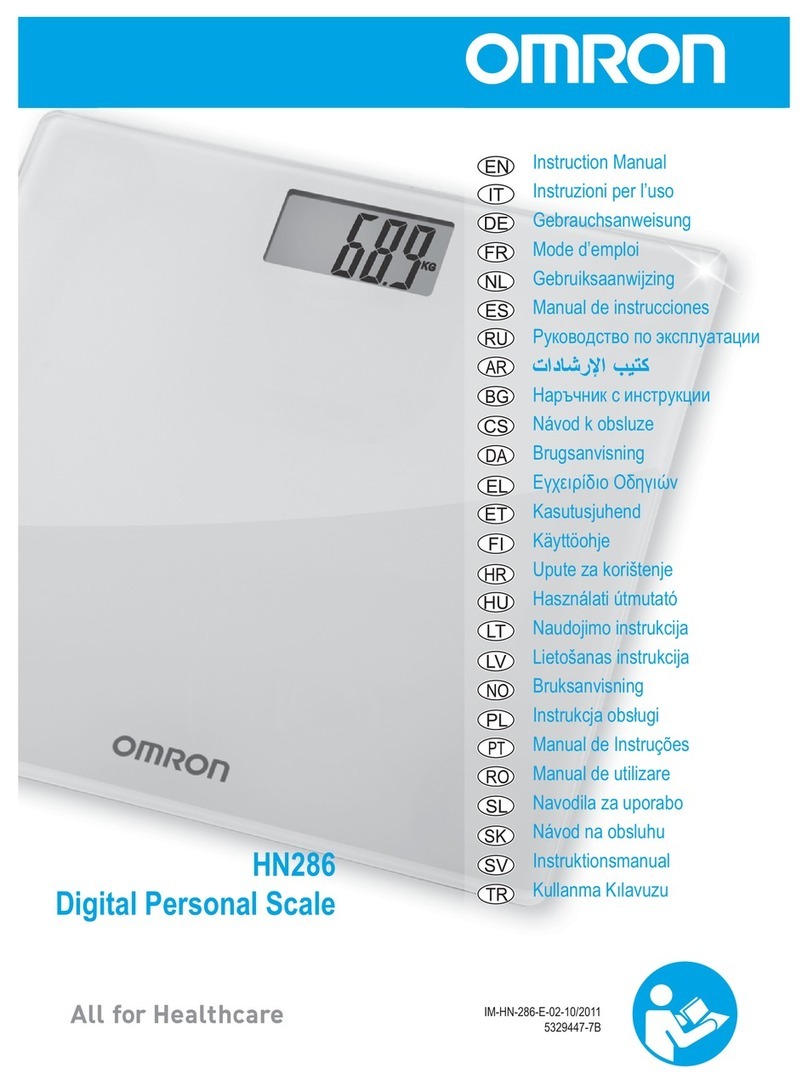
OHAUS Ranger Counting Scale User manual

Ohaus Corporation
29 Hanover Road
Florham Park, NJ
07932-0900
Operating Instructions
Ranger Counting Scale
Ranger
Clear Scale
Select Count
Weight Sample Size
10 Sample
APW
Count

Ohaus Corporation, 29 Hanover Road, Florham Park, New Jersey, 07932, USA
Declaration of Conformity We, Ohaus Corporation, declare under our sole responsibility that the balance models listed below
marked with “CE” - are in conformity with the directives and standards mentioned.
Konformitätserkärung Wir, die Ohaus Corporation, erklären in alleiniger Verantwortung, dass die untenstehenden
Waagentypen, gekennzeichnet mit “CE” - mit den genannten Richtlinien und Normen übereinstimmen.
Déclaration de conformité Nous, Ohaus Corporation, déclarons sous notre seule responsabilité, que les types de balance ci-
dessous cité - munis de la mention «CE» - sont conformes aux directives et aux normes mentionnées ci-après.
Declaración de Conformidad Nosotros, Ohaus Corporation, declaramos bajo responsabilidad exclusiva que los modelos de
balanzas indicados a continuación - con el distintivo ,CE’ - están conformes con las directivas y normas citadas.
Dichiarazione di conformità Noi, Ohaus Corporation, U.S.A, dichiariamo sotto nostra unica responsabilità, che i tipi di bilance
specificati di seguito - contrassegnati con la marcatura “CE” - sono conformi alle direttive e norme citate.
Balance Type/Waagentyp/Type de balance/Tipo de balanza/Tipo di bilancia Ranger Scale
Marked with: Directive Standard
gekennzeichnet mit: Richtlinie Norm
munis de la mention: Directive Norme
con el distintivo: Directiva Norma
contrassegnati con la Direttiva Norma
marcatura:
EU 73/23/EEC Low Voltage EN61010-1:1993 + A2: 1995 Safety Regulations
EU 73/23/EEC Niederspannung EN61010-1:1993 + A2: 1995 Sicherheitsbestimmungen
EU 73/23/EEC Basse tension EN61010-1:1993 + A2: 1995 Consignes de sécurité
EU 73/23/EEC Baja tensión EN61010-1:1993 + A2: 1995 Disposiciones sobreseguridad
EU 73/23/EECBassatensione
EN61010-1:1993 + A2: 1995 Prescrizioni di sicurezza
EU 89/336/EEC EN55011: 1991 (class B) Emissions; EN61000-3-2
Electromagnetic compatibility EN50082-2:1995 Immunity; EN61000-3-3
EU 89/336/EEC EN55011: 1991 (class B) Funkstörungen; EN61000-3-2
elektromagnetische Verträglichkeit EN50082-2:1995 Immunität; EN61000-3-3
EU 89/336/EEC EN55011: 1991 (class B) Emissions parasites; EN61000-3-2
Compatibilité électromagnétique EN50082-2:1995 Immunité; EN61000-3-3
EU 89/336/EEC EN55011: 1991 (class B) Radiointerferencias; EN61000-3-2
Compatibilidad electromagnética EN50082-2:1995 Inmunidad; EN61000-3-3
EU 89/336/EEC EN55011: 1991 (class B) Radiointerferenze; EN61000-3-2
Compatibilità elettromagnetica EN50082-2:1995 Immunità; EN61000-3-3
Year of
attachment of
the CE mark
Jahr der ersten
Eichung
Année de la
premère
vérification
Año de la
primera
verificación
annodella
prima verifica
ISO9001Registrationfor Ohaus Corporation. OhausCorporation,USA,wasexaminedand evaluatedin1994bythe BureauVeritasQuality International,
BVQI,andwasawardedISO9001registration. ThiscertifiesthatOhausCorporation,USA,hasaqualitysystemthatconformswiththeinternationalstandardsforquality
managementandqualityassurance(ISO9000series). RepeatauditsarecarriedoutbyBVQIatintervalstocheckthatthequalitysystemisoperatedinthepropermanner.
ISO9001-Zertifikat für OhausCorporation. Die FirmaOhausCorporation,USA, wurde1994durch dasBureauVeritasQuality InternationalBVQIgeprüft,und
erhieltdasISO9001Zertifikat. Diesesbescheinigt,dassOhausCorporation,USAübereinQualitätssystemverfügt,welchesdeninternationalenNormenfür
QualitätsmanagementundQualitátssicherung(ISO9000er-Reihe)entspricht. Anlässlich vonWiederhol-AuditsdurchdasBVQI wirdperiodischüberprüft,obdas
Qualitätssystemzweckmässiggehandhabtwird.
Certificat ISO 9001pour Ohaus Corporation. LasociétéOhaus Corporation,USA,aété contrôléeen1994par BureauVeritasQualityInternationalBVQIeta
obtenulecertificat,degréISO9001. Celui-ciattestequeOhausCorporation,USA,disposed’unsystèmequalitécorrespondant auxnormesinternationalespourlagestion
delaqualitéetpourI’assurancequalité(degréISO9000). DesauditsrégulierseffectuésparlaBVQIvérifientsilesystèmequalitéestappliquédefaconappropriée.
Certificado ISO 9001para Ohaus Corporation. Lafirma OhausCorporation,USA, hasidoinspeccionadaporlaBureauVeritasQualityInternational(BVQI)y
haobtenidoelcertificadoISO9001. Esto acreditaque OhausCorporation,USA,disponede unsistemadecalidadque cumplelas normasinternacionalesparagestión
ygarantfadecalidad(ISOserie9000). ConocasióndelasinspeccionesderepetibilidadporpartedelaBVQI,secompruebaperiódicamentesielsistemadecalidadse
manipuladeformacorrecta.
CertificatoISO 9001per laOhaus Corporation. llsistemadigaranziadellaqualitàdellaSocietàOhausCorporation,USAè certificatoISO9001sindal 1994dal
BureauVeritasQualityInternationalBVQI,ecosìfomisceladimostrazionecheilsuosistemadiGaranziaQualitàsoddisfaimassimirequisiti.VerificheperiodichedelBVQI
garantisconoche il sistema qualit
àopera correttamente.
00
122 M
1) applies only to certified balances/scale
1) 1)
EU 90/384 NAWI EN45501:1992 Non Automatic Weighing Instruments
EU 90/384 FNSW EN45501:1992 Für nicht selbsttätige Waagen
EU 90/384 BFNA EN45501:1992 Balances à fonctionnement non automatique
EU 90/384 PBNA EN45501:1992 Para balanzas no automátäcas
EU 90/384 BFNA EN45501:1992 Per bilance a funzionamento non automatics

NOTE: THIS EQUIPMENT HAS BEEN TESTED AND FOUND TO COMPLY WITH THE LIMITS FOR A CLASS A
DIGITAL DEVICE, PURSUANT TO PART 15 OF THE FCC RULES.
THESE LIMITS ARE DESIGNED TO PROVIDE REASONABLE PROTECTION AGAINST HARMFUL INTERFER-
ENCE WHEN THE EQUIPMENT IS OPERATED IN A COMMERCIAL ENVIRONMENT. THIS EQUIPMENT GEN-
ERATES, USES, AND CAN RADIATE RADIO FREQUENCY ENERGY AND, IF NOT INSTALLED AND USED IN
ACCORDANCE WITH THE INSTRUCTION MANUAL, MAY CAUSE HARMFUL INTERFERENCE TO RADIO COM-
MUNICATIONS. OPERATION OF THIS EQUIPMENT IN A RESIDENTIAL AREA IS LIKELY TO CAUSE HARMFUL
INTERFERENCE IN WHICH CASE THE USER WILL BE REQUIRED TO CORRECT THE INTERFERENCE AT HIS
OWN EXPENSE.
THIS DIGITAL APPARATUS DOES NOT EXCEED THE CLASS A LIMITS FOR RADIO NOISE EMISSIONS FROM
DIGITAL APPARATUS AS SET OUT IN THE INTERFERENCE-CAUSING EQUIPMENT STANDARD ENTITLED
DIGITAL APPARATUS, ICES-003 OF THE DEPARTMENT OF COMMUNICATIONS.
CET APPAREIL NUMERIQUE RESPECTE LES LIMITES DE BRUITS RADIOELECTRIQUES APPLICABLES AUX
APPAREILS NUMERIQUES DE CLASSE A PRESCRITES DANS LA NORME SUR LE MATERIEL BROUILLEUR :
APPAREILS NUMERIQUES, NMB-003 EDICTEE PAR LE MINISTRE DES COMMUNICATIONS.
Unauthorized changes or modifications to this equipment are not permitted.

4
Contents
OVERVIEW OF CONTROLS .................................................................................................................. 6
1. INTRODUCTION ................................................................................................................................8
1.1 Introduction ...................................................................................................................................... 8
1.2 Overview of the scale ......................................................................................................................... 8
2. INSTALLATION .................................................................................................................................. 9
2.1 Unpacking and checking the standard contents .................................................................................... 9
2.2 Safety considerations ......................................................................................................................... 9
2.3 Locating and leveling the scale ......................................................................................................... 10
2.4 Connecting power ........................................................................................................................... 10
2.5 Battery operation ............................................................................................................................. 11
2.6 Connecting communications ............................................................................................................ 11
2.7 Connecting a second scale for piece counting .................................................................................... 12
3. OPERATION .................................................................................................................................... 13
3.1 Menu structure ................................................................................................................................ 13
3.2 Switch functions .............................................................................................................................. 15
3.3 Menu operation ............................................................................................................................... 16
3.4 Turning on the scale and zeroing ...................................................................................................... 17
3.5 Basic weighing ............................................................................................................................... 17
3.6 Weighing with tare .......................................................................................................................... 18
3.7 Gross/Net/Tare recall operation ......................................................................................................... 18
3.8 Unit switch operation ....................................................................................................................... 19
3.9 Counting pieces into a container ....................................................................................................... 19
3.10 Counting pieces out of a container .................................................................................................... 20
3.11 Automatic reference optimization ....................................................................................................... 20
3.12 Adding mode .................................................................................................................................. 20
3.13 Piece counting with 2-scale systems ................................................................................................. 21
4. SETTING UP YOUR SCALE ............................................................................................................... 22
4.1 Overview ........................................................................................................................................ 22
4.2 Setup menu .................................................................................................................................... 22
4.3 Read menu..................................................................................................................................... 23
Contents

5
Contents
4.4 RS232-1 / RS232-2 menus ............................................................................................................. 24
4.5 Lockout menu ................................................................................................................................. 25
4.6 Quit menu ...................................................................................................................................... 26
5. CALIBRATION AND SEALING ............................................................................................................ 27
5.1 Calibration masses.......................................................................................................................... 27
5.2 Calibration ...................................................................................................................................... 28
5.3 Unlocking the menus ....................................................................................................................... 28
5.4 Weights and measures sealing ......................................................................................................... 29
6. CARE AND MAINTENANCE ............................................................................................................... 30
6.1 Troubleshooting .............................................................................................................................. 30
6.2 RS232 Interface .............................................................................................................................. 31
6.3 Error codes list ................................................................................................................................ 33
6.4 Service information .......................................................................................................................... 33
6.5 Accessories .................................................................................................................................... 33
6.6 Specifications.................................................................................................................................. 33

6
Ranger
Clear Scale
Select Count
Weight Sample Size
10 Sample
APW
Count
1
Overview of controls
1
2
3
5
6
7
8
9 10a 11 12 13 14
15 16
24
Rear of scale
Display
kg %Pcs
Com
tbz NET B/G
12 12
%
Auto Opt
050 100
17 18
19
20
21
22
23
Clear APW Scale
Select Count
Weight Sample
10 Sample
Size
4
25 26 27 28 29 30
Function keys
10b

7
Scale
1Keypad
2Function keys
3Display
4Scale specifications
5Weighing pan
6Power cord
7Power cord with AC Adapter (Scale with internal
battery optional)
8Adjustable feet
Rear of scale
9Jack for AC Adapter (battery)
10a Serial # label (Europe)
10b Serial # label (USA) under weighing platform
11 Hole for antitheft device
12 Spirt level
13 RS232 Interface (Optional)
14 RS232 Interface (Standard)
Display
15 Stability indicator
16 Active interface (for menu mode)
17 Active scale (in 2-scale syytems)
18 Weighing range display (for dual range scales)
19 Symbols for net/gross weight
20 Battery discharge status (optional battery)
21 Weighing unit
22 Number of user selected reference pieces
23 Weighing range bar graph
24 Center of zero
Function keys
25 Clear APW and return to weighing.
26 Average Piece Weight - one piece reference is
displayed for 3 seconds.
27 If two scales are connected, this button switches
the display between the host scale and the
remote scale. Tare, Zero and G/N/T buttons
functions are active for the scale being displayed.
28 Switching from Weighing to Counting Mode.
29 Ten pieces sample size/ 10 pieces on the scale.
30 Continuous press - scrolls through 5, 15, 20, 25,
30, 50 and 100 pieces - sample size.
Short press - take sample size as indicated on
the display.

8
Thank you for deciding to purchase a Ranger Counting Scale from Ohaus. Behind your instrument stands
OHAUS, a leading manufacturer of precision Scales, Moisture Analyzers, Balances, and Indicators. An Aftermar-
ket Department with trained instrument technicians is dedicated to provide you with the fastest service possible
in the event your instrument requires servicing. OHAUS also has a Customer Service Department to answer any
inquiries regarding applications and accessories.
To ensure you make full use of the possibilities offered by your new Ranger Counting Scale, please read the
manual completely before installation and operation.
The Ranger Counting Scale offers a high level of operating convenience and useful functions to make accurate
measurements.
The Ranger Counting Scale has the following features:
Extremely rugged cast aluminum case and chemically resistant paint finish construction.
Weighing pan constructed of stainless-steel.
Fully programmable with front panel controls.
Ergonomic operating controls and a large, easily readable display.
Easy to follow menus for simplified operation.
Lockout feature prevents inadvertent changing of menu settings.
Back lit display.
Gross, Net, Tare operation.
Selectable graduations.
Auto zero operation.
Auto tare operation.
Piece counting.
Automatic reference optimization.
Piece counting with two scales.
Built-in leveling feet and level indicator.
Built-in functions for manual and, automatic timing of printing intervals.
Built-in RS232 communication interface (and optional additional channel).
Optional built-in battery operation .
Up to 30 hours continuous operation with optional battery.
Legal for trade operation.
Calibration with either kg or lb.
A variety of accessories includes interface communication cables, printer, and a security device.
Section 1 - Introduction
1.1 Introduction
1.2 Overview of the scale

9
In this section, you will learn how you unpack and install your new Ranger Counting Scale and prepare it for
operation. On completion of the steps described in this section, your Scale is ready for operation.
Remove packing material from the instrument.
Check the instrument for transport damage. Immediately inform your
Ohaus dealer if you have complaints or parts are missing.
Store all parts of the packaging. This packaging guarantees the best
possible protection for the transport of your instrument.
Open the package and remove the instrument and the accessories.
Check the completeness of the delivery. The following accessories are
part of the standard equipment of your new scale.
1 Removable power cable (supplied only with battery operated
scales)
1 Set of operating instructions
1 Warranty card
2.1 Unpacking and checking contents
Your scale employs state of the art technology and meets the latest
demands regarding instrument safety. For safe and dependable opera-
tion, please comply with the following instructions:
The Scale must not be operated in a hazardous environment and
only under ambient conditions specified in these instructions.
Only use approved accessories and peripherals.
Do not tamper with the retaining screws for the load plate support
underneath the weighing pan.
It is not permitted to open the scale by removing screws in its base.
The scale is a precision instrument, handle it carefully,
Your scale is supplied with a 3-pin power cable with an equipment
grounding conductor. Only extension cables which meet the relevant
standards and also have an equipment grounding conductor may
be used. Intentional disconnection of the equipment grounding
conductor is prohibited.
2.2 Safety considerations
Section 2 - Installation

10
2.3 Locating and leveling the scale
2.4 Connecting power
The scale should always be used in an environment which is free from
excessive air currents, corrosives, vibration, and temperature or humidity
extremes. These factors will affect displayed weight readings.
DO NOT install the scale:
Next to open windows or doors causing drafts or rapid temperature
changes.
Near air conditioning or heat vents.
Near vibrating, rotating or reciprocating equipment.
Near magnetic fields or equipment that generate magnetic fields.
On an unlevel work surface.
In confined areas, allow sufficient space around the instrument for
ease of operation and keep away from radiating heat sources.
Adjust the leveling feet so that the scale is exactly horizontal and the
air bubble in the indicator is centered.
NOTE: The instrument should be leveled each time its location is
changed.
Check to ensure the voltage printed on the scale label matches your local
line voltage. If this is not the case, DO NOT connect the scale to the
power supply, but contact your responsible OHAUS dealer.
Connect the power cord from the scale to a suitable power source. If the
scale is equipped with an optional internal battery, connect the AC cord
supplied to the rear of the scale.
Allow your scale to warm up for at least 30 minutes to enable it to
adapt itself to the ambient conditions. If the scale has been stored in a
very cold environment before installation, it may require several hours to
stabilize.
The scale now performs a self-test, loads parameters, displays the
software version, capacity, and the normal weight display then appears.
Ranger
ClearScale
Select Count
WeightSample Size
10Sample
APW
Count
Ranger
Clear Scale
Select Count
Weight Sample Size
10 Sample
APW
Count
Ranger
ClearScale
Select Count
Weight Sample Size
10 Sample
APW
Count

11
2.5 Battery operation
The scale is equipped with one bi-directional RS232 interface for commu-
nication with printers and computers. When the scale is connected
directly to a printer, displayed data can be output at any time by simply
pressing the PRINT UNITS button or by using one of the RS232 Mode
print features. (A second optional RS232 interface is also available).
Connecting the scale to a computer or printer enables you to operate the
scale from the computer, as well as receive data such as displayed
weight, weighing mode, stability status, etc. and to have a permanent
printed record.
On the rear of the scale, a 9-pin male subminiature D connector is
provided for interfacing to other devices. Table below indicates pin
connections.
1N/C
2 Data Out (TXD)
3 Data In (RXD)
4N/C
5 GND
6N/C
7N/C
8N/C
9N/C
See Accessories listed in paragraph 6.5. Connect a suitable cable from
the scale to the external device.
Review paragraph 6.2, RS232 Interface for additional information regard-
ing formats and command table.
(See rear of balance)
12345
6789
2.6 Connecting communications
Scales with a built-in battery automatically switch to battery operation if
there is a power failure or the power cord is removed. The battery symbol
indicates the current discharge status of the battery (1 segment = 25%
capacity). If the symbol flashes, the battery must be recharged.
A discharged battery requires at least 8 hours until it is recharged. During
the charging process, work with the scale can continue, but under these
conditions, a longer charging time is needed.
In normal use, the battery can operate the scale for up to 30 hours
independent of the AC power line. The battery is protected against
overcharging and the scale can remain connected to the AC power line.

12
2.7 Connecting a second scale for piece counting
The RS connector(s) on the rear of the scale can also be used to connect
2 scales, together for a counting system. Use the scale - to - scale cable
listed in the accessory section.
Connect the cable between the scales.
The host scale (scale 1) must be a Ranger Count. In the RS menu of the
host MODE should be set to:
REF 2 If remote scale is used for average
piece weight reference.
BULK 2 If remote scale will be the bulk counting
scale.
The remote Ranger Scale can be a Ranger Count or Ranger simple
weighing. The remote scale should be set to DIALOG in the Mode sub
menu.

13
Section 3 - Operation
CALIBRATION
Setup
reset
YES, NO
LFT
ON, OFF, CAN
quit
Cal Un
kg, lb
quit
Grad
0.0005, 0.001,
0.002, 0.005,
0.0001,0.0002,
quit
APPL IC
Stand
Fill
quit
Bac lt
ON,OFF
quit
Aut Opt
ON,OFF
A-Add
ON,OFF
List
End set
Read
reset
YES, NO
Al
med
high
low
quit
Unit 1
Unit 1LB , Unit 1g, Unit 1kg,
Unit 1 OZ
quit
Unit 2
Unit 2LB , Unit 2g, Unit 2kg,
Unit 2 OZ
quit
Azt
0.5d, 1d, 3d, OFF
quit
A-t
OFF, ON
quit
Aot
YES, NO
quit
Rzd
OFF, ON
quit
End rd
CAL
Span
-0-
(full capacity weight)
-done-
Lin
-0-
(50% capacity weight)
(100% capacity weight)
-done-
EndCAL
The following table illustrates the first three menus in the Ranger Scale. The Main Menu contains 7 sub menus.
The remaining menus appear on the next page.
3.1 Menu structure
SETUP READ
Can be viewed but not changed when LFT is ON.

14
Loc
Cal
ON, OFF
quit
Setup
ON, OFF
quit
Read
ON, OFF
quit
RS232-1
ON, OFF
quit
RS232-2
ON, OFF
quit
Locset
ON, OFF
quit
Endloc
quit
Store ?
rs232-1 Com 1
reset
YES, NO
Mode
Print, On Stb, Stb
only, Cont, Dialog,
Disp 2, Ref 2, Bulk2
quit
baud
300,600,1200, 2400,
4800, 9600, 19200,
quit
Parity
7 even, 7 no p,
8 no p, 7 odd
quit
Stop
1, 2
quit
Handsh
YES, NO
quit
Defstr
Header
ON, OFF
Gross
ON, OFF
Net
ON, OFF
Tare
ON, OFF
PCS
ON, OFF
APW
ON, OFF
REF CT
ON, OFF
4 L INF
ON, OFF
F Feed
ON, OFF
LN For
Single, multi,
End rs1
QUIT
3.1 Menu structure
RS232-1 RS232-2 LOCKOUT
Quit
Store ?
rs232-2 Com 2
reset
YES, NO
Mode
Print, On Stb, Stb
only, Cont, Dialog,
Disp 2, Ref 2, Bulk2
quit
baud
300,600,1200, 2400,
4800, 9600, 19200,
quit
Parity
7 even, 7 no p,
8 no p, 7 odd
quit
Stop
1, 2
quit
Handsh
YES, NO
quit
Defstr
Header
ON, OFF
Gross
ON, OFF
Net
ON, OFF
Tare
ON, OFF
PCS
ON, OFF
APW
ON, OFF
REF CT
ON, OFF
4 L INF
ON, OFF
F Feed
ON, OFF
LN For
Single, multi,
End rs2

15
3.2 Switch functions
There are two sets of button switches located on the front panel of the scale. The six button switches located
directly under the display are used for counting functions. The four button switches located below the six
switches provide basic scale operation and menu setups. Please read the following information before pressing
any of these buttons.
Clear APW Scale
Select Count
Weight Sample
10 Sample
Size
BUTTONS FUNCTION
Clear Short press -Average Piece Weight (APW) is cleared and scale returns to weighing mode.
APW Short press - Average Piece Weight - one piece reference weight is displayed for 3 seconds.
Scale Switches the display between scale 1 (host) and scale 2 (remote). If 2 scales are connected,
Select the functions zero, G/N/T & tare will be executed on the scale that is currently on the host LCD.
Count Short press - Switches from weighing to counting mode.
Weight
Sample 10 Short press - Takes average piece weight for a sample size of 10.
Sample Size Long press and hold - scrolls through 5, 15, 20, 25, 30, 50 and 100 pieces - sample size.
Short press - sample number of pieces shown in display.
G/N/T
MENU TARE
PRINT
UNITS
BUTTONS PRIMARY FUNCTION SECONDARY FUNCTION
ON/ZERO Short press - Turns scale ON if OFF. When scale is ON, short press zeros the scale.
OFF Long press - Turns scale OFF if ON.
PRINT Short press - Sends PRINT command. When in MENU MODE: short press = NO.
UNITS Long press - Changes UNITS.
G/N/T Short presses - Gross/Net/Tare. When in MENU MODE: short press = YES.
MENU No action for 5 secs., scale returns NET.
Long press - Enter MENU.
TARE Short press - enter TARE.
ON/ZERO
OFF

16
In this section, you will learn how to work with the menu. The menu allows you to match your scale to your
specific weighing needs. In the menu, you can change the settings of your scale and activate functions. The
Main Menu contains 7 sub menus. Each of the seven sub menus are described in detail in the following
sections.
3.3 Menu operation
How to enter the menus
To enter the menus, press and hold the G/N/T MENU button until CAL
appears. This is the first menu, CALIBRATION.
G/N/T
MENU
How to enter an individual menu
A short press on the G/N/T MENU button = YES and you can enter a
specific menu.
(Long press)
G/N/T
MENU (Short press=YES)
CALIBRATION SETUP READ RS232-1 RS232-2 LOCKOUT QUIT
How to enter an individual menu item
When in any menu, a short press on the G/N/T MENU button = YES and
you can enter a specific menu item. To advance through a given menu,
make short presses on the PRINT UNITS =NO button.
PRINT
UNITS
PRINT
UNITS
A short press on the PRINT UNITS button = NO. When in MENU MODE
short presses will advance to the next menu as shown above. When
QUIT is reached, the next press on the PRINT UNITS button will return to
the CALIBRATION menu.
(Short press= NO)
How to select a specific menu
G/N/T
MENU

17
How to save and store an individual menu item
When a menu item has been changed once the desired selection is
shown, make a short press on G/N/T MENU button, Quit appears on the
display. If NO is selected by pressing the PRINT UNITS button, the next
menu item appears. If yes is selected by pressing G/N/TMENU, StorE?
appears. Pressing the G/N/T MENU button will store the change and
return the scale to a weighing mode. If NO is selected, the menu change
is ignore and scale is returned to weighing mode.
PRINT
UNITS
A short press on the PRINT UNITS button = NO. When in MENU MODE,
short presses will advance through the menus until QUIT is reached. To
quit, make a short press on the G/N/T MENU button, StorE? appears,
answer YES to save and scale returns to a weighing mode, or NO to
ignore changes and continue.
How to quit the menus
G/N/T
MENU
Briefly press the ON/ZERO OFF button to turn the scale ON.
The scale performs a display test routine and then is ready for weighing.
Briefly press the ON/ZERO OFF button again to zero the display. When
O is displayed in the lower left of the display, the scale is at the center of
zero.
3.4 Turning on the scale and zeroing
ON/ZERO
OFF
3.5 Basic weighing
Place the object to be weighed on the scale.
Wait until the stability indicator (an asterisk in the upper left corner of the
display) appears, then read the indicated weight.
The bar graph at the bottom of the display indicates the capacity range.
kg
11
%
Auto Opt
050 100
kg
12
%
Auto Opt
050 100
kg
12
%
Auto Opt
050 100
G/N/T
MENU
PRINT
UNITS
Clear Select Weight 10
APW Size
Sample
Ranger

18
3.6 Weighing with tare
Place an empty weighing container or packaging on the scale.
Press the TARE button briefly to tare the scale. The zero display and NET
(net weight) symbol appear. Items to be weighed can now be placed on
the platform. The weight of the tared item (container) is automatically
subtracted and the weight of the item is displayed. If the container is also
removed, the scale will indicate a negative number which represented the
tared weight. To clear this, press the TARE button.
NOTE: If the AUTO TARE (A-t) function has been activated in the READ
menu, there is no need to press the TARE button
TARE
3.7 Gross/Net/Tare recall operation
When a container has been placed on the scale and tared, its weight is
stored in memory. Adding material to the container is shown as NET
weight. The gross weight is a combination of the tared weight and the
material. The G/N/T Menu button allows switching between GROSS, NET
and TARE weights.
Repeately press (short presses) the G/N/T Menu button to cycle through
Gross, Tare and Net readings. The sample illustrations indicate a tare
weight of 0.020kg representing a container, a net weight of 1.000kg
which would be the material in a container and a gross weight of
1.020kg which is the total weight of the container and material. After 5
seconds, display returns to net weighing.
NOTE: The display uses symbols for NET and Tare. NET=NET, T=Tare.
Gross=B/G.
G/N/T
MENU
kg
NET
11
%
Auto Opt
050 100
kg
T
11
%
Auto Opt
050 100
kg
B/G
11
%
Auto Opt
050 100
kg
NET
11
%
Auto Opt
050 100
Ranger
Clear Select Weight 10
APW Size
Sample
Ranger
Clear Select Weight 10
APW Size
Sample

19
3.8 Unit switch operation
When the Read menu Unit 1 and Unit 2 have been set to either g, kg, oz
or lb, you may press and hold the PRINT UNITS button to select one of
the preset units. See Read Menu for selecting units.
PRINT
UNITS
3.9 Counting pieces into a container
Read this procedure entirely before counting pieces. Piece counting can
be further enhanced using menu selections in the Setup menu.
if you are using a weighing container, place the empty container on the
pan and tare the scale with the TARE button.
Press the CLEAR button.
Place the desired number of sample pieces in the container. Increased
sample size results in better results.
If you have placed 10 pieces in the container, short press the
SAMPLE 10 button.
or
If you elect to use a higher number of samples, press and hold
the SAMPLE SIZE button. To scroll thru the choices NO, 5, 15,
20, 25, 30, 50, 100 pieces, release button when desired sample
size is displayed.
Piece counting can be made considerably more accurate with the
additional function Automatic Reference Optimization (Section 3.11).
When the number of pieces is currently displayed, pressing the APW
button (average piece weight), the average weight of one piece is
displayed for 5 seconds and returns to number of pieces.
Pressing the Count Weight button displays the weight of the pieces.
Pressing the Count weight button again returns to number of pieces.
If Add mode (Section 3.12) is activated, the minimum number of refer-
ence pieces necessary with small components is ensured automatically.
TARE
Clear
Pcs
11
%
Auto Opt
050 100
kg
11
%
Auto Opt
050 100
lb
11
%
Auto Opt
050 100
APW Count
Weight
g Pc
11
%
Auto Opt
050 100
kg
NET
11
%
Auto Opt
050 100
Ranger
Clear Select Weight 10
APW Size
Sample

20
3.10 Counting pieces out of a container
Put container full of parts on scale and press the Tare button.
Count out pieces equal to the sample size and press the Sample Size
button.
Number of pieces removed from the container are displayed as a nega-
tive number.
Auto optimization and ADD Mode are supported for Counting Out.
TARE
3.11 Automatic reference optimization
Automatic reference optimization results in more accurate counting on
piece counting duties. This function can be activated or deactivated in
the Setup menu. The factory default setting is ON.
Automatic reference optimization requires no action on the part of the
operator. The Auto Opt symbol appears in the lower right hand side of
the display when this function is active.
Operation:
In order to optimize the calculated reference piece weight automatically, a
number of pieces less than or equal to the number of reference pieces
already on the pan are added to it. The message AUt OPt appears in the
display and automatic weight optimization is carried out. This process
can be repeated several times.
Pcs
11
%
Auto Opt
050 100
3.12 Add mode
Add mode ensures that the number of reference pieces used on piece
counting applications is not too small, which could produce inaccurate
results. This function is activated in the Setup menu. The factory default
setting is OFF.
If you have activated add mode and the number of pieces placed on the
pan is too small for accurate determination of the reference weight, you
are prompted to place more pieces on the scale (e.g. 2 pieces).
Place the stipulated number of pieces on the pan. The scale then deter-
mines the reference weight.
Pcs
NET
11
%
Auto Opt
050 100
Sample
Size
NET
11
%
Auto Opt
050 100
This manual suits for next models
5
Other OHAUS Scale manuals

OHAUS
OHAUS PR Series User manual

OHAUS
OHAUS ES50R User manual

OHAUS
OHAUS CS 200 User manual

OHAUS
OHAUS Valor 1000 User manual

OHAUS
OHAUS EC Series User manual

OHAUS
OHAUS ES series User manual

OHAUS
OHAUS Valor 1000 User manual

OHAUS
OHAUS CS 2000 User manual

OHAUS
OHAUS YS202 User manual

OHAUS
OHAUS ES series User manual

OHAUS
OHAUS Valor 1500 Series User manual

OHAUS
OHAUS Emerald Series User manual

OHAUS
OHAUS Scout SJX User manual

OHAUS
OHAUS valor 5000 series User manual

OHAUS
OHAUS Ranger RD User manual

OHAUS
OHAUS 5000 User manual

OHAUS
OHAUS Adventurer AX User manual

OHAUS
OHAUS RS Series User manual

OHAUS
OHAUS Scout pro User manual

OHAUS
OHAUS CKW3R User manual