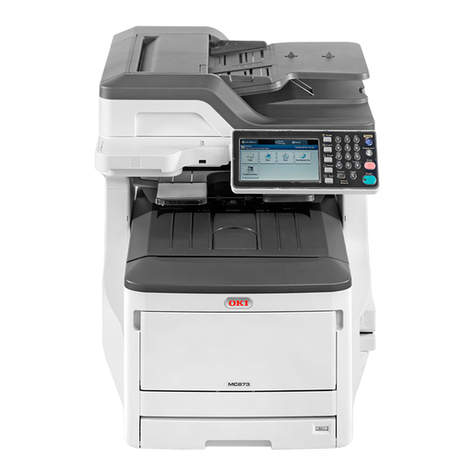
Oki CX4545 MFP User manual

MULTIFUNCTIONAL DIGITAL COLOR SYSTEMS/
MULTIFUNCTIONAL DIGITAL SYSTEMS
Operator’s Manual
for FAX Unit
ES9160 MFP/ES9170 MFP
ES9460 MFP/ES9470 MFP
CX3535 MFP/CX4545 MFP

©2012 Oki Data Corporation All rights reserved
Under the copyright laws, this manual cannot be reproduced in any form without prior written permission of Oki Data.

Preface 1
Preface
Thank you for purchasing the Oki FAX Unit GD-1250/GD-1260.
This Operator's Manual describes how to use the fax functions, troubleshooting and its maintenance, etc.
Before using the fax functions, thoroughly read and understand this Operator's Manual. To ensure that the fax functions
are used in optimum working conditions, keep this Operator's Manual in a handy place for future reference.

2 Before Reading This Manual
Before Reading This Manual
How to read this manual
Symbols in this manual
In this manual, some important items are described with the symbols shown below. Be sure to read these items before
using this equipment.
Other than the above, this manual also describes information that may be useful for the operation of this equipment with
the following signage:
Explanation for control panel and touch panel
The details on the touch panel menus may differ depending on the operating environment such as whether options are
installed.
The illustration screens used in this manual are for paper in the A/B format. If you use paper in the LT format, the
display or the order of buttons in the illustrations may differ from that of your equipment.
Description of original/paper direction
Paper or originals of A4, B5 or LT size can be placed either in a portrait direction or in a landscape direction. In this
manual, “-R” is added to this paper size when this size of paper or original is placed in a landscape direction.
Example: A4 size original on the original glass
Paper or originals of A3, B4, LD or LG can only be placed in a landscape direction, therefore “-R” is not added to these
sizes.
Trademarks
The company names and product names in this manual are the trademarks of their respective companies.
Accessories
Accessories Provided for GD-1250
Modular cable: 1
Operator's Manual: 1
Indicates a potentially hazardous situation which, if not avoided, could result in death, serious
injury, or serious damage, or fire in the equipment or surrounding objects.
Indicates a potentially hazardous situation which, if not avoided, may result in minor or moderate
injury, partial damage to the equipment or surrounding objects, or loss of data.
Indicates information to which you should pay attention when operating the equipment.
Describes handy information that is useful to know when operating the equipment.
Pages describing items related to what you are currently doing. See these pages as required.
Placed in a portrait direction: A4 Placed in a landscape direction: A4-R

General Precautions 3
General Precautions
Disclaimer notice
The following notice sets out the exclusions and limitations of liability of Oki Data Corporation (including its employees,
agents and sub-contractors) to any purchaser or user (hereafter “User”) of the ES9160 MFP/ES9170 MFP/ES9460 MFP/
ES9470 MFP/CX3535 MFP/CX4545 MFP, including its accessories, options and bundled software (hereafter “Product”).
1. The exclusion and limitations of liability referred to in this notice shall be effective to the fullest extent permissible at
law. For the avoidance of doubt, nothing in this notice shall be taken to exclude or limit Oki Data Corporation’s liability
for death or personal injury caused by Oki Data Corporation’s negligence or Oki Data Corporation’s fraudulent
misrepresentation.
2. All warranties, conditions and other terms implied by law are, to the fullest extent permitted by law, excluded and no
such implied warranties are given or apply in relation to the Products.
3. Oki Data Corporation shall not be liable for any loss, cost, expense, claim or damage whatsoever caused by any of the
following:
- use of handling of the Product otherwise than in accordance with the manuals, including but not limited to the
Operator’s Manual, User’s Guide, and/or incorrect or careless handling or use of the Product;
- any cause which prevents the Product from operating or functioning correctly which arises from or is attributable to
either acts, omissions, events or accidents beyond the reasonable control of Oki Data Corporation including
without limitation acts of God, war, riot, civil commotion, malicious or deliberate damage, fire, flood, or storm,
natural calamity, earthquakes, abnormal voltage or other disasters;
- additions, modifications, disassembly, transportation, or repairs by any person other than service technicians
authorized by Oki Data Corporation; or
- use of paper, supplies or parts other than those recommended by Oki Data Corporation.
4. Subject to paragraph 1, Oki Data Corporation shall not be liable to Customer for:
- loss of profits, loss of sales or turnover; loss of or damage to reputation; loss of production; loss of anticipated
savings; loss of goodwill or business opportunities; loss of customers; loss of, or loss of use of, any software or
data; loss under or in relation to any contract; or
- any special, incidental, consequential or indirect loss or damage, costs, expenses, financial loss or claims for
consequential compensation;
whatsoever and howsoever caused which arise out of or in connection with the Product or the use of handling of the
Product even if Oki Data Corporation is advised of the possibility of such damages.
Oki Data Corporation shall not be liable for any loss, cost, expense, claim or damage caused by any inability to use
(including, but not limited to failure, malfunction, hang-up, virus infection or other problems) which arises from use of the
Product with hardware, goods or software which Oki Data Corporation has not directly or indirectly supplied.

4 General Precautions

CONTENTS 5
CONTENTS
Preface....................................................................................................................................... 1
Before Reading This Manual ................................................................................................... 2
General Precautions................................................................................................................. 3
Chapter 1 BEFORE USING FAX
Description of Each Component............................................................................................. 8
Control panel ......................................................................................................................... 8
Touch panel......................................................................................................................... 10
Options ................................................................................................................................ 11
Connecting Cables ................................................................................................................. 12
Chapter 2 SENDING/RECEIVING A FAX
Sending a Fax ......................................................................................................................... 14
Basic procedures................................................................................................................. 14
Handling an original............................................................................................................. 17
Setting the transmission conditions..................................................................................... 21
Specifying the recipient ....................................................................................................... 25
Other transmissions.............................................................................................................32
Receiving a Fax ...................................................................................................................... 35
Reception mode ..................................................................................................................35
Originals and paper .............................................................................................................37
Chapter 3 CHECKING AND CANCELING THE COMMUNICATIONS
Checking Communications ................................................................................................... 42
Checking reserved transmissions........................................................................................ 42
Checking communication status (log).................................................................................. 43
Canceling the Transmission.................................................................................................. 45
Canceling the memory transmission ................................................................................... 45
Canceling direct transmissions............................................................................................ 47
Canceling reserved transmissions....................................................................................... 48
Chapter 4 ADVANCED FUNCTIONS
Transmitting 2-Sided Originals ............................................................................................. 50
Priority Transmission............................................................................................................. 52
Polling Communication ......................................................................................................... 53
Polling transmission............................................................................................................. 53
Polling reception.................................................................................................................. 54
Mailbox Transmission............................................................................................................55
Registering/printing/deleting an original .............................................................................. 56
Sending/retrieving an original .............................................................................................. 60
Creating/modifying/deleting a mailbox................................................................................. 63
Chain Dial Communication.................................................................................................... 68
Delayed Transmission Reservation...................................................................................... 69
Recovery Transmission ......................................................................................................... 70

6 CONTENTS
Onramp Gateway .................................................................................................................... 71
Offramp Gateway.................................................................................................................... 72
Save as File ............................................................................................................................. 73
Printing SECURE RECEIVE fax jobs..................................................................................... 75
Chapter 5 PRINTING LISTS AND REPORTS
Printing Lists & Reports Manually ........................................................................................ 78
Journal (transmission journal/reception journal).................................................................. 78
Reservation list .................................................................................................................... 79
Mailbox/relay box report ...................................................................................................... 80
Printing Lists & Reports Automatically................................................................................ 81
Lists/Reports Samples...........................................................................................................82
Transmission journal ........................................................................................................... 82
Reception journal................................................................................................................. 83
Reservation list .................................................................................................................... 83
Mailbox/relay box report ...................................................................................................... 84
Memory transmission report ................................................................................................ 85
Transmission report.............................................................................................................86
Multi transmission report ..................................................................................................... 86
Multi polling report ............................................................................................................... 87
Relay TX orig. terminal report.............................................................................................. 87
Relay TX relay station report ............................................................................................... 88
Relay TX end terminal report............................................................................................... 88
Relay station report ............................................................................................................. 89
Mailbox reception report ...................................................................................................... 89
Chapter 6 SETTING ITEMS
User Settings .......................................................................................................................... 92
Fax settings ......................................................................................................................... 92
Administrator Settings........................................................................................................... 95
Registering the terminal ID.................................................................................................. 97
Setting the initial setup ........................................................................................................ 98
Setting RX printing............................................................................................................. 100
Setting recovery transmission ........................................................................................... 102
Setting 2nd Line for FAX Unit ............................................................................................ 103
SECURE RECEIVE........................................................................................................... 104
Chapter 7 TROUBLESHOOTING AND SPECIFICATIONS
Troubleshooting ................................................................................................................... 108
Error codes........................................................................................................................ 108
Error messages ................................................................................................................. 108
Transmission/reception trouble ......................................................................................... 109
Specifications of GD-1250 ................................................................................................... 110
INDEX ................................................................................................................................................................... 111

1.BEFORE USING FAX
This chapter describes the basics of this equipment you should learn before you start using it.
Description of Each Component............................................................................................. 8
Control panel ..........................................................................................................................................................8
Touch panel ..........................................................................................................................................................10
Options .................................................................................................................................................................11
Connecting Cables................................................................................................................. 12

1 BEFORE USING FAX
8 Description of Each Component
Description of Each Component
Control panel
This section describes the buttons on the control panel used for the fax functions. For any details of the control panel not
covered in this document, refer to the Quick Start Guide.
1. [FAX] button
Use this button to display the fax screen when you use the fax function.
When you use the Internet Fax function, you also press this button. For details of the Internet Fax function, refer to
the Scanning Guide.
2. [USER FUNCTIONS] button
Use this button when you register/make settings such as initial setting for the fax function.
3. Digital keys
Use these keys to enter fax numbers, etc.
4. [FUNCTION CLEAR] button
Use this button to clear all current selected functions and return to the default settings.
5. [STOP] button
Use this button to stop any scanning in progress.
6. [START] button
Use this button to start scanning a document for fax transmission.
7. [CLEAR] button
Use this button to cancel entered numbers.
8. Alarm lamp
This lamp lights when an error occurs and this equipment needs some actions to be taken.
9. MEMORY RX
This lamp lights when there is a received fax which is not printed yet and its data are still in the memory.
10. LINE
This lamp lights when a telephone line is busy.
11. Touch panel
P.10 “Touch panel”
12. [PRINT] button
Use this button to print a SECURE RECEIVE fax job.
1 2
3
4
5
6
7810 911
12
13

1.BEFORE USING FAX
Description of Each Component 9
1 BEFORE USING FAX
13. PRINT DATA lamp
This lamp lights when there is a received SECURE RECEIVE fax job.
This lamp does not light when the equipment is in the Super Sleep mode.

1 BEFORE USING FAX
10 Description of Each Component
Touch panel
This section describes the fax screen on the touch panel. For any details of the touch panel not covered in this document,
refer to the Quick Start Guide.
1. Header area
The name of the currently selected function and buttons related to the current status of this equipment are shown here.
2. Message area
Various messages such as the status of this equipment and operating instructions are shown here.
3. Operation object area
Operation-related buttons and text boxes are shown here.
4. Alert message area
Messages are shown here to inform you of various alerts such as the replacement time of toner cartridges and waste
toner boxes, or the existence of a received SECURE RECEIVE fax job.
5. Date and time
The current date and time are shown here.
6. [JOB STATUS] button
Use this button to view the job status or its history.
When this equipment is managed under the department management or user management, key in user
information such as the department code, user name and password to display the operation screen. For details of
the operation, refer to the Quick Start Guide.
1
3
2
456

1.BEFORE USING FAX
Description of Each Component 11
1 BEFORE USING FAX
Options
This section describes the options related to the fax function.
FAX Unit (GD-1250)
This unit enables the use of the fax function.
2nd Line for FAX Unit (GD-1260)
This board enables the use of 2 lines for sending and receiving faxes.

1 BEFORE USING FAX
12 Connecting Cables
Connecting Cables
Be sure that the power of this equipment is turned OFF before connecting the cables.
ES9460 MFP/ES9470 MFP/CX3535 MFP/CX4545 MFP (GD-1250)
Be sure that the power of this equipment is turned OFF before connecting the cables.
ES9160 MFP/ES9170 MFP (GD-1250)
1. LINE2
Connect a telephone line when the 2nd Line for FAX Unit (optional) is installed.
2. LINE
Connect a telephone line.
3. TEL
Connect an external telephone.
Do not connect this equipment and the external telephone to a telephone connector in parallel.
Use the external telephone without an answerphone (or with the function off) to be connected with the TEL.
3
2
1
1
2
3

2.SENDING/RECEIVING A FAX
This chapter describes how to send and receive a fax.
Sending a Fax......................................................................................................................... 14
Basic procedures..................................................................................................................................................14
Handling an original..............................................................................................................................................17
Setting the transmission conditions......................................................................................................................21
Specifying the recipient ........................................................................................................................................25
Other transmissions .............................................................................................................................................32
Receiving a Fax ...................................................................................................................... 35
Reception mode ...................................................................................................................................................35
Originals and paper ..............................................................................................................................................37

2 SENDING/RECEIVING A FAX
14 Sending a Fax
Sending a Fax
Basic procedures
This section describes the basic procedures to send a fax. For details of in-depth operations, see the page under each
procedure as required.
Besides the basic sending functions described in this page, there are various useful ways to send a fax. These procedures
are described in the following pages.
P.32 “Other transmissions”
P.49 “ADVANCED FUNCTIONS”
1
Place the original(s).
Check the original size and scanning range, etc. Place the original(s) on the original glass or RADF (Reversing
Automatic Document Feeder) in the correct direction. (The illustration above shows the original placed on the
original glass.)
P.17 “Handling an original”
2
Press the [FAX] button on the control panel.
The fax screen is displayed. If you leave the screen unattended for the period of the auto clear setting time (45 sec
by manufacture default), the screen returns to the default one automatically.
3
Press [OPTION] and set the transmission conditions.
The transmission condition setting screen is displayed. Set the transmission conditions such as resolution, original
mode, exposure and transmission mode, as required.
P.21 “Setting the transmission conditions”

2.SENDING/RECEIVING A FAX
Sending a Fax 15
2 SENDING/RECEIVING A FAX
4
Specify the recipient.
To specify the recipient, dial the number using the digital keys on the control panel or use the address book.
P.25 “Specifying the recipient”
5
To display the preview screen, press [PREVIEW].
P.33 “Displaying the preview”
6
Press [SEND].
The fax is sent or reserved.
Alternatively, you can press the [START] button on the control panel.
In the memory transmission mode, the original is scanned into memory. Once a connection has been made,
this equipment automatically starts sending the scanned document. In the direct transmission mode, the fax
number is dialed immediately, and the scanned document will be sent. (Transmission conditions can be set
in the transmission condition setting screen.)
If memory becomes full during scanning in the memory transmission mode, that original will not be stored in
memory. When that happens, reduce the number of originals you are sending, or try sending them in the
direct transmission mode.
You can check the status of the current sending. You can also cancel the transmission (deletes the job).
P.41 “CHECKING AND CANCELING THE COMMUNICATIONS”

2 SENDING/RECEIVING A FAX
16 Sending a Fax
Redial function
In the memory transmission mode, if the fax cannot be sent due to a busy-line, the fax number is redialed automatically to
send the fax. By default, this equipment redials 3 times at 1-minute intervals.
Batch transmission function
If there are multiple transmission jobs to the same recipient in memory, you can send them at once using this function,
resulting in reduction of communication costs. However, if their recipients are the same but their transmission conditions
vary or if users or departments are different when this equipment is managed under the department management or user
management, this function is not applied to those reserved jobs.
Sending the next original
If an original is placed on the original glass and its scanning is completed, the confirmation screen for the next original is
displayed. If you want to continue scanning of the next original, place it on the original glass, and then press the [START]
button on the control panel. Once all the originals are scanned, press [JOB FINISH]. If you place an original on the RADF
(Reversing Automatic Document Feeder) and press the [CONTINUE] button during scanning, the confirmation screen for
the next original can be displayed after the scanning is completed.
If you leave the screen unattended for a period of the auto clearance setting time (45 sec. by manufacturer default), a
copy of the scanned originals is sent.
To cancel the transmission in the memory transmission mode, press [JOB CANCEL].
P.45 “Canceling the memory transmission”
To change the transmission conditions for each page, press [OPTION].
P.24 “Changing the settings for each page”

2.SENDING/RECEIVING A FAX
Sending a Fax 17
2 SENDING/RECEIVING A FAX
Handling an original
Originals that can be sent
This equipment can send a fax of the following originals.
You can place 1-sided or 2-sided originals of the media types, such as standard paper, recycled paper and paper having
holes (2, 3 or 4 holes) for filing, on the RADF (Reversing Automatic Document Feeder). On the original glass, you can
place 1-sided originals of the above media types as well as OHP film, tracing paper, booklets and three-dimensional
objects.
* RADF is an option.
Do not place any heavy objects (4 kg/9 lb. or over) on the original glass and do not press on it with force.
If the original is any of the following sizes, it is automatically rotated and sent as described below.
A4 →A4-R
A5-R →A5
B5-R →B5
LT →LT-R
ST-R →ST
Original scanning range
The following figures show the original scanning area. Any information in the shaded area is not printed on the paper.
1. LD, LG, LT-R, ST-R, COMP, A3, A4-R, A5-R, B4, B5-R, FOLIO
2. LT, ST, A4, A5, B5
Location Maximum size Paper weight Original size
Original glass Length: 297 mm (11.69")
Width: 432 mm (17.01")
−North American format:
LD, LG, LT, LT-R, ST, ST-R,
COMP
A/B format:
A3, A4, A4-R, A5, A5-R, B4,
B5, B5-R, FOLIO
RADF* Length: 297 mm (11.69")
Width: 432 mm (17.01")
1-sided originals
35 - 157 g/m2(9.3 - 41.8 lb.)
2-sided originals
50 - 157 g/m2(13.3 - 41.8 lb.)
North American format:
LD, LG, LT, LT-R, ST-R,
COMP
A/B format:
A3, A4, A4-R, A5-R, B4, B5,
B5-R, FOLIO
(ST/A5 is not available)
12
5 mm
(0.2 inch)
5 mm
(0.2 inch)
5 mm
(0.2 inch)
5 mm
(0.2 inch)
5 mm
(0.2 inch)
5 mm
(0.2 inch)
5 mm
(0.2 inch)
5 mm
(0.2 inch)

2 SENDING/RECEIVING A FAX
18 Sending a Fax
Placing the original(s) on the original glass
This section describes how to set an original on the original glass. Originals are sent in the order they are placed on the
original glass.
Do not place any heavy objects (4 kg/9 lb. or over) on the original glass and do not press on it with force.
Breaking the glass could injure you.
1
Raise the Original Cover or RADF (Reversing Automatic Document Feeder), and place
the original with its face down on the glass.
Raise it 60 degrees or more for the detection of the original.
2
Align the original against the left inner corner of the glass.
Different size originals can also be sent in one transmission.
When an original of any size other than LT/A4 is placed in the direction shown in the above left figure,
transmission to a recipient is carried out so that the pre-entered sender information is printed in position A in the
figure.
When an original of LT/A4 size is placed in the direction shown in the above right figure, transmission to a
recipient is carried out so that the pre-entered sender information is printed in position B in the figure.
The pre-entered sender information shows what is registered in the Terminal ID.
P.97 “Registering the terminal ID”
3
Lower the Original Cover or RADF slowly.
AB
Other manuals for CX4545 MFP
10
This manual suits for next models
7
Table of contents
Other Oki All In One Printer manuals

Oki
Oki ES3640eMFP User manual

Oki
Oki B2500 MFP Training manual

Oki
Oki ES3640e MFP User manual

Oki
Oki ES9460 MFP User manual

Oki
Oki CX2731MFP User manual

Oki
Oki B4545 MFP User manual

Oki
Oki C9850 MFP User manual

Oki
Oki CX2033MFP Service manual

Oki
Oki CX 1145 MFP Configuration guide

Oki
Oki MC332dn Installation guide