Oki C3200n Service manual


1
Ordering Replacement Supplies . . . . . . . . . . . . . . . . . . . . . 2
Media Settings . . . . . . . . . . . . . . . . . . . . . . . . . . . . . . . . . . 3
Defaults . . . . . . . . . . . . . . . . . . . . . . . . . . . . . . . . . . . . . . 3
Media Weight Settings . . . . . . . . . . . . . . . . . . . . . . . . . . . . 4
Changing Default Settings . . . . . . . . . . . . . . . . . . . . . . . . . 5
MP Tray Default . . . . . . . . . . . . . . . . . . . . . . . . . . . . . . . . 6
Media Specifications . . . . . . . . . . . . . . . . . . . . . . . . . . . . . . 9
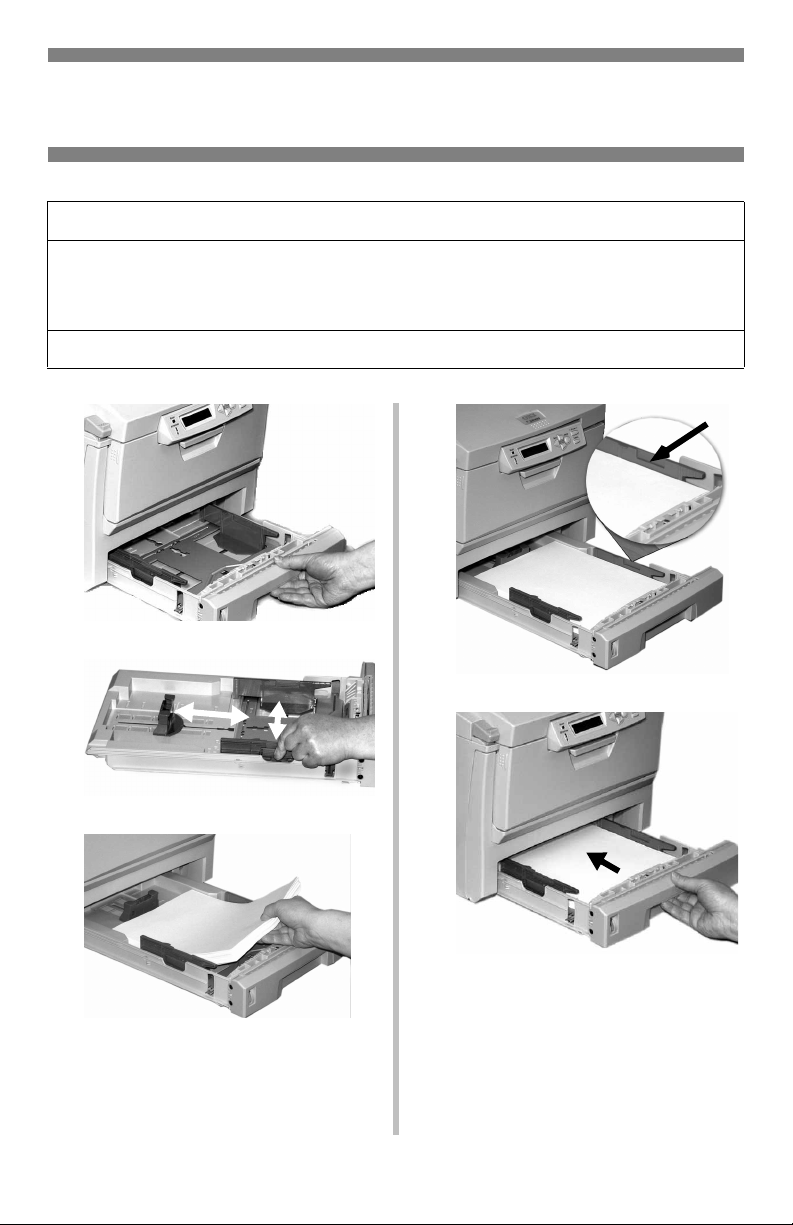
Tray 1 . . . . . . . . . . . . . . . . . . . . . . . . . . . . . . . . . . . . . . . 9
Multi-Purpose Tray . . . . . . . . . . . . . . . . . . . . . . . . . . . . . 10
Print Media . . . . . . . . . . . . . . . . . . . . . . . . . . . . . . . . . . . . 11
Paper . . . . . . . . . . . . . . . . . . . . . . . . . . . . . . . . . . . . . . . 11
Transparencies . . . . . . . . . . . . . . . . . . . . . . . . . . . . . . . . 12
Labels . . . . . . . . . . . . . . . . . . . . . . . . . . . . . . . . . . . . . . 13
Thick Paper. . . . . . . . . . . . . . . . . . . . . . . . . . . . . . . . . . . 14
Envelopes. . . . . . . . . . . . . . . . . . . . . . . . . . . . . . . . . . . . 15
Oki . . . . . . . . . . . . . . . . . . . . . . . . . . . . . . . . . . . . . . . . 16
Features . . . . . . . . . . . . . . . . . . . . . . . . . . . . . . . . . . . . . . 17
Built-In Reports. . . . . . . . . . . . . . . . . . . . . . . . . . . . . . . . 17
Power Save . . . . . . . . . . . . . . . . . . . . . . . . . . . . . . . . . . 18
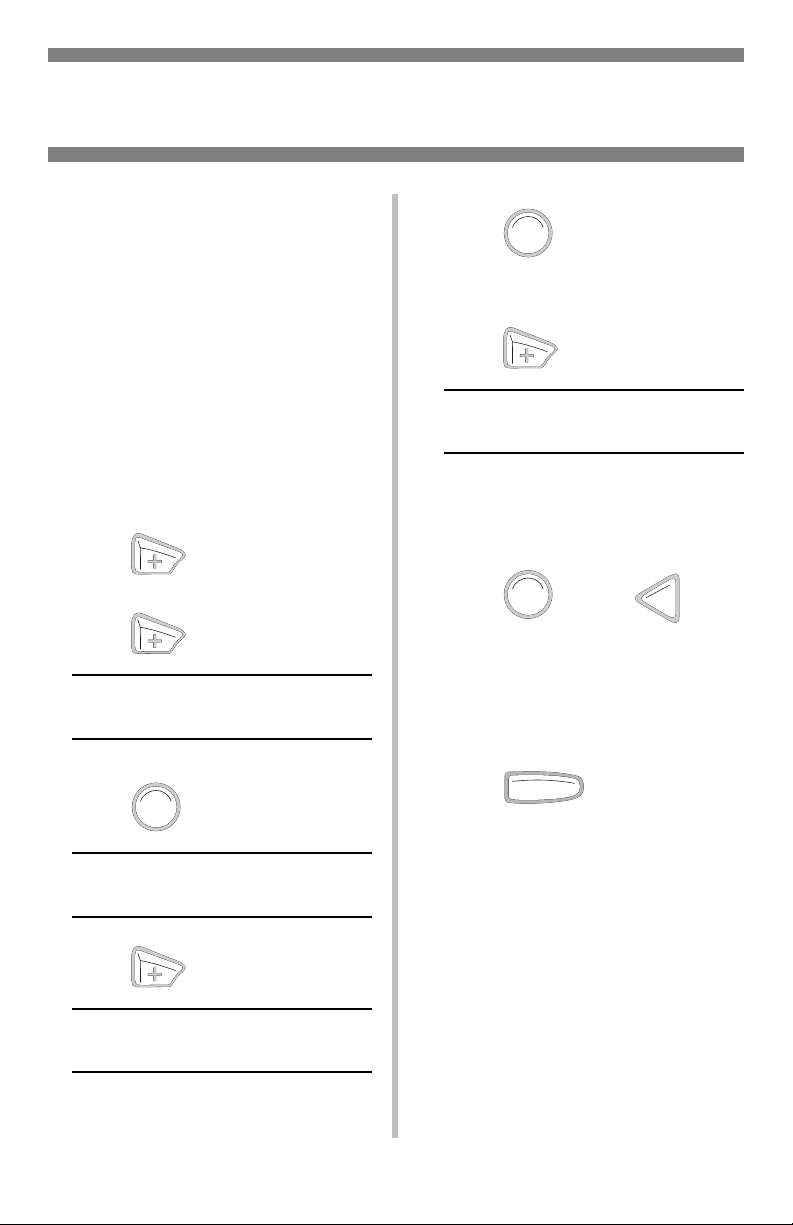
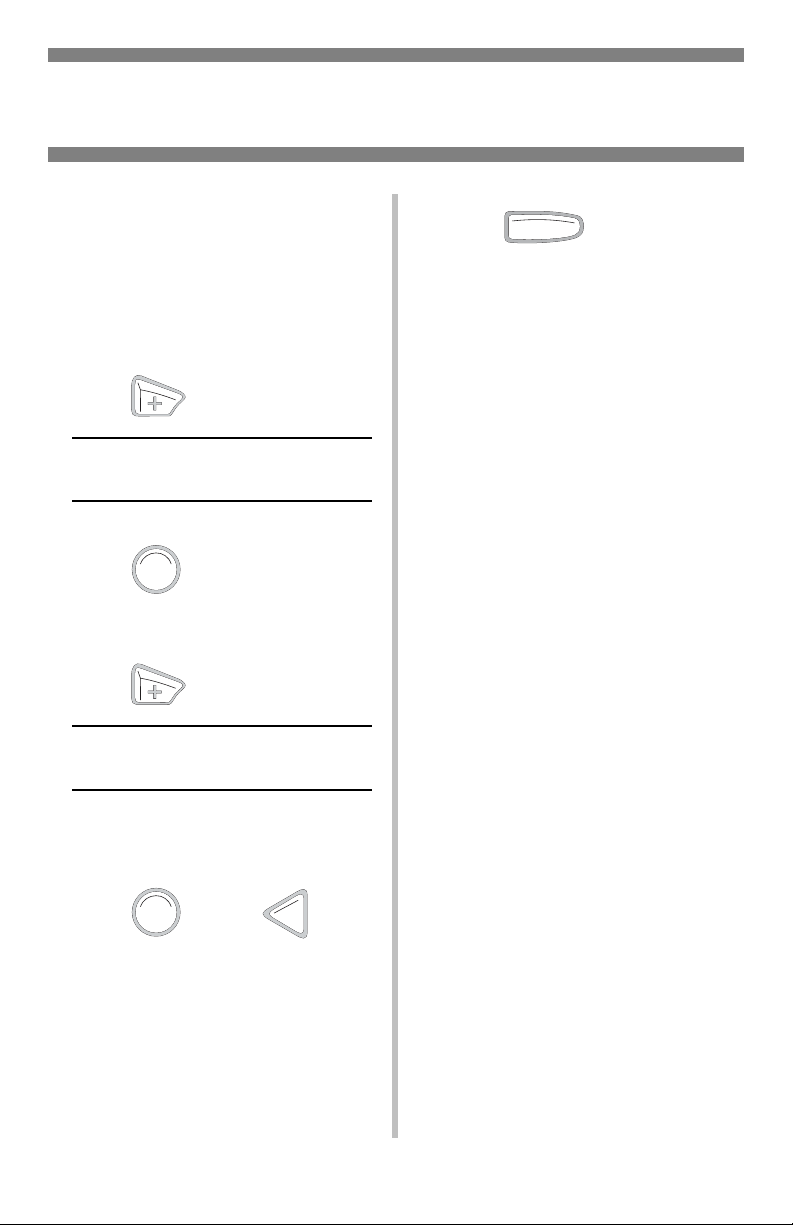
Control Panel . . . . . . . . . . . . . . . . . . . . . . . . . . . . . . . . . . 20
Buttons . . . . . . . . . . . . . . . . . . . . . . . . . . . . . . . . . . . . . 20
Lights . . . . . . . . . . . . . . . . . . . . . . . . . . . . . . . . . . . . . . 21
Clearing Media Jams . . . . . . . . . . . . . . . . . . . . . . . . . . . . . 22
Jam 370, 373, 383 . . . . . . . . . . . . . . . . . . . . . . . . . . . . . 22
Jam 371 . . . . . . . . . . . . . . . . . . . . . . . . . . . . . . . . . . . . . 23
Jam 372 & 380 . . . . . . . . . . . . . . . . . . . . . . . . . . . . . . . . 24
Jams 381 . . . . . . . . . . . . . . . . . . . . . . . . . . . . . . . . . . . . 25
Jam 382 . . . . . . . . . . . . . . . . . . . . . . . . . . . . . . . . . . . . . 27
Jam 390 . . . . . . . . . . . . . . . . . . . . . . . . . . . . . . . . . . . . . 28
Jam 391 . . . . . . . . . . . . . . . . . . . . . . . . . . . . . . . . . . . . . 29
Error Messages . . . . . . . . . . . . . . . . . . . . . . . . . . . . . . . . . 31
Service & Support . . . . . . . . . . . . . . . . . . . . . . . . . . . . . . . 34
Contents
59370701

2
How to Order
• Consult the dealer where you
purchased your printer.
• Consult an Oki Data Authorized
Sales or Service Dealer. For the
nearest dealer, call
1-800-654-3282.
•U.S., Puerto Rico, Guam, U.S.
Virgin Islands only: Order on the
Internet at
WWW.OKIPRINTINGSOLUTIONS
.COM/US
.
•U.S. only: Order toll-free by
phone at 1-800-654-3282, using
VISA
®
, MasterCard
®
, or AMEX
®
.
Order Numbers
Toners/Drums, Type C6
Other Consumables
Installation
The printer’s consumable items all
include replacement instructions.
Take Advantage of
OKI
®
’s Supply Manager
• Calculates your usage based on
information you provide.
• Sends you an email reminder
when it’s time to reorder
To regist e r, go to
WWW.OKIPRINTINGSOLUTIONS.COM/
US
.
Check Out
Oki Managed Services
A document output analysis of your
business which could save you up
to 30% on your printing costs.
Call 1-888-654-6264 to schedule
an appointment with an Oki
Managed Services project manager.
Or, for more informaton, go to
WWW.OKIPRINTINGSOLUTIONS.COM/
US
.
Color Oki Part No.
Toner Cartridges Only
Black 43034804
Cyan 43034803
Magenta 43034802
Yellow 43034801
Image Drums, with Toner Cartridge
Black 42126661
Cyan 42126660
Magenta 42126659
Yellow 42126658
Item Oki Part No.
Fuser, 120V
Fuser, 230V
42625501
42625502
Transfer Belt 42158711
Ordering Replacement Supplies

3
Why Change Media
Settings?
Improper media settings:
• cause poor quality printing
•causeflaking
• can damage the printer
Default Media
Settings
The Default Setting
The default media weight setting
for all trays is Medium.
Changing Defaults
To change the printer’s default
settings for print media, see pages
6 and 7.
Resetting to Original
Defaults
Note:
…
= keep pressing the
button repeatedly until you
see the display indicated.
To reset the printer menu to its
original default settings:
1. Press to enter the Menu
mode.
2. Press
…
MAINTENANCE MENU
3. Press
.
MENU RESET
EXECUTE
4. Press
.
The printer resets and returns to
the on-line state.
Media Settings for
Individual Print Jobs
If you are printing a job on special
media, you can temporarily load
the media in a tray and change the
media settings for that tray in the
driver as you print the job.
ENTER
ENTER
Media Settings
Defaults

4
Ranges for Printer
Media Weight
Settings
Note:
To determine if a paper
weight is US Bond or Index,
check the metric equivalent.
E.g.,
35 lb. US Bond = 132 g/m
2
35 lb. Index = 64 g/m
2
For more information, go to
WWW.PAPER-PAPER.COM/
WEIGHT.HTML
.
Media Weight Settings, US Bond
Setting US Bond (Metric)
Light 16 to 19 lb.
(60 to 71 g/m
2
)
Medium 20 to 27 lb.
(75 to 101 g/m
2
)
Heavy 28 to 32 lb.
(105 to 120 g/m
2
)
Ultra Heavy 33 to 54 lb.
(124 to 203 g/m
2
)
Media Weight Settings, Index
Setting Index (Metric)
Light 33 to 40 lb.
(60 to 71 g/m
2
)
Medium 42 to 56 lb.
(75 to 101 g/m
2
)
Heavy 58 to 67 lb.
(105 to 120 g/m
2
)
Ultra Heavy 69 to 113 lb.
(124 to 203 g/m
2
)
Media Settings
Media Weight Settings

5
To Change the Media
Weight Default for
Tray 1
Note:
The default media weight
setting for Tray 1 is Medium.
Note:
…
= keep pressing the
button repeatedly until you
see the display indicated.
1. Press to en
ter the Menu
mode.
2. Press
…
MEDIA MENU
3. Press
.
TR AY 1 PA P E R S I ZE
LETTER
4. Press
…
TRAY1 MEDIAWEIGHT
MEDIUM
5. Press
.
The second line of the display
starts blinking.
6. Press
…
TRAY1 MEDIAWEIGHT
YYYY*
7. Press , press
.
*
YYYY
= Your choice of media
weights (see page 4): Light,
Medium, Heavy.
ENTER
ENTER
ENTER OLN INE
Media Settings
Changing Default Settings

6
To Set
Transparencies as
the Default Media in
the MP Tray
Note:
For the MP Tray, the default
Media Type setting is Plain.
Note:
…
= keep pressing the
button repeatedly until you
see the display indicated.
1. Press to enter the Menu
mode.
2. Press
…
MEDIA MENU
3. Press .
4. Press
…
MPT MEDIATYPE
PLAIN *
5. Press .
The second line of the display
starts blinking.
6. Press
…
MPT MEDIATYPE
TRANSPARENCY
7. Press .
An asterisk appears next to your
selection.
MPT MEDIATYPE
TRANSPARENCY *
8. Press .
The setting is engaged and the
second line of the display stops
blinking.
9. Press .
ENTER
ENTER
ENTER
BACK
OLN INE
Media Settings
MP Tray Default

7
To Set Heavy Paper,
Labels, or Envelopes
as the Default Media
in the MP Tray
Note:
For the MP Tray, the default
Media Size setting is Letter
and the default Media Type
setting is Plain.
First, set the Media Size
Note:
…
= keep pressing the
button repeatedly until you
see the display indicated.
1. Press to enter the Menu
mode.
2. Press
…
MEDIA MENU
3. Press .
TR AY 1 PA P E R S I ZE
LETTER *
4. Press
…
MPT PAPER SIZE
LETTER *
5. Press .
The second line of the display
starts blinking.
6. Press
…
MP TRAY PAPERSIZE
XXXX†
† XXXX represents your media
size choice (for envelopes, select
COM-10 ENVELOPE
).
7. Press , press .
The setting is engaged and the
second line of the display stops
blinking.
8.
Envelopes
: If you are setting
the MP Tray for envelopes:
Press and you are
done.
Heavy paper/labels:
If you
are setting the MP Tray for heavy
paper or labels, keep going.
ENTER
ENTER
ENTER BACK
OLN INE
Media Settings
MP Tray Default

8
Then, Set the Media
Type (Heavy Paper
and Labels Only)
Note:
…
= keep pressing the
button repeatedly until you
see the display indicated.
1. Press .
MPT MEDIATYPE
PLAIN *
2. Press .
The second line of the display
starts blinking.
3. Press
…
MPT MEDIATYPE
YYYY†
†
YYYY
=
LABELS
or
CARD
STOCK
.
4. Press , press .
The setting is engaged and the
second line of the display stops
blinking.
5. Press .
The printer goes back on line.
6. You’re done!
ENTER
ENTER BACK
OLN INE
Media Settings
MP Tray Default

9
1
2
3
4
5
Media Weight Range
16 to 32 lb. US Bond (60 to 120 g/m
2
)
Media Size Range:
Letter, Legal-14, Legal-13.5, Legal-13, A4, A5, A6, B5,
Executive, Custom. Custom sizes (min. 3.94'' x 5.83'' [100
x 148 mm], max. 8.5'' x 14'' [215.9 x 355.6 mm]) must be
defined in driver before printing.
Capacity:
300 sheets of 20-lb. (75 g/m
2
) paper
Media Specifications
Tray 1

10
1
2
3
4
5
6
Letterhead stationery:
• Single-sided printing: load face
up, top edge into the printer.
• Double-sided printing: load face
down with top edge away from
the printer.
Weight
Range
20 to 54 lb. US Bond (42 to 113 lb. Index, 75 to 203 g/m
2
metric)
Size Range:
Min. 3.94" x 5.83" [100 to 148 mm], max. 8.5" x 14" [216 x 356 mm]
(Non-standard sizes must be defined in driver before printing: see your
on-line User’s Guide.)
Banners: 8.25 to 8.5'' [210 to 216 mm] wide by up to 47.25'' [1.2 m]
long. Must be fed one sheet at a time.
Takes:
100 sheets 20-lb. (75 g/m
2
) paper, 50 transparencies, 10 envelopes
Labels: max. feed stack = about 3/8-inch (1 cm) high
Media Specifications
Multi-Purpose Tray

11
Sample Ream Label:
Media Weight, US Bond (see page 4) [sometimes given as substance]
Media Weight, Metric: Look for this to confirm US Bond vs Index.
Specifications
Caution!
The ink on pre-printed letterhead stationery must be able to withstand
446°F (230°C) for 0.2 second, including mechanical pressures to 25 psi
(1.8 kg/cm
2
).
Important!
If you experience curling when printing a file in duplex mode, switch to
28-lb. US Bond paper.
Sizes Feed Tray Exit Tray Media Weight Recommended Media
1
1. Weight designations in this column are US Bond.
•Letter
• Executive
•Legal-14
•Legal-13.5
•Legal-13
• A4, A5, A6
•B5
•Custom
2
2. Minimum = 3.94" x 5.83"; maximum = 8.5" x 14".
MP Tray Only: banners, one sheet at a time, 8.25 to 8.5 '' wide by up to 47.25''
long
Custom sizes must first be defined in the printer driver.
Tray 1 Top
Rear
•Light
•Medium
•Heavy
• Oki 52206101 Bright
White Proofing Paper,
32 lb. (see page 16)
• Hammermill Laser Printer
Radiant White,
24 lb.
• Xerox 4024, 20 lb.
MP Tray Rear Only
•Medium
•Heavy
Print Media
Paper

12
Specifications
Caution!
Transparencies must be able to withstand 446°F (230°C) for 0.2 second,
including mechanical pressures to 25 psi (1.8 kg/cm
2
).
Important!
Use only recommended transparencies.
Printing
Transparencies
For Individual Print Jobs on
Transparencies
Make the following settings in the
printer driver as you print the job:
•Source=MPTray
• Media Size = Letter or A4
• Media Type = Trans pare ncy
Making
Transparencies the
Default Print Media
If the MP Tray will normally be
loaded with transparencies, set the
printer menu as follows (see
page 6):
• MP Tray PaperSize = Letter (the
default) or A4
• MP Tray MediaType =
Transparency
Usable
Sizes
Feed
Tray
Exit
Tray Media Type Media
Weight Recommended
•Letter
•A4
MP Tray
Only
Rear Only Transparency Ignored. • OKI 52205701 (see
page 16)
• 3M CG3720
Print Media
Transparencies

13
Specifications
Insert labels in the Multi-Purpose tray:
•labelsideup
• top edge aimed into the printer.
Caution!
Labels must be able to withstand 446°F (230°C) for 0.2 second,
including mechanical pressures to 25 psi (1.8 kg/cm
2
).
Printing Labels
For Individual Print Jobs on
Labels
Make the following settings in the
printer driver as you print the job:
•Source=MPTray
• Media Size = Letter or A4
• Media Type = Labels
Making Labels the Default
Print Media
If the MP Tray will normally be
loaded with labels, set the printer
menu as follows (see page 7):
• MP Tray PaperSize - Letter or A4
• MP Tray MediaType = Labels
Usable
Sizes Feed Tray Exit Tray Media
Type
Media
Weight Recommended
•Letter
•A4
MP Tray Rear Only Labels • Medium
•Heavy
•Ultra
Heavy
• Avery 5161 White
Laser Label, Letter
size
• Avery 7162, 7664,
7666 White Laser
Label, A4 size
Print Media
Labels

14
Sample Ream Label:
Media Weight, Index (see
page 4).
Media Weight, Metric: Look for
this to confirm Index vs US Bond
(see page 4)
Caution!
To avoid damage to the printer,
ALWAYS CHANGE THE PRINTER
SETTINGS WHEN PRINTING ON
THICK MEDIA.
Specifications
Sizes
• Letter, Executive
• Legal-14, Legal-13.5, Legal-13
•A4,A5,A6,B5
• Custom (must be defined in the
printer driver).
Feed Tray
•Tray1
•MPTray
Exit Tray
•RearOnly
Media Type
•CardStock
Media Weight
•Tray1:Heavy
• MP Tray: Heavy, Ultra Heavy
Recommended
• Oki Premium Card Stock (see
page 16)
Printing Thick Paper
Printing Individual Jobs on
Thick Paper
Make the following settings in the
printer driver as you print the job:
•Source=Tray1(
17 lb. to 32 lb.
US Bond) or MP Tray (
20 lb. to
54 lb.
US Bond)
• Size = see sizes at left
• Type = Heavy or Ultra Heavy
(see page 4).
Making Thick Paper the
Default Print Media
Set the printer menu to (see page
7):
• PaperSize (Tray 1 or MP Tray) =
see sizes at left.
•MediaType:
– Tray 1 = Heavy
– MP Tray = Heavy or Ultra Heavy
Print Media
Thick Paper

15
Specifications
Caution!
Envelopes must be able to
withstand 446°F (230°C) for 0.2
second, including mechanical
pressures to 25 psi (1.8 kg/cm
2
)
Important!
For the best print results, use only
the recommended envelopes.
Never use envelopes with metal
clasps, snaps, windows, or V-flap
seals:
Printing Envelopes
To Print an Individual Job
on Envelopes
Make the following settings in the
printer driver as you print the job:
•Source=MPTray
•Size=COM-10
Making Envelopes the
Default Print Media
for the MP Tray
Set the printer menu to (see
page 7):
•PaperSize=COM-10ENVELOPE
No!
Size Feed Tray Exit Tray Media
Type
Media
Weight Recommended
COM-10 MP Tray
Only
Rear Only Any
Setting
Any
Setting
• OKI 52206301
• OKI 52206302
(see page 16)
Print Media
Envelopes

16
Oki
®
Synflex™
Waterproof, Tear Resistant
White, 8½'' x 11'' (216 x 279 mm
)
Oki Bright White
Proofing Paper
White, 32-lb.
8½'' x 11'' (216 x 279 mm)
Oki Premium
Envelopes
COM-10 (#10), white wove
Security tinted, Redi-Strip seal
Oki Premium Color
Transparencies
Size 8½'' x 11'' (216 x 279 mm)
Oki Banner Paper
70 lb. Index (128 g/m
2
)
Size 8½'' x 35.4'' (216 x 899 mm
)
Oki Premium Card
Stock
Acid-free archival quality
White, 8½'' x 11'' (216 x 279 mm
)
* For best printing results:
OKI Part # Qty
52205901 100/box
OKI Part # Qty
52206101 500/box
OKI Part # Qty
52206301 100/box
52206302 500/box
OKI Part # Qty
52205701 50/box
OKI Part # Qty
52206002 100/box
OKI Part # Weight Qty
52205601 60 lb. Cover 250/box
52205602 90 lb. Index 250/box
52205603 110 lb. Index 250/box
Temperature range Humidity
65 to 77°F (18 to 25°C) 40 to 65%RH
To purchase Oki media, contact
your local Oki dealer or visit us at
WWW.OKIPRINTINGSOLUTIONS.COM
/US
.
Print Media
Oki

17
Printing the
MenuMap (Listing of
the Current Menu
Settings)
Note:
…
= keep pressing the
button repeatedly until you
see the display indicated.
To print a list of the current menu
settings:
1. Press
…
INFORMATION MENU
2. Press
…
PRINT MENU MAP
EXECUTE
3. Press
.
The MenuMap prints and the printer
goes back on line.
Printing the Demo
Page
1. Press
…
INFORMATION MENU
2. Press
…
PRINT MENU MAP
EXECUTE
3. Press
…
DEMO1
EXECUTE
4. Press
.
The Demo page prints and the
printer goes back on line.
ENTER
ENTER
ENTER
ENTER
Features
Built-In Reports

18
Power Save sets how long the
printer waits before going into
standby mode. This saves energy,
but the printer requires time to
warm up when it receives a print
job or if you want to enter the
menu and change settings.
Setting the Power
Save Interval
Note:
…
= keep pressing the
button repeatedly until you
see the display indicated.
1. Press
…
SYSTEM CONFIG MENU
2. Press
…
POW SAVE TIME
60 MIN *
3. Press
…
The second line of the display
starts blinking.
4. Press
…
POW SAVE TIME
XX† MIN
†
XX
= 5, 15, 30, 60 (default), or
240 minutes.
5. Press
,
press
.
The new setting is engaged and
the second line of the display
stops blinking.
6. Press .
To Disable/Enable
Power Save
1. Press to enter Menu
mode.
2. Press
…
MAINTENANCE MENU
3. Press
.
4. Press
…
POWER SAVE
ENABLE†
ENTER
ENTER
ENTER BACK
OLN INE
ENTER
Features
Power Save

19
5. Press
.
POWER SAVE
DISABLE†
† Pressing the
+
button toggles
back and forth between Enable
and Disable.
6. Press
,
press
.
The new setting is engaged and
the second line of the display
stops blinking.
7. Press .
ENTER BACK
OLN INE
Features
Power Save
Other manuals for C3200n
21
Table of contents
Other Oki Printer manuals