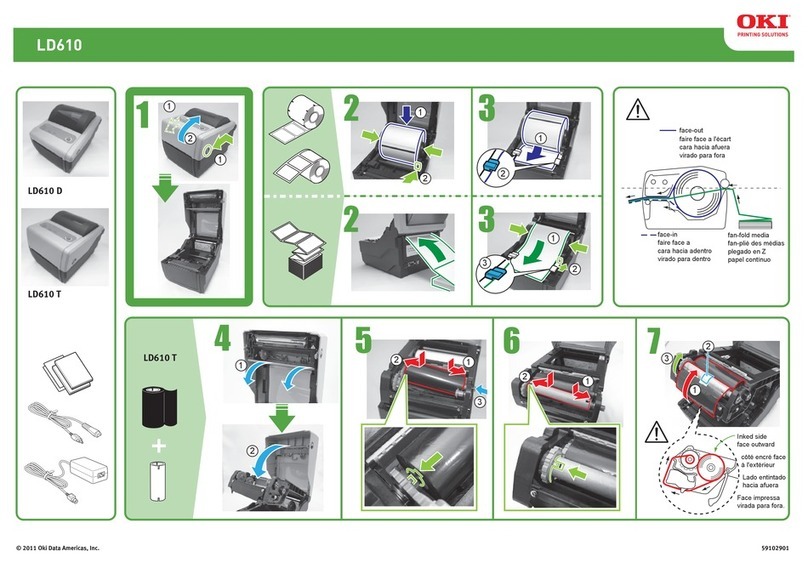
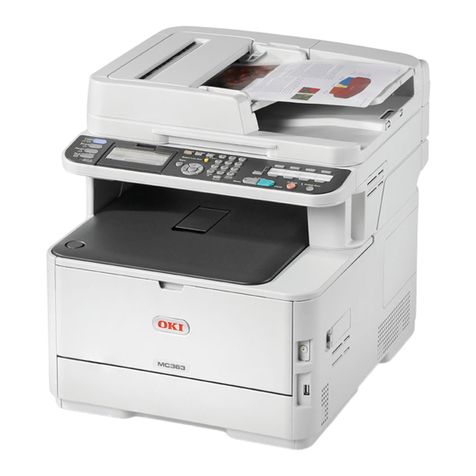
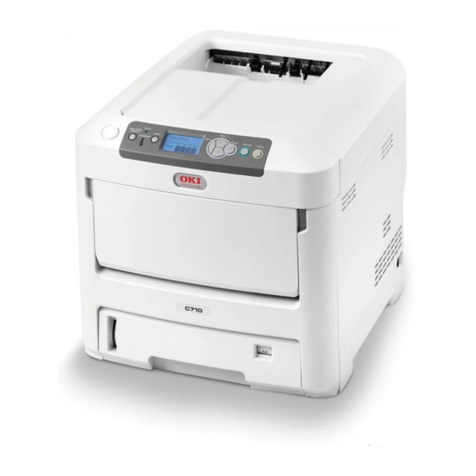
Oki OKIPAGE 12i Series Programming manual

All specifications are subject to change without notice.
OKIPAGE 12i
LED Page Printer
Troubleshooting Manual
with Component Parts List
ODA/OEL/INT

OKIDATA is a registered trademark of Oki America, Inc.
OKIDATA est une marque déposée de Oki America, Inc.

CONTENTS
1. OUTLINE.........................................................................................................1
2. TOOLS............................................................................................................1
3. CIRCUIT DESCRIPTION................................................................................2
4. TROUBLESHOOTING..................................................................................36
5. CIRCUIT DIAGRAM......................................................................................67
6. COMPONENT PARTS LIST

- 1 -
1. OUTLINE
ThismanualhasbeenwrittentoprovideguidancefortroubleshootingoftheOKIPAGE12iPrinter
(primarily for its printed circuit boards), based on the assumption that the reader has a thorough
knowledge concerning the printer. Read the maintenance manual for this printer, if necessary.
Notes:
1. The power supply board containing a high voltage power supply is dangerous. From the
viewpointofthesafetystandards,thelocalrepairingofadefectiveboardisnotallowed.Thus,
the objects to be locally repaired as a result of troubleshooting are switches and fuses.
2. Replacement of CPU (MHM2029) is not recommended. If CPU is found to be defective,
board replacement is suggested.
2. TOOLS
For troubleshooting the printer, the tools listed below may be needed in addition to general
maintenance tools.
Tool Remarks
Extension cord kit
Oscilloscope
Soldering iron
P/N: 40581901
Frequency response 100 MHz or higher
A slender tip type, 15-20 watts

- 2 -
3. CIRCUIT DESCRIPTION
3.1 Outline
ThemaincontrolboardcontrolsthereceptionofdatatransferredthroughahostI/Fandprocesses
commandanalysis, bitimagedevelopment,raster bufferread.Italso controlstheengineand the
operator panel. Its block diagram is shown in Fig. 3-1 and 3-2.
(1) Reception control
OKIPAGE12iPrintercanbeequippedwithtwoI/FportsbyaddinganRS232CI/Fornetwork
I/F option board in addition to the Centronics I/F on the main control board.
Either of the two I/F ports which receives data first can be used automatically.
The other I/F port outputs a busy state signal.
The parallel I/F port can specify the following item when set by the control panel:
I-PRIME: Enabled/Disabled
The serial I/F port can specify the following item when set by the control panel:
Flow control : DTRHI/DTR LO/XONXOFF/RBSTXON
Baud rate : 300/600/1200/2400/4800/9600/19200 (Baud)
Data bit : 7/8 (bits)
Minimum busy time : 200/1000 (ms)
Parity : NONE/ODD/EVEN
An interface task stores all data received from the host into a receive buffer first.
(2) Command analysis processing
The OKIPAGE 12i printers support PCL6 (Hewlett Packard LJ6P compatible).
An edit task fetches data from the receive buffer, analizes commands, and reconstructs the
data in such a way that print data are aligned from up to down and from right to left; then it
writestheresultantdataintoapagebufferwithsuchcontroldataasprintpositioncoordinate,
font type, etc. added.
(3) Font Processing
Whenonepageeditingisfinished,adevelopingtaskmakesanenginestartandfetchesdata
from the page buffer synchronizing with a printing operation; then it developes the fetched
datatoabitmapasreferringtodatafromacharactergenerator,andwritestheresultantdata
into the raster buffer (of band buffer structure).
(4) Raster buffer read.
As controlling the engine operation, an engine task sends data from the raster buffer to the
LED head.
- 3 -
Figure 3-1 Block Diagram
1MB Memory Board
(Option) RS232C Interface Board
(Option) Network Interface Board
(Option)
or
Program & Font ROM
16MB Mask ROM Resident RAM
1M x 16 DRAM
(4MB)
For optional board
Main Control Board
Power Supply
Board
or
DATA
BUS
(32bit)
EEPROM
7407
Inlet sensor 1
Inlet sensor 2
Paper sensor
Outlet sensor
Paper out sensor
Toner low sensor
Reset
circuit
Centronics
parallel I/F
1 Chip CPU
Drum motor &
Registration motor
drive circuit
FAN Driver FAN ALM
HEAT ON
Low voltage
generation circuit
LSI
AC
transformer
High voltage
generation
circuit
Charge roller
Transfer roller
Developping
roller
Toner supply
roller
Cleaning
roller
FAN
LED Head
M
M
Registration Motor
Drum Motor
High Capacity
Second Paper
Feeder (Option)
Multi-Purpose
Feeder (Option)
Operation Panel
+8V -8V 0V +5V+38V
Cover
open
switch
Fusing temperature
control circuit
Heater drive
circuit
Filter circuit AC IN
Heater
Thermistor

- 4 -
Figure 3-2 Memory Expansion Board Block Diagram (Option)
OPTION CONNECTOR
A2 to A23
CS3, EEPCS, EECLK
EEPDAT
IOS1
CAS0 to
CAS3
RAS2 to
RAS4
ORE, RD,
WR
D0 to D31
PD2, 3
BSY
RD
WR
RAS3, 4
WR
RAS2
ORE
WR
DRAM
1M Byte
ALS244ALS244ALS244
ALS244
SIMM1
DRAM SIMM
SIMM2
Flash SIMM

- 5 -
Figure 3-3 RS-232C Serial Interface Board Block Diagram (Option)
A2 to A23
CS3, EEPCS, EEPCLK
EEPDAT
IOS1
TXD, RST, DTR
RXD RS-232C
CONNECTOR
CAS0 to
CAS3
RAS2 to
RAS4
ORE, RD,
WR
D0 to D31
PD2, 3
BSY
RD
WR
RAS3, 4
WR
ALS244ALS244
75188
ALS244
ALS244
SIMM1
DRAM SIMM
SIMM2
Flash SIMM
OPTION CONNECTOR

- 6 -
Figure 3-4 Network Interface Board Block Diagram (Option)
A2 to A23
CS3, EEPCS, EEPCLK
EEPDAT
IOS1
IOS0
CS2
INT2, DMARQ
10 base T
CONNECTOR
CAS0 to
CAS3
RAS2 to
RAS4
ORE, RD,
WR
D0 to D31
PD2, 3
BSY1 BSY2
CS2
RD
WR RD
WR
RAS3, 4
WR
ALS244ALS244ALS244
ALS244
SIMM1
DRAM SIMM
SIMM2
Flash SIMM
Flash ROM
1M Byte
LZ9FF22
CS 8900
OPTION CONNECTOR
Puls
Traus

- 7 -
3.2 CPU and Memory
(1) CPU (MHM2029-004K)
CPU core RISC CPU (MIPS R3000 compatible)
CPU clock 20.2752 MHz
Internal CPU CLK 40.5504 MHz
(2) Program and Font ROMs
ROM capacity 16M bytes (64M bit mask ROM two pieces)
ROM type 64M bits (4M x 16 bits)
Access time 100 ns
(3) Resident RAM
RAM capacity 4M bytes (16-Mbit D-RAM two pieces)
RAM type 16M bits (1M x 16 bits)
Access time 60 ns
(4) Option Board
RAM capacity (chip) 1M byte
RAM type (chip) 4M bits D-RAM two pieces Memory Expansion Board only
Access time (chip) 60 ns
SIMM 1 socket 2, 4, 8, 16 or 32M bytes, 72 pin DRAM SIMM, 60 to 100 ns
SIMM 2 socket Flash SIMM (72 pin)
Flash ROM capacity (chip) 4 M byte or 8 M byte
Flash ROM type (chip) 8MbitsFlashROMfourpiecesor16MbitsFlashROMfour
pieces.
Access time (chip) 90 ns
The block diagram of CPU and memory circuit is shown in Fig. 3-3.
The timing chart of CPU and memory ciucuit is shown in Fig. 3-4.
}

- 8 -
Figure 3-8 Block Diagram of CPU & Memory Circuit
CPU
CS0
CS2
CS3
CS4 CS0
RD
RAS0
RD/WR
CAS0, 1, 2, 3
RAS2, 3, 4, 5CAS0, 1, 2, 3 RD/WR
Main
control
board
RAS0
RAS1
RAS2
RAS3
RAS4
RAS5
CAS0
CAS1
CAS2
CAS3
Option board
IC4, IC5
DRAM
(1M x 16 bits)
2 pieces
DRAM
1M Byte
RAS2 WR
D00 to D32
A00 to A25
IC2, IC3
Mask ROM
(4M x 16 bits)
2 pieces
<Program>
Option
board
(Memory Expansion Board only)
(Network Board only)
CAS0,1,2,3
SIMM 1
DRAM SIMM
RAS3, 4 WR
CAS0,1,2,3
SIMM 2
Flash SIMM
CS3, RD/WR
Flash ROM
1M byte
CS2, RD/WR

- 9 -
Figure 3-9 Timing Chart of CPU & Memory Circuit
(40.5504 MHz)
SYSCLK
A00-A25-P
DRAS0~5-N
DCAS0~3-N
RD-N
D00~D31-P
0 12.33 24.66 36.99 49.32 61.65 73.98 86.31 98.64 110.97 123.30 (ns)
T2 -7 sysclk
T1 -2.5 sysclk
T3 -1 sysclk T2 -7 sysclk
46.0
32.0
(DRAS0N~ 5N)
T4 -3.5 sysclk T2 -7 sysclk
T2 -7 sysclk
T3 -1 sysclk
32.0
DATA
31.0
VARIDVARID
No SIMM
60 ns
70 ns
80 ns
100 ns
T1 T2 T3 T4
TIME
SIMM speed
2.5 sysclk
2.5 sysclk
2.5 sysclk
2.5 sysclk
3 sysclk
7 sysclk
7 sysclk
7 sysclk
7 sysclk
8 sysclk
1 sysclk
1 sysclk
1 sysclk
1 sysclk
1 sysclk
3.5 sysclk
3.5 sysclk
3.5 sysclk
3.5 sysclk
4 sysclk
CPU detects the type of SIMM memory installed on the memory
expansion board, and sets the suitable timing as shown in the left
handside table.
Due to this, T1~T4 values shown above vary depending on the type
of SIMM memory being used.
42.5

- 10 -
Power OFF
Power ON
+38V
+38V
+8V
IC10 Input
CLRST-N
+5V
+8V
IC10-6
IC10-5
+38V +8V +5V
IC10
To Option Board
CPU
5
6
D2
(15V)
172
+
–7
3.3 Reset Control
When power is turned on, a CLRST-N signal is generated by the rising sequence of +38V and
+8V power supply.

- 11 -
Instruction Start bit Operation Address Data
code
Read (READ) 1 10 A7 to A0
Write Enabled (WEN) 1 00 11XXXXXX
Write (WRITE) 1 1 01 A7 to A0 D15 to D0
Write All Address (WRAL) 1 00 01XXXXXX D15 to D0
Write Disabled (WDS) 1 00 00XXXXXX
Erase 1 11 A7 to A0
Chip Erasable (ERAL) 1 00 10XXXXXX
Write cycle timing (WRITE)
CPU
SSTXD-P
EEPRMCS0-P
EEPRMCLK-P
3
154
150
151 2
4
1
DI DO
CS
SK
The EEPROM operates in the following instruction modes
Read cycle timing (READ)
CS
SK
DI
DO HIGH-Z
12 4 1112 27
Min. 2
µ
s
10 1
A7 A6 A1 A0 D15 D14 D1 D0
STATUS
BUSY READY
Max. 500 ns
Max. 10 ms
HIGH-Z
12
110
411 12
A7 A6 A1 A0
27 28
D15 D14 D1 D00 D15 D14
CS
SK
DI
DO
3.4 EEPROM Control
The BR93LC66ARF E2 is an electrical erasable/programmable ROM of 256 x 16-bit configura-
tion. Data input to and output from the ROM are bidirectionally transferred in units of 16 bits
through a serial I/O port (SSTXD-P) in serial transmission synchronized with a clock signal from
the CPU.
The EEPROM operates in the following instruction modes

- 12 -
CPU
CENT
87, 88, 91 to 96
PDATA1-P to PDATA8-P
PSTB-N
PBUSY-P
PACK-N
PPE-P
PERROR-N
PSEL-P
PINIT-N
PSELIN-N
PAUTOFD-N
97
85
86
83
81
79
80
82
84
2 to 9
1
11
10
12
13
32
31
36
0
DATA8-P
to
DATA1-P
STB-N
BUSY-P
ACK-N
PE-P
FAULT-N
IPRIME-N
SEL-P
SELIN-N
AUTOFEED-N
+5V 14
5V +5V
18
IC11
3.9k
Ω
PARALLEL DATA
(DATA BITs 1 to 8)
DATA STOROBE
ACKNOWLEDGE
BUSY
0.5 µs min. 0.5 µs min.
0.5 µs min.
0.5 µs max.
0.5 µs min.
0 min.
0 min.
0 min.
0.5 µs to 10 µs
0 min.
3.5 Centronics Parallel Interface
TheCPUsets a BUSY-PsignaltoONatthesame time whenitreadstheparalleldata(PDATA1-
PtoPDATA8-P)fromtheparallelportatthefallofPSTB-Nsignal.Furthermore,itmakesthestore
processingof receiveddataintoareceivebuffer terminatewithinacertainfixed timeandoutputs
an ACK-N signal, setting the BUSY-P signal to OFF.

- 13 -
SSTXD-P
Main control board
OLCC-2
3
4
6
1
4
3
1
6
44780
LCD
Control
Driver
Zebra Rubber
LCD
Flexible
Cable
CPU
LED
154 DB4~DB7
RS
R/W
E
158
153
152
CN1
PANEL
SSRXD-P
SSCLK-N
SSLD-N
LSI
BU6152S
Command (first)
bit 0 bit 7
Command (second)
bit 7
bit 0
Command response (first) Command response (second)
SSTXD-P
SSCLK-N
SSRXD-P
SSLD-N
3.6 Operator Panel Control
The operator panel consists of the following circuits.
(1) BU6152S (LSI)
This LSI is connected to a clock synchronous serial port of the CPU. It controls switch data
input, LED data output and LCD data input/output according to the commands given by the
CPU. The CPU sends the 2-byte (16-bit) command (SSTXD-P) together with the shift clock
signal (SSCLK-N) to the LSI and then makes a predetermined input/output control if the
command decoded by the LSI is found to be a normal command.
On receiving a command sent from the CPU, the LSI, synchronizing with the serial clock of
the command, returns a 2-byte command response to the CPU.

- 14 -
STRB1-N
STRB2-N
STRB3-N
STRB4-N
LOADI
CLOCKI
DATAI0
DATAI1
DATAI2
DATAI3
MSM6730
WAF
EEPROM
Correction
Values
LED LED LED LED LED LED LED
LED Driver
MSM6732BWAF LED Driver
MSM6732BWAF
LED Driver
MSM6731BWAF LED Driver
MSM6731BWAF
LED Array
Printing and correction data combined signal line
Correction data signal line
From
CPU
3.7 LED Head Control
An LED correcting head, which is capable of correcting the illumination of the LED for each dot,
isbeingusedinthisprinter. LEDilluminationcorrectionfunctionof16stepsiscarriedoutbyusing
an EEPROM which is installed in the LSI that maintains the LED illumination correction values,
and an LED correction drivers (MSM6731BWAF or MSM6732BWAF) together as a pair.
The LED correcting head consists of the correction control LSI (MSM6730WAF), LED drivers
(MSM6731BWAF or MSM6732BWAF), and an LED array.

- 15 -
CLOCKI
LOADI
DATAI3~0
STRB1I-N
STRB2I-N
STRB3I-N
STRB4I-N
Normal Mode Printing Timing Chart
First line printing data sent Second line printing data sent
First line printing
The printing operation is carried out in the following sequence. First, the printing data DATAI3
through DATAI0 are stored, sequentially shifted, in the shift registers of the LED drivers, by the
printing data synchronous clock, CLOCKI. Then the printing data stored in shift registers are
latchedbythehighlevelpulseofLOADI. ThelatchedprintingdataturnstheLEDsonby STRB1I-
N through STRB4I-N and actuates printing.

- 16 -
CPU A2918SW
MTD2005F
M
Main (Drum) Motor
M
DMPH1-P
132 13
RMPH2-N 3
12
RMPH2-P 4
8
RMPH1-N 2
7
RMPH1-P 1
3
DMPH2-P 4
4
DMPH2-N 3
2
DMPH1-P 2
17
DMPH1-N 1
1
+38V
+38V
IC9
IC8 Registration Motor
Main Control Board
RM
DM
DMPH2-P
131 8
DMON1-N
127 7
14
RMPH1-P
134 26
RMPH2-P
133 17
RMON-N
327
16
DMON1-N
DMPH1-P
DMPH2-P
T0 T1 T2 T3
Operation at normal speed: T0 to T3 =0.82 ms
3.8 Motor Control
(1) Registration and main (drum) motors
A registration motor and a drum motor are driven by means of control signals from the CPU
and a driver IC.
(2) Drum motor

- 17 -
Operation at normal speed: T0 to T3 = 0.82 ms
RMON-N
RMPH1-P
RMPH2-P T0 T1 T2 T3
Rotation Forward rotation
Hopping drive Reverse rotation
Registration roller drive
Stop
(3) Registration motor
(4) Drive control
Time T0 to T3 determines the motor speed, while the difference of phase direction between
phase signals DMPH1-P and DMPH2-P (RMPH1-P and RMHPH2-P) determines the
rotationdirection.DMON1-NandRMON-Nsignalscontrolamotorcoilcurrent.Accordingto
the polarity of the phase signal, the coil current flow as follows:
1) +38V →SW →motor coil →SW →resistor →earth, or,
2) +38V →SW →motor coil →SW →resistor →earth
The voltage drop across the resistor is input to comparator, where it is compared with a
reference voltage. If an overcurrent flow occurs, a limiter operates to maintain it within a
certain fixed amount of current.
Other manuals for OKIPAGE 12i Series
5
Table of contents
Other Oki Printer manuals

Oki
Oki OKIPAGE10e User manual

Oki
Oki B2200 User manual

Oki
Oki 6300FB User manual

Oki
Oki lp-1030-mf User manual

Oki
Oki C5800Ldn Series User manual

Oki
Oki ML1120 User manual

Oki
Oki MICROLINE 385/6 User manual

Oki
Oki C 5200n User manual

Oki
Oki ML420 Series User manual

Oki
Oki C711WT Operating and maintenance instructions