Oki OKIPAGE10ex User manual

1
➦
Features
OKIPAGE
10ex
User’s Guide
• Fast print speed - 10ppm with a 28 MHz RISC micro processor
• Excellent print quality–True 600 dpi and 600 x1200 graphics
• Large paper capacity–250 sheet paper tray and manual sheet/
envelope feeder plus options for increasing paper capacity up to
850 sheets
• Memory - 2MB installed, expandable to 35MB
• Fonts - 35 PCL®fonts (Agfa), 10 True Type fonts, USPS Barcode
font, OCR-A/B supported
• Emulations - Standard HP®LaserJet 5 (PCL6), IBM®
ProprinterIII/Epson®FX (9-pin emulation)
• Printer drivers - Windows®NT 4.0, Windows 95, Windows 98,
Windows 3.x
• Interface - IEEE 1284 bi-directional parallel interface
• On-screen status monitor and interactive software operator panel
• Energy Savings - Power is reduced when not printing
• 1 year overnight exchange warranty, 5 year warranty on the LED
printhead (overnight exchange available in the US and Canada)
Consumables
Toner - 2,000 pages @ 5% print density (Type 5 Toner Cartridge Kit,
Part# 52109001)
Drum - 20,000 pages with continuous printing (Type 5 Image Drum
Cartridge Kit, Part# 40433305)
Options
• 500 sheet 2nd Paper Tray/Mechanism (Part# 70028701)
• 100 sheet/50 envelope Multi-purpose Feeder (Part# 70025101)
• 1 MB Memory Expansion Board with 2 expansion (SIMM)
sockets (Part# 70033101)
• RS-232 Serial Interface Board with 2 expansion (SIMM)
sockets (Part# 00025302)
To install the following options, a Memory Expansion Board or RS-232
Serial Interface Board must be purchased.
• Flash Memory SIMM 4MB (Part# 70032601)
• Flash Memory SIMM 8MB (Part# 70033201)
• 4MB Memory SIMM Chip (Part# 70028801)

Section1
➨
SettingUpYourPrinter
➥2OKIPAGE
10ex
User’s Guide
Selecting a Location for Your Printer
• A firm surface such as a table or desktop
• Space to open the cover and pull out the paper tray
and the rear output extender
• Air circulation around the printer to prevent overheating
(minimum of 4 inches)
• A nearby power source
• Room temperature of 50° to 90°F (10° to 32°C).
• Relative Humidity of 20- 80%
• No direct sunlight
http://www.okidata.com
for the latest information on:
• Product Guides
• Customer Support
• Software Drivers
• Corporate Information
• Documentation
Checking the Contents
Unpack your printer. The shipping box should contain:
1. OKIPAGE 10ex Printer (with image drum cartridge installed)
2. CD-ROM (includes printer drivers and software)
3. Printer software diskette (to install printer software without CD-
ROM)
4. Toner Cartridge
5. Black plastic light-shield bag (to store image drum if you need to
ship the printer)
6. Power Cord
7. Okipage 10ex User’s Guide
8. Warranty Registration Card
If you are missing anything, contact your dealer.
Visit the OKIDATA Web Site
Image drum cartridge

OKIPAGE
10ex
User’s Guide 3
➦
1 Setting UpYour Printer
Remove the Image Drum Protective Paper
1. Press the cover release buttons and lift the cover.
LETTERLEGALA4OTHERENV
READY
ATTENTION
MANFEED
DATA
2. Lift out the image drum cartridge. Do not touch the drum’s
green surface.
➯
Only the OKIPAGE 10 and 12 Series Type 5 Image Drum will fit
in this unit (Part# 40433305)
3. Remove the protective paper from the image drum.
4. Reinstall the image drum cartridge in the printer.
Removing Operator Panel Protective Film
Lift up the corner and peel the protective plastic film from the control
panel.
LETTER LEGAL A4 OTHER ENV
READY
ATTENTION
MANFEED
DATA

➥4OKIPAGE
10ex
User’s Guide
Setting UpYour Printer 1
Installing Toner
1. Remove the sponge.
2. Unwrap the toner cartridge. Shake the cartridge from side to side
to distribute the toner.
➯
Only the OKIPAGE 10 and 12 Series Type 5 Toner Cartridge will
fit in this unit (Part# 52109001)
3. Peel tape off the bottom.
4. Grasp the lock lever and place the left side of the toner cartridge
into the toner well, under the tab.
5. Lower the right side, aligning the lock lever slot with the ridge in
the drum cartridge.
PUSH
6. When the cartridge is in place, push the lock lever forward until
it stops.
7. Lower the printer cover and press firmly to close.
ridge
slot
tab

OKIPAGE
10ex
User’s Guide 5
➦
1 Setting UpYour Printer
Loading Paper
1. Slide the tray out of the printer.
➯
The paper gauge indicates how much paper remains in the tray.
2. Adjust the paper guides for the paper size you are using.
3. Fan a stack of paper (Maximum 250 sheets, 20 lb.) and place it in
the tray under the tabs. Do not fill above the “PAPER FULL”
mark. To use letterhead, place paper print side down, top-edge
facing you.
➯
Recommended paper weight for the tray is 16 to 28 lb (60 to 105
g/m2)..
4. Place the tray back into the printer until it locks.
Using Legal Size Paper
To load legal size paper, open out the tray extender and adjust the rear
paper guide.
Paper Full mark
paper gauge
guide

➥6OKIPAGE
10ex
User’s Guide
Setting UpYour Printer 1
Choosing Paper
• For best results, use paper that is smooth and of high quality.
• Store paper in its ream wrapper until you are ready to use it, and keep it away from moisture or conditions that can cause it to wrinkle or curl.
• Avoid printing on both sides of the paper for more than a few pages, or preprinted documents that have been in a photocopier.
• Try paper before you buy it in quantity.
➯
See Section 2 for information on using recycled print media.
Paper Exit Options
Two paper exit options are available. Select the paper path that is
appropriate for the media you are using.
Top Paper Exit
Use top paper exit for most printing jobs.
• Printed pages exit face down
• Pages are stacked in the order printed
• Exit bin holds 150 sheets of 20-lb. paper
LETTER LEGAL A4 OTHER ENV
READY
ATTENTION
MANFEED
DATA
1. Pull the front tray extender forward.
2. Lift out the support bar.
➯
Don’t change paper paths while printing, paper jam may
occur.
Rear Paper Exit
The rear paper exit tray provides a straighter paper path. Use rear exit
when printing on heavy paper, envelopes, labels, and transparencies.
• Printed pages feed face up into the rear tray
• Pages are stacked in reverse order
• Tray holds a maximum of 50 sheets of 20 lb. paper
• Use rear exit for printing on heavy paper, envelopes, labels,
transparencies or odd size paper
LETTER LEGAL A4 OTHER ENV
READY
ATTENTION
MANFEED
DATA
1. Pull out the rear exit tray until it locks in place.
2. Lift out the support bar.
To return to top exit, close the support bar and push the rear exit extender
firmly back in place, paper will then exit into the top bin.
➯
See Section 2 for information on using special print media.

OKIPAGE
10ex
User’s Guide 7
➦
1 Setting UpYour Printer
Interfacing with your Computer
Your printer has a high-speed, bi-directional parallel IEEE 1284 interface
port. Purchase a cable marked IEEE 1284 compliant. To comply with
FCC regulations, the cable must be shielded and ULand CSA
approved. Consult your PC manual for details on cable requirements and
interface ports on your computer.
➯
OKIDATA has tested and approved the following bi-directional
cable: Part# 70000803. See Section 5 for purchasing information.
➯
An optional RS-232 Serial I/O Card is available: Part#
00025302. See Section 5 for purchasing information.
Connect the Cable
Make sure the printer and computer are off.
1. Insert the printer end of the cable firmly into the connector on the
back of the printer). Fasten the cable to the printer securely.
2. Connect the other end of the cable to the proper connector on
your computer. Fasten the cable securely to your computer.
Attaching the Power Cord
1. Make sure the printer power switch (on left side) is set off.
POWER
ON OF
F
POWER
ON OF
F
O
F
O
F
2. Plug the power cord into the printer first, then into a grounded
outlet.
3. Turn the printer on. It takes about 10 seconds for the printer to
initialize, warm up, and display the ON-LINE message,
indicating the printer is ready to receive data.

➥8OKIPAGE
10ex
User’s Guide
Setting UpYour Printer 1
Changing the Display Language
LETTER LGL OTHER
A4 ENV
To change the language on the panel display and menu printout:
1. Press ON-LINE until the READY light goes out.
2. Press and hold MENU1/Menu2 until PRINT MODE displays.
3. Press MENU1/Menu2 10 times until the display reads
LANGUAGE.
4. Press ENTER/Power Save . The display now reads
LANGUAGEENGLISH*.
5. Press >/Reset until the language you want appears. Press
ENTER/Power Save.
6. Press ON-LINE.
Printing a Demo Page
LETTER LGL OTHER
A4 ENV
PRINT
DEMO
To print a page showing printer features and capabilities, do the
following:
1. Press ON-LINE until the READY light goes out and the printer
is OFF-LINE.
2. Press FORM FEED/Print Demo and hold until DEMO appears.
3. Press ENTER. The demo page will print.
Printing a Font Page
To print a page showing the printers available fonts, do the following:
1. Press ON-LINE until the READY light goes out and printer is
OFF-LINE.
2. Press TRAY TYPE/Print Fonts and hold until FONTS appears.
3. Press ENTER. The font page will print.
4. To print the font page for a different emulation, before pressing
ENTER, press > until that emulation displays.

OKIPAGE 10ex User’s Guide 9
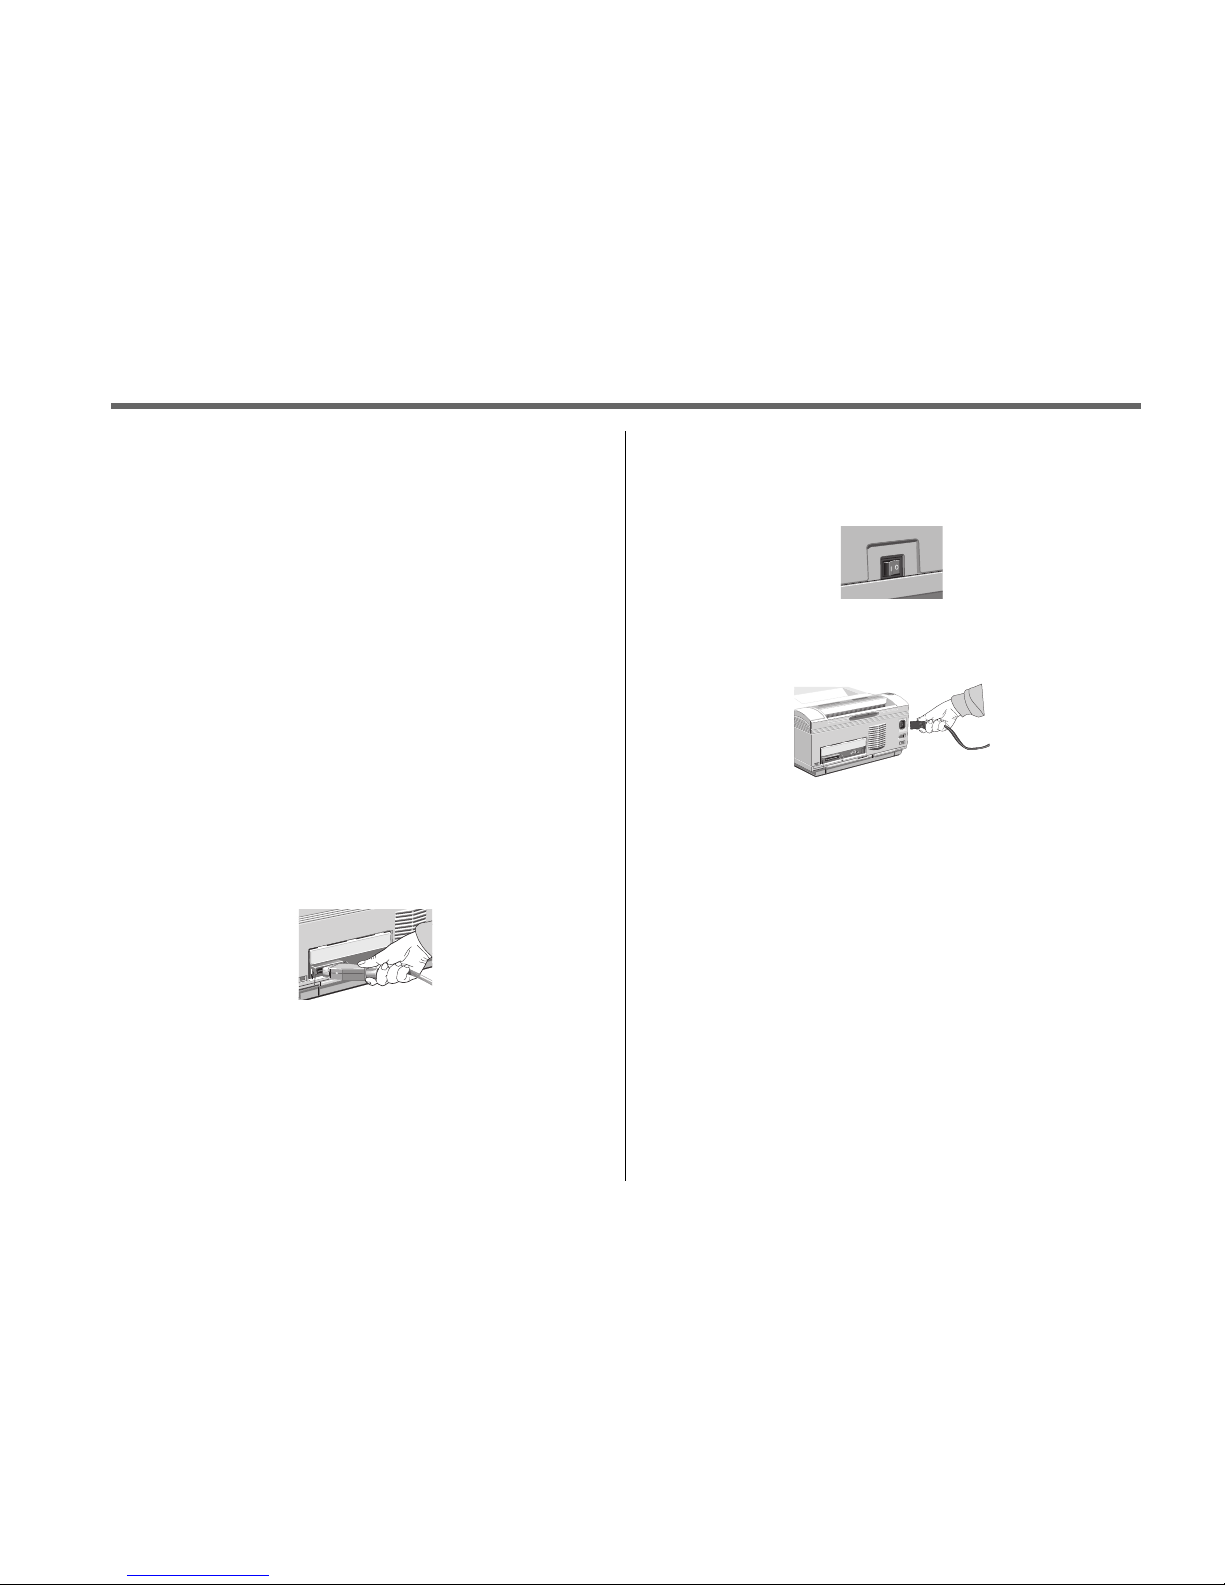
➦
1 Setting UpYour Printer
Printer Software
The CD-ROM provided with your printer includes printer drivers
required to use all the OKIPAGE 10ex features. Follow the steps in this
guide to install the appropriate driver on your computer system.
In addition to printer drivers, you have the option of installing an on-
screen printer status monitor and operator panel, and the OKI electronic
registration program.
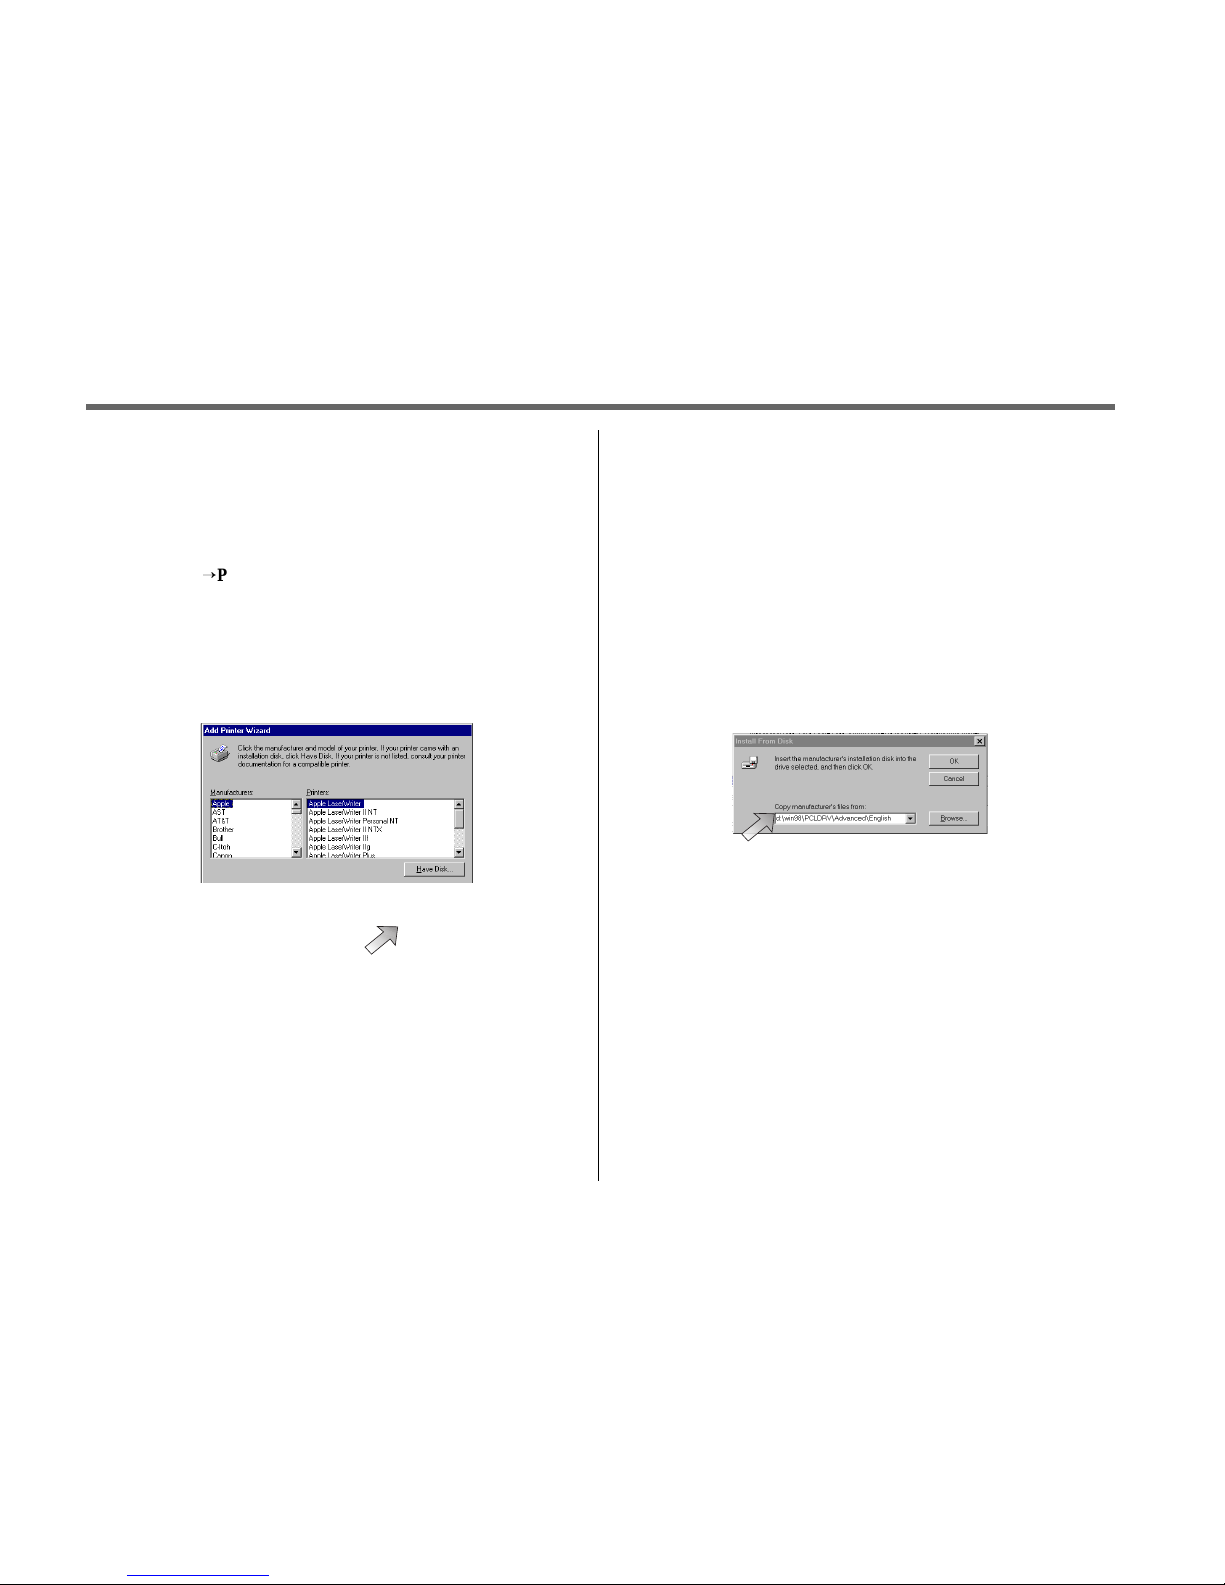
Printer Drivers
Printer drivers must be installed so your software application can
communicate with your OKIPAGE 10ex printer and support all of its
features.
The OKIPAGE 10ex CD-ROM includes printer drivers for printing in the
following Windows environments:
• Windows 95
• Windows 98
• Windows NT 4.0
• Windows 3.1
➯
If you are using DOS or another non-windows operating system,
select a Hewlett-Packard®LaserJet®5, LaserJet6 or LaserJet 6P
printer driver in your software application.
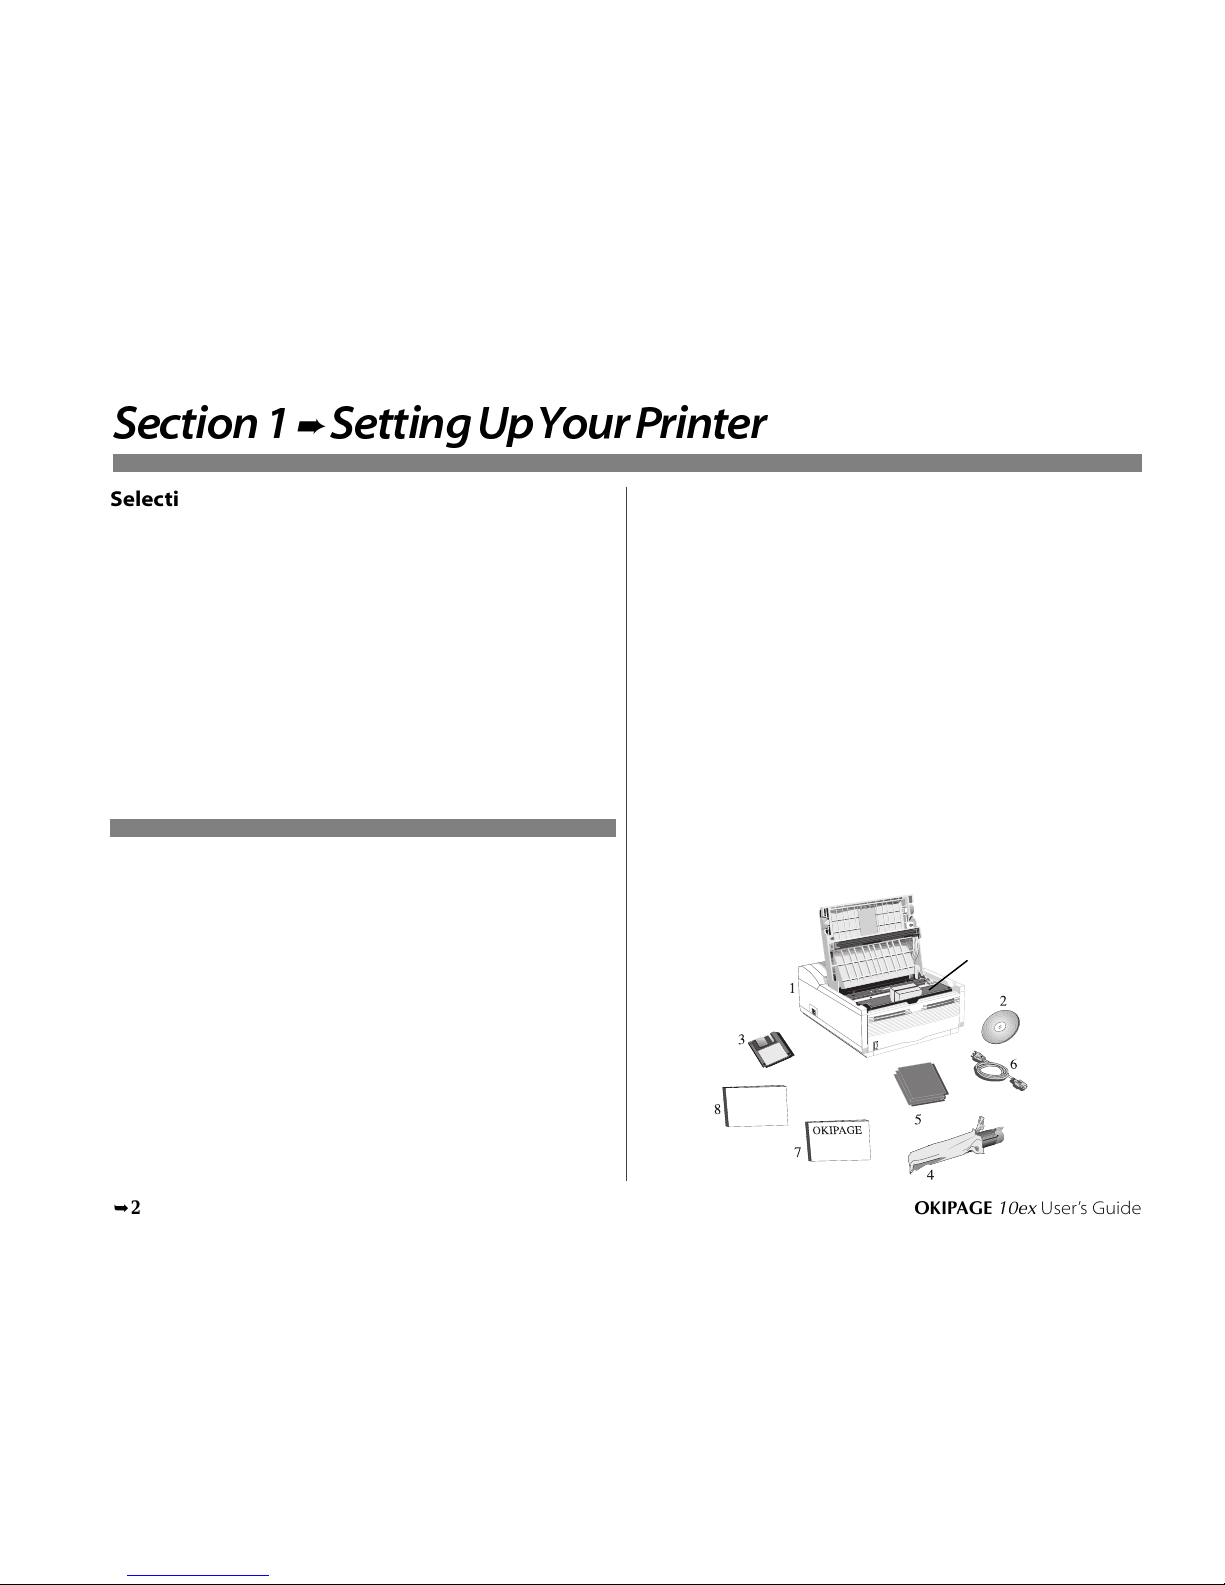
No CD-ROM Drive?
1. Visit the Okidata web site at http://www.okidata.com and
download the printer drivers.
or
2. Use the enclosed 3.5" diskette. It contains a Windows®driver
that will allow you to use your printer right away. Follow the
instructions in the README.TXT file on the diskette to install it.
To obtain a set of diskettes, call 1-888-232-8530 and request the
appropriate set.
Standard Windows 3.1 MS 10370/1098
Standard Windows 95 MS 10371/1098
Standard Windows 98 MS 10372/1098
Standard Windows NT 4.0 MS 10373/1098
Standard Driver vs. Advanced Driver
The standard OKIPAGE 10ex (PCL 5, HP6P) driver is ideal for most
Windows documents. However, we have also provided an advanced
(PCL-XL) driver that optimizes the printing of complex graphics in the
Windows environment. Additional printer memory may be required to
print complex pages and to take full advantage of the features offered by
the advanced driver.
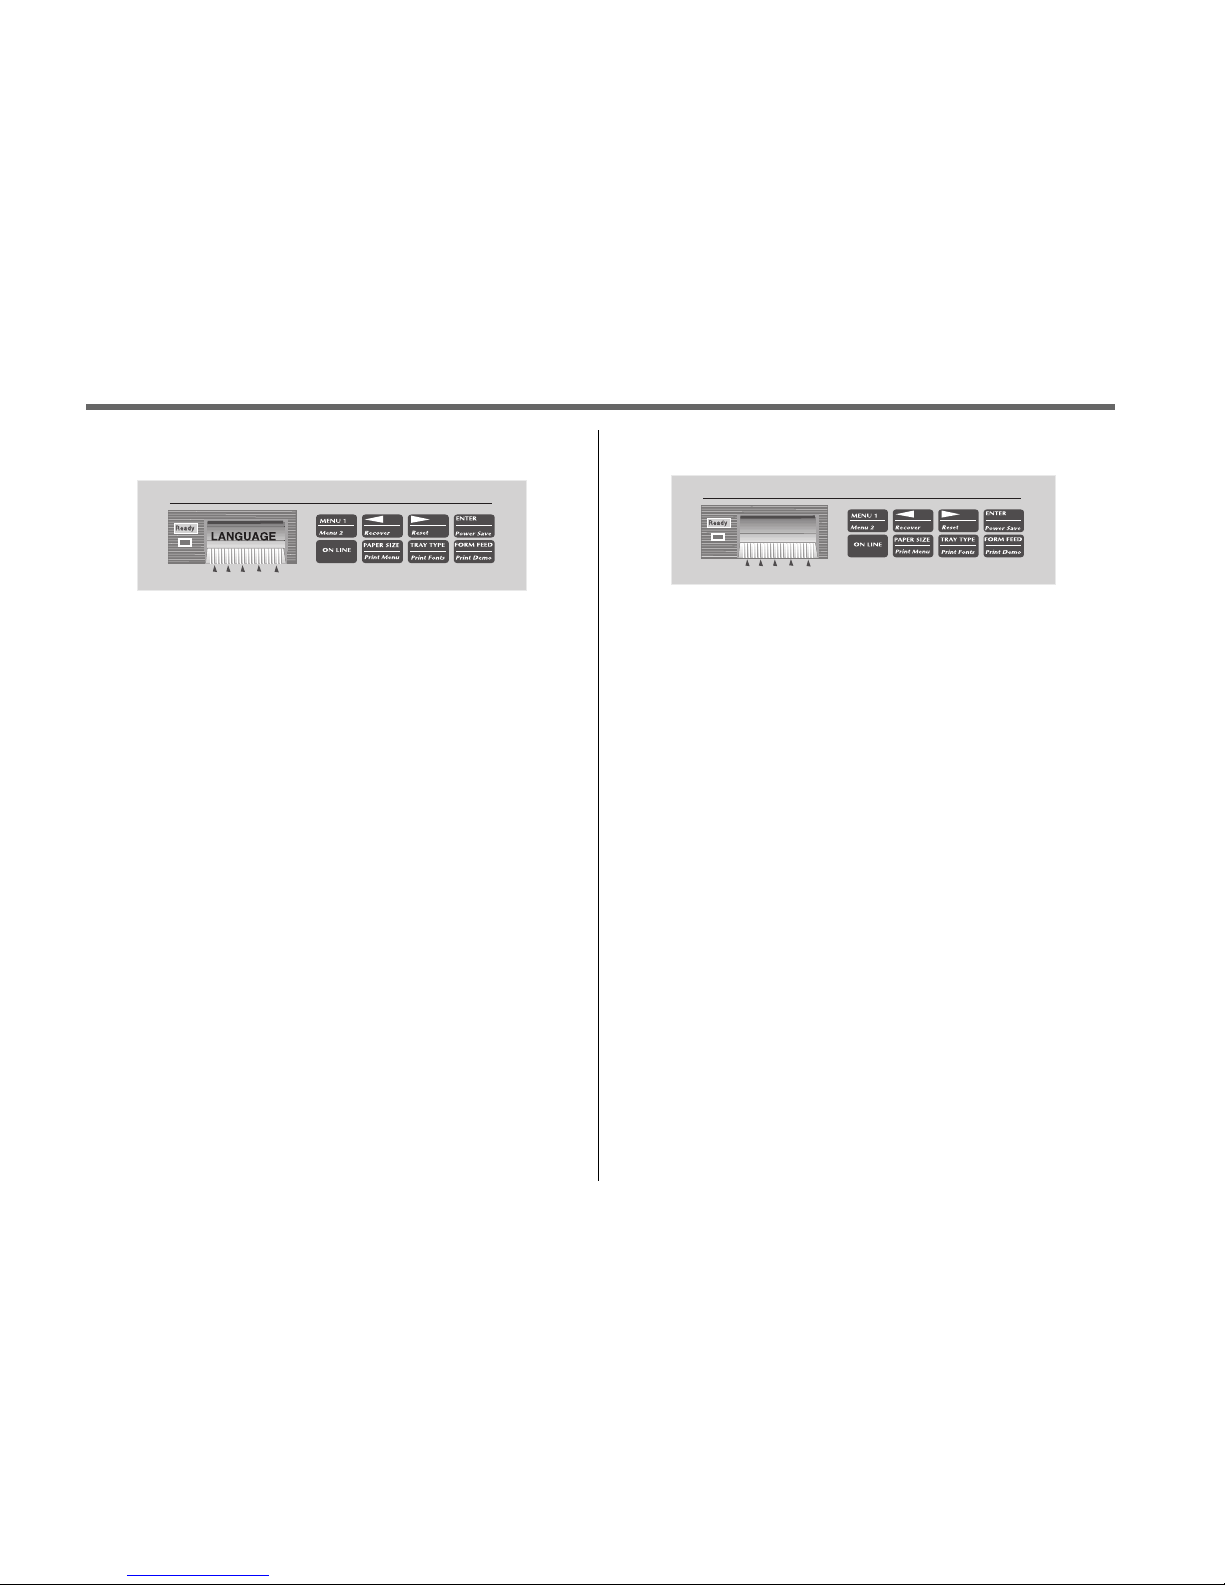
Status Monitor
The status monitor program allows you to monitor and configure an
OKIPAGE 10ex that is connected to your parallel port. In addition to
displaying printer status messages, the status monitor provides remote
access to the printer's operator panel. See pages 8 and 9 for additional
information about status monitor features.

➥10 OKIPAGE
10ex
User’s Guide
Setting UpYour Printer 1
Windows 95,Windows 98, and Windows NT 4.0
Installing the Driver
1. Close all open applications.
2. Insert the OKIPAGE 10ex CD into your CD-ROM drive.
3. Click the Start button on the Windows taskbar, then choose
Settings
Õ
Printers.
4. Double-click the Add Printer icon.
5. The Add Printer Wizard screen appears; follow the instructions
on your screen.
6. Select Local or Network printer, (depending on your
configuration), then click Next.
7. When the Manufacturers list appears, Click Have Disk.
8. When Install From Disk window appears, depending on your
operating system and choice of driver, type one of the following
paths in the Copy manufacturers files box:
d:\win95\PCLDRV\standard\english
d:\win95\PCLDRV\advanced\english
d:\win98\PCLDRV\standard\english
d:\win98\PCLDRV\advanced\english
d:\NT40\PCLDRV\standard\english
d:\NT40\PCLDRV\advanced\english
➯
assuming “d” is the location of your CD ROM
drive.
9. Click OK.
10. When the driver you selected appears, click Next.
11. Continue with the installation following the Add Printer Wizard
instructions on your screen.

OKIPAGE 10ex User’s Guide 11
➦
1 Setting UpYour Printer
Windows 3.x
Installing the Standard Driver and the Status Monitor
1. Insert the disc into your CD-ROM drive.
2. Close all open applications.
3. Click File
Õ
Run.
4. Enter d:\install (assuming “d” is the location of your CD-ROM
drive). Click OK.
5. Welcome window appears. Click Next.
6. LicenseAgreement appears. Click Yes.
7. Destination window appears. Click Next.
8. Select Component window appears. Here you have the option of
installing the following:
✓ OKIPAGE 10ex Standard Driver
✓ OKIPAGE 10ex Status Monitor
✓Electronic Registration
Clear the items you do not want to install. Click Next.
Installing the Status Monitor
To install the on-screen status monitor:
1. Close all open applications.
2. Insert the OKIPAGE 10ex CD into your CD-ROM drive.
3. Click the Start button on the Windows taskbar, then click Run.
4. Enter d:\install (assuming “d” is the location of your CD ROM
drive). Click OK.
A message appears reminding you that this program installs only
the printer software. (To install the driver, see instructions in the
previous section).
Click Yes to continue the installation.
5. Welcome window appears. Click Next.
6. LicenseAgreement appears. Click Yes.
7. Destination window appears. Click Next.
8. Select Component window appears. Here you have the option of
installing the following:
✓ OKIPAGE 10ex Status Monitor
✓ Electronic Registration
Clear the items you do not want to install. Click Next.
9. Select Program Folder windows appears, with OKIPAGE 10ex
listed. Click Next. Installation begins. Follow the instructions on
the screen.
10. When prompted, click Finish to complete the installation.
11. Restart Windows.
12. Click the Start button on the Windows taskbar, then choose
Programs
Õ
OKIPAGE 10ex. From the submenu, click
Electronic Registration, Windows Status Monitor, or
Readme.txt to see any of these programs.
➯
To register your printer online, visit the OKIDATA Web Site at
http://www.okidata.com.

➥12 OKIPAGE
10ex
User’s Guide
Setting UpYour Printer 1
9. Select Program Folder windows appears, with OKIPAGE 10ex
listed. Click Next. Installation begins.
10. To complete the installation, click restart Windows. Click
Finish.
Installing the Advanced Driver
1. From Program Manager Double-click the Main group.
2. Double-click the Control Panel icon.
3. Double-click Printers icon.
4. Click the Add button.
5. Highlight Unlisted or Updated Printer. Click Install.
6. When the Install Driver box appears, type in
d:\WIN31\PCLDRV\Advanced\English (assuming “d” is the
location of your CD ROM drive). Click OK.
7. OKIPAGE 10exPCLXL advanced driver appears. Click OK.
8. Click Close.
Using the Status Monitor`
You have the option of installing an on-screen printer status monitor and
operator panel. With the status monitor open, printer status messages pop-
up on your computer screen, and printer menu settings can be modified
using the on-screen operator panel.
➯
Printer features selected in your application software will
override settings in the on-screen operator panel.
Three tabs include the following information:
•Status - (shown here) shows the printer status and current job
status.
•Controls - allows user access to the Printer Setup dialog (printer
driver control) and the operator panel.
• Preferences - allows the user to select the behavior and
appearance of the status monitor.
Click the Help button for a description of each feature.

OKIPAGE 10ex User’s Guide 13
➦
1 Setting UpYour Printer
Using the Operator Panel
The on-screen operator panel is designed to perform as an interactive
software “front panel” for accessing the printer's menu from your
computer. To invoke the operator panel, open the status monitor, click the
controls tab, then click the operator panel button. Click the Help button
for an explanation of each feature.
➯
Printer features set in your application software, will override
printer menu settings.
Click on the appropriate tab to see the menu settings.
➊Set display language, copies, low toner alert, miscellaneous
settings.
➋Print demo page, font page, menu settings, cleaning page.
➌Reset menu, drum count, print menu.
➍Set power save, toner save.
➎Select paper source, weight, size, transparencies.
➏Set print output quality, darkness setting.
➐Adjust lines per page, orientation, edit size.
➑Select emulation (PCL, IBM®, EPSON®).
Uninstall Printer Software
If you want to remove the printer driver or status monitor from your hard
drive, use the following procedure:
Windows 95, Windows 98, and NT 4.0
Tor e m o ve the pr int er dr iver:
1. Click Start
Õ
Settings
Õ
Printers
2. Highlight the OKIPAGE 10ex Printer icon.
3. Click File from the Menu bar.
4. Click Delete.
Tore m ove the status monitor:
1. Click Start
Õ
Settings
Õ
Control Panel.
2. Double-click Add/Remove Program.
3. On the Install/Uninstall tab, select the OKIPAGE 10ex
Software.
4. Click theAdd/Remove button.
Windows 3.x
Tor e m ove the pr int er dr iver and status monitor:
1. From Program Manager double-click the OKIPAGE 10ex icon
(or the group where your printer is installed).
2. Double-click uninstallShield.
3. Restart your computer.
➊➋➌➍
➎➏➐➑

Section2
➨
OperatingYourPrinter
➥14 OKIPAGE
10ex
User’s Guide
This section provides the following information:
• Using the front operator panel
• Setting printer features using the printer menu
• Using the printer software
• Using manual feed
• Printing envelopes
• Printing transparencies and labels
• Using recycled print media
Using the Front Operator Panel
LETTER LGL OTHER
A4 ENV
Ready Light
On
Printer is online, ready to receive data; button functions inactive (except
ON-LINE).
Off
Printer is off-line, cannot receive data; button functions active.
Blinking
Printer is receiving data.
LCD Display Window
Indicates:
• What the printer is doing during normal operation.
• When you need to add paper or change consumables.
• When there’s something wrong with the printer.
• Printer feature selections in Menu mode
➯
See “Problem Solving” for a description of display messages.
Paper Size Indicator
The paper size in the tray is indicated by using the dot at the very bottom
of the LCD display. Paper size options are shown immediately below the
LCD display.
Buttons
LCD Display Window
Ready Light
Paper Size Indicator

OKIPAGE
10ex
User’s Guide 15
➦
2Operating Your Printer
Button Functions
NOTTUBNOTTUB NOTTUB NOTTUBNOTTUBNOITAREPONOITAREPO NOITAREPO NOITAREPONOITAREPONOITCNUFNOITCNUF NOITCNUF NOITCNUFNOITCNUF
ENILNO sserpkciuQ .edomENIL-FFOdnaENIL-NOneewtebsehctiwS
uneMnI .edomuneMstixE
DEEFMROFsserpkciuQ .detnirpsiataddetnirpnu,edomENIL-FFOnI.detcejesiteehseno,edomENIL-NOnI
omeDtnirPsserpdnoces2nIENIL-FFO.tnirpegapomed,edom
EPYTYART sserpkciuQ .uneMbuStceleSyarTsretne,edomENIL-FFOnI
stnoFtnirP sserpdnoces2 .egaptnofstnirp,edomENIL-FFOnI
EZISREPAPsserpkciuQ .uneMbuSeziSrepaPsretne,edomENIL-FFOnI
uneMtnirPsserpdnoces2.sgnittesuneMstnirp,edomENIL-FFOnI
1UNEM sserpkciuQ .uneM1-leveLsretne,edomENIL-FFOnI
edomuneMnI sdnoces8rofdesserpnehwyrogetacuneMsuoiverpotstreveR.yrogetacuneMtxenotsevoM .eromro
norewoptA .edomecnanetniaMresUsretnE
2uneM sserpdnoces2 .uneM2-leveLsretne,edomENIL-FFOnI
RETNEedomuneMnI .gnittestluafedsanoitcelesdeyalpsidehtteS
evaSrewoPsserpdnoces2 .uneMbuSevaSrewoPehtsretne,edomENIL-FFOnI
§§
§
§§ edomuneMnI .metiuneMsuoiverpotsnruteR
revoceR sserpdnoces2 .enil-noretnirpsnruterdnasrorreatadeviecerniatrecsraelC
©©
©
©© edomuneMnI.metiuneMtxenotsecnavdA
teseRsserpdnoces2.teserlanretnisetucexednaatadllasraelC

OperatingYour Printer 2
OKIPAGE
10ex
User’s Guide
➥16
Using the Printer Menu
The Menu provides a way to select printer operations and features using
the printer’s front operator panel.
The Menu is divided into Level 1 and Level 2.
Level-1 Menu
• Enter this mode using a quick press of the Menu 1/Menu 2
button with the printer off-line.
• Items frequently changed are included.
Level-2 Menu
• Enter this mode by pressing the Menu 1/Menu 2 button for 2
seconds with the printer off-line.
• Items rarely changed are included.
Each level has a hierarchical structure of categories and items, and
options. Selections display in the LCD window.
1. Press the ON LINE button to enter off-line mode.
2. Enter the Menu mode by pressing the MENU 1/Menu 2 button.
3. Continue pressing MENU 1/Menu 2 to display the next
category.
4. Press MENU 1 again to see more items in a category.
5. To select an item, press ENTER. Items are displayed on the top
line. The bottom line indicates available options within each
item. An asterisk (*) indicates the current selection.
6. Press >/Recover to see more selections.
7. Press ENTER to choose a selection.
8. Press ON-LINE to exit the menu.
➯
Operations and features set in your application software, will
override Menu settings.
➯
Most printer menu options can also be set using the soft operator
panel on-screen. See “Using the Status Monitor” in Section 1.
Resetting the Menu
The menu can be reset to the factory (default) settings in the Maintenance
Menu (See Maintenance Menu for information on using this feature).
Sub Menus
Sub Menus are accessed by pressing a specific button on the front
operator panel. This feature allows quick access to three often used
features:
• Power Save
• Paper Size
• Tray Type
The operation is the same as the regular menu, but only the category
indicated on the button is activated.
Printing the Menu
For a printout of all menu settings including default (factory) and user
settings, firmware revisions, and total RAM capacity:
1. Press ON-LINE to select off-line mode.
2. Press PAPER SIZE/Print Menu for 2 seconds. MENU and the
current emulation setting displays.
3. Press ENTER to print the menu.
4. To print the menu for a different emulation, before pressing
ENTER, press >until that emulation displays.

OKIPAGE
10ex
User’s Guide 17
➦
2 Operating Your Printer
Category Items Options
Level 1 Menu
*Default Setting
PERSONALITY
EMULATION
AUTO EMULATON*, HP PCL6, IBM PPR, EPSON FX
Notes: Auto Emulation detects the emulation required by the file and sets the printer accordingly.
TRAY SELECT
MANUAL
OFF*
ON
Notes: When set ON, paper will feed from the front feeder.
PAPER IN
TRAY 1*
TRAY 2 (OPTION)
FEEDER
MULTI FEEDER (OPTION)
Notes: Select paper source. Tray 2 and Multi Feeder appear if installed.
AUTO TRAY SWITCH
OFF*
ON
NOTES: ON=WHEN PAPER TRAY 1 IS EMPTY, PRINTER AUTO-
MATICALLY SWITCHES TO TRAY WITH SAME SIZE PAPER
INSTALLED. (ONLY WHEN 2ND TRAY OR FEEDER IS INSTALLED).
EDIT SIZE
EDIT SIZE
CASSETTE SIZE*
LETTER
EXECUTIVE
LEGAL 14
LEGAL 13
A4 SIZE

➥18 OKIPAGE
10ex
User’s Guide
OperatingYour Printer 2
Category Items Options
Level 1 Menu
*Default Setting
A5 SIZE
A6 SIZE
B5 SIZE
COM-9
COM-10
MONARCH
DL ENVELOPE
C5 ENVELOPE
C4 ENVELOPE
Notes: CASSETTE SIZE=Paper size in the tray is automatically identified by paper sensors. This setting eliminates
having to select paper size manually.
Other sizes=setting must match paper size in tray or PAPER SIZE ERROR displays unless PAPER SIZE CHECK is set
to Disable.
PAPER SIZE
TRAY1
TRAY 2 (Option)
LETTER*
EXECUTIVE
LEGAL 14
LEGAL 13
A4 SIZE
A5 SIZE
A6 SIZE
B5 SIZE
Notes: Select paper size.
MANUAL
LETTER*
EXECUTIVE
LEGAL 14
LEGAL 13
A4 SIZE
A5 SIZE
A6 SIZE
B5 SIZE
COM-9
COM-10
MONARCH

OKIPAGE
10ex
User’s Guide 19
➦
2 Operating Your Printer
Category Items Options
Level 1 Menu
*Default Setting
DL ENV
C5 ENV
Notes: Select paper size installed in Front Feeder (manual feed). If paper size installed does not match setting, printer
will display message requesting the size set in menu.
MULTI FEEDER ENVELOPE
(option)
MEDIA TYPE
TRAY 1
MEDIUM HEAVY
HEAVY
LIGHT
MEDIUM*
MEDIUM LIGHT
Notes: Paper thickness setting.
Medium Light=18-lb paper
Medium Heavy=24-lb paper
Heavy= 28-lb paper
Light=16-lb paper
Medium=20-lb paper
MANUAL
MEDIUM LIGHT
MEDIUM HEAVY
HEAVY
LIGHT
MEDIUM*
TRANSPARENCY
TRAY 2 (Option)
MULTI FEEDER ENVELOPE
(Option)
PAPER SIZE CHECK
PAPER SIZE CHECK
ENABLE*
DISABLE
Notes: ENABLE=paper size selected in software must match size loaded in drawer.
DISABLE=printer accepts any paper size selected in software.

➥20 OKIPAGE
10ex
User’s Guide
OperatingYour Printer 2
Category Items Options
Level 1 Menu
*Default Setting
COPIES
COPIES
1* TO 999
Notes: Select number of copies to print for each document.
THE FOLLOWING CATEGORIESARE DEPENDENT ON EMULATION
FONTS & SYMBOLS
(PCL) FONT SRC
RESDENT*, SIMM , DLLSOFT
Notes: Select location of default fonts. SIMM is indicated only when a ROM SIMM option is installed.
DLLSOFT is indicated only when a soft font is downloaded at permanent setting.
(PCL) FONT NO.
I000* TO I046
Notes: Select font by ID number (see font print sample); S=soft font.
(PCL )FONT CPI
Notes: Appears if selected font is scalable/fixed spaced
10.00*, 0.44 TO 99.99
ADJUST IN .01 POINT INCREMENTS.
Notes: Select number of characters printed in a horizontal inch (pitch) when scalable font with fixed spacing is
selected. (72 points= 1 inch). Character height (point size) adjusts accordingly.
(PCL) FONT HGT
Notes: Appears if selected font is scalable/proportional spaced
This manual suits for next models
1
Table of contents
Other Oki Printer manuals

Oki
Oki B6500 Series Installation and maintenance instructions

Oki
Oki C130n User manual

Oki
Oki PRO511DW How to use

Oki
Oki Pro8432WT User manual

Oki
Oki C7300 User manual

Oki
Oki B6500 Series User manual

Oki
Oki C9600hdn Original instructions

Oki
Oki 6300FB User manual

Oki
Oki B4200 Firmware update

Oki
Oki B4400 Series User manual