Oliver 4420 User manual

1
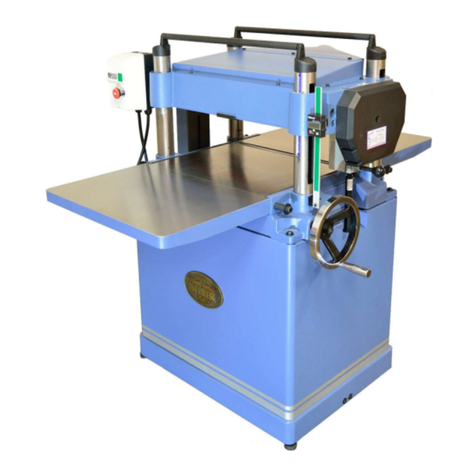
4420 16” Planer
Owner’s Manual
Oliver Machinery M-4630 9/2019
Seattle, WA Copyright 2019
info@olivermachinery.net www.olivermachinery.net

2
Warranty
Oliver makes every effort possible to assure that its equipment meets the highest possible standards of
quality and durability. All products sold by Oliver are warranted to the original customer to be free from
defects for a period of 2 (two) years on all parts, excluding electronics and motors, which are warranted for 1
year. Oliver’s obligation under this warranty shall be exclusively limited to repairing or replacing (at Oliver’s
option) products which are determined by Oliver to be defective upon delivery F.O.B. (return freight paid by
customer) to Oliver, and on inspection by Oliver. This warranty does not apply to defects due, directly or
indirectly, to misuse, abuse, negligence, accidents, unauthorized repairs, alterations, lack of maintenance,
acts of nature, or items that would normally be consumed or require replacement due to normal wear. In no
event shall Oliver be liable for death, personal or property injury, or damages arising from the use of its
products.
Warning
Read this manual thoroughly before operating the machine. Oliver Machinery disclaims any liability for
machines that have been altered or abused. Oliver Machinery reserves the right to effect at any time, without
prior notice, those alterations to parts, fittings, and accessory equipment which they may deem necessary for
any reason whatsoever.
For More Information
Oliver Machinery is always adding new Industrial Woodworking products to the line. For complete, up-to-
date product information, check with your local Oliver Machinery distributor, or visit www.olivermachinery.net.
PROP 65 NOTICE:
WARNING: Some dust created by power sanding, sawing, grinding, drilling, and other construction activities
contains chemicals known to the State of California to cause cancer and birth defects or other reproductive
harm.
Some examples of these chemicals are:
• lead from lead-based paints,
• crystalline silica from bricks and cement and other masonry products, and
• arsenic and chromium from chemically treated lumber.
Your risk from exposure to these chemicals varies, depending on how often you do this type of work. To
reduce
your exposure, work in a well-ventilated area and with approved safety equipment, such as dust masks that
are
specially designed to filter out microscopic particles. For more information go to www.P65Warnings.ca.gov.
All efforts have been made to ensure that the information in this catalog is accurate. However, Oliver
Machinery does not guarantee the accuracy of this information and reserves the right to change information in
this catalog without notification.

3
For Your Own Safety Read Instruction Manual Before Operating This Tool
Read this manual completely and observe all warning labels on the machine. This machine has made every
attempt to provide a safe, reliable, easy-to-use piece of machinery. Safety, however, is ultimately the
responsibility of the individual machine operator. As with any piece of machinery, the operator must exercise
caution, patience, and common sense to safely run the machine. Before operating this product, become
familiar with the safety rules in the following sections.
1. KEEP WORK AREA CLEAN. Cluttered areas and benches invite accidents.
2. DON'T USE IN DANGEROUS ENVIRONMENT. Don't use power tools in damp or wet locations,
or expose them to rain. Keep work area well lighted.
3. KEEP CHILDREN AWAY. All visitors should be kept safe distance from work area.
4. MAKE WORKSHOP KID PROOF with padlocks, master switches, or by removing starter keys.
5. USE RIGHT TOOL Don't force tool or attachment to do a job for which it was not designed.
6. WEAR PROPER APPAREL Do not wear loose clothing, gloves, neckties, rings, bracelets, or
other jewelry which may get caught in moving parts. Nonslip footwear is recommended. Wear
protective hair covering to contain long hair.
7. ALWAYS USE SAFETY GLASSES. Also use face or dust mask if cutting operation is dusty.
Everyday eyeglasses only have impact resistant lenses, they are NOT safety glasses.
8. SECURE WORK. Use clamps or a vise to hold work when practical. It's safer than using your
hand and it frees both hands to operate tool.
9. DON'T OVERREACH. Keep proper footing and balance at all times.
10. MAINTAIN TOOLS WITH CARE. Keep tools sharp and clean for best and safest performance.
Follow instructions for lubricating and changing accessories.
11. REDUCE THE RISK OF UNINTENTIONAL STARTING. Make sure switch is in off position
before plugging in.
12. USE RECOMMENDED ACCESSORIES. Consult the owner's manual for recommended
accessories. The use of improper accessories may cause risk of injury to persons.
13. CHECK DAMAGED PARTS. Before further use of the tool, a guard or other part that is
damaged should be carefully checked to determine that it will operate properly and perform its
intended function - check for alignment of moving parts, binding of moving parts, breakage of
parts, mounting, and any other conditions that may affect its operation.
A guard or other part that is damaged should be properly repaired or replaced.
14. DIRECTION OF FEED. Feed work into a blade or cutter against the direction of rotation of the
blade or cutter only.
15. NEVER LEAVE TOOL RUNNING UNATTENDED. TURN POWER OFF. Don't leave tool until it
comes to a complete stop.
16. Wear eye protection.

4
17. KEEP GUARDS IN PLACE and in working order.
18. REMOVE ADJUSTING KEYS AND WRENCHES. Form habit of checking to see that keys and
adjusting wrenches are removed from tool before turning it on.
19. DON'T FORCE TOOL It will do the job better and safer at the rate for which it was designed.
20. DISCONNECT TOOLS before servicing; when changing accessories, such as blades, bits,
cutters, and the like.
21. NEVER STAND ON TOOL. Serious injury could occur if the tool is tipped or if the cutting tool is
unintentionally contacted.
Your risk from these exposures varies, depending on how often you do this type of work. To
reduce your exposure to these chemicals, work in a well-ventilated area, and work with
approved safety equipment, such as those dust masks that are specifically designed to filter out
microscopic particles.
Familiarize yourself with the following safety notices used in this manual:
CAUTION: (This means that if precautions are not heeded, it may result in minor or moderate
injury and/or possible machine damage)
WARNING: (This means that if precautions are not heeded, it could result in serious injury or
possibly even death).
Grounding
This tool should be connected to a grounded metal permanent wiring system; or to a system having
an equipment-grounding conductor.

5
Table of Contents Page Number
Warranty........................................................................................................................................................ 2
Warnings ....................................................................................................................................................3-4
Table of Contents .......................................................................................................................................... 5
Specifications ................................................................................................................................................ 5
Receiving the planer ..................................................................................................................................... 6
Unpacking the Machine................................................................................................................................. 6
Machine Preparation and Setup.................................................................................................................... 7
Assembly....................................................................................................................................................... 7
Knife Replacement ........................................................................................................................................ 8
Switch safety lock.......................................................................................................................................... 8
Lubrication Schedule..................................................................................................................................... 9
Depth of Cut ................................................................................................................................................ 10
Pulley Alignment.......................................................................................................................................... 10
V-belt Tensioning ........................................................................................................................................ 10
Feed Speed................................................................................................................................................. 11
Return Rollers ............................................................................................................................................. 11
Feed Rollers ................................................................................................................................................ 11
Table Rollers ............................................................................................................................................... 12
Table Parallelism......................................................................................................................................... 12
Feed Rollers and Chip breaker ................................................................................................................... 13
Adjustment of Chip Breaker.................................................................................................................. 14
Adjustment of Feed Rollers .................................................................................................................. 14
Digital Readout............................................................................................................................................ 15
Parts .......................................................................................................................................................16-25
Specifications
Stock No......................................................................................... (5HP, 1Ph Helical Cutterhead) 4420.001
Maximum Stock Width (in.) ......................................................................................................................... 16
Maximum Depth of Cut (in.) ....................................................................................................................... 1/8
Maximum Stock Thickness (in.) .................................................................................................................... 6
Minimum Stock Thickness (in.) .................................................................................................................. 1/8
Minimum Stock Length (in.) .......................................................................................................................... 6
Dust Port Diameter (in.) ................................................................................................................................ 4
Minimum CFM Required ........................................................................................................................... 600
Feed Speeds (FPM)........................................................................................................................ 16 and 20
Bed Rollers................................................................................................................................. 2, Adjustable
Overall Dimension When Assembled (L x W x H in.)............................................................ 48 x 28 x 43-1/2
Cutterhead Diameter (in.)........................................................................................................................2-7/8
Number of Knives........................................................................................................................................ 90
Cutterhead Speed (RPM)........................................................................................................................ 4800
Motor .............................................................................................................................5HP, 1Ph, 220V Only
Gross Weight (lbs.).................................................................................................................................... 675
6
16” PLANER
Thank you for choosing this planer.
This unit is carefully tested and inspected before
shipment and if properly used and maintained, will
provide you with many years of reliable service. To
ensure optimum performance and trouble free
operation a reasonable amount of care and attention is
required. To get the most from your new planer, please
take the time to read this manual before assembling,
installing and operating the unit.
UNPACKING AND CLEANING
To ensure maximum performance from your 16" planer,
clean it properly; and install it accurately before use. As
soon as you receive the planer, we recommend you
follow these procedures:
1. Remove the contents of the shipping container.
2. Report damage, if any to your local distributor.
3. Clean all rust protected surfaces with a mild solvent
or kerosene. Do not use lacquer thinner; paint thinner,
or gasoline. These will damage painted surfaces.
4. To prevent rust, apply a light coating of paste wax to
surface.
CARRIAGE
The planer has four lifting handles (A), that can be
pulled out when needed. (Fig.1)
USING A SLING
When using a sling to carry machine, lifting handles
must be pulled out (Fig.2). Try keeping sling parallel to
machine and hold steady.
MAGNETIC CONTACTOR CURCUIT
FI G. 3
- Single phase motor
- Power source: A,C in put
- Motor source : A,C, out put
- Grounding: D
Fig. 1
Fig. 2
Fig. 3

7
EXTENSION TABLE ASSEMBLY
Ask another person to provide assistance to hold an
extension table. Bolt the table to the machine using the
supplied bolts then place a straight edge on the table
as shown if Fig. 4. If they are not aligned, loosen the
bolts and adjust the alignment screws accordingly and
the tighten back the main bolts.
WARNING: Always disconnect the machine from
the power source before assembly or any servicing
to the machine.
DUST CHUTE ASSEMBLY
Mount the dust chute to the planer hood with hex head
screws and washers (A) & (B). Make sure the dust
collection system has sufficient capacity and
suction for your planer. Always turn on the
dust collection system before starting the planer.
Figure 5
CONSTRUCTING GAUGE BLOCK
Your Oliver planer has been adjusted at the factory and
should not need adjustment. Typically poor
performance can be attributed to dull knives however if
the knives are in good order it may be time to check the
machine. Construct a guage block as shown if Fig. 6.
Machine adjustments are found further along in this
manual.
Fig. 4
Fig. 5
Fig. 6

8
Knife Replacement
Knife inserts are dangerously
sharp. Use extreme caution when inspecting,
removing, or replacing knife inserts.
The knife inserts on the Jointer are four-sided. When
dull, simply remove each insert, rotate it 90° for a fresh
edge, and re-install it. No further adjustment is
necessary. Use the two provided torx wrench to
remove the knife insert screw. Use one of the torx
wrenches to help hold the cutterhead in Position, and
the other to remove the screw. See Fig. 7. It is
advisable to rotate all inserts at the same time to
maintain consistent cutting. However, if one or more
knife inserts develops a nick, rotate only those inserts
that are affected.
Each knife insert has an etched reference mark so you
can keep track of the rotations.
IMPORTANT: When removing or rotating inserts,
clean saw dust from the screw, the insert, and the
cutterhead platform. Dust accumulation between
these elements can prevent the insert from seating
properly, and may affect the quality of the cut.
Before installing each screw, lightly coat the screw
threads with machine oil and wipe off any excess.
Securely tighten each screw which holds the knife
inserts before operating the jointer! Loose inserts
can be propelled at high speed from a rotating
cutterhead, causing injury.
SWITCH
The planer is equipped with magnetic
switch that will accept a safety padlock
(not included). See Fig. 8. To safeguard
your machine from unauthorized operation
and accidental starting by young children,
the use of a padlock is required.
Fig. 7
Fig. 8

4420 Lubrication Schedule
Components on this chart are referenced to the illustrations below. The illustrations are for component
clarification and may not match your specific model.
Component Interval Types of Lubricant Reference
Return Rollers
Monthly
SAE 30
Figure A
Drive chain Monthly General purpose grease Figure B
Gear box Drain (A) and refill (B) every
2,500 hours
Standard gear oil, 70-90 weight Figure B
Lead screw (x4) Once every 3 months General purpose grease #3, Figure C
Column (x4) Clean and lubricate weekly Light coat of SAE-30 oil
#4, Figure C
Feed roller shafts Every 30 hours Clean and apply SAE-30 oil. #6, Figure C
Anti-kickback fingers (A),
rollers (B & E), cutter
head (D)
Clean and lubricate
as needed.
Very light coat of SAE-30 oil. Figure D
Table chain Every 4 to 6 months Grease, or good
quality cycle chain
lubricant #5, Figure E
Figure A
Figure B

Figure C
Figure D
Figure E

9
DEPTH OF CUT
The cutting depth scale is a combination of inch /
metric scale, the cutting range is from
0 to 8" (204 mm).
*See page 15 for DRO instructions.
TABLE LOCKS
Before adjusting the table upward, or downward;
loosen knob A, after positioning to required position,
tighten knob A again to hold in position. (Fig.9)
CHECKING PULLEY ALIGNMENT
To verify that motor pulley (B) is in line with
the shaft pulley of (A), using the edge of a straight
scale check to see if they are on-line with each
other. (Fig.10). If out of alignment, loosen the motor
securing nuts as shown in Figure 11 and adjust as
necessary.
ADJUSTING BELT TENSION
Use the two nuts to adjust the belt tension (Fig.11)
When achieved proper position of adjustment tighten
bolts to hold in place.
Fig. 9
Fig. 16
Fig. 10
Fig. 11

10
FEEDING SPEEDS
This planer is supplied with a 2-speed gear box for
planning both hard and soft woods. Low speed is
16FPM (feed per minute) for hard wood and 20FPM for
soft wood. Adjust power feed rate while planer is running.
To engage power feed at low speed (16 FPM), pull shift
handle out away from planer. To engage power feed at
high speed (20 FPM), push shift handle in all the way,
toward planer. Figure 12
RETURN ROLLERS
The rollers located on top of machine will save time in
returning the stock to the infeed operator for continued
material removal. Figure 13.
FEED ROLLERS
There are two powered feed rollers on your Oliver 16”
planer. One is located before and the other after the
cutterhead. The feed rollers transmit the work piece
through the machine. The downward pressure on the
work piece is adjustable. If your piece is slipping and
not feeding through the machine, increase the spring
pressure by turning clockwise the pressure nuts with
an allen key as shown in Figure 14. There is a spring
on each end of each feed roll. To ensure great results
make sure both ends are at the same tension. If the
work piece is damaged by the feed roll, decrease the
spring pressure.
Fig. 12
Fig. 13
Fig. 14

11
TABLE ROLLERS
Your planer is supplied with two idler table rollers
(Figure 15) which help to reduce friction. It is not
possible to give exact dimensions on the proper height
setting of the table rollers because each type of wood
behaves differently. As a general rule, however, when
planing rough stock the table rollers should be set at
high position. When planing smooth stock the rollers
should be set at low position. The down side to the
rollers being high is the increased probability of ‘snipe’
appearing on the work piece. This is an increased
amount of material being removed at the ends of the
board because the board rocks on the table roll.
To make adjustment, turn the eccentric adjusters ‘A’
as shown in Figure 16.Use a straight edge across
both front and rear rollers and check that they are at
the same height side to side.
Note: each adjuster is secured in place by a set
screw on top of the adjuster. It is accessed with
an allen key through the top of the table casting.
TABLE PARALLELISM
If your material is tapered from left to right the
cutterhead may not be parallel to the table. Using the
guage block constructed earlier, check the cutterhead
to table for parallelism. If the head is not parallel,
remove the bolts securing the planer to the stand and
tilt the planer on it’s side. Remove bolt C and loosen
bolt (D) (Fig.26). This will enable you to move the idler
sprocket assembly (E) this procedure will release the
tension of the chain.
Remove chain from sprocket on the end that must be
adjusted. When chain has to be released, do not turn
the sprocket more than one or two teeth. Turn sprocket
clockwise to decrease the distance, and counter
clockwise to increase the distance between the table
and head casting.
Fig. 15
Fig. 16
Fig. 17

12
FEED ROLLER AND CHIP BREAKER ADJUSTMENTS
Figure 18 shows the relationship of the feed rollers and chipbreaker to the lowest point of the cutting circle. As shown
in the diagram, both the infeed roller, outfeed roller and chip breaker should all be 0.02” below the lowest point of the
cutting circle.
TO BEGIN
To begin, place a 0.02” feeler guage on top of the guage
block as shown in Figure 19. Raise the table so that the
feeler guage just scrapes the bottom of the knife at its
lowest point of the cutting circle. To find the lowest point,
turn the cutterhead by hand. This is easily done by
removing the belt guard and turning the cutterhead with
the v-belts. Once the lowest point of the cutting circle is
found, do not change the height of the table until after all
the adjustments are made.

13
CHIP BREAKER ADJUSTMENT
Remove the feeler gauge from the top of the gauge
block and then move the gauge block to underneath the
chip breaker. Once adjusted correctly, the chip breaker
will just barely touch the top of the gauge block.
Remove the top cover over the cutterhead. Once
removed you will see the chip breaker adjusting screws
exposed as in Figure 20. Loosen the jam nuts ‘A’ on
each side and using an Allen key turn the adjusting
screws so that the chip breaker just scrapes the top of
the gauge block on each side. Once set, it will be 0.02”
below the cutting circle as seen in Figure 18.
INFEED & OUTFEED ROLLERS ADJUSTMENT
Position the gauge block to underneath the outfeed roller
as seen in Figure 21. Loosen the jam nut ‘3’ and adjust
the roller until is just touches the top of the gauge block.
Repeat for the other side of the roller as well as the
infeed roller.
Fig. 20
Fig. 21

14
DIGITAL READOUT
The digital scale equipped with 16” planer can serve
many applications, however for wood planning we
need only concern ourselves with the ON/OFF,
SET, and mm/in buttons. When set properly the
digital readout will display the thickness of the finished
product.
Calibration: In order to calibrate the unit first run a
board through the planer and measure the finished
thickness with a set of Vernier calipers. This is the
number to be entered into the display unit. At this point
turn the unit on by pushing the ON/OFF button. Now
press the mm/in button to set the unit to American
standard or the metric system.
1. Press and hold the SET button until the ‘+’
sign starts to flash and immediately release A it.
2. Cycle the set button by pressing it until the ‘+’ sign
remains on.
3. Press and hold the SET button until the second
zero to the right of the ‘+’ plus sign starts to flash
and immediately release it.
4. Cycle the SET button by pressing it until the
number reads the correct whole number taken with
the vernier calipers and immediately release the
button.
5. Press and hold the SET button until the zero to the
right of the decimal point starts to flash.
6. Repeat steps 4 and 5 until the last digit in the 0.001
place is entered.
7. Press and hold the SET button until the SET
on the display starts to flash and
immediately release it.
8. Press and release the SET button one final time to
complete the calibration.
Note: Do not turn the device off. If you do you
will have to re-calibrate the unit.
Battery: When the display begins to flash the
battery should be replaced. The battery is to be
replaced with a SR144 (or equivalent) and can be
found at most pharmacies or grocery stores. When
replacing the battery the positive side of the button
cell must face out.
Fraction
Decimal
Metric
1/32
0.031
0.794
1/16
0.063
1.588
3/32
0.094
2.381
1/8
0.125
3.175
5/32
0.156
3.969
3/16
0.188
4.763
7/32
0.219
5.556
1/4
0.250
6.350
9/32
0.281
7.144
5/16
0.313
7.938
11/32
0.344
8.731
3/8
0.375
9.525
13/32
0.406
10.319
7/16
0.438
11.113
15/32
0.469
11.906
1/2
0.500
12.700
17/32
0.531
13.494
9/16
0.563
14.288
19/32
0.594
15.081
5/8
0.625
15.875
21/32
0.656
16.669
11/16
0.688
17.463
23/32
0.719
18.256
3/4
0.750
19.050
25/32
0.781
19.844
13/16
0.813
20.638
27/32
0.844
21.431
7/8
0.875
22.225
29/32
0.906
23.019
15/16
0.938
23.813
31/32
0.969
24.606
1
1.00 25.400

Key Part No. Q'ty
1230118-000 NUT 2
2170871-000 BELT GUARD FRONT 1
4380147-901 BOLT 2
5000902-102 HEX SCREW W/WASHER M6*1.0P*12 27
6170432-000 BELT GUARD REAR 1
7000003-105 HEX. SCREW M8*1.25P*25 2
8006001-043 FLAT WASHER 8.2*30*4.0t 1
9050273-901 CUTTER HEAD PULLEY 60HZ 1
10 006002-046 FLAT WASHER 8.5*16*1.5t 2
11 009005-200 HEX NUT 5/16"-18NC(12.7B*6.75H) 2
12 000003-104 HEX. SCREW M8*1.25P*20 4
13 921727-000 DIGITAL READ OUT 6" 1
14 000103-103 SOC HD CAP SCREW M6*1.0P*12 1
15 000902-202 HEX SCREW W/WASHER M6*1.0P*12 7
16 250348-000 DUST CHUTE 1
19 008304-100 HEX NUT M6*1.0P(10B*7H) 2
20 172851-000 DUST HOOD 1
21 000103-107 SOC HD CAP SCREW M6*1.0P*20 20
22 050288-000 ROLLER BRACKET 3
23 012002-004 KEY 4*4*10 2
24 240015-000 HAND WHEEL 1
25 570890-000 RAISE / LOWER LABEL 1
26 006001-067 FLAT WASHER 10*20*1.5t 1
27 008008-100 HEX NUT M10*1.25P(17B*8H) 1
26 006001-067 FLAT WASHER 10*20*1.5t 5
27 008009-100 HEX NUT M12*1.75P(19B*10H) 4
28 230114-906 HANDLE 1
30 006001-056 FLAT WASHER 8.5*23*2.0t 12
31 250158-617 CHIP DEFLECTOR 1
32 270015-901 SPRING PLATE 3
33 000104-114 SOC HD CAP SCREW M8*1.25P*50 5
34 006001-041 FLAT WASHER 8.2*22*3.0t 3
35 170405-901 BRACKET 1
36 290039-901 SHAFT 1
37 130071-000 CHAIN TENSIONER 1
38 360349-901 CHAIN TENSIONER SHAFT 1
39 170424-905 SIDE COVER GUARD 2
40 011004-102 SPRING PIN 6*20 2
41 050276-000 SIDE COVER 1
42 380200-901 SCREW 4
43 000203-106 SET SCREW M6*1.0P*16 1
44 280050-000 SPRING 1
45 170406-901 HOOK 1
46 030209-002 BALL BEARING 6205 1
47 000103-102 SOC HD CAP SCREW M6*1.0P*10 2
48 012006-001 KEY 8*8*40 1
49 922839-001
HELICAL CUTTERHEAD ASSEMB
6 SLOT 1
49.2 038201-702 TORX SCREW #10-32UNF*12.5 108
49.3 P-15mm 4S INSERT
10PCS/BOX 1
50 000205-101 SET SCREW M10*1.5P*12 16
52 280051-000 SPRING 4
53 130039-000 BUSHING 4
54 923901-000 RETAINER PLATE 4
55 170036-019 CHIP BREAKER 1
4420 Parts List
Descriptions

Key Part No. Q'ty
4420 Parts List
Descriptions
56 010003-000 RETAINING RING STW-12 2
57 051069-000 HEAD CASTING 1
58 360024-000 ROLLER 1
59 000402-104 FLAT HEAD SCREW M5*0.8P*12 2
60 170409-901 LIMIT PLATE 1
61 012003-008 KEY 5*5*22 2
62 070012-000 CHAIN SPROCKET 1
63 006001-020 FLAT WASHER 6.2*20*3.0t 3
64 000002-103 HEX. SCREW M6*1.0P*16 7
65 016306-000 CHAIN #06B*63P 1
66 050009-000 EXTENSION ROLLER 2
67 360021-902 SHAFT 1
68 360947-902 SHAFT 1
69 170464-156 POINTER 1
70 010209-000 RETAINING RING ETW-15 2
71 250160-615 SPACER 45
72 172281-905 ANTI-KICK BACK 44
73 360023-902 SHAFT 1
74 360020-000 INFEED ROLLER 1
75 070013-000 CHAIN SPROCKET 1
76 030208-002 BALL BEARING 6204 1
77 320196-000 GEAR 1
78 000103-108 SOC HD CAP SCREW M6*1.0P*25 5
79 030106-002 BALL BEARING 6201 5
80 320197-000 GEAR 1
81 320160-000 SHAFT 1
82 012003-002 KEY 5*5*10 1
83 050280-000 GEARBOX COVER 1
84 360355-901 PIN 2
85 002602-106 CAP LOCKING SCREW M6*1.0P*25 1
86 320205-000 SHAFT 1
87 012004-003 KEY 6*6*40 1
88 320198-000 GEAR 1
89 250372-615 KNOB 1
90 016303-000 CHAIN #06B*47P 1
91 150008-000 CHAIN SPROCKET 1
92 043401-000 PLUG PT1/4"-19 2
93 043608-000 OIL SEAL TCX4 28*40*8 1
94 050281-000 GEARBOX 1
95 340012-615 GEARBOX GASKET 1
96 922351-000 GEAR 1
97 190176-906 ROLLER 2
98 360357-901 SHAFT 1
99 280052-000 SPRING 1
100 017002-000 STEEL BALL Ф6 1
101 043505-000 OIL SEAL SC25*47*6 1
102 030109-002 BALL BEARING 6204 1
104 070014-000 SHIFTING CLAW 1
105 360358-901 SHAFT 1
106 043303-000 RETAINING RING P12 1
107 000204-103 SET SCREW M8*1.25P*12 7
109 360949-902 ECCENTRIC SHAFT 4
110 030005-001 BALL BEARING 608 8
111 190026-000 ROLLER 2

Key Part No. Q'ty
4420 Parts List
Descriptions
112 230115-000 KNOB 2
113 130037-000 COLUMN LOCK BUSHING 2
114 360948-902 FIX ROD 2
115 051070-000 TABLE 1
116 000203-104 SET SCREW M6*1.0P*12 2
117 130038-000 COLUMN LOCK BUSHING 2
118 002301-201 RIVET 2*5 2
119 000801-104 ROUND HD HEX. SCREW M6*1.0P*20 8
120 173029-000 STAND ACCESS PANEL 2
121 000003-109 HEX. SCREW M8*1.25P*45 4
122 PK03-18 CABINET ASSEMBLY 1
124 000204-104 SET SCREW M8*1.25P*16 4
123 000003-106 HEX. SCREW M8*1.25P*30 4
126 003005-106 HEX. SCREW 3/8"-16NC*2-1/2" 4
127 PK03-02 SWITCH ASSEMBLY 1
127 821007-029 MAGNETIC SWITCH ONLY 1
127 473004-037 SWITCH CORD 12AWG*3C*1450mm 1
127 473004-036 SWITCH CORD 12AWG*3C*2000mm 1
127 471004-012 SWITCH CORD 12AWG*1C*150mm 1
128 250400-000 WHEEL 4
129 009102-100 HEX NUT 3/8"-16NC(14.2B*11.5H) 4
130 004001-101 KNOB 5/16"-18NC*3/4" 2
131 190177-902 CASING 1
132 PK03-01 MOTOR ASSEMBLY 5HP 230V 1Ph 1
132 593012-000 MOTOR ONLY 5HP 230V 1Ph 1
132 006001-091 MOTOR PULLEY 1
133 008006-100 HEX NUT M8*1.25P(13B*6.5H) 4
134 006001-091 FLAT WASHER 13*28*3.0t 4
136 360986-902 MOTOR MOUNTING SHAFT 2
137 380249-901 MOTOR MOUNT TENSION SHAFT ASSEMBLY 2
139 190074-901 SPACER 2
140 000003-108 HEX. SCREW M8*1.25P*40 4
141 006305-100 SPRING WASHER 8.2*15.4 4
142 000203-101 SET SCREW M6*1.0P*6 4
150 130043-000 NUT 4
151 360359-000 COLUMN SHAFT 3
152 050284-000 COLUMN 3
153 051071-000 BASE CASTING 1
154 030003-001 BALL BEARING 6202 4
155 010103-000 RETAINING RING RTW-35 4
156 150010-000 CHAIN SPROCKET 4
157 170413-901 CHAIN TENSIONER BRACKET 1
158 360362-901 SPROCKET SHAFT 1
159 150009-000 CHAIN SPROCKET 1
160 010006-000 RETAINING RING STW-15 1
161 016221-000 CHAIN #410*148P 1
162 010208-000 RETAINING RING ETW-12 4
163 360367-902 ROD 4
164 050286-000 MAIN COLUMN 1
165 570889-000 SCALE 1
166 000301-101 ROUND HD SCREW M3*0.5P*6 1
167 010001-000 RETAINING RING STW-10 1
168 320201-000 WORM GEAR 1
169 010104-000 RETAINING RING RTW-38 1

Key Part No. Q'ty
4420 Parts List
Descriptions
170 130041-000 BUSHING 1
171 360372-000 ELEVATING SCREW 1
173 360380-902 SHAFT 4
NS 040006-000 HEX. WRENCH 6mm 1
NS 040005-000 HEX. WRENCH 5mm 1
NS 040004-000 HEX. WRENCH 4mm 1
NS 040003-000 HEX. WRENCH 3mm 1
NS 040201-000 WRENCH BOX 8*10 1
NS 040204-000 WRENCH BOX 12*14 1
186 012003-003 KEY 5*5*12 1
192 050289-000 ELEVATING SCREW GEARBOX 1
193 320306-000 LEAD SCREW 1
194 030006-001 BALL BEARING 6200 1
195 010101-000 RETAINING RING RTW-30 1
198 200013-615 BELT GUARD SPACER 2
199 006001-021 FLAT WASHER 6.2*22*3t 5
207 490124-000 TERMNAL COVER 1
208 003303-102 ROUND HD SCREW 3/16"-24NC*1/4" 1
209 000303-103 ROUND HD SCREW M5*0.8P*10 2
210 006502-100 TOOTH WASHER 5.3*10(BW-5) 3
211 021311-000 RELIEF BUSHING PGA13.5-11B 4
213 PK03-06 POWER CORD 1
215 048201-103 HEX HEAD SCREW M8*1.25P*25 1
Other manuals for 4420
1
Table of contents
Other Oliver Planer manuals

Oliver
Oliver 4455 User manual

Oliver
Oliver 4420 User manual

Oliver
Oliver 0015 User manual

Oliver
Oliver 4430 User manual

Oliver
Oliver 4430.201 M-4430 User manual

Oliver
Oliver 4455 User manual

Oliver
Oliver 4470 User manual

Oliver
Oliver 5235 User manual

Oliver
Oliver 10014 User manual

Oliver
Oliver 5240 User manual