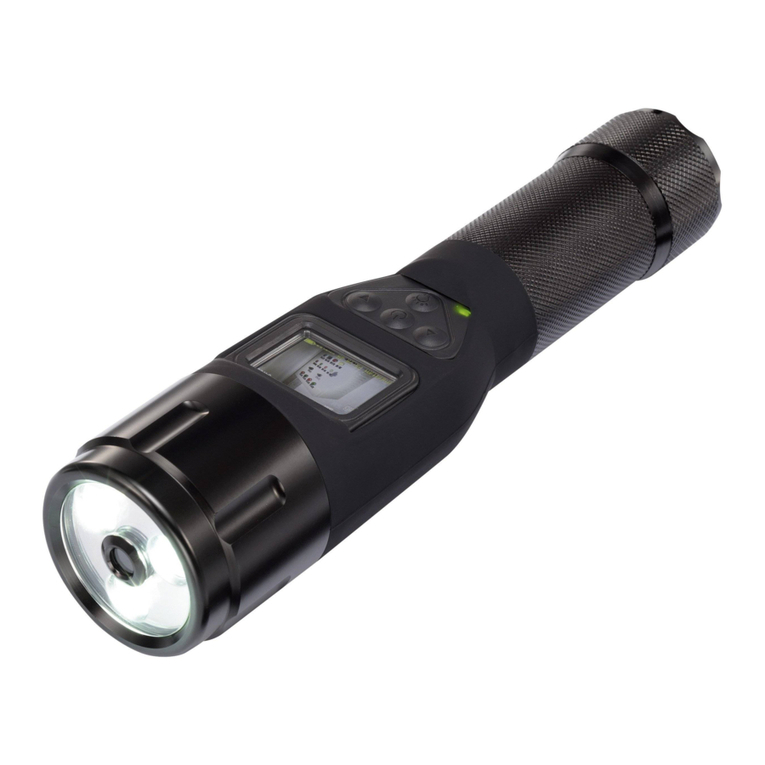
Olympus IPLEX G Series User manual

INSTRUCTIONS
IPLEX G
INDUSTRIAL ENDOSCOPE
IV9000G
IV9420G
IV9435G
IV9620G
IV9635G
IV9675G
IV96100G
Industrial Endoscope
B5A-2439-20
MM3053 05

Life science solutions
Service Center
https://www.olympus-lifescience.com/
support/service/
Official website
https://www.olympus-lifescience.com
Industrial solutions
Service Center
https://www.olympus-ims.com/
service-and-support/service-centers/
Official website
https://www.olympus-ims.com
Distributed by
Manufactured by
6666 Inatomi, Tatsuno-machi, Kamiina-gun, Nagano 399-0495, Japan
EVIDENT CORPORATION
EVIDENT EUROPE GmbH
Caffamacherreihe 8-10, 20355 Hamburg, Germany
EVIDENT SCIENTIFIC, INC.
48 Woerd Ave Waltham, MA 02453, U.S.A.
EVIDENT AUSTRALIA PTY LTD
97 Waterloo Road, Macquarie Park, NSW 2113, Australia
Part 2nd Floor Part A, Endeavour House, Coopers End Road, Stansted CM24 1AL, U.K.
EVIDENT EUROPE GmbH UK Branch

Introduction ..................................................................................................................... 1
Intended use ........................................................................................................................... 1
Instruction manual ........................................................................................................... 1
Product configuration ................................................................................................... 1
Expanded functionality of the IPLEX G series .............................. 1
Safety precautions .................................................................................................. 2
Rating plate/caution plate ........................................................................ 10
1 Unpacking .............................................................................................................. 11
1-1 Unpacking ................................................................................................................... 11
1Storing the optical adapter case ........................................................................... 11
2Options ................................................................................................................................................... 12
2 Nomenclature ..................................................................................................... 13
2-1 Nomenclature ......................................................................................................... 13
2-2 Distal end/optical adapter nomenclature ........................... 15
2-3 LCD monitor nomenclature ................................................................... 16
3 Pre-operation preparation and inspection ..................... 23
3-1 Transporting of the case ........................................................................... 23
3-2 Preparing the product .................................................................................. 24
1Removing the base unit from the case ........................................................ 24
2Attaching/removing the scope unit ................................................................... 25
3-3 Preparing the power supply ................................................................. 26
1Using the battery ....................................................................................................................... 26
2Using the AC adapter ......................................................................................................... 27
3Charging the battery ............................................................................................................. 27
3-4 Attaching and removing the optical adapter .................. 28
Contents

3-5 Inserting/removing the SDHC or micro SDHC
card ................................................................................................................................... 30
3-6 Placing the base unit .................................................................................... 31
3-7 Connecting the base unit and scope unit ......................... 32
3-8 Binding the insertion tube ...................................................................... 32
3-9 Attaching/removing the guide tube ............................................ 33
3-10 Connecting/disconnecting the USB wireless
LAN adapter ........................................................................................................... 33
3-11 Pre-operation/post-operation inspections ........................... 34
4 Basic operation ................................................................................................ 36
4-1 Turning ON the power ................................................................................. 36
1Turning ON the power ....................................................................................................... 36
2Selecting an optical adapter ...................................................................................... 36
4-2 Checking the remaining battery level ...................................... 37
4-3 Turning ON the light ....................................................................................... 38
1Checking the lighting of the illumination at the distal
end of the insertion tube ................................................................................................. 38
4-4 Operating the instrument ......................................................................... 38
4-5 Observing the inspection object .................................................... 41
4-6 Adjusting the image display ................................................................ 42
1Still image (Freeze) .................................................................................................................. 42
2Enlarging the image (Zoom) ....................................................................................... 42
3Adjusting the brightness .................................................................................................. 43
4-7 Switching the folder on the live screen .................................. 44
4-8 Recording images ............................................................................................ 45
1Image recording preparation ..................................................................................... 45

2Recording the still image ................................................................................................ 47
3Recording the movie ............................................................................................................ 49
4Appending the movie .......................................................................................................... 51
4-9 Playing back the image ............................................................................. 52
1Playing back an image in a full-screen view
(View screen) ................................................................................................................................... 52
2Viewing the thumbnail screen and selecting
image ....................................................................................................................................................... 53
3Sound attached to the still image ....................................................................... 54
4Playing back and pausing the movie ............................................................ 54
4-10 Using the constant video (only applicable to
GX, GX (stereo measurement)) ...... 55
1Image recording preparation ..................................................................................... 55
2Recording a constant video ........................................................................................ 55
3Playing a constant video ................................................................................................. 55
4Saving to an SDHC card ................................................................................................. 56
4-11 Displaying live images on the external monitor
......................... 56
4-12 Displaying live images on the mobile terminal
........................... 56
1Connecting the USB wireless LAN adapter
......................................................... 57
2Enabling the USB wireless LAN adapter from the menu
....................... 57
4-13 Using recorded images on a PC ................................................... 57
5 Menu operations and functions .................................................. 58
5-1 Menu operations ................................................................................................. 58
5-2 Using the live screen/freeze screen .......................................... 59
1Initial setting menu .................................................................................................................. 59
2Inputting a title .............................................................................................................................. 64

3Registering a text string as a preset title ..................................................... 66
4Adjusting the image sharpness (only applicable to GX,
GX (stereo measurement)) ........................................... 67
5Adjusting the image color (only applicable to GX,
GX (stereo measurement)) ........................................... 67
6DATE TIME ........................................................................................................................................ 68
7LANGUAGE ...................................................................................................................................... 68
5-3 Using the thumbnail/view screens .............................................. 69
1File/folder operation menu ............................................................................................ 69
6 Measurement functions ......................................................................... 71
6-1 Scaler measurement function ............................................................ 71
1About scaler measurement ......................................................................................... 71
2Scaler measurement screen ...................................................................................... 71
3Making scaler measurements ................................................................................. 73
6-2 Stereo measurement function (only applicable to
GX (stereo measurement)) ........................................... 74
1Steps for stereo measurement ................................................................................ 75
2Attaching the stereo optical adapter ................................................................ 76
3Registering/re-registering a stereo optical adapter ....................... 77
4Selecting a registered stereo optical adapter ...................................... 82
5Checking measurement values ............................................................................. 82
6Observing the measurement area on the live screen ............... 85
7Measuring the distance to the measurement area
by spot ranging ........................................................................................................................... 86
8Measurement ................................................................................................................................. 88
9Measurement screen ........................................................................................................... 89
10 Measurement method types ...................................................................................... 91

11 Specification of measurement points ............................................................. 93
7 Observation of special light .............................................................. 94
7-1 Replacing the LED unit ............................................................................... 94
7-2 Observation using UV light .................................................................... 96
7-3 Observation using IR light ....................................................................... 96
8 Troubleshooting ............................................................................................... 97
8-1 Troubleshooting guide ................................................................................ 97
1Error messages ........................................................................................................................... 97
2Common problems ................................................................................................................ 99
8-2 Requesting repair of this product .............................................. 101
9 Storage and maintenance .............................................................. 102
9-1 Replacing the battery ................................................................................ 102
9-2 Replacing the O-ring .................................................................................. 102
9-3 Cleaning components ............................................................................. 102
1Cleaning the insertion tube ...................................................................................... 102
2Cleaning the distal end ................................................................................................. 103
3Cleaning the optical adapter .................................................................................. 103
4Cleaning the LCD monitor ......................................................................................... 104
5Cleaning of other units ................................................................................................... 104
9-4 Storing to the case ........................................................................................ 104
10 Specifications .............................................................................................. 107
10-1 Operating environment ............................................................................ 107
10-2 Other specifications ..................................................................................... 108
1Other specifications ........................................................................................................... 108
2External application standard ................................................................................ 111

3Software license information ................................................................................... 112
4Using open source software .................................................................................. 112
5AVC Patent Portfolio License .................................................................................. 112
10-3 Optical adapter specifications ........................................................ 113
1For 4-mm type insertion tube ................................................................................ 113
2For 6-mm type insertion tube ................................................................................ 114
Appendix ..................................................................................................................... 115
System chart ..................................................................................................................... 115

Intended use
This instrument is intended for inspecting and observing the interior of machinery, equipment,
materials, and other objects, without damaging the object being inspected.
Instruction manual
This instruction manual contains the information to understand the operations and handling
method of this instrument and to use this instrument safely.
Before using the instrument, carefully read the contents of this instruction manual to ensure that
you use the instrument correctly. After reading this instruction manual, store it together with the
warranty agreement in a safe place.
If you have any questions about any information in this instruction manual, please contact
Olympus.
Product configuration
For the configuration of devices required by this instrument and devices that can be used in
combination with it, see “System chart” (page 115) in “Appendix”.
Note that use of this instrument in combination with options or separately available items other
than “System chart” does not only create the risk of abnormal operations but it may also damage
the device.
Expanded functionality of the IPLEX G series
Functionality can be expanded by purchasing the necessary options.
IPLEX GT →IPLEX GX
IPLEX GX →IPLEX GX (stereo measurement)
TIP
Symbol in the text
: Functions usable with IPLEX GX
: Functions usable with IPLEX GX (stereo measurement)
Contact Olympus for more details.
Introduction
1

Note that use of this instrument in ways that are not specifically described in this instruction
manual does not ensure the safety and it may also cause the malfunction of this instrument. Be
sure to follow this instruction manual when using this instrument.
The following symbols are used throughout this instruction manual.
:Indicates an imminently hazardous situation which, if not avoided, will
result in death, serious injury or damage of observation object.
:Indicates a potentially hazardous situation which, if not avoided, could
result in death, serious injury or damage of observation object.
:Indicates a potentially hazardous situation which, if not avoided, may
result in minor or moderate injury. It may also be used to alert against
unsafe practices or potential material damage.
: Indicates a potential situation which, if not avoided, may result in
failure of this instrument.
:Indicates additional helpful information.
Safety precautions - General safety precautions -
Comply strictly with the precautions described below when handling this instrument. The
information is supplemented by dangers, warnings and cautions given in each chapter. The
safety cannot be ensured when the instrument is used in ways that are not specifically described.
DANGER
●Never use the instrument for observing inside of the human or animal cavity.
Otherwise, death or the serious injury of the person or animal may result.
●Never use the instrument in the following environments.
–Where flammable atmospheres are present
–Where metal dust or other dust is present
Otherwise, an explosion or fire may result.
WARNING
●Do not repair, disassemble or remodel the instrument.
Never repair, disassemble or remodel the instrument. Otherwise, the injury of human bodies
or the damage of the instrument may result. Only personnel who are authorized by Olympus
are allowed to repair the instrument. Olympus is not liable for any accidents or instrument
damage that occurs as a result of repairs attempted by personnel who are not authorized
by Olympus.
●Stop using the instrument immediately at the first sign of heat, smoke, abnormal odor,
abnormal noise or any other abnormality.
Even if the instrument is still operable, turn OFF the power.
DANGER
WARNING
CAUTION
NOTE
NOTICE or
TIP
IPLEX G
Safety precautions
2

WARNING
●Do not insert the insertion tube into an inspection object that is in operation or
conducting electricity.
Otherwise, the insertion tube may be damaged by being caught inside of the inspection
object, etc., or the insertion tube may touch the object, which results in electric shock.
●Before storing the instrument in its carrying case, be sure to turn OFF the power and
remove the battery.
Leaving the battery loaded during storage causes it to be hot, which may cause fire.
●The gas tube must not be used for grounding.
Otherwise, it may cause an explosion.
CAUTION
●Do not use the instrument in any environment (including strongly radioactive
environments) other than the specified operating environment.
Otherwise, unexpected accidents that may damage the insertion tube may result.
●Note the following precautions when moving this unit to or using it at an elevated
location.
–Conduct a prior inspection
–Take measures to prevent the unit from falling off
–Implement thorough safety measures
●Pay careful attention to the temperature of the distal end and the insertion tube right
after using this instrument in high temperature environments as the temperature does
not cool down immediately.
Otherwise, you may get burned.
●Do not grip the control for a prolonged period of time when using the unit under a high
temperature.
Otherwise, it may cause low-temperature burns. Take precautionary measures such as
wearing protective gloves to prevent low-temperature burns.
●Pay attention not to trip over the relay cable, power cord or cables of the insertion tube.
●Do not use commercially-sold electronic transformers for overseas travel use (travel
converters).
●Use only the power cord and the AC adapter specified by Olympus and connect the
power cord to the power outlet within the rated range.
Otherwise, smoke, fire, or electric shock may occur.
●Do not use the power cord specified for this instrument for other products.
●Do not use the AC adapter outdoors.
Otherwise, electric shock, smoke or fire may occur, which may cause damage to the
instrument.
The AC adapter is designed for indoor use.
●Do not apply a strong impact to the AC adapter by hitting it against the wall or dropping
it to the floor, etc.
Otherwise, the malfunction or damage may be caused and result in electric shock.
3

CAUTION
●If you sense any abnormality while inserting the insertion tube into the inspection object,
do not attempt to insert it forcibly any more but carefully pull out the insertion tube.
Note the following when pulling out the insertion tube.
–Do not pull out the insertion tube from the inspection object while the angulation is locked
or while the angulation section is bent.
–If the insertion tube is caught on something during pulling it out, rotate the insertion tube
gently while continuing to pull out.
●Note the following precautions when handling the distal end of the insertion tube.
–Do not drop the optical adapter or subject it to strong impact.
–Do not subject the distal end to severe impact or pulling.
–Do not subject the angulation section to strong pressure or bending.
–Do not move by holding the distal end of the insertion tube.
–Do not use this instrument if the O-ring of the distal end of the insertion tube is damaged
or torn.
Otherwise, the glass lenses and the precision components which constitute the distal end
and the angulation section may be damaged.
–Do not tilt or strongly scratch the distal end of the insertion tube against the retention hole
for the distal end of the insertion tube when inserting or removing the distal end.
Otherwise, the angulation section may be damaged.
●Always attach the optical adapter before using this instrument.
If you use the instrument without attaching the optical adapter to the insertion tube, parts
(screws, etc.) are easily deformed due to contact with hard objects, etc. If the insertion tube
parts are deformed, the optical adapter cannot be attached or may fall off.
●Never use the optical adapter if any of its parts are loose.
Otherwise, the loose parts may fall off.
●If the optical adapter cannot be attached or removed because the nut does not rotate,
stop using it.
Contact Olympus.
●If abnormality is found in the observation image, stop using immediately and pull out the
insertion tube from the inspection object carefully.
If the optical adapter is about to fall off the distal end of the insertion tube while it is being
inserted into the inspection object, the entire or a part of the observation image will appear
whitish due to light of the illumination, or a part of the view may be lost. Continued use in
this condition may cause the optical adapter to fall off from the distal end of the insertion
tube. In this case, pull out the insertion tube carefully from the inspection object and attach
the optical adapter firmly again according to “Attaching and removing the optical adapter”
(page 28).
The entire image
appears clear.
The image appears
white (due to strong
light on some parts of
the image).
Abnormal Normal
IPLEX G
4

CAUTION
●If you sense any abnormality while performing the angulation operation, do not attempt
to force the angulation operation.
Otherwise, the insertion tube or the inspection object may be damaged.
●When hanging this unit from your neck using the shoulder strap, do not allow it to be
caught on other objects.
Be careful so that it does not strangle your neck.
●Do not allow metal or other foreign objects to enter the base unit or scope unit through
connector terminals or any other openings.
Otherwise, the malfunction or electric shock may result.
●Do not use the parts other than the insertion tube underwater or clean them under
running water.
Otherwise, water creates the risk of electric shock. Other than the insertion tube, the unit is
waterproof when the DC-IN terminal cap, and the doors of the battery compartment,
interface, SD card, and relay cable are tightly closed. Do not use or store the instrument in
an environment where it is submerged in water.
●Do not subject the LCD monitor to strong impact, strong pressure or to scratching by a
hard or pointed object.
Otherwise, the LCD monitor may be cracked or scratched, or the damaged monitor may
cause personal injury.
●When pushing down the handle, be careful not to get your hand or other objects caught
in between.
●Use SDHC card and microSDHC card recommended by Olympus to record images.
This instrument comes with an SDHC card.
●Do not remove the battery or the AC adapter during operation.
Otherwise, the recorded data may be damaged.
●Do not remove the SDHC card or the microSDHC card while recording or replaying the
image.
Otherwise, the recorded data or the image recording media may be damaged or lost.
●Do not repeat inserting or removing the SDHC card or the microSDHC card continuously.
Otherwise, the recorded data or the image recording media may be damaged or may not
function properly.
●Be careful for followings when using the extendable handle of the carrying case.
–Be careful you do not catch your hand when storing the handle inside the case.
–Do not attempt to lift the case by holding the extendable handle.
5

CAUTION
●Note the following precautions when the illumination is turned ON.
–Do not leave the distal end of the insertion tube near the flammable substances for a
long time.
–The light goes off during replacement of the optical adapter.
–Do not stare at the light emitted from the distal end.
When using a UV LED unit or IR LED unit, check that the LED icon ( /) lights up on
the live screen or other screens.
–Use the equipment in accordance with the regulations for Workers Health and Safety, if
any.
Information of IEC62471
●RISK GROUP2
●CAUTION :Possibly hazardous optical radiation emitted from this product. Do not
stare at operating lamp. May be harmful to the eyes.
●NOTICE :UV emitted from this Product. Minimize exposure to eyes or skin. Use
appropriate shielding.
●NOTICE :IR emitted from this Product. Use appropriate shielding or eye
protection.
IPLEX G
6

NOTE
●Do not store the instrument in the following locations.
–Environments exposed to high temperature, high humidity and large amounts of dust or
particulate
–Locations exposed to direct sunlight or radiation
–Locations exposed to gas that includes halide*1
Otherwise, the instrument may be damaged.
*1 The performance of some electrical parts may deteriorate due to the halide in
insecticides, pesticides and gaseous extinguishing agents, etc.
●Do not continue to use the instrument when it is wet with condensation.
In case of a sudden temperature change, such as entering a warm room from cold outside,
condensation may be caused inside the instrument. Using the instrument while it is wet
with condensation may cause malfunction. If condensation occurs, leave the instrument in
the environment where it will be used and allow the condensation to dry before using it.
●Do not insert the insertion tube into the inspection object which is in an environment
that exceeds the operating temperature range.
The continued use may damage or deteriorate the performance of the instrument.
●Do not use the instrument if the contaminants are attached to the outer surface of the
instrument.
The instrument may be damaged or the performance may be deteriorated.
●Do not cover the base unit or scope unit with a plastic bag or other objects.
The inside of the instrument may not be cooled down sufficiently, which may damage the
instrument.
●Do not allow any liquids other than water, saltwater, machine oil or diesel oil to be
attached to the insertion tube.
Otherwise, the insertion tube may be damaged.
●Note the following precautions when handling the battery compartment door, interface
doors, SD card door and relay cable door.
–Do not open or close the doors when there is water on the relay cable or surrounding
surfaces.
–Do not open or close covers with your wet hands.
–Do not open or close covers in the area exposed to high humidity and/or dust.
–Close covers when storing the instrument and when the terminals are not in use.
●Note the following precautions with regard to the terminals on this unit and those on
the LED unit.
–Do not touch the terminals directly with your hands
–Prevent dirt and water droplets from coming in contact with the terminals.
●Do not use this instrument when the waterproof packing inside the door of the relay
cable is damaged, cut, or misaligned.
●Note the following precautions when taking out the instrument from the carrying case
and scope case.
–Do not lift and pull the insertion tube.
The instrument may be damaged.
●Do not pull the insertion tube and other cables with force or carry them around.
●Note the following precautions when storing the instrument in the carrying case and
scope case.
–Make sure that the distal end has cooled down sufficiently before storing it.
–Make sure that the insertion tube is not twisted before storing it.
●Do not lift the case when the covers of the carrying case and scope case are not closed.
●When disposing of this product, be sure to do so in accordance with all local laws, rules
and regulations.
Before disposing of this product, check your local laws, rules and regulations, and follow
them accordingly.
7

Safety precautions - Battery precautions -
If you experience any problems when using this instrument with batteries, contact Olympus.
Comply strictly with the precautions described below when handling the battery. If the batteries
are handled improperly, the battery fluid leakage, excessive heat generation, smoke, battery burst,
electric shock and/or burns may result.
Before use, thoroughly read the instruction manual provided with the battery charger to fully
understand the information contained in them, and observe their instructions during use.
DANGER
●Use the battery NC2040NO29 or NC2040NO34 and charge the battery using the
charger CH5000C or CH5000X.
●Do not subject the battery to strong impact.
●Do not allow terminals to be short circuited with metal objects.
●Do not throw the battery into fire or subject it to heat.
●Do not open or modify the battery.
●Do not use the battery charger outdoors.
Otherwise, the electric shock, smoke or fire may occur, which may cause the damage to
the charger. The battery charger is designed for indoor use.
WARNING
●Do not cover the battery charger with clothing, bedding or other materials while charging.
●After charging is complete, always be sure to unplug the AC power cord of the charger
from the electrical outlet.
●If you sense any abnormality such as heat generation in the instrument or battery
charger, abnormal odor, abnormal noise or smoke, disconnect the power plug of the
battery charger immediately and stop using it.
Contact Olympus.
●If the battery charger does not complete recharging the battery in the specified
recharging time, stop attempting to recharge the battery.
●Do not allow the battery compartment to become deformed and never put any foreign
object into it.
●Do not allow metal or water, or any other fluid to get into the battery compartment or
onto the battery terminals.
If any foreign object enters the base unit, remove the battery and disconnect the AC adapter,
and immediately contact Olympus.
●Do not remove the battery immediately if the instrument was used continuously for a
long time.
The heat generated by the battery causes the risk of burn injury.
●Do not touch the battery terminals with your wet hands.
●If you plan not to use the instrument for a long time, remove the battery from the base
unit and store it in a dry place.
Otherwise, the battery fluid may leak and the heat generation may result in a fire or injury.
●Keep the battery out of the reach of small children.
●If liquid leaking from the battery comes into contact with your body, rinse it off
immediately with clean water from the tap, etc. and seek medical attention if necessary.
IPLEX G
8

CAUTION
●If you are experiencing problems in inserting the battery, do not attempt to insert it
forcibly.
Check the orientation of the battery and check the terminals for abnormalities. Attempting
to insert the battery forcibly into the compartment may cause malfunction.
●If you are experiencing problems removing the battery from the instrument, do not
attempt to remove it forcibly.
Contact Olympus.
●Contact the airlines in advance if you plan to transport the battery by aircraft.
●When replacing the battery, do not repeat inserting or removing it rapidly.
Otherwise, the power may not be turned ON.
●Do not store the battery in the following locations.
–Environments exposed to water, high temperature, high humidity, low humidity and dust
–Locations exposed to direct sunlight or radiation
–Locations exposed to gas containing halide*1
*1 The performance of some electrical parts may deteriorate due to gas containing
halide in insecticides, pesticides and gaseous extinguishing agents, etc.
●Do not use, charge or store the battery in areas exposed to direct sunlight, in a closed
automobile in the sun, or near a heater, etc.
●Do not use a battery if it shows any irregularity such as fluid leak, discoloration,
deformation, abnormal odor or other abnormality.
●Do not immerse the battery in fresh water or sea water, or allow the battery to get wet.
●When disposing of a battery, be sure to do so in accordance with all local laws, rules,
and regulations.
NOTE
●The contamination of battery electrodes with sweat or oil will cause the contact failure. If the
battery is dirty, wipe it with a dry cloth before use.
●Use the battery correctly. If the battery is used incorrectly, battery fluid leakage, heat
generation or damage may result. Insert the battery in the correct orientation when replacing
it.
●Temperature range for Li-ion battery operation
–Discharge (when using this unit): -10 °C to 40 °C
–Charging : 0 °C to 40 °C
–Storage : -20 °C to 60 °C (Recommended: 20 °C)
Using the battery under a temperature exceeding the temperature ranges described above
will result in degradation of its performance and service life. Before storing the instrument,
be sure to remove the battery from the base unit.
9

The safety ratings, cautions, and serial numbers are described on the label attached to this
product.
Study the meaning of the safety symbols and always use the product in the safest possible
manner.
If labels are missing or if their contents are illegible, contact Olympus.
Conformity label, Rating, model,
serial number
Conformity label, model, serial number,
precautions
CAUTION
Possibly hazardous optical radiation emitted from this
product. (See page 6)
IPLEX G
Rating plate/caution plate
10

1-1 Unpacking
When unpacking, make sure that all items listed below are included.
If anything is missing or damaged, contact Olympus.
Name Quantity
Base unit 1
SDHC card (inserted into the SDHC card slot of the base unit) 1
AC adapter 1
Relay cable 1
HDMI cable 1
Battery 1
Instruction manual 1
Carrying case
Transport pad (used when transporting the base unit) 1
*1 For procedures to store the instrument in the carrying case, refer to the label which describes
the storing procedures, attached to the inner surface of the top lid of the carrying case. (For
procedures to store the instrument in the carrying case, refer to “Storing to the case”
(page 104).)
1Storing the optical adapter case
The following items can be stored in the
adapter case provided with the optional
scope unit.
●Optical adapter
●SDHC card (optical data media)
●O-ring (kept in a bag)
●Tip cap
Store these items in the optical adapter
case when they are not in use.
The figure on the right shows the locations
to store each item.
Tip cap
O-ring
SDHC card
Optical adapter
11
11
1
1
1
1
1Unpacking
11

2Options
●Scope unit
IV9●●●G ((●●●) indicates the scope diameter and the length.)
Name Quantity
Scope unit 1
Insertion tube fastening strap 1
Optical adapter case 1
Tip cap 1
Lens cleaning kit (cotton swab, brush) 1
Model number identification sticker 1
Instruction manual 1
●Stereo optical adapter
Name Quantity
Stereo optical adapter 1
Optical data media 1
O-ring 6
Stereo measurement reference guide 1
Check tool 1
Check tool calibration certificate 1
Instruction manual 1
●Optical adapter
Name Quantity
Optical adapter 1
O-ring 6
Instruction manual 1
Refer to “System chart” (page 115) for information on other options.
IPLEX G
12
This manual suits for next models
7
Table of contents
Other Olympus Analytical Instrument manuals

Olympus
Olympus IPLEX TX User manual

Olympus
Olympus IPLEX UltraLite User manual

Olympus
Olympus IPLEX FX Series User manual

Olympus
Olympus IPLEX RX Series User manual

Olympus
Olympus IPLEX G Lite User manual

Olympus
Olympus IPLEX TX User manual

Olympus
Olympus IV0620C User manual

Olympus
Olympus IV8000-2 User manual

Olympus
Olympus IV8200T User manual

Olympus
Olympus IPLEX G Lite User manual