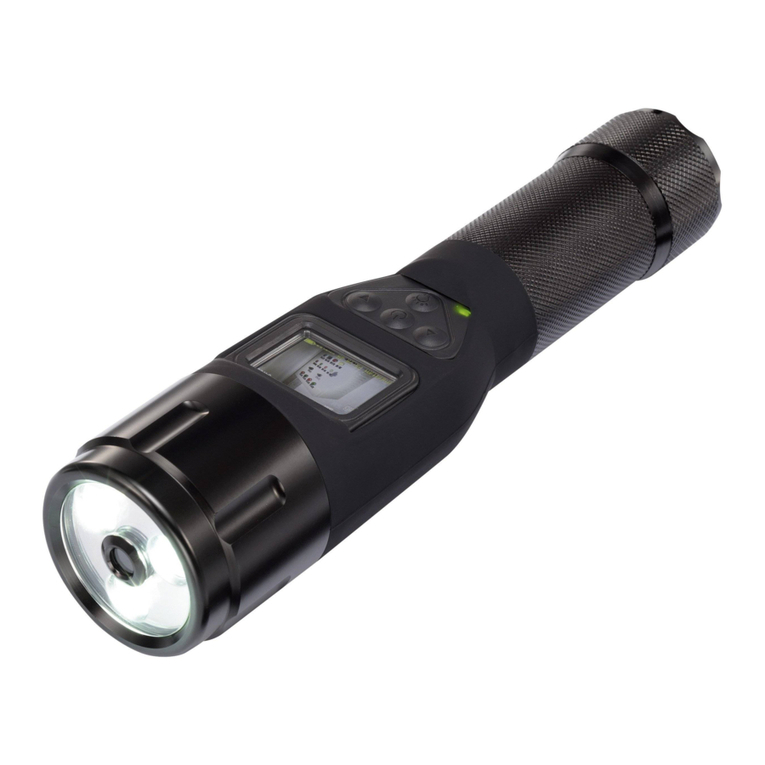
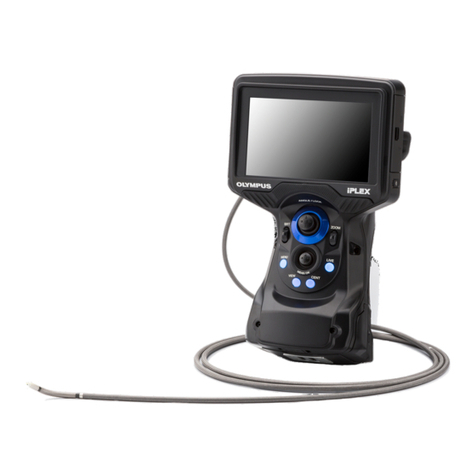
Olympus IV0620C User manual

1
IV0620C Operation Manual
Intended use
This instrument is intended for inspecting and observing the interior of machinery, equipment,
materials, and other objects, without damaging the object being inspected.
Setting up the IV0620C
This product can be set up easily for inspection to be performed immediately.
Simply follow the four steps below to complete the setup.
1. Remove components from the case
Remove the components in the following
sequence: insertion unit →main unit.
2. Preparing the power supply
•Using battery: Check to ensure that the battery is charged, followed by setting it to the main unit.
APush down the battery door lock to open the battery door.
BLoad the battery according to the direction indicated on the battery terminal while paying
attention to the orientation of the battery.
CPress the battery from above until a “click” sound is heard. After the battery is correctly loaded,
close the battery door.
Before handling this product, please read through and follow the instructions and
precautions in the instruction manual of the IV0620C.
This operation manual is an excerpt from the descriptions and instructions in the instruction
manual of the IV0620C, which include the setup procedures during the use of the product,
the functions of the basic operating components, descriptions on the indicator and menu
displays, and safety precautions.
Industrial Endoscope
Insertion Unit
Main Unit

2
•Using AC adapter: After connecting the AC power cord to the AC inlet of the AC adapter,
connect the plug of the AC power cord to the AC adapter terminal on the
main unit.
Next, connect the plug of the AC power cord securely to the power outlet.
•Perform charging on this instrument (For details, refer to the instruction manual of the main unit.)
3. Checking the state of the tip protection hood
When using this instrument, be sure to tighten the tip protection hood
in the clockwise direction.
If the tip protection hood is loose, attach it properly according to “6.2
Replacing the Tip Protection Hood” in the instruction manual of
IV0620C.
The tip protection hood is an expendable item. Replace the tip
protection hood when it is worn out or deformed.
4. Turning on power
Press the POWER button ( ) on the main unit for 2
seconds or longer.
After pressing for 2 seconds or longer, the power
indicator lights up and the power turns on.
Once the power is turned on, the light automatically
lights up.
Touch the [LIGHT] button on the live screen to switch on
or switch off the light.
NOTE
•To display the button, touch the LCD monitor.
AC inlet
POWER button
Power indicator
Setup is now complete.

3
Part names and functions
LCD monitor
(Touch Panel)
Joystick
Angulation
Operation
[FRZ/REC] button
Freeze/Record
Observation Image
Perform angulation
Operate the joystick carefully in the direction you want to observe.
Record images
If you are using the SD card media for the first time, format it with the main unit before you start
recording. For more details on the procedure, please refer to the instruction manual of the IV0620C.
Record still images
1. Short-press the [FRZ/REC] button to freeze the image.
2. Long-press the [FRZ/REC] button (about 1 second) while the freeze screen is displayed to start
recording.
Record movies
1. While the live image is displayed, long-press the
[FRZ/REC] button (about 1 second).
2. After a still image is recorded, a movie confirmation screen appears.
3. Touch [YES] on the LCD monitor to start recording.
4. Short-press the [FRZ/REC] to end recording.

4
LCD monitor nomenclature
[MENU] button : Displays the menu screen.
[VIEW] button : Displays the latest image in full screen (view screen).
[THUMBNAIL] button : Displays the thumbnail screen.
[LIGHT] button : Switches on or switches off the light.
ZOOM : Enlarges or reduces the displayed image.
BRT : Adjusts the brightness.
NOTE
•To hide or display the buttons, touch the LCD monitor.
Menu screen display
Touch the [MENU] button.
(This displays the main menu.)
Folder name Number of images
that can be recorded
Freeze indicator
[MENU] button
[VIEW] button
[THUMBNAIL] button
[LIGHT] button
Logo
Title
Battery indicatorMovie recording indicator
Folder Jump Button
Temperature indicator
Zoom setting button,
zoom level
Date/Time
Brightness setting
button, brightness
level

5
Using the live screen/freeze screen
Menu Available settings
TITLE INPUT Title input
A title can be displayed in the live screen and in registered images. Input can
be up to 30 characters.
WHITE
BALANCE
White balance adjustment (Live screen only)
Specifies whether to perform white balance.
Adjust by capturing a white object (paper, etc.) from a distance of about 50 to
60 mm.
SCALE
DISPLAY
Displays patterns on the screen.
You can select a fixed pattern (3 types) or the free-drawing pattern (1 type).
The following menu is in the "SETUP ( )" menu.
REC FUNCTION [FRZ/REC] button image type setting
Specifies the type of image that is recorded when a record operation is
performed with the [FRZ/REC] button.
PRINT SCREEN
ON/OFF
Date, title, and other information recording
Specifies date, time, title and logo and other information included on the
display should be recorded in images.
DATE/TIME
/LOGO
Display information setting
Specifies whether display information (date and time, title, etc.) should be
displayed on the LCD monitor, and the type of information to be displayed.
IMAGE
INVERSION
Reverses an image laterally.
You can reverse a live image laterally.
COLOR/B&W
DISPLAY
Displays the image in color or black-and-white.
You can display a live image in color or black-and-white.
FILE NAME
MARK
Letter appending to the end of image file names
Specifies whether a letter should be added to names assigned to recorded
image files.

6
Using the thumbnail/view screens
MEDIA
FORMAT
SD card formatting (initialization)
DATE TIME Date and time settings
TOUCH
SCREEN
ADJUST
Adjusts the response position when you touch the touch panel.
Perform adjustments accordingly when the response position is out of
alignment when you touch the screen.
LANGUAGE Display language selection
Specifies the language used for menus and messages.
Button Available settings
DELETE Image delete
Delete the image files marked with () on the thumbnail screen.
MOVE FILE Move image files to folder (Thumbnail screen only)
Moves the image files marked with () on the thumbnail screen.
RENAME FILE Rename file (Thumbnail screen only)
Changes the file name of the images marked with () on the thumbnail
screen.
(This option can be executed when only one image is selected.)
CHANGE FOLDER Specifies a folder for image recording and playback (Thumbnail screen
only)
MAKE FOLDER Create folder (Thumbnail screen only)
RENAME FOLDER Rename folder (Thumbnail screen only)
Menu Available settings

7
Inputting a title
Input text from the on-screen keyboard
1Touch the character selection button to select an input mode.
2Touch the character buttons.
3Touch [EXECUTE].
Selecting a preset title for input
1Touch [PRESET].
2Touch the corresponding preset title in the list.
3Touch [EXECUTE].
123
1 32

8
Marks used in this manual
The following signal words are used throughout this manual.
DANGER
•Indicates an imminently hazardous situation which, if not avoided, will result in death, serious injury, or
damage of the inspected object.
WARNING
•Indicates a potentially hazardous situation which, if not avoided, could result in death or serious injury, or
damage of the inspected object.
CAUTION
•Indicates a potentially hazardous situation which, if not avoided, may result in minor or moderate injury. It
may also be used to alert against unsafe practices or potential material damage.
CAUTION
•Indicates a potentially hazardous situation which, if not avoided, may result in the malfunction of this
instrument.
NOTE
•Indicates knowledge and information that is useful for using this instrument.
Safety precautions
General safety precautions
Observe the precautions described below when handling the instrument. The information is to be
supplemented by the dangers, warnings and cautions given in each chapter. Safety cannot be
guaranteed when the instrument is used in ways that are not specifically described.
DANGER
•Never use this instrument for observation inside a human or animal cavity.
Otherwise, death of the person or animal may result.
•Never use the instrument in the following types of environments.
-Where flammable atmospheres are present
-Where metal dust or other dust is present
Otherwise, an explosion or fire may result.
WARNING
•Do not repair, disassemble, or modify the instrument.
This instrument does not contain any user serviceable parts. Do not disassemble, modify or attempt to
repair. User injury and/or equipment damage can result.
Contact Olympus for all repair and servicing. Olympus is not liable for any accident or instrument damage
that occurs as a result of repairs attempted by non-Olympus personnel.
•Immediately stop using the instrument at the first sign of smoke, abnormal odor, abnormal noise, or any
other abnormality.
Even if operation of the instrument is still possible, turn off power.

9
•Do not insert the insertion tube into an observation object that is in operation or conducting electricity.
Otherwise the insertion tube may be damaged by being caught inside of the observation object, etc., or the
insertion tube may touch the object, resulting in electric shock.
•Before stowing the instrument in its carrying case, be sure to turn off the power and attach the battery cap.
Leaving the battery loaded during storage can cause it to become hot, causing the risk of fire.
CAUTION
•Do not use this instrument in any environment (including strongly radioactive environments) that does not
conform to the specified operating environment.
Otherwise, unexpected accidents that may damage the insertion tube may result.
•Do not insert the insertion tube into an observation object in an environment that is outside the operating
temperature range.
Continued use may damage or reduce the performance of the instrument.
•Do not touch the distal end immediately after use in a high-temperature environment.
Doing so may cause burn injuries.
•Do not grip the control unit for a prolonged period of time when using the instrument in a high-temperature
environment.
Doing so may result in low-temperature burns. To prevent this, take precautions such as by wearing a pair
of gloves.
•Pay attention not to trip over the power cord or cables of the insertion tube.
•Use only a power cord and AC adapter specified by Olympus.
Doing so may result in fuming, fire, or electric shock.
•Do not use the AC adapter outdoors.
Doing so may result in fuming, fire, or electric shock.
The AC adapter is designed for indoor use.
•Do not subject the AC adapter to strong impact cause by striking it against a wall, dropping it, etc.
Otherwise, malfunction, damage, or electric shock might occur.
•Do not use commercially-sold electronic transformers for overseas travel use (travel converters).
•If abnormality is found during insertion of the insertion tube, do not push it in forcibly. Pull out the insertion
tube carefully.
Pay attention to the following when pulling out the insertion tube.
-Do not bend it forcibly.
-Do not pull out the inspected object when the angulation section is bent.
-If the insertion tube gets caught inside while withdrawing, pull while turning it carefully.
•Pay attention to the following when pulling out the insertion tube.
-Do not hit or pull the distal end.
-Do not squeeze or bend the angulation section with force.
-Do not use the insertion tube if any of the parts are loose.
-
Attach the tip protection hood correctly for use.
If the protection hood is not firmly attached to the distal end of the insertion tube, the entire observation image or
a part of it may appear whitish due to the illumination, or a part of the angle of view may not be visible. Also, the
protection hood may fall off into the inspected object.
•Do not look directly into the light emitted from the distal end.
Doing so may hurt your eyes.
Abnormal
Theimageappearswhite
(duetostronglightonsome
partsoftheimage)
Normal
Theentireimage
appearsclear.

10
•Do not use components other than the insertion tube in the rain or in water, and do not wash them with
running water or a wet object.
This instrument is not waterproof. Exposure to water may result in electric shock. It must not be used or
stored in water.
•Do not hit the LCD monitor with an object, press it with force, or rub it with hard or sharp objects.
Doing so may break or scratch the LCD monitor, or cause injuries as a result of the damaged monitor.
•Do not insert metallic and other foreign objects into the main unit from the connectors or other openings.
Otherwise, a malfunction or electric shock may result.
•Check to make sure that the SD card is correctly loaded before using it.
The SD card might come out if it is not inserted into the slot as far as it will go, if the instrument is subjected
to impact during transport, etc.
•Do not remove the battery or AC adapter while the system is running.
Otherwise, recorded data may be damaged.
•Connect the AC adapter, do not insert or remove an SD card, and do not connect or disconnect the USB
cable while image data is being exchanged with a PC.
Otherwise, the data recorded in the SD card may be destroyed.
•When you have the instrument hung from your neck, take care to avoid getting tangled with other nearby
items.
Take care to avoid entanglement and possible strangulation.
CAUTION
•Do not continue to use the instrument when it is wet with condensation.
Sudden temperatures changes such as those that occur when entering a warm room from the outside cold
can cause condensation to form inside the instrument. Using the instrument while it is wet with
condensation can cause malfunction. If condensation forms, leave the instrument in the environment
where it is to be used and allow the condensation to dry before using it.
•Do not cover the main unit with a plastic bag or other objects during use.
The interior of the instrument may not be sufficiently cooled, resulting in damage of the instrument.
•Do not expose the insertion tube to liquids other than water, saline solution, machine oil, and light oil.
Doing so may damage the insertion tube.
•Pay attention to the following when handling the battery door, SD card slot cover, terminal cover, and AC
adapter terminal cover.
-Do no open or close the covers with wet hands.
-Do not open or close the covers in a humid or dusty environment.
-Keep the covers closed when storing the instrument or when the terminals are not in use.
•Pay attention to the following when taking the instrument out of the carrying case.
-Do not apply undue force when pulling the insertion tube from the slot in the cushion.
-When removing the main unit, do not lift it up by the insertion tube.
Otherwise, the instrument may be damaged.
•Note the following precautions whenever stowing the instrument in its carrying case.
-Make sure that the insertion tube is not twisted before storing it.
-Make sure the distal end has cooled before storing it.
-Restore the joystick to the neutral position when storing the instrument.
•Do not store the instrument in the following locations.
-Environments subjected to high temperature, high humidity, and large amounts of dust or particulate
-Locations exposed to direct sunlight or radiation
-Locations subject to gas that includes halide*1
Doing so could damage the equipment.
*1 The performance of some kind of electric parts will be deteriorated by the gas including the halide
contained in the insecticide, the herbicide, and the gas extinguishant, etc.
•When disposing of this product, be sure to do so in accordance with all local laws, rules, and regulations.
Before disposing of this product, check your local laws, rules, and regulations and follow them accordingly.
11
Battery precautions
Should you experience any problems when using the instrument with batteries, contact Olympus.
Observe the precautions described below when handling the battery. Otherwise, battery fluid leak,
excessive heat generation, smoke, battery burst, electric shock and/or burns may result.
DANGER
•Use only the specified BN-VF815UWIE battery.
•Do not allow connectors to become shorted.
•Do not attempt to apply solder directly to a terminal.
•Do not interconnect the electrodes of the battery with metal, or carry or store the battery together with
metal objects.
•Do not connect the battery directly to a power outlet or the cigar lighter of an automobile.
•Do not immerse the battery in fresh or sea water, or allow the battery to get wet.
•Do not throw the battery into fire or subject it to heat.
•Do not attempt to open or modify the battery.
•Do not pierce the battery, hit it with a hammer, or step on it.
•Do not subject the battery to strong impact.
•Do not use or leave the battery where it is exposed to direct sunlight, in a closed automobile in the sun,
near a heater, etc.
•Fluid leaking from the battery can cause loss of sight if it gets into your eyes. Flush your eyes with tap
water or other clean water without rubbing. Contact a physician immediately.
WARNING
•Do not cover the battery charger with clothing, bedding, or other material while charging.
•After charging is complete, always be sure to unplug the AC power cord of the charger from the electrical
outlet.
•At the first sign of heat generation, abnormal odor, abnormal noise, smoke, or any other abnormality during
charging, immediately unplug the battery charger and stop using it.
Contact Olympus.
•If the battery charger cannot complete battery charging in the specified recharging time, stop trying to
recharge the battery.
•Do not use a battery if it shows any irregularity such as fluid leak, discoloration, deformation or other
abnormality.
Immediately request servicing.
•Should the battery fluid get onto your skin or clothing, immediately rinse with tap water or other clean
water.
Otherwise, a skin injury may result. Contact a physician for treatment if necessary.
•Do not allow the battery compartment to become deformed and never put any foreign object into it.
•Do not allow metal or water, or any other fluid to get into the battery compartment or onto the battery
terminals.
Should any foreign object enter the main unit, remove the battery and disconnect the AC adapter, and
immediately contact Olympus.
•Do not remove the battery as soon as possible after using the instrument for a long time.
Heat generated by the battery creates the risk of burn injury.
•Do not leave the battery in a location subject to moisture, water leak or extremely high or low
temperatures.
•Do not touch the battery terminals while your hands are wet.
•If the instrument is not to be used for a prolonged period of time, remove the battery from the main unit,
attach the battery cap, and store it in a place with a low level of humidity.
Otherwise, battery fluid leak and heat build-up may result in a fire or injury.
•Keep the battery out of the reach of small children.

12
CAUTION
•If you are experiencing problems loading the battery, do not try to force it in.
Check the orientation of the battery and check the terminals for abnormalities. Trying to force the battery
into the compartment may cause malfunction.
•If you are having problems removing the battery from the instrument, do not apply undue force.
Contact Olympus.
•When carrying the battery onto an airplane, please contact the airline beforehand.
•When changing the battery, do not remove and insert the battery rapidly and repeatedly.
You might not be able to turn on the power.
•When disposing of a battery, be sure to do so in accordance with all local laws, rules, and regulations.
NOTE
•Be sure to recharge the battery before using it for the first time after purchase or after it has not been used
for a long period.
•In general, the battery performance drops as the ambient temperature drops. Note that the battery
performance degraded due to low temperatures recovers when the temperature rises to a normal level.
•Contamination of battery electrodes with sweat or oil will cause contact failures. When the battery is dirty,
wipe it clean with a dry cloth before use.
•When the battery is fully charged, you can use this instrument continuously up to 120 minutes or more
(reference value when using a new battery). Actual operating time depends on the charging method, the
operating environment, and the instrument's settings. Preparation of multiple spare batteries is
recommended when long hours of battery-powered operation are expected. The estimated charging time
is approximately 130 minutes.
•Recommended temperature range for Li-ion battery operation.
-Discharging (using main unit) : -10°C to 40°C
-Charging : 0°C to 40°C
-Storage : -20°C to 40°C
Using the battery under a temperature outside the above temperature ranges will result in degradation of its
performance and service life. When storing the battery, be sure to remove it from the main unit.
•The battery is a consumable item.
Shinjuku Monolith, 3-1 Nishi-Shinjuku 2-chome, Shinjuku-ku, Tokyo 163-0914, Japan
Telephone: (81)3-6901-4038
3 Acacia Place, Notting Hill VIC 3168, Australia
Telephone: (61)130-013-2992
L43, Office Tower, Langham Place, 8 Argyle Street, Mongkok, Kowloon, Hong Kong
Telephone: (852)2481-7812
Wendenstrasse 14-18, 20097 Hamburg, Germany
Telephone: (49)40-23-77-30
48 Woerd Avenue, Waltham, MA 02453, U.S.A.
Telephone: (1)781-419-3900
MM2490 01
B5A-0510-00
Table of contents
Other Olympus Analytical Instrument manuals

Olympus
Olympus IPLEX LX Series User manual

Olympus
Olympus IPLEX UltraLite User manual

Olympus
Olympus IV8200T User manual

Olympus
Olympus IPLEX G Lite User manual

Olympus
Olympus IPLEX TX User manual

Olympus
Olympus IV8000-2 User manual

Olympus
Olympus IPLEX RX Series User manual

Olympus
Olympus IPLEX TX User manual

Olympus
Olympus IPLEX FX Series User manual

Olympus
Olympus IPLEX NX User manual