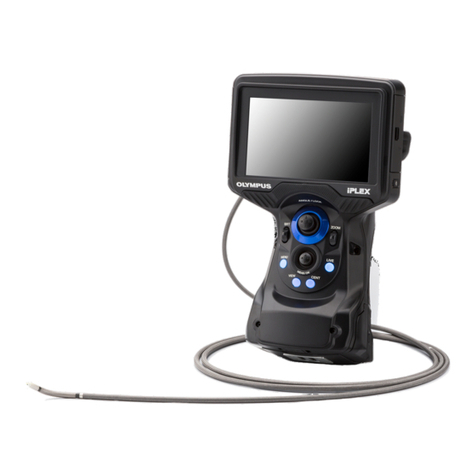
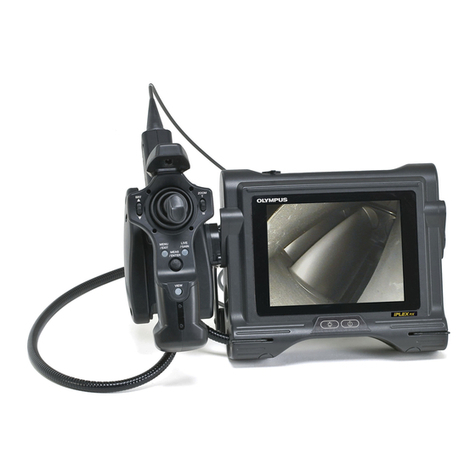
Olympus IPLEX NX User manual

1
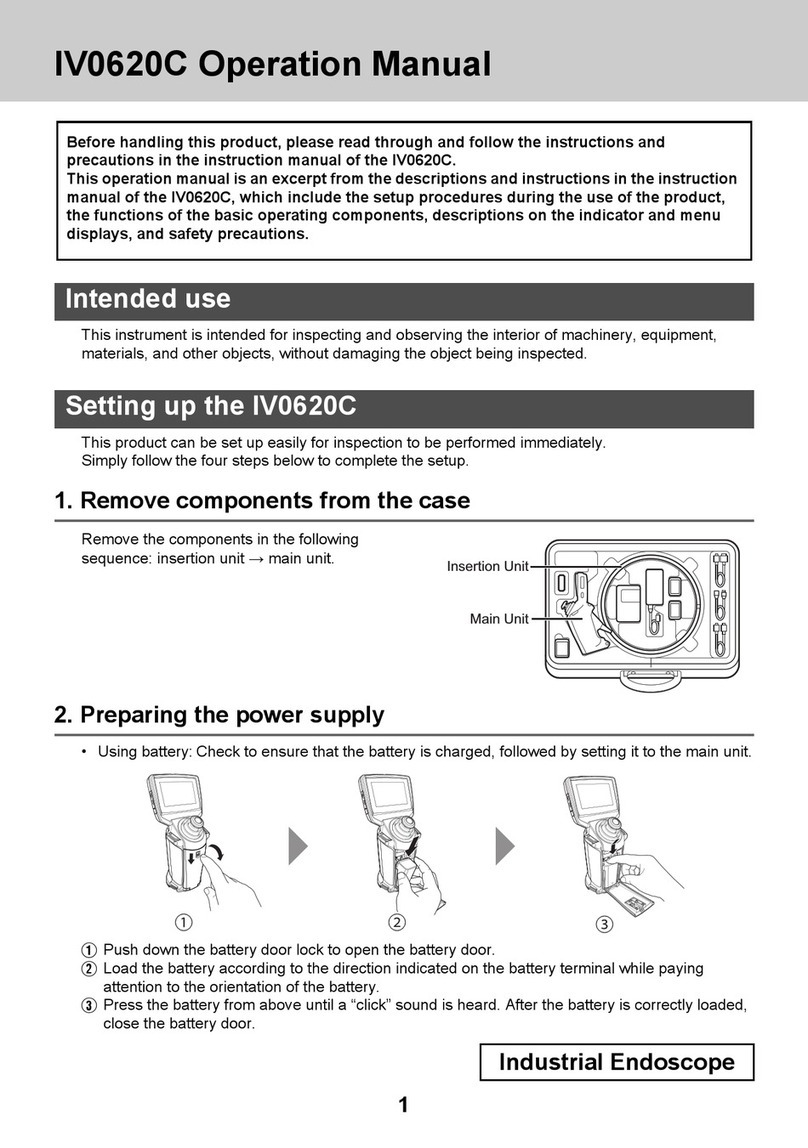
IPLEX NX Operation Manual
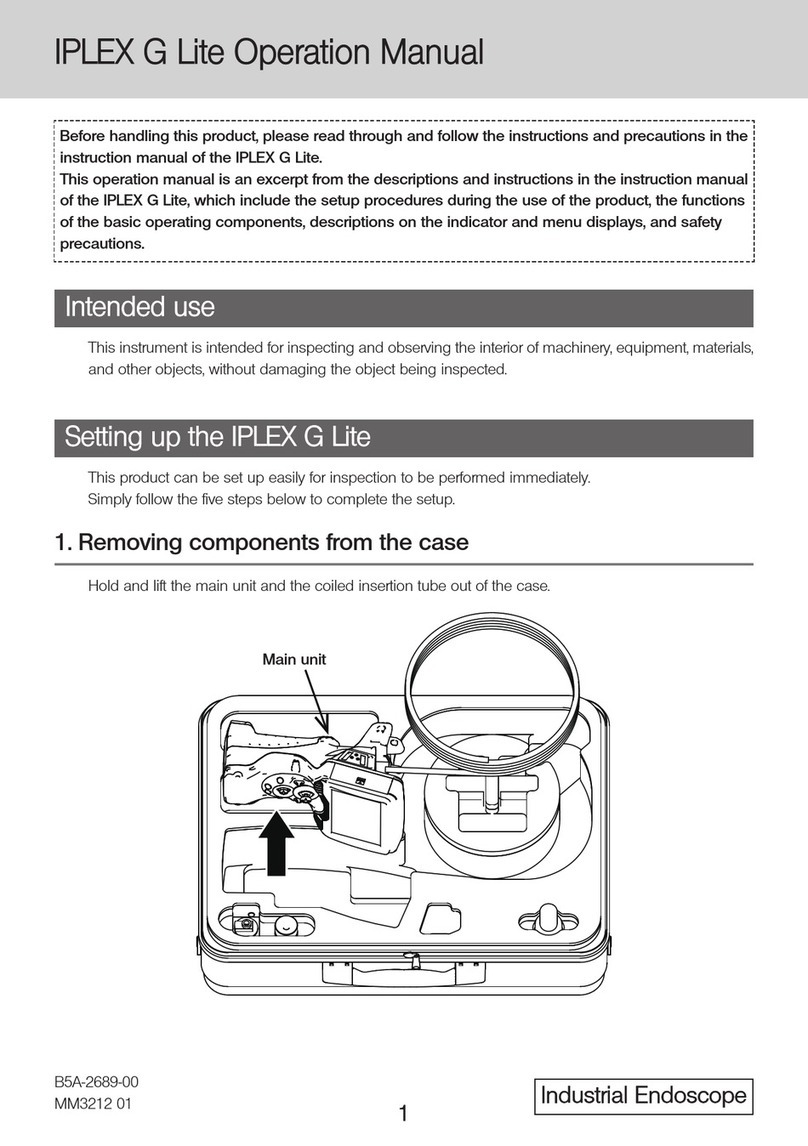
This product can be set up easily for inspection to be performed immediately.
Simply follow the six steps below to complete the setup.
Hold the handle of the NX main unit to take out from the carrying case.
This instrument is intended for inspecting and observing the interior of machinery, equipment, materials,
and other objects,without damaging the object being inspected.
The symbols used in the texts of this manual have following meanings:
[ ] indicates the words on the user interface of the product displayed in English.
< > indicates the words on the user interface of the product and the language displayed is selectable by user settings.
1. Remove components from the carrying case
Before handling this product, please read through and follow the instructions and precautions in
the instruction manual of the IPLEX NX.
This operation manual is an excerpt from the descriptions and instructions in the instruction
manual of the IPLEX NX, which include the setup procedures during the use of the product, the
functions of the basic operating components, descriptions on the indicator and menu displays,
and safety precautions.
MM2693 05
Intended use
Setting up the IPLEX NX
Industrial Endoscope
Handle of the NX main unit

2
• Using AC adapter:
1 Open the connector cover on the side of the main unit.
2 Connect the AC power cord to the AC inlet of the AC adapter
3 Connect the output connector of the AC adapter to the DC-IN terminal of the main frame.
4 Connect the plug of the AC power cord securely into a 3P power outlet.
AC inlet
Connecteor cover
1 Open the battery cover.
2 Noting the orientation of the battery, insert it.
3 Make sure that the battery is locked and close the cover. Confirm that the battery cover is locked
completely.
2. Preparing the power supply
• Using battery:
Check to ensure that the battery is charged, followed by setting it to the main unit.
12 3
Check that the end surface of the connector is not dirty. If it is dirty, wipe it completely with the cot-
ton swab provided with the lens cleaning kit.
Match the scope unit attaching tab with the main unit attaching bar, and attach the scope unit to
the main unit.
Rotate the latch clockwise to lock it.
1
2
3
3. Attaching the scope unit
2 31
Connector
Attaching tab
Attaching bar
When the scope unit is not attached to the main unit, attach the scope unit according to the following
procedures.

3
• Be sure to turn OFF the power before removing or attaching the scope unit.
Otherwise, the instrument may be damaged.
Remove the drum from the drum case of the main unit, and take out the insertion tube from the drum.
NOTE
4. Taking out the insertion tube
Drum
• When using the stereo optical adapter, refer to the IPLEX NX instruction manual.
Optical adapter
NOTE
Rotate the nut of the optical adapter clockwise until the connecting
screw thread passes over the first screw thread.
After passing the first screw thread, rotate the entire main body of
the optical adapter clockwise while pushing gently until the optical
adapter main body fits into the positioning groove of the insertion
tube and stops rotating anymore.
Rotate the nut of the optical adapter clockwise to attach the con-
necting screw thread to the second screw thread. Tighten the nut
until it stops completely.
2
3
4
Optical adapter
main body
6-mm type 4-mm type
6.2-mm type
5. Attaching the optical adapter
Holding the optical adapter and the distal end so that they make one straight line each other, care-
fully insert the optical adapter into the distal end.
1
Second screw thread
Connecting screw
thread
First screw thread
O-ring
Distal end
Nut
Optical adapter
Optical adapter positioning
groove
First screw thread Connecting screw
thread
Second screw thread
O-ring
Distal end
Nut
Optical adapter
Optical adapter positioning
groove
First screw thread
Connecting screw thread
Second screw thread
O-ring
Distal end
Nut
Optical adapter
Optical adapter positioning
groove
Nut

4
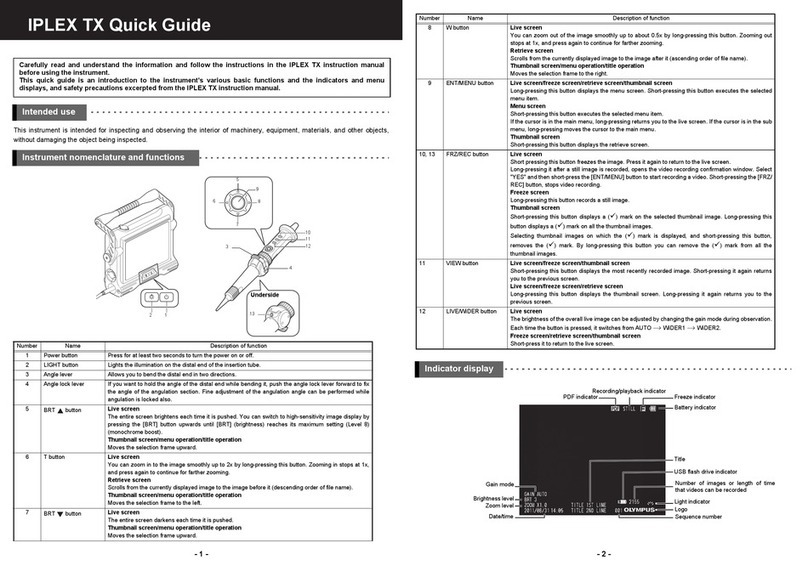
[POWER] button ( )
[POWER] indicator
[LIGHT] button ( )
[LIGHT] indicator
Setup is now complete.
6. Turning on power
To turn ON the power, press the [POWER] button ( )
of the main unit approx. one second.
After pressing the [POWER] button approx. one sec-
ond, the [POWER] indicator lights up and the power
turns on.
The display screen and menu operations become
enabled approx. 35 seconds after the [POWER] button
( ) is pressed.
Pressing the [LIGHT] button ( ) turns ON or OFF the
light.
While the light turns ON, the [LIGHT] indicator lights
on.
1 2 3
Using the strap
When the shoulder strap is not attached to the main unit, attach the shoulder strap hooks to the
two belt brackets.
Adjust the length of the shoulder strap by the length adjuster buckle.
Hang the shoulder strap on your shoulder and hold the shoulder strap firmly with your hand.
1
2
3
[ROTATE] button
[FREEZE] button
[RECORD] button
[ANGLE SEL/CENTER] button
[ANGLE/LOCK] joystick
Part names and functions
Perform the angulation operation
Operate the [ANGLE/LOCK] joystick carefully in the direction you want to observe.
Lock the angulation status
1. While the angulation section is bent, press the [ANGLE/LOCK] joystick to lock the angulation
section.
2. Even though the angulation is locked, the angulation operation can be adjusted finely by operating
the [ANGLE/LOCK] joystick.

5
Record images
If you are using the image recording media (SDHC card or USB flash drive) for the fiirst time, format it with
the base unit before you start recording. For more details on the procedure, please refer to the instruction
manual of the IPLEX NX.
Record still images
1. Press the [FREEZE] button to freeze the image.
2. While the freeze screen is displayed, press the [RECORD] button to record the still image.
Record movies
1. While the live image is displayed, long-press the [RECORD] button (about 1 second).
2. After a still image is recorded, a movie recording confirmation dialog appears.
3. Touch <YES> on the LCD monitor to start recording.
4. Press the [RECORD] button to end recording.
Optical adapter name
Distal end temperature indicator
Manual icon
External input icon
Angle lock icon
Angle centering icon
Warming-up icon
Folder name
Brightness level[BRT] button
Zoom level
[ZOOM] button
Date/Time TitleWiDER icon
Freeze icon
Recording sound icon
Recording movie icon
[MENU] button
[LIVE] button
[VIEW] button
[THUMBNAIL] button
[SPOT RANGING] button
[MEASURE] button
[Move] button,
[ENTER] button
Battery indicator
Logo
Number of recordable images
Media icon (SD or USB)
LCD monitor nomenclature
[ZOOM] button : Enlarges or reduces the displayed image.
[BRT] button : Adjusts the brightness. increases the brightness level and de-
creases the brightness level.
[MENU] button : Displays the menu screen.
[LIVE] button : (Tap) Displays the live screen.
(Log-tap) Changes the brightness adjustment between Auto mode and
Manual mode.
[VIEW] button : Displays the image in full screen (view screen).
[THUMBNAIL] button : Displays the thumbnail screen.
[SPOT RANGING] button : Starts/exits the spot ranging function.
[MEASURE] button : Starts the stereo measurement function.
[Move] button : Selects the menu or moves the cursor.
Switches the save destination folder of the image on the live screen.
Switches the selected image on the thumbnail screen.
displays the last image and displays the next image on the view
screen.
[ENTER] button : Decide the menu, etc.

6
• Touch in the upper right corner of the LCD monitor to show button and touch to hide button.
TIP
Tap the icon on the screen.
Tap the [MENU] button. (This displays the main menu.)
1
2
Menu screen display
1
2

7
Main menu Sub menu Available settings
<TITLE> –Inputs a title.
Puts a title on the live screen and recorded images. Up to 30 characters can be inputted.
<WHITE BALANCE> –Adjusts the white balance (Live screen only).
When replacing parts like the optical adapter, adjust the white balance by capturing an
image of a white object such as a piece of paper, from a distance of 50 to 60 mm.
<IMAGE MODE> <SHARPNESS> Adjusts the sharpness of the image.
The sharpness level increases from left to right (4 levels).
<SATURATION> Adjusts the color of the image.
<WIDER> Enables the WIDER function.
The level increases in the order of <OFF>, <WIDER1> and <WIDER2>.
<NOISE REDUCTION> Reduces the noise from the image.
The effect level increases in the order of <OFF>, <LOW>, <MEDIUM> and <HIGH>.
<STEREO ADAPTER
IMAGE DISPLAY MODE>
Selects the screen in <MONOCULAR IMAGE> or <BINOCULAR IMAGE>.
Sets the live image whether to display in monocular view or binocular view when the stereo
optical adapter is attached.
• <MONOCULAR IMAGE> : Displays the image in monocular view (one screen)
• <BINOCULAR IMAGE> : Displays the image in binocular view (two screens)
<GRID> Displays the grid on the screen.
The grid display can be selected from <OFF> or three grid types.
The grid is displayed on the live screen.
<STEREO ADAPTER
SELECT>
Displays the stereo optical adapter list.
Selecting to decide the optical adapter will set the stereo optical adapter that is connected
to the system.
<RECORD MODE> <PRINT SCREEN> Records the texts and the graphic data over the still images or movies.
<FILE NAME MARK> Specifies whether to add the markings to the file names of the still image or the movie.
• <OFF> : The mark is not attached.
• <ON> : The mark is attached.
You can select the marking to be added when recording the image. The markings can
be selected from "None, _A, _B, _C and _D".
<RECORD MODE> <STILL AUDIO> Switches whether to record the sound when recording the image.
The sound recoding can be selected from <ON> or <OFF>. If <ON> is selected, the sound
recording confirmation dialog appears when recording the still image.
<MEDIA> Selects the drive for recording and playing back.
The SDHC card or the USB flash drive can be selected.
<MEDIA FORMAT> Formats the media (SDHC card or USB flash drive) currently selected.
<SYSTEM SETUP> <DISPLAY> Selects whether to show or hide the information on the screen.
<AUDIO VOLUME> Specifies the sound volume.
The sound volume can be selected from <OFF>, <LOW>, <MEDIUM> and <HIGH> (4levels).
<BEEP> Sets the output of the operation sound (beep sound).
<VIDEO IN> Specifies the image input mode for next startup.
The input mode can be selected from <OFF>, <NTSC> or <PAL>.
<DATE TIME> Specifies date and time.
<LANGUAGE> Specifies the display language.
English and other languages are supported. The default is [ENGLISH].
Using the live screen/freeze screens


8
Using the thumbnail screen
Using the view screen
Menu Available settings
<DELETE> Deletes the recorded image.
On the thumbnail screen, the currently selected image or all images that are check-marked ( ) are deleted.
<MOVE FILE> Moves image files to folders (Thumbnail screen only).
The currently selected image or all images that are check marked ( ) on the thumbnail screen are moved.
<RENAME FILE> Rename file (Thumbnail screen only)
<CHANGE FOLDER> Switches a folder for image recording and playback (Thumbnail screen only).
The initial setting is set to "DCIM\100IPLEX".
<MAKE FOLDER> Creates a new folder for image recording and playback.
<RENAME FOLDER> Renames a folder for image recording and playback.
<BATCH TRANSFER> Upload the still image files stored in the folder to the cloud server at once.
Menu Available settings
<DELETE> Deletes the recorded image.
On the view screen, the currently displayed image is deleted.
<NOTE> Inputs the note information (texts/symbols) to the desired position on the screen.
You can input the note information (texts/symbols) by tapping on the still image that is being played back or by
tapping the up/down/left/right button ( ).
<COMPARE> Displays the comparison screen.
To hide the comparison screen, tap the [MENU] button.
<GHOST> Displays the ghost screen.
To hide the ghost screen, tap the [MENU] button.
Main menu Sub menu Available settings
<SYSTEM SETUP> <VERSION> Displays the software version.
<FINE MODE SPEED> Specifies the angulation speed for the angulation lock.
The angulation speed can be selected from <SLOW>, <STANDARD> and <FAST> (3levels).
<NETWORK> <WIRELESS> Specifies the wireless communication.
・ Enables the wireless communication.
・ Specifies and selects the access point.
<TRANSFER AS
RECORDING>
Specifies the transfer as recording.
・ OFF: Disables the transfer as recording.
・ ON: Enables the transfer as recording.
Enabling this setting allows you to upload the still image to the cloud server in
conjunction with the recording operation.
<DEVICE AUTHEN
AUTHENTICATION> Specifies the device authentication.
Input the PIN code to process the device authentication.

9
Input text from the on-screen keyboard
Select the input mode.
Select the text buttons you want.
Select <EXECUTE>.
1
2
3
Select <PRESET>.
Select the strings you want to input as titles from the preset title list.
Select <EXECUTE>.
1
2
3
Selecting a preset title for input
Inputting a title
Marks used in this manual
The following signal words are used throughout this manual.
DANGER : Indicates an imminently hazardous situation which, if not avoided, will
result in death, serious injury or damage of observation object.
WARNING : Indicates a potentially hazardous situation which, if not avoided, could
result in death, serious injury or damage of observation object.
CAUTION : Indicates a potentially hazardous situation which, if not avoided, may result
in minor or moderate injury. It may also be used to alert against unsafe
practices or potential material damage.
NOTE
: Indicates a potential situation which, if not avoided, may result in failure of
this instrument.
TIP
: Indicates additional helpful information.
1
1
2
2
3
3

10
General safety precautions
Observe the precautions described below when handling the instrument. The information is to be sup-
plemented by the dangers, warnings and cautions given in each chapter. Safety cannot be guaranteed
when the instrument is used in ways that are not specifically described.
• Never use the instrument for observing inside of the human or animal cavity.
Otherwise, death or serious injury of the person or animal may result.
• Never use the instrument in the following environments.
-Where flammable atmospheres are present
-Where metal dust or other dust is present
Otherwise, an explosion or fire may result.
• Do not repair, disassemble or remodel the instrument.
Never repair, disassemble or remodel the instrument. Otherwise, the injury of human bodies or the damage
of the instrument may result. Only personnel who are authorized by Olympus are allowed to repair the
instrument. Olympus is not liable for any accidents or instrument damage that occurs as a result of repairs
attempted by personnel who are not authorized by Olympus.
• Stop using the instrument immediately at the first sign of heat, smoke, abnormal odor, abnormal noise or any
other abnormality.
Even if the instrument is still operable, turn OFF the power.
• Do not insert the insertion tube into an inspection object that is in operation or conducting electricity.
Otherwise, the insertion tube may be damaged by being caught inside of the inspection object, etc., or the
insertion tube may touch the object, which results in electric shock.
• Before storing the instrument in its carrying case, be sure to turn OFF the power and remove the battery.
Leaving the battery loaded during storage causes it to be hot, which may cause fire.
DANGER
WARNING
Safety precautions
• Do not use the instrument in any environment (including strongly radioactive environments) other than
the specified operating environment.
Otherwise, unexpected accidents that may damage the insertion tube may result.
• Do not touch the distal end immediately after using this instrument in high-temperature environments.
Otherwise, you may get burned.
• Use the stereo optical adapter and the scope unit in combination specified by Olympus.
If you use them in combination that is not specified by Olympus, the unexpected accidents that may
deteriorate the performance may result.
• Use only the power cord and the AC adapter specified by Olympus and connect the power cord to the
3P power outlet within the rated range.
Otherwise, smoke, fire, or electric shock may occur.
• Do not use the power cord specified for this instrument for other products.
• Do not use the AC adapter outdoors.
Otherwise, electric shock, smoke or fire may occur, which may cause damage to the instrument.
The AC adapter is designed for indoor use.
CAUTION

11
CAUTION
• Do not apply a strong impact to the AC adapter by hitting it against the wall or dropping it to the floor, etc.
Otherwise, malfunction or damage may be caused and result in electric shock.
• If you sense any abnormality while inserting the insertion tube into the inspection object, do not attempt
to insert it forcibly any more but carefully pull out the insertion tube. Note the following when pulling out
the insertion tube.
- Do not pull out the insertion tube from the inspection object while the angulation is locked or while the
angulation section is bent.
- If the insertion tube is caught on something during pulling it out, rotate the insertion tube gently while
continuing to pull out.
• Note the following precautions when handling the distal end of the insertion tube.
- Do not drop the optical adapter or subject it to strong impact.
- Do not subject the distal end to severe impact or pulling.
- Do not subject the angulation section to strong pressure or bending.
- Do not move with holding the distal end of the insertion tube.
- Do not use this instrument if the O-ring of the distal end of the insertion tube is damaged or torn.
Otherwise, the glass lenses and the precision components which constitute the distal end and the
angulation section may be damaged.
• Always attach the optical adapter before using this instrument.
If you use the instrument without attaching the optical adapter to the insertion tube, parts (screws, etc.)
are easily deformed due to contact with hard objects, etc. If the insertion tube parts are deformed, the
optical adapter cannot be attached or may fall off.
• Never use the optical adapter if any of its parts are loose.
Otherwise, the loose parts may fall off.
• If the optical adapter cannot be attached or removed because the nut does not rotate, stop using it.
Contact Olympus.
• If you sense any abnormality while performing the angulation operation, do not attempt to force the
angulation operation.
Otherwise, the insertion tube or the inspection object may be damaged.
• When hanging the main unit on your shoulder using the shoulder strap, do not allow it to be caught on
other objects.
Be careful so that it does not strangle your neck.
• Do not allow metal or other foreign objects to enter the main unit through connector terminals or any
other openings.
Otherwise, the malfunction or electric shock may result.
• Do not use this instrument near the strong electromagnetic radiation source.
The proper operations may be interfered. Check the electromagnetic environment before using this
instrument.
• The interfaces in the connector cover, SDHC card and USB flash drive are high sensitivity parts. Be
sure to remove the electricity before use.
Otherwise, the malfunction may occur due to the static electricity.
• Remove the electricity around the heat sink of the main unit before operation.
Otherwise, the malfunction may occur due to the static electricity.
• Do not use the parts other than the insertion tube underwater or clean them under running water.
Otherwise, water creates the risk of electric shock. The parts other than the insertion tube are designed
for water proof construction only if the battery cover and connector covers are closed completely. Do not
use or store the instrument in an environment where it is submerged in water.
• Do not subject the LCD monitor to strong impact, strong pressure or to scratching by a hard or pointed object.
Otherwise, the LCD monitor may be cracked or scratched, or the damaged monitor may cause
personal injury.
• When tilting the handle, be careful not to pinch your hands or any objects.
• Use SDHC card and microSDHC card recommended by Olympus to record images.
This instrument comes with an SDHC card.

12
• Do not store the instrument in the following locations.
- Environments exposed to high temperature, high humidity and large amounts of dust or particulate
- Locations exposed to direct sunlight or radiation
- Locations exposed to gas that includes halide*1
Otherwise, the instrument may be damaged.
*1 The performance of some electrical parts may deteriorate due to the halide in insecticides,
pesticides and gaseous extinguishing agents, etc.
• Do not continue to use the instrument when it is wet with condensation.
In case of a sudden temperature change, such as entering a warm room from cold outside,
condensation may be caused inside the instrument. Using the instrument while it is wet with
condensation may cause malfunction. If condensation occurs, leave the instrument in the environment
where it will be used and allow the condensation to dry before using it.
• Do not insert the insertion tube into the inspection object which is in an environment that exceeds the
operating temperature range.
The continued use may damage or deteriorate the performance of the instrument.
• Do not use the instrument if the contaminants are attached to the outer surface of the instrument.
The instrument may be damaged or the performance may be deteriorated.
• Do not cover the main unit with a plastic bag or other objects.
The inside of the instrument may not be cooled down sufficiently, which may damage the instrument.
• Do not allow any liquids other than water, saltwater, machine oil or diesel oil to be attached to the
insertion tube.
Otherwise, the insertion tube may be damaged.
• Be sure to attach the O-ring to the insertion tube's distal end before using the optical adapter.
Water getting into the area where the insertion tube and optical adapter join might cause malfunction or
damage. Also note that an optical adapter by itself is not watertight.
• Never use the instrument while dirt or water is present in the optical adapter.
Water tightness between the optical adapter and the distal end may be lost, or the optical adapter or the
distal end may be damaged.
• Do not clean the optical adapter under running water.
Otherwise, the optical adapter might be damaged.
• Do not bend the insertion tube to a radius that is less than its minimum bend radius (20 mm for the
4-mm type, 30 mm for the 6-mm type and 6.2-mm type) whenever operating the angulation section.
• Note the following precautions when handling the battery cover and the connector cover.
- Do not open or close covers with your wet hands.
- Do not open or close covers in the area exposed to high humidity and/or dust.
- Close covers when storing the instrument and when the terminals are not in use.
• Note the following precautions when taking out the instrument from the carrying case.
- When taking out the scope unit or the main unit, do not hold it up with the insertion tube.
The instrument may be damaged.
• Note the following precautions when storing the instrument in the carrying case.
- Make sure that the distal end has cooled down sufficiently before storing it.
NOTE
• Do not remove the battery or the AC adapter during operation.
Otherwise, the recorded data may be damaged.
• Do not remove the SDHC card or the USB flash drive while recording or replaying the image.
Otherwise, the recorded data or the image recording media may be damaged or lost.
• Do not repeat inserting or removing the SDHC card or the USB flash drive continuously.
Otherwise, the recorded data or the image recording media may be damaged or the SDHC card may
not work properly.
• Be careful for followings when using the extendable handle of the carrying case.
- Be careful you do not catch your hand when storing the handle inside the carrying case.
- Do not attempt to lift the carrying case by holding the extendable handle.
CAUTION

13
When replacing the hook:
• Do not reuse the hook removed from the spring shaft.
Otherwise, the hook may fall off.
• As the hole in the hook is not threaded, it may be hard to screw the hook into the spring shaft. However, keep
screwing the hook until it contacts the hook butting position in the spring shaft.
Otherwise, the hook may fall off.
• Do not screw the hook furthermore after the hook contacts the hook butting position in the spring shaft.
Otherwise, the hook and the screw thread of the spring shaft may be damaged. Also, the hook may fall off.
• Once the hook is attached to the spring shaft, do not loosen the hook.
Otherwise, the hook may fall off.
• If you loosened the hook, remove that hook and replace it with a new hook.
Otherwise, the hook may fall off.
• If you cannot screw the hook or if the hook falls off extremely easily, replace the hook assembly with a spare
hook assembly.
Otherwise, the hook may fall off.
When inserting the hook assembly into the channel of the scope unit and when using the hook
assembly:
• Keep your face away from the ends of the hook assembly.
Your eyes may be poked by the ends of the hook assembly.
• Do not insert any tool that is not specified by Olympus into the channel.
The tool may not be pulled out or the loose parts of the tool may fall off.
• Attach the safety cap to the proximal end of the hook assembly before using the scope unit.
Your eyes may be poked by the proximal end of the hook assembly.
• Use the hook assembly only for the portion described necessary in the inspection manual for the inspection
object in compliance with descriptions in the inspection manual for the inspection object.
Otherwise, the failure such that the hook may fall off and drop on the inspection object to damage the
inspection object, etc. may result.
WARNING
Hook assembly precautions
Comply strictly with the precautions described below when handling the hook assembly.
Before use, thoroughly read the inspection manual for the inspection object to fully understand the informa-
tion contained in them, and observe their instructions during use.
• When taking out the scope unit from the scope case, do not hold it up with the insertion tube.
• Note the following precautions when storing the scope unit in the scope case.
- Make sure that the distal end has cooled down sufficiently before storing it.
- Store the scope unit in the scope case with the insertion tube wound around the drum.
• When disposing of this product, be sure to do so in accordance with all local laws, rules and regulations.
Before disposing of this product, check your local laws, rules and regulations, and follow them accordingly.
• Do not store the instrument in the carrying case with the shoulder strap attached.
NOTE

14
• Use the NP-L7S battery and the JL-2Plus battery charger.
• Do not allow terminals to be short circuited.
• Do not solder the battery directly to the terminal.
• Do not interconnect the electrodes of the battery with metal, or carry or store the battery together with metal
necklaces, hair pins or other metal objects.
• Do not connect the battery directly to the power outlet or the cigar lighter socket of an automobile.
• Do not immerse the battery in fresh water or sea water, or allow the battery to get wet.
• Do not throw the battery into fire or subject it to heat.
• Do not open or modify the battery.
• Do not pierce the battery, hit it with a hammer, or step on it.
• Do not subject the battery to strong impact.
• Do not use or leave the battery in an area exposed to direct sunlight, in a closed automobile in the sun, or
near a heater, etc.
• If the fluid leaking from the battery enters your eyes, the loss of sight may result. In this case, wash your eyes
with tap water or other clean water without rubbing and visit a physician immediately.
• Do not use the battery charger outdoors.
Otherwise, electric shock, smoke or fire may occur, which may cause the damage to the charger. The battery
charger is designed for indoor use.
• Do not cover the battery charger with clothing, bedding or other materials while charging.
• When the charging is complete, always unplug the power plug of the battery charger from the power
outlet.
• If you sense the heat generation, abnormal odor, abnormal noise, smoke, or any other abnormality,
unplug the power plug of the battery charger immediately and stop using it.
Contact Olympus.
• If the battery charger does not complete recharging the battery in the specified recharging time, stop
attempting to recharge the battery.
• Do not use a battery if it shows any irregularity such as fluid leak, discoloration, deformation, abnormal
odor or other abnormality.
Immediately request the repair service.
• If the battery fluid gets onto your skin or clothing, immediately wash away with tap water or other clean
water.
Otherwise, a skin injury may result. Contact a physician for treatment if necessary.
• Do not allow the battery compartment to become deformed and never put any foreign object into it.
• Do not allow metal or water, or any other fluid to get into the battery compartment or onto the battery
terminals.
If any foreign object enters the main unit, remove the battery and disconnect the AC adapter, and
immediately contact Olympus.
• Do not remove the battery immediately if the instrument was used continuously for a long time.
The heat generated by the battery causes the risk of burn injury.
• Do not leave the battery in a location subject to moisture, water leakages or extremely high or low
temperatures.
• Do not touch the battery terminals with your wet hands.
DANGER
WARNING
Battery precautions
Should you experience any problems when using the instrument with batteries, contact Olympus.
Observe the precautions described below when handling the battery. Otherwise, battery fluid leakage, exces-
sive heat generation, smoke, battery burst, electric shock and/or burns may result.
Before use, thoroughly review the instruction manual for the battery charger to fully understand the informa-
tion contained in them, and observe their instructions during use.

15
• If you plan not to use the instrument for a long time, remove the battery from the main unit and store it
in a dry place.
Otherwise, the battery fluid may leak and the heat generation may result in a fire or injury.
• Keep the battery out of the reach of small children.
WARNING
• If you are experiencing problems in inserting the battery, do not attempt to insert it forcibly.
Check the orientation of the battery and check the terminals for abnormalities. Attempting to insert the battery
forcibly into the compartment may cause malfunction.
• If you are experiencing problems in removing the battery from the instrument, do not attempt to remove it
forcibly.
Contact Olympus.
• Contact the airlines in advance if you plan to transport the battery by aircraft.
• When replacing the battery, do not repeat inserting or removing it rapidly.
Otherwise, the power may not be turned ON.
• When disposing of a battery, be sure to do so in accordance with all local laws, rules, and regulations.
Before disposing of batteries, check your local laws, rules, and regulations and follow them accordingly.
• The contamination of battery electrodes with sweat or oil will cause the contact failure. If the battery is dirty,
wipe it with a dry cloth before use.
• Use the battery correctly. If the battery is used incorrectly, battery fluid leakage, heat generation or damage
may result. Insert the battery in the correct orientation when replacing it.
• Recommended temperature range for Li-ion battery operation.
-Discharging (using main unit) : -10 °C to 40 °C
-Charging : 0 °C to 45 °C
-Storage : -20 °C to 60 °C
Using the battery under the temperature exceeding the temperature ranges described above will result in
degradation of its performance and service life.
Before storing the instrument, be sure to remove the battery from the main unit.
CAUTION
NOTE

16
Illumination light precautions
This product is equipped with high intensity illumination in order to obtain sufficient brightness for observ-
ing the inspection object. When the illumination of this product is turned ON, the intense light comes out
from the distal end of the insertion tube of the scope unit. Comply strictly with the precautions described
below when using this product.
• Turn OFF the illumination if not necessary. Please refer to the "6. Turning on power" on page 4 for how to turn
off the illumination.
If the illumination light enters your eyes, your eyes may get injured. If you see the illumination light for a long
time even though it is at the edge of your field of view, your eyes may get injured.
If there is any possibility that the illumination light enters human eyes, turn OFF the illumination if not neces-
sary.
In particular, be careful the illumination turns ON automatically in the following cases.
-When you turn ON the power while the optical adapter is attached.
-When you attach the optical adapter while the power is turned ON.
• Do not see the illumination light.
Otherwise, your eyes may get injured. If you see the illumination light for a long time even though seeing it
diagonally or from the side, your eyes may get injured.
• Do not see the light reflected from the illumination light.
The light reflected from the illumination light may be collected depending on the shape of the reflection
surface. If such reflected light enters your eyes, your eyes may get injured.
• If there are people around you, call attention according to the precautions described in this page.
People around you may get eye injury.
• Do not leave the distal end of the insertion tube keeping its illumination turned ON near the flammable sub-
stances for a long time.
Otherwise, fire may result.
Information of IEC62471
●RISK GROUP2
CAUTION: Possibly hazardous optical radiation emitted from this product. Do
not stare at operating lamp. May be harmful to the eyes.
TIP
This product uses the fluorescence (white light) emitted from the phosphor excited by the laser beam as a
illumination light. The laser beam is not emitted from this product.
WARNING
Table of contents
Other Olympus Analytical Instrument manuals

Olympus
Olympus IPLEX TX User manual

Olympus
Olympus IPLEX TX User manual

Olympus
Olympus IV8000-2 User manual

Olympus
Olympus IPLEX YS User manual

Olympus
Olympus IV8200T User manual

Olympus
Olympus IPLEX G Lite User manual

Olympus
Olympus EVIS LUCERA GIF N260 User manual

Olympus
Olympus IPLEX LX Series User manual

Olympus
Olympus IPLEX FX Series User manual

Olympus
Olympus IV0620C User manual