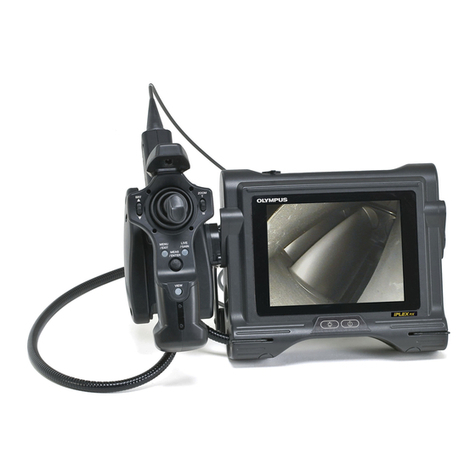
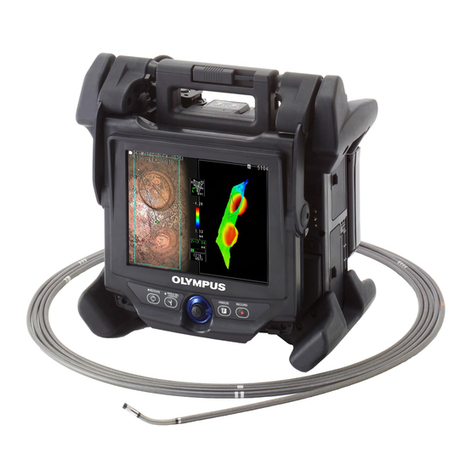
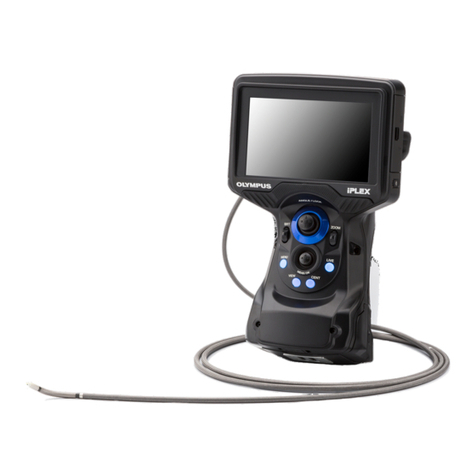
Olympus IPLEX TX User manual

IPLEX TX Quick Guide
This instrument is intended for inspecting and observing the interior of machinery, equipment, materials, and other objects,
without damaging the object being inspected.
Carefully read and understand the information and follow the instructions in the IPLEX TX instruction manual
before using the instrument.
This quick guide is an introduction to the instrument's various basic functions and the indicators and menu
displays, and safety precautions excerpted from the IPLEX TX instruction manual.
Number Name Description of function
1Power button Press for at least two seconds to turn the power on or off.
2LIGHT button Lights the illumination on the distal end of the insertion tube.
3Angle lever Allows you to bend the distal end in two directions.
4Angle lock lever If you want to hold the angle of the distal end while bending it, push the angle lock lever forward to fix
the angle of the angulation section. Fine adjustment of the angulation angle can be performed while
angulation is locked also.
5BRT button Live screen
The entire screen brightens each time it is pushed. You can switch to high-sensitivity image display by
pressing the [BRT] button upwards until [BRT] (brightness) reaches its maximum setting (Level 8)
(monochrome boost).
Thumbnail screen/menu operation/title operation
Moves the selection frame upward.
6T button Live screen
You can zoom in to the image smoothly up to 2x by long-pressing this button. Zooming in stops at 1x,
and press again to continue for farther zooming.
Retrieve screen
Scrolls from the currently displayed image to the image before it (descending order of file name).
Thumbnail screen/menu operation/title operation
Moves the selection frame to the left.
7BRT button Live screen
The entire screen darkens each time it is pushed.
Thumbnail screen/menu operation/title operation
Moves the selection frame upward.
Intended use
Instrument nomenclature and functions
6
7
4
5
10
8
3
21
Underside
11
9
12
13
8W button Live screen
You can zoom out of the image smoothly up to about 0.5x by long-pressing this button. Zooming out
stops at 1x, and press again to continue for farther zooming.
Retrieve screen
Scrolls from the currently displayed image to the image after it (ascending order of file name).
Thumbnail screen/menu operation/title operation
Moves the selection frame to the right.
9ENT/MENU button Live screen/freeze screen/retrieve screen/thumbnail screen
Long-pressing this button displays the menu screen. Short-pressing this button executes the selected
menu item.
Menu screen
Short-pressing this button executes the selected menu item.
If the cursor is in the main menu, long-pressing returns you to the live screen. If the cursor is in the sub
menu, long-pressing moves the cursor to the main menu.
Thumbnail screen
Short-pressing this button displays the retrieve screen.
10, 13 FRZ/REC button Live screen
Short pressing this button freezes the image. Press it again to return to the live screen.
Long-pressing it after a still image is recorded, opens the video recording confirmation window. Select
"YES" and then short-press the [ENT/MENU] button to start recording a video. Short-pressing the [FRZ/
REC] button, stops video recording.
Freeze screen
Long-pressing this button records a still image.
Thumbnail screen
Short-pressing this button displays a () mark on the selected thumbnail image. Long-pressing this
button displays a () mark on all the thumbnail images.
Selecting thumbnail images on which the () mark is displayed, and short-pressing this button,
removes the () mark. By long-pressing this button you can remove the () mark from all the
thumbnail images.
11 VIEW button Live screen/freeze screen/thumbnail screen
Short-pressing this button displays the most recently recorded image. Short-pressing it again returns
you to the previous screen.
Live screen/freeze screen/retrieve screen
Long-pressing this button displays the thumbnail screen. Long-pressing it again returns you to the
previous screen.
12 LIVE/WiDER button Live screen
The brightness of the overall live image can be adjusted by changing the gain mode during observation.
Each time the button is pressed, it switches from AUTO WiDER1 WiDER2.
Freeze screen/retrieve screen/thumbnail screen
Short-press it to return to the live screen.
Number Name Description of function
Indicator display
Number of images or length of time
that videos can be recorded
USB flash drive indicator
Battery indicator
Light indicator
Logo
Sequence number
Title
Date/time
Zoom level
Brightness level
Gain mode
Recording/playback indicator Freeze indicator
PDF indicator
-1- -2-

1. Long-press the [ENT/MENU] button.
This displays the menu.
2. Use the [BRT ]/[BRT ] buttons to move up and down and [W]/[T] buttons to move left and right to select the menu item
you want to execute.
3. Short-press the [ENT/MENU] button.
This executes the selected menu item.
4. Short-press the [LIVE/WiDER] button.
This returns you to the live screen.
•If the cursor is in the main menu, long-pressing the [ENT/MENU] button returns you to the live screen.
•If the cursor is in the sub menu, long-pressing the [ENT/MENU] button moves the cursor to the main menu.
Main menu Sub menu Available settings
TITLE INPUT -Title input.
A title can be displayed in the live screen, freeze screen, and in registered images.
Input can be up to 30 characters.
WHITE BALANCE -White balance adjustment (Live screen only).
After changing the scope unit, capture an image of a white object, such as a piece of paper, from a
distance of 50 to 60 mm.
CHANGE FOLDER -Specifies a folder for image recording and playback.
The default is "100IV7R1".
RECORD FILE NAME MARK Appends a letter to the end of image file names.
You can select from among _A, _B, and _C. A screen for selecting the letter to be appended to each
image file name is displayed.
PRINT
SCREEN ON/OFF
Adds date, title, and other information to recorded images.
Specifies whether date, time, title, logo, and other information on the display should be recorded in
images.
REC FUNCTION [FRZ/REC] button image type setting.
Long-pressing the [FRZ/REC] button performs one of the following operations.
STILL+MOVIE
Live screen: Records still images and moving images.
Freeze screen: Records still images only.
STILL ONLY
Live screen: Records still images only.
Freeze screen: Records still images only.
Performing menu operations
Sub menu
Main menu
Using the live screen/freeze screens
•You can use only alphanumeric characters and symbols for folder and file names. Some symbols are unavailable for folder and
file names also.
SELECT PDF FILE -PDF file display.
Selects PDF files stored in the "PDF" folder on the USB flash drive so that they can be viewed.
SETUP MEDIA FORMAT USB flash drive formatting (initialization).
DATE/TIME/LOGO Display information setting.
Specifies whether display information (date and time, title, etc.) should be shown on the LCD
monitor.
ALL: Show the date, time, title, "OLYMPUS" logo, zoom level, and brightness level.
DATE/TIME/LOGO: Show the date, time, title, and "OLYMPUS" logo.
DATE/TIME: Show the date, time, and title.
OFF: Do not show information.
BEEP ON/OFF Beep sound output.
SCOPE
INITIALIZATION
Execution of scope initialization.
Adjusts the noise level of the scope. Always do this when attaching a new scope.
Do it if there is a lot of screen noise too.
DATE TIME Date and time settings.
LANGUAGE Display language selection.
English and other languages are supported.The default is "English".
TV FORMAT Change of TV format.
Button Available settings
DELETE Deletes a recorded image.
On the retrieve screen, the currently displayed image is deleted. On the thumbnail screen, the currently selected image
or all images that are check marked () are deleted.
CHANGE FOLDER Specifies a folder for image recording and playback (Thumbnail screen only).
The default is "100IV7R1".
COPY FILE Copies the image file between folders (Thumbnail screen only).
The currently selected image or all images that are check marked () on the thumbnail screen are copied. Also, new
folders at a copy destination can be created and new folders can be named.
MOVE FILE Moves image files between folders (Thumbnail screen only).
The currently selected image or all images that are check marked () on the thumbnail screen are moved. Also, new
folders at a move destination can be created and new folders can be named.
RENAME FILE Renames image files (Thumbnail screen only).
MEDIA FORMAT Formats (initializes) USB flash drives (Thumbnail screen only).
Main menu Sub menu Available settings
Using the thumbnail/retrieve screens
-3- -4-

On the menu on which the PDF file is displayed, you can work with that PDF file as shown below.
PDF main menu PDF submenu Functional description
MOVE PDF
DOCUMENT
Displays the top page.
Displays the previous page.
Long-pressing the [BRT ] button gives you the same effect.
Displays the next page.
Long-pressing the [BRT ] button gives you the same effect.
Displays the last page.
Displays your desired page.
EXPAND/SHRINK
PDF DOCUMENT
Displays the whole page.
Displays the page to fit width.
Displays the page to fit height.
Zooms in the page.
Long-pressing the [T] button gives you the same effect.
Zooms out the page.
Long-pressing the [W] button gives you the same effect.
ROTATE PDF
DOCUMENT
Rotates the page counterclockwise.
All the pages in the document are also rotated to match the page being displayed.
Rotates the page clockwise.
All the pages in the document are also rotated to match the page being displayed.
DISPLAY PDF
INFORMATION
-Allows you to display or hide the PDF file name, page number of current page/total pages,
position in page of portion being displayed (vertical/horizontal), and scroll bars on the PDF
screen.
SPLIT SCREEN
ON/OFF
-Allows you to split and display the PDF screen and live or freeze screen.
You can switch over between the PDF screen and the live or freeze screen by pressing the [VIEW]
button (held down for a short time).
Operations in the PDF file display screen
Inputting text from the on-screen keyboard
1. Select the input mode and then short-press the [ENT/MENU] button.
2. Select text from the on-screen keyboard, and then short-press the [ENT/MENU] button.
3. Edit the text if necessary.
Selecting a preset title for input
1. Select [PRESET] and then short-press the [ENT/MENU] button.
2. Select the desired text string from the preset title list and then short-press the [ENT/MENU] button.
3. Repeat steps 1 and 2 to complete inputting a title.
General safety precautions
Observe the precautions described below when handling the instrument.
•Never use this instrument for observation inside a human or animal cavity.
•Never use the instrument in the following types of environments.
•Where flammable atmosphere is present
•Do not repair, disassemble, or modify the instrument
•Immediately stop using the instrument at the first sign of smoke, abnormal odor, abnormal noise, or any other abnormality.
•Do not insert the insertion tube into an observation object that is in operation or conducting electricity.
•Before stowing the instrument in its carrying case, be sure to turn off power and remove the battery.
•Do not use this instrument in strongly radioactive environment or any other environment that does not conform to the specified
operating environment.
•Do not insert the insertion tube into an observation object in an environment that is outside the operating temperature range.
•Do not hold the control unit for a long time while using the instrument in an environment that is very hot.
•Do not continue to use the instrument when it is wet with condensation.
•Take care that your feet are not caught by the power cord or other cords.
•Use only a power cord and AC adapter specified by Olympus.
•To ensure electrical safety, connect the power cord to a 3P power outlet.
•Do not unplug the power cord while the system is on.
•Do not use the AC adapter outdoors.
•Do not subject the AC adapter to strong impact such as by striking it against a wall, dropping it, etc.
•Do not connect the AC power cord to power outlets having a different rating.
•Always grasp the plug when unplugging it from the electric outlet.
•Do not leave the distal end illumination on.
Inputting titles
Serial number (3 digits)
Preset title register button
Title input box
Preset title select button
Keyboard
Safety precautions
-5- -6-

•Do not look directly into the illumination being emitted by the distal end.
•Do not expose the LCD monitor to strong impact, strong pressure, or to scratching by a hard or pointed object.
•Do not subject the insertion tube or other cables to strong pulling, and do not move the main unit around by holding the cables.
•Do not allow any liquids other than water, saltwater, machine oil, or diesel oil to come into contact with the insertion tube.
•Do not allow water to come into contact with parts other than the insertion tube.
•Do not subject the distal end to dropping, impact or pulling, and do not expose the angulation section to severe impact or bending.
•The distal end of the insertion tube is hot immediately after it is used in a very hot environment.
•Note the following precautions whenever operating the angulation section.
•Do not bend the insertion tube to a radius that is less than its minimum bend radius of 20 mm.
•Should you sense any abnormality when performing angulation operation, do not try to force the angulation operation.
•Never use an insertion tube when any of its parts are loose.
•Do not allow metal or other foreign objects to enter the main unit through connectors, connector terminals or any other openings.
•Avoid accidentally dropping the main unit while cables or devices are still attached to connectors.
•Whenever connectors become wet, wipe them clean before use.
Also, should connectors become clogged with foreign matter, remove the foreign matter before use.
•Do not connect any USB flash drive to the USB connector except the standard one provided or one recommended by Olympus.
•Do not touch the terminals when attaching or detaching the USB flash drive or battery.
•Note the following precautions whenever handling the battery cover, video connector cap, and AC adapter connector cap.
•Do not open or close covers/caps while your hands are wet.
•Do not open or close covers/caps in an area subject to high humidity and/or dust.
•Close covers/caps before storing the instrument and when they are not in use.
•Check to make sure that the USB flash drive is correctly loaded before using it.
•Do not remove the battery or AC adapter while the system is running.
•Should the battery indicator start to flash, immediately turn off power or connect the AC adapter.
•Note the following precautions whenever removing the instrument from its carrying case.
•Do not apply undue force when pulling the insertion tube from the slot in the cushion.
•When removing the main unit, do not lift it up by the insertion tube.
•Note the following precautions whenever stowing the instrument in its carrying case.
•Before stowing the instrument, align the "F" mark on the angulation lock ring with the " " mark and then release the angulation lock
lever.
•Make sure the distal end has cooled before storing it.
•Make sure that the insertion tube is not twisted before storing it.
•When closing the top lid of the carrying case, take care not to pinch your hand, belt, insertion tube, or cables.
•Make sure that the latch on the carrying case is securely locked.
•When hanging the main unit from your neck by the shoulder belt, do not allow it to catch on other objects.
•Do not store the instrument in the carrying case with the shoulder belt still attached.
•Regularly back up recorded data.
•Do not store the instrument in the following locations.
•Environments subject to high temperature, high humidity, and large amounts of dust or particulates
•Locations exposed to direct sunlight or radiation
•Locations subject to gas that includes halide*1
*1 The performance of some electric parts will deteriorate when exposed to gases such as the halide in insecticides, herbicides, and fire
extinguishers.
•When disposing of this product, be sure to do so in accordance with all local laws, rules, and regulations.
Battery precautions
Observe the precautions described below when handling the battery. Otherwise, battery fluid leakage, overheating, smoke,
rupture, electric shock and/or burns may result.
•Use only the specified NC2040OL24 battery and CH5000C or CH5000X battery charger.
•Do not allow connectors to short circuit.
•Do not attempt to apply solder directly to a terminal.
•Do not connect the electrodes of the battery with metal, or carry or store the battery together with metal objects.
•Do not connect the battery directly to a power outlet or the cigarette lighter of an automobile.
•Do not immerse the battery in fresh or sea water, or allow the battery to get wet.
•Do not throw the battery into fire or subject it to heat.
•Do not attempt to open or modify the battery.
•Do not pierce the battery, hit it with a hammer, or step on it
•Do not subject the battery to strong impact.
•Do not use or leave the battery where it is exposed to direct sunlight, in a closed automobile in the sun, near a heater, etc.
•Fluid leaking from the battery can cause loss of sight. If it gets into your eyes, flush your eyes with tap water or other clean water
without rubbing. Contact a physician immediately.
•Do not use the battery charger outdoors.
•Do not cover the battery charger with clothing, bedding, or other material while charging.
•After charging is complete, always be sure to unplug the battery charger's power plug from the electric outlet.
•Immediately unplug the battery charger and stop using it at the first sign of overheating, abnormal odor, abnormal noise, smoke,
or any other abnormality.
•If the battery charger cannot complete battery charging in the specified recharging time, stop trying to recharge the battery.
•Do not use a battery if it shows any irregularity such as fluid leakage, discoloration, deformation or other abnormality.
•Should the battery fluid get onto your skin or clothing, immediately rinse with tap water or other clean water.
•Do not allow the battery compartment to become deformed and never put any foreign object into it.
•Do not allow metal or water, or any other fluid to get into the battery compartment or onto the battery terminals.
•Remove the battery immediately after using the instrument for a long time.
•Do not leave the battery in a location subject to moisture, water leakage or extremely high or low temperatures.
•Do not touch the battery terminals while your hands are wet.
•If you do not plan to use the battery for a long time, remove it from the main unit and store it in a dry place.
•Keep the battery out of the reach of small children.
•If you are experiencing problems loading the battery, do not try to force it in.
•If you are having problems removing the battery from the instrument, do not apply undue force.
•When disposing of a battery, be sure to do so in accordance with all local laws, rules, and regulations.
•When replacing the battery, do not suddenly insert or remove it repeatedly.
MM1505 01
-7-

Other manuals for IPLEX TX
4
Other Olympus Analytical Instrument manuals

Olympus
Olympus IPLEX TX User manual

Olympus
Olympus IV0620C User manual

Olympus
Olympus IV8200T User manual

Olympus
Olympus IV8000-2 User manual

Olympus
Olympus IPLEX TX User manual

Olympus
Olympus IPLEX RX Series User manual

Olympus
Olympus IPLEX TX User manual

Olympus
Olympus IPLEX YS User manual

Olympus
Olympus IPLEX UltraLite User manual

Olympus
Olympus IPLEX G Lite User manual