manuals.online logo
Brands
  1. Home
  2. •
  3. Brands
  4. •
  5. Olympus
  6. •
  7. Medical Equipment
  8. •
  9. Olympus EU-ME2 User manual

Olympus EU-ME2 User manual

CAUTION:
This quick reference guide is only a summary of the EU-ME2, EU-ME2 Premier Plus Instructions for Use. For detailed operating instructions, be sure to follow
the EU-ME2, EU-ME2 Premier Plus Instruction Manual included with your EU-ME2 or EU-ME2 Premier Plus purchase.
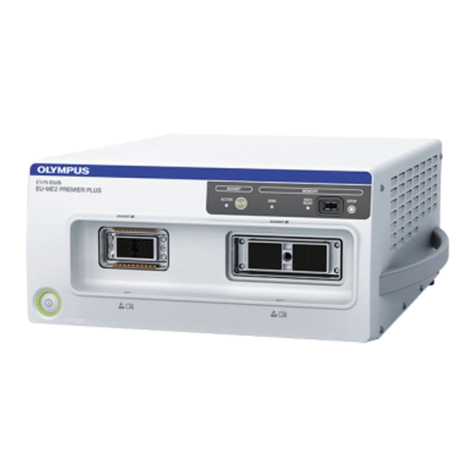
EU-ME2, EU-ME2 Premier Plus
Quick Reference Guide - Setup
Connecting Ultrasound Endoscopes
Video Source
1
Insert mechanical scanning scopes in the left socket (SOCKET1) or electronic scanning scopes in the right socket
(SOCKET2). Turn the lever of the ultrasound connector clockwise to tighten.
2
Press the POWER switch and confirm that the power indicator (green light) is lit.
* Confirm that either the POWER or ACTIVE switch is turned off when the scope is being connected.
* It takes approximately one minute to start up the EU-ME2.
* To change scopes, turn off the ACTIVE switch, which eliminates the hassle of turning off the EU-ME2.
1
Press the VIDEO SOURCE key on the keyboard to switch between US and EVIS.
* EVIS operation can be controlled by the LCD touch panel on the keyboard.
* This feature is only available when the 2 keyboards are integrated.
With electronic scanning scopes
With mechanical scanning scopes
Lever
SOCKET1
Ultrasound Connector
Lever
SOCKET2
Ultrasound Connector
With electronic scanning scopes
With mechanical scanning scopes
Lever
SOCKET1
Ultrasound Connector
Lever
SOCKET2
Ultrasound Connector
POWER Switch
VIDEO SOURCE key
US mode EVIS mode
Image on Monitor LCD Touch Panel
Switch
ACTIVE Switch
2
CAUTION:
This quick reference guide is only a summary of the EU-ME2, EU-ME2 Premier Plus Instructions for Use. For detailed operating instructions, be sure to follow
the EU-ME2, EU-ME2 Premier Plus Instruction Manual included with your EU-ME2 or EU-ME2 Premier Plus purchase.
EU-ME2, EU-ME2 Premier Plus
Quick Reference Guide - Setup
ID Input
Mode Selection
1
Press the ID INPUT key and the Patient Data screen appears on monitor.
2
Enter all the necessary data and click OK to proceed.
* ID input is mandatory to save data after examinations.
* When the EU-ME2 is integrated with the CV-190 or CV-180, ID input is not available on the EU-ME2 and patient data must be entered via the
CV-190 or CV-180 system.
ID INPUT Key Patient Data Screen
1
Press the B, FLOW and PW keys on the keyboard to select the B mode, FLOW mode and Pulse Wave Doppler mode,
respectively.
2
Press the ELST button to select Elastography mode.
* It is not possible to switch modes while in the FREEZE mode. Select modes in LIVE mode only.
* Refer to the separate guide regarding the FLOW mode selection (COLOR FLOW, POWER FLOW, and H-FLOW).
* Refer to the separate guide regarding the Elastography mode..
* The ELST button on the LCD touch panel is displayed in the upper right corner of the MAIN MENU (shown right after unfreezing).
* The ELST button will only appear on the EU-ME2 Premier Plus.
MODE Buttons (LCD)
MODE Keys
Elastography
Pulse Wave Doppler
FLOW Mode
B Mode
3
CAUTION:
This quick reference guide is only a summary of the EU-ME2, EU-ME2 Premier Plus Instructions for Use. For detailed operating instructions, be sure to follow
the EU-ME2, EU-ME2 Premier Plus Instruction Manual included with your EU-ME2 or EU-ME2 Premier Plus purchase.
EU-ME2, EU-ME2 Premier Plus
Quick Reference Guide - Setup
Preparation of Portable Memory
Data Management (Move Data)
1
Insert the Portable Memory in the Portable Memory Port on the front panel until it clicks.
2
Ensure the Portable Memory Access Indicator is lit.
* Note: The Portable Memory Access Indicator is lit (green) when the device is ready and blinks (orange) when the EU-ME2 is accessing memory.
In the latter case, do not remove the Portable Memory.
Portable MemoryPortable Memory Access Indicator
1
Press the MOVE DATA key and the Move Data screen (below) appears on the monitor.
2
Select the type of data movement.
3
The Progress Bar screen appears on the monitor while moving data. The Progress Bar screen disappears, when data
movement is complete.
* Do not turn off the EU-ME2 or external storage device while the Progress Bar is displayed.
* It is highly recommended to execute periodic data backup.
Moves all image data saved in the
internal memory
Moves the image data saved on the
same day as the movement date
Moves the image data saved in the
current exam
MOVE DATA Key
Progress Bar Screen
Move Data Screen
4
CAUTION:
This quick reference guide is only a summary of the EU-ME2, EU-ME2 Premier Plus Instructions for Use. For detailed operating instructions, be sure to follow
the EU-ME2, EU-ME2 Premier Plus Instruction Manual included with your EU-ME2 or EU-ME2 Premier Plus purchase.
EU-ME2, EU-ME2 Premier Plus
Quick Reference Guide - Setup
Exam End
Disconnecting Ultrasound Endoscopes
1
Press the EXAM END key on the keyboard to set the EU-ME2 to the original settings.
* If an examination starts with the CV-190/CV-180, the EU-ME2 keyboard should be used in EVIS operation mode. In this case, use the EXAM ON
button on the LCD touch panel.
1
Press the POWER switch and confirm that the power indicator (green light) is not lit.
2
Turn the lever on the US scope connector counterclockwise to disconnect the scope. Pull the connector straight back
once the lever comes to a stop.
* Confirm either the POWER or ACTIVE switch is turned off when the scope is being disconnected.
* To change scopes, turn off the ACTIVE switch, which eliminates the hassle of turning off the EU-ME2.
Setting
Observation monitor
Patient data display
Comment display
Measurement result display
FREEZE
Set Value
Ultrasound image cleared
Cleared
Cleared
Cleared
Frozen
Settings restored after pressing EXAM END:EXAM END Key
With electronic scanning scopes
With mechanical scanning scopes
Lever
SOCKET1
Ultrasound Connector
Lever
SOCKET2
Ultrasound Connector
With electronic scanning scopes
With mechanical scanning scopes
Lever
SOCKET1
Ultrasound Connector
Lever
SOCKET2
Ultrasound Connector
POWER Switch
ACTIVE Switch
Olympus is a registered trademark of Olympus Corporation, Olympus America Inc., and/or their affiliates.
3500 Corporate Parkway, PO Box 610, Center Valley, PA 18034
For more information, contact your Olympus
sales representative, or call 800-848-9024.
www.medical.olympusamerica.com
©2015 Olympus America Inc. All rights reserved.
Printed in the USA OAIGI0315QRG15612

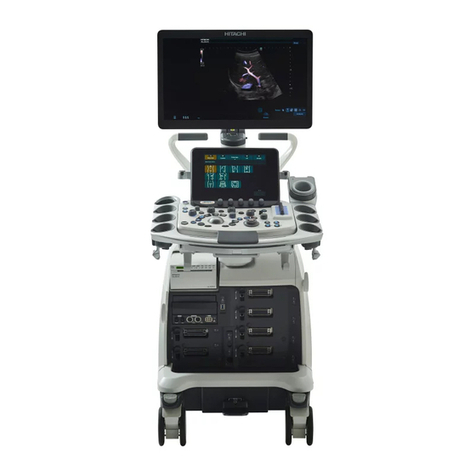
This manual suits for next models

1

Other Olympus Medical Equipment manuals

Olympus OER-Elite User manual

Olympus

Olympus OER-Elite User manual

Olympus TJF 160VR Quick guide

Olympus

Olympus TJF 160VR Quick guide

Olympus ScopeGuide UPD-3 User manual

Olympus

Olympus ScopeGuide UPD-3 User manual

Olympus UHI-4 User manual

Olympus

Olympus UHI-4 User manual

Olympus EVIS EXERA II User manual

Olympus

Olympus EVIS EXERA II User manual

Olympus BF-P190 User manual

Olympus

Olympus BF-P190 User manual

Olympus HysteroFlow/HysteroBalance II User manual

Olympus

Olympus HysteroFlow/HysteroBalance II User manual

Olympus VISERA ENF-V2 User manual

Olympus

Olympus VISERA ENF-V2 User manual

Olympus EVIS X1 User manual

Olympus

Olympus EVIS X1 User manual

Olympus PSD-10 User manual

Olympus

Olympus PSD-10 User manual

Olympus MU-1 User manual

Olympus

Olympus MU-1 User manual

Olympus EVIS EUS EU-ME3 User manual

Olympus

Olympus EVIS EUS EU-ME3 User manual

Olympus KV-6 User manual

Olympus

Olympus KV-6 User manual

Olympus VISERA ELITE II User manual

Olympus

Olympus VISERA ELITE II User manual

Olympus InstaClear User manual

Olympus

Olympus InstaClear User manual

Olympus OCS-500 User manual

Olympus

Olympus OCS-500 User manual

Olympus HiQ+ User manual

Olympus

Olympus HiQ+ User manual

Olympus EVIS EUS EU-ME2 Premier Plus User manual

Olympus

Olympus EVIS EUS EU-ME2 Premier Plus User manual

Olympus PCF 160AL/I User manual

Olympus

Olympus PCF 160AL/I User manual

Olympus BX3-SSU User manual

Olympus

Olympus BX3-SSU User manual

Olympus MAJ-2336 User manual

Olympus

Olympus MAJ-2336 User manual

Olympus MAJ-2306 User manual

Olympus

Olympus MAJ-2306 User manual

Olympus VISERA OTV-S7V User manual

Olympus

Olympus VISERA OTV-S7V User manual

Olympus QuickClip Pro HX-202LR User manual

Olympus

Olympus QuickClip Pro HX-202LR User manual

Popular Medical Equipment manuals by other brands

ResMed S7 Elite user manual

ResMed

ResMed S7 Elite user manual

Vermeiren 9042 instruction manual

Vermeiren

Vermeiren 9042 instruction manual

Prism Medical UK Hammock Sling Child user manual

Prism Medical UK

Prism Medical UK Hammock Sling Child user manual

Maico MA 41 Operation manual

Maico

Maico MA 41 Operation manual

Wissner-Bosserhoff SafeSense instruction manual

Wissner-Bosserhoff

Wissner-Bosserhoff SafeSense instruction manual

Ondal Acrobat Swing Ceiling-unit installation instructions

Ondal

Ondal Acrobat Swing Ceiling-unit installation instructions

Roche CoaguChek XS System Step-by-step guide

Roche

Roche CoaguChek XS System Step-by-step guide

swissflex uni 20_75RF operating instructions

swissflex

swissflex uni 20_75RF operating instructions

Laser GX 2000 B manual

Laser

Laser GX 2000 B manual

Arjo Tenor Operating and Product Care Instructions

Arjo

Arjo Tenor Operating and Product Care Instructions

Promedon Calistar A Instructions for use

Promedon

Promedon Calistar A Instructions for use

biodex ECONO Operation manual

biodex

biodex ECONO Operation manual

Dräger Medical Narkomed MRI Operator's instruction manual

Dräger Medical

Dräger Medical Narkomed MRI Operator's instruction manual

GE Vivid E9 Service manual

GE

GE Vivid E9 Service manual

ECOPOSTURAL C3565 instructions

ECOPOSTURAL

ECOPOSTURAL C3565 instructions

DS Produkte Z 08381 instruction manual

DS Produkte

DS Produkte Z 08381 instruction manual

EKO Device CORE user guide

EKO Device

EKO Device CORE user guide

Launch CRP229 user manual

Launch

Launch CRP229 user manual

manuals.online logo
manuals.online logoBrands
  • About & Mission
  • Contact us
  • Privacy Policy
  • Terms and Conditions

Copyright 2025 Manuals.Online. All Rights Reserved.