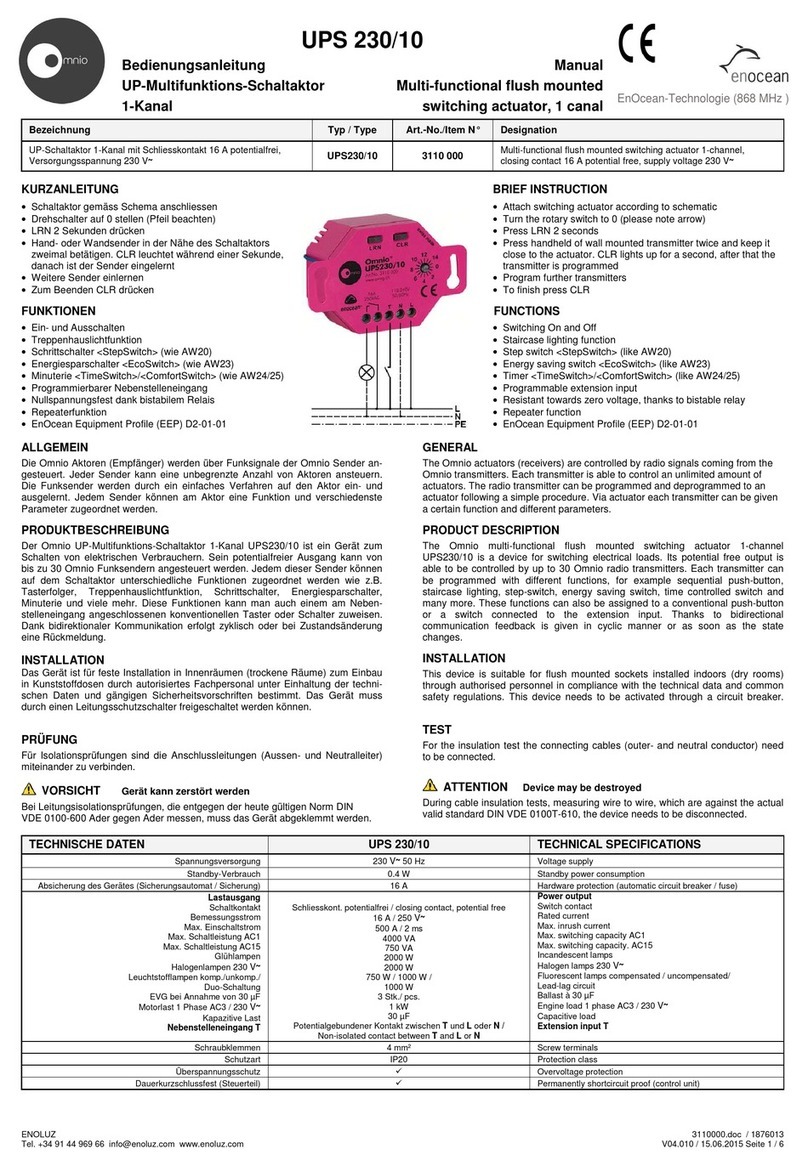
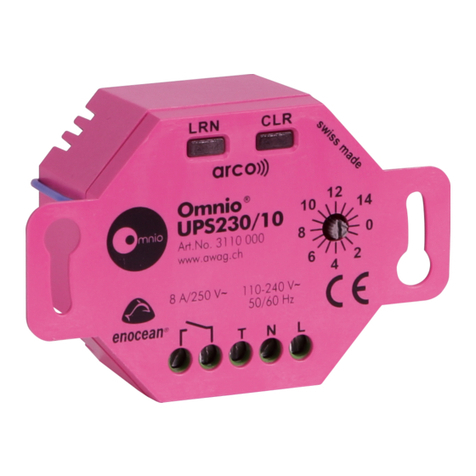
Omnio UPS230/10 User manual

AWAG Elektrotechnik AG Sandbüelstrasse 2 CH-8604 Volketswil 3110000.docx / 1876012
Tel. +41 44 908 19 19 Fax +41 44 908 19 99 i[email protected] www.awag.ch SW: UPS_V181107 / 31.11.2018 Seite 1 / 7
UPS230/10
Bedienungsanleitung Manual
UP-Multi-Schaltaktor Flush mounted multi
1-Kanal switching actuator, 1-channel
Bezeichnung
Typ / Type
Art.-No./Item N°
Designation
UP-Multi-Schaltaktor 1-Kanal mit Nebenstelleneingang
Schliesskontakt 8 A potentialfrei, Versorgungsspannung 230 V~
UPS230/10
3110 000
Flush mounted multi switching actuator 1-channel with extension
input, closing contact 8 A potential free, supply voltage 230 V~
KURZANLEITUNG
•Schaltaktor gemäss Schema anschliessen
•Drehschalter HEX auf 0 stellen
•LRN 2 Sekunden drücken
•Hand- oder Wandsender in der Nähe des Schaltaktors
zweimal betätigen. CLR leuchtet während einer
Sekunde, danach ist der Sender eingelernt
•Weitere Sender einlernen
•Zum Beenden CLR drücken
FUNKTIONEN
•Ein- und Ausschalten
•Treppenlichtfunktion
•Tastenfolger
•Schrittschalter (AW20)
•Minuterie (AW23/24/25)
•Fenster- und Schiebetürüberwachung
•Programmierbarer Nebenstelleneingang
•Programmierbare Szenen
•Anwesenheitssimulation
•Repeaterfunktion
•EnOcean Equipment Profile (EEP) D2-01-01
•ARCO fähig (AWAG Remote Commissioning)
BRIEF INSTRUCTION
•Attach switching actuator according to schematic
•Turn the rotary switch HEX to 0
•Press LRN 2 seconds
•Press handheld or wall mounted transmitter twice
while keeping it close to the actuator. CLR lights up for
a second, after that the transmitter is programmed
•Program further transmitters
•To finish press CLR
FUNCTIONS
•Switch On and Off
•Staircase light function
•Sequential push-button
•Step switch (AW20)
•Timer (AW23/24/25)
•Window and sliding door surveillance
•Programmable extension input
•Programmable scenes
•Presence simulation
•Repeater function
•EnOcean Equipment Profile (EEP) D2-01-01
•ARCO ready (AWAG Remote Commissioning)
ALLGEMEIN
Die Omnio Aktoren (Empfänger) werden über Funksignale der Omnio Sender an-
gesteuert. Jeder Sender kann eine unbegrenzte Anzahl von Aktoren ansteuern. Die
Funksender werden manuell durch ein einfaches Verfahren auf den Aktor ein- und
ausgelernt. Jedem Sender können am Aktor eine Funktion und verschiedenste Pa-
rameter zugeordnet werden.
Mit ARCO-Technologie lassen sich alle Omnio Aktoren vollständig und ohne ma-
nuellen Zugriff zum Gerät per Funk konfigurieren. Die leistungsstarke Software
E-Tool bildet dabei das Herzstück, um Projekte beliebiger Grösse bequem am
Schreibtisch zu planen, konfigurieren und dokumentieren.
PRODUKTBESCHREIBUNG
Der Omnio UP-Multi-Schaltaktor 1-Kanal UPS230/10 ist ein Gerät zum Schalten
von elektrischen Verbrauchern. Sein potentialfreier Ausgang kann von bis zu 50
Omnio Funksendern angesteuert werden. Jedem dieser Sender kann auf dem
Schaltaktor eine von über zwanzig Funktionen zugeordnet werden wie z.B. Ein-
schalten, Ausschalten, Treppenlicht, Tastenfolger, Schrittschalter (AW20), Minute-
rie (AW23/24/25), Fenster- und Schiebetürüberwachung, programmierbare Szenen
und Anwesenheitssimulation. Diese Funktionen kann man auch einem am Neben-
stelleneingang angeschlossenen konventionellen Taster oder Schalter zuweisen.
Bidirektionale Kommunikation, EEP D2-01-01, ARCO fähig (AWAG Remote Com-
missioning). Zusätzlich kann bei Reichweitenproblemen die eingebaute Repeater-
funktion aktiviert werden. Geeignet für die Unter- oder Aufputzmontage in Kuststoff-
dosen.
GENERAL
The Omnio actuators (receivers) are controlled by radio signals coming from the
Omnio transmitters. Each transmitter is able to control an unlimited number of ac-
tuators. The radio transmitter can be manually programmed and deprogrammed to
an actuator following a simple procedure. Via actuator each transmitter can be given
a certain function and different parameters.
With ARCO technology, all Omnio actuators can be configured completely by radio
without manual access to the device. The powerful software E-Tool constitutes the
key component for convenient planning, configuring and documenting projects of
any size right at your desk.
PRODUCT DESCRIPTION
The Omnio flush mounted multi switching actuator 1-channel UPS230/10 is a de-
vice for switching electrical loads. Its potential free output is able to be controlled by
up to 50 Omnio radio transmitters. Each transmitter can be programmed with one
of over twenty different functions, for example switch on, switch off, staircase light,
sequential push-button, step-switch (AW20), timer (AW23/24/25), window and slid-
ing door surveillance, programmable scenes and presence simulation. These func-
tions can also be assigned to a conventional push-button or a switch connected to
the extension input. Bidirectional communication, EEP D2-01-01. ARCO ready
(AWAG Remote Commissioning). In addition, this actuator can be used as repeater
in case of range issues. Suitable for flush mounted sockets.
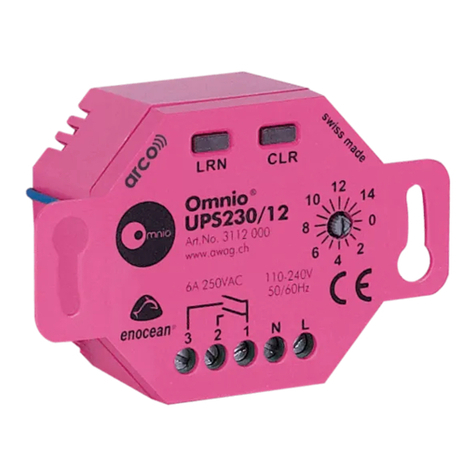
ANZEIGE- UND BEDIENELEMENTE
Klemmen
•L Netzspannung L 110 - 240 V~
•N Netzspannung N 110 - 240 V~
•T Nebenstelleneingang
•1 Relaiskontakt (COM)
•2 Relaiskontakt (NO)
Bedienelemente
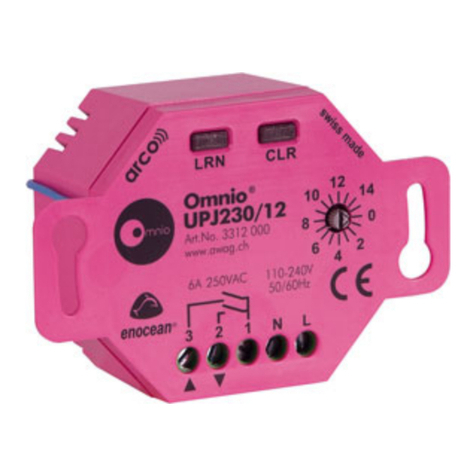
•CLR Taste und LED Clear
•LRN Taste und LED Learn
•HEX Drehschalter 0..15
DISPLAY AND OPERATING ELEMENTS
Terminals
•L line voltage L 110 - 240 V~
•N line voltage N 110 - 240V~
•T extension input
•1 relay contact (COM)
•2 relay contact (NO)
Operating elements
•CLR button and LED clear
•LRN button and LED learn
•HEX rotary switch 0..15
EnOcean-Technologie (868 MHz)

AWAG Elektrotechnik AG Sandbüelstrasse 2 CH-8604 Volketswil 3110000.docx / 1876012
Tel. +41 44 908 19 19 Fax +41 44 908 19 99 i[email protected] www.awag.ch SW: UPS_V181107 / 31.11.2018 Seite 2 / 7
INSTALLATION
Das Gerät ist für feste Installation in Innenräumen (trockene Räume)
zum Einbau in Kunststoffdosen durch autorisiertes Fachpersonal unter
Einhaltung der technischen Daten und gängigen Sicherheitsvorschrif-
ten bestimmt.
Das Gerät muss mit einem 13 A Leitungsschutzschalter abgesichert
werden.
KONFIGURATION MIT E-TOOL
Die Konfiguration des Omnio Aktors erfolgt entweder manuell am Gerät selber oder
durch ARCO Technologie über Funk mit der Planungssoftware E-Tool Goldlizenz.
Zum Erwerb der Goldlizenz kontaktieren Sie bitte AWAG Elektrotechnik AG unter
www.awag.ch. Die Software sowie eine detaillierte System- und Funktionsbeschrei-
bung von ARCO sind auf der Omnio Webseite www.omnio.ch zu finden.
Standardmässig ist der ARCO-Fernzugriff beim Aufstarten des Gerätes während
einer halben Stunde freigegeben. Er lässt sich aber auch über einen Sicherheits-
code einschalten. Die Standardeinstellung des Sicherheitscodes ist A9081919.
MANUELLE KONFIGURATION
Die manuelle Konfiguration erfolgt mit Hilfe der oben erwähnten Bedienelemente.
SENDER EINLERNEN
Beim Einlernvorgang wird dem Sender eine Funktion auf dem Aktor zugewiesen.
Dabei darf der Sender nicht mehr als 5 m vom Aktor entfernt sein. Eine Übersicht
aller Funktionen ist in Tabelle 1 FUNKTIONEN zu finden. Verschiedene Sender
können auf dem gleichen Aktor ganz unterschiedliche Funktionen ausüben, z.B.
Sender 1 = S01: Schalten mit Wippe und Sender 2 = S05: Schrittschalter.
1.Funktion wählen.
2.Drehschalter gemäss Tabelle 1 (Spalte 1) einstellen.
3.Einlernmodus durch einen langen Tastendruck (2 s) auf aktivieren.
LRN leuchtet und CLR blinkt.
4.Drehschalter gemäss Tabelle 1 (Spalte 3) einstellen.
5.Sender zweimal drücken.
CLR leuchtet 1 s und blinkt danach weiter.
6. drücken. LRN und CLR erlöschen.
SENDER LÖSCHEN
Eine Übersicht ist in Tabelle 2 SENDER LÖSCHEN zu finden.
1.Drehschalter auf Position 0 stellen.
2.Löschmodus durch einen langen Tastendruck (2 s) auf aktivieren.
LRN blinkt und CLR leuchtet.
3.Sender zweimal drücken.
LRN leuchtet 1 s und blinkt danach weiter.
4. drücken. LRN und CLR erlöschen.
FUNKTIONSPARAMETER
Funktionsparameter (z.B. Verzögerungszeiten) sind nur für den jeweiligen Sender
gültig. Eine Übersicht aller Funktionsparameter ist in Tabelle 3 FUNKTIONS-PA-
RAMETER zu finden.
1.Drehschalter gemäss Tabelle 3 (Spalte 1) einstellen.
2.Einlernmodus durch einen langen Tastendruck (2 s) auf aktivieren.
LRN leuchtet und CLR blinkt.
3.Drehschalter gemäss Tabelle 3 (Spalte 3) einstellen.
4.Sender zweimal drücken.
LRN leuchtet 1 s und blinkt danach weiter.
5.Je nach Parameter Schritt 3) und 4) wiederholen.
6. drücken. LRN und CLR erlöschen.
GERÄTEPARAMETER
Geräteparameter (z.B. Aufstartverhalten) sind für den ganzen Aktor gültig. Eine
Übersicht aller Geräteparameter ist in Tabelle 4 GERÄTEPARAMETER zu finden.
1.Geräteparameter wählen.
2.Drehschalter gemäss Tabelle 4 (Spalte 1) einstellen.
3.Einlernmodus durch einen langen Tastendruck (2 s) auf aktivieren.
LRN leuchtet und CLR blinkt.
4.Drehschalter gemäss Tabelle 4 (Spalte 3) einstellen.
5. drücken. LRN und CLR erlöschen.
INSTALLATION
This device is suitable for flush mounted sockets installed indoors (dry
rooms) through authorised personnel in compliance with the technical
data and common safety regulations.
This device needs to be protected by a 13 A circuit breaker.
CONFIGURATION WITH E-TOOL
Omnio actuators can be configured either manually on the device itself or by radio
with the software E-Tool Gold license through ARCO technology. Please contact
AWAG Elektrotechnik AG at www.awag.ch to obtain the license. The software and
a detailed description of the ARCO system and all its functions can be found on the
Omnio website www.omnio.ch.
By default, ARCO remote commissioning is unlocked for 30 minutes at power-on of
the device. It can also be unlocked via a security code. The default value is
A9081919.
MANUAL CONFIGURATION
The manual configuration is done with the above mentioned operating elements.
PROGRAM TRANSMITTER
At programming the transmitter is assigned a function on the actuator. During the
process the transmitter must not be further than 5 m away from the actuator. An
overview of all functions can be found in table 1 FUNCTIONS. Different transmitters
can have very different functions on the same actuator as well, e.g. transmitter 1 =
S01: Switch with rocker and transmitter 2 = S05: Step switch.
1.Choose function.
2.Turn rotary switch according to table 1 (column 1).
3.Enter programming mode by pressing 2 s.
LRN illuminates and CLR blinks.
4.Turn rotary switch according to table 1 (column 3).
5.Press transmitter twice.
CLR illuminates 1 s and then blinks.
6.Press . Both LRN and CLR go out.
DELETE TRANSMITTER
An overview can be found in table 2 DELETE TRANSMITTER.
1.Turn rotary switch to position 0.
2.Enter deletion mode by pressing the button 2 s.
LRN blinks and CLR illuminates.
3.Press transmitter twice.
LRN illuminates 1 s and then blinks.
4.Press . Both LRN and CLR go out.
FUNCTION PARAMETERS
Function parameters (e.g. delay times) are only valid for the corresponding trans-
mitter. An overview of all function parameters can be found in table 3 FUNCTION
PARAMETERS.
1.Turn rotary switch according to table 3 (column 1).
2.Enter programming mode by pressing the button 2 s.
LRN illuminates and CLR blinks.
3.Turn rotary switch according to table 3 (column 3).
4.Press transmitter twice.
LRN illuminates 1 s and then blinks.
5.Repeat steps 3) and 4) depending on the parameter.
6. Press . Both LRN and CLR go out.
DEVICE PARAMETERS
Device parameters (e.g. startup behaviour) are valid for the entire actuator. An over-
view of all device parameters can be found in table 4 DEVICE PARAMETERS.
1.Choose device parameter.
2.Turn rotary switch according to table 4 (column 1).
3.Enter programming mode by pressing the button 2 s.
LRN illuminates and CLR blinks.
4.Turn rotary switch according to table 4 (column 3).
5.Press . Both LRN and CLR go out.

AWAG Elektrotechnik AG Sandbüelstrasse 2 CH-8604 Volketswil 3110000.docx / 1876012
Tel. +41 44 908 19 19 Fax +41 44 908 19 99 i[email protected] www.awag.ch SW: UPS_V181107 / 31.11.2018 Seite 3 / 7
Tabelle 1
FUNKTIONEN
1
2
3
4
5
Table 1
FUNCTIONS
AWAG FUNKTIONEN
AWAG FUNCTIONS
A01: Anwesenheitssimulation mit Wippe
Taste O: Aus, zur Kontrolle schaltet das Licht 3 s ein
Taste I: Ein, zur Kontrolle schaltet das Licht 6…30 s ein, bevor
die Anwesenheitssimulation startet
2
2 s drücken
press 2 s
0
Wippe 2x drücken
press rocker 2x
drücken
press
A01: Presence simulation with rocker
Button O: Off, as a check the light turns on 3 s
Button I: On, as a check the light turns on 6...30 s before the
simulation starts
A02: Anwesenheitssimulation mit Key-Card Schalter
Karte gesteckt: Aus, zur Kontrolle schaltet das Licht 3 s ein
Karte gezogen: Ein, zur Kontrolle schaltet das Licht 6…30 s
ein, bevor die Anwesenheitssimulation startet
2
1
Karte 2x einstecken
insert card 2x
A02: Presence simulation with key-card switch
Inserted card: Off, as a check the light turns on 3 s
Removed card: On, as a check the light turns on 6...30 s before
the simulation starts
A05: Sperre mit Wippe
Taste O: Ausgang freischalten
Taste I: Ausgang sperren
1
11
Wippe 2x drücken
press rocker 2x
A05: Lock with rocker
Button O: Unlock output
Button I: Lock output
A23: Minuterie EcoSwitch (AW23)
Timer oder aus. Einschaltdauer einstellbar, siehe Tabelle 4 Trep-
penlicht Einschaltdauer, Standardzeit = 3 Min
0
8
Taste 2x drücken
press push-button 2x
A23: Timer EcoSwitch (AW23)
Timer or off. Adjustable light duration, see Table 4 Staircase light
duration, default = 3 min
A24: Minuterie TimeSwitch (AW24)
Retriggerbarer Timer mit einstellbarer Einschaltdauer, siehe Ta-
belle 4 Treppenlicht Einschaltdauer, Standardzeit = 3 Min
0
9
A24: Timer TimeSwitch (AW24)
Retriggerable timer with adjustable light duration, see Table 4
Staircase light duration, default = 3 min
PIR (Bewegungsmelder), gleiche Funktion wie oben
Unterstützte EEP: A5-07-01/02/03
A5-08-01/02/03
LRN-Taste an PIR drücken
press LRN-button on PIR
PIR (motion detector), same function as above
Supported EEP: A5-07-01/02/03
A5-08-01/02/03
A25: Minuterie ComfortSwitch (AW25)
Kurzer Tastendruck: Retriggerbarer Timer mit einstellbarer Ein-
schaltdauer, siehe Tabelle 4 Treppenlicht
Einschaltdauer, Standardzeit = 3 Min
Langer Tastendruck: Timer mit 4-facher Verzögerungszeit
1
9
Taste 2x drücken
press push-button 2x
A25: Timer ComfortSwitch (AW25)
Short keystroke: Retriggerable timer with adjustable light dura-
tion, see Table 4 Staircase light duration, de-
fault = 3 min
Long keystroke: Timer with fourfold time delay
SCHALTFUNKTIONEN
SWITCH FUNCTIONS
S01: Schalten mit Wippe
Taste O: Aus
Taste I: Ein
Verzögerungszeiten einstellbar, siehe Tabelle 3 Ausschaltverzöge-
rung (S01 –S04) / Einschaltverzögerung (S01 –S04)
0
2 s drücken
press 2 s
0
Wippe 2x drücken
press rocker 2x
drücken
press
S01: Switch with rocker
Button O: Off
Button I: On
Adjustable time delay, see Table 3 Switch-on delay (S01 –S04) /
Switch-off delay (S01 –S04)
Gleiche Funktion wie oben, aber mit vertauschten Wippentasten O
und I
1
Same function as above, but with buttons O and I swapped
Treppenlicht
Treppenlichtfunktion mit einstellbarer Einschaltdauer, siehe Ta-
belle 4 Treppenlicht Einschaltdauer, Standardzeit = 3 Min
7
Staircase light
Staircase light function with adjustable light duration, see Table 4
Staircase light duration, default = 3 min
S02: Einschalten
Einschalten mit einstellbarer Verzögerung, siehe Tabelle 3 Ein-
schaltverzögerung (S01 –S04)
0
2
Taste 2x drücken
press push-button 2x
S02: Switch on
Switch on with adjustable time delay, see Table 3 Switch-on delay
(S01 –S04)
PIR (Bewegungsmelder), gleiche Funktion wie oben
Unterstützte EEP: A5-07-01/02/03
A5-08-01/02/03
LRN-Taste an PIR drücken
press LRN-button on PIR
PIR (motion detector), same function as above
Supported EEP: A5-07-01/02/03
A5-08-01/02/03
S03: Ausschalten
Ausschalten mit einstellbarer Verzögerung, siehe Tabelle 3 Aus-
schaltverzögerung (S01 –S04)
0
3
Taste 2x drücken
press push-button 2x
S03: Switch off
Switch off with adjustable time delay, see Table 3 Switch-off delay
(S01 –S04)
S04: Ein-Impuls
Türklingelfunktion mit einstellbarer Impulszeit, siehe Tabelle 3
Pulsdauer, Standardzeit = 3 s. Aus beim Loslassen. Der Ausgang
kann invertiert werden, siehe Tabelle 3 Ausgangsmodus.
0
6
Taste 2x drücken
press push-button 2x
S04: On-impulse
Doorbell function with adjustable time delay, see Table 3 Impulse,
default = 3 s. Off when button released. The output can be in-
verted, see Table 3 Output mode.
Nicht retriggerbarer Ein-Impuls mit einstellbarer Impulszeit, siehe
Tabelle 3 Pulsdauer, Standardzeit = 10 s
14
Non retriggerable on-impulse with adjustable time delay, see Ta-
ble 3 Impulse, default = 10 s
S05: Schrittschalter (AW20)
Zustandsänderung mit jedem Tastendruck, Verzögerungszeiten
einstellbar, siehe Tabelle 3 Ausschaltverzögerung (S05 –S07) /
Einschaltverzögerung (S05 –S07)
0
4
Taste 2x drücken
press push-button 2x
S05: Step switch (AW20)
Toggle with every keystroke, with adjustable time delay, see Ta-
ble 3 Switch-on delay (S05 –S07) / Switch-off delay (S05 –S07)
Gleiches Verhalten wie oben, der Zustand ändert aber bei jeder
Flanke (Schalter)
13
Same behaviour as above, but the output state toggles with every
edge (switch)
S06: Tastenfolger
Ein solange die Taste gedrückt ist. Der Ausgang kann invertiert
werden, siehe Tabelle 3 Ausgangsmodus., Verzögerungszeiten
einstellbar, siehe Tabelle 3 Ausschaltverzögerung (S05 –S07) /
Einschaltverzögerung (S05 –S07)
0
5
Taste 2x drücken
press push-button 2x
S06: Sequential push-button
On while button is pressed. The output can be inverted, see Ta-
ble 3 Output mode. With adjustable time delay, see Table 3
Switch-on delay (S05 –S07) / Switch-off delay (S05 –S07)
Key-Card Schalter, gleiche Funktion wie oben
Karte gesteckt: Ein
Karte gezogen: Aus
Karte 2x einstecken
insert card 2x
Key-card switch, same function as above
Inserted card: On
Removed card: Off
PIR (Bewegungsmelder), gleiche Funktion wie oben
Unterstützte EEP: A5-07-01/02/03
A5-08-01/02/03
LRN-Taste an PIR drücken
press LRN-button on PIR
PIR (motion detector), same function as above
Supported EEP: A5-07-01/02/03
A5-08-01/02/03
S07: Blinken
Blinkfrequenz einstellbar, siehe Tabelle 4 Treppenlicht Einschalt-
dauer, Standardzeit = 3 Min ein / 3 Min aus, kein Stopp möglich
1
14
Taste 2x drücken
press push-button 2x
S07: Blinking
Blinking frequency adjustable, see Table 4 Staircase light dura-
tion, default = 3 min on / 3 min off, no stop possible
Blinkfrequenz einstellbar, siehe Tabelle 3 Ausschaltverzögerung
(S05 –S07) / Einschaltverzögerung (S05 –S07), Standardzeit = 9
s ein / 12 s aus, Stopp mit erneutem Tastendruck
15
Blinking frequency adjustable, see Table 3 Switch-on delay (S05
–S07) / Switch-off delay (S05 –S07), default = 9 s on / 12 s off,
stop by repressing the push-button
LRN leuchtet / illuminates
CLR blinkt / blinks
Einlernen erfolgreich / Programming successful:
CLR leuchtet 1 s und blinkt / lights up 1 s and blinks
Einlernen fehlgeschlagen / Programming failed:
LRN blinkt / blinks
LRN erlischt / goes out
CLR erlischt / goes out

AWAG Elektrotechnik AG Sandbüelstrasse 2 CH-8604 Volketswil 3110000.docx / 1876012
Tel. +41 44 908 19 19 Fax +41 44 908 19 99 i[email protected] www.awag.ch SW: UPS_V181107 / 31.11.2018 Seite 4 / 7
Tabelle 1
FUNKTIONEN
1
2
3
4
5
Table 1
FUNCTIONS
AWAG FUNKTIONEN
AWAG FUNCTIONS
S08: Kurz/Lang mit Taste
Kurzer Tastendruck: Timer mit einstellbarer Verzögerungszeit,
siehe Tabelle 4 Treppenlicht Einschalt-
dauer, Standardzeit = 3 Min
Langer Tastendruck: Aus
0
LRN-Taste 2 s drücken
Press LRN-button 2 s
10
Taste 2x drücken
press push-button 2x
CLR drücken
press CRL
S08: Short/Long with push-button
Short key stroke: Timer with adjustable time delay or off, see
Table 4 Staircase light duration, default = 3
min
Long key stroke: Off
Kurzer Tastendruck: Ein
Langer Tastendruck: Aus
11
Short key stroke: On
Long key stroke: Off
Kurzer Tastendruck: Aus
Langer Tastendruck: Ein
12
Short key stroke: Off
Long key stroke: On
S09: Fensterkontakt
Fenster geschlossen: Aus
Fenster offen: Ein
Eingelernte Fensterkontakte und Türgriffe werden UND-verknüpft.
Defekte Kontakte blockieren diese Funktion und müssen über die
Werkseinstellungen ausgelernt werden, siehe Tabelle 2 Werksein-
stellungen.
1
0
LRN-Taste an Fensterkontakt
drücken
press LRN-button on window
contact
S09: Window contact
Window closed: Off
Window open: On
Programmed window contacts and door handles are AND-linked.
Defective contacts block this function and must be deprogrammed
via factory settings, see Table 2 Factory settings.
S10: Fenstergriff
Gleiches Verhalten wie Funktion S09, gekippt zählt als offen
1
7
Griff 2x betätigen
turn handle 2x
S10: Window handle
Same behaviour as function S09, tilted counts as open
Gekippt zählt als geschlossen
8
Tilted counts as closed
S22: Szene
Kurzer Tastendruck: Gespeicherten Wert abrufen
Langer Tastendruck (> 3.5 s): Aktuellen Wert speichern
2
2
Taste 2x drücken
press push-button 2x
S22: Scene
Short keystroke: Restore saved value
Long keystroke (> 3.5 s): Save actual value
ARCO FUNKTIONEN
ARCO FUNCTIONS
X01: Gateway
Gateway einlernen
0
2 s drücken
press 2 s
15
UTE D2-01-01
drücken
press
X01: Gateway
Program gateway
X10: ARCO freischalten
Taste O: Fernzugriff freischalten
Taste I: Fernzugriff sperren
2
3
Wippe 2x drücken
press rocker 2x
X10: Unlock ARCO
Button O: Unlock remote access
Button I: Lock remote access
Beispiele:
Examples:
S01: Schalten mit Wippe:
0 –LRN (2 s) –Wippe 2x drücken –CLR
S01: Switch with rocker:
0 –LRN (2 s) –press rocker 2x –CLR
S05: Schrittschalter (AW20):
0 –LRN (2 s) –4 –Taste 2x drücken –CLR
S05: Step switch (AW20):
0 –LRN (2 s) –4 –press push-button 2x –CLR
S06: Tastenfolger:
0 –LRN (2 s) –5 –Taste 2x drücken –CLR
S06: Sequential push-button:
0 –LRN (2 s) –5 –press push-button 2x –CLR
Tabelle 2
SENDER LÖSCHEN
1
2
3
4
5
Table 2
DELETE TRANSMITTERS
Wippe
Beide Wippentasten müssen einzeln gelöscht werden
0
2 s drücken
press 2 s
0
Wippentaste 2x drücken
press rocker 2x
drücken
press
Rocker
Both buttons need to be deleted separately
Taste
Taste 2x drücken
press push-button 2x
Push-button
Key-Card Schalter
Karte 2x einstecken
insert card 2x
Key-card switch
Fensterkontakt
LRN-Taste am FK drücken
press LRN-button on window contact
Window contact
Fenster- / Türgriff
Griff 2x betätigen
turn handle 2x
Window / door handle
PIR
LRN-Taste an PIR drücken
press LRN-button on PIR
PIR
Temperatursensor
LRN-Taste am Sensor drücken
press LRN-button on sensor
Temperature sensor
ALLE SENDER LÖSCHEN
DELETE ALL TRANSMITTERS
Alle Sender löschen
0
2 s
drücken
press
2 s
15
LRN-Taste 2 s drücken
press LRN-button 2 s
Delete all transmitters
WERKSEINSTELLUNGEN
FACTORY SETTINGS
Auf Werkseinstellungen zurücksetzen
Achtung: Eingelernte Sender bleiben erhalten
13
2 s
drücken
press
2 s
15
LRN-Taste 2 s drücken
press LRN-button 2 s
Reset to factory settings
Attention: The programmed transmitters remain
Defekte Fensterkontakte auslernen
14
drücken
press
Delete faulty window contacts
Beispiele:
Examples:
Wippe beidseitig löschen:
0 –CLR 2 s drücken –Wippentaste O 2x drücken –
Wippentaste I 2x drücken –CLR
Delete both sides of a rocker:
0 –press CLR 2 s –press button O 2x –press button I
2x –CLR
Taste löschen:
0 –CLR 2 s drücken –Taste drücken –CLR
Delete push-button:
0 –press CLR 2 s –press button 2x –CLR
Gerät komplett zurücksetzen:
0 –CLR 2 s drücken –15 –LRN 2 s drücken
13 –LRN 2 s drücken –15 –LRN drücken
Reset device completely:
0 –press CLR 2 s –15 –press LRN 2 s
13 –press LRN 2 s –15 –press LRN
LRN leuchtet 1 s und blinkt
lights up 1 s then blinks
LRN blinkt / blinks
CLR leuchtet / illuminates
LRN erlischt / goes out
CLR erlischt / goes out

AWAG Elektrotechnik AG Sandbüelstrasse 2 CH-8604 Volketswil 3110000.docx / 1876012
Tel. +41 44 908 19 19 Fax +41 44 908 19 99 i[email protected] www.awag.ch SW: UPS_V181107 / 31.11.2018 Seite 5 / 7
Tabelle 3
FUNKTIONSPARAMETER
1
2
3
4
5
6
7
Table 3
FUNCTION PARAMETERS
AUSGANGSMODUS
OUTPUT MODE
Ausgang invertieren
9
2 s drücken
press 2 s
8
Sendertaste
2x drücken
press trans-
mitter
button 2x
0
Sendertaste
2x drücken
press trans-
mitter
button 2x
drücken
press
Invert output
AUSSCHALTVERZÖGERUNG (S01 –S04)
SWITCH-OFF DELAY (S01 –S04)
Verzögerungszeit = A x B
A
B
time delay = A x B
0 ... 15 s in 1-Sekunden-Schritten
8
2 s drücken
press 2 s
0
Sendertaste 2x drücken
press transmitter
button 2x
0...15
Sendertaste 2x drücken
press transmitter
button 2x
drücken
press
0 ... 15 s in 1-second steps
4 ... 60 s in 4-Sekunden-Schritten
1
1...15
4 ... 60 s in 4-second steps
15 ... 225 s in 15-Sekunden-Schritten
2
1...15
15 ... 225 s in 15-second steps
1 ... 15 Min in 1-Minuten-Schritten
3
1...15
1 ... 15 min in 1- minute steps
4 ... 60 Min in 4-Minuten-Schritten
4
1...15
4 ... 60 min in 4-minute steps
15 ... 225 Min in 15-Minuten-Schritten
5
1...15
15 ... 225 min in 15-minute steps
1 ... 15 Std in 1-Stunden-Schritten
6
1...15
1 ... 15 h in 1-hour steps
4 ... 60 Std in 4-Stunden-Schritten
7
1...15
4 ... 60 h in 4-hour steps
AUSSCHALTVERZÖGERUNG (S05 –S07)
SWITCH-OFF DELAY (S05 –S07)
0 ... 15 s in 1-Sekunden-Schritten
9
2 s drücken
press 2 s
0
Sendertaste
2x drücken
press trans-
mitter
button 2x
0...15
Sendertaste
2x drücken
press trans-
mitter
button 2x
drücken
press
0 ... 15 s in 1-second steps
4 ... 60 s in 4-Sekunden-Schritten
1
1...15
4 ... 60 s in 4-second steps
15 ... 225 s in 15-Sekunden-Schritten
2
1...15
15 ... 225 s in 15-second steps
1 ... 15 Min in 1-Minuten-Schritten
3
1...15
1 ... 15 min in 1-minute steps
EINSCHALTVERZÖGERUNG (S01 –S04)
SWITCH-ON DELAY (S01 –S04)
Verzögerungszeit = A x B
A
B
time delay = A x B
0 ... 15 s in 1-Sekunden-Schritten
8
2 s drücken
press 2 s
0
Sendertaste 2x drücken
press transmitter
button 2x
0...15
Sendertaste 2x drücken
press transmitter
button 2x
drücken
press
0 ... 15 s in 1-second steps
4 ... 60 s in 4-Sekunden-Schritten
1
1...15
4 ... 60 s in 4-second steps
15 ... 225 s in 15-Sekunden-Schritten
2
1...15
15 ... 225 s in 15-second steps
1 ... 15 Min in 1-Minuten-Schritten
3
1...15
1 ... 15 min in 1-minute steps
4 ... 60 Min in 4-Minuten-Schritten
4
1...15
4 ... 60 min in 4-minute steps
15 ... 225 Min in 15-Minuten-Schritten
5
1...15
15 ... 225 min in 15-minute steps
1 ... 15 Std in 1-Stunden-Schritten
6
1...15
1 ... 15 h in 1-hour steps
4 ... 60 Std in 4-Stunden-Schritten
7
1...15
4 ... 60 h in 4-hour steps
EINSCHALTVERZÖGERUNG (S05 –S07)
SWITCH-ON DELAY (S05 –S07)
0 ... 15 s in 1-Sekunden-Schritten
8
2 s drücken
press 2 s
0
Sendertaste
2x drücken
press trans-
mitter
button 2x
0...15
Sendertaste
2x drücken
press trans-
mitter
button 2x
drücken
press
0 ... 15 s in 1-second steps
4 ... 60 s in 4-Sekunden-Schritten
1
1...15
4 ... 60 s in 4-second steps
15 ... 225 s in 15-Sekunden-Schritten
2
1...15
15 ... 225 s in 15-second steps
1 ... 15 Min in 1-Minuten-Schritten
3
1...15
1 ... 15 min in 1-minute steps
PULSDAUER
IMPULSE
Verzögerungszeit = A x B
A
B
time delay = A x B
1 ... 15 s in 1-Sekunden-Schritten
8
2 s drücken
press 2 s
8
Sendertaste 2x drücken
press transmitter
button 2x
1...15
Sendertaste 2x drücken
press transmitter
button 2x
drücken
press
1 ... 15 s in 1-second steps
4 ... 60 s in 4-Sekunden-Schritten
9
1...15
4 ... 60 s in 4-second steps
15 ... 225 s in 15-Sekunden-Schritten
10
1...15
15 ... 225 s in 15-second steps
1 ... 15 Min in 1-Minuten-Schritten
11
1...15
1 ... 15 min in 1- minute steps
4 ... 60 Min in 4-Minuten-Schritten
12
1...15
4 ... 60 min in 4-minute steps
15 ... 225 Min in 15-Minuten-Schritten
13
1...15
15 ... 225 min in 15-minute steps
1 ... 15 Std in 1-Stunden-Schritten
14
1...15
1 ... 15 h in 1-hour steps
4 ... 60 Std in 4-Stunden-Schritten
15
1...15
4 ... 60 h in 4-hour steps
WIPPENTASTEN VERTAUSCHEN
SWAP ROCKER KEYS
Wippentasten O und I vertauschen
7
2 s
drücken
press
2 s
7
Wippe 2x drücken
press rocker 2x
drücken
press
Swap rocker keys O and I
Beispiele:
Examples:
Einschaltverzögerung 75 s (S01):
8 –LRN (2 s) –2 –Wippe 2x –5 –Wippe 2x –CLR
Switch on delay 75 s (S01):
8 –LRN (2 s) –2 –rocker 2x –5 –rocker 2x –CLR
Ausschaltverzögerung 7 Min. (S05):
9 –LRN (2 s) –3 –Taste 2x –7 –Taste 2x –CLR
Switch off delay 7 min (S05):
9 –LRN (2 s) –3 –button 2x –7 –button 2x –CLR
Pulsdauer 2 h (S04):
8 –LRN (2 s) –14 –Taste 2x –2 –Taste 2x –CLR
Impulse 2 h (S04):
8 –LRN (2 s) –14 –button 2x –2 –button 2x –CLR
CLR leuchtet 1 s, dann
Doppelblinken
lights up 1 s then
double blinks
LRN leuchtet / illuminates
CLR blinkt / blinks
CLR leuchtet 1 s und
blinkt
lights up 1 s then
blinks
LRN erlischt / goes out
CLR erlischt / goes out

AWAG Elektrotechnik AG Sandbüelstrasse 2 CH-8604 Volketswil 3110000.docx / 1876012
Tel. +41 44 908 19 19 Fax +41 44 908 19 99 i[email protected] www.awag.ch SW: UPS_V181107 / 31.11.2018 Seite 6 / 7
Tabelle 4
GERÄTEPARAMETER
1
2
3
4
Table 4
DEVICE PARAMETERS
Standardwerte erscheinen unterstrichen
Default values appear underlined
AUFSTARTVERHALTEN
STARTUP BEHAVIOUR
Aus
13
2 s
drücken
press
2 s
0
drücken
press
Off
Ein
1
On
Impuls 1 s
5
Pulse 1 s
NEBENSTELLENEINGANG MODUS
EXTENSION INPUT MODE
Taster
14
2 s
drücken
press 2 s
0
drücken
press
Push-button
Schalter
1
Switch
Deaktiviert
2
Deactivated
NEBENSTELLENEINGANG TELEGRAMMTYP
EXTENSION INPUT TELEGRAMTYPE
RPS Taste: Ein: AI pushed
Aus: AI released
14
2 s drücken
press 2 s
3
drücken
press
RPS push-button: On: AI pushed
Off: AI released
RPS Wippe: Ein: AI
Aus: AO
4
RPS rocker: On: AI
Off: AO
Deaktiviert
5
Deactivated
MANUELLER EINLERNMODUS
MANUAL PROGRAMMING MODE
Doppelklick
15
2 s
drücken
press
2 s
13
drücken
press
Double click
Einfachklick
14
Single click
MANUELLE RÜCKMELDUNG
MANUAL FEEDBACK
UTE Einlernsequenz starten
13
2 s
drücken
press 2 s
11
drücken
press
Launch UTE teach in
UTE Auslernsequenz starten
12
Launch UTE teach out
Lerntelegramm senden
13
Send teach in telegram
REPEATER
REPEATER
Bei Problemen mit der Empfangsqualität kann die Repeaterfunktion aktiviert werden.
Dann sendet der Aktor alle empfangenen Funktelegramme verstärkt weiter. Innerhalb
eines Umkreises von 5 Metern darf nur ein Gerät als Repeater aktiviert werden.
In case of problems with the reception quality, the repeater function can be activated.
The actuator will amplify the received radiograms and retransmit them. Only one de-
vice must be activated as a repeater within a radius of 5 meters.
Aus
15
2 s drücken
press 2 s
0
drücken
press
Off
Level 1: Verstärkt nur Originaltelegramme
1
Level 1: Amplifies original radio telegrams
Level 2: Verstärkt Originaltelegramme und bereits einmal verstärkte
Telegramme
2
Level 2: Amplifies original radio telegrams and also retransmitted
radio telegrams
RÜCKMELDUNGEN TELEGRAMMTYP
FEEDBACK TELEGRAM TYPE
RPS Wippe Ein: AI
Aus: AO
15
2 s drücken
press 2 s
9
drücken
press
RPS rocker On: AI
Off: AO
RPS Taste Ein: AI pushed
Aus: AI released
10
RPS push-button On: AI pushed
Off: AI released
4BS Ein: 0x 00 64 00 0C
Aus: 0x 00 00 00 0C
11
4BS On: 0x 00 64 00 0C
Off: 0x 00 00 00 0C
VLD EEP D2-01-01
12
VLD EEP D2-01-01
RÜCKMELDUNGEN ZEITPUNKT
FEEDBACK TRIGGER
Keine Rückmeldung
15
2 s drücken
press 2 s
5
drücken
press
No feedback
Bei Zustandsänderung
6
On change of state
Bei Zustandsänderung und alle 3 Min
7
On change of state and every 3 min
Bei Zustandsänderung und alle 30 s
8
On change of state and every 30 s
SICHERHEITSCODE ERLAUBT
SECURITY CODE ALLOWED
Standardmässig kann mit dem Sicherheitscode A9081919 der Fernzugriff via E-Tool
freigeschaltet werden, damit der Servicetechniker im Fehlerfall Zugriff auf den Aktor
hat. Ist das nicht erwünscht, muss diese Funktion ausgeschaltet werden.
By default, remote access via E-Tool can be enabled with the security code A9081919
so that the service technician has access to the actuator in the event of a fault. If this is
not desired, this function must be switched off.
Ja
Fernzugriff kann über Sicherheitscode freigeschaltet werden
11
2 s
drücken
press 2 s
8
drücken
press
Yes
Remote commissioning can be enabled with security code
Nein
Fernzugriff kann nicht über Sicherheitscode freigeschaltet werden
9
No
Remote commissioning can’t be enabled with security code
LRN leuchtet / illuminates
CLR blinkt / blinks
LRN erlischt / goes out
CLR leuchtet 1 s und erlischt
lights up 1 s and goes out

AWAG Elektrotechnik AG Sandbüelstrasse 2 CH-8604 Volketswil 3110000.docx / 1876012
Tel. +41 44 908 19 19 Fax +41 44 908 19 99 i[email protected] www.awag.ch SW: UPS_V181107 / 31.11.2018 Seite 7 / 7
TREPPENLICHT EINSCHALTDAUER
STAIRCASE LIGHT DURATION
10 s
4
2 s drücken
press 2 s
0
drücken
press
10 s
30 s
1
30 s
1 Min
2
1 min
2 Min
3
2 min
3 Min
4
3 min
4 Min
5
4 min
5 Min
6
5 min
7 Min
7
7 min
10 Min
8
10 min
15 Min
9
15 min
20 Min
10
20 min
30 Min
11
30 min
45 Min
12
45 min
1 h
13
1 h
2 h
14
2 h
3 h
15
3 h
TREPPENLICHT VORWARNFUNKTION
STAIRCASE LIGHT PREWARNING FUNCTION
Ein
30 s vor Ablauf der Zeit blinkt das Licht einmal kurz
12
2 s
drücken
press
2 s
0
drücken
press
On
30 s before time elapses it blinks once
Aus
1
Off
Beispiele:
Examples:
Treppenlicht Einschaltdauer 10 Minuten:
4 –LRN 2 s drücken –8 –LRN drücken
Staircase light duration 10 minutes:
4 –press LRN 2 s –8 –press LRN
Repeater Level 2:
15 –LRN 2 s drücken –2 –LRN drücken
Repeater Level 2:
15 –press LRN 2 s –2 –press LRN
Rückmeldungen bei Zustandsänderung
15 –LRN 2 s drücken –6 –LRN drücken
Feedback on change of state:
15 –press LRN 2 s –6 –press LRN
Rückmeldung Telegrammtyp VLD
15 –LRN 2 s drücken –12 –LRN drücken
Feedback telegram type VLD
15 –press LRN 2 s –12 –press LRN
TECHNISCHE DATEN
UPS230/10
TECHNICAL SPECIFICATIONS
Spannungsversorgung
110-240 V~ 50/60 Hz
Voltage supply
Standby-Verbrauch
0.6 W
Standby power consumption
Absicherung des Gerätes (Sicherung / -automat)
13 A
Hardware protection (automatic circuit breaker / fuse)
Lastausgang
Schaltkontakt
Bemessungsstrom
Induktive Last (cosφ = 0.6)
Glühlampen
Fluoreszenzlampen (cosφ = 0.9, C = 140 µF)
1 Schliesskontakt potentialfrei, bistabiles Relais
1 isolated closing contact, latch relay
16 A / 240 V~
8 A / 240 V~
8 A / 240 V~
10 AX / 240 V~
Power output
Switch contact
Rated current
Inductive load (cosφ = 0.6)
Incandescent lamp
Fluorescent lamp (cosφ= 0.9, C = 140 µF)
Schraubklemmen
4 mm²
Screw terminals
Schutzart
IP20
Protection class
Überspannungsschutz
✓
Overvoltage protection
Dauerkurzschlussfest (Steuerteil)
✓
Permanently shortcircuit proof (control unit)
Technologie
EnOcean 868 MHz
Technology
Funkmodul
EnOcean TCM320 bidirektional / bidirectional
Radio module
EnOcean Equimpent Profile (EEP)
D2-01-01
EnOcean Equipment Profile (EEP)
Umweltbedingungen
-20 … +40 °C / 5 ... 90 % rH non condensing
Environment
Gehäuse
Lexan, ø 51 x 25 mm
Housing
Gewicht
45 g
Weight
EC-Direktiven
2006/95/EC, 2004/108/EC
EC-Directives
Normen
EN 60669-1/-2-1/-2-2, EN 61000-3-2/-3-3, EN 62493
Standards
Legende:
Legend:
Drehschalter HEX
Rotary switch HEX
LRN-Taste
Push-button LRN
CLR-Taste
Push-button CLR
Sendertaste (Wippe, Taster etc.)
Transmitter button (rocker, push-button, etc.)
Fachkraft erforderlich
Specialist required
VORSICHT
ATTENTION
Tabelle 4
GERÄTEPARAMETER
1
2
3
4
Table 4
DEVICE PARAMETERS
This manual suits for next models
1
Table of contents
Other Omnio Controllers manuals

Omnio
Omnio REGJ12/04M Reference guide

Omnio
Omnio UPJ230/12 User manual

Omnio
Omnio UPS230/08 User manual

Omnio
Omnio UPS230/10 User manual

Omnio
Omnio Enocean UPS 230/10 User manual

Omnio
Omnio APG03B-RS485 User manual

Omnio
Omnio UPS230/12 User manual

Omnio
Omnio UPS230/08 User manual

Omnio
Omnio RATIO UPJ230/01 User manual

Omnio
Omnio TST230/10 User manual