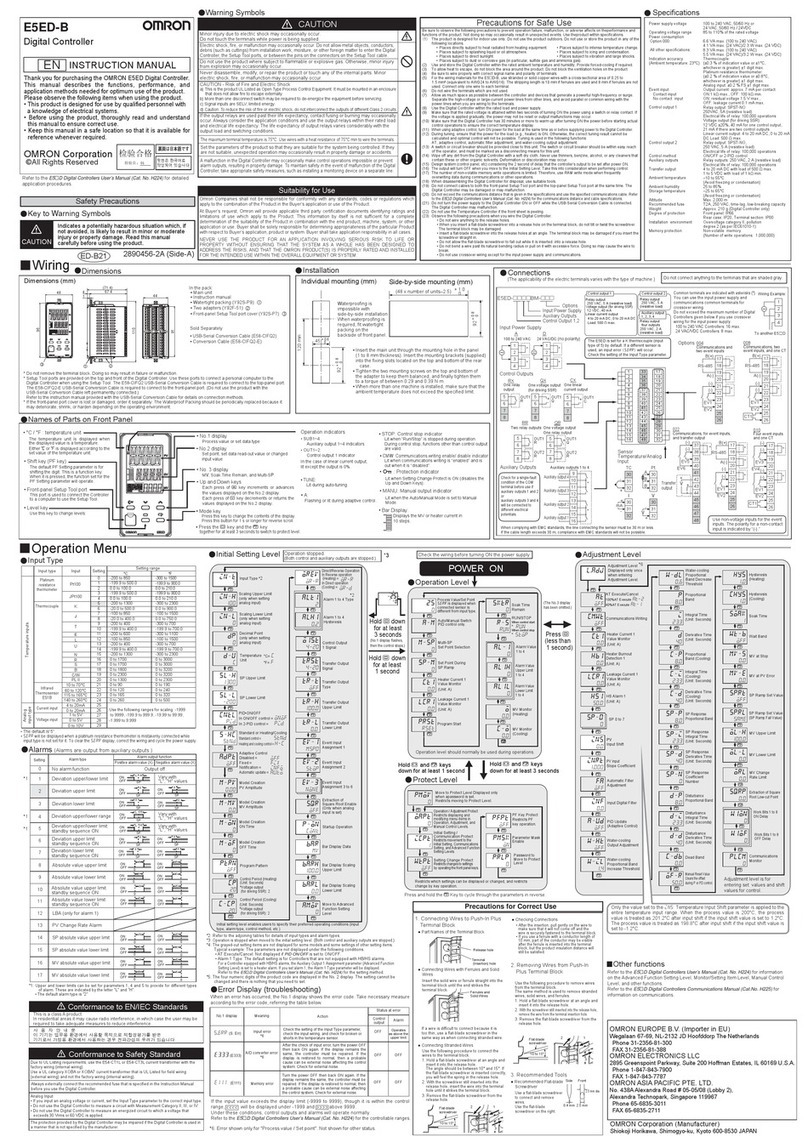
PRECAUTIONS ON SAFETY
PRECAUTIONS FOR SAFE USE
PRECAUTIONS FOR CORRECT USE
INSTRUCTION SHEET
Thank you for selecting OMRON product. This sheet primarily
describes precautions required in installing and operating the product.
Before operating the product, read the sheet thoroughly to acquire
sufficient knowledge of the product. For your convenience, keep the
sheet at your disposal.
© OMRON Corporation All Rights Reserved.
Model
ZW-7000□
2016
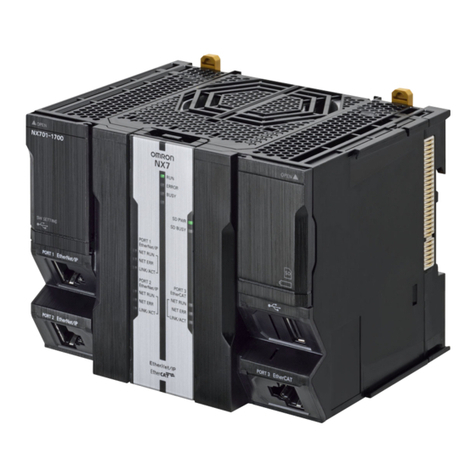
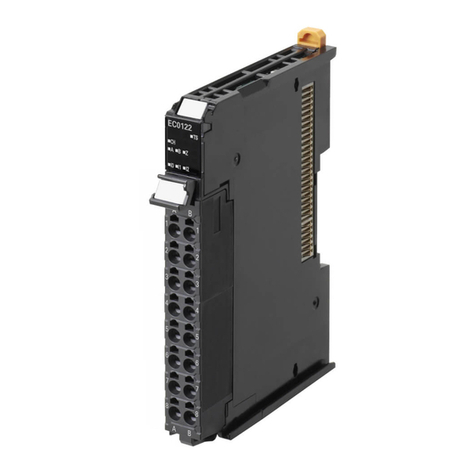
Controller for Fiber Coaxial Displacement Sensor
■Parts Names and Functions <Back>
No.
31
Name
DIN track mounting hook
Function
Used when securing the Controller to the DIN track.
<Bottom>
No.
32
Name
Mounting screw hole
Function
Used to secure the Controller with screws
■
Specifications
●
Meanings of Signal Words
●
Alert Statements in This Sheet
Do not use it exceeding the rated voltage.
There is a possibility of failure and �fire.
Do not connect amplifier units to AC power supply.
Risk of explosion.
Looking into the LED light continuously may cause visual
impairment.
Do not look directly into the LED light.
Indicates a potentially hazardous situation which, if
not avoided, will result in minor or moderate injury, or
may result in serious injury or death. Additionally,
there may be significant property damage.
WARNING
Indicates a potentially hazardous situation which, if
not avoided, may result in minor or moderate injury or
in property damage.
CAUTION
This product is not designed or rated for ensuring safety of
persons either directly or indirectly. Do not use it for such
purposes.
Do not disassemble the product. Doing so may cause electric shock due
to the high voltage portion. Burn also may result due to high
temperature.
Do not attempt to disassemble, deform by pressure, incinerate, repair,
or modify this product.
WARNING
CAUTION
Please observe the following precautions for safe use of the products.
1.Installation Environment
• Do not use the product in environments where it can be exposed to inflammable/explosive gas.
•
To secure the safety of operation and maintenance, do not install the product close to high-voltage devices and power devices.
• Ensure clearances 30 mm or more wide and 10 mm or more wide on the top and both sides of the sensor controller main
unit for intaking and exhausting air, respectively.
• Hang the upper side of the groove on the back of the sensor controller on the DIN rail. After installing the sensor
controller, be sure to confirm that the controller is fixed surely.
• When fixing the sensor controller with mounting screws, tighten the screws to the specified torque (1.2 Nm) described in
this Instruction Sheet.
• Avoid installing in the place with the vibrations as much as possible.
• Do not install the product near any devices that generate noise. If there is no choice but to install the product in a noisy
environment, make sure to take noise prevention measures.
2.Power Supply and Wiring
• Be careful when using a power supply with the overcurrent detection function. This sensor uses a DC-DC converter for
the power supply circuit. The protection circuit may be activated due to surge current when using a power supply with the
overcurrent detection function.
Recommended power supply: S8VS-06024 (OMRON: 24 VDC 2.5 A 60 W)
• Do not apply voltages or AC power supplies that exceed the rated voltage (24 VDC±10%).
• Do not reverse the polarity of the power connection.
• Unstable voltage may cause unexpected operation of the sensor controller. If such condition is anticipated, use an UPS
(Uninterruptible Power Supply).
Recommended UPS: S8BA Series (OMRON)
• Open-collector outputs should not be short-circuited.
• Use a load that is equal to or less than the rating.
• High-Voltage lines and power lines must be wired separately from this product. Wiring them together or placing them in
the same duct may cause induction, resulting in malfunction or damage.
• Take sufficient safety measures such as fail-safe circuit to use the product.
• Use a wire of the specified size for wiring. Do not connect the wire other than the specified size to the terminal block.
• Fix the terminal block tightly to protect from accidental injury by pushing the release button on the attached terminal
block with a screwdriver.
• Supply power from a DC power supply for which measures have been applied to prevent high voltages (e.g., a safety
extra low voltage circuit).
• The length of the power supply cable should be as short as possible.
• For the frame ground terminals, the terminal screw and crimp terminal of the specified size must be used. Do not directly
connect the merely twisted wires to the frame ground terminals.
Terminal screw: M4
• Perform class D grounding (the ground resistance of 100 ohm or less). Set the grounding point as close as possible and the
length of the grounding wire as short as possible.
• Do not share the grounding wire with other device or do not connect the grounding wire to the beam of a building.
Otherwise an adverse effect may occur.
• Do not connect this product with the same power supply as applied to an apparatus which might cause noises.
• Tighten the mounting screw to the torque specified in this instruction sheet.
• Always turn off the power of the main unit before taking the following actions. Not doing so may result in malfunction.
• Connecting or wiring the cable
• Mounting or removing the connector
• Mounting or removing the Calibration ROM
•
Before turning on the power after the wiring is completed, verify that the power is correct, that there are no incorrect
connections such as a shorted load circuit, and that the load current is suitable. Incorrect wiring may cause damage and failures.
• When inserting or removing the EtherCAT cable, be careful not to stress the calibration ROM
• Handling of the fiber cable
Using the product without observing the following might damage the fiber cable.
• Use the fiber cable with a bend radius of 20 mm or more
• Avoid the root of the fiber connector from being stressed by the bend.
• Do not pull the fiber cable strongly.
• Do not step on the fiber cable or put anything heavy on it.
• Avoid applying torsional stress on the fiber cable.
3.Others
• Do not look into the light injection port directly.
• Do not use in safety circuits for atomic energy or that are critical for human life.
• Do not attempt to disassemble, deform by pressure, incinerate, repair, or modify this product.
• When disposing of the product, treat as industrial waste.
• Connect a dedicated device (Sensor Head, Calibration ROM, fiber cable or RS-232C cable). Use of other devices may
result in fire, explosion, malfunction or failure.
• Do not cut off the fiber cable. Otherwise, you might be injured by the glass of the cut portion. In addition, the controller
does not operate normally if the cable is cut off.
• If you notice an abnormal condition such as a strange odor, extreme heating of the unit, or smoke, immediately stop using
the product, turn off the power, and consult your dealer.
• Do not drop or impose shock on the product.
• Ensure that all components which have locking mechanisms are locked before using the product.
4.Regulations and standards
This sensor complies with EMC directive and EN standards as follows:
• EN61326-1
• Electromagnetic environment : Industrial electromagnetic environment (EN/IEC 61326-1 Table 2)
• The following condition is applied to the immunity test of this product:
While receiving electromagnetic interference, the voltage/current output might vary within ±3% of full scale.
• EMC Directive
No.2014/30/EU
Observe the following to prevent failure, malfunctioning, and adverse effects on performance and the device.
1.Installation site
Do not install in the following locations:
• Locations where the ambient temperature exceeds the rated temperature range.
• Locations subject to sudden temperature changes (where condensation will form).
• Locations where the relative humidity is below or above 35 to 85% RH.
• Locations where there are corrosive or flammable gases.
• Locations where there is dust, salt, or iron powder.
• Locations where the device will be subject to direct vibration or shock.
•
Locations where there is strong scattered light (laser light, arc welding light, ultraviolet light, etc.)
• Locations exposed to direct sunlight or next to a heater.
• Locations where there is splashing or spraying of water, oil, or chemicals.
• Locations where there is a strong electrical or magnetic field.
2.Power and cable connections
• When using a commercially available switching regulator, make sure that the Frame ground terminal is grounded.
• Wire without placing load on the cables/connectors.
• If there are surges on your power line, connect a surge absorber as appropriate for your conditions of use.
• Use the product with the specified voltage. Applying a voltage or AC voltage that exceed the rating may result in burning
or explosion of circuit components.
• To extend the fiber cable between the Sensor Head and Controller, an optional extension fiber cable (ZW-XF70□□R)
must be used. Only one extension fiber cable can be connected.
• Use the Sensor Head and Calibration ROM of the same serial number. Operation will fail if those with different serial
numbers are used.
• Use the dedicated Setup Software. Using the other software may result in malfunction of the product.
• Do not turn off the power supply while saving data into the Controller built-in memory. Doing so may damage the data.
• When the fiber cable is not connected, attach the provided protective caps to the fiber cable connector. Leaving the
product without the protective caps may result in malfunction caused by adhesion of a foreign material.
3.
Warming Up
After turning on the power supply, allow the Controller to stand for at least 30 minutes before use. The internal temperature
of the controller are unstable immediately after the power supply is turned on and attempting measurement may result in
inconsistent measurement values.
4.Maintenance
•
Do not use thinner, benzene, acetone or kerosene to clean the Sensor Head, fiber cable or Controller. If considerable foreign
matter or dust collects on the Sensor Head or receiver/emitter of the Controller, use a blower brush (for camera lenses) to blow
off the foreign matter. Avoid blowing it off with your breath. For a small amount of foreign matter or dust, gently wipe with a
soft cloth. Do not wipe hard. If the receiver/emitter is damaged, malfunction or measurement error may result.
•
Do not touch the end face of the fiber cable of the sensor head. Otherwise, performance deterioration might occur. If the end
face touches anything or becomes unclean, wipe off the dirt with option product ZW-XCL, the commercially available
dedicated fiber cleaner, or a dry soft cloth. Do not use cloth soaked in alcohol. Otherwise, dirt might adhere again.
•
To clean the fiber connector of the controller, use option product ZW-XCL or the commercially available dedicated fiber
cleaner.
•
If inserting/extracting the sensor head frequently, use of the repeatedly usable commercially available dedicated fiber cleaner is
recommended. For the recommended fiber cleaner, refer to the operation manual of the sensor head (ZW-S70□□).
• Clean the vent hole periodically so as not to be clogged with dust or particulate. If the vent hole is clogged, heat is not
dissipated from inside, leading a failure.
5.Sensing Object For Sensor Head
Depending on the material/shape of the object, the object cannot be measured or can be measured but accuracy is poor:
Transparent objects, objects with a low reflective sensor ratio, objects smaller than the spot diameter, objects with a large
curvature, excessively inclined objects, objects with thin film on the surface, etc.
6.Effects of surrounding lightings
Avoid installing the product at a location where the emitter/receiver of the Sensor Head is exposed to strong lighting. If the
objects
has reflective surface, malfunction of the product may occur due to light reflection. Prevent it by covering the
lighting.
7. Influence of air current
Measured values may vary due to slow air current around the Sensor Head. In such case, put a cover around the Sensor
Head.
8.Operation beyond the measurement range
As this sensor is sensitive, malfunction may occur beyond the measurement range (near side). In such case, shortening the
exposure time may solve the problem.
9.Service life of writing to sensor controller built-in EEPROM
When the zero resetting memory is preset ON, data are written in the EEPROM (non-volatile memory) in the sensor
controller every time the memory is reset to zero. The life of this EEPROM as a writable memory is approximately one
million times. So, if using the memory with setting it ON, be careful with the life of the writable memory.
The following notice applies only to products that carry the CE mark:
Notice:
This is a class A product. In residential areas it may cause radio
interference, in which case the user may be required to take adequate
measures to reduce interference.
Manufacturer:
OMRON Corporation,
Shiokoji Horikawa, Shimogyo-ku,
Kyoto. 600-8530 JAPAN
TRACEABILITY INFORMATION:
Importer in EU:
OMRON Europe B.V.
Wegalaan 67-69,
NL-2132 JD Hoofddorp
The Netherlands
No.
1
2
3
4
5
6
7
8
9
10
11
12
13
14
15
Name(color)
HIGHindicator(Orange)
PASSindicator(Green)
LOWindicator(Orange)
STABILITYindicator(Green)
ZEROindicator(Green)
ENABLEindicator(Green)
Maindigitalindicator(White)
Subdigitalindicator(Green)
RUNindicator(Green)
THRESHOLD-Lindicator(Orange)
THRESHOLD-Hindicator(Orange)
ECATRUNindicator(Green)
L/AINindicator(Green)
L/AOUTindicator(Green)
ECATERRORindicator(Red)
Function
LightswhenthejudgmentresultisHIGH(HIGHthreshold<measuredvalue).
LightswhenthejudgmentresultisPASS
(LOWthreshold≤measuredvalue≤HIGHthreshold).
LightswhenthejudgmentresultisLOW(measuredvalue<LOWthreshold).
Lightswhenthefirstsurfaceiswithinthemeasuringrange.
TurnsOFFwhenthemeasuredvalueisoutsidethemeasuringrange.
Lightswhenzeroresetsettingismade.
Lightswhenmeasurementisenabled.Turnsoffwhenmeasurementisdisabled(e.g.whenthe
receivedlightamountisexcessiveorinsufficient,whentheCalibrationROMisnotconnected,
orwhenFUNCmodeisnotactiveformeasurement).
Showsameasurementvalueorfunctionname.
Showsthesupplementalinformationofthemeasurementvalueorsetvalueofthefunction.
LightsatRUNmodeandturnsoffatFUNCmode.
LightswhenaLOWthresholdisshownonthesubdigital.
LightswhenaHIGHthresholdisshownonthesubdigital.
LightswhenEtherCATcommunicationsisavailable.
LightswhenconnectedtotheEtherCATdevice,andblinksduringcommunications(datainputs).
LightswhenconnectedtotheEtherCATdevice,andblinksduringcommunications(dataoutputs).
LightswhentheEtherCATcommunicationserroroccurs.
●Connector/terminal
No.
21
22
23
24
25
26
27
28
29
30
Name
RS-232Cconnector
Ethernetconnector
EtherCATconnector(IN)
EtherCATconnector(OUT)
24Vinputterminalblock
32-poleexpansion
connector
Analogoutputterminalblock
Fiberadapter
ROMconnector
Framegroundterminal
Function
UsedwhenconnectingaPLCorPCviaRS-232Cport.
BesuretouseadedicatedRS-232Ccable.
Otherwisemalfunctionorfailuremayresult.
•ForPLC/programmableterminal:ZW-XPT2
•ForPC:ZW-XRS2
UsedtoconnectaPLCorPCviaEthernet.
BesuretouseacommercialEthernetcablethatsatisfiesthefollowingconditions:
•Category5eorhigher,length30morshorter
•RJ45connector(8-pinmodularjack)
•1:1connection:Selectacrosscable.
•ConnectionvianetworkHUB:Selectastraightcable.
UsedwhenconnectingtotheEtherCATcompatibledevice.
UsearecommendedEtherCATcable.
UsedwhenconnectingtotheEtherCATcompatibledevice.
UsearecommendedEtherCATcable.
Connectsthe24VDCpowersupplyofthecontroller.
ConnectsparallelI/O(judgmentoutput,ALARMoutput,BUSYoutput,
ENABLEoutput,bankNo.output,SYNCFLG/TRIGBUSYoutput,
STABILITYoutput,LOGSTAToutput,LOGERRoutput,TASKSTAToutput,
ZEROinput,RESETinput,TIMINGinput,LIGHTOFFinput,LOGGINGinput,
bankNo.selectinput,SYNC/TRIGinput) Ensurethatthecableis2morlesslong
Connectsananalogvoltageoutputandanalogcurrentoutput.
Connectsafiberconnector.
ConnectstheCalibrationROM.
Aterminalforframegrounding.Connectsagroundingwire.
●Operating section
No.
16
17
18
19
20
Name
ZERORST/ESCkey
←(LEFT)key
→(RIGHT)key
↑(UP)key
↓(DOWN)key
ZERO/SETkey
Modeswitchkey
Nodeaddresssettingswitch
(inhexadecimal)
Function
Functionsdifferdependingonoperatingmode.
UsedforstationaddresssettingsasanEtherCATcommunicationsdevice.
Thesettingrangeis0x01(1)to0xFF(255).
<Front>
●Display section
Main digital indicator
Sub digital indicator
Status indicator
EtherCAT display
Ethernet
EtherCAT
RS-232C
Analog output
terminal block
32-pole
expansion
connector
Exposure time
Measurement cycle *1
Specified materials
Measurement items
Filter processing
Outputs
Display
Total number of registrations
Task processing
System
Powersupplyvoltage
Currentconsumption
Insulationresistance
Dielecticstrength
Degreeofprotection
Vibrationresistance(destruction)
Shockresistance(destruction)
Ambienttemperaturerange
Ambienthumidityrange
Item
Input/output type
Total number of Sensor Heads connected
Operating Sensor Head
Light source for measurement
Safety of LED
Segment
display
LED
display
External
interface
Main
functions
Ratings
Environmental
immunity
Grounding
Material
Weight
Accessories
Bank output during
selection
(BANK_OUT1 to 3)
Bank selection
input
(BANK_SEL1 to 3)
Specifications
ZW-7000□
NPN/PNP
1
ZW-S70□□
White LED
Risk Group 3 (IEC 62471)
11-segment white display, 6 digits
11-segment green display, 6 digits
HIGH (Orange), PASS (Green), LOW (Orange), STABILITY (Green),
ZERO (Green), ENABLE (Green), THRESHOLD-H (Orange),
THRESHOLD-L (Orange), RUN (Green)
ECAT RUN (Green), L/A IN (Link/Activity IN) (Green)
L/A OUT (Link/Activity OUT) (Green), ECAT ERR (Red)
100BASE-TX\10BASE-T non-procedural(TCP/UDP), EtherNet/IP
EtherCAT-specific protocol 100BASE-TX
115,200 bps max.
-10 V to +10 V, output impedance: 100 Ω
4 mA to 20 mA, maximum load resistance: 300Ω
Transistor output method
Output voltage: 21.6 to 30 VDC
Load current: 50 mA max.
ON residual voltage: 2 V max.
OFF leakage current: 0.1 mA max.
DC input method
Input voltage: 24 VDC±10% (21.6 to 26.4 VDC)
Input current: 7 mA Typ. (24 VDC)
ON voltage/ON current: 19 V/3 mA min.
OFF voltage/OFF current: 5 V/1 mA max.
Auto/fixed
20
μ
s to 400
μ
s
Standard/mirror surface/rough surface
Height/thickness/operation
Median/average/differentiation/high-pass/low-pass/band-pass
Scaling/holds/zero reset/measurement value logging
Measurement value/threshold/analog output voltage value
or current value/judgment result/resolution/exposure time
Internal logging state/incident light peak level
Up to 8 banks
Multitasks (up to 4 tasks per bank)
Saving/initialization/measurement information display/ communication
setting/Sensor Head calibration/key lock/zero reset memory/timing input
21.6 V to 26.4 VDC (including ripple)
800 mA max.
Between all lead wires and FG terminal: 20 M
Ω
(250 VDC)
Between all lead wires and FG terminal: 500 VAC, 50/60 Hz, 1 min.
IP20 (IEC60529)
10 to 55 Hz, 0.35-mm half amplitude 50 min each in X, Y, and Z directions
150m/s
2
3 times each in six directions (up/down, left/right, forward/backward)
Operating: 0 to 40
°C
, Storage: -15 to +60
°C
(with no icing or condensation)
Operating and storage: 35% to 85RH% (with no condensation)
Class D grounding (grounding resistance 100 Ωmax.) * Conventional class 3 grounding
Case: PC
Approx. 900 g (main unit only),Approx. 150 g (parallel cable)
Parallel cable(ZW-XCP2E),10bottlesoffibercleaner(ZW-XCL),
Instruction Sheet(This Instruction Sheet),Membership Registration Sheet
The Export Trade Control Order compatible Controller (ZW-7000T) is available.
When using this Controller, the minimum resolution is 0.25 μm regardless of the connected Sensor Head and setting conditions.
*1 If an extension fiber cable 5 m long or more is connected, the setup range of measurement cycle (exposure time) must be
changed. For details, refer to "Setting Measurement Cycle" in the user's manual.
Item
Communications standards
Physical layer
Connector
Communication medium
Communication distance
Process data
Mail box (CoE)
Distributed clock
LED display
Specifications
IEC 61158 Type12
100BASE-TX (IEEE802.3)
RJ45×2 EtherCAT IN: EtherCAT input EtherCAT OUT: EtherCAT output
Category 5 or higher twisted pair cable
(Aluminum tape and woven double shielded straight cable is recommended.)
Distance between nodes: within 100m
Variable PDO mapping
Emergency message, SDO request, SDO response, SDO information
Synchronization in DC mode
L/A IN (Link/Activity IN)×1 L/A OUT(Link/Activity OUT)×1
ECAT RUN×1 ECAT ERR×1
●EtherCAT communications specifications
Analog voltage output (OUTV)
Analog current output (OUTA)
Judgment outputs
(HIGH/PASS/LOW)
Busy output (BUSY)
Alarm output (ALARM)
Enabling output (ENABLE)
Sync flag output(SYNFLG)
Trigger busy output(TRIGBUSY)
Logging state output (LOGSTAT)
Logging error output (LOGERR)
Stability output (STABILITY)
Task state output(TASKSTAT)
LIGHT OFF input
(LIGHT OFF)
Zero reset input (ZERO)
Timing input (TIMING)
Reset input (RESET)
Sync input (SYNC)
Trigger input (TRIG)
Logging input (LOGGING)
Bank
<Front> <Back>
<Bottom>
32
1
2
3
4
5
69
10
11
17
19
12
22
23
24
28
21
20
16
18
26
27
29
13
14
15
30
31
8
7
25
9532207-1C
8.5mmmax.
8.5mmmax.
Crimp terminal
