Oneil microFlash 8i 270 User manual

User's Guide
MICROFLASH 8I 270


TABLE OF CONTENTS
microFlash 8i 270 Printer..............................1
Open View...................................................1
Closed View.................................................1
Installing the Printer.....................................2
Using the Battery...........................................2
Installing and/or Replacing Batteries .............2
Charging the Battery....................................3
Using the Ribbon ...........................................4
Ribbon Guidelines ........................................4
Installing the Ribbon....................................4
Removing the Ribbon...................................4
Installing Paper .............................................5
Paper Guidelines..........................................6
Printing a Self-Test........................................7
Setting Top of Form.......................................7
Tearing the Paper..........................................7
Using Buttons and Indicators .......................8
Control Panel...............................................8
LED Indicators.............................................8
Button Functions..........................................9
Audio Indicators......................................... 10
Using Power Options................................... 11
Attaching Cables........................................ 12
Configuring the Printer ............................... 12
Supplies........................................................ 16
MF8i 270 PRINTER USER'S GUIDE
1
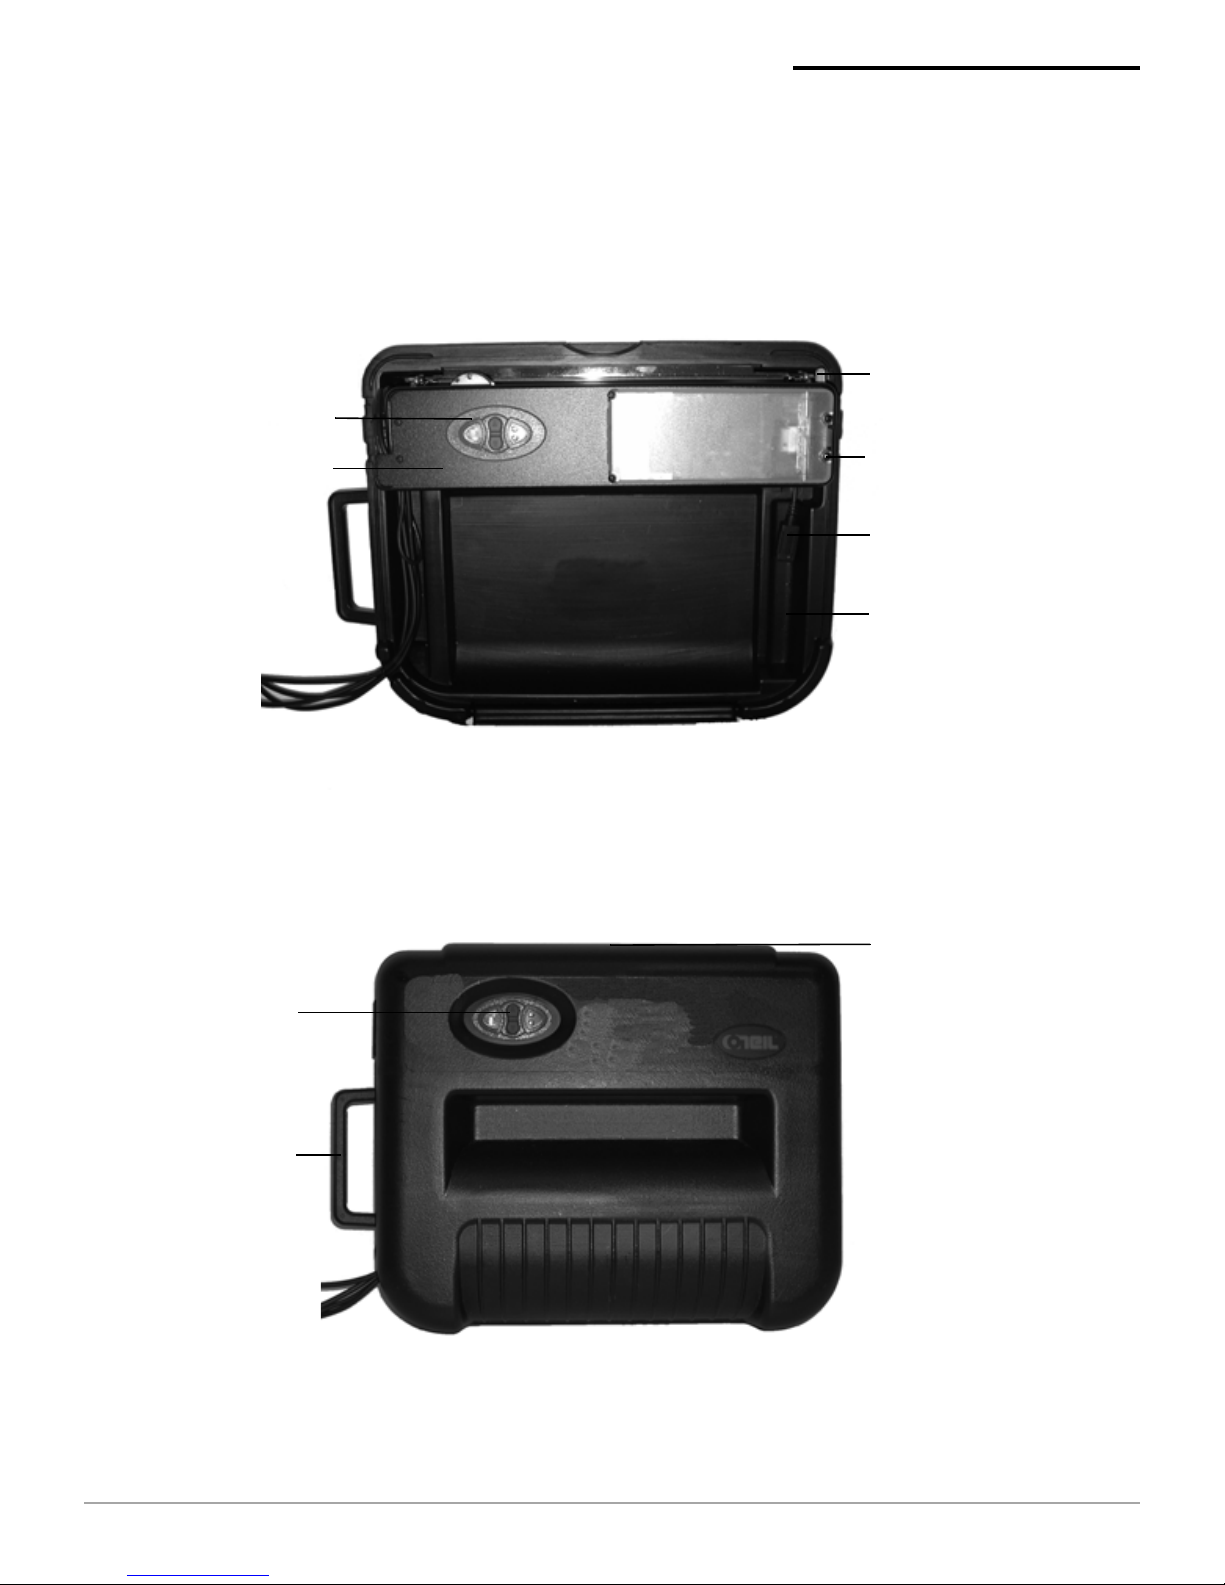
microFlash 8i 270 Printer
Open View
Closed View
Battery well
Battery
cable
Access
cover
Locking
lever (green
knob)
Control
panel
Printer
assembly
Figure 1
Paper Exit
Handle
Control
panel
Figure 2
MF8i 270 PRINTER USER'S GUIDE
2
Installing the Printer
For information on installing the printer, see the
MF8i
270 Installation Guide
, which is accessible from
www.oneilprinters.com.
Using the Battery
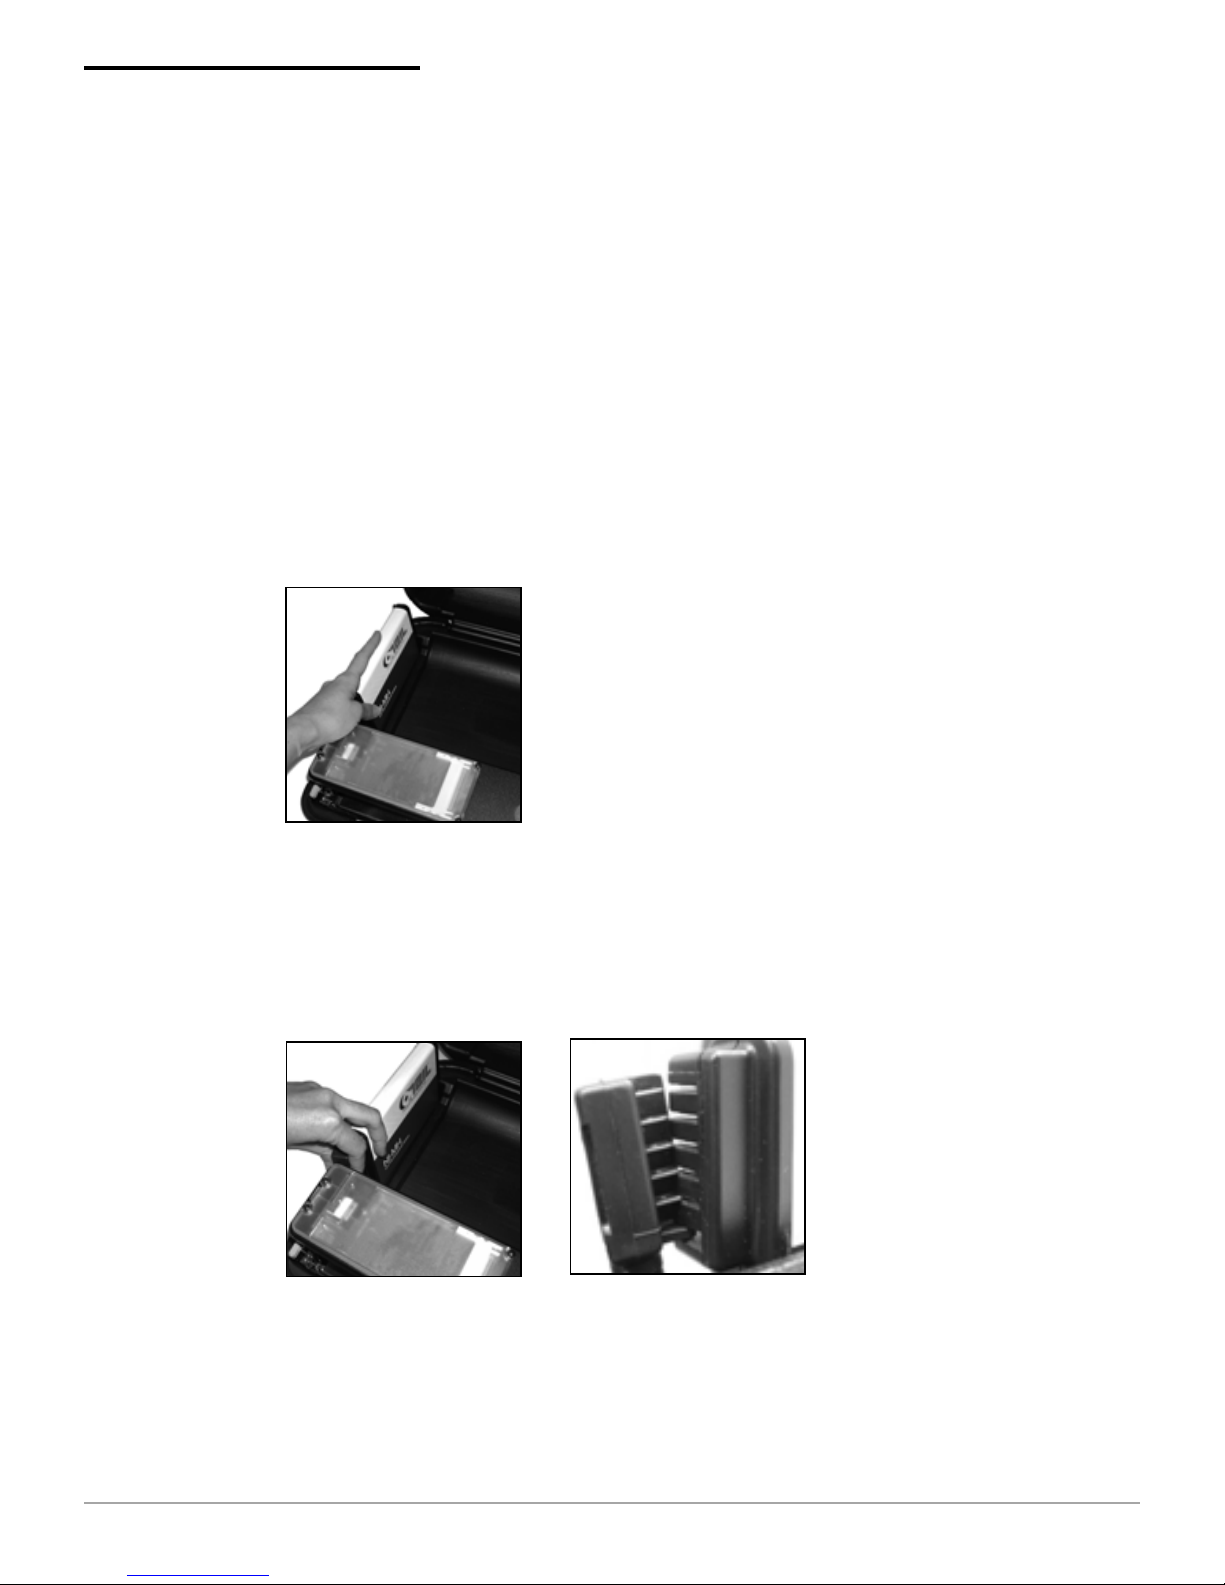
Installing and/or Replacing Batteries
1. Open the printer’s cover.
2. Place the battery in the battery well (Figure 3).
3. Align and connect the cable connector to the battery
(Figure 4a). Do not force the cable connector to fit to
the battery, the parts easily connect when properly
aligned (Figure 4b).
4. Close the printer’s cover.
5. Charge the battery. For more information, see
Charging the Battery on page 3
.
Figure 3
Figure 4a Figure 4b

MF8i 270 PRINTER USER'S GUIDE
3
Charging the Battery
Plug the AC power cord into a wall outlet. The battery
charges in approximately 4 to 5 hours with a handheld
computer (HHC) installed.
Caution: There is a risk of explosion if the battery is
replaced by an incorrect type. Dispose of used
batteries according to the instructions.
Caution: The operating temperature of this portable
printer is 50° C. However, the operating temperature
when used with O’Neil power supply for charging the
portable printer is limited to 35° C. Please charge the
printer in a suitable location that meets this
temperature requirement.
Caution: (For US/Canada) Please only use the O’Neil
part number 220180-100 power supply with this
product.

MF8i 270 PRINTER USER'S GUIDE
4
Using the Ribbon
Ribbon Guidelines
In the event of a jam to or under the ribbon, replace the
ribbon immediately. If the jam continues, do not remove
the smear guards.
Installing the Ribbon
The printer ships without a ribbon installed. To install a
ribbon, perform the following:
1. Open the printer’s cover.
2. Depress the locking lever (green knob) to open the
print mechanism.
3. Remove the ribbon from its packaging.
4. Hold the ribbon by the flat handle.
5. Install the ribbon on the printhead (Figure 5).
6. Turn the knob counter-clockwise several times to
fully seat the ribbon.
Removing the Ribbon
1. Grasp the flat handle.
2. Pull the ribbon out of the brackets.
Figure 5

MF8i 270 PRINTER USER'S GUIDE
5
Installing Paper
1. Open the two latches on the side of the printer’s
cover and lift the printer’s cover to the fully open
position.
2. Depress the locking lever (green knob) to open the
print mechanism (Figure 6).
3. Flip open the print mechanism and verify the center
guide is centered.
4. Lift the two tractor feed clips.
5. Fold the stack of paper in half with the short sides
together and with the top of the form coming out
from the inside fold (Figure 7).
6. Place the paper into the paper cavity with the
bottom edges under the paper lip in the bottom of
the cavity (Figure 8).
Note: Remove the orange label from the locking lever
(green knob).
Figure 6
Figure 7 Figure 8

MF8i 270 PRINTER USER'S GUIDE
6
7. Feed the top of the form from the inside of the fold
through the tractor feed pins and to the outside edge
of the printer.
8. Align the holes in the paper with the studs in the
tractor feed wheel (Figure 9).
9. The left tractor feed is adjustable. Lift the locking
lever (green knob) to release the tractor feed.
10. Verify that the paper is taut and the paper feeds
correctly.
11. Close the tractor feed clips, the print mechanism,
and the printer’s cover (Figure 10).
12. Set top of form. For more information, see
Setting
Top of Form on page 7
.
Paper Guidelines
Form Parts Maximum Number of Sheets
1 200
290
360
450
Figure 9 Figure 10
MF8i 270 PRINTER USER'S GUIDE
7
Printing a Self-Test
1. Turn the printer off by pressing Button 1 and Button
2 simultaneously.
2. Press and hold Button 1. After printing begins,
release Button 1.
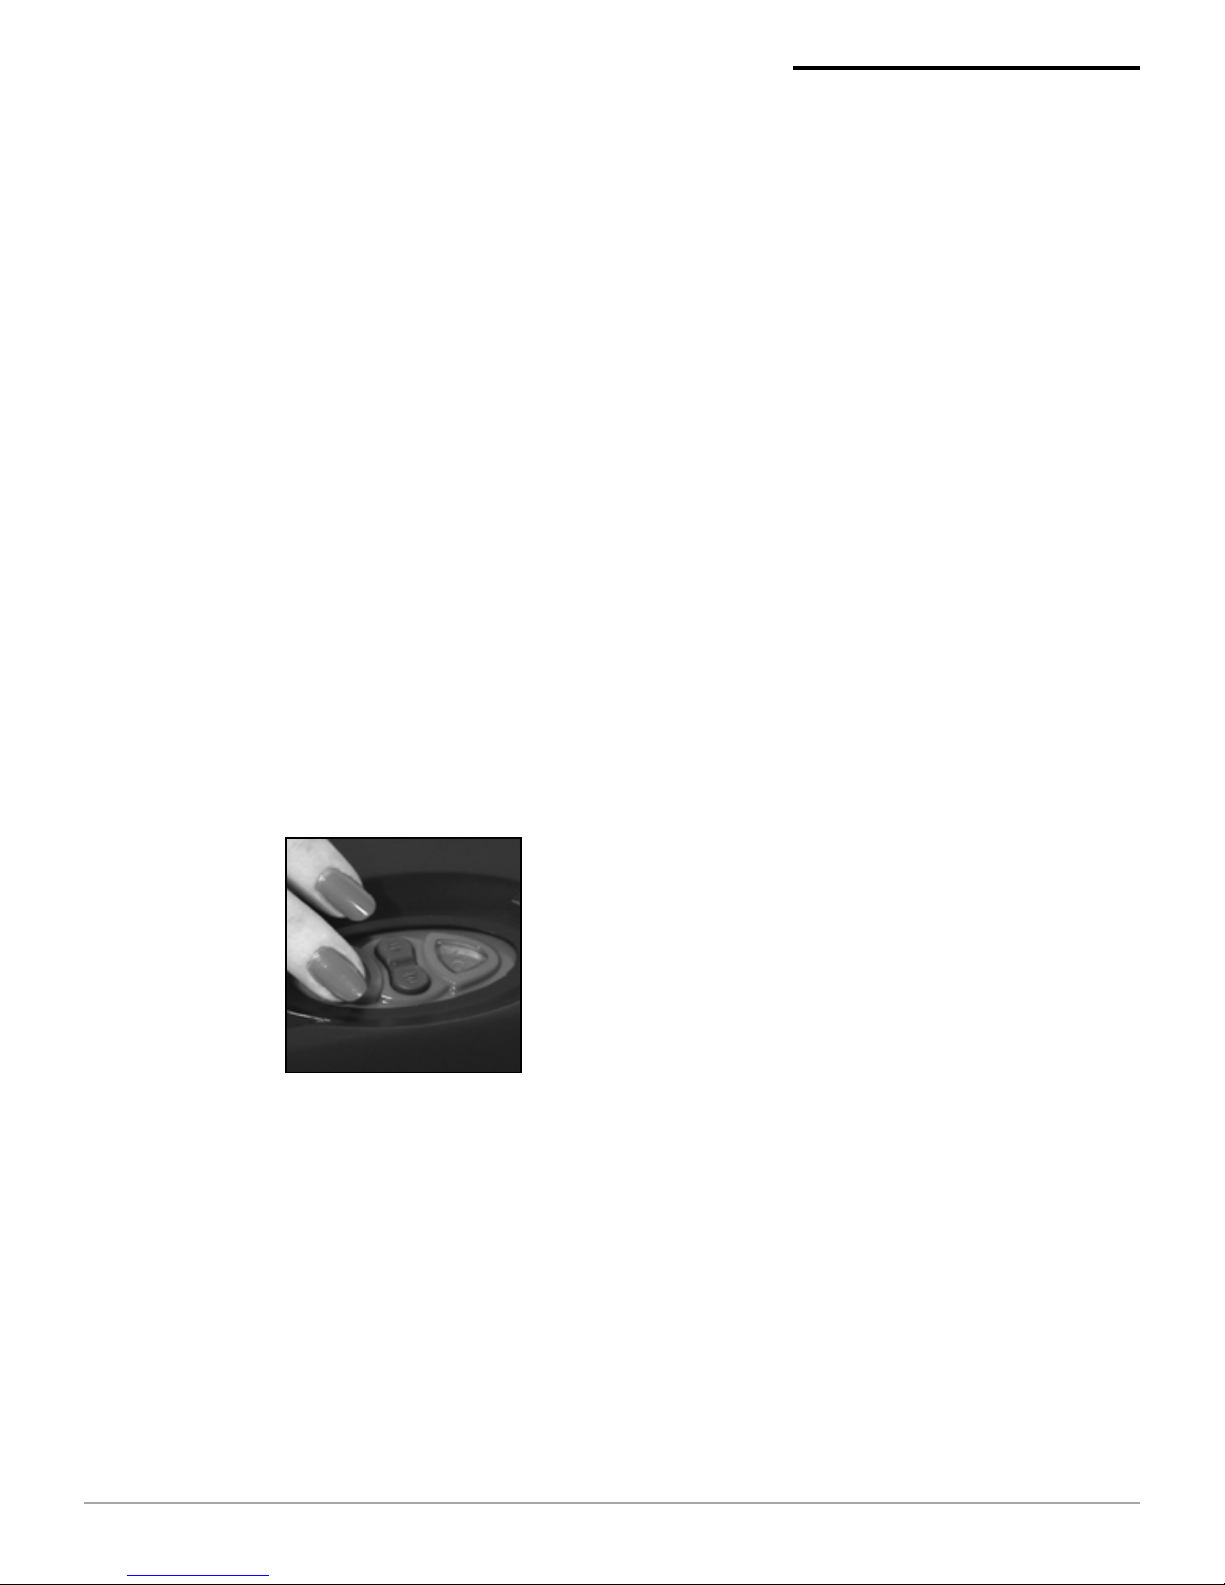
Setting Top of Form
1. Press Button 1 to turn on the printer.
2. Position the paper by pressing Button 1 until the end
of the paper is at the edge of the case, for easy tear
up or tear down. If necessary, press Button 2 to
back feed the paper.
3. Turn the printer off by pressing buttons 1 and 2
simultaneously (Figure 11).
4. Press Button 1 to turn on the printer. The top of form
is automatically set.
Tearing the Paper
1. Set the paper to top of form. For more information,
see
Setting Top of Form on page 7
.
2. Grab one side of the paper at a leading edge and
pull up. Once the paper has started tearing at the
perforation, finish with a swift pull upward and
away.
Figure 11
Table of contents
Other Oneil Printer manuals

Oneil
Oneil PrintPAD For 8100 User manual

Oneil
Oneil VMP-2000 User manual

Oneil
Oneil microFlash 4te Manual

Oneil
Oneil PrintPAD 9000 User manual

Oneil
Oneil RP-1000 Owner's manual

Oneil
Oneil LP3 Owner's manual

Oneil
Oneil microFlash 2t User manual

Oneil
Oneil VMP-2000 Owner's manual

Oneil
Oneil microFlash 4t User manual

Oneil
Oneil MF4T User manual

Oneil
Oneil OC3 User manual

Oneil
Oneil microFlash 4t User manual

Oneil
Oneil MICROFLASH 2TE User manual

Oneil
Oneil microFlash 8i User manual

Oneil
Oneil microFlash Series User manual

Oneil
Oneil VMP Series User manual

Oneil
Oneil RP-2000 User manual

Oneil
Oneil MICROFLASH 2TE User manual

Oneil
Oneil PrintPad 7900 User manual

Oneil
Oneil OC2 Owner's manual


