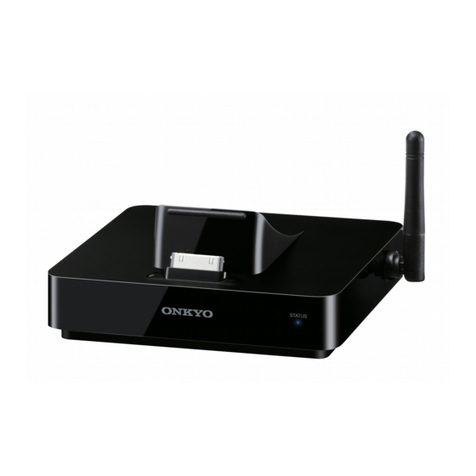
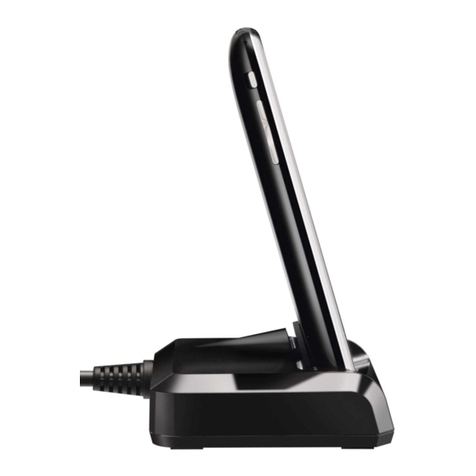
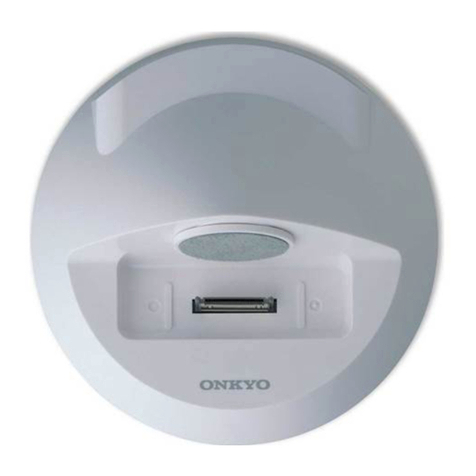
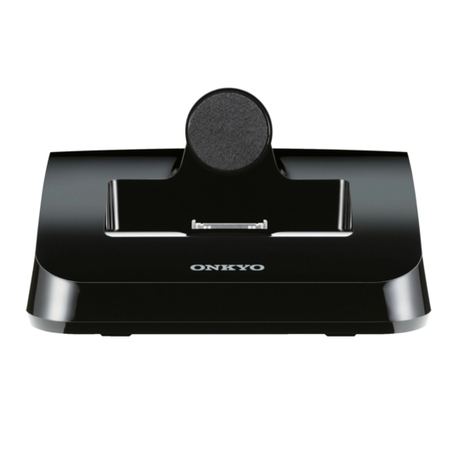
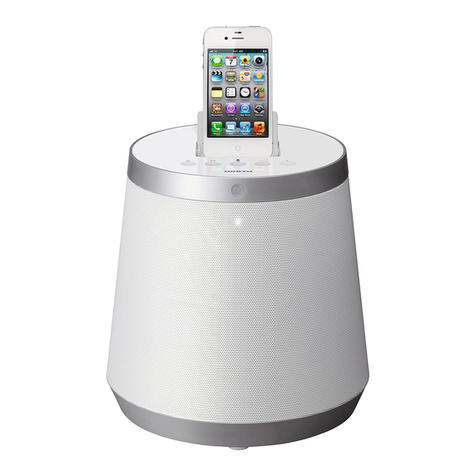
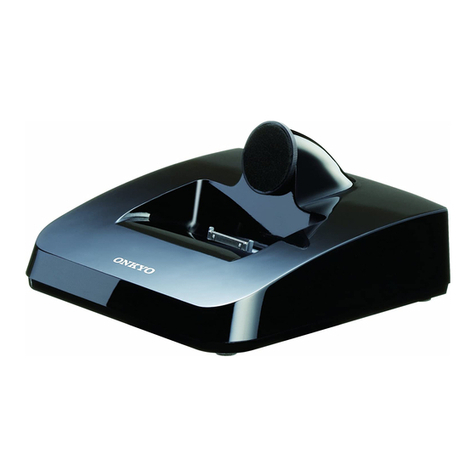
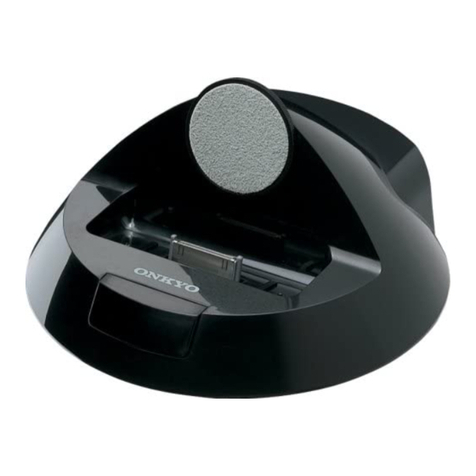
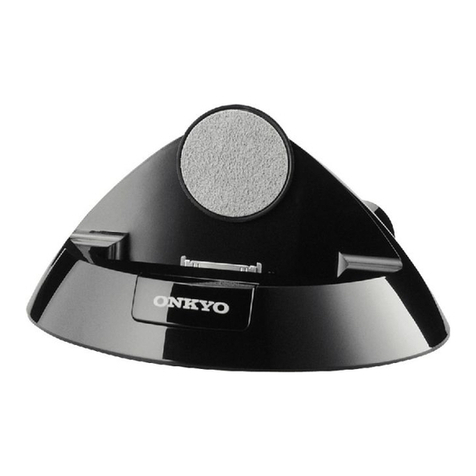
Onkyo DS-A1X User manual

D
e
S
v
N
l
ItFr
E
s
En
Remote Interactive Dock
Dock Remote Interactive
Dock Interactivo Remoto
Remote Interactive-Dock
Remote Interactive Dock
RI Dock voor interactieve
afstandsbediening
RI-docka för iPod-spelare
DS-A1X
Instruction Manual
Manuel d’instructions
Manual de Instrucciones
Manuale di istruzioni
Bedienungsanleitung
Gebruiksaanwijzing
Bruksanvisning
English
Français
Español
Italiano
Deutsch
Nederland
Svenska

En-2
Thank you for purchasing an Onkyo product. Please read this manual carefully before making any
connections or using this product. By following these instructions, you’ll get the best audio perfor-
mance and the most listening pleasure from your Onkyo product. Keep this manual for future ref-
erence.
Important Safety Instructions
1. Read these instructions.
2. Keep these instructions.
3. Heed all warnings.
4. Follow all instructions.
5. Do not use this apparatus near water.
6. Clean only with dry cloth.
7. Do not block any ventilation openings. Install in
accordance with the manufacturer’s instruc-
tions.
8. Do not install near any heat sources such as radi-
ators, heat registers, stoves, or other apparatus
(including amplifiers) that produce heat.
9. Do not defeat the safety purpose of the polar-
ized or grounding-type plug. A polarized plug
has two blades with one wider than the other. A
grounding type plug has two blades and a third
grounding prong. The wide blade or the third
prong are provided for your safety. If the pro-
vided plug does not fit into your outlet, consult
an electrician for replacement of the obsolete
outlet.
10. Protect the power cord from being walked on or
pinched particularly at plugs, convenience
receptacles, and the point where they exit from
the apparatus.
11. Only use attachments/accessories specified by
the manufacturer.
12. Unplug this apparatus during lightning storms
or when unused for long periods of time.
13. Refer all servicing to qualified service personnel.
Servicing is required when the apparatus has
been damaged in any way, such as power-sup-
ply cord or plug is damaged, liquid has been
spilled or objects have fallen into the apparatus,
the apparatus has been exposed to rain or mois-
ture, does not operate normally, or has been
dropped.
14. Damage Requiring Service
Unplug the apparatus from the wall outlet and
refer servicing to qualified service personnel
under the following conditions:
A. When the power-supply cord or plug is dam-
aged,
B. If liquid has been spilled, or objects have
fallen into the apparatus,
C. If the apparatus has been exposed to rain or
water,
D. If the apparatus does not operate normally
by following the operating instructions.
Adjust only those controls that are covered
by the operating instructions as an improper
adjustment of other controls may result in
damage and will often require extensive
work by a qualified technician to restore the
apparatus to its normal operation,
E. If the apparatus has been dropped or dam-
aged in any way, and
F. When the apparatus exhibits a distinct
change in performance this indicates a need
for service.
WARNING:
TO REDUCE THE RISK OF FIRE OR ELECTRIC SHOCK, DO NOT
EXPOSE THIS APPARATUS TO RAIN OR MOISTURE.
CAUTION:
TO REDUCE THE RISK OF ELECTRIC SHOCK, DO NOT REMOVE
COVER (OR BACK). NO USER-SERVICEABLE PARTS INSIDE.
REFER SERVICING TO QUALIFIED SERVICE PERSONNEL.
The lightning flash with arrowhead symbol, within an equilateral
triangle, is intended to alert the user to the presence of
uninsulated “dangerous voltage” within the product’s enclosure
that may be of sufficient magnitude to constitute a risk of electric
shock to persons.
The exclamation point within an equilateral triangle is intended
to alert the user to the presence of important operating and
maintenance (servicing) instructions in the literature
accompanying the appliance.
WARNING
RISK OF ELECTRIC SHOCK
DO NOT OPEN
RISQUE DE CHOC ELECTRIQUE
NE PAS
OUVRIR
AVIS

En-3
Precautions
1. Recording Copyright—Unless it’s for personal
use only, recording copyrighted material is ille-
gal without the permission of the copyright
holder.
2. Care—Occasionally you should dust the unit all
over with a soft cloth. For stubborn stains, use a
soft cloth dampened with a weak solution of
mild detergent and water. Dry the unit immedi-
ately afterwards with a clean cloth.Don’t use
abrasive cloths, thinners, alcohol, or other chem-
ical solvents, because they may damage the fin-
ish or remove the panel lettering.
3. NeverTouch this Unit with Wet Hands—Never
handle this unit or its power cord while your
hands are wet or damp. If water or any other liq-
uid gets inside this unit, have it checked by your
Onkyo dealer.
For some models
Before use,connect the appropriate AC plug adapter
to the AC adapter.
The type of plug adapter depends on the place of
purchase.
For European Models
Contents
Important Safety Instructions . . . . . . . . . . . . . . . . 2
Precautions . . . . . . . . . . . . . . . . . . . . . . . . . . . . . . . . . 3
Getting Started . . . . . . . . . . . . . . . . . . . . . . . . . . . . . . 4
About the RI Dock. . . . . . . . . . . . . . . . . . . . . . . . . . . . . . . . 4
Features . . . . . . . . . . . . . . . . . . . . . . . . . . . . . . . . . . . . . . . . . 4
Package Contents . . . . . . . . . . . . . . . . . . . . . . . . . . . . . . . . 4
Compatible iPods . . . . . . . . . . . . . . . . . . . . . . . . . . . . . . . . 4
Getting to Know the RI Dock. . . . . . . . . . . . . . . . . . . . . . 5
Hooking Up the RI Dock . . . . . . . . . . . . . . . . . . . . . . . . . . 6
Using the RI Dock . . . . . . . . . . . . . . . . . . . . . . . . . . . . 7
Putting Your iPod in the RI Dock . . . . . . . . . . . . . . . . . . 7
Function Overview . . . . . . . . . . . . . . . . . . . . . . . . . . . . . . . 7
Using Your Amp’s Remote Controller . . . . . . . . . . . . . 9
Troubleshooting. . . . . . . . . . . . . . . . . . . . . . . . . . . . 10
Specifications . . . . . . . . . . . . . . . . . . . . . . . . . . . . . . 11
Disconnect Connect
Notch
Declaration of Conformity
We, ONKYO EUROPE
ELECTRONICS GmbH
LIEGNITZERSTRASSE 6,
82194 GROEBENZELL,
GERMANY
GROEBENZELL, GERMANY
ONKYO EUROPE ELECTRONICS GmbH
K. MIYAGI
declare in own responsibility, that the ONKYO product
described in this instruction manual is in compliance with the
corresponding technical standards such as EN60065,
EN55013, EN55020 and EN61000-3-2, -3-3.

En-4
Getting Started
With the Onkyo RI Dock,you can easily play the
music stored on your Apple*iPod*through
your Onkyo audio system and enjoy great
sound, and watch iPod slideshows and videos
on your TV.You can use your Onkyo amp’s
remote controller to operate your iPod.
, which stands for Remote Interactive,is an
exclusive Onkyo control system that allows all
-capable Onkyo audio components to be
turned on or off together,and your amp to turn
on automatically and select the appropriate
input source when playback is started on a
source component.It also allows you to control
your iPod with your amp’s remote controller.
In this manual, the DS-A1X Remote Interactive
Dock is referred to as the“RI Dock.”
❑Play your iPod music through your Onkyo
audio system and enjoy great sound
❑Control your iPod with your Onkyo
remote controller
❑Watch iPod videos and slideshows on your
TV
❑Supports all iPods with an iPod connector,
except 3rd generation iPods
❑Charges your iPod’s battery while you
enjoy your music
For the latest information on the RI Dock, see
the Onkyo Web site at: www.onkyo.com
* iPod is a trademark of Apple Inc., registered in the U.S.and
other countries.
Make sure you have the following items:
■Made for:
•5th Generation iPod (iPod with video)
•iPod photo (iPod with color display)
•4th Generation iPod
•2nd Generation iPod nano
•1st Generation iPod nano
•iPod mini
About the RI Dock
Features
Package Contents
Compatible iPods
•DS-A1X Remote
Interactive Dock
•AC adapter (1.4 m,
4.59 feet)
•AV cable (1.5 m,
4.92 feet)
• cable (1.8 m,
5.90 feet)
•Instruction manual
Adapter varies from
country to country.
Note:
•3rd generation iPods are not sup-
ported.
•Before using the RI Dock, update your
iPod with the latest software,available
from the Apple Web site at:
www.apple.com

En-5
Getting Started—Continued
Getting to Know the RI Dock
CD-R
HDD/DOCK
TAPE
TAPE
MD
TAPE
DOCK
MD
CD-R
HDD/DOCK
MD
TAPE
MD
CDR
MD CD-R
TAPE HDD/DOCK
CDR
HDD/DOCK
or
MD CD-R
TAPE HDD/DOCK
HDD
iPod slot
iPod connectorPower
indicator
RI MODE switch
jack
VIDEO OUT jack
DC IN 5V 1A jack
AUDIO OUT L/R jacks
Set it to match your amp’s
input display (see below).
Amp input
display
RI MODE switch
See your amp’s instruction manual for details on changing the input
display. On some amps,you press and hold the [TAPE] button to
change the input display from TAPE to MD, CDR, HDD or Dock.
To control your iPod with your amp’s remote
controller,select the matching remote control
mode.
Amp remote
controller’s mode
iPod adapter

En-6
Getting Started—Continued
Depending on the Onkyo amp that you’re
using, choose connection method Aor B.
A: Connect the RI Dock’s AUDIO OUT L/R jacks
and VIDEO OUT jack to an RI Dock-compati-
ble input on your Onkyo amp. (You might
need to change the input display to“HDD”
or“DOCK.”)
B: Connect the RI Dock’s AUDIO OUT L/R jacks
to the TAPE (MD,CDR) IN jacks on your
Onkyo amp.And connect the RI Dock’s
VIDEO OUT jack directly to your TV.
See your amp’s instruction manual for details.
1. Using the supplied AV cable, connect the RI
Dock’s AUDIO OUT L/R jacks to a suitable
audio input on your amp. And connect the
RI Dock’s VIDEO OUT jack to a video input
on your Onkyo AV receiver (A) or TV (B).
The input you use depends on the type of
Onkyo amp you have.See your amp’s
instruction manual for details.
2. Using the supplied cable,connect the
RI Dock’s jack to an jack on one of
the Onkyo components in your system.
3. Connect the supplied AC adapter to the RI
Dock’s DC IN jack.
■If you’ve connected the RI Dock’s AUDIO
OUT L/R jacks to your amp’s TAPE (MD,
CDR) IN jacks and also want to connect
the RI Dock’s VIDEO OUT jack to your amp
Connect the RI Dock’s VIDEO OUT jack to an
unused video input on your amp.
When you want to watch an iPod slideshow or
video, select the video input source first, and
then select the TAPE (MD, CDR) input source.
Your AV receiver will output the audio being
fed to the TAPE (MD, CDR) input,and because
the video source doesn’t change when the
TAPE input source is selected, it’ll continue to
output the video being fed to the video input.
■What to do if you already have a compo-
nent connected to your amp’s TAPE input
or RI Dock-compatible input
Connect the RI Dock to an unused AV input on
your amp. However, you will not be able to use
any of the functions.
Hooking Up the RI Dock
L
R
AUDIO
INPUT
VIDEO
INPUT
5
VIDEO
INPUT
AC adapter
Wall outlet
TV
-capable amp
Supplied AV cable
Supplied
cable
White
Red
Yellow
White
Yellow
Red
Yellow
or
Note: When the AC adapter is unplugged or
not connected to the RI Dock, the RI Dock
will output no sound or video, functions
will not work,and your iPod’s battery will not
be charged.
Caution: Connect the supplied cable to
only jacks. Do not connect headphones
to the jack,as it will damage your equip-
ment.

En-7
Using the RI Dock
1. Plug in the AC adapter.
2. Turn on your amp,and select the appropri-
ate inputs on your amp.
3. Align your iPod with the RI Dock’s iPod slot,
and carefully place your iPod in the slot, as
shown.
■Adjusting the iPod Adapter
The iPod adapter needs to be adjusted to
match your particular iPod. If there’s a gap
between the back of your iPod and the adapter,
turn the adapter counterclockwise to close the
gap.Turning the adapter counterclockwise
moves it forward.Turning it clockwise moves it
backward.
■Basic Operation
•System On Function
When you turn on your amp, the iPod turns on
as well.With some amps, you may need to
press the [ON] button on your amp’s remote
controller’s twice to turn on the other compo-
nents in your system.
•System Off Function
When you turn off your amp, the iPod turns off
as well.
•Auto Power On Function*
If you start iPod playback while your amp is on
Standby, your amp will automatically turn on
and select your iPod as the input source.Then,
your iPod will start playback.
•Direct Change Function*
If you start iPod playback while listening to
another input source, your amp will automati-
cally select your iPod as the input source.
•Timer Play
You can use your amp’s Timer function to turn
on your amp and iPod and start playback at a
specified time.
•Linked Dimmer Operation
When you use your amp’s Dimmer function to
change its display’s brightness, the brightness
of the RI Dock’s Power indicator will change as
well.
•Using Your Amp’s Remote Controller
You can use your amp’s remote controller to
control basic iPod functions (see page 9).
Putting Your iPod in the RI Dock
Remove your
iPod’s case
Forward
Backward
Notes:
•To prevent iPod connector damage,don’t
twist your iPod when inserting or remov-
ing it, and be careful not to knock over
the RI Dock while your iPod is inserted.
•Don’t use the RI Dock with any other iPod
accessories, such as FM transmitters and
microphones,because they may cause a
malfunction.
Function Overview
*If you use your iPod’s controls to start an iPod slideshow or
video,these functions will not work, so use the remote con-
troller instead.
Note:
•Your amp may take several seconds to
startup, so you might not hear the first
few seconds of the first song.

En-8
Using the RI Dock—Continued
■Using Your iPod’s Alarm Clock
You can use your iPod’s Alarm Clock function to
automatically turn on your iPod and amp at a
specified time.Your amp’s input source will
automatically be set to the input to which your
iPod is connected.
■Charging Your iPod’s Battery
The RI Dock charges your iPod’s battery while
your iPod is in the RI Dock.
Operating Notes:
•The RI Dock must be connected to your
amp with both an cable and an audio
cable to use the functions.
•If your amp doesn’t support the System
On, System Off, Auto Power On, and
Direct Change functions, you’ll need to
turn your amp on and off and select the
input source manually.
•Before you select another input source,
stop iPod playback to prevent your amp
from selecting the iPod input source by
mistake.
•If any accessories are connected to your
iPod, your amp may not be able to select
the input source properly.
•While your iPod is in the RI Dock, its vol-
ume control has no effect. If you adjust
your iPod’s volume control while it’s in the
RI Dock, make sure it’s not set too high
before you reconnect your headphones.
Notes:
•To use this function, your iPod must be in
the RI Dock,and the RI Dock must be con-
nected to your amp with both an
cable and an audio cable.
•When you use this function,be sure to set
your amp’s volume control to a suitable
level.
•Your amp may take several seconds to
startup, so you might not hear the first
few seconds of the first song.
Notes:
•To charge your iPod battery, the AC
adapter must be plugged into a suitable
wall outlet and connected to the RI
Dock’s DC IN jack.
•See your iPod’s instruction manual for
more information on battery charging.

En-9
Using the RI Dock—Continued
The following table shows which buttons on your amp’s remote controller you can use to control
your iPod while it’s in the RI Dock. Be sure to select the appropriate remote mode first,and point
your remote controller at your amp.Note that some buttons may be labelled differently, and some
remote controllers may not have certain buttons.
*To select the next or previous photo in an iPod photo slideshow, use the controls on your iPod photo.
The following functions can be used with some Onkyo amps.
*Depending on your amp, some buttons may not work as expected.
Using Your Amp’s Remote Controller
iPod function Remote controller button to use Description
TAPE mode MD mode CDR mode HDD mode
Turn on/off [STANDBY], [ON] — iPod is turned on and off.
Play Play [ ] Starts playback on the iPod. If the iPod is not
already on, it’s turned on automatically.
Pause Pause [ ], Stop [ ] Pause [ ] Pauses iPod playback.
Next song [],
[] Next [ ] Selects the next iPod song.
Previous song [],
[] Previous [ ] Restarts the current iPod song. Press it twice to
select the previous song.
Fast forward —Fast Forward [ ] Press and hold to fast forward the iPod.
Rewind —Rewind [ ] Press and hold to rewind the iPod.
iPod function Remote controller button to use Description
TAPE mode MD mode CDR mode HDD mode
Shuffle [DOLBY
MODE] [RANDOM], [PLAYMODE], [SHUFFLE] Sets the iPod’s Shuffle function to: Songs,
Albums, or Off.
Repeat [REVERSE
MODE] [REPEAT] Sets the iPod’s Repeat function to: One,All, or
Off.
Backlight REC [ ] [DISPLAY], [SCROLL] The iPod’s backlight comes on for 30 seconds.
Playlist/Album
mode
Reverse
Play [ ]
[ENTER], [PROGRAM],
[MEMORY] —
To use the next four functions with modes
other than HDD, first select Playlist/Album
mode by using one of these buttons, and then
press the listed button while the RI Dock’s
Power indicator is flashing (about 5 seconds).
Next playlist Fast Forward [ ] [PLAYLIST
UP]
Selects the next playlist on the iPod.
Select Playlist/Album mode first (see above).
Previous
playlist Rewind [ ] [PLAYLIST
DOWN]
Selects the previous playlist on the iPod.
Select Playlist/Album mode first (see above).
Next album Next [ ] [ALBUM
UP]
Selects the next album on the iPod.
Select Playlist/Album mode first (see above).
Previous
album Previous [ ] [ALBUM
DOWN]
Selects the previous album on the iPod.
Select Playlist/Album mode first (see above).

En-10
Troubleshooting
■There’s no sound
•Make sure your iPod is actually playing.
•Make sure your iPod is inserted properly in the RI
Dock.
•Make sure the RI Dock is connected to the correct
input jacks on your amp. Do not connect it to any
output jacks.
•Make sure your amp is turned on,the correct input
source is selected, and the volume is turned up.
•Make sure the plugs are pushed in all the way.
•Make sure the AC adapter is connected to a suit-
able wall outlet and connected to the RI Dock.
•Try resetting your iPod.
■There’s no video
•Make sure that your iPod’s TV OUT setting is set to
On.
•Make sure the correct input is selected on your TV
or amp.
•Some versions of the iPod do not output video.
■Your amp’s remote controller doesn’t con-
trol your iPod
•3rd generation iPods are not supported.
•Make sure your iPod is properly inserted in the RI
Dock. If your iPod is in a case, it may not connect
properly to the RI Dock. Always remove your iPod
from the case before inserting it into the RI Dock.
•The iPod cannot be operated while it’s displaying
the Apple logo.
•If your amp’s remote controller has remote mode
buttons,make sure you’ve selected the right
mode.
•Check the RI Dock’s RI MODE switch setting.
•When you use your amp’s remote controller,point
it toward your amp.
•The RI Dock must be connected to your amp with
both an cable and an audio cable.
•TheTAPE IN on some amps can be set to TAPE,MD,
or CDR. Make sure the RI Dock’s RI MODE switch
setting and the remote control mode match this
setting.See your amp’s manual for more informa-
tion.
If you still can’t control your iPod,start playback by
pressing your iPod’s Play button.Remote opera-
tion should then be possible.
•Make sure your amp’s remote controller is set to
the correct remote control ID.
■Your amp unexpectedly selects your iPod
as the input source
•Always pause iPod playback when listening to
another component that’s connected to your amp.
If playback is not paused, the Direct Change func-
tion may select your iPod as the input source by
mistake when one track ends and another starts
playing.
Caution: If you use this product under
direct sunlight, fluorescent light,or germi-
cidal lamp,ultraviolet or another elements in
the light may change the product exterior
color.

En-11
Specifications
Power supply: AC adapter (5 V DC)
Power consumption
(iPod not inserted): 0.5 W
Weight: 0.48 lbs.(220 g)
Dimensions (W x H x D):
4-7/16 x 2-3/8 x 4-7/16 inches
112 x 60 x 112 mm
Connectors: VIDEO OUT,AUDIO OUT L/R,
jack
Specifications and features are subject to change
without notice.
In catalogs and on packaging,the letter at the end of
the product name indicates the color. Specifications
and operation are the same regardless of color.
•The operating instructions in this manual apply
to the iPod as of June 2007,and may change with
future upgrades to the iPod software.
•The AC adapter supplied with the DS-A1X is
designed exclusively for use with the DS-A1X.Do
not use it with another device.Likewise,do not
use any other AC adapter with the DS-A1X,
including those supplied with other RI Dock
models.Doing so may damage the RI Dock.
•If there’s any noise when listening to an FM or AM
radio station on your tuner or receiver, try mov-
ing its antenna away from the RI Dock, iPod, and
AC adapter’s cable.In addition, don’t wrap the
AC adapter’s cable around any other cables.

Fr-2
Nous vous remercions d’avoir opté pour un produit Onkyo.Veuillez lire ce manuel d’instructions
attentivement avant d’effectuer la moindre connexion et d’utiliser ce produit. En suivant les ins-
tructions données,vous profiterez au mieux des possibilités de ce produit Onkyo et de tout le plai-
sir qu’il peut procurer. Conservez ce manuel afin de pouvoir le consulter ultérieurement.
Remarques importantes pour votre sécurité
1. Veuillez lire ces instructions.
2. Veuillez conserver ces instructions.
3. Respectez tous les avertissements.
4. Suivez toutes les instructions.
5. Ne vous servez pas de cet appareil à proximité
d’eau.
6. Essuyez le boîtier avec un chiffon sec unique-
ment.
7. Ne bloquez pas les orifices d’aération. Installez
cet appareil en suivant les instructions du fabri-
cant.
8. Ne le placez pas à proximité de sources de cha-
leur telles que radiateurs, chauffage, poêles ou
autre dispositif (y compris les amplificateurs)
générateur de chaleur.
9. N’essayez pas de circonvenir le dispositif de
sécurité que représente une fiche polarisée ou
une fiche avec mise à la terre. Une fiche polari-
sée dispose de deux lames dont l’une est plus
large que l’autre. Une fiche avec terre est munie
de deux lames ainsi que d’une broche de mise à
la terre. La lame la plus large ou la broche assu-
rent votre sécurité. Si la fiche fournie ne peut
être insérée dans la prise murale, demandez à
un électricien de remplacer la prise.
10. Protégez le cordon d’alimentation en évitant
qu’on ne marche pas dessus et qu’il ne soit plié
(notamment au niveau des fiches, des cache-
câbles et de la sortie de l’appareil).
11. Servez-vous exclusivement des fixations/acces-
soires préconisés par le fabricant.
12. Débranchez l’appareil durant un orage ou
lorsqu’il reste inutilisé longtemps.
13. Veuillez faire appel à un technicien qualifié pour
l’entretien. Un entretien est indispensable si
l’appareil a été endommagé d’une façon ou
d’une autre: cordon d’alimentation ou fiche
endommagée, liquide renversé ou chute de
petits objets dans l’appareil,exposition à la pluie
ou à une humidité excessive, fonctionnement
anormal ou chute de l’appareil.
14. Dommages nécessitant réparation
Débranchez l’appareil du secteur et confiez-le à
un technicien qualifié lorsque:
A. Le cordon d’alimentation ou sa fiche sont
endommagés.
B. Des objets sont tombés dans l’appareil ou du
liquide a été renversé et a pénétré ce dernier.
C. L’appareil a été exposé à la pluie.
D. L’appareil ne semble pas fonctionner norma-
lement lorsque vous l’utilisez en respectant
les instructions données. N’effectuez que les
réglages préconisés dans le manuel car un
mauvais réglage d’autres commandes risque
d’endommager l’appareil et nécessitera un
long travail de remise en état par un techni-
cien qualifié.
E. L’appareil est tombé ou son boîtier est
endommagé.
F. Ses performances semblent affectées.
ATTENTION:
AFIN DE REDUIRE LES RISQUES D’INCENDIE ET DE DECHAR-
GE ELECTRIQUE, NE PAS EXPOSER CET APPAREIL A LA PLUIE
OU A L’HUMIDITE.
DANGER:
AFIN D’EVITER TOUT DANGER DE DECHARGE ELECTRIQUE,
NE PAS OUVRIR LE BOITIER (OU L’ARRIERE) DE L’APPAREIL.
CONFIER TOUT TRAVAIL D’ENTRETIEN OU DE REPARATION
A UN TECHNICIEN QUALIFIE.
Un symbole d’éclair fléché dans un triangle équilatéral est
destiné à attirer l’attention de l’utilisateur sur le fait que
certains organes internes non-isolés de l’appareil sont
traversés par un courant électrique assez dangereux pour
constituer un resque d’électrocution.
Un point d’exclamation dans un triangle équilatéral est des-
tiné à attirer l’attention de l’utilisateur sur des instructions
importantes relatives à l’entretien et à l’utilisation du pro-
duit.
WARNING
RISK OF ELECTRIC SHOCK
DO NOT OPEN
RISQUE DE CHOC ELECTRIQUE
NE PAS
OUVRIR
AVIS
Fr-3
Précautions
1. Enregistrement et droits d’auteur—Outre
pour l’utilisation privée,tout enregistrement
d’œuvres protégées par des droits d’auteur est
interdit sans l’accord préalable du détenteur de
ces droits.
2. Entretien—Essuyez régulièrement le boîtier de
l’appareil avec un chiffon doux et sec.Vous pou-
vez éliminer les taches rebelles avec un chiffon
légèrement imbibé d’eau et de détergent doux.
Essuyez ensuite l’appareil avec un chiffon pro-
pre et sec.N’utilisez jamais de chiffons rêches,
de dissolvant,d’alcool ou d’autres solvants chi-
miques car ceux-ci pourraient endommager la
finition ou faire disparaître la sérigraphie du boî-
tier.
3. Ne touchez jamais cet appareil avec des
mains mouillées—Ne manipulez jamais cet
appareil ou son cordon d’alimentation avec des
mains mouillées ou humides.Si de l’eau ou tout
autre liquide pénètre à l’intérieur de l’appareil,
faites-le vérifier par votre revendeur Onkyo.
Modèle canadien
REMARQUE: CET APPAREIL NUMÉRIQUE DE LA
CLASSE B EST CONFORME À LA NORME NMB-003 DU
CANADA.
Modèles pour l’Europe
Sommaire
Remarques importantes pour votre sécurité . . . 2
Précautions . . . . . . . . . . . . . . . . . . . . . . . . . . . . . . . . . 3
Prise en main . . . . . . . . . . . . . . . . . . . . . . . . . . . . . . . . 4
A propos du RI Dock. . . . . . . . . . . . . . . . . . . . . . . . . . . . . . 4
Fonctions . . . . . . . . . . . . . . . . . . . . . . . . . . . . . . . . . . . . . . . . 4
Contenu de l’emballage . . . . . . . . . . . . . . . . . . . . . . . . . . 4
iPods compatibles. . . . . . . . . . . . . . . . . . . . . . . . . . . . . . . . 4
Tour d’horizon du RI Dock . . . . . . . . . . . . . . . . . . . . . . . . 5
Schémas de connexions du RI Dock. . . . . . . . . . . . . . . 6
Utiliser le RI Dock . . . . . . . . . . . . . . . . . . . . . . . . . . . . 7
Placer l’iPod dans le RI Dock . . . . . . . . . . . . . . . . . . . . . . 7
Survol des fonctions. . . . . . . . . . . . . . . . . . . . . . . . . . . . . . 7
Utiliser la télécommande de l’ampli . . . . . . . . . . . . . . . 9
En cas de problème . . . . . . . . . . . . . . . . . . . . . . . . . 10
Fiche technique. . . . . . . . . . . . . . . . . . . . . . . . . . . . . 11
Pour certains modèles
Avant toute utilisation, branchez l’adaptateur de
prise adéquat à l’adaptateur secteur.
L’adaptateur de prise varie selon le lieu d’acquisition.
Déclaration de Conformité
Nous, ONKYO EUROPE
ELECTRONICS GmbH
LIEGNITZERSTRASSE 6,
82194 GROEBENZELL
ALLEMAGNE
GROEBENZELL, ALLEMAGNE
ONKYO EUROPE ELECTRONICS GmbH
garantissons que le produit ONKYO décrit dans ce manuel est
conforme aux normes techniques: EN60065, EN55013,
EN55020 et EN61000-3-2, -3-3.
K. MIYAGI
Débrancher Brancher
Encoche

Fr-4
Prise en main
Le RI Dock Onkyo vous permet d’écouter facile-
ment la musique de votre iPod*Apple*avec
votre chaîne audio Onkyo afin de bénéficier
d’une sonorité extraordinaire et de visionner
les diaporamas et les vidéos de votre iPod sur
votre téléviseur.Vous pouvez utiliser la
télécommande de l’ampli Onkyo pour piloter
votre iPod.
(“Remote Interactive”) est un système de
commande exclusif d’Onkyo grâce auquel tous
les composants audio Onkyo compatibles
peuvent être activés ou coupés simultané-
ment; l’ampli est automatiquement activé et
sélectionne la source d’entrée adéquate lors-
que vous lancez la lecture sur un des compo-
sants sources.Il vous permet aussi de piloter
l’iPod avec la télécommande de votre ampli.
Dans ce manuel, le dock DS-A1X Remote Inte-
ractive est appelé“RI Dock”.
❑Ecoutez la musique de votre iPod en béné-
ficiant du son exceptionnel de votre
chaîne audio Onkyo
❑Pilotage de l’iPod avec votre
télécommande Onkyo
❑Regardez les vidéos et diaporamas de
l’iPod sur votre téléviseur
❑Compatible avec tous les iPods dotés d’un
connecteur iPod, à l’exception des iPods
de 3ème génération
❑Recharge la batterie de l’iPod pendant
que vous écoutez la musique
Pour en savoir plus sur le RI Dock, veuillez con-
sulter le site internet Onkyo: www.onkyo.com
* iPod est une marque commerciale d’Apple Inc.,déposée aux
Etats-Unis et dans d’autres pays.
Vérifiez si vous avez bien reçu les éléments sui-
vants:
■Conçu pour:
•iPod de 5ème génération(iPod avec vidéo)
•iPod photo (iPod avec écran couleur)
•iPod de 4ème génération
•iPod nano de 2ème génération
•iPod nano de 1ère génération
•iPod mini
A propos du RI Dock
Fonctions
Contenu de l’emballage
iPods compatibles
•Dock Remote Interac-
tive DS-A1X
• Adaptateur (1,4 m)
• Câble AV (1,5 m) • Câble (1,8 m)
•Manuel d’instruc-
tions
Le type d’adaptateur
dépend du pays.
Remarque:
•Les iPods de 3ème génération ne sont
pas compatibles.
•Avant d’utiliser le RI Dock, mettez votre
iPod à jour avec la dernière version du
système,disponible sur le site internet
d’Apple: www.apple.com

Fr-5
Prise en main—suite
Tour d’horizon du RI Dock
CD-R
HDD/DOCK
TAPE
TAPE
MD
TAPE
DOCK
MD
CD-R
HDD/DOCK
MD
TAPE
MD
CDR
MD CD-R
TAPE HDD/DOCK
CDR
HDD/DOCK
or
MD CD-R
TAPE HDD/DOCK
HDD
Connecteur de iPodTémoin de mise
sous tension
Sélecteur RI MODE
Prise
Prise VIDEO OUT
Prise DC IN 5V 1A
Prises AUDIO OUT L/R
A régler en fonction de l’affichage
d’entrée de l’ampli (voyez ci-dessous).
Affichage de source
d’entrée de l’ampli
Sélecteur RI MODE
Voyez le manuel d’instructions de votre ampli pour savoir comment
changer l’affichage d’entrée.Sur certains amplis,vous pouvez main-
tenir le bouton [TAPE] enfoncé pour faire passer la source d’entrée
de TAPE à MD,CDR, HDD ou DOCK.
Pour piloter l’iPod avec la télécommande
de votre ampli,sélectionnez le mode de
télécommande correspondant.
Mode de la
télécommande de l’ampli
Adaptateur de l’iPod
ou
Logement pour iPod

Fr-6
Prise en main—suite
Selon l’ampli Onkyo que vous utilisez, choisis-
sez la méthode de connexion Aou B.
A: Branchez les prises AUDIO OUT L/R du RI
Dock et la prise VIDEO OUT à une entrée
compatible RI Dock de votre ampli Onkyo.
(Vous devrez peut-être régler l’assignation
des entrées sur“HDD”ou“DOCK”).
B: Reliez les prises AUDIO OUT L/R du RI Dock
aux prises TAPE (MD,CDR) IN de l’ampli
Onkyo.Reliez la prise VIDEO OUT du RI Dock
directement au téléviseur.
Pour en savoir plus,voyez le mode d’emploi de
l’ampli.
1. Utilisez le câble AV pour brancher les prises
AUDIO OUT L/R du RI Dock à une entrée
audio adéquate de l’ampli. Branchez
ensuite la prise VIDEO OUT du RI Dock à une
entrée vidéo de l’ampli-tuner AV Onkyo (A)
ou du téléviseur (B).
L’entrée varie en fonction du type d’ampli
Onkyo.Pour en savoir plus, voyez le manuel
d’instructions de l’ampli.
2. Branchez la prise du RI Dock à la prise
d’un des composants Onkyo du sys-
tème avec le câble .
3. Branchez l’adaptateur secteur à prise DC IN
du RI Dock.
■Si, après avoir branché les prises AUDIO
OUT L/R du RI Dock aux prises TAPE (MD,
CDR) IN de votre ampli, vous souhaitez
également brancher la prise VIDEO OUT
du RI Dock à l’ampli
Branchez la prise VIDEO OUT du RI Dock à une
entrée vidéo libre de votre ampli.
Pour regarder un diaporama ou une vidéo de
l’iPod, sélectionnez d’abord la source d’entrée
vidéo puis la source d’entrée TAPE (MD, CDR).
L’ampli-tuner AV reproduit les données audio
arrivant à la prise TAPE (MD, CDR) et, comme la
source vidéo ne change pas quand vous sélec-
tionnez la source audioTAPE,l’ampli-tuner con-
tinue à produire les données de la source vidéo.
■Si vous avez déjà branché un appareil à
l’entrée compatible RI Dock de l’ampli
Branchez le RI Dock à une prise AV disponible
de l’ampli.Toutefois,vous ne serez pas en
mesure d’utiliser les fonctions .
Schémas de connexions du RI Dock
L
R
AUDIO
INPUT
VIDEO
INPUT
5
VIDEO
INPUT
Adaptateur
secteur
Prise
secteur
Téléviseur
Ampli compatible
Câble AV fourni
Câble
fourni
Blanc
Rouge
Jaune
Blanc
Rouge
Jaune
ou
Jaune
Remarque: Quand l’adaptateur secteur est
débranché ou déconnecté du RI Dock, le RI
Dock ne produit ni son ni vidéo,les fonctions
ne sont pas disponibles et la batterie de
l’iPod n’est pas chargée.
Prudence: Branchez le câble fourni aux
prises exclusivement.Ne branchez pas
de casque à la prise car cela endomma-
gerait votre installation.

Fr-7
Utiliser le RI Dock
1. Branchez l’adaptateur secteur.
2. Mettez l’amplificateur sous tension et sélec-
tionnez les entrées adéquates.
3. Alignez l’iPod avec son logement sur le RI
Dock et insérez prudemment l’iPod dans le
logement.
■Régler l’adaptateur de l’iPod
L’adaptateur pour iPod doit être réglé en fonc-
tion du modèle de votre iPod.S’il y a un espace
entre l’iPod et l’adaptateur, tournez l’adapta-
teur dans le sens inverse des aiguilles d’une
montre pour fermer l’espace.Tournez l’adapta-
teur vers la gauche pour l’avancer et vers la
droite pour le reculer.
■Opérations de base
•Activation du système
Lorsque vous allumez l’ampli, l’iPod s’allume
également. Avec certains amplis, il faut
appuyer deux fois sur le bouton [ON] de la
télécommande pour allumer les autres compo-
sants du système.
•Coupure du système
Lorsque vous coupez l’ampli, l’iPod est éga-
lement coupé.
•Activation automatique*
Si vous lancez la lecture sur l’iPod alors que
l’ampli est en mode de veille (Standby),ce der-
nier est automatiquement activé et choisit
l’iPod comme source d’entrée. L’iPod lance
alors la lecture.
•Changement automatique*
Si vous lancez la lecture sur l’iPod alors que
vous écoutiez une autre source, l’ampli
sélectionne automatiquement l’iPod comme
source d’entrée.
•Lecture programmée
Vous pouvez programmer la fonction Timer de
l’ampli pour activer automatiquement l’ampli
et l’iPod et lancer la lecture à l’heure program-
mée.
•Luminosité liée
Lorsque vous utilisez la fonction Dimmer de
l’ampli pour changer la luminosité de l’écran,la
luminosité du témoin de mise sous tension du
RI Dock change aussi.
•Utiliser la télécommande de l’ampli
Vous pouvez utiliser la télécommande de
l’ampli pour piloter les fonctions de base de
l’iPod (voyez page 9).
Placer l’iPod dans le RI Dock
Retirez l’étui
de l’iPod
Avance
Recul
Remarques:
•Pour éviter d’endommager le connecteur
de iPod, ne tournez pas l’iPod lors de son
insertion ou de son extraction et veillez à
ne pas renverser le RI Dock quand l’iPod
s’y trouve.
•N’utilisez pas le RI Dock avec d’autres
accessoires pour iPod tels que transmet-
teurs FM et microphones car cela risque-
rait d’entraîner des dysfonctionnements.
Survol des fonctions
* Si vous utilisez les commandes de l’iPod pour lancer un dia-
porama ou une vidéo de l’iPod, cela ne fonctionnera pas: uti-
lisez la télécommande.
Remarque: L’ampli peut mettre plusieurs
secondes à démarrer: vous risquez donc de
ne pas entendre les premières secondes du
premier morceau.

Fr-8
Utiliser le RI Dock—suite
■Utiliser l’alarme de l’iPod
Vous pouvez utiliser la fonction“Alarme”de
l’iPod pour activer automatiquement l’iPod et
l’ampli à une heure donnée.L’ampli sélec-
tionnera automatiquement l’entrée à laquelle
l’iPod est branché.
■Charger la batterie de l’iPod
Le RI Dock recharge la batterie de l’iPod tant
que l’iPod est sur le RI Dock.
Remarques concernant l’utilisation:
•Le RI Dock doit être branché à l’ampli
avec un câble et un câble audio pour
bénéficier des fonctions .
•Si votre ampli ne reconnaît pas les fonc-
tions Activation/Coupure du système,
Activation automatique et Changement
automatique, il faut activer/couper
l’ampli et sélectionner la source d’entrée
manuellement.
•Avant de changer de source d’entrée,
arrêtez la lecture sur l’iPod pour éviter
que l’ampli ne sélectionne l’iPod par
erreur.
•Si vous branchez des accessoires à votre
iPod, l’ampli risque de ne pas pouvoir
sélectionner la source convenablement.
•Tant que l’iPod est dans le RI Dock, sa
commande de volume n’a aucun effet. Si
vous réglez la commande de volume de
l’iPod alors qu’il se trouve dans le RI Dock,
vérifiez que le réglage n’est pas trop élevé
avant d’utiliser les écouteurs.
Remarques:
•Pour bénéficier de cette fonction, l’iPod
doit être dans le RI Dock et le RI Dock doit
être branché à l’ampli avec un câble
et un câble audio.
•Quand vous utilisez cette fonction,
n’oubliez pas de régler le volume de
l’ampli à un niveau adéquat.
•L’ampli peut mettre plusieurs secondes à
démarrer: vous risquez donc de ne pas
entendre les premières secondes du pre-
mier morceau.
Remarques:
•Pour recharger la batterie de l’iPod,
l’adaptateur secteur doit être branché à
une prise murale adéquate et à la prise
DC IN du RI Dock.
•Pour en savoir plus sur le chargement de
la batterie,voyez le manuel d’instructions
de l’iPod.

Fr-9
Utiliser le RI Dock—suite
Le tableau suivant montre les boutons que vous pouvez utiliser sur la télécommande de l’ampli pour
piloter les fonctions de l’iPod quand il se trouve dans le RI Dock. Choisissez le bon mode de
télécommande et pointez la télécommande vers l’ampli. Notez que certains boutons peuvent avoir
une appellation différente et que des télécommandes peuvent être dépourvues de quelques boutons.
*Pour choisir la photo suivante ou précédente d’un diaporama iPod photo, utilisez les commandes de l’iPod photo.
Les fonctions suivantes sont disponibles avec certains amplis Onkyo.
*Certains boutons peuvent ne pas fonctionner de la façon décrite selon l’ampli que vous possédez.
Utiliser la télécommande de l’ampli
Fonction iPod Bouton de télécommande à utiliser Description
Mode TAPE Mode MD Mode CDR Mode HDD
Activer/couper
[STANDBY], [ON] — L’iPod est activé/coupé.
Lecture Lecture [ ] Lance la lecture sur l’iPod. Si l’iPod n’est pas encore
activé, il l’est automatiquement.
Pause Pause [ ], Stop [ ] Pause [ ] Interrompt la lecture de l’iPod.
Morceau sui-
vant
[],
[] Suivant [ ] Sélectionne le morceau suivant sur l’iPod.
Morceau pré-
cédent
[],
[] Précédent [ ] Recommence le morceau en cours de l’iPod.Appuyez
deux fois pour sélectionner le morceau précédent.
Avance rapide —Avance rapide [ ] Maintenez enfoncé pour une avance rapide sur l’iPod.
Rembobiner —Rembobiner [ ] Maintenez enfoncé pour revenir en arrière sur l’iPod.
Fonction iPod Bouton de télécommande à utiliser Description
Mode TAPE Mode MD Mode CDR Mode HDD
Aléatoire [DOLBY
MODE] [RANDOM], [PLAYMODE], [SHUFFLE] Règle la fonction“Aléatoire”de l’iPod sur: Morceaux,
Albums ou Non.
Répéter [REVERSE
MODE] [REPEAT] Règle la fonction“Répéter”de l’iPod sur: Un,Tous ou
Non.
Rétro-éclairage REC [ ] [DISPLAY], [SCROLL] L’iPod est rétroéclairé durant 30 secondes.
Mode Liste de
lecture/Album
Lecture
inversée
[]
[ENTER], [PROGRAM],
[MEMORY] —
Pour utiliser les quatre fonctions suivantes avec tous
les modes sauf“HDD”, sélectionnez d’abord le mode
“Liste de lecture/Album”avec un de ces boutons,
puis appuyez sur le bouton affiché,tant que le
témoin d’activation du RI Dock clignote (dans les 5
secondes).
Liste de lecture
suivante Avance rapide [ ] [PLAYLIST
UP]
Sélectionne la liste lecture suivante sur l’iPod.
Sélectionnez d’abord le mode Liste de lecture/
Album (voyez plus haut).
Liste de lecture
précédente Rembobiner [ ] [PLAYLIST
DOWN]
Sélectionne la liste lecture précédente sur l’iPod
Sélectionnez d’abord le mode Liste de lecture/
Album (voyez plus haut).
Album suivant Suivant [ ] [ALBUM UP]
Sélectionne l’album suivant sur l’iPod.
Sélectionnez d’abord le mode Liste de lecture/
Album (voyez plus haut).
Album précé-
dent Précédent [ ] [ALBUM
DOWN]
Sélectionne l’album précédent sur l’iPod
Sélectionnez d’abord le mode Liste de lecture/
Album (voyez plus haut).

Fr-10
En cas de problème
■Il n’y a pas de son
•Vérifiez que l’iPod est en mode de lecture.
•Vérifiez que l’iPod est bien inséré dans le RI Dock.
•Vérifiez que le RI Dock est branché aux entrées cor-
rectes de l’amplificateur. Ne le branchez pas à des
sorties.
•Vérifiez que l’ampli est activé, que la source cor-
recte est sélectionnée et que le volume n’est pas
au minimum.
• Vérifiez que les fiches sont correctement enfon-
cées.
•Assurez-vous que le cordon d’alimentation est
branché à une prise de courant de tension appro-
priée et connecté au RI Dock.
•Initialisez l’iPod.
■Il n’y a pas de vidéo
•Vérifiez que le réglage“TV OUT”de l’iPod est réglé
sur“On”.
•Veillez à choisir l’entrée correcte sur votre télévi-
seur ou amplificateur.
•Certaines versions de l’iPod ne sont pas compati-
bles avec la vidéo.
■La télécommande de l’ampli ne pilote pas
l’iPod
•Les iPods de 3ème génération ne sont pas compa-
tibles.
•Vérifiez que l’iPod est correctement inséré dans le
RI Dock. Si votre iPod est dans un étui, il risque de
ne pas être branché correctement au RI Dock.Reti-
rez toujours l’iPod de l’étui avant de l’insérer dans
le RI Dock.
•L’iPod ne peut pas être utilisé tant qu’il affiche le
logo Apple.
•Si la télécommande de l’ampli a des boutons de
mode Remote,vérifiez que vous avez choisi le bon
mode de télécommande.
• Vérifiez le réglage du sélecteur RI MODE du RI
Dock (voyez page 5).
•Quand vous utilisez la télécommande de l’ampli,
orientez-la toujours vers l’ampli.
•Le RI Dock doit être connecté à l’ampli avec un
câble et un câble audio.
• Sur certains amplis,TAPE IN peut être réglé sur
TAPE, MD ou CDR.Vérifiez que le sélecteur RI
MODE du RI Dock et le mode de télécommande
ont le même réglage.Pour en savoir plus, voyez le
mode d’emploi de l’ampli.
Si vous ne parvenez toujours pas à contrôler l’iPod,
lancez la lecture en appuyant sur le bouton Lec-
ture de l’iPod. Il devrait alors être possible de le
commander à distance.
•Vérifiez que la télécommande de l’ampli est réglée
sur la bonne adresse ID.
■Votre ampli sélectionne intempestive-
ment l’iPod comme source d’entrée
•Arrêtez toujours la lecture sur l’iPod quand vous
écoutez une autre source branchée à l’ampli. Si
vous n’arrêtez pas la lecture, la fonction“Direct
Change”risque de sélectionner l’iPod comme
source d’entrée par erreur au moment où une
plage se termine et la suivante commence.
Prudence: Si vous exposez ce produit au
soleil, à un éclairage fluorescent ou germi-
cide,les ultraviolets et d’autres composants
de la lumière peuvent modifier la couleur
externe du produit.
Other manuals for DS-A1X
1
Table of contents
Languages:
Other Onkyo Docking Station manuals

Onkyo
Onkyo UP-A1 - Dock For The iPod User manual

Onkyo
Onkyo DS-A1X User manual

Onkyo
Onkyo DS-A1 User manual

Onkyo
Onkyo DS-A4 User manual

Onkyo
Onkyo DS-A4 User manual

Onkyo
Onkyo iOnlyBass SBX-300 User manual

Onkyo
Onkyo DS-A2X User manual

Onkyo
Onkyo DS-A1 User manual

Onkyo
Onkyo UP-A1 - Dock For The iPod User manual

Onkyo
Onkyo iOnlyBass SBX-300 Instruction Manual
Popular Docking Station manuals by other brands

Bookendz
Bookendz Docking Stations owner's manual

Philips
Philips DC315/05 user manual

Philips
Philips LFH9110 - Digital Voice Recorder Docking... user manual

SonoSite
SonoSite SiteStand Service manual

Beam
Beam iridium IntelliDOCK 9555 Installation & user manual

Freecom
Freecom HARD DRIVE DOCK PRO - datasheet