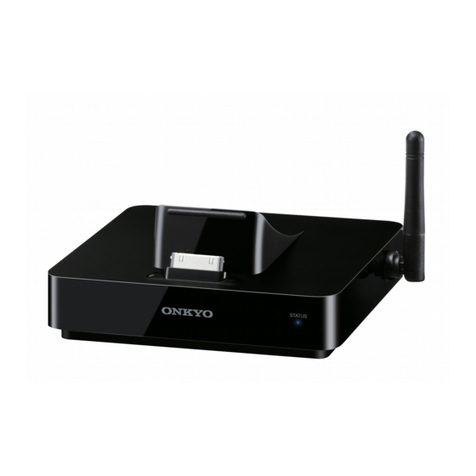
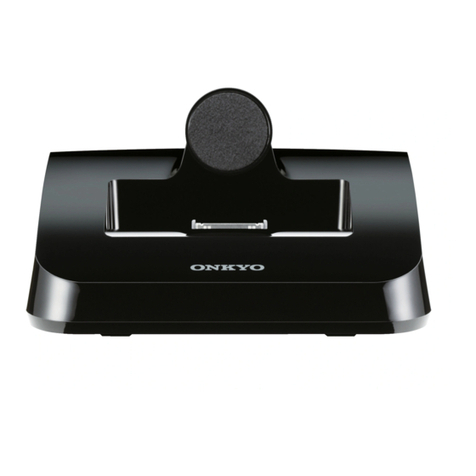
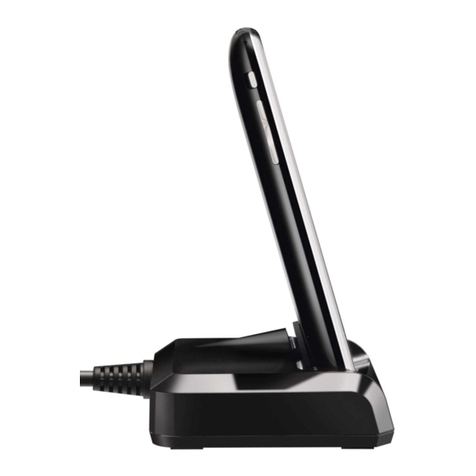
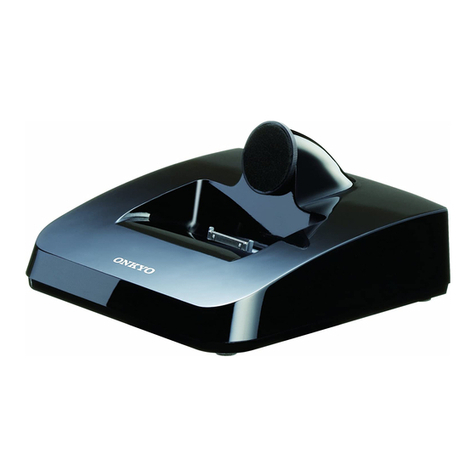
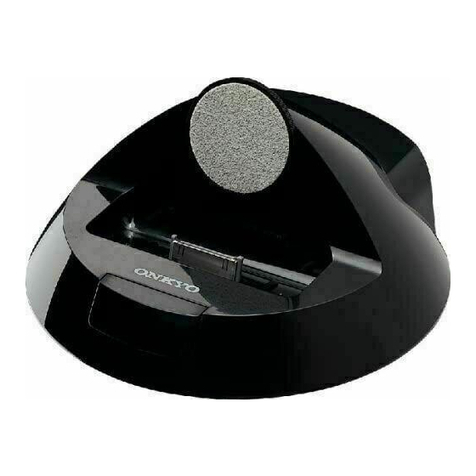
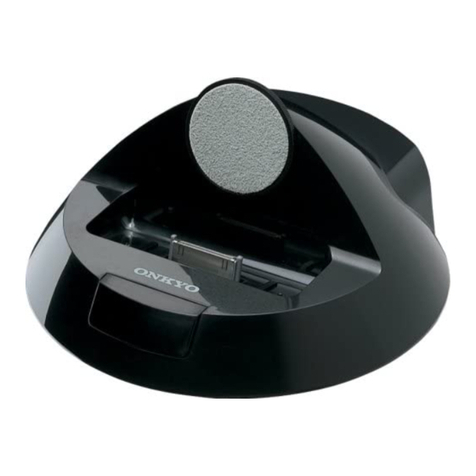
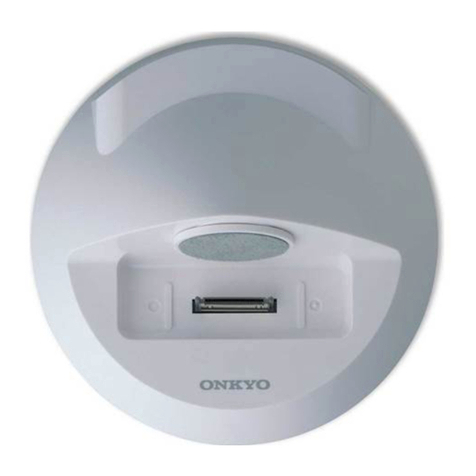
Onkyo DS-A4 User manual

Remote Interactive Dock
DS-A4
Instruction Manual
Thank you for purchasing
an
Onkyo product.
Please
read this manual carefully before making
any connections
or
using this product.
By
follow-
ing these instructions, you'll
get
the best audio
performance and
the
most listening pleasure
from yourOnkyo product. Keep this manual for
future reference.
Made
for
~
iPod
C
iPhone
iPhone, iPod, iPod classic, iPod nano, iPod shuffle, and
iPod touch are trademarks
of
Apple Inc., registered in
the
u.s.
and other countries.
"Made for iPod" and "Made for iPhone" mean
that
an
electronic accessory
has
been designed
to
connect
specifically
to
iPod
or
iPhone, respectively and
has
been certified by the developer
to
meetApple perfor-
mance standards. Apple
is
not
responsible for the
operation
of
this device or its compliance
with
safety
and regulatory standards.
Please
note
that
the
use
of
this accessory
with
iPod
or
iPhone may affect wireless performance.
Contents
Important
Safety Instructions 2
Getting Started 4
About
the
RI
Dock 4
Features 4
Package Contents .4
Getting
to
Know
the
RI
Dock 5
Remote Controller 6
Hooking Up the
RI
Dock 8
Using
the
RI
Dock.
..•••..•..•••.•..•.
9
Setting
the
OSO
Mode 9
Controlling Your iPod/iPhone
without
theOSD 9
Controlling Your iPod/iPhone
with
the
OSO
9
Music Mode 9
Video Mode
11
Resume Function
11
Setting
the
TV
System (European
model only)
12
Other Functions
12
Setting
the
Remote Controller's
10
13
Using Your Amp's Remote Controller
..
14
ISpecifications 15

2
WARNING:
TO
REDUCE
THE
RISK
OF
FIRE
OR
ELECTRIC
SHOCK,
DO
NOT
EXPOSE
THIS
APPARATUS
TO
RAIN
OR
MOISTURE.
CAUTION:
TO
REDUCE
THE
RISK
OF
ELECTRIC
SHOCK,
DO
NOT
REMOVE
COVER
(OR
BACK).
NO
USER-SERVICEABLE
PARTS
INSIDE.
REFER
SERVICING
TO
QUALIFIED
SERVICE
PERSONNEL.
~A\
..
'
ill
The lightning flash with arrowhead symbol, within
an
equilateral
~
triangle,
is
intended to alert the user
to
the presence
of
~
uninsulated "dangerous voltage" within the product's enclosure
that may be
of
sufficient magnitude to constitute a
risk
of
electric
shock to persons.
Ji\ The exclamation point within
an
equilateral triangle
is
intended
~
to
alert the user to the presence
of
important operating and
maintenance (servicing) instructions in
the
literature
accompanying the appliance.
Important Safety Instruc-
tions
1.
Read
these instructions.
2.
Keep
these instructions.
3.
Heed all warnings.
4.
Follow all instructions.
5.
Do
not
use
this apparatus near water.
6.
Clean only with dry cloth.
7.
Do
not
block any ventilation openings. Install in
accordance with the manufacturer's instruc-
tions.
8.
Do
not
install near any heat sources such
as
radi-
ators, heat registers, stoves,
or
other apparatus
(including amplifiers) that produce heat.
9.
Do
not
defeat the safety purpose
of
the polar-
ized or grounding-type plug. Apolarized plug
has
two
blades with one wider than the other. A
grounding type plug
has
two
blades and athird
grounding prong.
The
wide blade or the third
prong are provided for your safety.
If
the pro-
vided plug does not fit into your outlet, consult
an
electrician for replacement
of
the obsolete
outlet.
10.
Protect the power cord from being walked on or
pinched particularly at plugs, convenience
receptacles, and the
point
where they exit from
the apparatus.
11.
Only
use
attachments/accessories specified by
the manufacturer.
12.
Unplug this apparatus during lightning storms
or when unused for long periods
of
time.
13.
Refer
all servicing
to
qualified service personnel.
Servicing
is
required when the apparatus
has
been damaged in any
way,
such
as
power-sup-
ply cord
or
plug
is
damaged, liquid
has
been
spilled
or
objects have fallen into the apparatus,
the apparatus
has
been exposed
to
rain
or
mois-
ture, does
not
operate normally, or
has
been
dropped.
14.
Damage Requiring Service
Unplug the apparatus from the wall outlet and
refer servicing to qualified service personnel
under the following conditions:
A.
When the power-supply cord or plug
is
dam-
aged,
B.
If
liquid
has
been spilled, or objects have
fallen into the apparatus,
C.
If
the apparatus
has
been exposed
to
rain or
water,
D.
If
the apparatus does
not
operate normally
by following the operating instructions.
Adjust only those controls that are covered
by the operating instructions
as
an
improper
adjustment
of
other controls may result in
damage and will often require extensive
work by aqualified technician
to
restore the
apparatus
to
its normal operation,
E.
If
the apparatus
has
been dropped or dam-
aged in any
way,
and
F.
When the apparatus exhibits adistinct
change in performance this indicates aneed
for service.
Precautions
1. Recording
Copyright-Unless
it's for personal
use
only, recording copyrighted material
is
ille-
gal
without
the permission
of
the copyright
holder.
2.
Care-Occasionally
you should dust the
unit
all
over with asoft cloth.
For
stubborn stains,
use
a
soft cloth dampened with aweak solution
of
mild detergent and water. Dry the
unit
immedi-
ately afterwards with aclean cloth. Don't
use
abrasive cloths, thinners, alcohol,
or
other chem-
ical solvents, because they may damage the fin-
ish
or
remove the panel lettering.
3. NeverTouch this
Unit
with
Wet
Hands-Never
handle this
unit
or its power cord while your
hands are wet or damp. Ifwater or any other liq-
uid gets inside this unit, have
it
checked by your
Onkyo dealer.
We, ONKYO EUROPE
ELECTRONICS GmbH
LIEGNITZERSTRASSE 6,
82194 GROEBENZELL,
GERMANY
Attach
Declaration
of
Conformity
(E
declare
in
own
responsibility, that the
ONKYO
product
described in this instruction manual
is
in
compliance with the
corresponding technical standards such as EN60065,
EN550
13,
EN55020 and EN61 000-3-2, -3-3.
GROEBENZELL,
GERMANY
~
K.
MIYAGI
ONKYO EUROPE ELECTRONICS
GmbH
Push and
slide
down.
Detach
For European Models
For some models
Before use,
connect
the
appropriate
AC
plug
adapter
to
the
AC
adapter.
The
type
of
plug
adapter depends
on
the
place
of
purchase.
For Canadian Models
NOTE:
THIS
CLASS
B
DIGITAL
APPARATUS
COMPLIES
WITH CANADIAN
ICES-003.
For models having a
power
cord
with
apolarized
plug:
CAUTION:
TO
PREVENT
ELECTRIC
SHOCK,
MATCH
WIDE
BLADE
OF
PLUG
TO
WIDE
SLOT,
FULLY
INSERT.
Modele
canadien
REMARQUE:
CET
APPAREIL
NUMERIQUE
DE
LA
CLASSE
BEST
CONFORME
A
LA
NORME
NMB-003
DU
CANADA.
Sur
les
modeles
dont
la
fiche est polarisee:
ATTENTION:
POUR
EVITER
LES
CHOCS
ELECTRIQUES,
INTRODUIRE
LA
LAME
LA
PLUS
LARGE
DE
LA
FICHE
DANS
LA
BORNE
CORRESPONDANTE
DE
LA
PRISE
ET
POUSSER
JUSQU'AU
FOND.
For U.S. models
FCC
Information for User
CAUTION:
The user changes or modifications
not
expressly
approved
by
the
party
responsible
for
compliance
could void
the
user's
authority
to
operate
the
equip-
ment.
NOTE:
This
equipment
has been tested and
found
to
com-
ply
with
the
limits
for
a
Class
B
digital
device, pursu-
ant
to
Part
15
of
the
FCC
Rules.
These limits are
designed
to
provide
reasonable
protection
against
harmful interference in aresidential installation.
This
equipment
generates, uses and can radiate radio
frequency energy and,
if
not
installed and used in
accordance
with
the
instructions, may cause harmful
interference
to
radio communications. However,
there
is
no
guarantee
that
interference
will
not
occur
in aparticular installation.
If
this
equipment
does
cause harmful interference
to
radio
or
television
reception,
which
can be
determined
by
turning
the
equipment
off
and on,
the
user
is
encouraged
to
try
to
correct
the
interference
by
one
or
more
of
the
fol-
lowing
measures:
•Reorient
or
relocate
the
receiving antenna.
•Increase
the
separation between
the
equipment
and receiver.
•Connect
the
equipment
into
an
outlet
on
acircuit
different
from
that
to
which
the
rece.iver
is
con-
nected.
•Consult
the
dealer
or
an
experienced radioiTV
technician
for
help.
3

Getting Started
About the
RI
Dock
With
the
On
kyo
RI
Dock, you can easily play
the
music stored on your Apple iPod/iPhone
through
your
Onkyo audio system and enjoy
great sound, and watch iPod/iPhone slide-
shows and videos on
your
TV.
In addition,
the
onscreen display (05D) allowsyou
to
view, nav-
igate, and selectyour iPod/iPhone model's con-
tents
on
your
TV,
and
with
the
supplied remote
controller, you can control your iPod/iPhone
from
the
comfort
of
yoursofa.
You
can even use
your
Onkyoamp's remote controller
to
operate
your
iPod/iPhone.
RI,
which
stands for Remote Interactive,
is
an
exclusive Onkyo control system
that
allows all
RI-capable Onkyo audio components
to
be
turned
on
or
off
together, and your
amp
to
turn
on automaticallyand select
the
appropriate
input
source
when
playback
is
started on a
source component. Italso allowsyou
to
control
your
iPod/iPhone
with
your
amp's remote con-
troller.
In this manual,
the
D5-A4 Remote Interactive
Dock
is
referred
to
as
the
"RI
Dock:'
and byiPhone3G, iPhone, and iPod touch
(1st generation)
at
480i
or576i resolution
oOnscreen Display
to
Show iPod/iPhone
model's contents
oDedicated Remote Control Supplied
oGold-Plated Audio/Video Outputs
oConnectable with any Onkyo RI-compati-
ble
AN
Systems orComponents
oRemote Control Operabilityvia Onkyo's
Remote Interactive (RI) System
oRecharging Function via
AC
oAvailable in Black Only
Notes:
•Before using
the
RI
Dock, update
your
iPod/iPhone
with
the
latest software,
available from the Apple Web site at:
www.apple.com
•For
the
latest information on
the
RI
Dock,
see
the
Onkyo Web site at:
www.onkyo.com
C
...
,
Package
<:ontents
..
Make sure you have
the
following
items:
•Component video conversion cable
·AC
adapter
•
RI
cable
•Button-type battery
(CR
2025)
•Instruction manual
•DS-A4 Remote Interactive
Dock
•
AVcable
•Remote controller
F~ci~ures
oCompatible iPod/iPhone models
Made
for:
•iPod
touch
(1
st,
2nd, 3rd and 4th genera-
tion)
•iPod classic
•iPod (4th and 5th generation)
•iPod nano
(1
st,
2nd, 3rd, 4th, 5th and
6th
generation)
•iPod mini
•iPhone
4,
iPhone
3G5,
iPhone
3G,
iPhone
oiPod/iPhone Video Playback
oResume Music and Video Playback Func-
tion
oComponent video
output
to
television
is
supported
by
iPhone 4, iPhone 3GS, iPod
nano (3rd
~eneration
and later), iPod
touch (2nd generation and later), and
iPod classic
at
480p
or
576p
resolution;
4

Getting
to
Know
the
RI
Dock
.'O~,
.e:s
Remote
control
sensor
RI
MODE switch
Set
it
to
match your amp's
input
display
(see
below).
Q
OCINSV1.SAjack
fp
@~@@H@~
"MOD.
"I~~~
-!'~'!-I
l
'DC
.......
~
Ijack AUDIO OUT
L/R
jacks
VIDEO OUT jack
(COMPONENTNIDEO)
•Adjusting the iPod/iPhone Adapter
The iPod/iPhone adapter needs
to
be adjusted
to
match your particular iPod/iPhone.lnsert
your iPod/iPhone into the
RI
Dock.lfthere's a
gap between the back
of
youriPod/iPhoneand
theadapter, turn theadaptercounterclockwise
to
close the gap. Turning the adapter counter-
clockwise moves it forward. Turning it clock-
wise moves
it
backward.
Amp
input
display
RI
MODE
switch
~TAPE'-'
I
~
12
PE
IIJ
DOCKIHDD(DSD)
TAPE
~ ~
HDD
."
"'"
\or I
:DOCK:
I ,
..
i~KlHOD(OSD)
HOD/DOCK
See
your amp's instruction manual for details on
changing the
input
display.
Amp remote
controller's mode
To
control your iPod/iPhone
with
your amp's remote con-
troller, select the matching
remote control mode.
5

6
Remove the plasticfilm before using
the
remote controller.
CD
SETUP
button
Used
to
set
the
TV
system
(PAL/NTSC),
video
output
mode
(composite/component) and
the
remote controller's
ID.
®MODE
button
Sets
the
OSD
mode
to
On
or
Off.
@MENU
button
Used
to
switch
the
function mode between
Music
mode
and Video mode.
Used
to
select
the
previous menu on
the
onscreen displayand iPod/iPhone.
@
SELECT
button
Used
to
select songs/videos and menus on
the onscreen display and iPod/iPhone.
®Previous and Next [
....
]/[~]
buttons
The Previous [
....
]
button
selects
the
previ-
ous track. During playback
it
selects the
beginning
of
the current track. The Next
[~]
button
selects
the
next track.
Press
and hold the Previous [
....
]
button
to
rewind.
Press
and
hold
the
Next
[~]
but-
ton
to
fast forward.
®SHUFFLE
button
(Music
mode
only)
Sets
the Shuffle function
to
Songs, Albums,
or
Off.
(J)
Play/Pause
[~/
..
]
button
Starts
or
pauses playback
of
the
selected
song/video.
®PLAYLIST/PAGE MODE
[.
]/[
T]
buttons
Used
to
select
the
page modes. During play-
back
or
when
the
OSD
mode
is
set
to
Off,
they
select playlists.
®ALBUM/PAGE [ •
]/[
T]buttons
Used
to
page
through
the
playlists (artists,
albums, songs, genres, composers) dis-
played
on
your
TV.
During playback
or
when
the
OSD
mode
is
set
to
Off,
they
select
albums.
@)
RESUME
button
Used
to
resume playback.
It
has
no
function
when
the
OSD
mode
is
set
to
Off.
@
Up
and Down arrow [ •
]/[
T]buttons
Used
to
navigate songs/videos and menus
on the onscreen display and iPod/iPhone.
While pressing
the
SETUP
button,
they
switch
the
video
output
mode
between
Composite modeand Component mode.
@
REPEAT
button
Sets
the Repeat function
to
One, All,
or
Off.
@VOLUME [ •
]/[
T]buttons
Adjust
the
volume on
the
Onkyo
amp
or
AV
receiver. They
don't
affect
the
iPod/iPhone
model's volume setting.

Replacing
the
Battery
Aiming
the
Remote
Controller
Use
only abattery
of
the same type
(CR
2025).
1.
To
open the battery compartment, press
the small
hollow
and slide open
the
cover.
When using the remote controller,
point
it
toward the
RI
Dock's remote control sensor,
as
shown below.
RI
Dock
30'
Notes:
•
If
the
Rl
Dock
is
placed on
top
of
another
component, the remote controller's sig-
nal may be obstructed and
the
remote
controller may
not
work
reliably.
•The remote controller may
not
work
reli-
ably
if
the
Rl
Dock
is
subjected
to
bright
light, such
as
direct sunlight
or
inverter-
type fluorescent lights. Keep this in mind
when installing.
•
If
another remote controller
of
the
same
type
is
used in the same room,
or
the
RI
Dock
is
installed close
to
equipment
that
uses
infrared
rays,
the
remote controller
may
not
work reliably.
•Don't
put
anything on
top
of
the remote
controller, such
as
abook
or
magazine,
because a
button
may be pressed contin-
uously, thereby draining the batteries.
•The remote controller may
not
work
reli-
ably
if
the
RI
Dock
is
installed in arack
behind colored glass doors. Keep this in
mind when installing.
•The remote controller will
not
work
if
there's an obstacle between
it
and
the
RI
Dock's remote control sensor.
Notes:
•
If
the remote controller doesn't
work
reli-
ably,
try
replacing the battery.
•
If
you intend
not
to
use
the remote con-
trollerforalongtime, remove
the
battery
to
prevent damage from leakage or cor-
rosion.
•
An
expired batteryshould be removed
as
soon
as
possible
to
preventdamage
from
leakage
or
corrosion.
Caution: Replacing
the
battery incorrectly
may cause an explosion.
Use
only abattery
of
the
same
type
or
an
equivalent.
3. Slide the cover shut.
2. While pressing the tab
as
shown, slide
out
the old battery.
Slide
the
new battery
into
the battery com-
partment
with
the positive side facing up.
7

HookingUp
the
RI
Dock
Depending on
the
Onkyo
amp
that
you're
using, choose connection
method
Aor
B.
A:
Connect
the
RI
Dock's AUDIO
OUT
LlR jacks
and
VIDEO
OUT jack
to
an
RI
Dock-compati-
ble
input
on your Onkyo amp. (You
might
need
to
change
the
input
display
to
"HDD"
or
"DOCK.")
B:
Connect
the
RI
Dock's AUDIO
OUT
L/Rjacks
to
the
TAPE
IN
jacks on
your
Onkyo amp.
And connect
the
RI
Dock's
VIDEO
OUTjack
directly
to
your
TV.
See
your
amp's instruction manual for details.
Conversion Cable.
The
input
you
use
depends on
the
type
of
Onkyo
amp
you have.
See
your amp's
instruction manual for details.
2. Using the supplied RIcable, connect the
RI
Dock's RIjack
to
an
RIjack on one
of
the
Onkyo components in
your
system.
3. Connect
the
supplied
AC
adapter
to
the
RI
Dock's
DC
IN
jack.
Note: When
the
AC
adapter
is
unplugged
or
not
connected
to
the
RI
Dock, the
RI
Dock
will
output
no sound
or
video, RIfunctions
will
not
work, and your iPod/iPhone model's
battery will
not
be charged.
1. Using
the
supplied
AV
cable, connect
the
RI
Dock's AUDIO OUT LlR jacks
to
asuitable
audio
input
on
your
amp. And connect
the
RI
Dock's
VIDEO
OUT jack
to
avideo
input
on
your
Onkyo
amp
or
TV.
If
your
Onkyo
amp
or
TV
has
a
component
video
input
jack, connect the
RI
Dock's
COMPONENT
VIDEO
OUT
jacks
to
a
compo-
nent
video
input
jack on
your
Onkyo
amp
or
TV,
using
the
supplied ComponentVideo
'-...
Supplied
AV
cable
'-...
Supplied component
video conversion cable
Caution: Connect
the
supplied RIcable
to
only
RIjacks. Do
not
connect headphones
to
the
RIjack,
as
it
will damage
your
equip-
ment.
•
If
you've
connected
the
RI
Dock's AUDIO
OUT
L/R
jacks
to
your
amp's
TAPE
IN jacks
and
also
want
to
connect
the
RI
Dock's
VIDEO OUT
jack
to
your
amp
Connect
the
RI
Dock's
VIDEO
OUT jack
to
an
unused video
input
on
your
amp.
When you
want
to
watch
an
iPod/iPhone slide-
show orvideo, select
the
video
input
source
first, and then select
the
TAPE
input
source.
Your
amp
will
output
the
audiobeing fed
to
the
TAPE
input, and because
the
video source
doesn't change when
the
TAPE
input
source
is
selected, it'll continue
to
output
the
video
being fed
to
the
video input.
•
What
to
do
if
you
already
have a
compo-
nent
connected
to
your
amp's
TAPE
input
or
RI
Dock-compatible
input
Connect
the
RI
Dock
to
an
unused
AV
input
on
your
amp, and select
the
input
source manu-
ally.
amp
AUDIO
White INPUT
@L
Red
I
@R
amp
orTV
VIDEO
Yellow INPUT
'--CIII11ID'@
AC
adapter
--:r
Doll
Wall
outlet
YP.
PR
COMPONENT VIDEO IN
amp
amp
orTV
'-...
Supplied R I cable
~
L!J
8

MODE
a
MENU
SELECT
Notes:
•
To
prevent dockconnector damage,
don't
twist
your
iPod/iPhonewhen insert-
ing or removing it, and be careful
not
to
knock over the
RI
Dock while your
iPod/iPhone
is
inserted.
•Don't
use
the
RI
Dock
with
any
other
iPod/iPhone accessories, such
as
FM
transmitters and microphones, because
they
may cause amalfunction.
•
You
can't change the OsD
mode
while
watching an iPod/iPhone slideshow or
video.
Controlling
Your
iPod/iPhOraewith
theOSD
Controlling
Your
iPod/iPhone without
theOSD
To
control
your
iPod/iPhone
without
the
OsD,
set
the
OsD
mode
to
Off, and
use
the
remote
controller
as
explained on page
6.
When the OsD
mode
is
set
to
On and your
iPod/iPhone
is
inserted in
the
RI
Dock, you can
navigate and select
your
music
or
video on
your
TV.
Music
Mode
•Playing Songs
Setting
the
OSD
Mode
Set
the
OsD (onscreen display)
mode
before
you start using
the
RI
Dock.
1. Plug in
the
AC
adapter.
2. Turn
on
your
TV
and amp, and select
the
appropriate inputs on your
TV
and amp.
3. Insert your
iPod/iPhone
into
the
iPod/iPhone
RI
Dock.
Using
the
RI
Dock
4. Select
the
video
output
mode
depending
on
the video connection.
While pressing the remote controller's
[SETUP]
button,
press
the
Up
[.
]
button
for
the
component
videoconnection, press the
[T]
button
for the composite (default) con-
nection.
5.
Use
the
remote controller's
[MODE]
button
to
set
the
OsD mode.
On: Playlists (artists, albums, songs, and
so
on) are displayed on your
TV,
and you
can navigate and select
your
music or
video while looking at your
TV.
While
this
mode
is
selected, your iPod/iPhone
displays
the
Onkyo logo.
Off:
Nothing
is
displayed on
your
TV and
you navigate and select
your
contents
by using your iPod/iPhone model's dis-
play.
1.
Press
the
remote controller's [MENU]
but-
ton
to
select the Music mode.
9

•Song Shuffle
You
can play all
of
the songs in your
iPod/iPhone in random order.
•
Press
the
[MENU]
button
repeatedly
to
select the music
top
menu and use
the
Up
and Down arrow [ •
]/[
~
]
buttons
to
select
"Shuffle Songs;'and
then
press
the
[SELECT]
button.
•
Now
Playing
During playback, you can display information
about
the
current song.
•
Press
the
[MENU]
button
repeatedly
to
select
the
music
top
menu and use
the
Up
and Down arrow
[.
]/[
~]
buttons
to
select
"Now
Playing;' and
then
press
the
[SELECT]
button.
2.
Use
the
Upand Down arrow
[.
]/[
~
]
but-
tons
to
select Playlists, Artists, Albums,
Genres, Songs
or
Composers, and
then
press
the
[SELECT]
button.
Top Menu
3.
Use
the
Upand Down arrow [A
]/[
~
]
but-
tons and
[SELECT]
button
to
select asong,
and press
the
[SELECT]
button
to
start play-
back.
When selecting songs,
use
the
[MENU]
but-
ton
to
go
back
to
the
previous menu.
•Using
the
Page Modes
With
the
page modes, you can quickly locate
your
favorite songs even when your song lists,
artist lists, and
so
on are very long.There are
four
pagemodes:
L,
M,
S,
and
P.
These stand
for
Large, Medium,Small, and
Page.
In Pmode,you
can page
through
the
list consecutively. In
the
S,
M,
and Lmodes, you can page
through
the
list in progressively larger steps.
1.
Use
the
PAGE
MODE Up and Down [ •
]/[
~
]
buttons
to
select apage mode.
Depending on
the
size
of
the
list,
it
may
not
be possible
to
change
the
page mode.
2.
Use
the
PAGE
Up and Down
[.
]/[
~]
but-
tons
to
page
up
or
down
the
list.
Playback
time
Shufflemodes
~
Song shuffle
~
Album shuffle
Repeat mode
Shuffle
mode
Total
time
Repeat modes
mAll repeat
I9l
One-track repeat
~NeYer
/
Das
nA
[LJ
Note:
•While playing aplaylist, you can use
the
PLAYLIST
Upand Down
[.
]/[
~]
buttons
to
select
other
playlists. While playing an
album,you can use
the
ALBUM Up and
Down
[.
]/[
~
]buttons
to
select
other
albums.
First song
on
the
next
page First song on
the
previous page Page
mode
•Screen Saver
You
can
setthetimeatwhich
the
screen saver
is
activated
to
anyone
of
the
following
four
options: 1minute,Sminutes, 10 minutes,
or
Off
(screen saver off).
When
the
screen saver activates,
the
onscreen
display
on
yourTV
disappears.
Press
any
button
on
the
remote controller
to
cancel
the
screen
saver and resume
the
onscreen display.
10

Video
Mode
•Playing Videos
MENU
SELECT
~II
1.
Press
the
remote controller's [MENU]
but-
ton
to
select
the
Video mode.
2.
Use
the
Up and Down arrow
[.
]/[
~
]
but-
tons
to
select Movies, Music Videos, TV
Shows, Video Podcasts,
or
Rentals, and
then
press
the
[SELECT]
button.
Repeat mode
Top Menu
ResumeFunction
With
the
Resume function, you can resume
playback
of
the
song/video
that
was playing
when you removed
your
iPod/iPhone from
the
RI
Dock
or
changed
the
OSD
mode
to
Off.
1. Select and
playa
song/video displayed on
your
TV.
2. During playback
or
while
playback
is
paused, remove
your
iPod/iPhone from
the
RI
Dock
or
change
the
OSD
mode
to
Off.
The current song/video
is
remembered.
3. When you reinsert
your
iPod/iPhone
into
the
RI
Dock (set
the
OSD
mode
to
On), press
the
[RESUME]
button
to
resume playback
of
the remembered song/video.
Notes:
oThe Resume function can be used only
when
the
OSD
mode
is
set
to
On.
o
If
the
AC
adapter
is
disconnected,
the
remembered
songlvideo
will be forgot-
ten.
o
If
the Resume
function
is
used
during
shuffle playback, when
the
iPod/iPhone
is
reinserted in
the
RI
Dock, playback will
resume
with
any songlvideo.
oThe Video Menu
is
properly displayed
only when
the
language setting on
the
iPod/iPhone
is
set
to
English.
Be
sure
to
set
the
language
to
English
before you
use
the
Video Menu.
Repeat
modes
mAll repeat
191
One-track repeat
3.
Use
the
Up and Down arrow
[.
]/[
~
]
but-
tons and
[SELECT]
button
to
select avideo,
and press
the
[SELECT]
button
to
start play-
back.
When selecting videos,
use
the
[MENU]
but-
ton
to
go
back
to
the
previous menu.
11

Setting
the
TV
System
(European model only)
While
the
OSD
mode
is
set
to
On, you can set
the
RI
Dock's video
output
to
PAL
or
NTSC.
If
the
onscreen display looks distorted on your
TV,
try
changing
the
TV
system.
•While pressing and holding
down
the
[SETUP]
button,
press
the
VOLUME
Up
[.
]
button
for more than 3seconds
to
select
NTSC,
or press
the
VOLUME
Down [T ]
but-
ton
for more than 3seconds
to
select
PAL.
Other
Functions
• R IFunctions
Depending on your amp and generation
of
iPod/iPhone, you may also be able
to
use
the
following functions.
Note:
•Your amp may take several seconds
to
startup,
so
you
might
not
hear the first
few seconds
of
the
first song/video.
•System On Function
When you
turn
on your amp,
the
iPod/iPhone
turns on
as
well. With some amps, you may
need
to
press
the
[ON]
button
on your amp's
remote controller's twice
to
turn
on
the
other
components in your system.
•System
Off
Function
When you
turn
off
your amp, the iPod/iPhone
turns
off
as
well.
•Auto Power On Function*
If
you start iPod/iPhone playback while your
amp
is
on Standby,yourampwillautomatically
turn
on and select your iPod/iPhone
as
the
input
source. Then, your iPod/iPhone will start
playback.
•DirectChange Function*
If
you start iPod/iPhone playback while listen-
ing
to
another
input
source, your amp will
automatically select your iPod/iPhone
as
the
input
source.
*Ifyou use your iPod/iPhone model's controls
to
start an
iPod/iPhoneslideshow
or
video, these functions will
not
work,
so use
the
remote controller instead.
12
•Timer Play
You
can
use your amp's Timer function
to
turn
on your
amp
and iPod/iPhone and start play-
back at aspecified time.
•Using Your Amp's Remote Controller
You
can use youramp's remote controller
to
control basic iPod/iPhone functions
(see
page
14).
Operating Notes:
•The
RI
Dock must be connected
to
your
amp
with
both
an
R I cable and
an
audio
cable
to
use
the R I functions.
•Ifyour
amp
doesn't
support
the System
On,
System Off, Auto Power On, and
Direct Change functions, you'll need
to
turn
your amp on and
off
and select
the
input
source manually.
•Before you select another
input
source,
stop iPod/iPhone playback
to
prevent
yourampfrom selecting
the
iPod/iPhone
input
source by mistake.
•Ifany accessories are connected
to
your
iPod/iPhone, your amp may
not
be able
to
select the
input
source properly.
•While your iPod/iPhone
is
in
the
RI
Dock,
its volume control
has
no
effect.
If
you
adjust your iPod/iPhone model's volume
control while it's in
the
RI
Dock, make sure
it's
not
set
too
high before you reconnect
your
headphones.

•Using Your iPod/iPhone model's Alarm
Clock
You
can
use your iPod/iPhone model's Alarm
Clock function
to
automatically
turn
on your
iPod/iPhone and amp at aspecified time. Your
amp's
input
source will automatically be set
to
the
input
to
which your iPod/iPhone
is
con-
nected.
Notes:
oThis function only works when
the
OSD
mode
is
set
to
Off.
o
To
use this function, your iPod/iPhone
must be in
the
RI
Dock, and the
Rl
Dock
must be connected
to
your
amp
with
both
an
RI
cable and
an
audio cable.
oWhen you use thisfunction, be sure
to
set
youramp's volume control
to
asuitable
level.
oYour
amp
may take several seconds
to
startup,
so
you
might
not
hear
the
first
few seconds
of
the
first song/video.
•Charging Your iPod/iPhone model's Bat-
tery
The
Rl
Dock charges your iPod/iPhone model's
batterywhile your iPod/iPhone
is
in
the
Rl
Dock.
Notes:
o
To
charge your iPod/iPhone battery, the
AC
adapter must be plugged
into
asuit-
able wall
outlet
and connected
to
the
RI
Dock's
DC
IN
jack.
o
See
youriPod/iPhone model's instruction
manual for more information on battery
charging.
Setting
the
RemoteControner's ID
If
you cannot adjust
the
volume
of
yourOnkyo
component
with
the
DS-A4's
remotecontroller,
try
changing its remote
controllD.
The default
setting
is
#1.
Some Onkyo componentsare set
to
ID
#2
or
#3.
oWhile pressing and holding
down
the
[SETUP]
button, press one
of
the
following
buttons for more than 3seconds
to
set
the
ID:
10 #1:
PLAYLIST
Up
[.]
button
10 #2:
ALBUM
Up [• ]
button
10 #3:
PLAYLIST
Down
[T
]
button
10 #4: ALBUM Down
[T
]
button
13

Using
Your
Amp's
Remote
Controller
The following table shows which buttons on your amp's remote controller you
can
use
to
control
your iPod/iPhone while it's in the
RI
Dock.
Be
sure
to
select theappropriate remote modefirst, and
point
your remote controller at your amp. Notethat some buttons may
be
labelled differently, and
some remote controllers may
not
have certain buttons.
iPod/iPhone Remote controller button
to
use
function
TAPE
mode
HDDmode
Description
Turn on/off
[STANDBY],
[ON] -iPod/iPhone
is
turned on and off.
Starts playback on
the
iPod/iPhone.
If
the
Play
Play[~]
iPod/iPhone
is
not
already on, it's
turned
on
automatically.
Pause
Pause
[II],
Stop
[II]
Pause
[II]
Pauses
iPod/iPhone playback.
Next song
[~],[~]
Next[~]
Selects the next iPod/iPhone song.
Previous song [
.....
],[
..
]Previous [
....
]Restarts the current iPod/iPhone song.
Press
it
twice
to
select
the
previous song.
Fast
forward
Fast
Forward [~]
Press
and hold
to
fast forward
the
-iPod/iPhone.
Rewind -
Rewind[
..
]
Press
and hold
to
rewind the iPod/iPhone.
*
To
select
the
next
or
previous
photo
in
an
iPod/iPhone
photo
slideshow, use
the
controls
on
your
iPod/iPhone
photo.
The following functions
can
be used
with
some Onkyo amps.
iPod/iPhone Remote controller button to use
function
TAPE
mode
HDDmode
Description
Shuffle
[DOLBY
MODE] [RANDOM], [PLAYMODE],
Sets
the
iPod/iPhone model's Shuffle func-
[SHUFFLE]
tion
to: Songs, Albums,
or
Off.
Repeat
[REVERSE
MODE]
[REPEAT]
Sets
the iPod/iPhone model's Repeat func-
tion
to: One, All,
or
Off.
Backlight
REC
[e]
[DISPLAY],
[SCROLL]
The iPod/iPhone model's backlight comes on
for 30 seconds.
Next playlist -
[PLAYLIST
UP]
Selects the next playlist on the iPod/iPhone.
Previous
[PLAYLIST
DOWN] Selects the previous playlist on the
-
playlist iPod/iPhone.
Next
album
-[ALBUM
UP]
Selects the next album on the iPod/iPhone.
Previous [ALBUM DOWN] Selects
the
previous album on the
-
album iPod/iPhone.
*
Depending
on
your
amp,
some
buttons
may
not
work
as
expected.
14

Troubleshooting
•There's no sound
•Make sure your iPod/iPhone
is
actually playing.
• Make sure youriPod/iPhone
is
inserted properly in
the
Rl
Dock.
•Make sure your
amp
is
turnedon,
the
correct
input
source
is
selected, and
the
volume
is
turned up.
•Make sure
the
plugs are pushed in all
the
way.
•Make sure
the
AC
adapter
is
connected
to
asuit-
able wall
outlet
and connected
to
the
RI
Dock.
•The
RI
Dock's remote controller doesn't
control your iPod/iPhone
•
If
the
RI
Dock
is
placed on
top
of
anothercompo-
nent,
the
remote controller's signal may be
obstructed and
the
remote controller may
not
work
reliably.
In
this
case,
try
repositioning
the
Rl
Dock.
•Make sure youriPod/iPhone
is
properlyinserted in
the
RI
Dock.
•When you
use
the
RI
Dock's remote controller,
point
it
toward
the
RI
Dock
(see
page
7).
•Some
of
the
remote controllers
buttons
work
dif-
ferently depending on
the
OSD
mode:
On
or
Off
(see
page
6).
•Your amp's remote controller doesn't con-
trol your iPod/iPhone
•Make sure youriPod/iPhone
is
properly inserted in
the
RI
Dock.
•
If
your amp's remote controller
has
remote mode
buttons, make sure you've selected
the
right
mode.
•Check
the
RI
Dock's
Rl
MODE
switch setting.
•When you
use
your amp's remote controller,
point
it
toward your amp.
•The
RI
Dock must be connected
to
your
amp
with
both
an
R I cable and an audio cable
..
•Make sure
the
RI
Dock's
RI
MODE
switch setting
and the remote control
mode
match this setting.
See
your amp's manual for more information.
If
you still can't control your iPod/iPhone, start
playback by pressing your iPod/iPhone model's
Play
button.
Remote operation should then be
possible.
•Make sure your amp/s remote controller
is
set
to
the
correct remote
controllD.
•Theonscreen displaydoesn't
appear
on
your
TV
•
Set
the
OSD
mode
to
On
(see
page
9).
•Try setting
the
TV
system
to
PAL
or
NTSC
(see
page
12).
•Select
the
video
output
mode (composite/compo-
nent) according
to
the
video
input
onyour
TV
(see
page
9).
•
To
watch an iPod/iPhone slideshow or
video
on
TV
•
Set
the
OSD
mode
to
Off, and use your
iPod/iPhone model's controls orremote controller
to
select and start
the
slideshow
or
video.
•
To
control
the
slideshow, follow standard
iPod/iPhone operating procedures.
Specifications
Power supply:
AC
adapter
(5
V
DC)
Power consumption (iPod/iPhone
not
inserted):
North American model: 0.8 W
Other models:
0.8
W
Weight: 0.66Ibs. (300
g)
Dimensions (W x H x
D):
4-5/16x2-1/8 x4-7/16 inches
110 x54 x112
mm
Connectors:
VIDEO
OUT (COMPONENTNIDEO)
AUDIO OUT
L/R
Rljack
Specifications and features are subject
to
change
without
notice.
In
catalogs and on packaging,
the
letteratthe end
of
the
product
name indicates
the
color. Specifications
and operation are the same regardless
of
color.
•The operating instructions in this manual may
change
with
future upgrades
to
the
iPod/iPhone
software.
•The
AC
adapter supplied
with
the
Rl
Dock
is
designed exclusivelyfor use
with
the
RI
Dock. Do
not
use
it
with
another device. Likewise,
do
not
use
anyother
AC
adapter
with
the
Rl
Dock. Doing
so
may damage
the
RI
Dock.
•
If
there'sany noisewhen listening
to
an
FM
orAM
radio station on your
tuner
or receiver,
try
mov-
ing its antenna away from
the
Rl
Dock,
iPod/iPhone, and
AC
adapter's cable. In addition,
don't
wrap
the
AC
adapter's cable around any
othercables.
I
15

ONKYO SOUND &VISION CORPORATION
2-1, Nisshin-cho, Neyagawa-shi,
OSAKA
572-8540, JAPAN
Tel: 072-831-8023 Fax:
072-831-8163
ONKYO U.S.A. CORPORATION
18 Park Way,
Upper
Saddle River, N.J. 07458, U.S.A.
Tel: 800-229-1687,
201-785-2600
Fax:
201-785-2650
http://www.us.onkyo.com/
ONKYO EUROPE ELECTRONICS GmbH
Liegnitzerstrasse 6,
82194
Groebenzell,
GERMANY
Tel: +49-8142-4401-0 Fax: +49-8142-4401-555 http://www.eu.onkyo.com/
ONKYO EUROPE ELECTRONICS GmbH (UK BRANCH)
The
Coach
House
81A
High
Street, Marlow, Buckinghamshire,
SL7
1AB,
UK
Tel: +44-(0)1628-473-350 Fax: +44(0)-1628-401-700
ONKYO CHINA LIMITED
Unit 1&12,
9/F,
Ever Gain Plaza Tower
1,
88, Container Port Road, Kwai Chung,
N.T., Hong Kong Tel:
852-2429-3118
Fax: 852-2428-9039
http://www.ch.onkyo.com/ 11012-2
~~
~:~:~:;~o
ONKYO
SOUND.
VISION CORPORATION Japan.
1111111111111111111111
All rights reserved. *2 9 4 0 0 6 1 7 A *

ONKYOe
Product
Registration
(USA
and
Canada)
----_._------------
------
--------~
Thank you for purchasing this Onkyo product. In order
to
protect your investment and
to
receive
information
on
new products and updates, please register.
Please
visit our web site for your online registration at:
-----_
....
_--_._--_._----------------_
..
_--_._._---_.-_._-----------~
iwww.us.onkyo.com/prodreg_form.cfm (For
USA
customers)
www.onkyo.ca/prodreg_form.cfm (For Canadian customers)
\
_i!iPiiiiiiiiii~===::-::::::::=::::::::=::::::::=::::::::=::::::::=::::::::=::::::::=:~
www.onkyousa.com
can
assist
you
anytime with Frequently
Asked
Questions, Hookup Diagrams, and Service Information.
www.onkyo.cais
available for Canadian customer
We
offer Product Support 7days per week
Onkyo
has
extended its product support hours
to
aseven-day schedule.
For
questions, assistance,
or
comments,
please call
us
or visit on our website
at:
.ma
1-800-229-1687
~
www.onkyousa.com/support (For
USA
customers)
www.onkyo.ca/support (For Canadian customers)
Mon -
Fri
9:00am -8:00pm (Eastern Time)
Sat
-
Sun
10:00am -4:00pm (Eastern Time)
Onkyo
USA
Corporation
18
Park
Way,
Upper
Saddle
River,
NJ
07458
Phone: 201-785-2600
Fax:
201-934-7823
Enregistrement
du
produit (Etats
Unis
et
Canada)
Enregistrement
du
produi·t
:
?'
..
Nous vous remercions d'avoir achete
ce
produit
On
kyo. Pour proteger votre investissement et
pour
recevoir de
I'information sur nos nouveaux produits ainsi
que
des mises ajour, veuillez enregistrer votre
produit.
Pour
ce
faire,
consultez notre site Web aux adresses suivantes :
www.us.onkyo.com/prodreg_form.cfm
(pour
les clients des Etats Unis)
www.onkyo.ca/prodreg_form.cfm
(pour
les clients du Canada)
Vous
pouvez obtenir de I'aide
en
tout
temps sur
Ie
site
www.onkyousa.com
en consultant
les
sections
FrequentlyAsked Questions, Hookup Diagrams et Service
Information.
Les
clients canadiens peuvent
quant
aeux
consulter
Ie
site www.onkyo.ca.
Nous offrons un soutien technique 7jours sur 7
Onkyo offre maintenant un soutien technique 7jours sur
7.
Pour
obtenir
de I'aide, des reponses avos questions,
ou
pour
soumettre vos commentaires, veuillez
communiquer
avec nous par
telephone
ou consulter
notre
site
Web:
~
1-800-229-1687
~
www.onkyousa.com/support (pour
les
clients des Etats Unis)
www.onkyo.ca/support (pour
les
clients
du
Canada)
i~
Lundi
au
vendredi de 9 h 00 a20 h00 (heure de l'Est)
Samedi et dimanche de
10
h00 a
16
h
00
(heure de I'Est)
Onkyo
USA
Corporation
18
Park
Way,
Upper
Saddle River,
NJ
07458
Telephone: 201-785-2600 Telecopieur: 201-934-7823 SN:29365135

warranty
Period
ONKYO
USA
Corporation Limited Warranty
(Canada)
PLEASE
RETAIN
YOUR
ORIGINAL
BILL
OF
SALE
AS
YOU
WILL
NEED
TO
PRESENT
IT
SHOULD
YOU
REQUIRE
SERVICE
UNDER
THIS
WARRANTY.
On
kyo
USA
Corporation
(hereinafter referred
to
as
Onkyo)
hereby
warrants all Onkyo
products
PURCHASED
DIRECTLY
FROM
ONKYO
OR
AN
ONKYO AUTHORIZED INDEPENDENT
DEALER,
in
accordance
with
the
following
terms
and
conditions:
(from date
of
purchase):
To
verify current model's warranty period, please visit
www.onkyo.ca/warranty.cfm
or call
us
1-800-229-1687.
(Receivers, and Amplifiers _
::=========:::::::::::::===================~======~
(DVD Players, Tuners, Speakers _
(
CD
Players, Cassette Decks, Personal
Audio
Systems _
(
Multimedia
Products,
AudioNideo
Accessories _
Scope
of
Warranty
From
the
date
of
original
purchase and
for
the
respective
periods
specified above,
Onkyo
agrees
to
repair, at its sole expense, all Onkyo
products
purchased
directly
from
Onkyo
or
an
Onkyo
Authorized
Independent
Dealer,
which
are
defective
in material
and/or
workmanship.
EXCLUSIONS:
IF YOU
PURCHASE
AN
ONKYO
PRODUCTFROM
AN
UNAUTHORIZED
DEALER,
YOUR
ONKYO WARRANTYMAYNOT
BE
VALID,
pleaseuse
our
authorizeddealer locator.
This
Warranty
does
not
cover
the
following:
1.
Defects
or
damage caused by accident, fire, flood
or
other
waterdamage,
lightning
or
otheracts
of
God.
2.
Defects
or
damage caused by abuse, misuse, negligence
or
failure
to
observe the instructions contained in
the
manual furnished at the time
of
original
purchase.
3.
Damage caused
during
shipment
or
handling.
4.
Products purchased
from
anyone other than Onkyo
or
an Onkyo Authorized Independent Dealer.
If
you are uncertain
as
to
whether adealer
is
authorized,
please
contact
Onkyo's Customer Relations
Department
or
check
the
Dealer and Service Locator.
5.
Products
that
have had their serial numbers altered
or
removed.
6.
Products purchased in
"AS
IS"
condition.
7.
Products
that
have been altered
or
repaired
by
anyone
other
than
Onkyo or an Onkyo authorized
independent
service station in amanner
that
has affected
their
performance, stability or reliability.
8.
Accessories attached
to
or
to
be used
with
Onkyo products, such
as
antennas, batteries, cables, etc.
9.
Packing materials and cosmetic items.
10.
Parts
which
have prescribed useful lives
dependent
upon
the degree
of
their use, such
as
batteries, cassette heads, idler wheels, etc.
11.
Installation and removal
of
Onkyo products.
12.
Maintenance, cleaning
or
periodic check-ups.
13.
Adjustments or alterations required for
compatibility
with
conditions pertaining
to
foreign countries.
14.
Products used continuously
or
for commercial applications. Onkyo products are intended for consumer use and are
not
designed for continuous or
commercial use. In
the
event
that
the products concerned have been used commercially or continuously, the warranty period
is
limited to
90
days from
the
date
of
purchase.
Obtaining
Warranty
Service:
To
obtain
warranty
service, take
or
ship your Onkyo
product
to
an Onkyo Authorized Independent Service Center in Canada,
together
with
anote describing
your
complaint
and
your
copy
of
the dated purchase receipt. Please also include in any mailing acontact name, address and telephone number.
Ifyou choose
to
ship your Onkyo product
to
an
Onkyo Authorized Independent Service Center, all shipping arrangements
must
be made by you and all
shipping
charges and insurance must be fully prepaid. Any Onkyo
product
shipped in its entirety must be shipped in its original carton. Onkyo will pay all
return
shipping
charges for Onkyo products
that
have been serviced
under
this warranty.
Any service
or
repair for items
not
covered by this
limited
warranty shall be atthe Authorized Independent Service Center's rates and terms then in effect.
Contact an Onkyo Authorized Service Center for details.
Limitations:
Onkyo
makes
this
warranty
subject
to
the
following
limitations:
1.
This Warranty
is
valid only
within
Canada.
To
be covered by this warranty the Onkyo
product
concerned must have been purchased directly from Onkyo or
an Onkyo Authorized Dealer in Canada and the person seeking warranty service must reside in Canada. This warranty extends only
to
the original purchaser
and
cannot
be transferred
to
anyone.
2.
ONKYO SHALL
HAVE
NO
LIABILITY
WHATSOEVER
FOR
INCIDENTAL
OR
CONSEQUENTIAL
DAMAGES.
THE
RESPONSIBILITY
OF
ONKYO
UNDER
THIS
WARRANTY
SHALL
BE
LIMITED
TO
THE
REPAIR
OF
DEFECTIVE
ONKYO
PRODUCTS
BY
ONKYO
OR
ITS
AUTHORIZED
INDEPENDENT
SERVICE
STATIONS.
3.
This
warranty
is
valid only
with
respect
to
repairs affected by Onkyo or
an
Onkyo authorized
independent
service station.
4.
ALL
WARRANTIES
AND CONDITIONS
OTHER
THAN
THE
EXPRESS
WARRANTY
HEREIN
CONTAINED
INCLUDING
BUT
NOT
LIMITED
TO
ANY
IMPLIED
WARRANTY
OF
MERCHANTABILITY
OR
FITNESS
FOR
A
PARTICULAR
PURPOSE
ARE
LIMITED
IN
DURATION
TO
THE
APPLICABLE
WARRANTY
PERIOD
SET
FORTH
ABOVE.
Some jurisdictions
do
not
allow limitations on
how
long
an
implied
warranty or
condition
lasts
and/or
do
not
allow
the
exclusion
or
limitation
of
incidental
or
consequential damages,
so
the above limitations or exclusion may
not
apply
to
you. This warranty gives you specific legal rights and you may also have
other
rights
that
vary from province
to
province.

Garantie limitee
de
ONKYO
USA
Corporation
(Canada)
VEUILLEZ CONSERVER VOTRE FACTURE
ORIGINALE
PUISQUE
VOUS
DEVREZ
LA
PRESENTER POUR
VOUS
PREVALOIR
DU
SERVICE AUX
TERMES DE
LA
PRESENTE
GARANTIE.
Onkyo
USA
Corporation
(ci
apres
On
kyo)
garantit
par
les
presentes
tous
les
produits
Onkyo
ACHETES DIRECTEMENT AUPRES DE ONKYO OU
D'UN
MARCHAND
INDEPENDANT
AUTORISE DE ONKYO,
conformement
aux
modalites
suivantes
:
(a
compter
de
la
date
d'achat):
Pour
verifier
la
duree de
la
garantie de votre modele, veuillez consulter
Ie
site www.onkyo.ca/warranty.cfm
ou communiquer avec nous par telephone
au
1-800-229-1687.
(Recepteurs
et
amplificateurs _
(Lecteurs
DVD,
syntoniseurs
et
haut-parleurs _
(Lecteurs
CD,
platines acassettes
et
systemes audio
personnels_
(Produits multimedias et accessoires audio
et
video_
...
A
compter
de
la
date
de
I'achat
initial
et
durant
les
peri
odes
precisees
ci
dessus,
Onkyo
accepte
de
reparer,
ases
frais,
tous
les
produits
Onkyo
defectueux
au
qui
presentent
des
vices
de
fabrication
achetes
directement
aupres
d'elle
ou
aupres
d'un
marchand
independant
autorise
de
Onkya.
EXCLUSIONS:
51
VOU5
ACHETEZ
UN PRODUIT
ONKYO
AUPRES
D'UNMARCHAND NON
AUTORI5E,
LA
GARANTIE
ONKYO
POURRAIT
NE
PAS
ETRE
VAL/DE.
Veuillez consulterla Iiste de nosmarchands autorises.
La
prE!sente
garantie
ne
couvre
pas
les
elements
suivants
1.
Les
defectuosites ou
les
dommages
causes
par un accident, un incendie, une inondation ou autre infiltration d'eau, un orage
OU
toute autre catastrophe naturelle.
2.
Les
defectuosites
ou
les
dommages
causes par un usage abusif,
une
mauvaise utilisation,
une
negligence ou
Ie
defaut
de suivre les
instructions
du manuel
fourni au
moment
de
I'achat initial.
3.
Les
dommages causes au cours de
la
livraison ou
la
manutention.
4.
Les
produits achetes aupres
d'une
personne autre que Onkyo ou
qu'un
marchand
independant
autorise de Onkyo.
Si
vous
ignorez
si
un
marchand est
autorise, veuillez
communiquer
avec
Ie
service a
la
clientele de
Onkyo
ou
consulter la liste des marchands
et
fournisseurs de services autorises.
5.
Les
produits
dont
Ie
numero
de serie a
ete
modifie
ou efface.
6.
Les
produits
achetes «tel
quel
».
7.
Les
produits
qui
ont
ete modifies
ou
repares par une personne autre que Onkyo
ou
qu'un
fournisseur de services in
dependant
autorise
de
Onkyo de
fa~on
aaffecter leur rendement, leur
durabilite
ou leur fiabilite.
8.
Les
accessoires attaches aux
produits
Onkyo
ou
devant
etre utilises avec ceux ci,
comme
les
antennes,
les
batteries, les cables, etc.
9.
Les
materiaux d'emballage et
les
elements de presentation.
10.
Les
pieces
qui
ont
une duree
de
vie
utile
prescrite en
fonction
de leur utilisation,
comme
les batteries,
les
tetes de lecture,
les
engrenages, etc.
11.
L:installation et
Ie
demontage
des
produits
Onkyo.
12.
L:entretien,
Ie
nettoyage
ou
les
mises au
point
periodiques.
13.
Les
ajustements
ou
les modifications necessaires
pour
assurer
la
conformite
aux
normes
de
pays etrangers.
14.
Les
produits utilises sans
interruption
ou
ades fins commerciales.
Les
produits
Onkyo
sont destines aux consommateurs
et
ils ne
sont
pas
con<;us
pour un
usage
ininterrompu
ou commercial.
Si
les
produits
en cause
ont
ete utilises ades fins commerciales ou sans
interruption,
la
duree
de
la
garantie est Iimitee
a
90
jours a
compter
de
la
date de I'achat.
Execution
de
la
garantie:
Pour faire executer
la
garantie, veuillez remettre ou poster votre
produit
Onkyo aun centre de service
independant
autorise de Onkyo au Canada, avec une note
decrivant
Ie
probleme
et votre
re~u
d'achat date. Pour
tout
envoi postal, veuillez
egalement
fournir
Ie
nom
de
la
personne acontacter, son adresse et
son
numero
detelephone.
5i
vous choisissez d'expediervotre
produit
Onkyo aun centre de services
independant
autorise de Onkyo, vous devez
prendre
les dispositions
necessaires
pour
assurer
la
livraison
et
regler d'avance I'ensemble des frais
et
des assurances lies ala Iivraison. Tout
produit
Onkyo
complet
doit
etre expedie
dans
son
emballage d'origine.
Onkyo
remboursera
les
frais d'expedition
de
retour
pour
les
produits
Onkyo sous garantie.
Les
services
fournis
ou
les
reparations
effectuees aI'egard d'articles
qui
ne sont pas couverts par
la
presente garantie
limitee
seront effectues selon
les
tarifs
et
les modalites en
vigueur
du
centre de
services
independant
autorise. Pour
obtenir
plus de details,
communiquez
avec
un
centre
de
services autorises
de
Onkyo.
Limitations
de
la
garantie:
La
presente
garantie
de
Onkya
est
assujettie
aux
limitations
suivantes
:
1.
La
presente garantie n'est valide qu'au Canada. Pour etre couvert par
la
presente garantie,
Ie
produit
Onkyo en cause
doit
etre achete
directement
aupres
de Onkyo ou
d'un
marchand autorise
Onkyo
au Canada et la personne
qui
desire
se
prevaloir
de
la
garantie
doit
etre un resident
du
Canada.
La
presente
garantie ne vise
que
I'acheteur
d'origine
et elle ne
peut
etre cedee a
une
autre personne.
2.
ONKYO
N'AS5UME AUCUNE
RESPONSABILITE
EN
CAS
DE
DOMMAGES
CONSECUTIFS
au
INDIRECTS.
LA
RESPONSABILITE
DE
ONKYO AUX
TERMES
DE
LA
PRESENTE
GARANTI
ESE
LIMITE
A
LA
REPARATION
DES
PRODUITS
ONKYO
DEFECTUEUX
PAR
ONKYO
OU
PAR
SES
CENTRES
DE
SERVICE
INDEPENDANTS
AUTORISES.
3.
La
presente
garantie
n'est valide qu'a I'egard des reparations effectuees par Onkyo
ou
par
un centre de services
independant
autorise de
On
kyo.
4.
A
L:EXCEPTION
DES
GARANTIES
EXPRESSEMENT
CITEES
AUX
PRESENTES,
Y
COMPRIS
mUTE
GARANTIE
IMPLICITE
DE
QUA
LITE
MARCHANDE
OU
D'APTITUDE
A
UN
USAGE
PARTICULlER,
TOUTES
LES
GARANTIES
ET
LES
MODALITES
SONT
D'UNE
DUREE
L1MITEE
CONFORMEMENT A
LA
DUREE
DE
LA
GARANTIE
APPLICABLE
SUSMENTIONNEE.
Certains territoires n'autorisent aucune restriction sur
les
garanties implicites ni I'exclusion
ou
la
limitation
des dommages consecutifs
ou
indirects de sorte
que
les
limitations ou
les
exclusions susmentionnees pourraient ne pas s'appliquer dans
votre
cas.
La
presente garantie vous
donne
des
droits
legaux precis et vos
droits pourraient varier selon
les
provinces.

ON
KYO
USA
Corporation
Limited Warranty (USA)
PLEASE
RETAIN
YOUR
ORIGINAL BILL
OF
SALE
AS
YOU
WILL
NEED
TO
PRESENT
IT
SHOULD
YOU
REQUIRE
SERVICE
UNDER
THIS
WARRANTY.
Onkyo
USA
Corporation
(hereinafter referred
to
as
Onkyo)
hereby
warrants
all
Onkyo
products
PURCHASED
DIRECTLY
FROM
ONKYO
OR
AN ONKYO AUTHORIZED INDEPENDENT
DEALER,
in accordance
with
the
following
terms
and
conditions:
__
(from date
of
purchase):
To
verify
current
model's warranty period, please visit
www.us.onkyo.com/warranty.cfm
or call us 1-800-229-1687.
(;:::===============R=e:::c:=e::::iv,=e=:r=s,=a::::n::::d==A=m===p:=lifi=:=e=r=S=_
(
DVD
Players, Tuners, Speakers _
(
CD
Players,
Cassette
Decks, Personal Audio Systems _
(Multimedia Products,
AudioNideo
Accessories
._
Scope
of
Warranty
From
the
date
of
original
purchase and
for
the
respective
periods
specified above,
Onkyo
agrees
to
repair, at its sole expense, all
Onkyo
products
purchased
directly
from
Onkyo
or
an Onkyo
Authorized
Independent
Dealer,
which
are defective in material
and/or
workmanship.
EXCLUSIONS:
IF
YOU
PURCHASE
AN
ONKYOPRODUCTFROM
AN
UNAUTHORIZED
DEALER,
YOUR
ONKYO
WARRANTY
MAYNOT
BE
VALID,
please
use
our
authorizeddealerlocator.
This
Warranty
does
not
cover
the
following:
1.
Defects
or
damage
caused by accident, fire, flood
or
other water damage,
lightning
or
other acts
of
God.
2.
Defects
or
damage
caused by abuse, misuse, negligence
or
failure
to
observe
the
instructions contained in the manual furnished at
the
time
of
original
purchase.
3.
Damage caused during shipment
or
handling.
4.
Products purchased from anyone
other
than Onkyo
or
an
Onkyo Authorized
Independent
Dealer. Ifyou
are
uncertain
as
to
whether
adealer
is
authorized,
please
contact
Onkyo's Customer Relations
Department
or
check
the
Dealer
and
Service Locator.
5.
Products
that
have had their serial numbers altered
or
removed.
6.
Products purchased in
"AS
IS"
condition.
7.
Products
that
have been altered
or
repaired by anyone
other
than Onkyo
or
an Onkyo authorized independent service station in amanner that has
affected
their
performance, stability
or
reliability.
8.
Accessories attached
to
or
to
be used
with
Onkyo products, such
as
antennas, batteries, cables,
or
media such
as
CD's,
DVD's,
etc.
9.
Packing materials and cosmetic items.
,
O.
Parts
which
have prescribed useful lives
dependent
upon
the degree
of
their
use, such
as
batteries, cassette heads, idlerwheels, etc.
,
,.
Installation
and
removal
of
Onkyo products.
12.
Maintenance, cleaning or periodic check-ups.
13. Signal
reception
problems
whether
caused by external antennas, satellite,
or
cable systems
or
the physical location
of
the unit.
14. Damage caused by or
to
other
equipment
not
properly connected
to
the unit.
15.
Adjustments
or
alterations required for
compatibility
with
conditions pertaining
to
foreign countries.
,
6.
Products used continuously
or
for commercial applications. Onkyo products are intended for consumer
use
and are
not
designed for continuous
or
commercial use. In the event
that
the
products concerned have been used commercially
or
continuously, the warranty period
is
limited
to 90 days
from
the
date
of
purchase.
Obtaining
Warranty
Service:
To
obtain
warranty
service, take
or
ship
your
Onkyo
product
to
an Onkyo Authorized Independent Service Center,
together
with
a
note
describing
your
complaint
and
your
copy
of
the
dated
purchase receipt. Please also include in any mailing acontact name, address and telephone number. Ifyou choose to
ship
your
Onkyo
product
to
an
Onkyo Authorized Independent Service Center, all shipping arrangements must be made by you and all shipping charges and
insurance
must
be
fully
prepaid. Any Onkyo
product
shipped in its entirety must
be
shipped in its original carton. Onkyo will pay all return shipping charges for
Onkyo
products
that
have been serviced
under
this warranty. Any service
or
repair for items
not
covered by this limited warranty shall be atthe Authorized
Independent
Service Center's rates and terms
then
in effect. Contact
an
Onkyo Authorized Service Center for details.
Limitations:
Onkyo
makes
this
warranty
subject
to
the
following
limitations:
,.
This Warranty
is
valid only
within
the
territory
of
the
United States
of
America.
To
be covered by this warranty the Onkyo
product
concerned
must
have
been purchased directlyfrom Onkyo
or
an
Onkyo Authorized Dealer in
the
United States and
the
person seeking warranty service
must
reside
in
one
of
the
states
of
the
United States
of
America
or
in
the
District
of
Columbia.This
warranty
extends only
to
the original purchaser and cannot be transferred
to
anyone.
2.
ONKYO
SHALL
HAVE
NO
LIABILITY
WHATSOEVER
FOR
INCIDENTAL
OR
CONSEQUENTIAL
DAMAGES.
THE
RESPONSIBILITY
OF
ONKYO
UNDER
THIS
WARRANTY
SHALL
BE
LIMITED
TO
THE
REPAIR
OF
DEFECTIVE
ONKYO
PRODUCTS
BY
ONKYO
OR
ITS
AUTHORIZED
INDEPENDENT
SERVICE
STATIONS.
3This
warranty
is
valid only
with
respect
to
repairs affected by Onkyo
or
an
Onkyo Authorized Independent Service Station.
4.
ALL
WARRANTIES
AND CONDITIONS
OTHER
THAN
THE
EXPRESS
WARRANTY
HEREIN
CONTAINED
INCLUDING
BUT
NOT
LIMITED
TO
ANY
IMPLIED
WARRANTY
OF
MERCHANTABILITY
OR
FITNESS
FOR
A
PARTICULAR
PURPOSE
ARE
LIMITED
IN
DURATION
TO
THE
APPLICABLE
WARRANTY
PERIOD
SET
FORTH
ABOVE.
Some states
do
not
allow limitations on
how
long an
implied
warranty
or
condition
lasts and some states
do
not allow
the
exclusion
or
limitation
of
incidental
or
consequential damages,
so
the above
limitations
or
exclusion may
not
apply
to
you. This warranty gives you specific legal rights and you may also have other
rights
that
vary
from
state
to
state.
Other manuals for DS-A4
2
Table of contents
Other Onkyo Docking Station manuals

Onkyo
Onkyo RBX-500 User manual

Onkyo
Onkyo iOnlyBass SBX-300 Instruction Manual

Onkyo
Onkyo UP-A1 - Dock For The iPod User manual

Onkyo
Onkyo RBX-500 User manual

Onkyo
Onkyo ND-S1 User manual

Onkyo
Onkyo DS-A1X User manual

Onkyo
Onkyo DS-A1X User manual

Onkyo
Onkyo DS-A3 User manual

Onkyo
Onkyo ND-S1 User manual

Onkyo
Onkyo SBX-200 User manual

Onkyo
Onkyo DS-A4 Mounting instructions

Onkyo
Onkyo DS-A5 User manual

Onkyo
Onkyo DS-A4 User manual

Onkyo
Onkyo DS-A1XP User manual

Onkyo
Onkyo UP-A1 - Dock For The iPod User manual

Onkyo
Onkyo DS-A1 User manual

Onkyo
Onkyo DS-A2 User manual

Onkyo
Onkyo DS-A1XP User manual

Onkyo
Onkyo DS-A1 User manual

Onkyo
Onkyo DS-A2X User manual