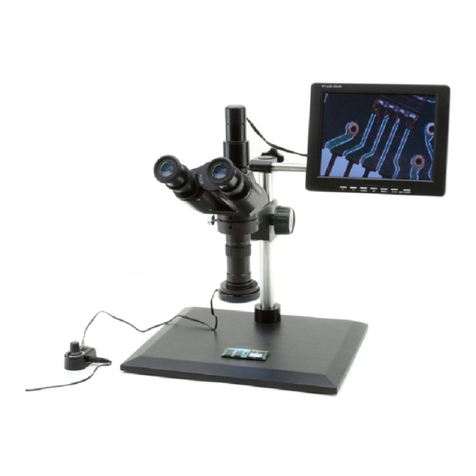
OPTIKA MICROSCOPES XZ-1 User manual

microscopes
i T A L Y
OPTIKA MICROSCOPES - ITALY
Ver. 1.1.0
XZ-1
OPERATION MANUAL
MANUAL DE ISTRUCCIONES

Page 2
INDEX
1.0 DESCRIPTION page 3
2.0 INTRODUCTION page 4
3.0 UNPACKING AND ASSEMBLY page 4
4.0 USING THE MICROSCOPE page 7
5.0 MAINTENANCE page 10
6.0 ELECTRICAL SPECIFICATIONS page 14
7.0 RECOVERY AND RECYCLING page 15

Page 3
1.0 DESCRIPTION
Zoom objective
10X micrometric
eyepiece
Focus knob
sample clips
on/oFF switch
incident
illuminator
transmitted
illuminator
brightness
adjustment
illuminator
selector switch

Page 4
This microscope is a scientific precision instrument designed to last for many years with a minimum
of maintenance. It is built to high optical and mechanical standards and to withstand daily laboratory
use.
Optika reminds you that this manual contains important information on safety and maintenance, and
that it must therefore be made accessible to the instrument users.
Optika declines any responsibility deriving from instrument uses that do not comply with this ma-
nual.
3.0 UNPACKING AND ASSEMBLY
2.0 INTRODUCTION
Components of the microscope
Unpack the components of the microscope from the box and put them on a stable surface.
Microscope as you find it in the box

Page 5
3.0 UNPACKING AND ASSEMBLY
The following components are provided:
- Microscope stand with focus and optics already mounted.
- 10X micrometric eyepiece.
- C-mount and eyepiece adaptors. The C-mount is mounted on the microscope when you
open the box.
- Black/white opaque disc.
- One spare fuse F500mA 250V.
- Dust cover.
- Power cable.
Assembling the microscope
1. Put the microscope stand with the mounted optical zoom on a stable plane.
2. If you want to use the eyepiece, put on the top of the microscope the eyepiece adaptor and
tighten the screw, in order to fix it in position.
eyepiece
adaptor c-mount
adaptor

Page 6
4. Insert the power cable on the rear (see section 5 and 6 for electrical maintenance and
specifications).
3.0 UNPACKING AND ASSEMBLY
3. Insert the eyepiece.
TIGHTEN THIS SCREW

Page 7
4.0 USING THE MICROSCOPE
1. Adjust the height of the microscope holder so that the distance between the front lens of the
objective and the glass plate on the stand is about 10cm. You can move the holder by loos-
ening the big screw on the rear. Later you can fine-adjust the focus using the focus knobs.
loosen this
screw to move
the holder

Page 8
2. Adjust the safety ring 3-4cm under the holder. This prevents the objective from falling on the
plate and getting damaged.
3. Put the sample under observation on the glass plate just below the zoom objective.
4. Put the ON/OFF switch in Iposition, then press the selector switch to choose between inci-
dent illumination (Iposition) or transmitted illumination (II position). Adjust the brightness of
the light with the proper knob on the side. Note that you can also change the orientation angle
of the incident illuminator.
5. Rotate the zoom until you reach the maximum magnification. Then rotate the focus knobs
until you get a sharp image of your sample. Now you should obtain perfect focussed images
at any level of zoom (parfocal zoom).
4.0 USING THE MICROSCOPE
actual Zoom value
SAFETY RING

Page 9
4.0 USING THE MICROSCOPE
6. If you want to change the transparent glass plate with the black/white opaque plate:
7. If you want to use a digital camera with C-mount standard, screw on the camera’s C-mount
the provided adaptor and then replace the eyepiece. Refer to the digital camera user
manual for more information.
unscrew the
FiXing nut
pull out the glass
plate and replace it
with the opaque plate

Page 10
5.0 MAINTENANCE
5.1 Electrical safety precautions
- Before plugging in the power cable with the supply, make sure that the supplying voltage of
your region matches with the operation voltage of the equipment and that the lamp switch is
in OFF-position.
- Do not turn the power on and off, off and on immediately as this will shorten the life span of
the bulb and may cause damage to the electrical system.
- Users should observe all safety regulations of the region. The equipment has acquired the
CE safety label. However, users do have full responsibility to use this equipment safely.
5.2 Always think about
- The following environment is required: Indoor temperature: 0-40°C, Maximum relative humi-
dity: 85 % (non condensing).
- Keep the microscope away from dust and shocks while in use.
- Turn off the light immediately after use.
- Use a soft lens tissue to clean the optics after use.
- Only if needed, use a cloth moistened with water and a mild detergent, rinsing with water and
drying immediately with a lint-free cloth.
- After use, cover the microscope with the included dust-cover, and keep it in a dry and clean
place.
5.3 Do not!
- Wipe the surface of any optical items with your hands. Fingerprints can damage the optics.
- Use solvents, neither on the microscope, nor on the optics.
- Disassemble objective or eyepieces to attempt to clean them.
- Mishandle or impose unnecessary force on the microscope.
- Clean the unit with volatile solvents or abrasive cleaners.
- Attempt to service the microscope yourself.
5.4 Lamp replacement
Before replacing a lamp, be sure that it is completed cooled.
Do not touch an halogen lamp with your bare hands, this could shorten the lifetime of the
bulb.
Page 11
5.0 MAINTENANCE
- To replace the transmitted light bulb, lift the microscope then open the lamp door. Extract the
lamp from the holder and replace it with the new one.
- To replace the incident light bulb, first remove the microscope tube from the holder:
lamp door

Page 12
Then unscrew the blue filter in order to access the lamp:
Extract the dichroic lamp and insert the new one in the holder:
5.0 MAINTENANCE

Page 13
Screw the blue filter in front of the lamp, and replace the microscope tube in its position.
5.5 Fuse replacement
If both incident and transmitted illuminators don’t work, check that the 2 fuses are not bro-
ken, unscrewing the fuse holders on the bottom of the microscope. Be sure to disconnect
the power cable before this operation.
5.6 If you need to send the microscope to OPTIKA for maintenance, please use the original
packaging.
lamp holder [bottom view]
5.0 MAINTENANCE
Fuse holders

Page 14
Voltage Supply: 230Vac, 50Hz
Power consumption: 10W (at maximum brightness)
Lamps: halogen 12V – 10W
Fuses: F500mA 250V (x2)
6.0 ELECTRICAL SPECIFICATIONS

Page 15
7.0 RECOVERY AND RECYCLING
Art.13 Dlsg 25 july 2005 N°151. “According to directives 2002/95/EC, 2002/96/EC and 2003/108/EC
relating to the reduction in the use of hazardous substances in electrical and electronic equipment
and waste disposal.”
The basket symbol on equipment or on its box indicates that the product at the end of its useful life
should be collected separately from other waste.
The separate collection of this equipment at the end of its lifetime is organized and managed by
the producer. The user will have to contact the manufacturer and follow the rules that he adopted
for end-of-life equipment collection. The collection of the equipment for recycling, treatment and en-
vironmentally compatible disposal, helps to prevent possible adverse effects on the environment
and health and promotes reuse and/or recycling of materials of the equipment. Improper disposal
of the product involves the application of administrative penalties as provided by the laws in force.

Página 16
INDICE
1.0 DESCRIPCIÓN pag. 17
2.0 INTRODUCCIÓN pag. 18
3.0 DESEMBALAJE Y MONTAJE pag. 18
4.0 UTILIZACIÓN DEL MICROSCOPIO pag. 21
5.0 MANTEMINIENTO pag. 24
6.0 ALIMENTACIÓN pag. 28
7.0 MEDIDAS ECOLÓGICAS pag. 29

Página 17
1.0 DESCRIPCIÓN
objetivo Zoom
ocular micrométrico
10X
mando de enFoque
pinZas de sujeción
de muestras
interruptor
on/oFF
iluminador para
luZ incidente
iluminador para
luZ transmitida
regulación de la
luminosidad
mando de selección
de la iluminación

Página 18
Este microscopio es un instrumento científico de precisión proyectado para durar muchos años
con un mínimo nivel de mantenimiento. Para su construcción se han utilizado elementos ópticos y
mecánicos de elevada calidad que lo convierten en el instrumento ideal para la utilización diaria en
las aulas y en el laboratorio.
Optika avisa que esta guía contiene importante información sobre la
seguridad y el mantenimiento del producto y por lo tanto debe ser accesible a todos aquellos que
utilizan dicho instrumento.
Optika declina cualquier responsabilidad derivada de un uso inapropiado del presente instrumento
no contemplado en la presente guía.
3.0 DESEMBALAJE Y MONTAJE
2.0 INTRODUCTION
Componentes del microscopio
Extraer los componentes del embalaje y situarlos sobre una superficie plana.
Material incluido en el eMbalaje

Página 19
3.0 DESEMBALAJE Y MONTAJE
En el embalaje se incluye:
- Base del microscopio con sistema de enfoque y piezas ópticas ya montadas.
- Ocular micrométrico 10X.
- Adaptador de rosca “C” y adaptador para los oculares. El adaptador de rosca “C” se entrega
ya montado en el microscopio.
- Disco porta-preparados blanco/negro.
- Fusible de recambio F500mA 250V.
- Funda antipolvo.
- Cable de alimentación.
Montaje del microscopio
1. Situar el soporte del microscopio con el zoom óptico montado en una superficie estable y
plana.
2. Si se desea utilizar el ocular, situar en la parte superior del microscopio el adaptador del
ocular y estrechar el tornillo para fijar su posición.
adaptador
oculares adaptador de
rosca “c”

Página 20
4. Introducir el cable de alimentación en el espacio situado en la parte posterior del microscoIntroducir el cable de alimentación en el espacio situado en la parte posterior del microsco
pio (ver sección 5 y 6 sobre mantenimiento y alimentación).
3.0 DESEMBALAJE Y MONTAJE
3. Introducir el ocular.
ESTRECHAR ESTE TORNILLO
Table of contents
Languages:
Other OPTIKA MICROSCOPES Microscope manuals

OPTIKA MICROSCOPES
OPTIKA MICROSCOPES CL-30 User manual

OPTIKA MICROSCOPES
OPTIKA MICROSCOPES SZP User manual

OPTIKA MICROSCOPES
OPTIKA MICROSCOPES SZM-GEM Series User manual

OPTIKA MICROSCOPES
OPTIKA MICROSCOPES MS-1 User manual

OPTIKA MICROSCOPES
OPTIKA MICROSCOPES B-190 Series User manual

OPTIKA MICROSCOPES
OPTIKA MICROSCOPES XDS-3 MET User manual

OPTIKA MICROSCOPES
OPTIKA MICROSCOPES XZ-2 User manual

OPTIKA MICROSCOPES
OPTIKA MICROSCOPES B-290 Series User manual

OPTIKA MICROSCOPES
OPTIKA MICROSCOPES B-500POL-I User manual

OPTIKA MICROSCOPES
OPTIKA MICROSCOPES SZM Series User manual