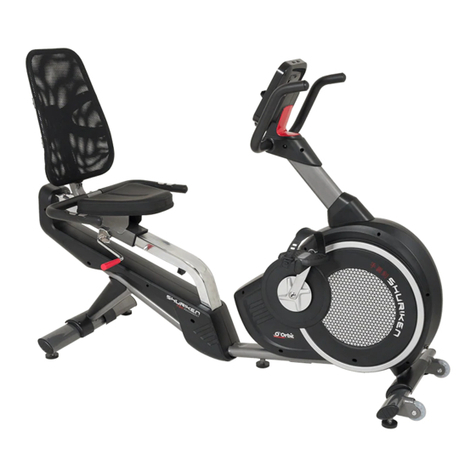
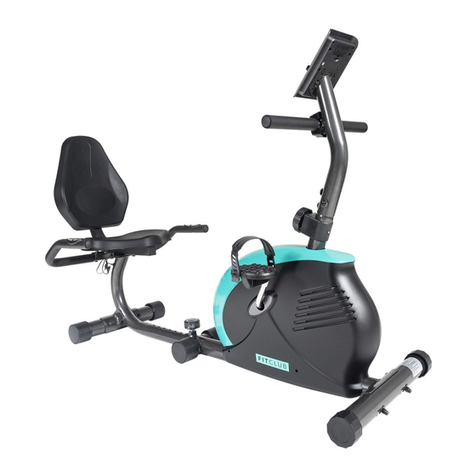
Orbit OBR103 User manual

1
MAGNETIC BIKE
OWNER'S MANUAL BGR103
CONTENTS
IMPORTANT INFORMATION -----
COMPLETE EXPLOSION DRAWING -----
PARTS LIST-----
ASSEMBLY INSTRUCTIONS-----
CONSOLE INSTRUCTION-----
OBR8301FC
OBR8301FC
OBR8301FC
OBR103
OBR103 Mag Recumbent
Owner’s manual OBR103

2
IMPORTANT INFORMATION
SAFETY
1.Please keep this manual in a safe place for your reference when necessary.
2.Please do not assembly or use this equipment until you read this manual thoroughly
& carefully. The safety and efficiency only can be achieved when the equipment is
assembled ,maintained and used properly. It is your responsibility to ensure that all the
users are informed of all the warnings and precautions.
3.For totally safe use, a stable , leveled surface is required. Protect your floor with a
mat. Do not use the equipment in a damp areas such as swimming pool sauna, etc. For
safety space, the equipment must have at least 0.5meter of free space all around it.
4.Before starting any exercise program you must consult your doctor to determine if
you have any physical or health conditions that could create a risk to your health and
safety, or prevent you from using the equipment properly. Your doctor's advice is
essential if you are taking medication that affects your heart rate, blood pressure or
cholesterol level.
5. Be aware of your body's signals. Incorrect or excessive exercise can damage your
health. Stop exercising if you experienced any of the following symptoms: pain,
tightness in your chest, irregular heartbeat, extreme shortness of breath, feeling light
headed, dizzy or nauseous. If you do experience any of these conditions you must
consult your doctor before continuing with your exercise program.
6.Keep children and pets away from the equipment, the equipment must be
assembled and used by adults only.
3
7.The equipment is designed for home use only, Maximum weight of the user
is :100kg.
8.The equipment is not suitable for therapeutic use.
9.Wearing proper clothing while using the equipment, Avoid wearing loose clothing
that may get caught in the equipment or that may restrict or prevent movements.
10.Keep your back straight while exercising.
11.Before using the equipment, check the handle bar, seat, and the nuts & bolts are
securely tightened.
12.For adjustable parts, bear the maximum position in your mind, do not exceed the
mark "stop", otherwise will cause risk.
13.Always use the equipment as indicated. If you find any defective components while
assembling or checking the equipment ,or if you hear any unusual noises coming from
the equipment during use, stop immediately. Do not use the equipment until the
problem has been solved.
14.Care must be taken when lifting or moving the equipment so as not to injure your
back. always use proper lifting techniques and /or seek assistance if necessary.
15.All moveable accessories(e.g. pedal, handlebar, saddle...etc.) require weekly
maintenance. Check them before use every time. If anything broken or loose, please fix
them immediately. You may continue using them only after they return to good
conditions.
16.Pay attention to the absence of a free wheel system which will cause serious risk.
17. You can adjust the resistance by turning around the resistance adjuster.
18.Lock the equipment when stop using.

4
MAINTENANCE
1. The safety level of the equipment only can be maintained if it is regularly examined
for damage and or /wear and tear.(e.g. handle bar, pedals and seat ...etc.).It is vital that
any faulty parts are replaced and the it is not used until completed repaired.
2. Regularly check that the elements fastened with nuts and bolts are correctly
tightened.
3.Remember regularly to grease moving parts.
4. Special attention to the component, most of them are susceptible to wear like
brake system, foot pad etc..
5. As sweat is very corrosive, do not allow it to come into contact with the enameled or
chromed parts of the equipment, particularly the computer. Immediately wipe the
equipment after using. The enameled parts can be cleaned using a damp sponge. All
aggressive or corrosive products must be avoided.
6.Stor the equipment in a clean and dry environment away from children.

5
Complete Explosion Drawing

6
Part List
NO.
NAME
QTY
NO.
NAME
QTY
1
Main Frame
1
40
Washer D10
2
2
Rear Stabilizer
1
41
Screw
2
3
Front Stabilizer
1
42
Magnet Board
1
4
Rear Support Rack
1
43
Tension Spring
1
5
Saddle
1
44
Axle of Rotation
1
6
Backrest
1
45
Circlip
2
7
Front Post
1
46
Screw
2
8
Front Handle Bar
1
47
Flywheel Axle
1
9
Console
1
48
Bearing seat end piece
2
10
Adjusting Knob
1
49
Bearing
2
11L
Pedal(L)
1
50
Bearing end piece
2
11R
Pedal(R)
1
51
screw M6*10
8
12
Front Stabilizer Tube
Plug(L)
4
52
washer D6
2
13
Rear Stabilizer Tube Plug
2
53
Foam of front handle bar
2
14
Console Wire(Top)
1
54
Screw M6*16
18
15
Adjuster setting
1
55
Waved washer
14
16
Speed Sensor Wire
1
56
washer
12
17
Resistance adjuster
1
57
Cap nut
6
18
Adjuster Wire(bottom)
1
58
Spring washer
4
19
Pulse Sensor Wire
1
59
Convenient Cover
1
20
Handle Pulse Sensor
2
60
Sensor Wire(bottom)
1
21
Backrest Elbow Tube
1
61
Sensor Wire(Middle)
1
22
Tube Bushing
1
62
Sensor Wire(Top)
1
23
Flywheel
1
63
waved washer
1
24
Left Cover
1
64
Screw M5*30
1
25
Right Cover
1
65
Screw M5*15
4
26
Crank
1
66
Screw M8*68
4
27
Belt Pulley
1
67
Screw ST4.2*16
1
28
Rear handle bar
1
68
Screw M4*14
8
29
Round tube plug
4
69
Lock Nut
1
30
Foam of rear handle bar
2
70
Locking Piece
1
31
Crank Cover
2
71
Ball Race (L)
1
32
Nylon Nut
2
72
Ball
2
33
Belt
1
73
Ball Retainer
2
34
Tension Spring
1
74
Ball Race(R)
1
35
U Bracket
1
75
Washer
1
36
screw M10*1.25
1
76
Screw
1
37
crew M10*1.25
1
77
Screw
2
38
Guide pulley
1
78
Oval tube plug
2
39
Idler Shaft Bushing
1

7
Assembling Instructions
STEP 1
--Attach the rear stabilizer(2) to the rear support rack (4) with screws (66) ,waved
washers (55) and cap nut(57)carefully.
Note: The rear stabilizer(2) is without the transport wheel, don’t mix with the front
stabilizer
--Attach the front stabilizer(3) to the main frame(1) with screws (66) ,waved washers
(55) and cap nut(57) carefully.
--Attach the pedal (11L/R) to the crank (26) with the spanner tightly. Be sure the right
pedal(11R) marked (R) is attached to the right crank tightly in the clockwise direction.
The left pedal(11L) marked(L) is attached to the left crank tightly in the anticlockwise
direction.

8
STEP 2
Attach the backrest elbow tube(21) to the rear support rack(4) with screws(54),
washers(56) and spring washers(58) correctly.

9
STEP 3
Attach the backrest (6) and saddle (5) to the backrest elbow tube (21) with screws(54)
and washers (56) carefully and tightly.

10
STEP 4
--Attach the rear handle bar (28) to the backrest elbow tube (21) with screws(41) and
waved washers (55) tightly.
--Connect the pulse sensor wires(19&60) correctly.

11
STEP 5
--Connect the resistance adjuster wire(17&18)console wires (14&16) together carefully.
Also connect the sensor wires (62&61) correctly. Please ensure that all the pins are
straight when connecting 17& 18,14&16 and 62&61. Failure to do so will result in
console malfunction.
--Attach the front post(7) to the main frame with screws(54) and curved washers(55)
tightly.

12
STEP 6
--Attach the front handle bar(8) to the front post(7) with the screws (54) and waved
washers(55) tightly.
--Connect the wires(14&62) with the console(9) carefully. Then attach console (9) to the
front post(7) with
Note:
1. To sure a good connection when connecting the hand pulse sensors and main
console wires firmly. Push all excess wires back down the stem until the console sits on
the bracket.
2. When connecting the console to the bracket, please note that all the fixings are
already preassembled to the back of the console.

13
Caution: Now the equipment is completed assembled, if you find it not leveled on the
floor, you can adjust it by the adjusting rear stabilizer tube plug(13). Make sure you
have tightened all the screws and nuts well before beginning your workout.

14
CONSOLE INSTRUCTION
SPECIFICATIONS
:
TIME
(
TMR
)
……………………………………………………………….…00:00-99:59
SPEED(SPD) …………………………………………………………0.0-99.9KM/H(ML/H)
DISTANCE(DIST) ………………………………………………………0.00-99.99KM(ML)
CALORIES(CAL) ……………………………………………………………0.0-999.9KCAL
※
ODOMETER(ODO) ………………………………………………………0-9999KM(ML)
※
PULSE(PUL) ………………………………………………………………. …40-240BPM
KEY FUNCTIONS:
MODE: This key lets you to select and lock on to a particular function you want.
※
SET (IF HAVE): Can to proceed the data establish for “TIME”“DISTANCE” “CALORIES”.
※
RESET(IF HAVE): The key to reset the value to zero by pressing the key.
OPERATION PROCEDURES:
1. AUTO ON/OFF
◆ The system turns on when any key is pressed or when it sensor an input from the speed sensor.
◆ The system turns off automatically when the speed has no signal input or no key are pressed for
approximately 4 minutes.
2. RESET
The unit can be reset by either changing battery or pressing the MODE key for 3 seconds.
3. MODE
To choose the SCAN or LOCK if you do not want the scan mode, press the MODE key when the

15
pointer on the function you want which begins blinking.
FUNCTIONS:
1. TIME: Press the MODE key until pointer lock on to TIME. The total working time will
be shown when starting exercise.
2. SPEED: Press the MODE key until the pointer advance to SPEED. The current
speed will be shown.
3. DISTANCE: Press the MODE key until the pointer advance to DISTANCE. The
distance of each workout will be displayed.
4. CALORIE: Press the MODE key until pointer lock on to CALORIE. The calorie
burned will be displayed when starting exercise.
5. ODOMETER (IF HAVE): Press the MODE key until the pointer advance to
ODOMETER. The total accumulated distance will be shown.
6. PULSE (IF HAVE): Press the MODE key until the pointer advance to PULSE. User’s
current heart rate will be displayed in beats per minute. Place the palms of your
hands on both of the contact pads (or put ear-clip to ear), and wait for 30 seconds for
the most accurate reading.
7.SCAN: Automatically display changes every 4 seconds.
BATTERY:
If improper display on monitor, please reinstall the batteries to have a good result.

16
Other Orbit Exercise Bike manuals

Orbit
Orbit OBKB01 User manual

Orbit
Orbit OBE8718 User manual

Orbit
Orbit OSP0270 User manual

Orbit
Orbit OBR8523FC User manual

Orbit
Orbit OBE8729 User manual

Orbit
Orbit OBK 8604 User manual

Orbit
Orbit OBR8718 User manual

Orbit
Orbit OBK8727 User manual

Orbit
Orbit OSP209M Kinetic Hybrid Spin Bike User manual

Orbit
Orbit OSP0043 User manual

Orbit
Orbit OSP0408 User manual

Orbit
Orbit OBR8301FC User manual

Orbit
Orbit OBE8727 User manual

Orbit
Orbit OBK8301FC User manual

Orbit
Orbit OBR170M User manual

Orbit
Orbit OBK 794 User manual

Orbit
Orbit OEB3001 User manual

Orbit
Orbit UM3296D User manual

Orbit
Orbit OBK170M User manual

Orbit
Orbit OBK8612 User manual