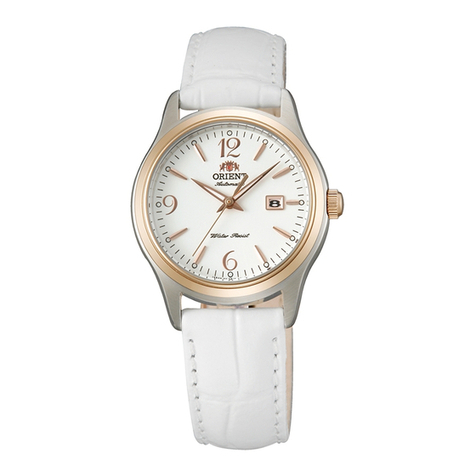
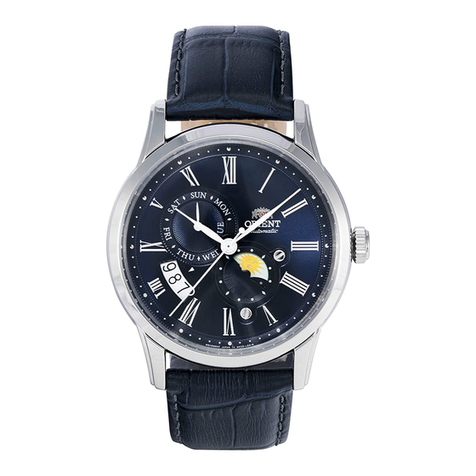
Orient FTD10002B0 User manual

лчиттничюнльтцию.
глтчн.Бзвыдны
www.sotmarket.ru
дбняинфмциятв,
тзывы,бзыиы
Инструкция для
Orient FTD10002B0
Перейти в карточку товара
8 800 775 98 98

1
CHRONOGRAPH <KFA (TD)>
INSTRUCTION MANUAL
Thank you for your purchase of our product. To ensure prolonged use and opti-
mum performance, please read this Instruction Manual carefully and familiarize
yourself with the terms of the guarantee.
Please keep this Instruction Manual in your hand and refer in time of need.
◆Function
•TIME/CALENDAR
•ALARM
Alarm can be set at every 1 minute within the coming 12 hours.
•STOPWATCH
Stopwatch can count up to 60 minutes in 1/5 second increments.
◆Specifications
(1) Crystal oscillator frequency
32,768 Hz (Hz= Oscillations per second)
(2) Wrist-worn accuracy (at normal temperature)
Mean monthly rate: ± 20 sec.
Alarm accurancy: ± 1 minute.
(3) Operating temperature range
–5°C ~ +50°C
(4) Drive system
Step motor
(5) Battery
Silver oxide battery SR927W
(6) Battery life
Approx. 3 years from installation in case that alarm is used once (for 20 sec-
onds) and stopwatch for 2 hours a day.
(7) IC (Integrated Circuit)
C-MOS-1C ; 1 piece
*The above specifications are subject to change without notice for improvement.
ENGLISH

2
◆Names and functions of individual component parts
*Some models use crowns and / or buttons with screw-lock mechanism.
*In case that explanation is not necessary, hands are omitted in the following
descriptions.
Button B
Button A
Crown
Second step (time settings, hand
position settings)
Normal position
First step (date setting, alarm
time setting)

3
◆Time Setting/0-Position Setting of Stopwatch Hands
(Basic Watch/Alarm Mini-watch/Stopwatch Hands)
Both the time setting (basic watch and mini-alarm-watch) and the 0-position set-
ting of stopwatch hands are performed in the second step of the crown. There-
fore, check and confirm, or reset the following three items and then press in the
crown, when the crown is pulled out to the second step for time setting, etc.
–Time of basic watch
–Time of mini-alarm-watch
–0positions of stopwatch hands (2 hands)
Stopwatch hands (minute
hand, second hand)
Crown
Basic watch (hour, minute,
and small-second hand)
Mini-alarm-watch (hour, minute)
[Setting the time (basic watch and mini-alarm-watch)]
Pull the crown out to the second step. Then, the small-second-hand will stop.
Stop the small-second-hand at the 12 o’ clock position.
Small-second-
hand
The mini-alarm-watch
indicates the current time.
*The stopwatch will be reset by force if the above-mentioned action is taken
during stopwatch timing.
*In case the mini-alarm-watch is indicating an alarm time (alarm is set), the mini-
alarm-watch will fast-forward and indicate the current time.

4
Turn the crown and perform time-setting of the basic watch.
Regarding the time you set in this case, we recommend that you set the time
that is several minutes advanced. It is because you will subsequently perform
[time setting of the mini-alarm-watch] and then [0-position setting of the stop-
watch hands]. You will have to press in the crown after completing all the
settings, and accordingly it becomes necessary to set the time several min-
utes ahead.
*The date changes at 12 o’clock midnight. Set it without mistaking a.m.with p.m.
or vice versa.
*At that time, advance the minute hand 4 ~ 5 minutes from the correct time, and
bring the hand back, to the correct time in order to set time accurately.
Then, press Button B and perform time-setting of the mini-alarm-watch.
Set it to the same time as that of the basic watch set at above.
Continued pressing of Button B results in fast-forwarding.
* The mini-alarm-watch does not come with the 24-hour option of a.m. and p.m.
Button B

5
Then, perform 0-position setting of two stopwatch hands.
Continue pressing Button A for about 2 seconds and the stopwatch minute
hand will make one round.
Press Button B and set the stopwatch minute hand to the 0-minute position.
Continued pressing of Button B results in fast-forwarding.
Stopwatch minute
hand
Stopwatch second hand
Button A
Button B
Subsequently, continue pressing Button A for about 2 seconds, and the stop-
watch second hand will make one round.
Press Button B and set the stopwatch second hand to the 0-second position.
Continued pressing of Button B results in fast-forwarding.
To reset again what has already been set, follow the procedures mentioned
below.
Setting the mini-alarm-watch
0-position setting of stopwatch
minute hand
0-position setting of stopwatch
second hand
It shows that the mini-alarm-watch has
turned 12 hours and is ready for a cor-
rection. Press Button B for setting.
It shows that the minute hand of stop-
watch has turned one round and is
ready for a correction.
Press Button B for setting.
It shows that the second hand of stop-
watch has turned one round and is
ready for a correction.
Press Button B for setting.
Continued pressing of
Button A for about 2 seconds
Continued pressing of
Button A for about 2 seconds
Continued pressing of
Button A for about 2 seconds
Continued pressing of
Button A for about 2 seconds
*You can reset as often as you like.

6
Upon completion of all the settings, press in the crown simultaneously with a
correct time signal.
*Check whether the time of the basic watch and that of the mini-alarm-watch
are same and, if they are same, press in the crown.
[Setting the date]
•Set the date after the time has been set.
•This is done to reset the date at the beginning of the next month of a month with
thirty or less days (February, April, June, September, and November).
Pull the crown out to the first step.
*Pressing Button B in this condition will result in either setting or correcting
the alarm time, and so we advise not to press Button B if there is no particu-
lar need.
Turn the crown clockwise and set the date.
*Do not set the date during the period from 9:00 p.m. until 1:00 a.m. If you set
the date within this time zone, the date may not change on the following day.
Be sure to set the date apart from this zone.
After you finish setting the date, press in the crown.

7
[Using the stopwatch]
–This is a stopwatch that measures up to 60 minutes in 1/5th second increments.
This stopwatch stops automatically after running 12 hours.
–Measurement is shown by the stopwatch second hand in the center and the
stopwatch minute hand at the 12 o’ clock position.
–It also comes with the function of split times.
•Reading the stopwatch
Read the time elapsed with two stopwatch hands (stopwatch second hand, stop-
watch minute hand).
Stopwatch
minute hand
Stopwatch second
hand
48 minutes 10
seconds 2
<The 0 position of stopwatch hand>
–In case that the stopwatch hand does not return to a 0 position even if it is
reset, it becomes necessary to perform 0-position setting.
–Carry out the 0-position setting of the stopwatch concurrently with the
time setting of the basic watch.
Refer to [◆Time Setting/0-Position Setting of Stopwatch Hands].

8
Button A
Button B
You can repeat as often as you wish.
•Resetting the stopwatch
–When the stopwatch hand is running
Stop it with Button A
Reset it with Button B
–The three cases, where the stopwatch hand is at a
stop, are mentioned below.
[Stopwatch at a stop]
Reset with Button B
[Stopwatch is measuring time in split mode]
Pressing Button B fast-forwards the stopwatch hand, measuring time
elapsed, and then the stopwatch hand makes normal run.
Stop with Button A
Reset with Button B
[At a stop in split mode]
Pressing Button B fast-forwards the stopwatch hand and stops.
Reset with Button B
•Use in a normal case
Button A →A→B
Start Stop Reset
•Acase where time is measured by adding up
Button A →A→A...→A→B
Start Stop Restart Stop Reset
•Acase where split time is measured
Button A →B→B→A→B
Start Split Release split Stop Reset
You can repeat as often as you wish.

9
•Measuring time for 2 persons
Button A →B→A→B→B
Start 1st person finishes 2nd person finishes Reset
Time of 1st person Time of 2nd person
[Using the alarm (one-time alarm)]
–This is the one-time alarm that sounds only once at a set time. After a sound,
the set time is cancelled.
–You can set the alarm at every one minute within the coming 12 hours.
This mini-alarm-watch indicates the current time
when the alarm is not set, and when the alarm is
set, it indicates the alarm time.
<Setting the time of mini-alarm-watch>
The time of mini-alarm-watch is set simultaneously with that of the basic
watch, etc.
Refer to [◆Time Setting/0-Position Setting of Stopwatch Hands].
•Setting the alarm time
Pull the crown out to the first step.
Crown
First step (setting the alarm time)
When the alarm is set, the alarm time
remains as indicated.
*Note that you cannot operate the stopwatch in the first step of the crown.

10
Press Button B and set the alarm time.
Continued pressing results in fast-forwarding.
Button B
* If you passed the time you desired to set, advance it further and set it.
When the alarm time reaches the current time, it enters a state of no alarm is
set. At the time, if Button B is continuously pressed and comes to the current
time, the fast-forwarding hand stops once. To set the alarm time, release
Button B once and press it again and set it.
* If current time is 10:08 a.m., you can set the alarm time until 10:07 p.m.
After you finish the setting, press in the crown.
*Be sure to press in the crown; otherwise, the alarm will not sound.
•To stop sounding alarm:
When the set alarm time comes, the alarm will continue to sound for 20 sec-
onds. Press Button A or Button B if you wish to stop the sounding alarm.
*While the stopwatch hand is running, the alarm may sound different from the
usual alarm sound, but this is not a malfunction. Furthermore, even if the
stopwatch is operated by pressing Button A or Button B while the alarm is
sounding, it will merely work as a sound stopper and will not operate the
stopwatch. You can operate it normally after the sound has stopped. After
the alarm has sounded once, a set alarm will be automatically cancelled.
•Correcting or canceling the alarm time
–You wish to correct the set alarm time.
–You wish to cancel the set alarm.

11
Pull the crown out to the first step.
Press Button B and then you can correct the alarm time. Continued pressing
results in fast-forwarding.
–To cancel the alarm, press Button B, and let the alarm time agree with the
hour / minute of the current time. Another easy way to cancel the alarm is to
continuously press Button B to allow fast-forwarding, and when fast-forward-
ing stops at the current time, you can release Button B.
After you have successfully carried out correction or cancellation, press in the
crown.
◆Operating the tachymeter
(for a item that has tachymeter scale on the dial)
60
400
250
70
80
90
100100
110
120
140
160
180
200
300
500
60
400
250
70
80
90
100100
110
120
140
160
180
200
300
500
70
•Measurement of speed per hour
1.Measure the time required to run 1
km.
2.Read the tachymeter figure which
the 1/5 second hand is indicating.
(70 km/hour)
1 km
•Measurement of output per hour
1.Measure the time required to pro-
duce one product.
2.Read the tachymeter figure which
the 1/5 second hand is indicating.
(70 pieces/hour)
Start Stop
60
400
250
70
80
90
100100
110
120
140
160
180
200
300
500
60
400
250
70
80
90
100100
110
120
140
160
180
200
300
500
70
One product
Start Stop

12
Underwater
operation of
crown and
operation of
crown with
water drops
adhered on it
Scuba diving
(oxygen tanks
are used)
Skin diving
without using
oxygen tanks
Conditions
of use
Watch with
marking of 50M
(5BAR) on back
cover or dial face
along with WATER
RESISTANT.
Non
water
resis-
tance
Watch without
marking of
WATER
RESISTANT on
back cover of
watchcase.
Exposure to
temporary
water drops
(face-
washing, rain,
etc.)
Watch with
marking of
WATER
RESISTANT on
back cover of
watchcase.
Water
resis-
tance for
daily life
Rein-
forced
water-
resis-
tance for
daily life I
Rein-
forced
water
resis-
tance for
daily life II
Watch with
marking of
100M (10BAR),
150M (15BAR)
200M (20BAR) on
back cover or dial
face along with
WATER
RESISTANT.
Type
⳯⳯⳯⳯⳯
嘷⳯⳯⳯⳯
嘷嘷⳯⳯⳯
嘷嘷嘷⳯⳯
Water sports
(swimming,
yachting,
etc), work
involving
constant
exposure to
water (fishery
agriculture,
etc),
exposure to
water from
high pressure
valves, etc.
◆In handling the watch
(1) Water-resistance

13
*It is recommendable that you use the watch correctly following the mentioned scope of usage
after ascertaining water-resistance precautions marked on the dial face of the watch or on the
back of the watchcase.
(2) Shock
Be sure to take the watch off your wrist when you engage in
strenuous sports, whereas playing such light sports as golf,
etc., will not adversely influence the watch.
Avoid a violent shock such as dropping the watch on the floor.
(3) Magnetism
If the watch is left at a place near strong magnetism for an
extended period, the component parts can get magnetized,
resulting in a failure. Be careful.
The watch can temporarily gain or lose time when exposed to magnetism, but
it functions with original precision when it is put away from the magnetism. In
this case, correct the time.
(4) Vibration
The watch can lose time temporarily when it is exposed
to strong vibration while riding motorcycles or using jack-
hammers, chain saws, etc.
(5) Temperature
In the environment below and above the normal temperatures <5°C~35°C>,
the watch may malfunction and stop.
(6) Chemicals, Gasses, etc.
Utmost caution must be exercised for contacts with gasses, mercury, chemi-
cals (thinner, gasoline, various solvents, detergents containing such compo-
nents, adhesives, paints, drugs, perfume, cosmetics, etc.), and so forth. Such
contacts may cause the discoloration of a watchcase, a watchband, and a dial
face.The discoloration, deformation, and damage of various resin-based com-
ponent parts may also occur.

14
◆Battery replacement
•This watch is provided with a battery life alarm function. If the small second
hand advances at two-second intervals, replace the battery within a week.
*If a dead battery is kept in the watch for a long time, electrolyte leakage from
the battery will cause malfunction.
*While the small second hand is moving at two-second intervals, the alarm
will not ring even if it is engage. This is not a malfunction.
•When a new normal battery is installed, this watch operates for approximately
three years.
*The battery in your watch may run down in less than three years after the
date of purchase, because it is a monitor battery which is inserted at the
factory to check the functions and performance of the watch.
*Please specify batteries approved for Orient watches.
*Please replace the battery at the place of purchase or at Orient Watch Ser-
vice Center.
*When a battery is taken out of a watch, it must be kept at a place beyond the
reach of an infant. In case it is swallowed by an infant, consult a doctor imme-
diately.
•Our request after battery replacement
After battery replacement, it is requested that you perform time setting of your
basic watch and mini-alarm-watch, as well as 0-position setting of your stop-
watch.
Refer to [◆Time Setting/0-Position Setting of Stopwatch Hands].

15
CHRONOGRAPH <KFA (TD)>
BEDIENUNGSANLEITUNG
Wir danken Ihnen für den Kauf dieses Preduktes. Bitte lesen Sie diese
Bedienungsanleitung sorgfältig durch und machen Sie sich mit den
Garantiebedingungen vertraut, um lange Verwendung und optimale Leistung
sicherzustellen.
Bitte halten Sie diese Bedienungsanleitung griffbereit, damit Sie sich jederzeit
darauf beziehen können.
◆Funktioner
• ZEIT/KALENDER
•ALARM
Alarmeinstellung ist in Schritten von 1 Minute für die nächsten 12 Stunden
möglich.
•STOPPUHR
Die Stoppuhr kann bis zu 60 Minuten in Schritten von 1/5 Sekunde messen.
◆Technische Daten
(1) Kristalloszillatorfrequenz
32.768 Hz (Hz= Schwingungen pro Sekunde)
(2) Ganggenauigkeit am Handgelenk (bei normaler Temperatur)
Durchschnittliche Monatsrate : ± 20 Sekunden
Alargenauigkeit : ± 1 Minute
(3) Betriebstemperaturbereich
–5°C bis +50°C
(4) Antriebssystem
Schrittmotor
(5) Batterie
Silberoxidbatterie SR927W
DEUTSCH

16
◆Namen und Funktionen der einzelnen Bestandteile
*Einige Kronen und Knöpfe haben eine Schraubverriegelung.
*In der nachfolgenden Beschreibung werden Zeiger für eine Komponente, die
keine Erklärung erfordert, ausgelassen.
Knopf B
Knopf A
Krone
Zweite Stufe (entsprechende Zeiteinstellungen,
Zeigerpositionseinstellungen)
Normalposition
Erste Stufe (Datumseinstellung,
Alarmzeiteinstellung)
(6) Batteriestandzeit
Etwa 3 Jahre ab Installation, wenn der Alarm täglich einmal (für 20 Sekunden)
und die Stoppuhr für 2 Stunden verwendet wird.
(7) IC (Integrierter Stromkreis)
C-MOS-1C ; 1 Stück
*Änderungen der obigen technischen Daten zum Zweck der Verbesserung bleiben
jederzeit vorbehalten.

17
◆Zeiteinstellung / 0-Position Stellen der Stoppuhrzeiger
(grundlegende Uhr / Alarm-Mini-Uhr / Stoppuhrzeiger)
Für die Uhr werden die Zeiteinstellung (grundlegende Uhr und Mini-Wecker) und
die Einstellung der 0-Position beide an der zweiten Stufe der Krone durchgeführt.
Wenn die Krone zum Einstellen der Uhrzeit usw. zur zweiten Stufe herausgezogen
worden ist, überprüfen Sie deshalb die folgenden drei Punkte und bestätigen Sie
diese oder stellen Sie sie erneut, und drücken Sie dann die Krone ein.
–Zeit der grundlegenden Uhr
–Zeit des Miniweckers
–0-Position der Stoppuhrzeiger (2 Zeiger)
Stoppuhrzeiger (Minutenzeiger,
Sekundenzeiger)
Krone
Grundlegende Uhr (Stunden-, Minuten- und
kleiner Sekundenzeiger)
Mini-Wecker (Stunden, Minuten)
[Stellen der Zeit (grundlegende Uhr und Mini-Wecker)]
Ziehen Sie die Krone zur zweiten Stufe heraus. Der kleine Sekundenzeiger
hält dann an. Halten Sie den kleinen Sekundenzeiger an der 12-Uhr-Position
an.
Kleiner
Sekundenzeiger
Der Mini-Wecker zeigt die
gegenwärtige Zeit an.
*Wenn die obige Tätigkeit bei laufender Stoppuhr durchgeführt wird, wird die
Stoppuhr zwangsweise zurückgestellt.
*Wenn der Mini-Wecker eine Alarmzeit anzeigt (Wecker gestellt), läuft der Mini-
Wecker schnell vorwärts und zeigt die gegenwärtige Zeit an.

18
Drehen Sie die Krone und stellen Sie die grundlegende Uhr.
Knopf B
Wir empfehlen, dass Sie zu dieser Zeit eine um mehrere Minuten in der Zukunft
liegende Zeit einstellen. Der Grund hierfür ist, dass [Sie anschließend die Zeit
für den Mini-Wecker] und die [0-Position der Stoppuhrzeiger einstellen]. Sie
müssen die Krone eindrücken, nachdem Sie alle Einstellungen gemacht haben,
weshalb eine um einige Minuten in der Zukunft liegende Zeit eingestellt werden
muss.
*Das Datum ändert sich um 12 Uhr Mitternacht. Verwechseln Sie bei der
Einstellung nicht Vormittag (a.m.) und Nachmittag (p.m.).
*Stellen Sie zu dieser Zeit den Minutenzeiger 4 bis 5 Minuten vor die korrekte
Zeit und bewegen Sie ihn dann zurück, um die Zeit mit maximaler Genauigkeit
zu stellen.
Drücken Sie dann die Taste B und stellen Sie den Mini-Wecker.
Stellen Sie ihn auf die gleiche Zeit wie die grundlegende Uhr im obigen Schritt .
Fortlaufendes Drücken von Knopf B bewirkt Schnellvorlauf.
*Der Mini-Wecker hat keine 12-Stunden-Option für Vormittag (a.m.) und
Nachmittag (p.m.).

19
Stellen Sie dann die 0-Position für die beiden Stoppuhrzeiger durch.
Drücken Sie den Knopf A etwa 2 Sekunden lang. Der Minutenzeiger der
Stoppuhr macht dann eine Umdrehung.
Drücken Sie den Knopf B und stellen Sie den Minutenzeiger der Stoppuhr auf
die 0-Minuten-Position.
Fortlaufendes Drücken von Knopf B bewirkt Schnellvorlauf.
Stoppuhrminutenzeiger
Stoppuhrsekundenzeiger
Knopf A
Knopf B
Wenn Sie dann den Knopf A etwa 2 Sekunden lang drücken, macht der
Minutenzeiger der Stoppuhr eine Umdrehung.
Drücken Sie den Knopf B und stellen Sie den Sekundenzeiger der Stoppuhr
auf die 0-Sekunden-Position.
Fortlaufendes Drücken von Knopf B bewirkt Schnellvorlauf.
Befolgen Sie die nachfolgenden Verfahren, um schon durchgeführte
Einstellungen neu einzustellen.
Stellen des Mini-Weckers
Einstellen der 0-Position für
den Stoppuhrminutenzeiger
Einstellen der 0-Position für
den Stoppuhrsekundenzeiger
Dies zeigt, dass der Mini-Wecker 12
Stunden durchlaufen hat und bereit für
Korrektur ist. Drücken Sie Knopf B zur
Einstellung.
Dies zeigt, dass der Minutenzeiger der
Stoppuhr eine Umdrehung gemacht
hat und bereit für Korrektur ist.
Drücken Sie Knopf B zur Einstellung.
Dies zeigt, dass der Sekundenzeiger
der Stoppuhr eine Umdrehung gemacht
hat und bereit für Korrektur ist.
Drücken Sie Knopf B zur Einstellung.
Fortlaufendes Drücken von
Knopf A für etwa 2 Sekunden
Fortlaufendes Drücken von
Knopf A für etwa 2 Sekunden
Fortlaufendes Drücken von
Knopf A für etwa 2 Sekunden
Fortlaufendes Drücken von
Knopf A für etwa 2 Sekunden
* Sie können Neueinstellung so oft wie Sie wollen durchführen.
This manual suits for next models
4
Table of contents
Languages:
Other Orient Watch manuals

Orient
Orient RA-KV0403S User manual

Orient
Orient VS75 User manual

Orient
Orient UB8A002B Series User manual
Orient
Orient AA F69 User manual
Orient
Orient CFA02001B User manual

Orient
Orient UG1R002B User manual

Orient
Orient BF J50 User manual

Orient
Orient SDH00001 User manual

Orient
Orient TV(KFC) User manual

Orient
Orient TT(KFB) User manual

Orient
Orient WE (KL7) User manual

Orient
Orient FUN8G001 User manual

Orient
Orient DB 46A User manual

Orient
Orient UT (H4A) User manual

Orient
Orient KU(RMC) User manual

Orient
Orient cem65001b User manual

Orient
Orient ST(KUD) User manual

Orient
Orient DM 48Y User manual

Orient
Orient UY (KTA) User manual

Orient
Orient FFT00001W0 User manual