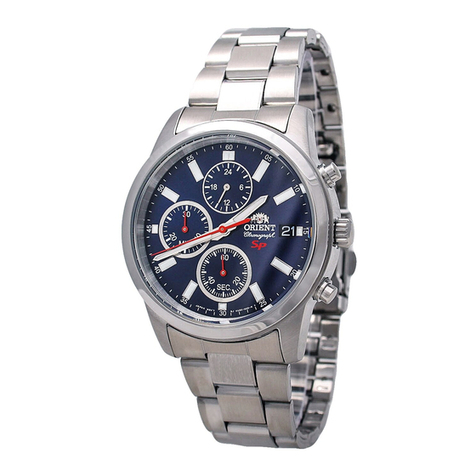
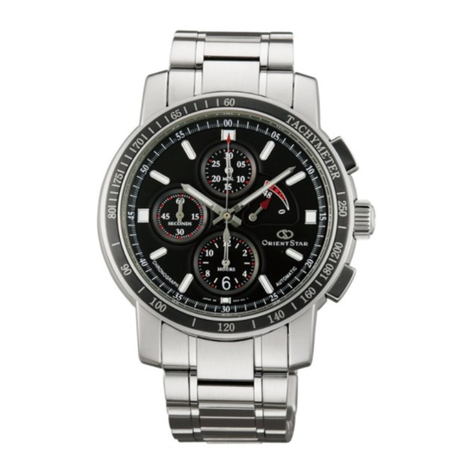
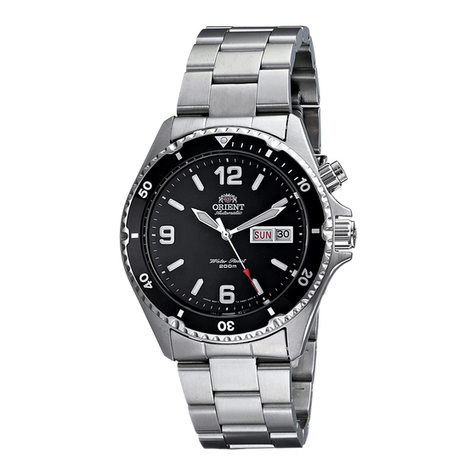
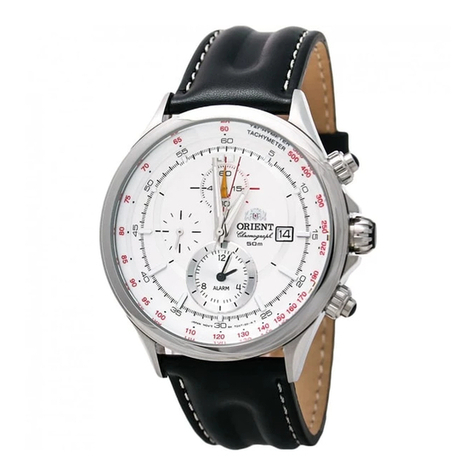
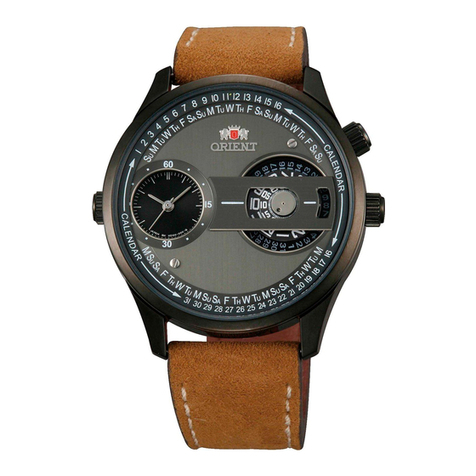
Orient GNA User manual

1
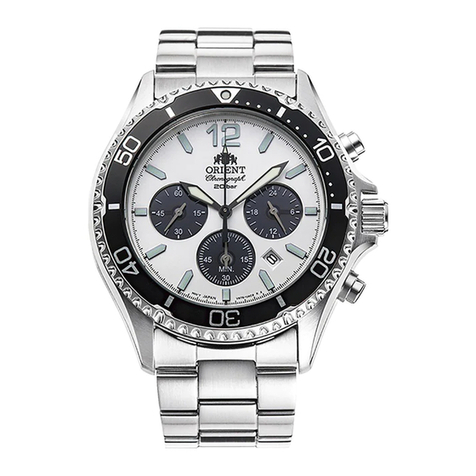
CHRONOGRAPH GNA (GN)
INSTRUCTION MANUAL
Thank you for your purchase of our product. To ensure prolonged use and optimum
performance, please read this Instruction Manual carefully and familiarize yourself
with the terms of the guarantee.
Please keep this Instruction Manual in your hand and refer in time of need.
◆SAFETY PRECAUTIONS
Make absolutely sure to observe the demarcated contents indicated below to
prevent any possible physical danger and property damage to you as well as
other persons concerned.
… A demarcation with this symbol represents the contents
assuming possibility for death or serious injury when
the product is used in any manner different from given
instructions.
… A demarcation with this symbol represents the contents
assuming possibility of causing human injury or mate-
rial damage only when a product is used in any manner
different from given instructions.
◆FEATURES
(1) This is an analogue crystal oscillator watch.
(2) It indicates the current time with a 24-hour hand, hour hand, minute hand and
second hand.
(3) In addition to time indicator, it has date and chronograph functions (one second
increments, up to 60 minutes).
WARNING
WARNING
CAUTIONCAUTION
ENGLISH

2
◆SPECIFICATIONS
(1) Crystal oscillator frequency
32,768 Hz (Hz = Oscillations per second)
(2) Drive system
Step motor
(3) Wrist-worn accuracy (at normal temperature <5°C - 35°C>)
Mean monthly rate: ±20sec.
(4) Operating temperature range
–10°C - +60°C
(5) Display system
[Time function]
24-hour hand, hour hand, minute hand and second hand (one-second
step motion)
[Calendar] Date indicator
(6) Additional functions
[Chronograph] One second increments, up to 60 minutes
(7) Battery
SR927SW; 1 piece
(8) Battery life
Approx. 3 years if the Chronograph is used for 60 minutes a day.
* The above specifications are subject to change without notice for improve-
ment.
◆DISPLAY AND CROWN / BUTTON OPERATION
Button A
Button B
Hour hand
Chronograph minute hand
Chronograph second hand
Minute hand
Date
Small second hand
Normal position
First click
Second click
24 hour hand
Crown

3
◆HOW TO SET THE TIME
1Pull out the crown to the second click when the small
second hand is at the 12 o’clock position.
The small second hand stops on the spot.
2Turn the crown to set the time.
This watch has a 24-hour hand, which is linked to
the operation of the watch, so check whether the
24-hour hand indicates AM or PM when turning the
hour and minute hands to set the time.
To set the time accurately, advance the minute hand
four or five minutes ahead of the correct time, then
move it back to the correct time.
3Press the crown in at the same time as the time
signal. The watch starts to run.
◆HOW TO SET THE DATE
㪌
1Pull out the crown to the first click.

4
㪏
2Turn the crown clockwise to set the date.
㪏
3After all the adjustments are completed, push the
crown back in to the normal position.
• Date correction at the end of the month
Date correction is necessary on months with 30 days or less, so on the first
day of the next month, adjust the date to the first.
WARNING
Do not set the date between 9:00 p.m. and 1:00 a.m. Otherwise, the date may not
change properly. If it is necessary to set the date during that time period, first change
the time to any time outside it, set the date and then, reset the correct time.
◆HOW TO USE THE CHRONOGRAPH
Chronograph measurement is in units of one second, up to a maximum duration
of 59 minutes and 59 seconds.
■Standard measurement
Button A
START →Button A
STOP →Button B
RESET
Button A
Button B
Chronograph minute hand
Chronograph second hand

5
■Accumulated elapsed time measurement
Restarting and stopping the stopwatch can
be repeated by pressing button A.
Button A
START
Button A
STOP
Button A
RESTART
Button B
RESET
Button A
STOP
* When button Bis pressed, the stopwatch will be reset even during time
measurement.
◆OPERATING THE TACHYMETER
The tachymeter is a function that measures the time required to pass through a
certain distance (1 km) and find the average hourly speed. It can also find perfor-
mance per unit time (one hour).
* The measurement time of the tachymeter is limited to one minute or less. Please
note that if the measurement time exceeds one minute, it will not be possible
to read the average hourly speed or performance per hour.
Button A
1Press button Asimultaneously with the start (or with the
start of product fabrication).
Button A
2Press button Asimultaneously with reaching the 1 km
point (or with the end of product fabrication).

6
3Read the number on the tachymeter scale indicated by
the chronograph second hand.
(In this example, the tachymeter number is 80, so the
average hourly speed is 80km/hr, or the hourly production
is 80 pieces.)
* Depending on the product, the tachymeter scale may be printed on the bezel
or on the face. Check the watch you purchased and then refer to the operation
method.
◆ NOTES ON THE SCREW CROWN
■Models with screw down crown
• If your watch has a screw down crown, it is necessary to unlock the crown by
unscrewing it before operating it.
• Except when you operate the crown, be sure that it is always locked by screwing
it in completely.
■[How to unlock the crown]
Unscrew the crown by turning it counterclockwise.
The crown can be pulled out or turned for time/cal-
endar setting or other watch operations.
The crown is locked.
The crown is unlocked.
* The crown can be
pulled out.
■[How to lock the crown]
After using the crown for watch operation, turn it
clockwise while pressing it until it locks in place.

7
◆ MOVE THE CHRONOGRAPH HANDS TO “0” POSITION.
1Pull the crown out to the second click.
2Press button Ato move the chronograph second hand to the “0” position.
* Press button Acontinuously to move the chronograph second hand forward
rapidly.
3Press button Bto reset the chronograph minute hand to the “0” position.
4Once the hands are at the “0” position, re-set the time.
Return the crown to the normal position.
* Please follow the above operation after battery replacement.

8
◆IN HANDLING THE WATCH
WARNING
(1) Water-resistance
Conditions
of use
Exposure to
temporary
water drops
(face-wash-
ing, rain,
etc.)
Water sports
(swimming,
yachting, etc),
work involving
constant
exposure to
water (fishery
agriculture,
etc), exposure
to water from
high pressure
valves, etc.
Skin diving
without
using oxygen
tanks
Scuba diving
(with oxygen
tanks)
Operation of
crown in un-
derwater with
water drops
adhered
on it
Non
water
resis-
tance
Watch without
marking of WA-
TER RESISTANT
on back cover of
watchcase.
²²²²²
Water
resis-
tance for
daily life
Watch with marking
of WATER RESIST
(ANT) on back
cover of watchcase
or marking of
3BAR(3ATM,
30m) with WATER
RESIST(ANT).
|²²²²
Rein-
forced
water-re-
sistance
for daily
life I
Watch with marking
of 5BAR (5ATM,
50m) on back
cover or dial face
along with WATER
RESIST (ANT).
||²²²
Rein-
forced
water re-
sistance
for daily
life II
Watch with marking
of 10BAR (10ATM,
100m) or 20BAR
(20ATM, 200m) on
back cover or dial
face along with WA-
TER RESISTANT.
|||²²
TypeType

9
* It is recommendable that you use the watch correctly following the mentioned
scope of usage after ascertaining water-resistance precautions marked on the
dial face of the watch or on the back of the watchcase.
CAUTION
1Keep the crown pushed in at all times (in the normal position) while using the
watch. If the crown is the screwed-down type, check that it is securely screwed
down.
2Do not operate the crown or buttons underwater, or while the watch is wet.
Water may enter the interior of the watch and defeat the water resistance.
3If your watch is non-water resistant, beware of splashes of water (during face
washing, rain, etc.) and sweat. If the watch becomes wet from water or sweat,
wipe the moisture off with a dry, soft cloth.
4Even with an improved water resistant watch for everyday use, avoid directing
strong jets of mains water onto the watch. Water pressure above the limit can
apply, which may defeat the water resistance.
5With an improved water resistant watch for everyday use, rinse sea water off
the case after exposure, then wipe it thoroughly to avoid corrosion and other
effects.
6The durability of leather bands may be adversely affected by wetting, due to the
nature of the material, and they may lose color or peel where glued. Especially
when you use the watch in water, change to another type of band first (one
made of metal or rubber).
7The interior of the watch contains some amount of moisture, which may cause
fogging on the inside of the glass when the outside air is cooler than the internal
temperature of the watch. If the fogging is temporary it causes no harm inside
the watch, but if prolonged, or if water enters the watch, consult your place of
purchase and do not leave the problem untreated.
10
(2) Shock
1Be sure to take the watch off your wrist when you engage in
strenuous sports, whereas playing such light sports as golf,
etc., will not adversely influence the watch.
2Avoid a violent shock such as dropping the watch on the
floor.
(3) Magnetism
1If the watch is left at a place near strong magnetism for an extended period,
the component parts can get magnetized, resulting in a failure. Be careful.
2The watch can temporarily gain or lose time when exposed to magnetism, but
it functions with original precision when it is put away from the magnetism. In
this case, correct the time.
(4) Vibration
The watch can lose time temporarily when it is exposed to
strong vibration while riding motorcycles or using jackham-
mers, chain saws, etc.
(5) Temperature
1In the environment below and above the normal temperatures <5°C-35°C>,
the watch may malfunction and stop.
2If the watch is left unworn, it may lose accuracy to some extent.
(6) Chemicals, Gasses, etc.
Utmost caution must be exercised for contacts with gasses, mercury, chemicals
(thinner, gasoline, various solvents, detergents containing such components,
adhesives, paints, drugs, perfume, cosmetics, etc.), and so forth. Such contacts
may cause the discoloration of a watchcase, a watchband, and a dial face. The
discoloration, deformation, and damage of various resin-based component parts
may also occur.

11
◆ABOUT THE BATTERY
■Handling the battery
WARNING
(1) Keep the batteries out of reach of small children. Seek medical advice if anyone
swallows a battery.
(2) Do not dispose of removed batteries in fire. They could explode.
(3) The battery is no rechargeable, so it cannot be recharged. Do not attempt to
do so, as the battery could overheat and explode.
■Battery Replacement
CAUTION
(1) If the battery is left in the watch for a long time after it has run down, it could
leak fluid, which would damage the watch, so replace the battery promptly.
(2) Always replace the battery with another of the specified type.
(3) Battery replacement requires special tools and skills, so ask your vendor to do
it.
(4) If the battery is inserted with the polarity (plus and minus) reversed, it may
overheat and explode, so be sure to use the battery in the right orientation.
(5) After replacing the battery, set the chronograph hands to the “0” position. Then
set the time.

12
■Battery life
(1) The battery life for this watch is based on the assumption that the chronograph
is used for one hour per day. If the chronograph is used more extensively, the
battery could expire before the time indicated in the product specification.
(2) The battery inserted in the watch when purchased is for monitor purposes. The
monitor battery is fitted in the factory to check the performance and functions
of the watch. Therefore, it may expire before the specified time has elapsed
after purchase.
The monitor battery is not included in the price of the watch, so the normal fee
will be charged for battery replacement, even if the battery expires during the
warranty period.

13
CHRONOGRAPH GNA (GN)
BEDIENUNGSANLEITUNG
Wir danken Ihnen für den Kauf dieses Produktes. Bitte lesen Sie diese Bedie-
nungsanleitung sorgfältig durch und machen Sie sich mit den Garantiebedingungen
vertraut, um lange Verwendung und optimale Leistung sicherzustellen.
Bitte halten Sie diese Bedienungsanleitung griffbereit, damit Sie sich jederzeit
darauf beziehen können.
◆SICHERHEITSMASSNAHMEN
Um zu verhindern, dass Sie oder andere Personen sich verletzen oder Sach-
schäden entstehen, lesen Sie sich die Anweisungen, die mit den nachfolgenden
Symbolen gekennzeichnet sind, sorgfältig durch und befolgen Sie diese.
… Die Missachtung dieser Anweisung kann zu Tod
oderschweren Verletzungen führen.
… Die Missachtung dieser Anweisung kann zu Verletzungen
oder Schäden an der Uhr führen.
◆EIGENSCHAFTEN
(1) Die vorliegende Uhr ist eine analoge Kristalloszillatoruhr.
(2) Sie zeigt die aktuelle Uhrzeit mit einem 24-Stunden-Zeiger, Stundenzeiger,
Minutenzeiger und Sekundenzeiger an.
(3) Neben der Zeitanzeige verfügt diese Uhr noch über eine Datums- und Chro-
nographfunktion - Stoppfunktion (1-Sekunden-Abstände, bis zu 60 Minuten).
WARNUNG
WARNUNG
ACHTUNGACHTUNG
DEUTSCH

14
◆TECHNISCHE DATEN
(1) Kristallschwingfrequenz
32.768 Hz (Hz = Schwingungen pro Sekunde)
(2) Antriebssystem
Schrittmotor
(3) Genauigkeit beim Tragen am Handgelenk (bei einer normalen Temperatur von
5 °C bis 35 °C)
(4) Betriebstemperaturbereich
–10 °C bis +60 °C
(5) Anzeigesystem
[Zeitfunktion] 24-Stunden-Zeiger, Stundenzeiger, Minutenzeiger und Sekun-
denzeiger (Bewegung in 1-Sekunden-Schritten)
[Kalender] Datumsanzeige
(6) Weitere Funktionen
[Chronograph] 1-Sekunden-Abstände, bis zu 60 Minuten
(7) Batterie
SR927W: 1 Stück
(8) Batterielebensdauer
Ungefähr 3 Jahre, wenn der Chronograph 60 Minuten pro Tag verwendet
wird.
* Änderungen der obigen technischen Daten für Verbesserungen bleiben jederzeit
vorbehalten.
◆ANZEIGE UND KRONE / KNOPFBETÄTIGUNG
Knopf A
Knopf B
Stundenzeiger
Minutenzeiger des Chronographen
Sekundenzeiger des Chronographen
Minutenzeiger
Datum
Kleiner Sekundenzeiger
Normalposition
Erste Raststellung
Zweite Raststellung
24-Stunden-Zeiger
Krone

15
◆STELLEN DER UHR
1Ziehen Sie die Krone zur zweiten Raststellung
heraus, wenn der kleine Sekundenzeiger an der
12-Uhr-Stellung ist.
Der kleine Sekundenzeiger wird dann an dieser
Position angehalten.
2
Drehen Sie die Krone, um die Uhrzeit einzustellen.
Diese Uhr verfügt über einen mit ihren Funktionen
verknüpften 24-Stunden-Zeiger. Prüfen Sie daher,
ob der 24-Stunden-Zeiger „AM“ (vormittags) oder
„PM“ (nachmittags) anzeigt, wenn Sie die Uhrzeit
durch Drehen des Stunden- und des Minutenzeigers
einstellen.
Um die Uhrzeit genau einzustellen, stellen Sie
den Minutenzeiger zuerst bezüglich der korrekten
Uhrzeit vier oder fünf Minuten vor und bewegen ihn
dann wieder zurück auf die korrekte Uhrzeit.
3Drücken Sie die Krone beim Ertönen des Zeitzei-
chens nach innen. Nun beginnt die Uhr zu laufen.
◆EINSTELLEN DES DATUMS
㪌
1Ziehen Sie die Krone zur ersten Raststellung her-
aus.

16
㪏
2Drehen Sie die Krone im Uhrzeigersinn, um das
Datum zu stellen.
㪏
3Drücken Sie die Krone nach Beendigung aller
Einstellungen wieder zur Normalposition zurück.
• Datumskorrektur am Ende des Monats
Bei Monaten mit 30 oder weniger Tagen ist eine Datumskorrektur erforderlich. Stellen
Sie das Datum daher am ersten Tag des darauf folgenden Monats auf den „1.“
WARNUNG
Stellen Sie das Datum nicht zwischen 21 Uhr abends und 1 Uhr morgens ein,
da sonst das Datum möglicherweise nicht korrekt umgeschaltet wird. Wenn es
erforderlich ist das Datum während dieser Zeit umzuschalten, so stellen Sie zuerst
die Uhr auf eine Zeit außerhalb dieses Bereiches, stellen Sie das Datum ein, und
stellen Sie dann die Uhr wieder auf die aktuelle Zeit.
◆VERWENDUNG DES CHRONOGRAPHEN - STOPPFUNKTION
Der Chronograph misst sekundengenau, und zwar bis maximal 59 Minuten und
59 Sekunden.
■Standardmessung
Knopf A
Start →Knopf A
Stopp →Knopf B
Rückstellung
Knopf A
Knopf B
Minutenzeiger des Chronographen
Sekundenzeiger des Chronographen

17
■Kumulative Zeitmessung
Neustart und Stopp der Stoppuhr können durch
Drücken von Knopf Awiederholt werden.
Knopf A
Start
Knopf A
Stopp
Knopf A
Neustart
Knopf B
Rückstellung
Knopf A
Stopp
* Durch Drücken von Knopf Bwird die Stoppuhr selbst während einer Messung
zurückgestellt.
◆VERWENDUNG DER TACHOMETERSKALA
Das Tachymeter ist eine Funktion zur Messung der Zeit, die zum Zurücklegen
einer bestimmten Entfernung (1 km) und zum Berechnen der Durchschnittsge-
schwindigkeit pro Stunde erforderlich ist. Mit der Funktion kann auch die Leistung
pro Zeiteinheit (eine Stunde) bestimmt werden.
* Die Messzeit des Tachymeters ist auf maximal eine Minute begrenzt. Sollte
die Messzeit eine Minute übersteigen, ist es nicht mehr möglich, die Durch-
schnittsgeschwindigkeit pro Stunde oder die Leistung pro Stunde abzulesen.
Knopf A1Drücken Sie die Taste Abeim Start (oder zum Start der
Produktherstellung).
Knopf A2Drücken Sie die Taste Abei Erreichen des 1-km-Punkts
(oder zum Ende der Produktherstellung).

18
3Lesen Sie die Zahl auf der Tachymeterskala ab, die durch
den Sekundenzeiger des Chronographen angegeben
wird. (Bei diesem Beispiel lautet die Tachymeternum-
mer 80, d. h. die Durchschnittsgeschwindigkeit beträgt
80 km/h bzw. die Produktion pro Stunde beträgt 80
Stück.)
* Je nach Modell ist die Tachymeterskala auf der Lünette oder der Uhrenoberflä-
che aufgedruckt. Prüfen Sie, welches Uhrenmodell Sie erworben haben, und
führen Sie dann den entsprechenden Bedienvorgang aus.
◆ HINWEISE FÜR VERSCHRAUBTE KRONE
■Modelle mit einer verschraubten Krone
• Wenn Ihre Uhr eine verschraubte Krone hat, muss die Krone vor der Betätigung
losgeschraubt werden.
• Achten Sie darauf, die Krone immer voll verschraubt zu halten, wenn die Krone
nicht betätigt wird.
■[Entriegeln der Krone]
Lösen Sie die Verschraubung der Krone durch
Drehen gegen den Uhrzeigersinn. Die Krone kann
dann herausgezogen oder gedreht werden, um
die Uhr bzw. den Kalender zu stellen oder sonstige
Betätigungen durchzuführen.
Die Krone ist verriegelt.
Die Krone ist entriegelt.
* Die Krone kann heraus-
gezogen werden.
■[Verriegeln der Krone]
Verschrauben Sie die Krone nach der Betätigung
durch Drücken und Drehen im Uhrzeigersinn, bis
sie verriegelt ist.

19
◆ STELLEN SIE DIE ZEIGER DES CHRONOGRAPHEN AUF DIE
POSITION „0“.
1Ziehen Sie die Krone bis zur zweiten Raststelle heraus.
2Drücken Sie Taste A, um den Sekundenzeiger des Chronographen auf die
Position „0“ zu stellen.
* Drücken Sie Taste Akontinuierlich, um den Sekundenzeiger des Chrono-
graphen schnell vorwärts zu bewegen.
3Drücken Sie Taste B, um den Minutenzeiger des Chronographen auf die
Position „0“ zurückzustellen.
4
Wenn sich die Zeiger an der Position „0“ befinden, stellen Sie die Uhrzeit erneut ein.
Bringen Sie die Krone wieder auf die Normalposition.
* Gehen Sie nach einem Batteriewechsel wie oben beschrieben vor.

20
◆HANDHABUNG DER UHR
WARNUNG
(1) Waserbeständigkeit
Verwendungsbe-
dingungen
Spritzwasser
(Waschen
des Gesichts,
Regen usw.)
Wassersport
wie Schwim-
men, Segeln
usw., Waschen
in der Fischerei
und Waschen
des Autos
usw., kräftiger
Wasserfluß von
Wasserhähnen
Sporttauchen
ohne Sauer-
stofftank
Sporttauchen
(mit Sauerstoff-
tank)
Betriebsweise
der Krone
unter Wasser,
wenn Wasser-
tropfen an ihr
haften
Nicht
wasserbe-
ständig
Uhr ohne die Auf-
schrift WATER
RESISTANT (was-
serbeständig)
auf der Rückseite
²²²²²
Wasser-
beständig
für den
Alltag
Uhr mit der
Aufschrift WATER
RESIST (ANT) auf
der Rückseite des
Uhrengehäuses
oder der Aufschrift
3BAR (3ATM,
30m) mit WATER
RESIST (ANT).
|²²²²
Verstärkte
Wasserbe-
ständigkeit
I für den
Alltag
Uhr mit der
Aufschrift 5BAR
(5ATM, 50m) auf der
Rückseite oder dem
Ziffernblatt zusam-
men mit WATER
RESIST (ANT).
||²²²
Verstärkte
Wasser-
dichtigkeit
II für den
Alltag
Uhr mit der
Aufschrift 10BAR
(10ATM, 100m)
oder 20BAR
(20ATM, 200m) auf
der Rückseite oder
dem Ziffernblatt
zusammen mit WA-
TER RESISTANT.
|||²²
TypTyp
This manual suits for next models
1
Table of contents
Languages:
Other Orient Watch manuals

Orient
Orient VS75 User manual

Orient
Orient UG1R002B User manual

Orient
Orient FTD10002B0 User manual

Orient
Orient EMAM80 User manual

Orient
Orient WE (KL7) User manual

Orient
Orient TX(VS75) User manual

Orient
Orient AA F69 User manual

Orient
Orient TT(KFB) User manual

Orient
Orient M14 User manual

Orient
Orient SY(KFF) User manual

Orient
Orient 32A00 User manual

Orient
Orient KU(RMC) User manual

Orient
Orient KFA (TD) User manual

Orient
Orient XC User manual

Orient
Orient UB8A002B Series User manual

Orient
Orient SDH00001 User manual

Orient
Orient TV(KFC) User manual

Orient
Orient UY (KTA) User manual

Orient
Orient DD (48C) User manual

Orient
Orient BEM5L003 User manual