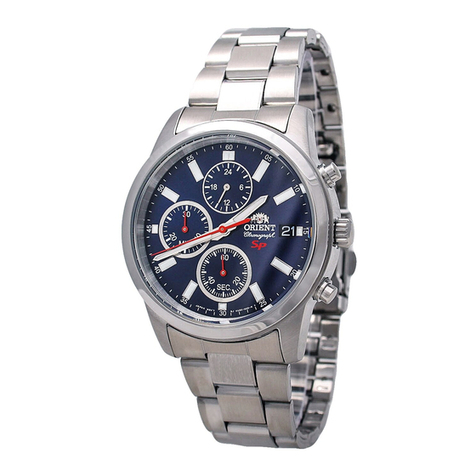
Orient KFB TT User manual

1
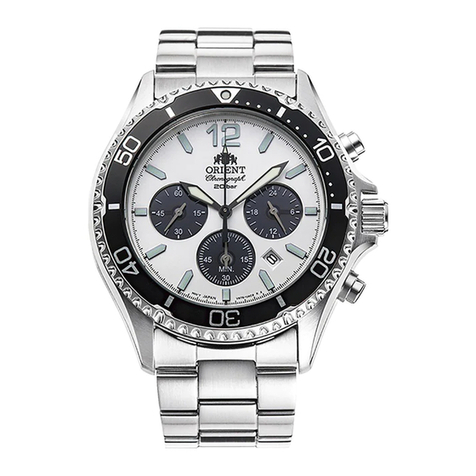
CHRONOGRAPH <KFB (TT)>
INSTRUCTION MANUAL
Thank you for your purchase of our product. To ensure prolonged use and opti-
mum performance, please read this Instruction Manual carefully and familiarize
yourself with the terms of the guarantee.
Please keep this Instruction Manual in your hand and refer in time of need.
◆Specifications
(1) Crystal oscillator frequency
32,768 Hz (Hz = Oscillations per second)
(2) Wrist-worn accuracy (at normal temperature <5°C ~ 35°C>)
Mean monthly rate: ±20sec.
(3) Operating temperature range
–5°C ~ +50°C
(4) Drive system
Step motor: 4 pieces
(5) Display system
[Time function]
Hour and minute hands with a small second hand that moves at one-second intervals.
[Stopwatch function]
Stopwatch 1/20 second hand turns a full circle in a second at 1/20 second intervals.
Stopwatch second hand turns a full circle in 60 seconds at one-second intervals.
Stopwatch minute hand turns a full circle in 60 minutes at one-minute intervals.
Stopwatch hour hand turns a full circle in 12 hours while moving correspond-
ingly with the stopwatch minute hand.
(6) Battery
Silver oxide battery SR927W; 1 piece
(7) Battery life
Approx. 3 years if the stopwatch is used for less than 2 hours a day.
(8) IC (Integrated Circuit)
C-MOS-1C; 1 piece
*
The above specifications are subject to change without notice for improvement.
ENGLISH

2
◆FEATURES
This is a multi-display analogue watch featuring a stopwatch function.
It is a very convenient multi-function watch.
•The current time is indicated by the hour and minute hands and a small second
hand.
•The stopwatch can measure up to 12 hours in 1/20 second increments. The
time measured is indicated by the four stopwatch hands (stopwatch 1/20 sec-
ond, second, minute and hour hands). Split time measurement is also available.
After 12 hours, the stopwatch will automatically stop and reset.
◆DISPLAY AND CROWN / BUTTON OPERATION
Button A(Start/Stop of the stopwatch)
Crown
Second click
(Time setting and adjusting the stopwatch hand position)
First click (Date setting)
Normal position
Button B(Split/Split release/Reset)
◆SETTING THE TIME AND ADJUSTING THE STOPWATCH
HAND POSITION
(Hands for time display and stopwatch hands)
This watch is so designed that
•time setting and
•stopwatch hand position adjustment
are both made with the crown at the second click position. Once the crown is
pulled out to the second click, be sure to make the above adjustments at the same
time.

3
Stopwatch hands
(Stopwatch 1/20 second and second hands)
Hands for time display
(Hour and minute hands and small second hand)
Stopwatch hands
(Stopwatch hour and minute hands)
Crown
■ How to set the time
Pull out the crown to the second click when the small second hand is at the 12
o’clock position.
The small second hand stops on the spot.
Small second
hand
*If the stopwatch is measuring, the stopwatch hands are automatically reset to
“0” position.
Turn the crown to set the hour and minute hands to the desire time.
*When setting the hour hand, check that AM/PM is correctly set.The watch is so
designed that the date changes once in 24 hours.
*When setting the minute hand, first advance it 4 to 5 minutes ahead of the
desired time, and then, turn it back to the exact minute.
It is recommended that the hands be set
to the time a few minutes ahead of the
current time, taking into consideration the
time required to adjust the stopwatch
hand position if necessary.

4
Reset the four stopwatch hands to “0” position.
Press button Afor 2 seconds to select the stopwatch hand to be adjusted.
Stopwatch 1/20
second hand
Stopwatch hour and minute hands
Stopwatch second hand
Button A
Button B
Press button Brepeatedly to reset the selected stopwatch hand to “0” position.
It moves quickly if button Bis kept pressed.
Press button Afor 2 seconds.
The stopwatch 1/20 second hand
turns a full circle to indicate that it is
ready for adjustment.Press button B
to reset it to “0” position.
The stopwatch second hand turns a
full circle to indicate that it is ready
for adjustment. Press button Bto re-
set it to “0” position.
The stopwatch hour and minute hands
turn a full circle to indicate that they
are ready for adjustment. Press but-
ton Bto reset it to “0” position.
4After all the adjustments are completed, push the crown back in to the normal
position in accordance with a time signal.
*Check that the hour and minute hands for the time display indicate the cur-
rent time, then, push the crown back in to the normal position.
Adjusting the stopwatch second
hand to “0” position
Adjusting the stopwatch 1/20 sec-
ond hand to “0” position
Adjusting the stopwatch hour and
minute hands to “0” position

5
◆HOW TO SETTHE DATE
•Be sure to set the time before setting the date.
•It is necessary to adjust the date on the first day of March and months following
30-day months.
Pull out the crown to the first click.
Turn the crown clockwise to set the date.
*Do not set the date between 9:00 p.m. and 1:00 a.m. Otherwise, the date
may not change properly. If it is necessary to set the date during that time
period, first change the time to any time outside it, set the date and then,
reset the correct time.
After all the adjustments are completed, push the crown back in to the normal
position.
◆HOW TO USETHE STOPWATCH
•The stopwatch can measure up to 12 hours in 1/20 second increments.After 12
hours, it will automatically stop.
•The time measured is indicated by the four stopwatch hands that move inde-
pendently of the hands for time display.
•After the stopwatch is started, the stopwatch 1/20 second hand moves for about
10 minutes and automatically stops at “0” position. When split time is measured
or the measurement is stopped, it moves to indicate the elapsed 1/20 seconds.
•Split time measurement is available.

6
[How to read the stopwatch hands]
The time measured is indicated by the four stopwatch hands (stopwatch 1/20
second, second, minute and hour hands).
1 hour, 30 minutes and 10.85 seconds
Stopwatch 1/20 second hand
(Elapsed time less than 1 second) Stopwatch second hand
(Elapsed seconds)
Stopwatch hour hand
Stopwatch minute hand (Elapsed hours
and minutes: Read the hands as you
read the hour and minutes of
conventional analogue watches.)
Time measured is indicated by the four stopwatch hands.
[Notes on the movement of the stopwatch 1/20 second hand]
•After the stopwatch is started, the stopwatch 1/20 second hand moves for about
10 minutes and automatically stops at “0” position.
•When split time is measured or the measurement is stopped, if moves to indi-
cate the elapsed 1/20 seconds.
•After split time is released or the measurement is restarted, it moves for about
10 minutes and stops automatically.
•In the same manner, if the stopwatch is stopped and restarted repeatedly or
split time is measured and released repeatedly, it moves for about 10 minutes
and stops automatically.
<Note on adjusting the stopwatch hand position>
•If the stopwatch hands do not return to “0” position when the stopwatch is
reset, follow the procedure in “◆ SETTING THE TIME AND ADJUSTING
THE STOPWATCH HAND POSITION” to reset them.
•In that case, be sure to adjust the hands for time display to the current time.

7
■ How to reset the stopwatch
•When the stopwatch hands are counting:
Press button Ato stop the stopwatch.
Press button Bto reset the stopwatch.
•When the stopwatch hands are stopped:
One of the following three stopwatch operations
has occurred.Reset the stopwatch accordingly.
[The stopwatch was stopped in“Standard mea-
surement” or “Accumulated elapsed time mea-
surement.”]
Press button Bto reset the stopwatch.
[Split time was measured and remains displayed “Split time measurement.”]
Press button B. The split time is released and the stopwatch hands move
quickly to indicate the measurement in progress.
Press button Ato stop the stopwatch.
Press button Bto reset the stopwatch.
[The time of the 2nd competitor was measured in “Measurement of two com-
petitors.”]
Press button B. The stopwatch hands move quickly and stop.
Press button Bto reset the stopwatch.
■ Standard measurement
Button B
Button A
Button A
START
Button A
STOP
Button B
RESET
→
Button A
START
Button A
STOP
Button A
RESTART
Button A
STOP
Button B
RESET
→
→→ →→
.....
■ Accumulated elapsed time measurement
Restarting and stopping the stopwatch can
be repeated by pressing button A.

8
Button A
START
Button B
SPLIT
Button B
SPLIT RELEASE
Button A
STOP
Button B
RESET
■ Split (intermediate) time measurement
Measurement and release of the split time
can be repeated by pressing button B.
→→ →→
Button A
START
Button B
FINISH TIME
OF FIRST
COMPETITOR
Button
A
SECOND
COMPETITOR
FINISH
Button B
FINISH TIME
OF SECOND
COMPETITOR
Button
B
RESET
■ Measurement of two competitors
→→ →→
60
400
250
70
80
90
100
100
110
120
140
160
180
200
300
500
60
400
250
70
80
90
100
100
110
120
140
160
180
200
300
500
70
•Measurement of speed per hour
1.Measure the time required to run 1
km.
2.Read the tachymeter figure which
the second hand is indicating. (70
km/hour)
1 km
Start Stop
◆Operating the tachymeter
(for a item that has tachymeter scale on the dial)

9
•Measurement of output per hour
1.Measure the time required to pro-
duce one product.
2.Read the tachymeter figure which
the second hand is indicating. (70
pieces/hour)
60
400
250
70
80
90
100
100
110
120
140
160
180
200
300
500
60
400
250
70
80
90
100
100
110
120
140
160
180
200
300
500
70
One product
Start Stop
◆NOTES ON THE SCREW DOWN CROWN AND BUTTONS WITH
PROTECTOR RINGS
•Some models have a screw down crown and buttons with protector rings that
can be locked while they are not used.
•Locking the crown and buttons will prevent mistaken operation of the watch and
enhance its water-resistant quality.
•Unlock the crown and buttons when operating them, and be sure to lock them
after use.
■ Models with screw down crown
•If your watch has a screw down crown, it is necessary to unlock the crown by
unscrewing it before operating it.
•Except when you operate the crown, be sure that it is always locked by screwing
it in completely.
[How to unlock the crown]
Unscrew the crown by turning it counterclockwise.
The crown can be pulled out or turned for time/
calendar setting or other watch operations.
The crown is locked.
The crown is unlocked.
*The crown can be
pulled out.

10
[How to lock the crown]
After using the crown for watch operation, turn it
clockwise while pressing it until it locks in place.
■Models having buttons with protector rings
•If your watch has buttons with protector rings, it is necessary to unlock them by
unscrewing the protector ring attached to the side face of the buttons before
using them for watch operation.
•Except when you operate the buttons, be sure that they are always locked by
screwing in the protector rings completely.
[How to unlock the button]
Unscrew each protector ring com-
pletely by turning it counterclockwise.
The buttons are unlocked for watch
operation.
*If the protector ring is not unscrewed
completely, the button may not be
pressed. When unscrewing the pro-
tector ring, however, do not turn it
forcibly.
[How to lock the button]
After using the buttons for watch op-
eration, turn each protector ring clock-
wise until it locks in place.
*Do not screw in the protector ring
forcibly.
Button protector
(Button locked) (Button unlocked)
(Button unlocked) (Button locked)
*The button is
unlocked for
watch operation.

11
Underwater
operation of
crown and
operation of
crown with
water drops
adhered on it
Scuba diving
(oxygen tanks
are used)
Skin diving
without using
oxygen tanks
Conditions
of use
Watch with
marking of 50M
(5BAR) on back
cover or dial face
along with WATER
RESISTANT.
Non
water
resis-
tance
Watch without
marking of
WATER
RESISTANT on
back cover of
watchcase.
Exposure to
temporary
water drops
(face-
washing, rain,
etc.)
Watch with
marking of
WATER
RESISTANT on
back cover of
watchcase.
Water
resis-
tance for
daily life
Rein-
forced
water-
resis-
tance for
daily life I
Rein-
forced
water
resis-
tance for
daily life II
Watch with
marking of
100M (10BAR),
150M (15BAR)
200M (20BAR) on
back cover or dial
face along with
WATER
RESISTANT.
Type
⳯⳯⳯⳯⳯
嘷⳯⳯⳯⳯
嘷嘷⳯⳯⳯
嘷嘷嘷⳯⳯
Water sports
(swimming,
yachting,
etc), work
involving
constant
exposure to
water (fishery
agriculture,
etc),
exposure to
water from
high pressure
valves, etc.
◆In handling the watch
(1) Water-resistance

12
*It is recommendable that you use the watch correctly following the mentioned
scope of usage after ascertaining water-resistance precautions marked on the
dial face of the watch or on the back of the watchcase.
(2) Shock
Be sure to take the watch off your wrist when you engage in
strenuous sports, whereas playing such light sports as golf,
etc., will not adversely influence the watch.
Avoid a violent shock such as dropping the watch on the floor.
(3) Magnetism
If the watch is left at a place near strong magnetism for an
extended period, the component parts can get magnetized,
resulting in a failure. Be careful.
The watch can temporarily gain or lose time when exposed to
magnetism, but it functions with original precision when it is
put away from the magnetism. In this case, correct the time.
(4) Vibration
The watch can lose time temporarily when it is exposed
to strong vibration while riding motorcycles or using jack-
hammers, chain saws, etc.
(5) Temperature
In the environment below and above the normal temperatures <5°C~35°C>,
the watch may malfunction and stop.
(6) Chemicals, Gasses, etc.
Utmost caution must be exercised for contacts with gasses, mercury, chemi-
cals (thinner, gasoline, various solvents, detergents containing such compo-
nents, adhesives, paints, drugs, perfume, cosmetics, etc.), and so forth. Such
contacts may cause the discoloration of a watchcase, a watchband, and a dial
face. The discoloration, deformation, and damage of various resin-based com-
ponent parts may also occur.

13
◆Battery replacement
•This watch is provided with a battery life alarm function. If the small second
hand advances at two-second intervals, replace the battery within a week.
*If a dead battery is kept in the watch for a long time, electrolyte leakage from
the battery will cause malfunction.
*While the small second hand is moving at two-second intervals, the alarm
will not ring even if it is engage. This is not a malfunction.
•When a new normal battery is installed, this watch operates for approximately
three years.
*The battery in your watch may run down in less than three years after the
date of purchase, because it is a monitor battery which is inserted at the
factory to check the functions and performance of the watch.
*Please specify batteries approved for Orient watches.
*Please replace the battery at the place of purchase or at Orient Watch Ser-
vice Center.
*When a battery is taken out of a watch, it must be kept at a place beyond the
reach of an infant.In case it is swallowed by an infant, consult a doctor imme-
diately.
•Our request after battery replacement
After battery replacement, it is requested that you perform time setting of your
basic watch and mini-alarm-watch, as well as 0-position setting of your stop-
watch.
Refer to [◆SETTING THE TIME AND ADJUSTING THE STOPWATCH
HAND POSITION].


15
CHRONOGRAPH <KFB (TT)>
BEDIENUNGSANLEITUNG
Wir danken Ihnen für den Kauf dieses Produktes. Bitte lesen Sie diese
Bedienungsanleitung sorgfältig durch und machen Sie sich mit den
Garantiebedingungen vertraut, um lange Verwendung und optimale Leistung
sicherzustellen.
Bitte halten Sie diese Bedienungsanleitung griffbereit, damit Sie sich jederzeit
darauf beziehen können.
◆Technische Daten
(1) Kristallschwingfrequenz
32.768 Hz (Hz = Schwingungen pro Sekunde)
(2) Genauigkeit bei Tragen am Handgelenk (bei einer normalen Temperatur von
<5°C bis 35°C>)
Durchschnittliche Monatsrate: ±20 sec
(3) Betriebstemperaturbereich
–5°C bis +50°C
(4) Antriebssystem
Schrittmotor: 4 Stück
(5) Anzeigesystem
[Zeitfunktion]
Stunden- und Minutenzeiger, sowie ein Sekundenzeiger, der sich in
Sekundenschritten bewegt.
[Stoppuhrfunktion]
Stoppuhrzeiger für 1/20 Sekunden, macht eine Umdrehung in einer Sekunde
in Schritten von 1/20 Sekunde.
Stoppuhr-Sekundenzeiger, macht eine Umdrehung in 60 Sekunden in
Sekundenschritten.
Stoppuhr-Minutenzeiger, macht eine Umdrehung in 60 Minuten in
Minutenschritten.
Stoppuhr-Stundenzeiger, macht eine Umdrehung in 12 Stunden mit Bewegung
entsprechend dem Minutenzeiger der Stoppuhr.
DEUTSCH

16
◆Eigenschaften
Dies ist eine Analoguhr mit Mehrfachanzeigen und Stoppuhrfunktion.
Dies ist eine sehr praktische Mehrfachfunktionsuhr.
•Die aktuelle Zeit wird durch Stunden- und Minutenzeiger und einen kleinen
Sekundenzeiger angezeigt.
•Die Stoppuhr kann bis zu 12 Stunden in Schritten von 1/20 Sekunde messen.
Die gemessene Zeit wird durch die vier Zeiger der Stoppuhr angezeigt
(Stoppuhrzeiger für 1/20 Sekunden, Sekunden, Minuten und Stunden).
Zwischenzeitmessung ist auch möglich.
Nach 12 Stunden hält die Stoppuhr automatisch an und wird zurückgestellt.
◆Anzeige und Krone/Knopfbetätigung
Knopf A(Start/Stopp der Stoppuhr)
Krone
Zweite Raststellung (Stellen der Uhr und Einstellen der
Position der Stoppuhrzeiger)
Erste Raststellung (Einstellen des Datums)
Normalposition
Knopf B(Zwischenzeit/Freigabe der Zwischenzeit/Rückstellung)
(6) Batterie
Silberoxidbatterie SR927W: 1 Stück
(7) Batterielebensdauer
Etwa 3 Jahre, wenn die Stoppuhr weniger als 2 Stunden pro Tag verwendet wird.
(8) IC (Integrierter Stromkreis)
C-MOS-1C: 1 Stück
*Änderungen der obigen technischen Daten für Verbesserungen bleiben jederzeit
vorbehalten.

17
◆Stellen der Uhr und Einstellen der Position der Stoppuhrzeiger
(Zeiger für Zeitanzeige und Stoppuhrzeiger)
Diese Uhr ist so entworfen, dass
•Stellen der Uhr und
•Einstellen der Position der Stoppuhrzeiger
beide mit der Krone in der zweiten Raststellung durchgeführt werden. Achten Sie
darauf, die beiden obigen Einstellungen gleichzeitig durchzuführen, wenn die Krone
zur zweiten Raststellung herausgezogen worden ist.
Stoppuhrzeiger
(Stoppuhrzeiger für 1/20 Sekunden und Sekunden)
Zeiger für Zeitanzeige
(Stunden- und Minutenzeiger und kleiner Sekundenzeiger)
Stoppuhrzeiger
(Stunden- und Minutenzeiger der Stoppuhr)
Krone
■ Stellen der Uhr
Ziehen Sie die Krone zur zweiten Raststellung heraus, wenn der kleine
Sekundenzeiger an der 12-Uhr-Stellung ist.
Der kleine Sekundenzeiger wird dann an dieser Position angehalten.
Kleiner
Sekundenzeiger
*Wenn die Stoppuhr läuft, werden die Stoppuhrzeiger automatisch zur Nullstellung
(“0”) zurückgestellt.

18
Stellen Sie die vier Zeiger der Stoppuhr auf die Nullstellung (“0”) zurück.
Drücken Sie den Knopf Azwei Sekunden lang, um den zu stellenden Zeiger
der Stoppuhr zu wählen.
Stoppuhrzeiger
für 1/20
Sekunden
Stunden- und Minutenzeiger der Stoppuhr
Stoppuhr-Sekundenzeiger
Knopf A
Knopf B
*Achten Sie beim Stellen der vier Zeiger darauf, dass AM/PM (Vormittag/
Nachmittag) richtig eingestellt ist. Die Uhr ist so entworfen, dass sich das Da-
tum alle 24 Stunden einmal ändert.
*Drehen Sie beim Stellen des Minutenzeigers den Zeiger vier bis fünf Minuten
vor die gewünschte Zeit, und drehen Sie ihn dann zur genauen Minute zurück.
Es wird empfohlen, die Uhr auf eine Zeit
um einige Minuten vor der aktuellen Zeit
zu stellen, um die möglicherweise
erforderliche Zeit für das Stellen der
Stoppuhrzeiger zu berücksichtigen.
Drehen Sie die Krone, um den Stunden- und den Minutenzeiger auf die
gewünschte Zeit zu stellen.

19
4Drücken Sie nach Beendigung aller Einstellungen die Krone beim Zeitzeichen
wieder zur Normalposition zurück.
*Stellen Sie sicher, dass der Stunden- und der Minutenzeiger die aktuelle
Zeit anzeigen, und drücken Sie dann die Krone zur Normalposition zurück.
Drücken Sie Knopf Bwiederholt, um den gewählten Zeiger der Stoppuhr auf
die Nullstellung (“0”) zurückzustellen. Wenn der Knopf Bgedrückt gehalten
wird, bewegt sich der Zeiger schnell.
Drücken Sie den Knopf A
zwei Sekunden lang.
Drücken Sie den Knopf A
zwei Sekunden lang.
Drücken Sie den Knopf Azwei
Sekunden lang.
Drücken Sie den Knopf Azwei
Sekunden lang.
Der Stoppuhrzeiger für 1/20 Sekunden
macht eine volle Umdrehung, um
anzuzeigen, dass er bereit für
Einstellung ist. Drücken Sie den Knopf
B, um den Zeiger auf die Nullstellung
(“0”) zurückzustellen.
Der Stoppuhr-Sekundenzeiger macht
eine volle Umdrehung, um anzuzeigen,
dass er bereit für Einstellung ist.
Drücken Sie den Knopf B, um den
Zeiger auf die Nullstellung (“0”)
zurückzustellen.
Der Stunden- und der Minutenzeiger
der Stoppuhr machen eine volle
Umdrehung, um anzuzeigen, dass sie
bereit für Einstellung sind. Drücken
Sie den Knopf B, um die Zeiger auf
die Nullstellung (“0”) zurückzustellen.
Stellen Sie den Stoppuhrzeiger für
1/20 Sekunden auf die Nullstellung
(“0”).
Stellen Sie den Stoppuhr-
Sekundenzeiger auf die Nullstellung
(“0”).
Stellen Sie den Stunden- und den
Minutenzeiger der Stoppuhr auf die
Nullstellung (“0”).

20
◆Einstellen des Datums
•Achten Sie darauf, die Uhr zu stellen, bevor Sie das Datum einstellen.
•Am 1.März und nach Monaten mit 30Tagen muss das Datum eingestellt werden.
Ziehen Sie die Krone zur ersten Raststellung heraus.
Drehen Sie die Krone im Uhrzeigersinn, um das Datum zu stellen.
*Stellen Sie das Datum nicht zwischen 9 Uhr abends und 1 Uhr morgens ein,
da sonst das Datum möglicherweise nicht korrekt umgeschaltet wird. Wenn
es erforderlich ist, das Datum während dieser Zeit umzuschalten, so stellen
Sie zuerst die Uhr auf eine Zeit außerhalb dieses Bereiches, stellen Sie das
Datum ein, und stellen Sie dann die Uhr wieder auf die aktuelle Zeit.
Drücken Sie die Krone nach Beendigung aller Einstellungen wieder zur
Normalposition zurück.
◆Verwendung der Stoppuhr
•Die Stoppuhr kann bis zu 12 Stunden in Schritten von 1/20 Sekunde messen.
Nach 12 Stunden hält sie automatisch an.
•Die gemessene Zeit wird durch die vier Zeiger der Stoppuhr angezeigt, die sich
unabhängig von den Zeigern für die Zeitanzeige bewegen.
•Nach dem Start der Stoppuhr bewegt sich der Stoppuhrzeiger für 1/20 Sekunden
etwa 10 Sekunden lang und hält dann automatisch an der Nullstellung (“0”) an.
Bei Zwischenzeitmessung und bei angehaltener Messung bewegt er sich, um
die verstrichenen 1/20 Sekunden anzuzeigen.
•Zwischenzeitmessung ist möglich.
Table of contents
Languages:
Other Orient Watch manuals

Orient
Orient TT(KFB) Manual

Orient
Orient EMAM80 User manual

Orient
Orient OrientStar DIVER'S WATCH 200m User manual

Orient
Orient VS75 User manual

Orient
Orient TT(KFB) User manual

Orient
Orient UB8A002B Series User manual

Orient
Orient cem65001b User manual

Orient
Orient EW 46F User manual

Orient
Orient RA-KV0403S User manual

Orient
Orient KU(RMC) User manual

Orient
Orient ES 46C User manual

Orient
Orient KFA (TD) User manual

Orient
Orient SDH00001 User manual
Orient
Orient DM 48Y User manual

Orient
Orient UU(KHA) User manual

Orient
Orient FTD10002B0 User manual

Orient
Orient TX(VS75) User manual

Orient
Orient M14 User manual

Orient
Orient DA 40R User manual
Orient
Orient AA F69 User manual