manuals.online logo
Brands
  1. Home
  2. •
  3. Brands
  4. •
  5. Oriental motor
  6. •
  7. Control Unit
  8. •
  9. Oriental motor PKP Series User manual

Oriental motor PKP Series User manual

1
Introduction
Before use
Only qualied personnel of electrical and mechanical engineering should work with the
product.
Use the product correctly after thoroughly reading the "Safety precautions." In addition,
be sure to observe the contents described in warning, caution, and note in this manual.
The product described in this manual is designed and manufactured to be incorporated
in general industrial equipment. Do not use for any other purpose. Oriental Motor Co.,
Ltd. is not responsible for any compensation for damage caused through failure to
observe this warning.
Safety precautions
The precautions described below are intended to ensure the safe and correct use of the
product, and to prevent the customer and others from exposure to the risk of injury. Use
the product only after carefully reading and fully understanding these instructions.
Description of signs
Handling the product without observing the instructions that
accompany a“WARNING”symbol may result in serious injury
or death.
Handling the product without observing the instructions
that accompany a“CAUTION”symbol may result in injury or
property damage.
The items under this heading contain important handling
instructions that the user should observe to ensure the safe
use of the product.
Description of graphic symbols
Indicates "prohibited" actions that must not be performed.
Indicates "compulsory" actions that must be performed.
yDo not use the product in explosive or corrosive environments, in the
presence of ammable gases, in places subjected to splashing water, or
near combustibles. Doing so may result in re or injury.
yDo not forcibly bend, pull, or pinch the cable. Doing so may result in re.
yDo not disassemble or modify the product. Doing so may result in injury.
yAssign qualied personnel to the task of installing, wiring, operating/
controlling, inspecting and troubleshooting the product. Handling by
unqualied personnel may result in re or injury.
yTake measures to keep the moving part in position if the product is used
in vertical operations such as elevating equipment. Failure to do so may
result in injury or damage to equipment.
yInstall the product inside an enclosure. Failure to do so may result in
injury.
yConnect the cables securely according to the wiring diagram. Failure to
do so may result in re.
yFor the power supply, use a DC power supply with reinforced insulation
on its primary and secondary sides. Failure to do so may result in electric
shock.
HM-7466-2
OPERATING MANUAL Thank you for purchasing an Oriental Motor product.
This Operating Manual describes product handling procedures and safety precautions.
yPlease read it thoroughly to ensure safe operation.
yAlways keep the manual where it is readily available.
2-Phase Stepping Motor
PKP Series CS geared type
yDo not use the product beyond its specications. Doing so may result in
injury or damage to equipment.
yKeep your ngers and objects out of the openings in the product.
Failure to do so may result in re or injury.
yDo not touch the product during operation or immediately after
stopping. Doing so may result in a skin burn(s).
yDo not carry the motor by holding the motor output shaft or cable.
Doing so may result in injury.
yDo not place combustibles around the product. Doing so may result in
re or a skin burn(s).
yDo not leave anything around the product that would obstruct
ventilation. Doing so may result in damage to equipment.
yDo not touch the rotating part (output shaft) during operation. Doing so
may result in injury.
yProvide a cover over the rotating part (output shaft) of the motor. Failure
to do so may result in injury.
yUse the motor and driver only in the specied combination. Failure to
do so may result in re.
yProvide an emergency stop device or emergency stop circuit external
to the equipment so that the entire equipment will operate safely in the
event of a system failure or malfunction. Failure to do so may result in
injury.
yWhen an abnormal condition has occurred, immediately stop operation
to turn o the driver power. Failure to do so may result in re or injury.
yThe motor surface temperature may exceed 70 °C
(158 °F) even under normal operating conditions.
If the operator is allowed to approach the motor in
operation, ax a warning label shown in the gure on
a conspicuous position. Failure to do so may result in a
skin burn(s). Warning label
Precautions for use
•When conducting the insulation resistance measurement or the
dielectric strength test, be sure to separate the connection between the
motor and the driver.
Conducting the insulation resistance measurement or dielectric strength test with the
motor and driver connected may result in damage to the product.
•Do not apply a radial load and axial load in excess of the specied
permissible limit.
Continuing to operate the motor under an excessive radial load or axial load may
damage the bearings (ball bearings) of the motor. Be sure to operate the motor within
the specied permissible limit of radial load and axial load.
•Motor surface temperature
The motor surface temperature may exceed 100 °C (212 °F) under certain conditions
(operating ambient temperature, operating speed, duty cycle, etc.). To prevent the
bearings (ball bearings) of the motor from reaching its usable life quickly, use the motor
in conditions where the surface temperature does not exceed 100 °C (212 °F).
Also, use in a condition where the surface temperature of the gearhead does not exceed
70 °C (158 °F) in order to prevent deterioration of grease and parts in the gearhead.
•Grease leakage
On rare occasions, a small amount of grease may ooze out from the gearhead. If there
is concern over possible environmental damage resulting from the leakage of grease,
check for grease stains during regular inspections. Alternatively, install an oil pan or
other device to prevent leakage from causing further damage. Oil leakage may lead to
problems in the customer's equipment or products.
•Holding torque at standstill
The motor holding torque is reduced by the current cutback function of the driver at
motor standstill. When selecting the motor, take account of the motor torque drop at the
time of stopping.
2
•Allowable torque
When operating the motor at a constant speed, use so that the torque does not exceed
the allowable torque in the specications. Operating the motor in excess of the allowable
torque may cause damage to the gearhead.
•Speed range
Operate the motor within the speed range in the specications. Operation beyond the
speed range may shorten the lifetime of the gearhead.
•Backlash
The gearhead output shaft has backlash. To suppress the inuence of the backlash,
perform positioning operation in either one direction of clockwise or counter-clockwise
directions.
•Rotation direction of the gearhead output shaft
The gearhead output shaft rotates in the same direction as the motor output shaft.
Preparation
Checking the product
Verify that the items listed below are included. Report any missing or damaged items to
the Oriental Motor sales oce from which you purchased the product.
yMotor ..................................................................1 unit
yParallel key ........................................................1 pc. (Included with PKP26)
yMotor mounting screw set..........................1 set (Included with PKP26)
[Packing items] Screw ................................4 pcs. [M4×60 mm (2.36 in.)]
Washer..............................4 pcs.
Spring washer................4 pcs.
yOPERATING MANUAL ....................................1 copy (this document)
How to identify the product model
Verify the model name of the purchased product against the model name shown on the
nameplate. Refer to "Information about nameplate" for how to identify the nameplate.
PKP 2 4 3 D 15 A 2 - CS 5
1 2 3 4 5 6 7 8 9 10
1 Series PKP: PKP Series
2 2-phase
3 Motor frame size
2: 28 mm (1.10 in.)
4: 42 mm (1.65 in.)
6: 60 mm (2.36 in.)
4 Motor length
5 Numbers of lead wire D: 4 lead wires
U: 6 lead wires
6 Motor winding specication
Representative example
15: Rated current 1.5 A/phase
23: Rated current 2.3 A/phase
7 Shaft shape A: Single shaft
B: Double shaft
8 Motor identication 2: Model A
Blank: Model B
9 Type of gear CS: CS geared
10 Gear ratio
Information about nameplate
The gure shows an example.
Motor model
Specications
Serial number
Manufacturing dat
e
The position describing the information may vary depending on the product.
Names of parts
The pin numbers as well as the colors of lead wires are shown in the gures.
The connection diagrams show our connection cable.
zMotors of Model A
Pilot
Output shaft
Mounting holes
(4 places)
Connector
Pin No.1
Pin No.5
Connector locks
Pin No.5/Red
Pin No.1/Black
Connection cable
Wiring connection diagram
1/Black
2/Green
4/Blue5/Red
A
B
* The pin No.3 is not used.
Applicable connector/lead wire
Type Model
Connector housing MDF97-5S-3.5C (HIROSE ELECTRIC CO., LTD.)
Contact MDF97-22SC(HIROSE ELECTRIC CO., LTD.)
Designated crimping tool HT801/MDF97-22S(HIROSE ELECTRIC CO., LTD.)
Applicable lead wire
yAWG24 to 22 (0.2 to 0.3 mm2)
yOuter sheath diameter:
ø1.24 to 1.38 mm (ø0.049 to 0.054 in.)
yStripping length of wire insulation:
1.8 to 2.3 mm (0.071 to 0.091 in.)
zMotors of Model B
Pin No.1/Blue
Pin No.6/Green
Connection cable
Pilot
Output shaf
t
Connector
Pin No.6
Pin No.1
Mounting holes
(4 places)
Wiring connection diagram
4/Black
5/Yellow
6/Green
AA
3/
Red
2/
White
1/
Blue
BB
• Unipolar
6 lead wires type
4/Black
6/Green
• Bipolar
4 lead wires type *
3/Red
1/Blue
A
B
* The pin Nos.2 and 5 are not used for the 4 lead wires type.
3
Applicable connector/lead wire
Type Model
Connector housing 51065-0600 (Molex Incorporated)
Contact 50212-8XXX (Molex Incorporated)
Designated crimping tool 63819-0500 (Molex Incorporated)
Applicable lead wire
yWhen the setting current is less than 1 A/phase:
AWG28 to 24 (0.08 to 0.2 mm2)
yWhen the setting current is 1 A/phase or more:
AWG26 to 24 (0.14 to 0.2 mm2)
yWhen the setting current is 1.5 A/phase or more:
AWG24 (0.2 mm2)
Outer sheath diameter:
ø0.8 to 1.4 mm (ø0.031 to 0.055 in.)
Stripping length of wire insulation:
1.3 to 1.8 mm (0.051 to 0.071 in.)
Connection
•When inserting the connector
Hold the connector main body, and insert it in straight securely. Inserting the connector
in an inclined state may result in damage to connector or a connection failure.
•When pulling out the connector
Pull out the connector in straight. Having the lead wires or pulling out the connector in a
state of being locked may damage the connector.
Secure the lead wires of the connection part of the connector to prevent the
connector or terminals from receiving stress due to bending or self-weight of
lead wires. Also, do not excessively bend the lead wires near the connection
part of the connector. Applying stress on the lead wires may cause poor
contact or disconnection, leading to malfunction or heat generation.
Connection with the drivers of Oriental Motor
Refer to the table when connecting with the drivers of Oriental Motor.
“Color” in the table shows the colors of lead wires of our connection cable.
The motors of the Model A and Model B are dierent in pin assignments. The
motor does not rotate properly if the connection is wrong.
•Connection with the CVD Series
Driver
CN2 pin number
Model A Model B
Pin number Color Pin number Color
1 4 Blue 1 Blue
2 5 Red 3 Red
3 − −
4 2 Green 6 Green
5 1 Black 4 Black
•Connection with the CMD driver
Driver
CN3 pin number
Model B
Pin number Color
1 1 Blue
2 2 White
3 3 Red
4 4 Black
5 5 Yellow
6 6 Green
Installation
Installation location
The motor is designed and manufactured to be incorporated in equipment. Install it in a
well-ventilated location that provides easy access for inspection. The location must also
satisfy the following conditions:
yInside an enclosure that is installed indoors (provide vent holes)
yOperating ambient temperature −10 to +50 °C (+14 to +122 °F) (non-freezing)
yOperating ambient humidity 85 % or less (non-condensing)
yArea free of explosive atmosphere, toxic gas (such as sulfuric gas), or liquid
yArea not exposed to direct sun
yArea free of excessive amount of dust, iron particles or the like
yArea not subject to splashing water (rain, water droplets), oil (oil droplets) or other
liquids
yArea free of excessive salt
yArea not subject to continuous vibrations or excessive shocks
yArea free of excessive electromagnetic noise (from welders, power machinery, etc.)
yArea free of radioactive materials, magnetic elds or vacuum
yUp to 1,000 m (3,300 ft.) above sea level
Installation method
Install the motor onto an appropriate at metal plate having excellent vibration
resistance and heat conductivity.
When installing the motor, use four mounting holes and secure the motor with four
screws so that no gap remains between the motor and the metal plate. A mounting
screw set is included in the PKP26.
yPKP22, PKP24
Metal plate
Mounting
holes
F
lange pilot
yPKP26
Secure the motor using the included mounting
screw set. [Screw size: M4×60 mm (2.36 in.)]
Metal plate
Screw set (included)
Flange pilot
Mounting
holes
Model Nominal size Tightening torque
[N·m (oz-in)]
Eective depth of screw
thread [mm (in.)]
PKP22 M3 1 (142) 6 (0.24)
PKP24 M4 2 (280) 8 (0.31)
PKP26 M4 2 (280) −
Do not loosen the gearhead assembling screws (four pieces).
Installing a load
When installing a load to the motor, align the centers of the motor output shaft and load
shaft. When installing a coupling or pulley on the motor output shaft, do so without
damaging the output shaft and bearings.
4
yUnauthorized reproduction or copying of all or part of this manual is prohibited.
yOriental Motor shall not be liable whatsoever for any problems relating to industrial
property rights arising from use of any information, circuit, equipment or device
provided or referenced in this manual.
yCharacteristics, specications and dimensions are subject to change without notice.
yWhile we make every eort to oer accurate information in the manual, we welcome
your input. Should you nd unclear descriptions, errors or omissions, please contact
your nearest Oriental Motor sales oce.
yis a registered trademark or trademark of Oriental Motor Co., Ltd., in
Japan and other countries.
© Copyright ORIENTAL MOTOR CO., LTD. 2020
Published in May 2021
T
echnical Support Tel:800-468-3982
8:30am EST to 5:00pm PST
(M-F)
www
.orientalmotor.com
Schiessstraße 44, 40549 Düsseldor
f, Germany
T
echnical Support Tel:00 800/22 55 66 22
www
.orientalmotor.de
T
el:+44-1256347090
www
.oriental-motor.co.uk
T
el:+33-1 47 86 97 50
www
.orientalmotor.fr
T
el:+39-02-93906347
www
.orientalmotor.it
• Please contact your nearest Oriental Motor oce for further information.
4-8-1Higashiueno
,Taito-ku,Tokyo 110-8536
Japan
T
el:+81-3-6744-0361
www
.orientalmotor.co.jp
Tel:0800-060708
www.orientalmotor.com.tw
Singapore
Tel:1800-842-0280
www.orientalmotor.com.sg
Tel:1800-806-161
www.orientalmotor.com.my
Korea
Tel:080-777-2042
www.inaom.co.kr
Tel:1800-888-881
www.orientalmotor.co.th
Tel:400-820-6516
www.orientalmotor.com.cn
Tel:1800-120-1995 (For English)
1800-121-4149 (For Hindi)
www.orientalmotor.co.in
Permissible radial load and permissible axial load
The radial load and the axial load applied to the motor output shaft must not exceed the
permissible values in the table.
Model
Permissible radial load [N (lb.)]
Distance from the tip of motor output shaft
0 mm
(0 in.)
5 mm
(0.2 in.)
10 mm
(0.39 in.)
15 mm
(0.59 in.)
20 mm
(0.79 in.)
PKP22 30 (6.7) 37 (8.3) 50 (11.2) 73 (16.4) −
PKP24 59 (13.2) 68 (15.3) 80 (18) 96 (21) −
PKP26 160 (36) 170 (38) 200 (45) 220 (49) 260 (58)
Model Permissible axial load [N (lb.)]
PKP22 30 (6.7)
PKP24 40 (9)
PKP26 70 (15.7)
Inspection and maintenance
Inspection
It is recommended that periodic inspections would be conducted for the items listed
below after each operation of the motor. If an abnormal condition is noted, discontinue
any use and contact your nearest Oriental Motor sales oce.
Inspection item
yCheck if any of the screws having installed the motor is loose.
yCheck if an unusual noise is generated from a bearing part (ball bearings) of the motor.
yCheck if a damage or stress is applied on the cable.
yCheck if the connection part with the connector or the driver is loose.
yCheck if the motor output shaft and the load shaft are out of alignment.
Warranty
Check on the Oriental Motor Website or General Catalog for the product warranty.
Disposal
Dispose the product correctly in accordance with laws and regulations, or instructions of
local governments.
Specications
Check on the Oriental Motor Website for the product specications.
General specications
Degree of protection IP20
Operation
environment
Ambient
temperature −10 to +50 °C (+14 to +122 °F) (non-freezing)
Humidity 85 % or less (non-condensing)
Altitude Up to 1,000 m (3,300 ft.) above sea level
Surrounding
atmosphere No corrosive gas, dust, water or oil
Storage
environment
Shipping
environment
Ambient
temperature −20 to +60 °C (−4 to +140 °F) (non-freezing)
Humidity 85 % or less (non-condensing)
Altitude Up to 3,000 m (10,000 ft.) above sea level
Surrounding
atmosphere No corrosive gas, dust, water or oil
Insulation resistance 100 MΩ or more when 500 VDC megger is applied
between the windings and the case.
Dielectric strength
Sucient to withstand the following conditions
applied between the windings and the case for
1 minute.
yPKP22, PKP24: 0.5 kVAC 50/60 Hz
yPKP26: 1.0 kVAC 50/60 Hz
Regulations and standards
RoHS Directive
The products do not contain the substances exceeding the restriction values of RoHS
Directive (2011/65/EU).

This manual suits for next models

3

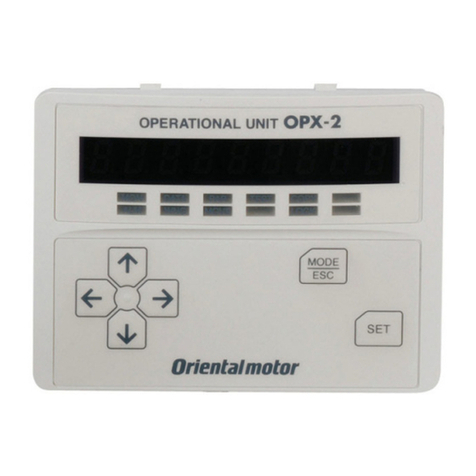
Other Oriental motor Control Unit manuals

Oriental motor OPX-2A User manual

Oriental motor

Oriental motor OPX-2A User manual

Oriental motor AR Series User manual

Oriental motor

Oriental motor AR Series User manual

Oriental motor MSS W Series User manual

Oriental motor

Oriental motor MSS W Series User manual

Oriental motor RKII Series User manual

Oriental motor

Oriental motor RKII Series User manual

Oriental motor OPX-2A User manual

Oriental motor

Oriental motor OPX-2A User manual

Oriental motor ASTEP AZ Series User manual

Oriental motor

Oriental motor ASTEP AZ Series User manual

Oriental motor ASTEP AR Series User manual

Oriental motor

Oriental motor ASTEP AR Series User manual

Oriental motor ASTEP AR Series User manual

Oriental motor

Oriental motor ASTEP AR Series User manual

Oriental motor ASTEP AR Series User manual

Oriental motor

Oriental motor ASTEP AR Series User manual

Oriental motor OPX-2A User manual

Oriental motor

Oriental motor OPX-2A User manual

Popular Control Unit manuals by other brands

Richter KNR/F series Installation and operating manual

Richter

Richter KNR/F series Installation and operating manual

Fisher D2T FloPro instruction manual

Fisher

Fisher D2T FloPro instruction manual

Fluidmaster PerforMAX 400CAR3 Quick install guide

Fluidmaster

Fluidmaster PerforMAX 400CAR3 Quick install guide

iWave iW-RainboW-G50M i.MX 93 Hardware user's guide

iWave

iWave iW-RainboW-G50M i.MX 93 Hardware user's guide

nvent RAYCHEM NGC-40-IO installation instructions

nvent

nvent RAYCHEM NGC-40-IO installation instructions

Altronix TROVE T2MK3F8Q2 installation guide

Altronix

Altronix TROVE T2MK3F8Q2 installation guide

Moons' Applied Motion Products STR2 quick start guide

Moons'

Moons' Applied Motion Products STR2 quick start guide

Digi XBee-PRO user guide

Digi

Digi XBee-PRO user guide

AAON RSMVQ2R Technical guide

AAON

AAON RSMVQ2R Technical guide

Bray RF15 Installation & maintenance manual

Bray

Bray RF15 Installation & maintenance manual

SMC Networks VHK-A Operation manual

SMC Networks

SMC Networks VHK-A Operation manual

Thermasol SWM-2 installation instructions

Thermasol

Thermasol SWM-2 installation instructions

KERN KUP-08 installation instructions

KERN

KERN KUP-08 installation instructions

QOLSYS IQ Water Valve Quick install guide

QOLSYS

QOLSYS IQ Water Valve Quick install guide

Halma Ocean Optics HR4000 Installation and operation instructions

Halma

Halma Ocean Optics HR4000 Installation and operation instructions

Simplex 2050 installation guide

Simplex

Simplex 2050 installation guide

Elsist SlimLine PCB124 00 Series Hardware manual

Elsist

Elsist SlimLine PCB124 00 Series Hardware manual

H3C SecPath PSR300-12A2 user manual

H3C

H3C SecPath PSR300-12A2 user manual

manuals.online logo
manuals.online logoBrands
  • About & Mission
  • Contact us
  • Privacy Policy
  • Terms and Conditions

Copyright 2025 Manuals.Online. All Rights Reserved.