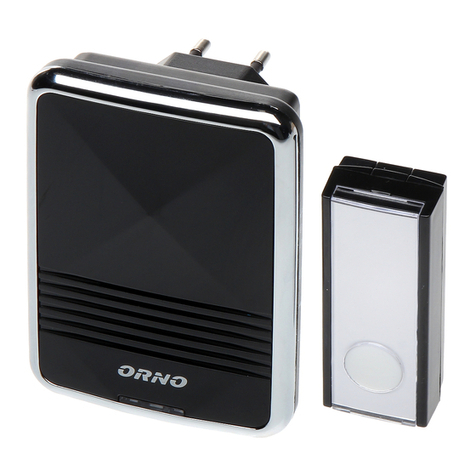
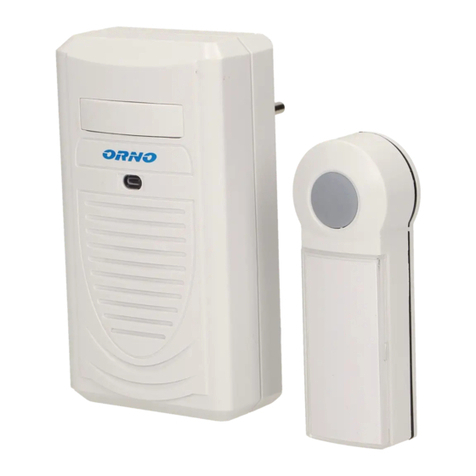
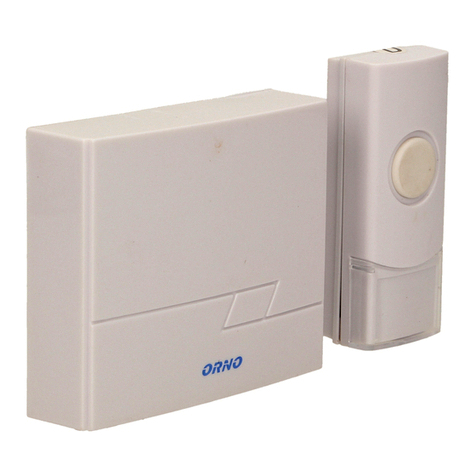
Orno ENKA DC User manual

OR-DB-AT-136
DZWONEK BEZPRZEWODOWY ENKA DC
WIRELESS DOORBELL ENKA DC
KABELLOSE KLINGEL ENKA DC
ORNO-LOGISTIC Sp. z o.o.
ul. Rolników 437
44-141 Gliwice
tel. 32 43 43 110
(PL) WAŻNE!
Przed rozpoczęciem korzystania z urządzenia, należy zapoznać się z niniejszą instrukcją obsługi oraz zachować ją na przyszłość. Dokonanie
samodzielnych napraw i modyfikacji skutkuje utratą gwarancji. Producent nie odpowiada za uszkodzenia mogące wyniknąć z nieprawidłowego
montażu czy eksploatacji urządzenia.
Z uwagi na fakt, że dane techniczne podlegają ciągłym modyfikacjom, Producent zastrzega sobie prawo do dokonywania zmian dotyczących
charakterystyki wyrobu oraz wprowadzania innych rozwiązań konstrukcyjnych niepogarszających parametrów i walorów użytkowych produktu.
Dodatkowe informacje na temat produktów marki ORNO dostępne są na: www.orno.pl. Orno-Logistic Sp. z o.o. nie ponosi odpowiedzialności za
skutki wynikające z nieprzestrzegania zaleceń niniejszej instrukcji. Firma Orno-Logistic Sp. z o.o. zastrzega sobie prawo do wprowadzania
zmian w instrukcji - aktualna wersja do pobrania ze strony www.orno.pl.
Wszelkie prawa do tłumaczenia/interpretowania oraz prawa autorskie niniejszej instrukcji są zastrzeżone. Nie używaj urządzenia niezgodnie
z jego przeznaczeniem.
1. Nie zanurzaj urządzenia w wodzie i innych płynach.
2. Nie obsługuj urządzenia gdy uszkodzona jest obudowa.
3. Nie dokonuj samodzielnych napraw.
(EN) IMPORTANT!
Before using the device, read this Service Manual and keep it for future use. Any repair or modification carried out by yourselves results in loss
of guarantee. The manufacturer is not responsible for any damage that can result from improper device installation or operation.
In view of the fact that the technical data are subject to continuous modifications, the manufacturer reserves a right to make changes to the
product characteristics and to introduce different constructional solutions without deterioration of the product parameters or functional quality.
Additional information about ORNO products are available at www.orno.pl. Orno-Logistic Sp. z o.o. holds no responsibility for the results of non-
compliance with the provisions of the present Manual. Orno Logistic Sp. z o.o. reserves the right to make changes to the Manual - the latest
version of the Manual can be downloaded from www.orno.pl.
Any translation/interpretation rights and copyright in relation to this Manual are reserved. Do not use the device against its intended use.
1. Do not dip the device in water or another fluid.
2. Do not operate the device when its housing is damaged.
3. Do not open the device and do not repair it by yourselves.
(DE) WICHTIG!
Vor der Inbetriebnahme des Geräts die Bedienungsanleitung sorgfältig lesen und für die zukünftige Inanspruchnahme bewahren. Selbständige
Reparaturen und Modifikationen führen zum Verlust der Garantie. Der Hersteller haftet nicht für die Schäden, die aus falscher Montage oder
falschem Gebrauch des Geräts folgen können.
In Anbetracht der Tatsache, dass die technischen Daten ständig geändert werden, behält sich der Hersteller das Recht auf Änderungen in
Bezug auf Charakteristik des Produktes und Einführung anderer Konstruktionslösungen, die die Parameter und Gebrauchsfunktionen nicht
beeinträchtigen, vor.
Zusätzliche Informationen zum Thema der Produkte der Marke ORNO finden Sie auf der Internetseite: www.orno.pl.
Die Firma Orno-Logistic Sp. z o.o. haftet nicht für die Folgen der Nichteinhaltung der Empfehlungen, die in dieser Bedienungsanleitung zu finden
sind. Die Firma Orno-Logistic Sp. z o.o. behält sich das Recht auf Änderungen in der Bedienungsanleitung vor –die aktuelle Version kann man
auf der Internetseite www.orno.pl herunterladen.
Alle Rechte auf Übersetzung/Interpretation sowie Urheberrechte an dieser Bedienungsanleitung sind vorbehalten. Nutzen Sie das Gerät seinem
Zweck entsprechend.
1. Tauchen Sie das Gerät nicht ins Wasser oder in andere Flüssigkeiten.
2. Nutzen Sie das Gerät nicht, wenn sein Gehäuse beschädigt ist.
3. Nehmen Sie keine selbständigen Reparaturen vor.
Każde gospodarstwo jest użytkownikiem sprzętu elektrycznego i elektronicznego, a co za tym idzie potencjalnym wytwórcą niebezpiecznego dla ludzi
i środowiska odpadu, z tytułu obecności w sprzęcie niebezpiecznych substancji, mieszanin oraz części składowych. Z drugiej strony zużyty sprzęt to
cenny materiał, z którego możemy odzyskać surowce takie jak miedź, cyna, szkło, żalazo i inne. Symbol przekreślonego kosza na śmieci umieszczany
na sprzęcie, opakowaniu lub dokumentach do niego dołączonych wskazuje na konieczność selektywnego zbierania zużytego sprzętu elektrycznego
i elektronicznego. Wyrobów tak oznaczonych, pod karągrzywny, nie można wyrzucać do zwykłych śmieci razem z innymi odpadami. Oznakowanie
oznacza jednocześnie, że sprzęt został wprowadzony do obrotu po dniu 13 sierpnia 2005r. Obowiązkiem użytkownika jest przekazanie zużytego
sprzętu do wyznaczonego punktu zbiórki w celu właściwego jego przetworzenia. Zużyty sprzęt może zostać również oddany do sprzedawcy,
w przypadku zakupu nowego wyrobu w ilości nie większej niż nowy kupowany sprzęt tego samego rodzaju. Informacje o dostępnym systemie zbierania
zużytego sprzętu elektrycznego można znaleźć w punkcie informacyjnym sklepu oraz w urzędzie miasta/gminy. Odpowiednie postępowanie ze
zużytym sprzętem zapobiega negatywnym konsekwencjom dla środowiska naturalnego i ludzkiego zdrowia!
Each household is a user of electrical and electronic equipment, and hence a potential producer of hazardous waste for humans and the environment,
due to the presence of hazardous substances, mixtures and components in the equipment. On the other hand, used equipment is valuable material
from which we can recover raw materials such as copper, tin, glass, iron and others. The weee sign placed on the equipment, packaging or documents
attached to it indicates the need for selective collection of waste electrical and electronic equipment. Products so marked, under penalty of fine, cannot
be thrown into ordinary garbage along with other waste. The marking means at the same time that the equipment was placed on the market after
August 13, 2005. It is the responsibility of the user to hand the used equipment to a designated collection point for proper processing. Used equipment
can also be handed over to the seller, if one buys a new product in an amount not greater than the new purchased equipment of the same type.
Information on the available collection system of waste electrical equipment can be found in the information desk of the store and in the municipal office
or district office. Proper handling of used equipment prevents negative consequences for the environment and human health!
2
Jeder Haushalt ist ein Nutzer von elektrischen und elektronischen Geräten und dadurch auch ein potenzieller Produzent von für Menschen und Umwelt
gefährlichen Abfällen aufgrund der sich drin befindenden gefährlichen Stoffe, Mischungen und Bestandteile. Andererseits sind die gebrauchten Geräte
auch ein wertvoller Stoff, aus denen wir Rohstoffe wie: Kupfer, Zinn, Glas, Eisen und andere wieder verwerten können. Das Zeichen einer
durchgestrichenen Mülltonne auf dem Gerät, der Verpackung oder in den Dokumenten, die dem Gerät beigelegt sind, weist darauf hin, dass die
elektronischen und elektrischen Altgeräte getrennt gesammelt werden müssen. Die so gekennzeichneten Produkte dürfen nicht im normalen Hausmüll
mitsamt anderen Abfällen entsorgt werden, unter Androhung einer Geldbuße. Das Zeichen bedeutet auch, dass das Gerät nach dem 13. August 2005
in den Verkehr gebracht wurde. Der Nutzer ist verpflichtet, das Altgerät an die angewiesene Rücknahmestelle zu übermitteln, damit es richtig wieder
verwertet wird. Beim Kauf von neuen Geräten kann man die Altgeräte in gleicher Menge und Art beim Verkäufer zurückgeben. Die Informationen über
das System der Sammlung der elektrischen Altgeräte kann man sich bei einem Auskunftspunkt des Ladens sowie bei der Stadt-/Gemeindeverwaltung
einholen. Der richtige Umgang mit den Altgeräten verhindert negative Konsequenzen für die Umwelt und die Gesundheit!
Zużyte baterie i/lub akumulatory należy traktować jako odrębny odpad i umieszczać w indywidualnym pojemniku. Zużyte baterie lub akumulatory
powinny zostać oddane do punktu zbierania/odbioru zużytych baterii i akumulatorów. Informacje na temat punktów zbierania/odbioru udzielają władze
lokalne lub sprzedawcy tego rodzaju sprzętu. Zużyty sprzęt może zostać również oddany do sprzedawcy, w przypadku zakupu nowego wyrobu w ilości
nie większej niż nowy kupowany sprzęt tego samego rodzaju. Produkt wyposażony w przenośną baterię. Sposób montażu i usuwania baterii
zmieszczono w poniższej instrukcji.
Used batteries and/or accumulators should be treated as separate waste and placed in an individual container. Used batteries or accumulators should
be taken to a collection/receipt point for used batteries and accumulators. For information on collection/collection points, contact your local authority or
your local dealer. Used equipment may also be returned to the seller in case of purchase of a new product in a quantity not greater than the new
purchased equipment of the same type. The product is equipped with a portable battery. Please refer to the following manual for instructions on how to
install and remove batteries.
Verbrauchte Batterien und/oder Akkumulatoren sollen als separater Abfall betrachtet und in einem einzelnen Behälter entsorgt werden. Verbrauchte
Batterien oder Akkumulatoren sind an eine Sammel-/Rücknahmestelle für verbrauchte Batterien und Akkumulatoren abzugeben. Informationen über
diese Sammel-/Rücknahmestellen erhalten Sie bei Ihrer Gemeinde oder beim Verkäufer dieser Geräte. Beim Kauf von neuen Geräten kann man die
Altgeräte in gleicher Menge und Art beim Verkäufer zurückgeben. Das Produkt ist mit einer mobilen Batterie ausgestattet. Die Informationen über
Montage und Demontage der Batterien finden Sie in der folgenden Anleitung.
01/2020
(PL) Instrukcja obsługi i montażu
OPIS I ZASTOSOWANIE
Bateryjny, prosty w montażu dzwonek, idealny do drzwi w domach, apartamentach, sklepach itd. lub jako urządzenie
przywoławcze dla osób starszych. Posiada 3 tryby pracy: dźwiękowy/optyczny/optyczno-dźwiękowy. Stopień ochrony IP44
pozwala na montaż przycisku na zewnątrz oraz w miejscu o podwyższonej wilgotności. Funkcja learning system umożliwia
proste zalogowanie dodatkowych nadajników. Nie wymaga instalacji dzwonkowej.
MONTAŻ / INSTALACJA
Zasięg pomiędzy przyciskiem, a dzwonkiem zależy od warunków otoczenia. Przed montażem zalecamy przetestowanie
urządzenia w wybranym miejscu w celu sprawdzenia czy jego zasięg nie został zakłócony. Zasięg mogą znacząco obniżyć:
ściany, stropy, metalowe powierzchnie, urządzenia o takiej samej częstotliwości, bliskość silników elektrycznych,
transformatorów, zasilaczy, komputerów itp.
DANE TECHNICZNE*
zasilanie dzwonka:
3xAA (brak w zestawie)
zasilanie nadajnika (przycisku):
1xA23 (w zestawie)
częstotliwość:
433,92 MHz
transmisja:
radiowa
zasięg w terenie otwartym:
max.100 m
poziom głośności:
50-80 dB
ilość dźwięków dzwonka
32 melodie
stopień ochrony przycisku:
IP44
wymiary dzwonka:
82 × 82 × 36 mm
wymiary przycisku:
42 × 81,5 × 27 mm
waga odbiornika (dzwonka):
0,117kg
waga nadajnika (przycisku):
0,03 kg

3
BUDOWA ODBIORNIKA
BUDOWA NADAJNIKA
INSTALACJA BATERII
Rys. 1
1. Zdejmij przezroczystą osłonkę chroniącą kartkę z
nazwiskiem. Następnie delikatnie podważ szarą pokrywę za
pomocą płaskiego śrubokręta.
2. Przytwierdź bazową płytkę do ściany za pomocą dwóch
dołączonych śrubek w zaznaczonych pozycjach lub za
pomocą samoprzylepnych naklejek montażowych.
3. Włóż baterie do odbiornika zachowując właściwą
polaryzację.
4. Zamontuj przycisk na bazowej płytce.
LOGOWANIE
Rys. 2
UWAGA: Urządzenie po wyjęciu i instalacji baterii powinno działać
automatycznie, ponieważ odbiornik i nadajnik są sparowane. Jeżeli
dzwonek nie działa poprawnie lub są problemy z zasięgiem zastosuj
poniższe kroki:
1. Wciśnij i przytrzymaj przycisk Wyboru dźwięku/Parowania
aż usłyszysz dźwięk „DING-DONG”.
2. Następnie naciśnij przycisk dzwonka, usłyszysz sygnał
dźwiękowy „DING” co będzie oznaczało że urządzenia
zostały sparowane.
3. Usłyszysz dźwięk „DING DONG” oznaczający wyjście z
trybu logowania.
Odtwarzanie dźwięku
Wybór dźwięku dzwonka/Parowanie
Głośność
Sygnalizacja optyczna
Sygnalizacja
dźwiękowa
Sygnalizacja
dźwiękowa
+ optyczna

4
WYBÓR MELODII
Rys. 3
Dzwonek posiada 32 melodie do wyboru. Naciśnięcie przycisku
Wyboru melodii/Parowania powoduje zmianę melodii na kolejną
w cyklu.
REGULACJA GŁOŚNOŚCI
Deklaracja zgodności:
Orno-Logistic Sp. z o.o. oświadcza, że typ urządzenia radiowego: OR-DB-AT-136, Dzwonek bezprzewodowy ENKA DC jest zgodny z dyrektywą
2014/53/UE. Pełen tekst deklaracji zgodności UE jest dostępny pod następującym adresem internetowym: www.orno.pl
(EN) User manual
DESCRIPTION AND USE
Battery doorbell, easy to install, ideal for doors in houses, apartments, shops, etc. or as a calling device for the elderly. It has
3 modes of working: audible/optical/optical-sound. Its protection level IP44 allows its installation outdoors or in areas of
increased humidity. The learning system is used to log in additional transmitters easily. No doorbell installation required.
INSTALLATION
The range between the button and the ringing tone depends on the environmental conditions. Before installation, we recommend
that you test the device at a location of your choice to ensure that its range is not disturbed. The coverage can significantly
reduce: walls, ceilings, metal surfaces, same frequency devices, proximity to electric motors, transformers, power supplies,
computers, etc.
TECHNICAL DATA*:
chime power supply:
3xAA (not included)
transmitter power supply (button):
1xA23 (included)
frequency:
433,92 MHz
transmission:
radio transmission
open field coverage:
max.100 m
volume level:
50-80 dB
number of ringtones:
32 melodies
button protection level:
IP44
dimensions of the chime:
82 × 82 × 36 mm
dimensions of the button:
42 × 81,5 × 27 mm
weight of the receiver (chime):
0,117kg
weight of the transmitter (button):
0,03 kg
By ustawić poziom głośności dzwonka przyciśnij wielokrotnie
przycisk głośności.

5
RECEIVER CONSTRUCTION
TRANSMITTER CONSTRUCTION
BATTERY INSTALLATION
Fig. 1
1. Take off the transparent cover protecting the name card.
Then carefully undermine the grey cover with a flat
screwdriver.
2. Fix the base plate to the wall using the two supplied
screws in the marked positions or using self-adhesive
mounting stickers.
3. Insert the batteries into the receiver observing the correct
polarity.
4. install the button on the base plate.
LOGIN
Fig. 2
NOTE: After removing and installing the battery, the device should
work automatically because the receiver and transmitter are paired. If
the doorbell does not work properly or there are problems with
coverage, use the following steps:
1. Press and hold the Sound Select / Pairing button until you
hear the "DING-DONG" sound.
2. Then press the bell button, you will hear the "DING" sound
signal which means that the devices have been paired.
3. You will hear the "DING DONG" sound indicating exit from
login mode.
Sound playback
Sound Select/pairing button
Volume
Optical indication
Optical indication
Audible
indication
Audible +
optical
signalling

6
SELECTION OF MELODY
Fig. 3
The ringtone has 32 melodies to choose from. Briefly pressing the
Sound Select/Pairing button on the receiver will change the ringtone to
the next one in the cycle.
VOLUME ADJUSTMENT
Declaration of conformity:
Orno-Logistic Sp. z o.o. declares that the OR-DB-AT-136 compatible with Directive 2014/53/EU. The full text of the EU declaration of conformity is
available at the following Internet address: www.orno.pl
(DE) Bedienungs- und Montageanweisung
BESCHREIBUNG UND ANWENDUNG
Die Klingel wird mit Batterien versorgt, einfache Montage, ideale für die Häuser, Appartements, Laden etc, oder als ein Gerät
zum Herbeirufen für Senioren. Sie verfügt über drei Betriebsarten: akustisch/optisch/optisch-akustisch. Die Schutzklasse IP44
ermöglicht, die Taste draußen und an die Stellen, wo die Luftfeuchtigkeit erhöht ist, zu montieren. Die Funktion „Learning-
System“ermöglicht, zusätzliche Sender einfach einzuloggen. Keine Klingeltoninstallation ist erforderlich.
MONTAGE / INSTALLATION
Die Reichweite zwischen der Taste und der Klingel hängt von Umgebungsbedingungen ab. Vor der Montage empfehlen wir das
Gerät an den gewählten Montageort zu testen, um zu prüfen, ob seine Reichweite nicht gestört wird.
Folgendes kann die Reichweite beeinträchtigen: Wände, Decke, Metalloberflächen, Geräten mit einer gleichen Frequenz,
elektrische Motoren, Transformatoren, Netzgeräte, Rechner, etc.
TECHNISCHE DATEN*
Versorgung der Klingel:
3xAA (keine Batterien mitgeliefert)
Versorgung des Senders (der Taste):
1xA23 (mitgeliefert)
Frequenz:
433,92 MHz
Übertragung:
Funkübertragung
Reichweite im offenen Feld:
max.100 m
Schallpegel:
50-80 dB
Anzahl der Klingeltöne
32 Melodien
Schutzart der Taste:
IP44
Abmessungen:
82 × 82 × 36 mm
Abmessungen der Taste:
42 × 81,5 × 27 mm
Gewicht des Empfängers (Klingel):
0,117kg
Gewicht des Senders (Taste):
0,03 kg
To set the ringer volume, press the volume button repeatedly on the receiver.

7
AUFBAU DES EMPFÄNGERS
AUFBAU DES SENDERS
MONTAGE VON BATTERIEN
Abb. 1
1. Nehmen Sie die durchsichtige Schicht, die das Blatt mit dem
Nahmen schützt, ab. Haben Sie dann die graue Haube mithilfe
eines flachen Schraubenziehers ab.
2. Befestigen Sie die Basisplatte an der Wand mithilfe von zwei
mitgelieferten Schrauben an die markierten Stellen oder mithilfe
von selbstklebenden Montageaufklebern.
3. Stecken Sie die Batterien in den Empfänger unter
Berücksichtigung der Schaltzeichen hinein.
4. Befestigen Sie die Taste an der Basisplatte.
EINLOGGEN
Abb. 2
ACHTUNG: Das Gerät mit richtig eingesteckten Batterien soll
automatisch funktionieren, weil der Empfänger und der Sender
gekoppelt sind. Funktioniert der Klingelton falsch oder gibt es
Probleme mit der Reichweite, nehmen Sie folgende Schritte vor:
1. Drücken Sie die Tonauswahl-/Kopplungstaste und halten Sie
diese so lange gedrückt,
bis ein Ton „DING-DONG“hörbar wird.
2. Drücken Sie dann die Klingeltaste so lange, bis Sie ein Ton
„DING“hören, dies bedeutet, dass die Geräte richtig gekoppelt
wurden.
3. Sie werden jetzt ein Ton „DING DONG“hören, was bedeutet,
dass man die Einloggen-Funktion verlassen hat.
Tonwiedergabe
Auswahl des Klingeltons/Koppeln
Lautstärke
Optische
Signalgebung
Optische Signalgebung
Akustische
Signalgebung
Optische +
akustische
Signalgebung

8
AUSWAHL VON KLINGELTÖNEN
Abb. 3
Die Klingel verfügt über 32 Klingeltöne zur Auswahl. Drückt man die
Tonauswahl-/ Kopplungstaste, wird die Melodie geändert.
EINSTELLUNG DER LAUTSTÄRKE
Konformitätserklärung
Orno-Logistic Sp. z o.o. erklärt hiermit, dass der Typ des Funkgerätes: OR-DB-AT-136, Funkklingel ENKA DC der Richtlinie 2014/53/EU entspricht.
Der vollständige Text der EU-Konformitätserklärung ist unter folgender Internetadresse verfügbar:www.orno.pl
Um die Lautstärke der Klingel einzustellen, drücken Sie mehrmals die Lautstärketaste.
This manual suits for next models
1
Table of contents
Other Orno Accessories manuals

Orno
Orno TORINO II AC User manual

Orno
Orno VIRONE VDB-1 User manual

Orno
Orno ONDO 2 AC User manual

Orno
Orno OR-AE-1304 User manual

Orno
Orno OR-CR-255 User manual

Orno
Orno OR-GB-417 GS User manual

Orno
Orno OR-GB-441(GS) User manual

Orno
Orno OR-DB-IL-128 User manual

Orno
Orno OR-CR-257 User manual

Orno
Orno OR-CR-236/W User manual

Orno
Orno OR-GB-438 User manual

Orno
Orno OR-CR-206 User manual

Orno
Orno OR-GB-441 User manual

Orno
Orno OR-CR-256 User manual

Orno
Orno OR-AE-1304 User manual

Orno
Orno OR-DB-QX-155 User manual

Orno
Orno OR-AE-1310 User manual

Orno
Orno OR-CR-259/W User manual

Orno
Orno OR-AE-1302 User manual

Orno
Orno OPERA DC User manual