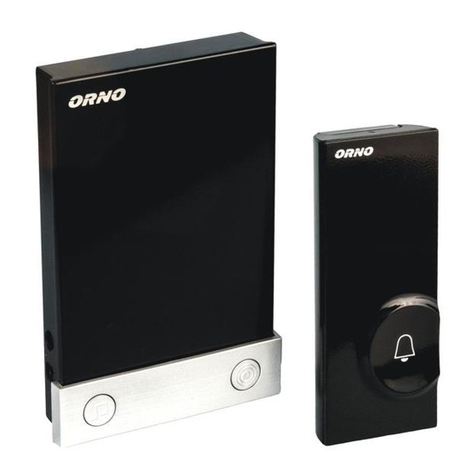
Orno VIRONE VDB-1 User manual

ORNO-LOGISTIC Sp. z o.o.
ul. Rolników 437, 44-141 Gliwice, POLAND
tel. (+48) 32 43 43 110, www.virone.pl
Model: VDB-1
PL| Bezprzewodowy wideo dzwonek z Wi-Fi i odbiornikiem dzwonkowym, LAYO
EN| LAYO Wireless video doorbell with Wi-Fi and bell receiver
DE| Drahtlose Video-Türklingel mit Wi-Fi und Klingelempfänger, LAYO
FR| Sonnerie vidéo sans fil avec Wi-Fi et récepteur de sonnerie, LAYO
RU| Беспроводной видеозвонок с Wi-Fi и приемником звонка, LAYO
PL| WAŻNE!
Przed podłączeniem i użytkowaniem urządzenia prosimy o dokładne zapoznanie się z niniejszą instrukcją obsługi. W razie jakichkolwiek problemów ze zrozumieniem jej treści prosimy o
skontaktowanie się ze sprzedawcą urządzenia. Producent nie odpowiada za uszkodzenia mogące wyniknąć z nieprawidłowego montażu czy eksploatacji urządzenia. Dokonywanie samodzielnych
napraw i modyfikacji skutkuje utratą gwarancji.
Z uwagi na fakt, że dane techniczne podlegają ciągłym modyfikacjom, Producent zastrzega sobie prawo do dokonywania zmian dotyczących charakterystyki wyrobu oraz wprowadzania innych
rozwiązań konstrukcyjnych niepogarszających parametrów i walorów użytkowych produktu.
Dodatkowe informacje na temat produktów marki VIRONE dostępne są na: www.virone.pl. Orno-Logistic Sp. z o.o. nie ponosi odpowiedzialności za skutki wynikające z nieprzestrzegania zaleceń
niniejszej instrukcji. Firma Orno-Logistic Sp. z o.o. zastrzega sobie prawo do wprowadzania zmian w instrukcji - aktualna wersja do pobrania ze strony support.virone.pl. Wszelkie prawa do
tłumaczenia/interpretowania oraz prawa autorskie niniejszej instrukcji są zastrzeżone.
1. Nie używaj urządzenia niezgodnie z jego przeznaczeniem.
2. Nie zanurzaj urządzenia w wodzie i innych płynach.
3. Nie obsługuj urządzenia gdy uszkodzona jest obudowa.
4. Nie dokonuj samodzielnych napraw.
EN| IMPORTANT!
Before connecting and using the device, read this Operating Manual and keep it for future reference. In case something written herein is unclear, please contact the seller. The manufacturer is not
responsible for any damage that can result from improper device installation or operation. Any repair or modification carried out by yourselves results in loss of guarantee.
In view of the fact that the technical data are subject to continuous modifications, the manufacturer reserves a right to make changes to the product characteristics and to introduce different
constructional solutions without deterioration of the product parameters or functional quality.
Additional information about VIRONE products are available at www.virone.pl. Orno-Logistic Sp. z o.o. holds no responsibility for the results of non-compliance with the provisions of the present
Manual. Orno Logistic Sp. z o.o. reserves the right to make changes to the Manual - the latest version of the Manual can be downloaded from support.virone.pl. Any translation/interpretation rights
and copyright in relation to this Manual are reserved.
1. Do not use the device against its intended use.
2. Do not immerse the device in water or other fluids.
3. Do not operate the device when its housing is damaged.
4. Do not make repairs yourself.
DE| WICHTIG!
Bevor Sie das Gerät anschließen und benutzen, lesen Sie bitte diese Anleitung sorgfältig durch. Wenn Sie Probleme beim Verständnis dieser Anleitung haben, wenden Sie sich bitte an den
Verkäufer des Gerätes. Der Hersteller haftet nicht für die Schäden, die aus falscher Montage oder falschem Gebrauch des Geräts folgen können. Selbständige Reparaturen und Modifikationen
führen zum Verlust der Garantie.
In Anbetracht der Tatsache, dass die technischen Daten ständig geändert werden, behält sich der Hersteller das Recht auf Änderungen in Bezug auf Charakteristik des Produktes und Einführung
anderer Konstruktionslösungen, die die Parameter und Gebrauchsfunktionen nicht beeinträchtigen, vor.
Für weitere Informationen zu VIRONE-Produkten besuchen Sie bitte die Website: www.virone.pl. Orno-Logistic Sp. z o.o. haftet nicht für die Folgen der Nichtbeachtung der Anweisungen in dieser
Bedienungsanleitung. Firma Orno-Logistic Sp. z o.o. behält sich das Recht vor, Änderungen in der Bedienungsanleitung vorzunehmen - aktuelle Version zum Herunterladen unter support.virone.pl.
Alle Rechte an Übersetzung/Dolmetschen und Urheberrechten an dieser Bedienungsanleitung sind vorbehalten.
1. Verwenden Sie das Gerät nicht bestimmungswidrig.
2. Tauchen Sie die Einrichtung niemals in Wasser oder anderen Flüssigkeiten.
3. Bedienen Sie die Einrichtung nicht, wenn das Gehäuse beschädigt ist.
4. Nehmen Sie keine Reparaturen selbst vor.
FR| IMPORTANT!
Avant d'utiliser l'appareil pour la première fois, lisez cette notice d'utilisation et gardez-la précieusement pour toute utilisation future de l'appareil. Les réparations et les modifications effectuées
par un non professionnel entrainent une perte de garantie. Le fabricant décline toute responsabilité des dommages qui pourraient résulter d'une mauvaise installation ou exploitation de l'appareil.
Étant donné que les spécifications techniques peuvent être modifiées, le fabricant se réserve le droit d'apporter des modifications aux caractéristiques techniques du produit et d'introduire d'autres
solutions qui n'ont pas d'impact sur les paramètres techniques et la facilité d'utilisation de l'appareil.
Des informations supplémentaires sur les produits de la marque VIRONE sont disponibles sur le site : www.virone.pl. Orno-Logistic Sp. z o.o. n'est pas responsable des conséquences résultant
du non-respect des recommandations de ce manuel. Orno-Logistic Sp. z o.o. se réserve le droit d'apporter des modifications au manuel - la version actuelle peut être téléchargée sur le site web
support.virone.pl. Tous les droits de traduction/d'interprétation et les droits d'auteur de ce manuel sont réservés.
1. Utiliser l’appareil conformément à sa destination.
2. Ne pas plonger l’appareil dans l’eau ou autres liquides.
3. Ne pas utiliser l’appareil si son cadre est abîmé.
4. Ne faites pas les réparations vous-même.
RU| ВАЖНО!
Перед началом использования устройства необходимо изучить настоящую инструкцию по эксплуатации и сохранить ее для будущего использования. Самостоятельный ремонт
и модификация приводят к потере гарантии. Производитель не несет ответственности за повреждения, которые могут возникнуть из-за неправильного монтажа или
эксплуатации устройства.
Ввиду постоянных модификаций технических данных Производитель оставляет за собой право вносить изменения в описание изделия и вносить прочие конструкционные
изменения, не влияющие отрицательно на параметры и эксплуатационные качества изделия.
Дополнительную информацию о продукции марки VIRONE можно найти на сайте: www.virone.pl. Компания Orno-Logistic Sp. z o.o. не несет ответственности за последствия,
возникшие в результате несоблюдения рекомендаций данного руководства. Orno-Logistic Sp. z o.o. оставляет за собой право вносить изменения в руководство - текущую версию
можно загрузить с сайта support.virone.pl. Все права на перевод/интерпретацию и авторские права настоящей инструкции защищены.
1. Не используйте изделие не по назначению.
2. Не погружайте изделие в воду и другие жидкости.
3. Не используйте устройство с поврежденным корпусом.
4. Не выполняйте ремонт самостоятельно.
Każde gospodarstwo jest użytkownikiem sprzętu elektrycznego i elektronicznego, a co za tym idzie potencjalnym wytwórcą niebezpiecznego dla ludzi i środowiska odpadu, z tytułu obecności w sprzęcie
niebezpiecznych substancji, mieszanin oraz części składowych. Z drugiej strony zużyty sprzęt to cenny materiał, z którego możemy odzyskać surowce takie jak miedź, cyna, szkło, żalazo i inne. Symbol
przekreślonego kosza na śmieci umieszczany na sprzęcie, opakowaniu lub dokumentach do niego dołączonych wskazuje na konieczność selektywnego zbierania zużytego sprzętu elektrycznego i elektronicznego.
Wyrobów tak oznaczonych, pod karą grzywny, nie można wyrzucać do zwykłych śmieci razem z innymi odpadami. Oznakowanie oznacza jednocześnie, że sprzęt został wprowadzony do obrotu po dniu 13 sierpnia
2005r. Obowiązkiem użytkownika jest przekazanie zużytego sprzętu do wyznaczonego punktu zbiórki w celu właściwego jego przetworzenia. Zużyty sprzęt może zostać również oddany do sprzedawcy, w
przypadku zakupu nowego wyrobu w ilości nie większej niż nowy kupowany sprzęt tego samego rodzaju. Informacje o dostępnym systemie zbierania zużytego sprzętu elektrycznego można znaleźć w punkcie
informacyjnym sklepu oraz w urzędzie miasta/gminy. Odpowiednie postępowanie ze zużytym sprzętem zapobiega negatywnym konsekwencjom dla środowiska naturalnego i ludzkiego zdrowia!
Every household is a user of electrical and electronic equipment and therefore a potential producer of hazardous waste to humans and the environment from the presence of hazardous substances, mixtures and
components in the equipment. On the other hand, waste equipment is a valuable material, from which we can recover raw materials such as copper, tin, glass, iron and others. The symbol of a crossed-out rubbish
bin placed on the equipment, packaging or documents attached thereto indicates the necessity of separate collection of waste electrical and electronic equipment. Products marked in this way, under penalty of a
fine, may not be disposed of in ordinary waste together with other waste. The marking also means that the equipment was placed on the market after the 13th August 2005.
It is the user’s responsibility to hand over the waste equipment to a designated collection point for proper treatment. Used equipment may also be returned to the seller in case of purchase of a new product in a
quantity not greater than the new purchased equipment of the same type. Information about the available waste electrical equipment collection system can be found at the information point of the shop and in the
municipal office. Proper handling of waste equipment prevents negative consequences for the environment and human health!
Jeder Haushalt ist ein Benutzer von Elektro- und Elektronikgeräten und daher ein potenzieller Produzent von gefährlichen Abfällen für Mensch und Umwelt, da die Geräte gefährliche Stoffe, Gemische und
Komponenten enthalten. Andererseits sind gebrauchte Geräte ein wertvolles Material, aus dem wir Rohstoffe wie Kupfer, Zinn, Glas, Eisen u.a. gewinnen können. Das Symbol des durchgestrichenen Mülleimers
auf Geräten, Verpackungen oder den angehängten Dokumenten deutet auf die Notwendigkeit der getrennten Sammlung von Elektro- und Elektronik-Altgeräten hin. So gekennzeichnete Produkte dürfen unter
Androhung einer Geldstrafe nicht mit dem Hausmüll entsorgt werden. Diese Kennzeichnung bedeutet gleichzeitig, dass das Gerät nach dem 13. August 2005 in Verkehr gebracht wurde.
Der Benutzer soll die Altgeräte einer festgelegten Sammelstelle zur entsprechenden Entsorgung zuführen. Gebrauchtgeräte können auch an den Verkäufer übergeben werden, wenn Sie ein neues Produkt in
einer Menge kaufen, die nicht höher ist als die der neu gekauften Ausrüstung desselben Typs. Informationen zum verfügbaren Sammelsystem für Elektroaltgeräte finden Sie am Informationspunkt des Geschäfts
und im Stadt- / Gemeindeamt. Der sachgemäße Umgang mit gebrauchten Geräten verhindert negative Folgen für die Umwelt und die menschliche Gesundheit!

2
Chaque ménage est un utilisateur d’équipements électriques et électroniques et donc un producteur potentiel de déchets dangereux pour l’homme et l’environnement du fait de la présence de substances,
mélanges et composants dangereux dans les équipements. D’autre part, les déchets d’équipements sont une matière précieuse à partir de laquelle nous pouvons récupérer des matières premières telles que le
cuivre, l’étain, le verre, le fer et autres. Le symbole d’une poubelle barrée d’une croix placée sur l’équipement, l’emballage ou les documents qui y sont joints indique la nécessité d'une collecte sélective des
déchets d’équipements électriques et électroniques. Les produits ainsi marqués, sous peine d’amende, ne peuvent être éliminés avec les déchets ordinaires avec les autres déchets. Le marquage signifie
également que l’équipement a été mis sur le marché après le 13 août 2005.
Il est de la responsabilité de l’utilisateur de remettre les équipements usagés à un point de collecte désigné pour un traitement approprié. L’équipement usagé peut également être retourné au vendeur en cas
d’achat d’un nouveau produit en quantité n’excédant pas celle de l’équipement neuf acheté du même type. Les informations sur le système de collecte des déchets d’équipements électriques sont disponibles au
point d’information du magasin et au bureau municipal. Une manipulation correcte des équipements de traitement des déchets permet d’éviter les conséquences négatives pour l’environnement et la santé
humaine!
Каждое хозяйство является пользователем электрического и электронного оборудования и, следовательно, потенциальным производителем опасных для людей и окружающей среды отходов
по причине присутствия в оборудовании опасных веществ, смесей и компонентов. С другой стороны, использованное оборудование является ценным материалом, из которого можно извлечь
сырье, такое как медь, олово, стекло, железо и другие. Условное обозначение перечеркнутого мусорного бака, размещенное на оборудовании, упаковке или прикрепленных к нему документах,
указывает на необходимость селективного сбора отходов электрического и электронного оборудования. Изделия, обозначенные таким образом, не могут быть выброшены в обычный мусор
вместе с другими отходами, в противном случае за это грозит штраф. Маркировка означает, что оборудование появилось на рынке после 13 августа 2005 года.
Пользователь обязан передать использованный прибор в указанный пункт сбора для дальнейшей его переработки. Использованное оборудование также может быть передано продавцу, в
случае покупки нового изделия в количестве не больше, чем новое приобретаемое оборудование такого же вида. Информацию о доступной системе сбора использованного электрического
оборудования можно получить в информационном пункте магазина и в городском либо районном управлении. Правильное обращение с использованным оборудованием предотвращает
негативные последствия для окружающей среды и здоровья человека!
Uproszczona deklaracja zgodności
Orno-Logistic Sp. z o.o. niniejszym oświadcza, że typ urządzenia radiowego: VDB-1 LAYO Bezprzewodowy wideo dzwonek z Wi-Fi i odbiornikiem dzwonkowym jest zgodny z dyrektywą
2014/53/UE. Pełen tekst deklaracji zgodności UE jest dostępny pod następującym adres internetowym: www.virone.pl.
Simplified Declaration of conformity
Orno-Logistic Sp. z o.o. hereby declares that the type of radio device: VDB-1 LAYO Wireless video doorbell with Wi-Fi and bell receiver complies with Directive 2014/53/EU. The full text of the EU
declaration of conformity is available at the following web address: www.virone.pl.
Vereinfachte Konformitätserklärung
Orno-Logistic Sp. z o.o. erklärt hiermit, dass der Typ des Funkgeräts: VDB-1 LAYO Drahtlose Video-Türklingel mit Wi-Fi und Klingelempfänger entspricht der Richtlinie 2014/53/EU. Der vollständige
Text der EU-Konformitätserklärung ist unter folgender Internetadresse abrufbar: www.virone.pl.
Déclaration de conformité simplifiée
Orno-Logistic Sp. z o.o. déclare par la présente que le type d'appareil radio : VDB-1 LAYO Sonnette vidéo sans fil avec Wi-Fi et récepteur de sonnette est conforme à la directive 2014/53/UE. Le
texte intégral de la déclaration de conformité de l'UE est disponible à l'adresse web suivante : www.virone.pl.
Упрощенная декларация соответствия
Компания Orno-Logistic Sp. z o.o. настоящим заявляет, что тип радиоустройства: VDB-1 LAYO Беспроводной дверной видеозвонок с Wi-Fi и приемником звонка соответствует
Директиве 2014/53/EU. Полный текст декларации соответствия ЕС доступен по следующему веб-адресу: www.virone.pl.
02/2022
BUDOWA URZĄDZENIA/ CONSTRUCTION OF THE DEVICE/ KONSTRUKTION DES GERÄTS
Wideo dzwonek
(nadajnik)
Video doorbell
(transmitter)
Video Türklingel
(Sender)
Sonnette vidéo
(émetteur)
Видеодомофон
(передатчик)
1. Mikrofon
2. Obiektyw kamery
3. Czujnik zmierzchu
4. Czujnik ruchu PIR
5. Przycisk wywołania
6. Przycisk wł./wył.
7. Przycisk RESET
8. Zewnętrzne zasilanie
na transformator 8~24V
AC
1. Microphone
2. Camera lens
3. Light sensor
4. PIR Motion sensor
5. Call button
6. ON/OFF
7. RESET button
8. External power
supply via 8~24V AC
transformer
1. Mikrofon
2. Objektiv der Kamera
3.Dämmerungssensor
4. PIR-
Bewegungssensoren
5. Ruftaste
6. Ein/Aus-Taste
7. RESET-Taste
8. Externe
Stromversorgung über
8~24V AC-
Transformator
1. Microphone
2. Objectif de la caméra
3. Capteur
crépusculaire
4. Capteur de
mouvement PIR
5. Bouton d'appel
6. Bouton marche/arrêt
7. Bouton RESET
8. Alimentation externe
via un transformateur
8~24V AC
1. Микрофон
2. Объектив камеры
3. Датчик сумерек
4. Датчик движения PIR
5. Кнопка вызова
6. Кнопка вкл./выкл.
7. Кнопка RESET
8. Внешний источник
питания для
трансформатора 8 ~ 24
В переменного тока
Odbiornik dzwonkowy
Doorbell receiver
Klingelempfänger
Récepteur de sonnette
Приемник звонка
9. Przycisk wyboru
melodii
10. Przycisk regulacji
głośności
9. Melody selection
button
10. Volume button
9. Melodieauswahltaste
10. Lautstärketaste
9. Touche de sélection
de mélodie
10. Bouton de contrôle
du volume
9. Кнопка выбора
мелодии
10. Кнопка регулировки
громкости
rys. 2/fig.2/Abb.2/fig.2/рис.2
Zawartość zestawu:
1x Wideo dzwonek
1x Odbiornik
dzwonkowy
1x Instrukcja obsługi
1x Wspornik
montażowy
1x Wspornik kątowy
(opcjonalnie)
1x taśma dwustronna
montażowa
1x kabel ładowania
USB
1x klucz imbusowy
1x śruba
zabezpieczająca
2x kołki montażowe +
śruby
2x dodatkowe śruby
montażowe (mniejsze,
do wspornika
kątowego)
2x przewody
przyłączeniowe
(opcjonalnie)
2x śruby do przewodów
(opcjonalnie)
Box contents:
1x Video doorbell
1x Bell receiver
1x user manual
1x flat mounting bracket
1x angled mounting
bracket
1x 3M adhesive
mounting sticker
1x USB charging cable
1x allen key
2x mounting screws +
wall plugs
2x additional mounting
screws (smallest,
angled bracket only)
2x hardwiring
connection wires
(optional)
2x conductor screws
(optional)
Inhalt des Sets:
1x Video-Türklingel
1x Klingelempfänger
1x
Bedienungsanleitung
1x Halterung
1x Winkelhalterung
(optional)
1x doppelseitiges
Klebeband
1x USB-Ladekabel
1x Inbusschlüssel
1x
Befestigungsschraube
2x Befestigungsdübel +
Schrauben
2x zusätzliche
Befestigungsschrauben
(kleiner, für die
Winkelhalterung)
2x Verbindungskabel
(optional)
2x Schrauben für Kabel
(optional)
Contenu du kit :
1x Sonnette vidéo
1x Récepteur de
sonnette
1x Notice d'utilisation
1x Support de montage
1x Support d'angle
(option)
1x ruban de montage
double-face
1x câble de charge
USB
1x clé Allen
1x vis de fixation
2x chevilles de montage
+ vis
2x vis de montage
supplémentaires (plus
petites, pour le support
d'angle)
2x câbles de connexion
(option)
2x vis pour câble
(option)
В состав набора
входят:
1x видеодомофон
1x приемник звонка
1x инструкция по
эксплуатации
1x монтажный
кронштейн
1x угловой кронштейн
(опционально)
1x двухсторонний
монтажный скотч
1x USB-кабель для
зарядки
1x шестигранный ключ
1x защитный винт
2x монтажных штифта +
винты
2x дополнительных
монтажных винта
(меньший, для углового
кронштейна)
2x соединительных
кабеля (опционально)
2x винта для проводов
(опционально)
rys. 3/fig.3/Abb.3/fig.2/рис.3
Montaż przy pomocy naklejki/ Adhesive sticker mounting/
Anbringung mittels Aufkleber/ Montage à l'aide d'un
autocollant/ Установка с помощью наклейки
rys. 4/fig.4/Abb.4/fig.4/ рис.4
Montaż przy pomocy śrub/ Mounting with screws/ Montage mit Schrauben/ Montage à l'aide de vis/ Установка с помощью
винтов

3
PL
Bezprzewodowy dzwonek z Wi-Fi i odbiornikiem dzwonkowym, LAYO
Instrukcja obsługi
CHARAKTERYSTYKA
Zestaw zawiera wideo dzwonek (nadajnik) oraz odbiornik dzwonkowy zasilany sieciowo. Dzwonek posiada połączenie WiFi i może być obsługiwany przez smartfon,
po pobraniu darmowej aplikacji Tuya Smart. Umożliwia to rozmowę z osobą stojącą na zewnątrz. Urządzenie posiada miejsce na kartę Mikro SD (brak w zestawie),
która umożliwia zapis zdjęć i video oraz wyposażone jest w czujnik, który po wykryciu ruchu od razu rozpoczyna nagrywanie filmów. Wideo dzwonek ma wąską budowę,
dzięki czemu może być montowany na wąskich słupkach. Zawiera przycisk oraz kamerę Full HD, podświetlaną diodami IR, które zapewniają wyjątkowo wyraźny obraz
nawet po zmroku. Wideo dzwonek zasilany jest z wbudowanego akumulatora, ładowanego przez USB. Istnieje również możliwość podłączenia transformatora w celu
doprowadzenia zasilania 8-24V AC. Urządzenie jest wyjątkowo szczelne i odporne na trudne warunki atmosferyczne, wysoka klasa szczelności IP65. Sieciowy
odbiornik dzwonkowy zapewnia sygnalizację dźwiękową na wypadek rozładowania się telefonu. Użytkownicy mają do wyboru aż 60 dźwięków dzwonka, a ich głośność
może być regulowana w zakresie 64-84 dB.
PAROWANIE
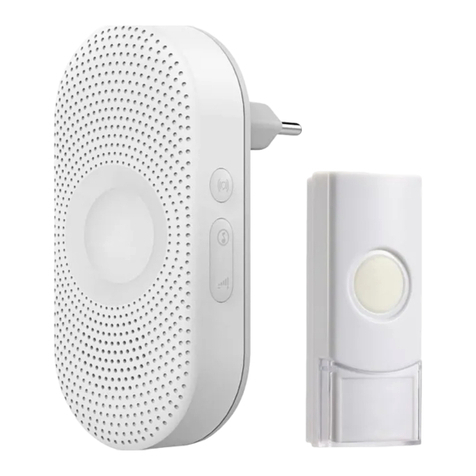
Zestaw zawiera odbiornik dzwonkowy (rys. 1b) zasilany sieciowo, który sygnalizuje naciśnięcie przycisku wywołania przez odwiedzającego na wideo dzwonku (rys.
1a). Przycisk wyboru melodii znajduje się po lewej stronie odbiornika natomiast przycisk regulacji głośności po prawej. Odbiornik i nadajnik komunikują się ze sobą
radiowo na częstotliwości 443Hz.
Parowanie odbiornika z nadajnikiem:
1. Podłącz odbiornik dzwonkowy do gniazdka sieciowego, usłyszysz sygnał dźwiękowy, a wskaźnik świetlny zamiga.
2. Naciśnij przycisk regulacji głośności (10) z prawej strony odbiornika i wybierz odpowiednie ustawienie (5-stopniowa regulacja, możliwość całkowitego wyciszenia).
3. Naciśnij przycisk wyboru dźwięku dzwonka (9) i wybierz odpowiednią melodię.
4. Potwierdź wybrany dźwięk, naciśnij i przytrzymaj przycisk regulacji głośności (10) tak długo, aż wskaźnik świetlny zapali się na niebiesko.
5. W ciągu 5 sekund naciśnij przycisk wywołania na wideo dzwonku (5). Urządzenia zostały sparowane.
Zmiany dźwięku dzwonka lub głośności można dokonywać bez konieczności ponownego parowania.
ŁADOWANIE WIDEO DZWONKA
Wideo dzwonek zasilany jest za pomocą 2 wbudowanych akumulatorów litowo-jonowych (typ 18650). Pozwalają one
na pracę urządzenia nawet do 6 miesięcy bez konieczności ładowania (w zależności od ilości aktywacji i połączeń).
Baterie są wbudowane w urządzeniu i niedostępne dla użytkownika. Nie należy otwierać urządzenia w celu uzyskania
dostępu do baterii!! Urządzenie nie wymaga ładowania przed pierwszym użyciem. Stopień naładowania widoczny jest
w aplikacji.
Ładowanie
Odkręć dolną śrubę zabezpieczającą i wyjmij wideo dzwonek z ramki montażowej. Wykorzystaj dostarczony kabel
micro USB i podłącz go do bocznego portu dzwonka i odpowiedniego źródła zasilania 5V/2A. Pełne naładowanie
zajmuje ok. 4 godzin. Podczas ładowania wskaźnik świetlny powinien świecić na niebiesko. Użyj aplikacji, aby
sprawdzić czy baterie zostały w pełni naładowane.
rys.5
INSTALACJA
Wideo dzwonek (nadajnik) można zamontować na 2 sposoby: przy pomocy dwustronnej taśmy klejącej lub śrub dołączonych do zestawu. Bez względu na to, którą
metodę montażu wybierzesz, pamiętaj o dokręceniu śruby zabezpieczającej od dołu urządzenia, aby uniknąć kradzieży dzwonka.
1. Montaż przy pomocy dwustronnej taśmy klejącej (rozwiązanie dobre dla gładkich powierzchni)
- odklej zabezpieczenie z jednej strony naklejki 3M i przyklej ją dokładnie (tak, aby wszystkie otwory pasowały do siebie) do tyłu ramki montażowej dzwonka (nie do
samego przycisku),
- odklej zabezpieczenie z drugiej strony naklejki i dociśnij mocno do wybranej powierzchni, przytrzymaj przez chwilę, aby naklejka wystarczająco się przykleiła,
- umieść wideo dzwonek w ramce montażowej i dokręć śrubę zabezpieczającą od spodu.
2. Montaż przy pomocy śrub montażowych
- umieść wspornik montażowy w wybranym miejscu montażu i zaznacz punkty wiercenia w górnym i dolnym otworze,
- wywierć otwory montażowe, a następnie użyj kołków i śrub, aby przykręcić wspornik do ściany,
- umieść wideo dzwonek w ramce montażowej i dokręć śrubę zabezpieczającą od spodu, upewnij się, że urządzenie zostało stabilnie zamocowane.
Uwaga: W przypadku użycia wspornika kątowego należy użyć mniejszych śrub montażowych dołączonych do zestawu. Umieść wspornik płaski na wsporniku kątowym
tak, aby wszystkie otwory pokrywały się, a następnie wkręć mniejsze śruby montażowe w mniejsze otwory wspornika. Następnie postępuj według powyższych punktów.
DANE TECHNICZNE
Wideo dzwonek (nadajnik)
Zasilanie:
2x ogniwa litowo-jonowe 18650; 3,7V DC 5000mAh
(opcjonalnie transformator 8-24V AC)
Pobór prądu podczas pracy:
<250mA
Kamera:
Matryca FHD 1080p, 4 diody IR
Rozdzielczość:
1920x1080p
Kąt widzenia:
61° pion, 110° poziom
Zasięg widzenia czujnika ruchu:
3-7m
Karta pamięci:
Micro SD, maks. 128GB, klasa min.10 (brak w zestawie)
Standard połączenia:
IEEE 802.11b/g/n
Częstotliwość Wi-Fi:
2,4 GHz
Aplikacja:
Tuya Smart
Stopień ochrony:
IP65
Temperatura pracy:
-10° ~ +40°
Wymiary:
46x137x25mm
Waga netto:
0,18 kg
Odbiornik dzwonkowy
Zasilanie:
230V~, 50 Hz
Ilość dźwięków dzwonka:
60
Poziom głośności:
64-84dB (5 stopniowa regulacja, możliwość całkowitego wyciszenia)
Wymiary:
52x70x69mm
Waga netto:
0,06kg
EN
LAYO Wireless video doorbell with Wi-Fi and bell receiver
Operation manual
CHARACTERISTICS
LAYO wireless video doorbell. The set includes a video doorbell and a mains-powered receiver. The bell has a WiFi connection and can be operated by a smartphone,
after downloading the free Tuya app. This makes it possible to talk to a person standing outside. The device has a slot for a microSD card (not included) to store photos
and video, and is equipped with a sensor that immediately starts recording video when motion is detected. The video doorbell has a slim design so it can be mounted
on narrow posts. It contains a button and a Full HD camera, backlit by IR diodes, which provide clear image even after dark. The video doorbell is powered by a built-
in rechargeable battery, charged via USB. It is also possible to connect a transformer to supply 8-24V AC. The device is tight and resistant to difficult weather conditions,
It has a high protection class IP65. The mains powered bell receiver provides audible signalling in case the phone runs out of power. Users can choose from up to 60
ringtones and their volume can be adjusted from 64-84 dB.

4
PAIRING
The set contains a mains-powered receiver which signals when a visitor presses the call button on the video doorbell. The melody selection button is located on the
left side of the receiver, and the volume control button on the right. The receiver and the video doorbell communicate with each other by radio at a frequency of 443Hz.
Pairing the receiver with the transmitter:
1. Plug the bell receiver into the mains socket, you will hear a beep and the indicator light will flash.
2. Press the volume button (10) on the right side of the bell receiver and select the desired setting (5-step adjustment, total muting possible).
3. Press the melody selection button (9) and select the desired melody.
4. Confirm the selected sound by pressing and holding the volume button (10) until the light indicator lights up blue.
5. Press the call button (5) on the video doorbell within 5 seconds. The devices are now paired.
Changes to the melody sound or volume can be made without re-pairing.
VIDEO DOORBELL CHARGING
The video doorbell is powered by two built-in lithium-ion batteries (type 18650). They allow the device to operate for up to
6 months without recharging (depending on the number of activations and calls). The batteries are built into the device and
are not accessible to the user. Do not open the device to gain access to the batteries!!!
The device does not need to be charged before first use. The level of charge is visible in the app.
Charging
Unscrew the bottom security screw and remove the panel from the mounting frame. Use the supplied micro USB cable and
connect it to the side bell port and a suitable 5V/2A power source. It will take approximately 4 hours to fully charge. While
charging, the light indicator should light up blue. Use the app to check if the batteries are fully charged.
INSTALLATION
The video doorbell (transmitter) can be mounted in 2 ways: using double-sided adhesive tape or the screws included in the set. Whichever mounting method you
choose, remember to tighten the security screw on the bottom of the unit to avoid theft of the doorbell.
1. Mounting with double-sided adhesive tape (good for smooth surfaces)
- peel off the protection from one side of the 3M sticker and stick it carefully (so that all the holes match) to the back of the doorbell mounting frame (not the button),
- peel off the protection from the other side of the sticker and press it firmly to the chosen surface, hold for a while to ensure the sticker sticks sufficiently,
- place the video doorbell in the mounting frame and tighten the securing screw on the bottom.
2. Mounting with screws
- place the mounting bracket on the desired mounting location and mark the drilling points in the upper and lower holes,
- drill the mounting holes and use dowels and screws to screw the bracket to the wall,
- place the video doorbell in the mounting frame and tighten the safety screw from the bottom, make sure the button is securely fastened.
Important: When using the angle bracket, use the smaller mounting screws provided. Place the flat bracket on the angle bracket so that all holes overlap, then screw
the smaller mounting screws into the smaller holes of the bracket. Then follow the above steps.
TECHNICAL DATA
Video doorbell (transmitter)
Power supply:
2x 18650 lithium-ion batteries 3.7V DC 5000mAh
(optional transformer 8-24V AC)
Power consumption during working:
<250mA
Camera:
FHD 1080p sensor, 4x IR LEDs
Resolution:
1920x1080p
Viewing angle:
61° vertical, 110° horizontal
Detection distance:
3-7m
Memory card:
Micro SD, max. 128GB, min.10 class (not included)
Connection standard:
IEEE 802.11b/g/n
Wi-Fi frequency:
2.4 GHz
Application:
Tuya Smart
Ingress protection:
IP65
Working temperature:
-10° ~ +40°
Dimensions:
46x137x25mm
Net weight:
0.18 kg
Bell receiver
Power supply:
230V~, 50 Hz
Number of ringtones:
60
Volume level:
64-84dB (5 steps adjustable, muting possible)
Dimensions:
52x70x69mm
Net weight:
0.06kg
DE
Drahtlose Video-Türklingel mit Wi-Fi und Klingelempfänger, LAYO
Bedienungsanleitung
CHARAKTERISTIK
LAYO drahtlose Video-Türklingel. Das Set umfasst eine Video-Türklingel und einen netzbetriebenen Empfänger. Die Klingel verfügt über eine WiFi-Verbindung und
kann mit einem Smartphone bedient werden, nachdem man die kostenlose Tuya-App heruntergeladen hat. Dies ermöglicht es, mit einer draußen stehenden Person
zu sprechen. Das Gerät verfügt über einen microSD-Kartensteckplatz (Karte nicht im Lieferumfang inbegriffen) zum Speichern von Fotos und Videos, außerdem ist mit
einem Sensor ausgestattet, der sofort die Videoaufzeichnung startet, wenn eine Bewegung erkannt wird. Die Video-Türklingel hat ein schlankes Design, so dass es an
schmalen Pfosten montiert werden kann. Es enthält eine Taste und eine Full-HD-Kamera, die von IR-Dioden beleuchtet wird und auch bei Dunkelheit ein
außergewöhnlich klares Bild ermöglicht. Die Video-Türklingel wird über einen eingebauten Akku betrieben, der über USB aufgeladen wird. Es ist auch möglich, einen
Transformator anzuschließen, um eine Spannung von 8-24V AC zu liefern. Das Gerät ist außergewöhnlich dicht und widerstandsfähig gegen raue Wetterbedingungen,
es verfügt über die Schutzklasse IP65. Der netzbetriebene Klingelempfänger sorgt für eine akustische Signalisierung, falls das Smartphone leer ist. Der Benutzer kann
aus bis zu 60 Klingeltönen auswählen, deren Lautstärke von 64-84 dB eingestellt werden kann.
VERBINDUNG
Das Set enthält eine netzbetriebene Klingelempfänger, der signalisiert, wenn ein Besucher die Ruftaste an der Video-Türklingel drückt. Die Melodieauswahltaste
befindet sich auf der linken Seite des Empfängers, die Lautstärketaste auf der rechten Seite. Der Empfänger und der Sender kommunizieren per Funk mit einer
Frequenz von 443 Hz miteinander.
Koppeln des Empfängers mit dem Sender:
1. Stecken Sie den Klingelempfänger in die Steckdose. Sie werden einen Signalton hören und die Anzeigeleuchte wird blinken.
2. Drücken Sie die Lautstärketaste (10) auf der rechten Seite des Empfängers und wählen Sie die gewünschte Einstellung (5-stufige Einstellung, Stummschaltung
möglich).
3. Drücken Sie die Melodieauswahltaste (9) und wählen Sie die gewünschte Melodie aus.
4. Bestätigen Sie den gewählten Ton, indem Sie die Lautstärketaste (10) gedrückt halten, bis die Leuchtanzeige blau leuchtet.
5. Drücken Sie innerhalb von 5 Sekunden die Ruftaste an der Video-Türklingel. Die Geräte sind nun gekoppelt.
Änderungen des Melodietons oder der Lautstärke können ohne erneute Kopplung vorgenommen werden.

5
AUFLADEN DER VIDEO-TÜRKLINGEL
Die Video-Türklingel wird von zwei eingebauten Lithium-Ionen-Akkus (Typ 18650) gespeist. Sie ermöglichen es, das Gerät
bis zu 6 Monate lang ohne Aufladen zu benutzen (abhängig von der Anzahl der Aktivierungen und Anrufe). Die Batterien
sind im Gerät eingebaut und für den Benutzer nicht zugänglich. Nehmen Sie das Gerät nicht auseinander, um an die
Batterie zu gelangen!!!
Das Gerät muss vor der ersten Verwendung nicht aufgeladen werden. Der Ladezustand wird in der App angezeigt.
Aufladen
Lösen Sie die untere Sicherungsschraube und nehmen Sie die Platte aus dem Einbaurahmen. Verwenden Sie das
mitgelieferte Micro-USB-Kabel und schließen Sie es an den Anschluss und an eine geeignete 5V/2A-Stromquelle an. Es
dauert etwa 4 Stunden, bis das Gerät vollständig aufgeladen wird. Während des Ladevorgangs sollte die Leuchtanzeige
blau leuchten. Nutzen Sie die App, um zu prüfen, ob die Batterien vollständig geladen sind.
MONTAGE
Die Video-Türklingel kann auf 2 Arten montiert werden: mit doppelseitigem Klebeband oder mit den im Set enthaltenen Schrauben. Unabhängig davon, für welche
Montageart Sie sich entscheiden, denken Sie daran, die Sicherheitsschraube an der Unterseite des Geräts gut anzuschrauben, damit die Klingel nicht geklaut werden
kann.
1. Befestigung mit doppelseitigem Klebeband (gut für glatte Oberflächen)
- Ziehen Sie den Schutz auf einer Seite des 3M-Aufklebers ab und kleben Sie ihn vorsichtig (so dass alle Löcher übereinstimmen) auf die Rückseite des
Befestigungsrahmens der Klingel (nicht auf den Knopf selbst),
- Ziehen Sie den Schutz von der anderen Seite des Aufklebers ab und drücken Sie ihn fest auf die gewählte Oberfläche, halten Sie ihn eine Weile, um sicherzustellen,
dass der Aufkleber ausreichend festklebt,
- Setzen Sie die Video-Türklingel in den Montagerahmen und ziehen Sie die Sicherungsschraube an der Unterseite fest.
2. Montage mit Befestigungsschrauben
- Platzieren Sie die Halterung am gewünschten Montageort und markieren Sie die Bohrpunkte in den oberen und unteren Löchern,
- Bohren Sie die Befestigungslöcher und schrauben Sie die Halterung dann mit Hilfe von Dübeln und Schrauben an der Wand fest,
- Setzen Sie die Video-Türklingel in den Montagerahmen ein und ziehen Sie die Sicherungsschraube von unten an. Stellen Sie sicher, dass das Gerät sicher befestigt
ist.
Hinweis: Verwenden Sie bei Einsatz einer Halterung die mitgelieferten kleineren Befestigungsschrauben. Setzen Sie die flache Halterung so auf die Winkelhalterung,
dass sich alle Löcher überlappen, und schrauben Sie dann die kleineren Befestigungsschrauben in die kleineren Löcher der Halterung. Folgen Sie dann den oben
genannten Schritten.
TECHNISCHE DATEN
Video-Türklingel (Sender)
Stromversorgung:
2x 18650 Lithium-Ionen-Zellen 3,7V DC 5000mAh (optional 8-24V AC)
Stromverbrauch während des Betriebs:
<250mA
Kamera:
FHD 1080p-Matrize, 4 IR-LEDs
Auflösung:
1920x1080p
Betrachtungswinkel:
61° senkrecht, 110° waagerecht
Erfassungsbereich des Bewegungssensors:
3-7m
Speicherkarte:
Micro SD, max. 128GB, min.10 Klasse
Verbindungsstandard:
IEEE 802.11b/g/n
Wi-Fi Frequenz:
2,4 GHz
Anwendung:
Tuya Smart
Schutzart:
IP65
Betriebstemperatur:
-10° ~ +40°
Abmessungen:
46x137x25mm
Nettogewicht:
0,18 kg
Klingelempfänger
Stromversorgung:
230V~, 50 Hz
Anzahl der Klingeltöne:
60
Lautstärkepegel:
64-84dB (5 Stufen einstellbar, Stummschaltung möglich)
Abmessungen:
52x70x69mm
Nettogewicht:
0,06kg
FR
Sonnerie vidéo sans fil avec Wi-Fi et récepteur de sonnerie, LAYO
Manuel d'opération
CARACTÉRISTIQUES
Le kit comprend une sonnette vidéo (émetteur) et un récepteur alimenté par le secteur. La sonnette dispose d'une connexion WiFi et peut être commandée par un
smartphone, après avoir téléchargé l'application gratuite Tuya Smart. Cela permet de parler à la personne qui se trouve à l'extérieur. Le dispositif dispose d'un
emplacement pour une carte Micro SD (non incluse) permettant d'enregistrer des photos et des vidéos et est équipé d'un capteur qui lance immédiatement
l'enregistrement d'une vidéo lorsqu'un mouvement est détecté. La sonnette vidéo a une forme étroite qui permet de la monter sur des montants étroits. Elle comprend
un bouton et une caméra Full HD, éclairée par des LED IR qui fournissent une image très claire même dans l'obscurité. La sonnette vidéo est alimentée par une
batterie intégrée, chargée par USB. Il est également possible de connecter un transformateur pour fournir l’alimentation 8-24V AC. Le dispositif est exceptionnellement
étanche et résistant aux conditions climatiques difficiles, avec un indice IP65. Le récepteur fournit une signalisation sonore au cas où le téléphone serait déchargé. Les
utilisateurs peuvent choisir parmi 60 sonneries et leur volume peut être réglé entre 64 et 84 dB.
COUPLAGE
Le kit contient un récepteur de sonnerie (fig. 1b) avec alimentation secteur, qui signale lorsqu'une personne appuie sur le bouton d'appel de la sonnette vidéo (Fig.
1a). Le bouton de sélection de mélodie se trouve sur le côté gauche du récepteur et le bouton de réglage du volume sur le côté droit. Le récepteur et l'émetteur
communiquent entre eux par radio à 443 Hz.
Couplage du récepteur et de l'émetteur :
1. Branchez le récepteur de sonnette dans une prise de courant, vous entendrez un signal acoustique et le voyant lumineux clignotera.
2. Appuyez sur le bouton de réglage du volume (10) situé sur le côté droit du récepteur et sélectionnez le réglage souhaité (réglage à 5 niveaux, muet complet).
3. Appuyez sur le bouton de sélection de sonnerie (9) et sélectionnez la mélodie souhaitée.
4. Confirmez le son sélectionné en appuyant sur le bouton de réglage du volume (10) et en le maintenant enfoncé jusqu'à ce que le voyant lumineux s'allume en bleu.
5. Dans les 5 secondes, appuyez sur le bouton d'appel de la sonnette vidéo (5). Les dispositifs sont couplés.
Il est possible de modifier la sonnerie ou le volume sans refaire le couplage.
Table of contents
Other Orno Accessories manuals

Orno
Orno OR-AE-1302 User manual

Orno
Orno OR-GB-438 User manual

Orno
Orno OR-CR-204 User manual

Orno
Orno OR-CR-227 User manual

Orno
Orno OR-CR-232 Product guide

Orno
Orno OR-DB-IL-128 User manual

Orno
Orno OR-AE-1303 User manual

Orno
Orno ONDO AC User manual

Orno
Orno OR-CR-220 User manual

Orno
Orno OR-DB-QS-158 User manual

Orno
Orno OR-CR-246 User manual

Orno
Orno DISCO AC User manual

Orno
Orno OR-SH-1712 User manual

Orno
Orno OR-CR-242 User manual

Orno
Orno OR-CR-235 User manual

Orno
Orno ERATO AC User manual

Orno
Orno OR-CR-236/W User manual

Orno
Orno OR-DB-LT-126 User manual

Orno
Orno OR-CR-224 User manual

Orno
Orno OR-CR-257 User manual