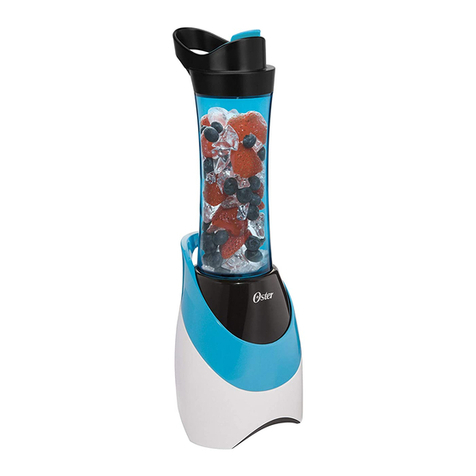
Oster ACTIFIT BLSTAFB User manual

Manual de Instrucciones
LICUADORA PERSONAL
OSTER®ACTIFIT™
LEA TODAS LAS INSTRUCCIONES ANTES DE USAR ESTE APARATO
Instruction Manual
PERSONAL BLENDER
OSTER®ACTIFIT™
READ ALL INSTRUCTIONS BEFORE USING THIS APPLIANCE
MODELOS
MODELS BLSTAFB

Español-1
PRECAUCIONES IMPORTANTES
A fin de reducir el riesgo de accidentes (tales como incendio, descarga eléctrica y/o
lesión personal), cuando se utilizan aparatos eléctricos, siempre se deben seguir
precauciones básicas de seguridad, incluyendo las siguientes recomendaciones:
LEA TODAS LAS INSTRUCCIONES ANTES DE UTILIZAR ESTE PRODUCTO.
1. A fin de protegerse contra una descarga eléctrica, no coloque ni sumerja el
cable, los enchufes o el aparato en agua ni en ningún otro líquido.
2. Este aparato no está destinado para ser usado por personas (incluyendo
niños) cuyas capacidades físicas, sensoriales o mentales estén disminuidas,
o carezcan de experiencia y conocimiento, a menos que una persona
responsable por su seguridad les haya supervisado o instruido en el uso
de este electrodoméstico. Los niños deberán estar bajo supervisión para
cerciorarse de que NO jueguen con el artefacto eléctrico.
3. Nunca deje el aparato desatendido cuando esté en uso.
4. Desenchufe el aparato del tomacorriente cuando no esté en uso, antes de
instalarle o retirarle piezas y antes de limpiarlo. Permita que se enfríe antes de
instalarle o retirarle piezas y antes de limpiarlo. Para desconectar desenchufe el
cable del tomacorriente. No tire el cable para desconectar el aparato.
5. Evite el contacto con la cuchilla o piezas móviles.
6. No opere ningún electrodoméstico que tenga el cable o enchufe dañado, si no
funciona correctamente, se ha dejado caer o está dañado de cualquier otra
forma. Lleve el artefacto al Centro de Servicio Autorizado de Electrodomésticos
Oster®más cercano para su revisión, reparación o ajuste eléctrico o mecánico.
7. Para aparatos con marcas en el contacto del enchufe: Este aparato tiene
marcas importantes en el contacto del enchufe. Ni el enchufe del accesorio ni
el cable (si el enchufe está moldeado en el cable) debe ser reemplazado. Si
alguno de los dos se daña, se debe reemplazar el aparato.
8. El uso de accesorios, incluyendo frascos para conservas, no recomendados
ni vendidos por el fabricante del producto podría ocasionar incendio, descarga
eléctrica o lesión personal.
9. No utilice al aire libre ni para fines comerciales.
10. No permita que el cable cuelgue del borde de la mesa o del mostrador ni que
entre en contacto con superficies calientes, inclusive la estufa.
11. Mantenga las manos y los utensilios fuera del vaso mientras licúa para reducir
el riesgo de lesiones severas personales o causar daño a la licuadora. Una
espátula puede ser utilizada, pero solo debe ser utilizada cuando el aparato no
esté funcionando.
12. ADVERTENCIA: La cuchilla es filosa. Manipúlela con cuidado, especialmente
al retirar la cuchilla del vaso, vaciar el vaso y durante la limpieza.
13. A fin de reducir el riesgo de una lesión personal, nunca coloque la cuchilla en la
base sin el vaso instalado correctamente.
14. El vaso debe estar en posición correcta antes de utilizar el aparato.
15. Siempre opere la licuadora con la tapa en su lugar. Siempre espere hasta que
todas las piezas móviles se hayan detenido antes de retirar la tapa.

Español-2
16. No utilice el aparato para otro fin que no sea para el que ha sido diseñado. El
uso incorrecto puede ocasionar lesiones. Siempre utilice el aparato sobre una
superficie seca, estable y nivelada. Nunca llene el vaso por encima de la línea
MAX que indica la capacidad máxima.
17. Si su licuadora está equipada con un enchufe de conexión a tierra, solo
conéctela a tomacorrientes diseñados adecuadamente para conexión a tierra.
Para modelos con los mini vasos o los vasos portátiles Blend-N-Go:
18. Asegúrese que el vaso esté bien colocado en la base antes de utilizarlo.
19. No mezcle ingredientes y líquidos con gas, calientes ni hirviendo, ya que esto
puede crear acumulación de presión. Sólo licúe líquidos sin gas e ingredientes
a temperatura ambiente o más fríos. Si el vaso se siente caliente al tocarlo, deje
que se enfríe antes de abrirlo.
20. No utilice la licuadora por más de 1 minuto a la vez para evitar la acumulación
de calor y presión. Permita que se enfríe por 1 minuto entre cada ciclo.
CONSERVE ESTAS INSTRUCCIONES
ESTE ELECTRODOMÉSTICO ESTÁ DISEÑADO SÓLO PARA USO
DOMÉSTICO Y AMBIENTES SIMILARES, TALES COMO:
• En tiendas, oficinas y otros ambientes de trabajo similares
• En ranchos o granjas
• Por clientes en hoteles, moteles y otros tipos de ambientes residenciales
• En ambientes de alojamiento y desayuno

Español-3
DESCRIPCIÓN DEL ARTEFACTO
1. Boquilla con tapa a prueba de derrames y asa para mejor
portabilidad
2. Vaso portátil de Tritan™ de 600 mL libre de BPA
3. Anillo sellador con función candado
4. Cuchilla trituradora de hielo
5. Parte inferior enroscable
6. Acople metálico
7. Base del sistema de nutrición
1
2
3
4
5
6
7

Español-4
CONOCIENDO SU SISTEMA
DE NUTRICIÓN OSTER®
Su producto incluye la siguiente tecnología y características:
• Vaso portátil de Tritan™ de 600 mL – Tecnología Tritan™ brinda los
benecios de un vaso de vidrio en un plástico resistente, inodoro y
no tóxico
• Cuchilla trituradora de hielo
• Acople metálico 10 veces más fuerte*
• Boquilla con tapa a prueba de derrames y asa para mejor
portabilidad
Antes de usar el producto por primera vez, separe la tapa, el vaso,
el anillo sellador con función candado, la cuchilla y la parte inferior
enroscable. Lave en agua caliente jabonosa o en la rejilla superior del
lavaplatos automático. Enjuague y seque bien.
CÓMO UTILIZAR SU SISTEMA DE NUTRICIÓN
1. Enchufe la unidad en un tomacorriente adecuado.
2. Voltee el vaso dejando el lado abierto hacia arriba y coloque todos
los ingredientes dentro de él (Figura 1).
3. Coloque la cuchilla en la parte inferior enroscable (Figura 2).
4. Coloque el anillo sellador con función candado sobre la cuchilla
(Figura 3). Con cuidado, presione e introduzca el anillo sellador en la
ranura nal de la parte inferior enroscable.
5. Asegúrese de que el anillo sellador con función candado esté
completamente y de manera uniforme en su lugar y que sujete la
cuchilla en la parte inferior enroscable.
6. Instale la parte inferior enroscable con la cuchilla y el anillo sellador
en el vaso (Figura 4). Gire hacia la derecha para apretar.
7. Asegúrese de que la parte inferior enroscable con la cuchilla y el
anillo sellador esté apretada en el vaso antes de usarlo.
8. Introduzca el vaso sobre la base del motor (Figura 5).
9. Para utilizar su sistema de nutrición, puede usar la velocidad
estándar o la función de pulso.
a. Para utilizar la velocidad estándar, asegúrese de empujar el
vaso hacia abajo y girar en el sentido de las agujas del reloj
con la mano hasta que esté bien insertado en las 4 ranuras de
la base tal y como se indica (Figura 6). Si no puede colocar el
vaso rmemente dentro de la base asegúrese de que la unidad
esté desenchufada, gire ligeramente el acople metálico (Figura
7), vuelva a enchufar la unidad en el tomacorriente y coloque
nuevamente el vaso asegurándose de que entre completamente
en la base. Una vez que haya alcanzado el resultado deseado,
empuje el vaso hacia abajo y gire en sentido contrario a las
agujas del reloj y remuévelo de la base (Figura 8).
b. Para utilizar la función de pulso, empuja el vaso hacia abajo
durante un breve período de tiempo deseado.
NO PROCESE ALIMENTOS O LÍQUIDOS CALIENTES.
10. Retire la parte inferior enroscable con la cuchilla y el anillo
sellador (Figura 9).
*Resistencia a la tracción de acero laminado en frío 1215 comparado
con plástico PP
Figura 5
Figura 4
Figura 6
Figura 7
Figura 1
Figura 2
Figura 3

Español-5
11. Enrosque la tapa con punta para beber y tapón a prueba de
derrames (Figura 10). Asegúrese de que la tapa del tapón esté
bien cerrada para evitar derrames.
12. Ahora su bebida nutritiva está lista para llevarla consigo a
cualquier lugar.
CUIDADO Y MANTENIMIENTO
Los vasos, las tapas de los vasos y la parte inferior enroscable para
el vaso con cuchilla se pueden lavar a mano en agua tibia o jabonosa
o en la rejilla superior del lavaplatos automático. Enjuague bien y
seque. Limpie la base con un paño suave y húmedo para limpiar.
Nunca sumerja la base en un líquido.
ALMACENAMIENTO
Vuelva a colocar la parte inferior enroscable del vaso con la cuchilla
en el vaso para evitar dejar las cuchillas expuestas y
almacene la unidad y el vaso en un gabinete seco.
ADVERTENCIA: Nunca coloque el vaso, o ninguna de las
demás piezas, en un horno microondas.
CONSEJOS PARA LICUAR
Cantidades de ingredientes
Utilice únicamente la cantidad de alimentos sugerida en las recetas. Si desea cantidades
más grandes, prepare en lotes. Usar cantidades más grandes puede sobrecargar y forzar
el motor. Además, es posible que obtenga resultados diferentes a los que se describen.
Figura 9
Figura 10
PREGUNTAS FRECUENTES
¿Por qué no se enciende la unidad?
Compruebe que la base esté enchufada en un tomacorriente activo.
¿Cómo puedo evitar el derrame de líquidos?
Asegúrese que el lado liso del anillo sellador esté en contacto con la parte inferior
enroscable. Además conrme que la parte inferior enroscable se encuentre bien
enroscada en el vaso.
Figura 8

English-1
IMPORTANT SAFEGUARDS
When using electrical appliances, basic safety precautions should always be
followed, including the following:
1. Read all instructions before using this product.
2. To protect against electric shock, do not place or immerse cord, plugs, or
appliance in water or other liquid.
3. This appliance is not intended for use by children or by persons with reduced
physical, sensory, or mental capabilities, or lack of experience and knowledge,
unless they have been given supervision or instruction concerning use of
the appliance by a person responsible for their safety. Children should be
supervised to ensure that they do not play with the appliance. Keep the
appliance and its cord out of reach of children.
4. Never leave appliance unattended when in use.
5. Unplug from outlet when not in use, before putting on or taking off parts and
before cleaning. Allow to cool before putting on or taking off parts, and before
cleaning. To disconnect, unplug power cord from outlet. Do not disconnect by
pulling on cord.
6. Avoid any contact with blades or moveable parts.
7. Do not operate any appliance with a damaged cord or plug or after the
appliance malfunctions, or has been damaged in any manner. Do not attempt
to replace or splice a damaged cord. Return appliance to the manufacturer (see
warranty) for examination, repair or adjustment.
8. For appliances with markings on plug blade: This appliance has important
markings on the plug blade. The attachment plug or entire cordset (if plug is
molded onto cord) is not suitable for replacement. If damaged, the appliance
shall be replaced.
9. The use of attachments, including canning jars, not recommended or sold by the
manufacturer may cause fire, electric shock or injury.
10. Do not use outdoors or for commercial purposes.
11. Do not let cord hang over edge of table or counter, or touch hot surfaces,
including the stove.
12. Keep hands and utensils out of container while blending to reduce the risk of
severe injury to persons or damage to the blender. A scraper may be used but
must be used only when the blender is not running.
13. Blades are sharp. Handle carefully, especially when removing the blades from
the container, emptying the container and during cleaning.
14. To reduce the risk of injury, never place cutter-assembly blades on base without
jar properly attached.
15. Always operate blender with cover in place. Always wait until all moving parts
have stopped before removing any lid or cover.
16. Do not use appliance for other than intended use. Misuse can cause injuries.
Always use appliance on a dry, stable, level surface. Never fill beyond the MAX
fill line.
17. If your blender comes with a grounded plug, connect to properly grounded
outlets only.

English-2
For models with mini jars or Blend-N-Go portable cups:
18. Make sure the jar is correctly placed onto the base before using the appliance.
19. Do not blend carbonated, hot or boiling liquids and ingredients, as this may
create pressure buildup. Only blend non-carbonated liquids and ingredients that
are at room temperature or cooler. If the jar is warm to the touch, allow to cool
before opening.
20. Do not use the blender for longer than 1 minute at a time to avoid heat and
pressure buildup. Allow to cool for 1 minute between cycles.
SAVE THESE INSTRUCTIONS
THIS APPLIANCE IS INTENDED TO BE USED IN HOUSEHOLD
AND SIMILAR
• APPLICATIONS SUCH AS:
• Shops, offices and other working environments
• Ranches and farmhouses
• Guests at hotels, motels, bed and breakfasts, and other residential environments

English-3
DESCRIPTION OF THE APPLIANCE
1. Spill-proof spout with lid and handle for better portability
2. 600 mL BPA-free portable Tritan™ cup
3. Locking sealing ring
4. Ice-crushing blade
5. Threaded cup bottom
6. All-Metal Drive®
7. Motor base
1
2
3
4
5
6
7

English-4
GETTING TO KNOW YOUR
OSTER® NUTRITION SYSTEM
Your appliance includes the following technology and features:
• 600 mL portable Tritan™ cup – Tritan™ technology provides the
benets of a glass cup in a resistant, odorless, and non-toxic plastic
• Ice-crushing blade
• All-Metal Drive®10x stronger*
• Spill-proof spout with lid and handle for better portability
Before you use the appliance for the rst time, separate lid, cup, locking
sealing ring, blade and threaded cup bottom. Wash in warm, soapy
water, or top rack in the dishwasher. Rinse and dry well.
USING YOUR NUTRITION SYSTEM
1. Plug in unit into appropriate outlet.
2. Turn cup leaving opening side up and place all ingredients inside it
(Figure 1).
3. Place the blade into the threaded cup bottom (Figure 2).
4. Place the locking sealing ring over the blade (Figure 3). Carefully
press and tuck the sealing ring into the last groove of the threaded
cup bottom.
5. Ensure the locking sealing ring is fully and evenly tucked in place and
holding the blade to the threaded cup bottom.
6. Install the threaded cup bottom with blade and sealing ring onto the
cup (Figure 4). Turn to the right to tighten.
7. Be sure the threaded cup bottom with blade and sealing ring is
tightened to the cup before use.
8. Place the cup onto the motor base (Figure 5).
9. To utilize your nutrition system, you may use the standard speed
option or the pulse function.
a. To use the standard speed, ensure to push the cup down and turn
clockwise with your hand until it is well inserted onto 4 grooves in
base as indicated (Figure 6). If it is not possible to place the cup
rmly inside the base, ensure the appliance is unplugged and
rotate the metal pin slightly (Figure 7), plug the unit back into the
outlet and replace the cup making sure that it completely enters
the base. Once you have achieved desired result, push the cup
down, turn counterclockwise and remove from the base (Figure 8).
b. To use the pulse function, push the cup down for a brief desired
length of time.
DO NOT PROCESS HOT FOODS OR LIQUIDS.
*Ultimate tensile strength of 1215 C.R.S. when compared to PP plastic
Figure 5
Figure 4
Figure 6
Figure 7
Figure 1
Figure 2
Figure 3

English-5
10. Remove threaded cup bottom with blade and sealing ring
(Figure 9).
11. Screw cap with drink-through/spill-proof lid (Figure 10). Make sure
the cap lid is tightly closed to avoid spills.
12. Now your nutritious beverage is ready to be taken on the go.
CARE AND MAINTENANCE
The cups, cup caps and threaded cup bottom with blade can be hand
washed in warm, soapy water or on top rack of dishwasher. Rinse well and
dry. Wipe the base with a soft, damp cloth to clean. Never submerge base
in a liquid.
STORING
Reassemble threaded cup bottom with blade in the cup to avoid
leaving the blades exposed and store unit and cup in a dry cabinet.
WARNING: Never put cup, or any other parts, in a
microwave oven.
BLENDING TIPS
Quantity of Ingredients
Use only the amount of food suggested in recipes. If you want greater amounts, prepare
in batches. Using larger amounts may overload and strain the motor. You might also get
different results from those described.
FREQUENTLY ASKED QUESTIONS
Why doesn’t unit turn on?
Make sure the base is plugged in an active power receptacle.
How can I prevent liquids from leaking out?
Make sure at side of sealing ring is touching threaded cup bottom. Check to see that
threaded cup bottom is tightly screwed onto cup.
Figure 9
Figure 10
Figure 8

La siguiente información es para México solamente.
The following information is intended for Mexico only.
LICUADORA OSTER®
MODELOS: BLSTAFB, BLSTAFB-013
LEA EL INSTRUCTIVO ANTES DE USAR ELAPARATO
LA SIGUIENTE INFORMACIÓN ES PARA MÉXICO:
IMPORTADOR: NEWELL BRANDS DE MÉXICO S.A. DE C.V.
AVE. JUÁREZ Nº 40-201, COLONIA EX HACIENDA SANTA MÓNICA,
TLALNEPANTLA DE BAZ, ESTADO DE MÉXICO
TEL: 5366-0800 / 01 800 506 1700
RFC SME570928G90
PAÍS DE ORIGEN: MÉXICO
PAÍS DE PROCEDENCIA: MÉXICO, E.U.A.
CONTENIDO: 1 PIEZA
CARACTERÍSTICAS ELÉCTRICAS
60 Hz 127 V 450 W
© 2021 Sunbeam Products, Inc. Todos los derechos reservados.
Garantía limitada de un año – por favor consulte los detalles en el inserto.
© 2021 Sunbeam Products, Inc. All rights reserved.
One year limited warranty – please see insert for details.
www.oster.com
Impreso en México
Printed in Mexico
P.N. 2147025 Rev A
GCDS-OST-SL
Other manuals for ACTIFIT BLSTAFB
1
Table of contents
Languages:
Other Oster Blender manuals

Oster
Oster 1791 User manual

Oster
Oster OSTERIZER Beehive User manual

Oster
Oster 1200 User manual

Oster
Oster BSLTTG User manual

Oster
Oster XPERT Series User manual

Oster
Oster Versa BLSTVB-103 User manual

Oster
Oster BPCT02 User manual

Oster
Oster BLSTMAZ03B-073 User manual

Oster
Oster 6641 User manual

Oster
Oster Ball Mason Jar User manual

Oster
Oster BLSTMP User manual

Oster
Oster IN2ITIVETM 6710 User manual

Oster
Oster BLSTTG User manual

Oster
Oster 6629 User manual

Oster
Oster OPB9000 Operational manual

Oster
Oster BLSTRM-DR0 User manual

Oster
Oster 2609 User manual

Oster
Oster 6800-6839 User manual

Oster
Oster Texture Select Pro Series User manual

Oster
Oster VERSA User manual