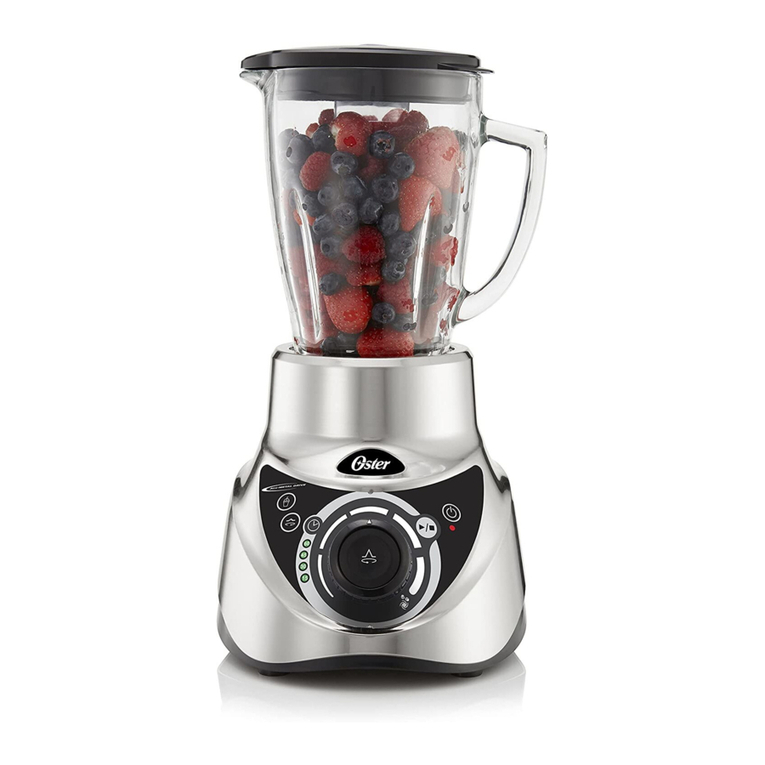
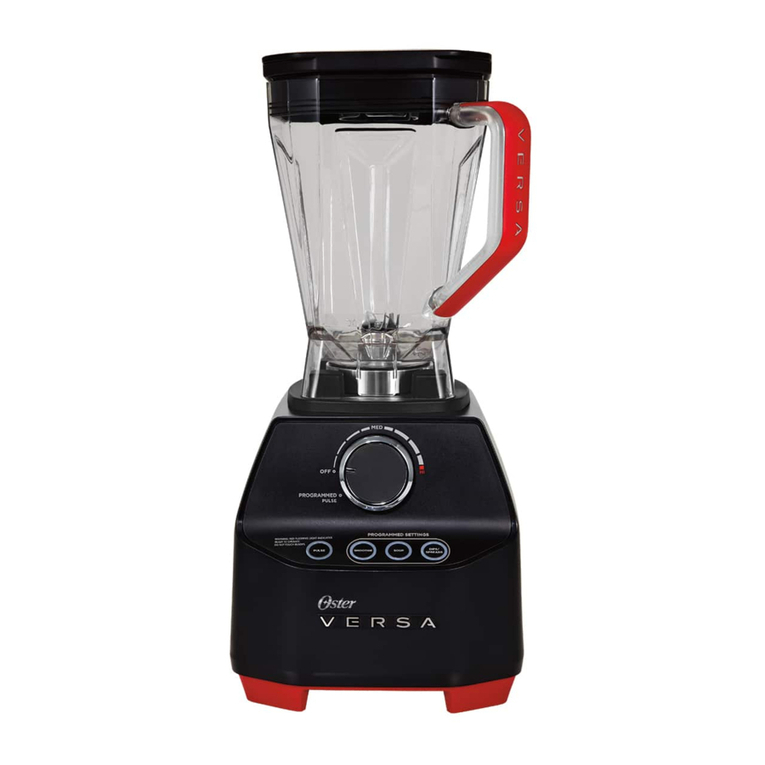
Oster Versa BLSTVB-103 User manual

PERFORMANCE
BLENDER
LICUADORA
DE ALTO
RENDIMIENTO
User Manual /
Manual del usuario
P.N. 170683Visit us at www.oster.com
BLSTVB-103_104_13ESM1.indd 1 12/13/13 9:18 AM

3
2
IMPORTANT SAFEGUARDS
When using your blender, you should always follow basic safety precautions, including
the following:
• Readallinstructionsbeforeuse.
• Toprotectagainstelectricalhazards,donotimmersethecord,plugormotorbasein
waterorotherliquids.
• Alwaysusetheproductonaclean,at,hard,drysurface.Thereshouldbenomaterial
suchasatableclothorplasticbetweentheunitandsurface.
• Flashinglightindicatesblenderisreadytooperate.AvoidANYcontactwiththe
bladesormoveableparts.
• Keephandsandutensilsoutofjarwhileblendingtoreducetheriskof:
–Severepersonalinjury
–Damagetotheblender
• Ifscrapingisnecessary,turnthepowerOFFandusearubberspatulaonly.
• Donotusetheappliance:
–Withadamagedcordorplug
–Aftertheunitfailstoworkcorrectly
–Afteryoudropordamagetheproductinanyway
• ReturntheproducttoyournearestAuthorizedOSTER®ApplianceServiceCenterfor
asafetycheck,adjustmentorrepair.
• Theblenderbladesaresharp.Handlecarefully.
• Toreducetheriskofinjury:
–Donotleavethebladesittingoutorexposed
–Alwayscompletelyassemblethebladetothejarbeforeputtingonthebase
• Alwaysputthelidonthejarbeforeoperatingtheblender.
• Whenblendinghotliquidsbewareofsteam.Removethellercapfromthelidto
allowsteamtoescape.
• Donotuseoutdoors.
• Donotallowthecordtotouchhotsurfacesorhangovertheedgeofatableorcounter.
• Unplugtheblenderwhenitisnotinuse,beforetakingofforputtingonparts,and
beforecleaning.Todisconnect,turnapplianceoffbypressingON/Offbuttonand
removeplugfromoutlet.
• Neverleavetheapplianceunattendedwhileitisrunning.
• Youriskpersonalinjury,reorelectricshockifyouuseattachments,jarsorparts
otherthanthoserecommendedbythemanufacturer.
• Supervisechildrencloselywhentheyuseorarenearbyappliances.
• Donotblendboilingliquidsintheblender.
• Theuseofattachments,includingcanningorordinaryjarandprocessingassembly
partsisnotrecommendedbythemanufacturer,andmaycauseriskorinjurytopersons.
Food Processor Accessory Additional Precautions
•Becertaincoverissecurelylockedinplacebeforeoperatingtheappliance.
•Donotattempttodefeatthecoverinterlockmechanism.
•Neverinsertfoodbyhand.Alwaysusefoodpusher.
•Thisappliancecontainsmovingparts.Donotplacengersintofeedtubecover.
•Bladesaresharp.Handlecarefully.
SAVE THESE INSTRUCTIONS
This product is for household use only.
• Themaximumratingmarkedontheproductisbasedontheattachmentthatdraws
thegreatestload.Otherattachmentsmaydrawlesspower.
Power Cord Instructions:
Pleasefollowtheinstructionsbelowtoensurethesafeuseofthepowercord.
• Thisapplianceisequippedwithapolarizedplugfor120Vand127Vunitsonly.
Thistypeofplughasonebladethatiswiderthantheother.Thisplugwilltina
polarizedoutletonlyoneway.Thisisasafetyfeatureintendedtohelpreducethe
riskofelectricalshock.Ifyouareunabletoinserttheplugintotheoutlet,contact
aqualiedelectriciantoreplacetheobsoleteoutlet.Donotattempttodefeatthe
safetypurposeofthepolarizedplugbymodifyingthepluginanyway.
• Trytopositiontheblendernearthepowersourcetoreducethehazardsassociated
withpowercords(stuckasbecomingentangledortrippingoveralongpower
cord).
• Donotpull,twistorotherwiseabusethepowercord.
• Donotwrapthepowercordaroundthemainbodyoftheblenderduringorafter
use.
• Donotuseanextensioncordwiththisproduct.
This symbol has been placed in specific areas of the User Guide portion of
this book. Its purpose is to help you easily identify instructions that require
your special attention.
BLSTVB-103_104_13ESM1.indd 2-3 12/13/13 9:18 AM

5
4
Table of Contents
Welcome .......................................................................................................................... 5
Learning About Your Product......................................................................................... 6
Using Your Product ......................................................................................................... 7
Caring for Your Product.................................................................................................. 9
Blending Tips .................................................................................................................10
Frequently Asked Questions ...........................................................................................10
Food Processor Accessory (Select Models Only).............................................................11
Assembling and Using Your Food Processor ................................................................. 12
Processing Tips...............................................................................................................14
Food Processing Chart .................................................................................................. 15
Blend-N-Go®Cup Accessory (Select Models Only)........................................................16
Using Your Blend-N-Go®With Your OSTER®Versa®Blender......................................17
4-Cup (32 oz) Blender Jar Accessory (Select Models Only) ............................................18
Using the 4-Cup Blender Jar...........................................................................................18
7 Years Limited Warranty ............................................................................................. 20
Welcome
Congratulations on your purchase of an OSTER®Versa®Performance Blender.
Ifyouhaveanycomments,questionsorinquiriesaboutthisproduct,pleasecall
1-800-334-0759.Yourproductincludesthefollowingtechnologyandfeatures:
•A user-friendly control panel designgivesyoutheoptionofProgrammed
SettingsorManualControls.
•A blade system thatprovidesawiderangeoffoodprocessingandblending
capabilities.
•A powerful reversible motorkeepstheingredientsnearthebladeby
spinningatverylowspeedsandgraduallyspeedinguptotheProgrammed
level,ensuringoptimumresultsfromsmoothtochunky.
•Manual Controlsgiveyoutheexibilitytooperatetheblenderforpersonal
recipes.
•A jar lid with filler capletsyouaddingredientswithoutremovingthejarlid.
BLSTVB-103_104_13ESM1.indd 4-5 12/13/13 9:18 AM

7
6
Learning About Your Product
1. Filler Cap – Allowsyoutoaddingredients
duringuse.Also,allowsyoutoopentoallow
steamtoescapewhenblendinghotfoods.In
addition,itcanbeusedasatooltoremoveor
tightenthethreadedjarbottom.
2. Jar lid – Sealstheblenderjar.
3. Jar – 8-CupBreakResistantBPA-Free
TritanTMPlastic.
4. Sealing Ring –Sealsthejartothebladefor
leak-proofoperation.
5. Blade –Createsaforwardandreverseaction
whentheProgrammedsettingsareinuseor
whentheReverseBlendbuttonispressed.
6. Threaded Jar Bottom
7.Sturdy Stylish Base –Holdsthejarsecurely.
Containsapowerful,reversible,variable
speedmotor.ItusesProgrammedlogicthat
takestheguessworkoutofcreatingfoods
anddrinks.
8. Control Panel
a. Power Button(On/Offbutton)–Turnsthe
productOnandOff.
b. Speed Control Knob Settings–Turnknob
to“Low”,“Medium”orHigh”speed
setting.Pressknobtostartorstop.
c. Programmed Settings–Usetoselect
“Smoothie/FrozenDrink”Buttonor“Dip/
Salsa”Button.Blenderautomaticallyshuts
offwhencycleisnished.
d. Pulse button – Press and release to Pulse,
releasethebuttontostop.
e. Reverse Blend Button – Press and hold to
toreversebladeactionwhiletheblenderis
operatingasneeded.Itmayalsobeused
whentheblenderisnotoperating.
Using Your Product
Beforeyouusetheproductforthersttime,separatethelid,llercapandblade
fromthejar.Washinwarm,soapywater,ortoprackinthedishwasher.Rinse
anddrywell.
Bladeissharp.Handlewithcare.
Assembly
1. Installthesealingringovertheblade.
2. Turnthejarupsidedownandplaceitonaatandstablesurface.
3. Turnthebladewithsealingringupsidedownandplaceintothebottomof
thejar.
4. Installthethreadedjarbottomoverthebladeassembly.Turnclockwiseto
tighten.
Besurethethreadedjar
bottomistightenedtothejar
beforeusing.
5.Choosearecipefromthe
recipebookprovided.
6.Puttheingredientsintothejar.
7. Securethelidandllercap.
8. Slidethejarontothebase.
9. Plugthepowercordintoa
standardhousehold120/127-volt,60hz.ACoutlet.Youarenowreadyto
start.
Using the Programmed Settings
1. PresstheON/OFFpowerbuttontoturntheproducton.Thepowerlight
willblink,meaningtheproductisactiveandreadytouse.Thelightwillstay
onwhenthemotorisrunning.
2. PressoneofthetwoProgrammedSettingbuttons
appropriateforyourrecipe.
-“Smoothie/FrozenDrink”Button
-“Dip/Salsa”Button
3. Tochangeyourselection,pressknobtostop,followed
byanotherProgrammedSettingbutton.
4. Oncetheprogramisnishedtheproductautomaticallystops.Pleasenote:
Youmaypresstheknobtocanceltheprogramatanytime.Theblinkingred
lightindicatesthattheblenderisready.
5. PresstheON/OFFpowerbuttontoturntheproductoff.
Thisproductisprogrammedtoturnoffautomaticallyifnotusedforaperiod
ofseveralminutes.Alllightswillturnoffwhentheunitautomaticallypowers
down.
1
2
3
4
5
6
7
8
b
c
a
d
e
BLSTVB-103_104_13ESM1.indd 6-7 12/13/13 9:18 AM

9
8
Using the Manual Controls
TheManual Controls include:
High(Highspeed)
Med(Mediumspeed)
Low (Low speed)
Pulse
ReverseBlend
Usethesecontrolsforpersonalrecipesortocontinueblendingaftera
ProgrammedSettingisnished.
1. PresstheON/OFFpowerbuttontoturntheproducton.Thepowerlight
willblink,meaningtheproductisactiveandreadytouse.Thelightwillstay
onwhenthemotorisrunning.
2. Choosearecipefromtherecipebookoruseoneofyourown.
3. Puttheingredientsintothejar.
4. Securethelidandthellercap.
Using the High Speed Selection
1.Verifythattheredlightisblinking.Thisindicates
thattheblenderisturnedon.
2.Turnknobto“High”andpressknobtostart.
3.Presstheknobtocanceltheoperationatanytime.
4. PresstheON/OFFpowerbuttontoturntheproductoff.
Using the Medium Speed Selection
1.Verifythattheredlightisblinking.Thisindicates
thattheblenderisturnedon.
2.Turnknobto“Med”andpressknobtostart.
3. Presstheknobtocanceltheprogramatanytime.
4.PresstheON/OFFpowerbuttontoturntheproduct
off.
Using the Low Speed Selection
1.Verifythattheredlightisblinking.Thisindicatesthattheblenderisturned
on.
2.Turnknobto“Low”andpressknobtostart.
3.Presstheknobtocanceltheprogramatanytime.
4.PresstheON/OFFpowerbuttontoturntheproduct
off.
NOTE:Usermayincreaseordecreasespeedselection
withoutinterruptionwhiletheblenderisoperating.
Using the Pulse
1.Verifythattheredlightisblinking.Thisindicatesthattheblenderisturnedon.
2.Pressandreleasethe“Pulse”button.
3.Releasethepulsebuttontostop.
4.PresstheON/OFFpowerbuttontoturntheproductoff.
Usepulsebuttontocrushiceorchopfood.
Using the Reverse Blend Button (Use with Blender Jar Only)
1.Verifythattheredlightisblinking.Thisindicatesthattheblenderisturnedon.
2.Turnknobto“Low”,“Med”,or“High”.
3.PressandholdtheReverseBlendButton.
4.Releasetostop.
5.PresstheON/OFFpowerbuttontoturntheproductoff.
UseReverseBlendButtontodrawfoodtowardsthebladeasneeded.Thisbutton
canalsobeusedduringnormalLow,Medium,orHighblending.
Caring for Your Product
After Use
1. PresstheOFFbuttonandunplugblender.Liftthejarstraightupfromthe
base,removethelidandemptythejar.
2. Ifnecessary,usearubberspatulatoscrapefoodsawayfromthesidesofthe
jar.
Cleaning
TheBladeisSHARP!CAREFULLYreleasethebladefromthebottomofthejar
byturningthethreadedjarbottomcounterclockwise.Thejarlid,llercapand
bladearedishwashersafe.Usethetoprackofthedishwasherforthejarlid,ller
cap,andblade.Placesealingringintobottombasketofdishwasher.
Youcanalsowashthepartsinwarm,soapywater.
Rinsewellanddry.Wipethebasewithasoft,damp
clothtoclean.Neversubmergetheblenderbaseina
liquid.
Checkthepartsasyouputthembacktogether.
TIP:Runblenderwithsoapywaterfor20-30seconds
forcleaningwithoutdisassembly.Followwithclean
waterrinse.
Storing
Reassembletheblenderforstorage.Leavethelidopenagapsonoodorsare
retained.
WARNING: Never put the jar, or any other parts, in a microwave
oven. Never store foods or drinks in the jar.
Servicing
Ifrepairsareneeded,sendyourapplianceonlytoanauthorizedOSTER®
ApplianceServiceCenter.Replacementpartsareavailableonwww.oster.comor
call1-800-334-0759.
BLSTVB-103_104_13ESM1.indd 8-9 12/13/13 9:18 AM

11
10
Blending Tips
Liquids
Putliquidsintothejarrst,unlesstherecipesaysotherwise.Addmoreliquidif
ingredientsarenotblendingproperly.
Using the Filler Cap
Donotremovethelidwhileinuse.Instead,openthellercaptoaddsmaller
ingredients.
Ice Crushing
Without Liquid:usepulsebuttonuntilyouachievedesiredresults.
With Liquid:Adddesiredamountoficecubesandwateruntiliceoats.Blend
onHighuntilyouachievedesiredresultsthenstrainoffwater.
Working with Hot Foods or Liquids
WARNING: When you work with HOT FOODS, remove the filler cap to
vent steam. Tilt the lid away from you partially covering the opening. Keep
hands and other exposed skin away from the lid opening to prevent
possible burns.
When you work with HOT LIQUIDS, remove the filler cap and start at a
low speed, and then gradually increase to a faster speed. Do not add liquid
over the 4 cup (1L) level. Always keep hands away from steam.
Ingredient Quantities
Useonlytheamountoffoodsuggestedintherecipes.Ifyouwantgreater
amounts,prepareinbatches.Usinglargeramountsmayoverloadandstrain
themotor.Youmightalsogetdifferentresultsfromthosedescribed.
Frequently Asked Questions
Why doesn’t the blender turn on?
•Makesurethebaseispluggedinanactivepowerreceptacle.
•Verifyblinkingredlightisactiveafterpushingon/offbutton.
•Makesurethecontrolknobispressedtostart.
How can I prevent liquids from leaking out?
Checktoseethatthesealingringiscorrectlyassembledinbetween
thebladeandthejar.
Food Processor Accessory (Select Models Only)
Cover–Thefeedtubeallows
the addition of ingredients while
processing.
Food Pusher–Usetosafelypush
ingredientsintoSlicing/Shredding
Disk.
S Blade – Specially designed for
choppingandmincing.Graspthe
plasticCenterHubwhenhandling
theBlade.CAUTION:Thebladeis
verysharp,handlecarefully.
Slicing/Shredding Disk – Specially
designedforslicingandshredding.
CAUTION:Thebladeisverysharp,
handlecarefully.
Blade Shaft–ForusewithSlicing/
ShreddingDisk.
Bowl–5-cupcapacityallowsforfast
processingofhard-to-chopfoods.
Adaptor–Transfersthepower
ofyourMotorBasetotheFood
ProcessorAccessory.
Before Using for the First Time–Afterunpacking,disassembleunitbeforeusing
forthersttime.
Washallparts(exceptAdaptor)inwarm,soapywater.
Rinseanddryimmediately.DONOTIMMERSEADAPTORINANYLIQUID.
ALLPARTSEXCEPTADAPTORARETOPRACKDISHWASHER-SAFE.
Cover
Slicing/Shredding
Disk
FoodPusher
Bowl
Adaptor
FlexibleSeal
MotorBase
BladeShaft
PlasticCenterHub
SBlade
BLSTVB-103_104_13ESM1.indd 10-11 12/13/13 9:18 AM

13
12
Assembling and Using Your Food Processor
1. Beforeassembly,makesureAdaptorisoperatingcorrectly.UnplugMotor
Baseduringassembly.
2. PlaceAdaptorinbowlandturncounterclockwisetolock.
3. PlaceBowlwithAdaptoronMotorBase.
To Chop or Mince
4. HoldSBladebytheplasticCenterHubandplaceoverpostofBowl.
Caution:Bladeisverysharp,handlecarefully.RotatetheSBladetomake
certainitisseatedonthepostasfarasitwillgo.AlwaysplaceSbladein
FoodProcessorbeforeaddingingredients.
5. PlacefoodinProcessingBowl.Foodtobeprocessedshouldalwaysbecut
into1-inch(2.5cm)pieces.
6. Usingalignmentmarksonthelid,placecoveronbowlandpressdown
rmlywhileturningcounterclockwisetolock.
DONOTOPERATEUNITUNLESSCOMPLETELYASSEMBLED
7. Turnunit“ON.”(SelectPulse,Low,orMedsettingontheMotorBase.)
ALWAYSHOLDFOODPROCESSORFIRMLYWITHONEHAND
WHENSTARTINGUNITANDWHENPROCESSING.Processuntil
desiredresultsareachievedbyrunningtheunitcontinuouslyorFast
Pulsing.FastPulsingisthetechniqueusedtocontrolthesizeofthefood
beingprocessedwiththeFoodProcessorAccessory.Pressandreleasethe
Pulsebuttonveryquickly.RefertoProcessingChartforpropertechniques,
quantitiesandendresults.
NOTE:DonotselectHighspeed,Programmedsettings,orReverseBlend
withthefoodprocessoraccessory.
To Slice or Shred
8. PlaceBladeShaftoverpost.PlaceSlicing/ShreddingDiskoverBladeShaft
withthebladeofyourchoicefacingup.Caution:Bladeisverysharp,handle
carefully.
9. Usingalignmentmarksonthelid,placecoveronbowlandpressdown
rmlywhileturningcounterclockwisetolock.
10.Loadthefeedtubewithingredientsbeforeturningthefoodprocessor“ON”.
11.ResttheFoodPusherinthefeedtube.Turnunit“ON”.(Selectmedium
speedsetting.)WhileholdingtheFoodPusherwithonehandandthefeed
tubeintheother,pushgentlydownontheFoodPusher.Alwaysusethe
FoodPushertoyieldmoreevenlyslicedorshreddedfoods.–NEVERUSE
YOURFINGERS.Whennished,turntheunit“OFF”.
NOTE:DonotselectHighspeed,Programmedsettings,orReverseBlendwith
thefoodprocessoraccessory.
How To Disassemble
1. Turnunit“OFF”andunplugMotorBase.
2. AlwayswaitfortheSBladeorSlicing/ShreddingDisktostopspinning.
3. RemoveFoodProcessorAccessoryfromMotorBase.
4. TurnCoverclockwisetoremovefromBowl.
5. RemoveSBladeorDiskcarefully.BecarefulnottoletBladeorDiskfallout
ofthecontainer.Thecuttingedgesareverysharp.Scrapeanyremaining
foodfromtheBladeandProcessingBowl.
6. UnlockBowlfromAdaptorbyturningBowlclockwise.
Cleaning
UnplugMotorBaseBeforeCleaning.
DoNotImmerseAdaptorinWater.AlwaysRemoveAdaptorfromprocessor
BowlBeforecleaning.
KeepSBladeandDiskoutofthereachofchildren.StoretheSBladeandDiskin
theBowlorinaconvenient,safelocationwhennotinuse.ThisBladeandDisk
shouldbetreatedwiththesamecautionasasharpknife.
Removestainscausedbyprocessinglargeamountsofcarrotsorsimilar
vegetableswithbakingsoda.Rinsestainedpartsinwaterandsprinklewith
bakingsoda.Rubwithasoft,dampcloth.Rinseanddry.Donotuseabrasive
cleanersonanyparts.
Maintenance
Thisunitisdesignedwithasafetyinterlock.Theinterlockrequiresthatthe
Coverbeinplacebeforethebladewillrotate.(Theinterlockdoesnotcontrol
operationoftheMotor.)Toensurethattheinterlockisoperatingcorrectly,hold
theAdaptorandrotatetheDriveShaftseveralturns.ThemetalStarDriveon
thebottomoftheAdaptorshouldNOTturn.Ifitdoesturn,DONOTUSE.
Returntheunittoanauthorizedservicefacilityforrepair.DONOTUSETHE
BLSTVB-103_104_13ESM1.indd 12-13 12/13/13 9:18 AM

15
14
INTERLOCKFEATUREASASUBSTITUTEforturningthepowerunit“OFF”
andunpluggingthepowerunitbeforedisassemblingandcleaning.NeverputS
BladeonAdaptorwithoutProcessorBowl.Donotoperateiftheexiblesealis
damagedormissing.Thesafetyinterlockcouldbecomejammed.
Processing Tips
1. Cutallfruitsandvegetables,cookedmeats,sh,seafoodsandcheesesinto
pieces1inchorsmaller.
2. DonotexceedthequantitiesindicatedintheFoodProcessingCharts.
3. AlwaysholdhandrmlyontheCoverwhenstartingandrunningMotor.
4. Donotprocesshotliquidsorfrozenfoods.
5. Donotprocesswholespices(exceptpeppercorns)suchasnutmegor
cinnamon.TheymaycausedamagetothesurfaceoftheProcessorBowl.
6. Processthehardestfoodsrst,usingonlyafewFastPulsestobegin
chopping.AddmoredelicatefoodsandcontinuetoprocessusingtheFast
Pulsetechnique.Theharderfoodswillcontinuetobechoppedalongwith
thesofterfoods.
7. ProcessingofParmesancheese,drieddatesorotherextremelyhardfoodsis
notrecommended.Ifaknifecannoteasilypiercethefood,itshouldNOTbe
processedintheFoodProcessorAccessory.
8. TheFoodProcessorAccessoryisnotdesignedtowhipcream,whipegg
whitesorprocessdough.Useastandardmixerforthosetasks.
9. IfliquidleaksfromCover,thereistoomuchliquidintherecipe.Adjustthe
liquidleveltopreventleakage.
10.Thetemperatureofcheesewillaffecthowitprocesses.Cheeseforspreads
shouldbeatroomtemperatureforasmooth,creamytexture.“Grated”
cheeseshouldberefrigeratorcold.
11.Large,harderpiecesoffoodcanbeprocessedwithseveralFastPulsesto
coarselychop.Thenprocesscontinuouslyforanetexture.
12.DonotselectHighspeed,Programmedsettings,orReversewiththefood
processoraccessory.
To Convert a Recipe
1. Totaltheamountofdryandliquidingredients.Ifthetotalexceeds5cups,
decideiftherecipecanbemadeeasilyinbatches.Donotattempttoprocess
largerecipes.
2. Iftotalisunder1cup(250ml),processdryingredientsorthemostnely
choppedfoodsrst.
3. ThenaddremainingingredientsandcombinewithseveralFastPulsestomix
together.
Food Processing Chart
Food Cutting Blade Processing Method
Vegetables (chopped) - Celery,
Potatoes, Onions, Carrots, Cucumbers,
Zuchini, Squash, etc.
S-Blade Pulsetodesiredsize
Fruits (chopped) - Apples, Mangos,
Pineapple, Papayas, Tomatoes, Chiles,
Cranberries, olives (pitted) etc.
S-Blade Pulsetodesiredsize
Peppers (chopped) - green, red or
orange, jalepenos
S-Blade Pulsetodesiredsize
Roots (chopped) - Garlic, Ginger Root,
Turnips, etc.
S-Blade Pulsetodesiredsize
Nuts (chopped) - Almonds, Peanuts,
Pecans, Walnuts, etc.
S-Blade Pulsetodesiredsize
Herbs, stems removed (chopped) -
Parsley, Cilantro, Basil, Oregano,
Rosemary, Marjoram, etc.
S-Blade Pulsetodesiredsize
Vegetables (sliced) - Celery, Potatoes,
Carrots, Cucumbers, Zuchini, Squash,
etc.
SlicingDisk MediumSpeed
Vegetables (shredded) - Carrots,
Potatoes, Zuchini, Squash, etc.
ShreddingDisk MediumSpeed
Cheese (chopped) - Mozzarella,
Chedder, Swiss, etc.
S-Blade Pulsetodesiredsize
Cheese (shredded) - Mozzarella,
Chedder, Swiss, etc.
ShreddingDisk MediumSpeed
Crumbs - Cracker, Graham Cracker,
Bread (dried)
S-Blade MediumSpeed
Eggs, hard-boiled (chopped) S-Blade MediumSpeed
Meats, raw or cooked (chopped) S-Blade MediumSpeed
BLSTVB-103_104_13ESM1.indd 14-15 12/13/13 9:18 AM
17
16
Blend-N-Go®Cup Accessory (Select Models Only)
A.Spillprooflid
B.20-oz.dishwasher-safe,BPA-freeTritanTM cup
C.Sealingringfortightsealtothreadedcup
D.Blade
E.Threadedcap
F.Blenderbase
Using Your Blend-N-Go®With Your OSTER®Versa®
Blender
Beforewashingensuretheblenderisoffandunplugged.Washallcomponents
exceptblenderbasewithsoapywaterwithasoftspongeandabottlebrush.Do
notuseabrasivecleansersorspongesforcleaning.Rinsewellanddry.Partsare
alsodishwashersafe.Donotblendhotliquids.
Place desired ingredients into cup according to the following order:
Liquids,freshingredients,frozenfruit,ice,yogurtandicecream.
(Cutallrmfruits,vegetablesandotherfoodsintopiecesnolargerthan1/2-inch
(1.25cm)by2inches(5.0cm).
• Placesealingringovercupopening.(SeeFigure1)
• Placebladeintocup.(SeeFigure2)
• Placethreadedcapontocup.Turnclockwisetotighten.(SeeFigure3)
• PlacecupassemblyontoBlenderbase.(SeeFigure4)
• Holdcupinposition.OperateBlenderaccordingtotheinstructionsinyour
BlenderUserManual.Blenduntildesiredconsistency.
• Removethreadedcap,bladeandsealingring.
• Placelidoncupandturnclockwisetotighten.(SeeFigure6)
You’renowreadytoenjoyyourblendeddrink!
Figure1 Figure2 Figure3
Figure6
Figure4 Figure5
A
B
C
D
E
F
BLSTVB-103_104_13ESM1.indd 16-17 12/13/13 9:18 AM

19
18
4-Cup (32 oz) Blender Jar Accessory (Select Models Only)
1. Filler Cap – Allowsyoutoaddingredients
duringuse.Also,allowsyoutoopento
allowsteamtoescapewhenblendinghot
foods.Thellercapcanalsobeusedasa
measuringcup.
2. Jar lid – Sealstheblenderjar.
3. Jar – 4-CupBreakResistantBPA-Free
TritanTM Plastic
4. Sealing Ring –Sealsthejartothebladefor
leak-proofoperation.
5. Blade –Createsaforwardandreverseaction
whentheProgrammedsettingsareinuseor
whentheReversebuttonispressed.
6. Threaded Jar Bottom
7. Tamper-specicallydesignedtopush
densefoodtowardsthebladesforultimate
blendingwithoutcomingincontactwiththe
blade.
NOTE:Tamperworkswith4-cupblenderjar
only.
Using the 4-Cup Blender Jar
Beforeyouusetheproductforthersttime,
separatethelid,llercapandbladefromthejar.
Washinwarm,soapywater,ortoprackinthe
dishwasher.Rinseanddrywell.
Bladeissharp.Handlewithcare.
Assembly
1. Installthesealingringovertheblade.
2. Turnthejarupsidedownandplaceitona
atandstablesurface.
3. Turnthebladewithsealingringupside
downandplaceintothebottomofthejar.
4. Positiontheopenendofthethreadedjarbottomoverthejarandsealing
ring.Turnclockwisetotighten.
Besurethethreadedjarbottomislockedsecurelytothejarbeforeusing.
5.Choosearecipefromtherecipebookprovided.
6.Puttheingredientsintothejar.
7. Securethelidandllercap.
8. Slidethejarontothebase.
9. Plugthepowercordintoastandardhousehold120/127-volt,60hz.AC
outlet.Youarenowreadytostart.
10.Usethe4-cupjarforavarietyofblendingtasksincludingsmoothies,frozen
drinks,nutbutters,dips,spreads,saladdressings,anddrygrains.
1
2
3
4
5
6
7
BLSTVB-103_104_13ESM1.indd 18-19 12/13/13 9:18 AM

21
20
7 Years Limited Warranty
Sunbeam Products, Inc. doing business as Jarden Consumer Solutions or if in Canada, Sunbeam
Corporation (Canada) Limited doing business as Jarden Consumer Solutions (collectively “JCS”) warrants
that for a period of seven years from the date of purchase, this product will be free from defects in
material and workmanship. JCS, at its option, will repair or replace this product or any component of
the product found to be defective during the warranty period. Replacement will be made with a new or
remanufactured product or component. If the product is no longer available, replacement may be made
with a similar product of equal or greater value. This is your exclusive warranty. Do NOT attempt to repair
or adjust any electrical or mechanical functions on this product. Doing so will void this warranty.
This warranty is valid for the original retail purchaser from the date of initial retail purchase and is
not transferable. Keep the original sales receipt. Proof of purchase is required to obtain warranty
performance. JCS dealers, service centers, or retail stores selling JCS products do not have the right
to alter, modify or any way change the terms and conditions of this warranty.
This warranty does not cover normal wear of parts or damage resulting from any of the following:
negligent use or misuse of the product, use on improper voltage or current, use contrary to the operating
instructions, disassembly, repair or alteration by anyone other than JCS or an authorized JCS service
center. Further, the warranty does not cover: Acts of God, such as fire, flood, hurricanes and tornadoes
.
What are the limits on JCS’s Liability?
JCS shall not be liable for any incidental or consequential damages caused by the breach of any
express, implied or statutory warranty or condition.
Except to the extent prohibited by applicable law, any implied warranty or condition of merchantability
or fitness for a particular purpose is limited in duration to the duration of the above warranty. JCS
disclaims all other warranties, conditions or representations, express, implied, statutory or otherwise.
JCS shall not be liable for any damages of any kind resulting from the purchase, use or misuse of,
or inability to use the product including incidental, special, consequential or similar damages or loss
of profits, or for any breach of contract, fundamental or otherwise, or for any claim brought against
purchaser by any other party. Some provinces, states or jurisdictions do not allow the exclusion or
limitation of incidental or consequential damages or limitations on how long an implied warranty lasts,
so the above limitations or exclusion may not apply to you.
This warranty gives you specific legal rights, and you may also have other rights that vary from
province to province, state to state or jurisdiction to jurisdiction.
How to Obtain Warranty Service
In the U.S.A.
If you have any question regarding this warranty or would like to obtain warranty service, please call
1-800-334-0759 and a convenient service center address will be provided to you.
In Canada
If you have any question regarding this warranty or would like to obtain warranty service, please call
1 800-667-8623 and a convenient service center address will be provided to you. In the U.S.A., this
warranty is offered by Sunbeam Products, Inc. doing business as Jarden Consumer Solutions located
in Boca Raton, Florida 33431. In Canada, this warranty is offered by Sunbeam Corporation (Canada)
Limited doing business as Jarden Consumer Solutions, located at 20 B Hereford Street, Brampton,
Ontario L6Y 0M1. If you have any other problem or claim in connection with this product, please write
our Consumer Service Department.
PLEASE DO NOT RETURN THIS PRODUCT TO ANY OF THESE ADDRESSES
OR TO THE PLACE OF PURCHASE.
MEDIDAS DE SEGURIDAD
IMPORTANTES
Siempretengaencuentalasprecaucionesdeseguridadbásicasalusarlalicuadora,incluidas
las siguientes:
• Leatodaslasinstruccionesantesdeusarla.
• Nosumerjaelcable,elenchufenilabasedelmotorenaguauotroslíquidos,ande
protegersederiesgosdedescargaseléctricas.
• Siempreuseelproductosobreunasupercieplana,dura,limpiayseca.Asegúresede
quenohayamaterialescomomantelesoplásticoentrelaunidadylasupercie.
• Potenciadeluzparpadeanteindicalistoparafuncionar.Evitarcualquiertipode
contactoconhojasopartesmóviles.Mantengalasmanosylosutensiliosfueradel
vasoduranteelmezcladoparaevitarheridascorporalesodanoalelectrodoméstico.
Puedeusarunaespátuladegomasólocuandolalicuadoranoestefuncionando.
• Mantengalasmanosylosutensilioslejosdelajarraallicuarparareducirelriesgode:
–Lesionespersonalesgraves
– Daños en la licuadora
• Sinecesitaretirarlosrestosmedianteraspado,apaguelalicuadorayuseúnicamente
unaespátuladegoma.
• Nouseelelectrodomésticoenlossiguientescasos:
–Sielcableoelenchufeestándañados.
–Silaunidadnofuncionacorrectamente.
–Sielproductosehacaídoodañadodealgunaforma.
• DevuelvaelproductoalCentrodeServicioparaElectrodomésticosOSTER®
autorizadomáscercanopararealizarunacomprobacióndeseguridad,ajusteo
reparación.
• Lascuchillasdelalicuadorasonaladas.Manipuleconcuidado.
• Parareducirelriesgodelesiones:
–Nodejelahojamultifuncionalsobresaliendoniexpuesta.
–Siemprecoloquelahojaenlajarraantesdeunirlaalabase.
• Siemprecoloquelatapasobrelajarraantesdeponerlalicuadoraenfuncionamiento.
• Allicuarlíquidoscalientes,tengacuidadoconelvapor.Retirelatapadellenadodela
tapadelvasoparaquepuedasalirelvapor.
• Nouseelelectrodomésticoalairelibre.
• Nopermitaqueelcabletoquesuperciescalientesnicuelguesobreelbordedeunamesa
omostrador.
• Desenchufelalicuadoracuandonoestéenuso,antesderetirarocolocarpiezasyantes
derealizarlalimpieza.
• Nuncadejeelelectrodomésticosinatenciónmientrasestéenfuncionamiento.
• Correelriesgodelesionespersonales,incendioodescargaeléctricasiutiliza
accesorios,vasosopiezasquenoseanlosrecomendadosporelfabricante.
• Supervisealosniñosatentamentecuandousenoesténcercadeelectrodomésticos.
• Nolicuelíquidoshirviendoenlalicuadora.
• Elusodeaccesorios,incluyendolatasofrascosordinarios,asícomosuensamblaje,no
esrecomendadoporelfabricanteypuedecausarriesgosodañosapersonas.
BLSTVB-103_104_13ESM1.indd 20-21 12/13/13 9:18 AM

23
22
Precauciones Adicionales para el Accesorio de Procesador de
Alimentos
•Asegúresequelatapaestébiencerradayensulugarantesdeponerafuncionarel
artefacto.
•Notratedeinterrumpirelmecanismodebloqueodelatapa.
•Nuncainsertealimentosconlamano.Siempreuseelempujadordealimentos.
•Esteartefactocontienepiezasenmovimiento.Nocoloquelosdedosdentrodelatapa
dellenado.
•Lascuchillasdelalicuadorasonaladas.Manipuleconcuidado.
CONSERVE ESTAS INSTRUCCIONES
Este producto es para uso doméstico únicamente.
• Lacalicaciónmáximacomercializadadelproductoestábasadaenelaccesorioque
generalacargamásalta.Losotrosaccesoriospuedengenerarmenospotencia.
Instrucciones sobre el cable de alimentación:
Sigalasinstruccionesacontinuaciónparagarantizarelusosegurodelcablede
alimentación.
• Esteaparatoestáequipadoconunenchufepolarizadode120Vy127Vunidadessólo.
Esteesundispositivodeseguridaddiseñadoparareducirelriesgodeunadescarga
eléctrica.Sinopuedeintroducirelenchufeeneltomacorriente,comuníqueseconun
electricistacalicadoparaquecambieeltomacorrienteobsoleto.Nointenteanular
lafuncióndeseguridaddelenchufededosespigas,efectuandomodicacionesal
enchufe.
• Intentecolocarlalicuadoracercadelafuentedealimentaciónparareducirlosriesgos
asociadosaloscablesdealimentación(atrapadoporqueseenredaosetropiezacon
uncabledealimentaciónlargo).
• Notire,tuerzaniabusedelcabledealimentacióndeningunaforma.
• Nocoloqueelcabledealimentaciónalrededordelcuerpoprincipaldelalicuadora
duranteodespuésdeusarla.
• Nouseuncablealargadorconesteproducto.
Este símbolo se ha utilizado en áreas específicas de la parte titulada Guía
del usuario de este libro. Tiene como fin ayudarlo a identificar fácilmente
las instrucciones que requieren atención especial.
Índice:
Bienvenido..................................................................................................................... 24
Conozca su producto..................................................................................................... 25
Uso del producto ........................................................................................................... 26
Cuidado del producto.................................................................................................... 28
Consejos para licuar ...................................................................................................... 29
Preguntas frecuentes...................................................................................................... 29
Accesorio de Procesador de Alimentos (Sólo Algunos Modelos)......................................30
Ensamblaje y Utilización del Procesador de Alimentos....................................................31
Consejos de Procesamiento ............................................................................................33
Tabla de Procesamiento de Alimentos........................................................................... 34
Accesorio de Vaso Blend-N-Go®(Sólo Algunos Modelos) .............................................35
Utilización de su Blend-N-Go®con su Licuadora OSTER®Versa®.............................. 36
Accesorio de Vaso de Licuadora de 4 tazas (32 oz) (Sólo Algunos Modelos)..................37
Utilización del Vaso de Licuadora de 4 tazas .................................................................37
Garantía Limitada de 7 años..........................................................................................39
BLSTVB-103_104_13ESM1.indd 22-23 12/13/13 9:18 AM

25
24
Bienvenido
Felicitaciones por su compra de la Licuadora de Alto Rendimiento OSTER®
Versa®.Siustedtienealgúncomentarioopreguntasacercadeesteproducto,
porfavorllameal1-800-334-0759.Suproductoincluyelasiguientetecnologíay
características:
•Un diseño de panel de control fácil de usarqueleofrecelaopcióndelos
AjustesProgramadosoControlesManuales.
•Un sistema de cuchillas queproporcionanunaampliagamade
procesamientodealimentosycapacidaddemezclado.
•Un potente motor reversiblequemantienelosingredientescercadela
cuchillagirandoavelocidadmuybajayconunaaceleracióngradualhasta
elnivelProgramado,garantizandoresultadosóptimosdesdemezclas
homogéneasasícomocontrozosmásgrandes.
•Controles Manualesqueledanlaexibilidaddeoperarlalicuadorapara
recetaspersonales.
•Una tapa del vaso de licuadora con la tapa de llenado,lepermitenagregar
ingredientessinnecesidadderetirarlatapadelvaso.
Conozca su producto
1. Tapa de Llenado – Lepermiteañadir
ingredientesduranteeluso.Además,lepermite
abrirparapermitirqueelvaporescapecuando
semezclanlosalimentoscalientes.También,
puedeserutilizadocomounaherramientapara
quitaroapretarlaroscadelaparteInferiordel
Vaso.
2. Tapa del Vaso de la Licuadora – Sellaelvasode
lalicuadora.
3. Vaso – 8Tazas,dePlásticoTritanTM Libre de
BPAyResistenteagolpes.
4. Anillo de Sellado –Sellaelvasoconlacuchilla
deformaherméticaparaevitarderrames.
5. Cuchilla –Creaunaacciónparaadelanteypara
atráscuandolosajustesprogramadosestánen
usoocuandosepresionaelbotóndeLicuaral
Reverso.
6. Rosca de la parte Inferior del Vaso
7.Base de Estilo Sólido –Mantieneelvaso
rmemente.Contieneunpotentemotor,
reversible,velocidadvariable.Utilizaunalógica
programadaquefacilitalacreacióndealimentos
ybebidas.
8. Panel de Control
a. Botón de Encendido(BotónOn/Off)–
Enciendeelproductoyloapaga.
b. Perilla de Control de Velocidad–Girela
perilladevelocidada“Bajo”,“Medio”o
Alto”.Presionelaperillaparainiciarodetener.
c. Ajustes Programados–Utilicepara
seleccionarBotón“Smoothie/Bebidas
Frozen(Congeladas)”o“Botónde“Dip
(Crema)/Salsa”.LaLicuadoraseapaga
automáticamentecuandoseterminaelciclo.
d. Botón de Pulsar (Pulse) – Presione y suelte
paraPulsar,suelteelbotónparaparar.
e. Botón de Licuar al Reverso – Presione
ymantengapresionadopararevertir
laaccióndelacuchillamientrasla
licuadoraestáenfuncionamiento,
segúnseanecesario.Tambiénsepuede
utilizarcuandolalicuadoranoestá
funcionando.
1
2
3
4
5
6
7
8
b
c
a
d
e
BLSTVB-103_104_13ESM1.indd 24-25 12/13/13 9:18 AM
27
26
Uso del producto
Antesdeutilizarelproductoporprimeravez,separelatapa,latapadellenado
ylacuchilladelvaso.Laveconaguatibiayjabón,oenlarejillasuperiordel
lavaplatos.Enjuagueysequebien.
Lacuchillaesalada.Manipuleconcuidado.
Ensamblaje
1. Instaleelanillodeselladosobrelacuchilla.
2. Volteeelvasobocaabajoycolóquelasobreunasupercieplanayestable.
3. Volteelacuchillaconelanillodeselladohaciaabajoycolóqueloenlaparte
inferiordelvaso.
4. Instalelaroscadelaparteinferiordelvasosobrelacuchillaensamblada.
Girealaderechaparaapretar.
Asegúresedequelaroscainferiordelvasoestébienajustadaconelvaso
antesdeusar.
5.Elijaunarecetadellibrode
recetasproporcionado.
6.Pongalosingredientesenel
vaso.
7. Asegurelatapadelvasoyla
tapadellenado.
8. Coloqueelvasoenlabase.
9. Conecteelcableeléctricoa
untomacorrientede120/127-
volt,.60hz..Ahoraestálistoparacomenzar.
Utilización de los Ajustes Programados
1. PresioneelbotóndeencendidoON/OFFparaencenderelproducto.La
luzdeencendidoharádestellos,loquesignicaqueelproductoestáactivo
ylistoparausar.Laluzpermaneceráencendidacuandoelmotorestáen
marcha.
2. Presioneunodelosdosbotonesprogramadosy
adecuadosparasureceta.
-Botón“Smoothie/FrozenDrink(Congelada)”
-Botón“Dip(Crema)/Salsa”
3. Paracambiarsuselección,presioneelbotónpara
detener,seguidodeotrobotóndeConguraciónProgramada.
4. Unavezqueelprogramahaterminado,elproductosedetiene
automáticamente.Tengaencuenta:Ustedpuedepresionarelbotónpara
cancelarelprogramaencualquiermomento.Laluzrojahaciendodestellos
indicaquelalicuadoraestálista.
5. PresioneelbotóndeencendidoON/OFFparaapagarelproducto.
Esteproductoestáprogramadoparaapagarseautomáticamentesinose
utilizaporvariosminutos.Todaslaslucesseapagaránsilaunidadseapaga
automáticamente.
Uso de los Controles Manuales
Los Controles Manuales incluyen:
High(AltaVelocidad)
Med(VelocidadMedia)
Low(BajaVelocidad)
Pulsar
LicuadoalReverso
Utiliceestoscontrolesparalasrecetaspersonalesocontinuarmezclandodespués
queunaConguraciónProgramadahayaterminado.
1. PresioneelbotóndeencendidoON/OFFparaencenderelproducto.Laluz
deencendidoharádestellos,loquesignicaqueelproductoestáactivoylisto
parausar.Laluzpermaneceráencendidacuandoelmotorestéenmarcha.
2. Elijaunarecetadelrecetariooutiliceunodelossuyos.
3. Pongalosingredientesenelvaso.
4. Asegurelatapadelvasoylatapadellenado.
Uso de la Selección de Alta Velocidad
1.Veriquequelaluzrojahagadestellos.Estoindicaquelalicuadoraestá
encendida.
2.Girelaperillaa“High”ypresionelaperillapara
empezar.
3.Presioneelbotónparacancelarlaoperaciónen
cualquiermomento.
4. PresioneelbotóndeencendidoON/OFFparaapagar
elproducto.
Uso de la Selección de Velocidad Media
1.Veriquequelaluzrojahagadestellos.Estoindica
quelalicuadoraestáencendida.
2.Girelaperillaa“Med”ypresionelaperillapara
empezar.
3. Presioneelbotónparacancelarelprogramaen
cualquiermomento.
4.PresioneelbotóndeencendidoON/OFFparaapagar
elproducto.
Uso de la Selección de Velocidad Baja
1.Veriquequelaluzrojahagadestellos.Estoindica
quelalicuadoraestáencendida.
2.Girelaperillaa“Low”ypresionelaperillapara
empezar.
3.Presioneelbotónparacancelarelprogramaen
cualquiermomento.
4.PresioneelbotóndeencendidoON/OFFparaapagarelproducto.
NOTA:Elusuariopuedeaumentarodisminuirlaseleccióndevelocidadsin
interrupciónmientraslalicuadoraestáenfuncionamiento.
BLSTVB-103_104_13ESM1.indd 26-27 12/13/13 9:18 AM
29
28
Uso de la Función de Pulsar
1.Veriquequelaluzrojahagadestellos.Estoindicaquelalicuadoraestáencendida.
2.Presioneysuelteelbotón“Pulse”.
3.Suelteelbotóndepulsarparadetener.
4.PresioneelbotóndeencendidoON/OFFparaapagarelproducto.
Utiliceelbotónde‘Pulse’(pulsar)parapicarhieloopicaralimentos.
Uso del Botón de Licuar al Reverso (Usar con Vaso de Licuadora Solamente)
1.Veriquequelaluzrojahagadestellos.Estoindicaquelalicuadoraestáencendida.
2.Girelaperillaa“Low”,“Med”o“High”.
3.PresioneymantengapresionadoelBotóndeLicuaralReverso.
4.Suelteparadetener.
5.PresioneelbotóndeencendidoON/OFFparaapagarelproducto.
UseelBotóndeLicuaralReversoparaatraerlosalimentoshacialacuchilla,
segúnseanecesario.Estebotóntambiénsepuedeutilizarduranteel
funcionamientonormaldelicuadoBajo,MediooAlto.
Cuidado del producto
Después del uso
1. PulseelbotónOFFydesenchufelalicuadora.Levanteelfrascohaciaarriba
desdelabase,retirelatapayelfrascovacío.
2. Siesnecesario,useunaespátuladegomapararetirarlosrestosdealimentos
delosladosdelajarra.
Limpieza
LacuchillaesAFILADA!CUIDADOSAMENTEliberelacuchilladelaparte
inferiordelvasogirandolaroscainferiordelvasoen
sentidocontrarioalasagujasdelreloj.Latapadel
vaso,latapadellenadoylacuchillasonaptasparael
lavaplatos.Utilicelarejillasuperiordellavaplatospara
latapadelvaso,tapadellenadoylacuchilla.Coloque
elanillodeselladoenlacestainferiordellavaplatos.
Tambiénpuedelavarlaspiezasconaguatibiay
detergente.Enjuagueysequebien.Limpielabasecon
unpañosuaveyhúmedo.Nuncasumerjalabasedemotorenlíquidos.
Compruebequelaspiezasnoestándañadasalvolveraunirlas.
CONSEJO:Enjuaguelalicuadoraconaguajabonosadurante20-30segundos
paralimpiarlosindesmontar.Luegoenjuagueconagualimpia.
Almacenamiento
Vuelvaaensamblarlalicuadoraparasualmacenamiento.Dejelatapaabriendo
unpequeñovacíoparaqueseconservesinolores.
ADVERTENCIA: Nunca coloque la jarra, o ninguna de las demás piezas, en un
horno microondas. Nunca guarde alimentos o bebidas en la jarra.
Servicio
Sisenecesitanreparaciones,envíesuaparatosolamenteaunCentrodeServicio
AutorizadoOSTER®.Laspiezasderepuestoestándisponiblesenwww.oster.com
ollameal1-800-334-0759.
Consejos para licuar
Líquidos
Coloqueloslíquidosenlajarraprimero,salvoquelarecetaindiquelocontrario.
Añadamáslíquidosilosingredientesnoseestánmezclandocorrectamente.
Usando la Tapa de Llenado
Noquitelatapamientrasestéenuso.Ensulugar,abralatapadellenadopara
agregaringredientesmáspequeños.
Picado de Hielo
Sin Líquido:utiliceelbotónde“pulse”hastaquelogrelosresultadosdeseados.
Con Líquido:Agreguelacantidaddeseadadecubitosdehieloyaguahastaque
elhieloote.MezcleaAltavelocidadhastaquelogrelosresultadosdeseadosy
luegocueleelagua.
Uso de la licuadora con alimentos o líquidos calientes
ADVERTENCIA: Cuando trabaje con ALIMENTOS CALIENTES, quite
la tapa de llenado para ventilar el vapor. Incline la tapa para alejarla de
usted y cubrir parcialmente la apertura. Mantenga las manos y otras partes
del cuerpo expuestas lejos de la apertura de la tapa para evitar posibles
quemaduras.
Cuando se trabaja con LÍQUIDOS CALIENTES, quite la tapa de llenado
y comience con una velocidad baja y luego aumente gradualmente a una
velocidad más rápida. No agregue líquidos por encima del nivel de 4 tazas
(1 litro). Siempre mantenga las manos lejos del vapor.
Cantidades de ingrediente
Useúnicamentelacantidaddealimentossugeridaenlasrecetas.Sidesea
cantidadesmásgrandes,prepareenlotes.Usarcantidadesmásgrandespuede
sobrecargaryforzarelmotor.Además,esposiblequeobtengaresultados
diferentesalosquesedescriben.
Preguntas frecuentes
¿Por qué la licuadora no se enciende?
•Compruebequelabaseestéenchufadaauntomacorrienteactivo.
•Compruebequelaluzrojaparpadeanteestéactivadespuésdepulsarel
botónon/off.
•Asegúresedequeelbotóndecontrolsepresioneparacomenzar.
¿Cómo puedo evitar el derrame de líquidos?
Compruebequeelanilloselladorestécolocadocorrectamenteentrelahoja
multifuncionalylajarra.
BLSTVB-103_104_13ESM1.indd 28-29 12/13/13 9:18 AM
31
30
Accesorio de Procesador de Alimentos (Sólo Algunos
Modelos)
Tapa–Eltubodealimentación
permitelaadicióndeingredientes
duranteelproceso.
Empujador de Alimentos – Se usa
paraempujardemaneraseguralos
ingredientes hacia dentro del Disco
deRebanar/Rallar.
Cuchilla S–Especialmentediseñado
paracortarypicar.SujeteelEjede
plásticoalmanipularlaCuchilla.
PRECAUCIÓN:Lacuchillaes
muyalada,manipuleconmucho
cuidado.
Disco de Rebanar / Rallar –
Especialmentediseñadapararebanar
yrallar.PRECAUCIÓN:Lahojilla
esmuyalada,manipuleconmucho
cuidado.
Eje para Disco – Para usar con el
DiscodeRebanar/Rallar.
Recipiente–Capacidadpara5tazas
permiteelprocesamientorápidode
alimentosdifícilesdepicar.
Adaptador–Transereelpoderde
laBasedelMotoralAccesoriode
ProcesadordeAlimentos.
Antes de Utilizar Por Primera Vez–Despuésdedesempacar,desmontarlaunidad
antesdeusarlaporprimeravez.
Lavetodaslaspartes(exceptoelAdaptador)enaguatibiayjabonosa.
Enjuagueysequeinmediatamente.NOSUMERJAELADAPTADOREN
NINGÚNLÍQUIDO.
TODASLASPARTESEXCEPTOELADAPTADORSONAPTASPARA
COLOCARDENTRODELAPARTESUPERIORDELLAVAPLATOS.
Ensamblaje y Utilización del Procesador de Alimentos
1. Antesdeensamblar,asegúresedequeelAdaptadorestéfuncionando
correctamente.DesenchufelaBasedelMotorduranteelensamblaje.
2. ColoqueelAdaptadorenelRecipienteygireensentidocontrarioalreloj
paracerrarybloquear.
3. ColoqueelRecipienteconelAdaptadorsobrelaBasedelMotor.
Para Picar o Triturar
4. SostengalaCuchillaSporelEjedeplásticoycolóquelasobreelEje(Guía)
CentraldentrodelRecipiente.Precaución:Lacuchillaestámuyalada,
manipuleconmuchocuidado.GirelacuchillaSparaasegurarsedequese
ajustesobreelEjeCentralhastadondesepueda.Siemprecoloquelacuchilla
SenelProcesadordeAlimentosantesdeañadirlosingredientes.
5. ColoquelosalimentosenelRecipiente.Losalimentosparaserprocesados
siempresedebencortarenpiezasde1pulgada(2,5cm).
6. Usandolasmarcasdealineaciónenlatapa,colóquelasobreelrecipientey
presionermementehaciaabajomientraslogiraensentidocontrarioalas
agujasdelrelojparabloquear.
NOOPERELAUNIDADAMENOSQUEESTÉCOMPLETAMENTE
ENSAMBLADO.
7. Enciendalaunidad“ON”.(Seleccione“Pulse”,“Low”o“Med”enlaBase
delMotor.)SUJETESIEMPREELPROCESADORDEALIMENTOS
CONFIRMEZACONUNAMANOTANTOCUANDOCOMIENCE
COMODURANTEELPROCESO.Procesehastaquelosresultados
deseadossealcancenhaciendoquelaunidadfuncionecontinuamenteo
pulsandolafuncióndePulsermemente.LafuncióndePulseenformarme
eslatécnicautilizadaparacontrolareltamañodelalimentoqueseestá
procesandoconelAccesoriodeProcesadordeAlimentos.Presioneysuelte
elbotónde“Pulse”muyrápidamente.ConsulteelCuadrodeProcesamiento
paralastécnicasadecuadas,lascantidadesylosresultadosnales.
NOTA:NoseleccioneAltavelocidad,AjustesProgramadosoLicuadoal
Reversoconelaccesoriodeprocesadordealimentos.
Para Rebanar o Rallar
8. ColoqueelEjeparaDiscosobreelEjeCentral.ColoqueelDiscodeRebanar/
RallarsobreelEjeparaDiscoconelrebanadororalladordesuelecciónhacia
arriba.Precaución:ElDiscotambiénesalado,manipuleconmuchocuidado.
Tapa
DiscodeRebanar
/Rallar
Empujadorde
Alimentos
Recipiente
Adaptador
SelloFlexible
BasedelMotor
EjeparaDisco
EjedePlástico
CuchillaS
BLSTVB-103_104_13ESM1.indd 30-31 12/13/13 9:18 AM

33
32
9. Usandolasmarcasdealineaciónenlatapa,colóquelasobreelrecipientey
presionermementehaciaabajomientraslogiraensentidocontrarioalas
agujasdelrelojparabloquear.
10.Insertedentrodeltubodealimentacióntodoslosingredientesantesde
encenderelprocesadordealimentos(“ON”).
11.ColoqueelEmpujadordeAlimentoseneltubodealimentación.Enciendela
unidad(“ON”).(Seleccionelavelocidadmedia.)MientrasmantieneelEmpujador
deAlimentosconunamanoyeltubodealimentaciónenelotro,empuje
suavementehaciaabajoelEmpujadordeAlimentos.SiempreuseelEmpujadorde
Alimentosparalograralimentosdemaneramásuniformerebanadosorallados.-
NUNCAUTILIZARLOSDEDOS.Cuandotermine,apaguelaunidad(“OFF”).
NOTA:NoseleccioneAltavelocidad,AjustesProgramadosoLicuadoalReverso
conelaccesoriodeprocesadordealimentos.
Cómo Desmontar
1. Apaguelaunidad(“OFF”)ydesenchufelaBasedelMotor.
2. EsperesiemprequelaCuchillaSsedetengaoelDiscodeRebanar/Rallar
dejedegirar.
3. RetireelAccesoriodeProcesadordeAlimentosdelaBasedelMotor.
4. GirelaTapaensentidodelasagujasdelrelojpararetirarladelRecipiente.
5. RetirelaCuchillaSoelDiscoconcuidado.Tengacuidadodenodejarque
laCuchillaoelDiscocaiganfueradelcontenedor.Estáspiezassonmuy
aladas.RaspecualquieralimentorestantedelaCuchillaydelRecipiente.
6. ParadesbloquearelRecipientedelAdaptadorgireelRecipienteensentidode
lasagujasdelreloj.
Limpieza
DesenchufelaBasedelMotorantesdelimpiarlo.
NosumerjaenaguaelAdaptador.SiempreretireelAdaptadordelRecipientedel
Procesadorantesdelimpiar.
MantengalaCuchillaSyelDiscofueradelalcancedelosniños.Guardela
CuchillaSyelDiscoenelRecipienteoenunlugaradecuadoysegurocuando
noestéenuso.EstaCuchillaSyelDiscodebensertratadosconlamisma
precauciónqueuncuchilloalado.
Quitelasmanchascausadasporelprocesamientodegrandescantidadesde
zanahoriasoverdurassimilaresconbicarbonatodesoda.Enjuaguelaspiezas
manchadasenaguayespolvoreeconbicarbonatodesoda.Froteconunpañosuavey
húmedo.Enjuagueyseque.Nouselimpiadoresabrasivosenningunadelaspartes.
Mantenimiento
Estaunidadestádiseñadaconunbloqueodeseguridad.Elbloqueorequiereque
laTapaestéensulugarantesdequelacuchillagire.(Elbloqueonocontrolael
funcionamientodelMotor.)Paraasegurarsequeelbloqueoestáfuncionando
correctamente,sostengaelAdaptadorygireelEjedelaUnidaddándolevarias
vueltas.ElelementodemetalenlaparteinferiordelAdaptadornodebegirar.Si
gira,NOLOUTILICE.Devuelvalaunidadauncentrodeservicioautorizado
parasureparación.NOUTILIZARLAFUNCIÓNDEBLOQUEOCOMO
SUSTITUTOparaapagarlaunidad“OFF”ysiempredesenchufelaunidadantes
dedesmontarylimpiar.NuncacoloquelaCuchillaSenelAdaptadorsinel
RecipienteparaProcesar.Noutilicesielselloexibleestádañadooausente.El
bloqueodeseguridadpodríaatascarse.
Consejos de Procesamiento
1. Cortartodaslasfrutasyverduras,carnescocidas,pescado,mariscosy
quesosentrozosde1pulgadaomáspequeños.
2. NoexcedalascantidadesqueseindicanenlasTablasdeProcesamientode
Alimentos.
3. SiempresujetermementelaTapaconlamanocuandocomienceyestéen
marchaelMotor.
4. Noproceselíquidoscalientesoalimentoscongelados.
5. Noproceseespeciesenteras(exceptolosgranosdepimienta)comolanuezmoscada
ocanela.PuedencausardañosalasuperciedelRecipientedelProcesador.
6. Proceselosalimentosmásdurosprimero,usandosólounospocosPulsos
Rápidosparacomenzarapicar.Añadalosalimentosmásdelicadosy
continúeprocesandomediantelatécnicadePulsosRápidos.Losalimentos
másduroscontinuaránsiendopicadosjuntoconlosalimentosmásblandos.
7. Noserecomiendaelprocesamientodequesoparmesano,dátilessecosuotros
alimentosextremadamenteduros.Siuncuchillonopuedecortarfácilmenteel
alimento,NOsedebeprocesarenelAccesoriodeProcesadordeAlimentos.
8. ElAccesoriodeProcesadordeAlimentosnoestádiseñadoparabatircremas,batir
clarasdehuevooprocesarmasa.Utiliceunabatidoraestándarparaestastareas.
9. SihayunderramedelíquidodelaTapa,haydemasiadolíquidoenlareceta.
Ajusteelniveldelíquidoparaevitarelderrame.
10.Latemperaturadelquesoafectarálaformaenqueseprocesa.Losquesos
parauntardebenestaratemperaturaambienteparaunatexturasuavey
cremosa.Losquesos“rallados“debenestarfríosdentrodelrefrigerador.
11.Lospedazosgrandesylosalimentosmásdurossepuedenprocesarcon
variosPulsosRápidosparacortarentrozosgrandes.Despuéspuedeprocesar
continuamenteporunatexturasuave.
12.NoseleccioneAltavelocidad,AjustesProgramadosoalReversoconel
accesoriodeprocesadordealimentos.
Para Convertir una Receta
1. Sumelacantidaddeingredientessecosylíquidos.Sieltotalessuperiora
5tazas,decidasilarecetasepuedehacerfácilmenteporlotes.Nointente
procesarrecetasgrandes.
BLSTVB-103_104_13ESM1.indd 32-33 12/13/13 9:18 AM

35
34
2. Sieltotalesmenorde1taza(250ml),proceseprimerolosingredientessecos
olosalimentosmásnamentepicados.
3. Acontinuación,agreguelosingredientesrestantesmezclándolosconvarios
PulsosRápidos.
Tabla de Procesamiento de Alimentos
Accesorio de Vaso Blend-N-Go®(Sólo Algunos Modelos)
A.Tapaapruebadederrames
B.Vasode20-ozdeTritanTMlibredeBPA,aptoparaellavaplatos
C.Anillodeselladohermético
D.Cuchilla
E.Rosca
F.BasedelaLicuadora
A
B
C
D
E
F
Alimentos Cuchilla/Disco Método de
Procesamiento
Vegetales (picados) - Celery, Papas,
Cebollas, Zanahorias, Pepinos,
Zuchini, Calabaza, etc.
CuchillaS Pulsealtamaño
deseado
Frutas (picadas) - Manzanas,
Mangos, Piñas, Papayas, Tomates,
Chiles, Cranberries, Aceitunas (sin
semilla) etc.
CuchillaS Pulsealtamaño
deseado
Pimentones (picados) - verdes, rojos o
anaranjados, jalepenos
CuchillaS Pulsealtamaño
deseado
Raíces (picadas) - Ajo, Jengibre,
Nabos, etc.
CuchillaS Pulsealtamaño
deseado
Frutas Secas (Picadas) - Almendras,
cacahuates, Pecans, Nueces, etc.
CuchillaS Pulsealtamaño
deseado
Hierbas, tallos removidos (picados) -
Perejil, Cilantro, Albahaca, Romero,
Tomillo, Orégano, etc.
CuchillaS Pulsealtamaño
deseado
Vegetales (rebanados) - Celery, Papas,
Cebollas, Zanahorias, Pepinos,
Zuchini, Calabaza, etc.
Disco de
Rebanar
VelocidadMedia
Vegetales (rallados) - Zanahorias,
Pepinos, Zuchini, Calabaza, etc
DiscodeRallar VelocidadMedia
Queso (picado) - Mozzarella,
Cheddar, Suizo, etc.
CuchillaS Pulsealtamaño
deseado
Queso (rallado) - Mozzarella,
Cheddar, Suizo, etc.
DiscodeRallar VelocidadMedia
Migas - Galletas, Galletas Graham,
Pan (seco)
CuchillaS VelocidadMedia
Huevos duros (picados) CuchillaS VelocidadMedia
Carnes, crudas o cocidas (picadas) CuchillaS VelocidadMedia
BLSTVB-103_104_13ESM1.indd 34-35 12/13/13 9:18 AM

37
36
Utilización de su Blend-N-Go®con su Licuadora OSTER®
Versa®(Sólo Algunos Modelos)
Antesdelavarasegúresequelalicuadoraestéapagadaydesenchufada.Lave
todoslaspartesexceptolabasedelalicuadoraconaguajabonosa,conuna
esponjasuaveyuncepilloparabotellas.Nouselimpiadoresabrasivoso
esponjasdelimpiar.Enjuaguebienyseque.Laspartessontambiénaptasparael
lavaplatos.Nolicuelíquidoscalientes.
Coloque los ingredientes deseados en el vaso de acuerdo al siguiente orden:
Líquidos,ingredientesfrescos,frutascongeladas,hielo,yogurtyhelados.
(Cortartodaslasfrutasrmes,vegetalesyotrosalimentosenpedazosnomás
grandesde1/2-pulgada(1.25cm)por2pulgadas(5,0cm).
• Coloqueelanillodeselladoherméticosobrelaaberturadelvaso.(VerFigura1)
• Coloquelacuchilladentrodelvaso.(VerFigura2)
• Coloquelatapaderoscaenelvaso.Girealaderechaparaapretar.(Ver
Figura3)
• ColoqueelvasoensambladosobrelabasedelaLicuadora.(VerFigura4)
• Sostengaelvasoenposición.OperelaLicuadoradeacuerdoconlas
instruccionesdelManualdeUsuario.Licuehastaobtenerlaconsistenciadeseada.
• Retirelarosca,lacuchillayelanillodesellado.
• Coloquelatapaenelvasoygirehacialaderechaparaapretar.(VerFigura6)
Ahorayaestálistoparadisfrutardesudeliciosabebidalicuada!
Accesorio de Vaso de Licuadora de 4 tazas (32 oz) (Sólo
Algunos Modelos)
1. Tapa de Llenado – Lepermiteañadir
ingredientesduranteeluso.Además,le
permiteabrirparapermitirqueelvapor
escapecuandosemezclanlosalimentos
calientes.Latapadellenadotambiénse
puedeutilizarcomounatazademedir.
2. Tapa del Vaso – sellaelvasodelalicuadora.
3. Vaso – 4Tazas,dePlásticoTritanTM Libre de
BPAyResistenteagolpes.
4. Anillo de Sellado –Sellaelvasoconla
cuchilladeformaherméticaparaevitar
derrames.
5. Cuchilla –Creaunaacciónparaadelantey
paraatráscuandolosajustesprogramados
estánenusoocuandosepresionaelbotón
deLicuaralReverso.
6. Rosca de la parte Inferior del Vaso
7. Empujador -especialmentediseñadopara
empujarlacomidapesadahacialascuchillas
yasílicuarcompletamentesinentraren
contactoconlacuchilla.
NOTA:ElEmpujadorfuncionaconelvasode
licuadorade4tazasúnicamente.
Utilización del Vaso de Licuadora
de 4 tazas
Antesdeutilizarelproductoporprimera
vez,separelatapa,latapadellenadoyla
cuchilladelvaso.Laveconaguatibiayjabón
ocolóqueloenlapartesuperiordellavaplatos.
Enjuagueysequebien.
Lacuchillaesalada.Manipulecon
cuidado.
Ensamblaje
1. Instaleelanillodeselladosobrelacuchilla.
2. Volteeelvasobocaabajoycolóquelasobreunasupercieplanayestable.
3. Volteelacuchillaconelanillodeselladohaciaabajoycolóqueloenlaparte
inferiordelvaso.
4. Coloqueelextremoabiertodelaroscasobreelvasoyelanillodesellado.
Girealaderechaparaapretar.
Asegúresedequelaroscaestébienajustadaalvasoantesdeusar.
1
2
3
4
5
6
7
Figura1 Figura2 Figura3
Figura6
Figura4 Figura5
BLSTVB-103_104_13ESM1.indd 36-37 12/13/13 9:18 AM

39
38
5.Elijaunarecetadellibroderecetasquelehasidoproporcionado.
6.Pongalosingredientesdentrodelvaso.
7. Asegurelatapadelvasoylatapadellenado.
8. Coloqueelvasosobrelabase.
9. Conecteelcableeléctricoauntomacorrientede120/127-volt.60hz.Ahora
estálistoparacomenzar.
10.Utiliceelvasode4tazasparaunavariedaddelicuados,incluyendomezcla
debatidos,bebidascongeladas,cremasdefrutossecos,salsas,cremaspara
untar,aderezosparaensaladasygranossecos.
Garantía Limitada de 7 años
Sunbeam Products, Inc. operando bajo el nombre de Jarden Consumer Solutions, o en Canadá,
Sunbeam Corporation (Canada) Limited operando bajo el nombre de Jarden Consumer Solutions, (en
forma conjunta, “JCS”), garantiza que por un período de siete años a partir de la fecha de compra,
este producto estará libre de defectos de materiales y mano de obra. JCS, a su elección, reparará
o reemplazará este producto o cualquier componente del mismo que presente defectos durante el
período de garantía. El reemplazo se realizará por un producto o componente nuevo o reparado. Si el
producto ya no estuviera disponible, se lo reemplazará por un producto similar de valor igual o superior.
Ésta es su garantía exclusiva. No intente reparar o ajustar ninguna función eléctrica o mecánica de este
producto. Al hacerlo elimínará ésta garantía. La garantía es válida para el comprador minorista original
a partir de la fecha de compra inicial y la misma no es transferible. Conserve el recibo de compra
original. Para solicitar servicio en garantía se requiere presentar un recibo de compra. Los agentes y
centros de servicio de JCS o las tiendas minoristas que venden productos de JCS no tienen derecho a
alterar, modificar ni cambiar de ningún otro modo los términos y las condiciones de esta garantía.
Esta garantía no cubre el desgaste normal de las piezas ni los daños que se produzcan como resultado
de uso negligente o mal uso del producto, uso de voltaje incorrecto o corriente inapropiada, uso
contrario a las instrucciones operativas, y desarme, reparación o alteración por parte de un tercero
ajeno a JCS o a un Centro de Servicio autorizado por JCS. Asimismo, la garantía no cubre actos
fortuitos tales como incendios, inundaciones, huracanes y tornados.
¿Cuál es el límite de responsabilidad de JCS?
JCS no será responsable de daños incidentales o emergentes causados por el incumplimiento de
alguna garantía o condición expresa, implícita o legal.
Excepto en la medida en que lo prohíba la ley aplicable, cualquier garantía o condición implícita de
comerciabilidad o aptitud para un fin determinado se limita, en cuanto a su duración, al plazo de la
garantía antes mencionada. JCS queda exenta de toda otra garantías, condiciones o manifestaciones,
expresa, implícita, legal o de cualquier otra naturaleza. JCS no será responsable de ningún tipo de
daño que resulte de la compra, uso o mal uso del producto, o por la imposibilidad de usar el producto,
incluidos los daños incidentales, especiales, emergentes o similares, o la pérdida de ganancias, ni de
ningún incumplimiento contractual, sea de una obligación esencial o de otra naturaleza, ni de ningún
reclamo iniciado contra el comprador por un tercero. Algunas provincias, estados o jurisdicciones
no permiten la exclusión o limitación de los daños incidentales o emergentes ni las limitaciones a la
duración de las garantías implícitas, de modo que es posible que la exclusión o las limitaciones antes
mencionadas no se apliquen en su caso.
Esta garantía le otorga derechos legales específicos y es posible que usted tenga otros derechos que
varían de un estado, provincia o jurisdicción a otro.
Cómo solicitar el servicio en garantía
En los Estados Unidos
Si tiene alguna pregunta sobre esta garantía o desea recibir servicio de garantía, llame al
1 800-334-0759 y podrá obtener la dirección del centro de servicio que le resulte más conveniente.
En Canadá
Si tiene alguna pregunta sobre esta garantía o desea recibir servicio de garantía, llame al
1 800-667-8623 y podrá obtener la dirección del centro de servicio que le resulte más conveniente.
En los Estados Unidos, esta garantía es ofrecida por Sunbeam Products, Inc. operando bajo el nombre
de Jarden Consumer Solutions, Boca Ratón, Florida 33431. En Canadá, esta garantía es ofrecida por
Sunbeam Corporation (Canada) Limited operando bajo el nombre de Jarden Consumer Solutions, 20 B
Hereford Street, Brampton, Ontario L6Y 0M1. Si usted tiene otro problema o reclamo en conexión con
este producto, por favor escriba al Departamento de Servicio al Consumidor.
POR FAVOR NO DEVUELVA ESTE PRODUCTO A NINGUNA DE
ESTAS DIRECCIONES NI AL LUGAR DE COMPRA.
BLSTVB-103_104_13ESM1.indd 38-39 12/13/13 9:18 AM
This manual suits for next models
1
Table of contents
Languages:
Other Oster Blender manuals

Oster
Oster BLSTMP-WOO User manual

Oster
Oster BLSTEG7827 Series User manual

Oster
Oster 004096-009-000 User manual

Oster
Oster PRO 1200 User manual

Oster
Oster 4094 User manual

Oster
Oster BLSTDP-W00 User manual

Oster
Oster Ball Mason Jar User manual

Oster
Oster 6800 User manual

Oster
Oster BLSTCP User manual

Oster
Oster VERSA User manual

Oster
Oster OPB0100 Operational manual

Oster
Oster 6710 User manual

Oster
Oster BLEND ACTIVE BLSTPP User manual

Oster
Oster BLST4126R User manual

Oster
Oster 4094 User manual

Oster
Oster 6629 User manual

Oster
Oster BLSTEG7805 SERIES User manual

Oster
Oster OBL167X User manual

Oster
Oster 2619 User manual

Oster
Oster Ball Mason Jar User manual