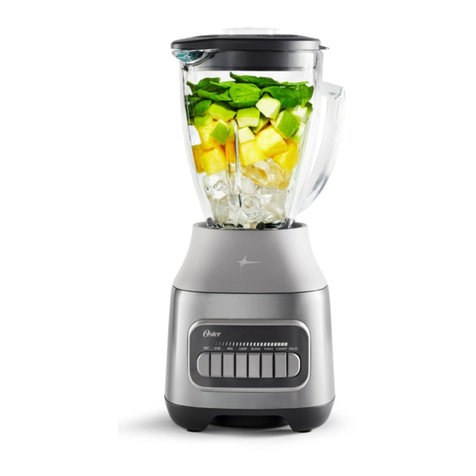
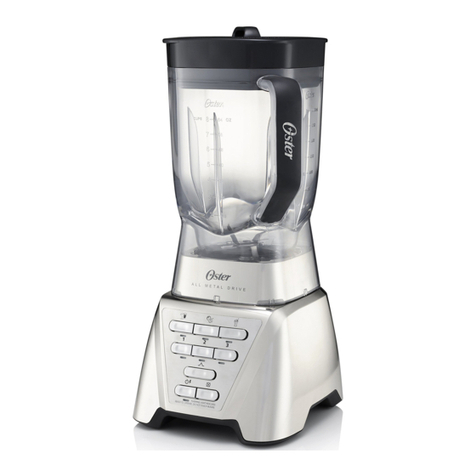
Oster PRO 1200 User manual

ASSEMBLING THE BLADE TO THE JAR
1. Place blade into threaded jar bottom
(Fig. 1). CAUTION: Blades are sharp.
Handle carefully.
2. Place sealing ring over blade assembly.
Carefully press and tuck sealing ring into
locking groove (Fig. 2).
3. Ensure the locking sealing ring is fully
and evenly tucked in place and holding
the blade assembly to the threaded jar
bottom. For correct assembly see (Fig. 3).
4. Install the integrated blade assembly
onto the jar. Turn clockwise to tighten.
Be sure the integrated blade assembly is
tightened to the jar before using.
NOTE: For proper installation onto blender
motor base, make sure locking lever rotates
past the anti-rotation tabs on the blender
jar or smoothie cup. Locking lever should
not touch container tabs. See (Fig. 4).
MONTAGE DU COUTEAU ET RECIPIENT
1. Posez le couteau dans le fond leté du
récipient (g. 1). ATTENTION : les lames
sont acérées. Agissez prudemment.
2. Placez la bague de blocage sur le
couteau. Poussez délicatement pour
rentrer la bague dans la rainure (g. 2).
3. Vériez que la bague de blocage est
complètement et uniformément adaptée
et qu’elle maintient le couteau dans le
fond leté. Voyez l’assemblage correct à
la g. 3.
4. Assemblez l’ensemble fond et couteau au
récipient. Tournez en sens horaire pour
l’immobiliser. Vériez le serrage avant
l’utilisation.
REMARQUE : an de le poser comme il
se doit sur le socle-moteur, veillez à ce
que le levier tourne au-delà des pattes
antirotation du récipient ou du verre à
smoothie. Le levier de blocage ne doit
pas toucher les pattes. Voyez la g. 4.
Oster Pro™1200 QUICK START GUIDE GUIDE DE DEMARRAGE DU Oster ProMC 1200
Locking Sealing
Ring
Bague de
blocage
Blade Couteaureaded Jar Bottom
with Locking Lever
Fond fileté du récipient à
levier de blocage
Fig. 1 Fig. 2
Incorrect Correct
Fig. 3
Incorrect Correct
Fig. 4
Fig. 1 Fig. 2
Non ! Oui !
Fig. 3
Non ! Oui !
Fig. 4
WARNING: This Quick Start Guide is not in-
tended to be a substitute for the User Manual,
and you should read and understand the
warnings and instructions in the User Manual
before using this appliance.
AVERTISSEMENT : ce guide de démarrage
ne remplace pas la notice d’emploi. Lisez et
assimilez les avertissements et instructions
donnés dans la notice d’emploi avant de
commencer à employer l’appareil.
French_BLSTMB Series_16EFQSG1.CS6.indd 1 3/31/16 9:53 AM

D’ABORD LES LIQUIDES PUIS LE RESTE
DES INGRÉDIENTS DANS LE RÉCIPIENT
• Le rapport liquide-solides est clé !
• Augmentez la quantité de liquide quand
les ingrédients ne se mélangent pas
convenablement.
ASTUCE : pour les boissons glacées et les
smoothies, ajoutez susamment de liquide
pour que les solides commencent à otter.
HACHEZ AVEC LA TOUCHE IMPULSIONS
ASTUCE : mettez en premier les ingrédients
que vous désirez hacher le plus menu.
BROYAGE PARFAIT DE LA GLACE
SANS LIQUIDE
• Jusqu’à 6 gros glaçons.
• Utilisez la touche Impulsions jusqu’à
l’obtention des résultats recherchés.
AVEC LIQUIDE
• Remplissez le récipient de glaçons (pas de
limite) et couvrez d’eau pour qu’ils ottent.
• Broyez la glace au besoin à haute vitesse
puis videz l’eau.
UTILISATION DES REGLAGES PREPROGRAMMES
1. Appuyez sur l’INTERRUPTEUR puis sur le réglage préprogrammé
de votre choix :
– « Smoothies Verts/Glacés »
– « Hacher/Salsa »
– « Laits Frappés »
2. Pour modier la sélection, appuyez sur « Arrêt » puis sur un autre
réglage préprogrammé ou sur une touche de commande manuelle.
3. Le cycle se termine automatiquement à la n du programme. Vous
pouvez l’annuler à tout moment en appuyant sur « Arrêt ». Le
voyant bleu clignotant signale que le mélangeur est prêt à servir.
UTILISATION DU VERRE A SMOOTHIE Blend-N-GoMD
• Après avoir mis les ingrédients, placez le couteau dans le verre et
tournez-le en sens horaire pour le serrer. Veillez à ce que le joint
d’étanchéité soit bien placé entre le couteau et le verre.
• Assujettissez le verre sur le socle-moteur et posez la main sur le
verre durant le fonctionnement. Suivez les instructions ci-haut.
UTILISATION DES REGLAGES MANUELS
1. Appuyez sur l’INTERRUPTEUR puis sur la commande manuelle
de votre choix : Haut / Moy / Bas / Impulsions.
2. Appuyez à tout moment sur la touche « Arrêt » pour annuler.
3. Appuyez sur l’INTERRUPTEUR pour éteindre le mélangeur.
Using the Pre-Programmed Settings
1. Press On/O button and press the desired pre-programmed
setting button:
– “Green/Frozen Smoothies”
– “Food Chop/Salsa”
– “Milkshakes”
2. To change your selection, press “STOP” followed by another
pre-programmed or manual setting button.
3. Once the program is nished the cycle automatically stops. Press
the “STOP” button to cancel the program at any time. The blinking
blue light indicates that the blender is ready.
Using MANUAL CONTROLS
1. Press On/O button and select manual control of your choice:
High / Med / Low / Pulse.
2. Press the “STOP” button to cancel the operation at any time.
3. Press the ON/OFF power button to turn blender o.
Using Blend-N-Go®Smoothie Cup
• After adding ingredients, place blade assembly into cup and turn
clockwise to tighten. Make sure sealing ring is placed between
blade and cup
• Place cup assembly onto blender base and hold cup in position
to operate. Follow instructions above.
ADD LIQUIDS IN THE JAR FIRST,
THEN ADD REMAINING INGREDIENTS
• Liquid to solid ratio is key!
• Add more liquid if ingredients are not
blending properly.
BONUS TIP: For frozen drinks and smoothies,
add enough liquid to the point where your
solid ingredients begin to oat.
USE PULSE BUTTON FOR CHOPPING
BONUS TIP: Add ingredients in rst that you
wish to process more thoroughly.
FOR BEST ICE CRUSHING
WITHOUT LIQUID
• Up to 6 large ice cubes.
• Use Pulse button until you achieve
desired results.
WITH LIQUID
• Fill jar with ice cubes (no ice limits) and
water until ice oats.
• Blend on high until you achieve desired
results then strain water.
Oster Pro™Blending Tips TRUCS PRATIQUES Oster ProMC
Oster Pro™1200 QUICK BLENDING TIPS CONSEILS ASTUCIEUX POUR LE ProMC 1200 Oster
www.oster.ca
1 800 667-8623
GCDSS-OST44874-BB PN: 184574-002-000
© 2016 Sunbeam Products, Inc. doing business as Jarden Consumer Solutions. All rights reserved. Distributed by Sunbeam Corporation
(Canada) Limited doing business as Jarden Consumer Solutions, 20B Hereford Street, Brampton, Ontario L6Y 0M1.
© 2016 Sunbeam Products, Inc. faisant affaire sous le nom de Jarden Consumer Solutions. Tous droits réservés. Distribué par Sunbeam
Corporation (Canada) Limited faisant affaire sous le nom de Jarden Consumer Solutions, 20B Hereford Street, Brampton (Ontario) L6Y 0M1.
French_BLSTMB Series_16EFQSG1.CS6.indd 2 3/31/16 9:53 AM
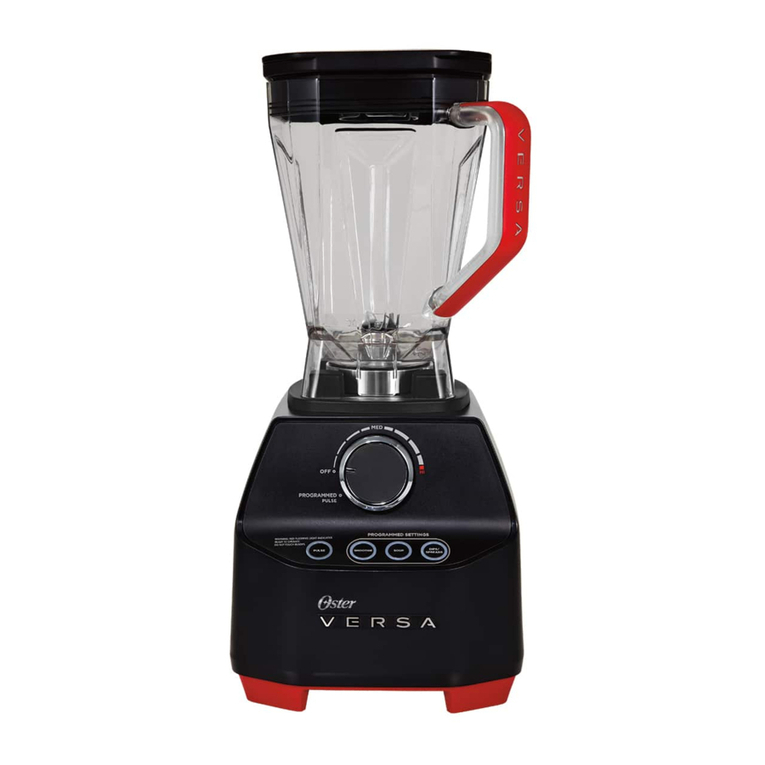
OSTER PRO 1200 VERSATILE POWER BLENDER
PUISSANT MÉLANGEUR POLYVALENT PRO 1200 OSTER
User Manual / Notice d’emploi
P.N. 186332-000-000Visit us at / Visitez www.oster.ca
OSTER PROTM/MC 1200
French_BLSTMB Series_16EFM1.indd 1 2/15/16 9:05 AM

3
2
IMPORTANT SAFEGUARDS
When using your blender, you should always follow basic safety precautions, including
the following:
• Readallinstructionsbeforeuse.
• Toprotectagainstelectricalhazards,donotimmersethecord,plugormotorbasein
waterorotherliquids.
• Alwaysusetheproductonaclean,at,hard,drysurface.Thereshouldbenomaterial
suchasatableclothorplasticbetweentheunitandsurface.
• Avoidcontactingthebladesandanymovingparts.
• Keephandsandutensilsoutofjarwhileblendingtoreducetheriskofinjuryor
damagetotheblender.Ascrapermaybeusedbutmustbeusedonlywhentheblender
isnotrunning.
• Donotoperateanyappliancewithadamagedcordorplugoraftertheappliance
malfunctions,orisdroppedordamagedinanymanner.Returnappliancetothe
nearestauthorizedservicefacilityforexamination,repairorelectricalormechanical
adjustment.
• Theblenderbladesaresharp.Handlecarefully.
• Toreducetheriskofinjury,neverplacecutter-assemblybladesordiscsonbase
withoutjarproperlyattached.
• Alwaysputthelidonthejarbeforeoperatingtheblender.
• Whenblendinghotliquidsbewareofsteam.Removethellercapfromthelidto
allowsteamtoescape.
• Donotuseoutdoors.
• Donotallowthecordtotouchhotsurfacesorhangovertheedgeofatableorcounter.
• Unplugtheblenderwhenitisnotinuse,beforetakingofforputtingonparts,and
beforecleaning.Todisconnect,turnapplianceoffbypressingON/Offbuttonand
removeplugfromoutlet.
• Neverleavetheapplianceunattendedwhileitisrunning.
• Closesupervisionisnecessarywhenanyapplianceisusedbyornearchildren.
• Donotblendboilingliquidsintheblender.
• Theuseofattachments,includingcanningjars,notrecommendedbythemanufacturer
maycauseariskofinjurytopersons.
Food Processor Accessory Additional Precautions
•Becertaincoverissecurelylockedinplacebeforeoperatingtheappliance.
•Donotattempttodefeatthecoverinterlockmechanism.
•Neverinsertfoodbyhand.Alwaysusefoodpusher.
•Thisappliancecontainsmovingparts.Donotplacengersintofeedtubecover.
•Bladesaresharp.Handlecarefully.
•Keephandsandutensilsawayfrommovingbladesordiscswhileprocessingfoodto
reducetheriskofsevereinjurytopersonsordamagetothefoodprocessor.Ascraper
maybeusedbutmustbeusedonlywhenthefoodprocessorisnotrunning.
SAVE THESE INSTRUCTIONS
This product is for household use only.
• Themaximumratingmarkedontheproductisbasedontheattachmentthatdraws
thegreatestload.Otherattachmentsmaydrawlesspower.
Power Cord Instructions:
Pleasefollowtheinstructionsbelowtoensurethesafeuseofthepowercord.
• Thisapplianceisequippedwithapolarizedplugfor120Vand127Vunitsonly.
Thistypeofplughasonebladethatiswiderthantheother.Thisplugwilltina
polarizedoutletonlyoneway.Thisisasafetyfeatureintendedtohelpreducethe
riskofelectricalshock.Ifyouareunabletoinserttheplugintotheoutlet,contact
aqualiedelectriciantoreplacetheobsoleteoutlet.Donotattempttodefeatthe
safetypurposeofthepolarizedplugbymodifyingthepluginanyway.
• Trytopositiontheblendernearthepowersourcetoreducethehazardsassociated
withpowercords(suchasbecomingentangledortrippingoveralongpowercord).
• Donotpull,twistorotherwiseabusethepowercord.
• Donotwrapthepowercordaroundthemainbodyoftheblenderduringorafter
use.
• Donotuseanextensioncordwiththisproduct.
This symbol has been placed in specific areas of the User Guide portion of
this book. Its purpose is to help you easily identify instructions that require
your special attention.
French_BLSTMB Series_16EFM1.indd 2-3 2/15/16 9:05 AM

5
4
Table of Contents
Welcome ......................................................................................................................... 5
Learning About Your Product......................................................................................... 6
Using Your Product ......................................................................................................... 7
Caring for Your Product.................................................................................................. 9
Blending Tips .................................................................................................................10
Frequently Asked Questions ...........................................................................................10
Food Processor Accessory (Select Models Only).............................................................11
Assembling and Using Your Food Processor ................................................................. 12
Processing Tips...............................................................................................................14
Food Processing Chart .................................................................................................. 15
Blend-N-Go®Cup Accessory (Select Models Only)........................................................16
Using Your Blend-N-Go®Cup With Your OSTER ProTM 1200 Blender ........................17
Limited Warranty.......................................................................................................... 20
Welcome
CongratulationsonyournewOSTERProTM1200Blender.YourOsterProTM
blenderwillallowyoutocreatedelicioussmoothies,milkshakes,salsasand
muchmoreatthetouchofabutton!Ifyouhaveanycomments,questionsor
inquiriesaboutthisproduct,pleasecall1-800-667-8623.Yourproductincludes
thefollowingfeaturesandbenets:
•User-friendlycontrolpanelwhichgivesyoutheoptionofProgrammed
SettingsorManualControl.
•Advanced6-PointBladeSystemwhichprovidesawiderangeoffood
processing&blendingoptions.
•PowerfulDualDirectionMotorwhichcycles throughforward&backward
atvaryingspeedstodeliveroptimalresultsforyourmostpopularfood
creations!
•ManualControlsgiveyoutheexibilitytooperatetheblenderforvarious
needs.
•ExtraWideBasedesignallowsfoodtofalleasilytothebottomofthejar,for
moreefcientBlending!
French_BLSTMB Series_16EFM1.indd 4-5 2/15/16 9:05 AM

7
6
Learning About The Oster ProTM
1200 Blender
1. Filler Cap / 2 Ounce Measuring Cup:–Allows
youtoaddingredientsduringuse.Alsoallows
youtoopentoallowsteamtoescapewhen
blendinghotfoods.
2. Jar lid–Sealstheblenderjar.
3. Jar–6-cupDishwasherSafeBoroclassTM glass
jarwithstandsThermalshockOR8-CupBreak
ResistantBPA-FreeTritanTMPlastic.
Blade Assembly–Withlockingfeaturetosecure
bladeassemblytothreadedjarbottom.Sealsthe
jartothebladeforleak-proofoperation.
4. Sealing Ring :
5. Blade–Createsaforwardandreverseaction
whentheProgrammedSettingsareinuse.
6. Threaded Jar Bottom With Locking Lever –
Advanceddesignforsimpleassemblytojar.
7.Motor Base–Holdsthejarsecurely.Contains
apowerful,reversible,variablespeedmotor.
8. Control Panel
a.Power Button ( )–TurnstheproductOn
andOff.
b.Pre-Programmed Settings:Useforawless
resultsatthetouchofabutton.Selectthe
desiredsettingandwatchtheOsterProTM
1200cyclethroughtheprogram,spinning
thebladeforwardandbackwardsforexpert
resultsatthetouchofabutton.Unitwill
shutafterrunningthroughthecycle.
SelectFrom:
Green/ Frozen Smoothies
Food Chop / Salsa
Milkshakes
c. Manual Controls:Selectfrom
Low-Med-High
d.Pulse button – Press to pulse and
releasetostop.
e.Stop Button: Press to stop any cycle or
manualcontrolsetting.
Using The Oster ProTM 1200 Blender
Beforeyouusetheproductforthersttime,separatethelid,llercapandbladefrom
thejar.Washinwarm,soapywater,ortoprackinthedishwasher.Rinseanddrywell.
CAUTION: Blade is sharp, handle with care.
Blade Assembly
1.PlaceBladeintoThreadedJarBottom(Fig.1).
2.Placesealingringoverbladeassembly.Carefullypress
andtucksealingringintolockinggroove(Fig2).
3.Ensurethelockingsealingringisfullyandevenlytucked
inplaceandholdingthebladeassemblytothethreaded
jarbottom.Forcorrectassemblysee(Fig3).
4. InstalltheIntegratedBladeAssemblyontotheJar.Turnclockwisetotighten.
BesuretheIntegratedBladeAssemblyistightenedtothejarbeforeusing.
NOTE:ForproperinstallationontoBlenderMotorbase,makesurelocking
leverrotatespasttheanti-rotationtabsontheBlenderjarorsmoothiecup.
See(Fig4).
5.Puttheingredientsintothejar.
6.Securethelidandllercap.
7. Placethejarontothebase.
8. Plugthepowercordintoastandardhousehold
120/127-volt,60hz.ACoutlet.Youarenowready
tostart.
Using the Pre-Programmed Settings
1. Pressthe( )powerbuttontoturntheproducton.Thepowerlightwill
blink,indicatingtheproductisactiveandreadytouse.Thelightwillstayon
whenthemotorisrunning.
2. SelectandPressthedesiredPre-ProgrammedSettingButton:
-“Green/FrozenSmoothie”
-“FoodChop/Salsa”
-“Milkshakes”
3. Tochangeyourselection,pressStopfollowedbyanotherPre-Programmed
Settingbutton(“FrozenDrinks&Shakes”or“FoodChop”)
4. Oncetheprogramisnishedtheproductautomaticallystops.Pleasenote:
Youmaypressthe“Stop”buttontocanceltheprogramatanytime.The
blinkingbluelightindicatesthattheblenderisready.
5. Pressthe( )powerbuttontoturntheproductoff.Thisproductispre-
programmedtoturnoffautomaticallyifnotusedforaperiodofseveral
minutes.Alllightswillturnoffwhentheunitautomaticallypowersdown.
b
c
ad
e
1
2
3
4
5
6
7
8
Fig1
Fig4
Fig2
Locking
SealingRing
ThreadedJar
Bottomwith
lockinglever
Fig3
Incorrect Correct!
Blade
French_BLSTMB Series_16EFM1.indd 6-7 2/15/16 9:05 AM

9
8
Using the Manual Controls
TheManual Controls include:
Low
Med
High
Pulse
Stop
Usethesecontrolsforpersonalrecipesortocontinueblendingaftera
ProgrammedSettingisnished.
1. Pressthe( )powerbuttontoturntheproducton.Thepowerlightwill
blink,meaningtheproductisactiveandreadytouse.Thelightwillstayon
whenthemotorisrunning.
2. Puttheingredientsintothejar.
3. Securethelidandthellercap.
Using High
1.Pressthe“High”buttontoruntheproductatahighspeed.
2.Pressthe“Stop”buttontocanceltheoperationatanytime.
3.Pressthe( )powerbuttontoturntheproductoff.
Using the Medium
1.Pressthe“Medium”buttontoruntheproductatamediumspeed.
2.Pressthe“Stop”buttontocanceltheprogramatanytime.
3.Pressthe( )powerbuttontoturntheproductoff.
Using the Low
1.Pressthe“Low”buttontoruntheproductatalowspeed.
2.Pressthe“Stop”buttontocanceltheprogramatanytime.
3.Pressthe( )powerbuttontoturntheproductoff.
Using the Pulse
1.Verifythatthebluelightisblinking.Thisindicatesthattheblenderisturnedon.
2.Pressandreleasethe“Pulse”button.
3.Releasethepulsebuttontostop.
4.Pressthe( )powerbuttontoturntheproductoff.
Usepulsebuttontocrushiceorchopfood.
Caring for Your Product
After Use
1. Pressthe( )powerbuttontoturntheunitoffandunplugblender.Liftthe
jarstraightupfromthebase,removethelidandemptythejar.
2. Ifnecessary,usearubberspatulatoscrapefoodsawayfromthesidesofthejar.
Cleaning
CAUTION:Bladesaresharp.Handlecarefully.
Carefullyreleasethebladefromthebottomofthejarbyturningthethreaded
jarbottomcounterclockwise.Thejarlid,llercapandbladearedishwasher
safe.Usethetoprackofthedishwasherforthejarlid,llercap,andblade.Place
sealingringintobottombasketofdishwasher.
Youcanalsowashthepartsinwarm,soapywater.Rinsewellanddry.Wipe
thebasewithasoft,dampclothtoclean.Neversubmergetheblenderbaseina
liquid.
Checkthepartsasyouputthembacktogether.
TIP:Runblenderwithsoapywaterfor20-30seconds
atLoworMediumSpeedforcleaningwithout
disassembly.Followwithcleanwaterrinse.
Storing
Reassembletheblenderforstorage.Leavethelidopena
gapsonoodorsareretained.
NOTICE: Never put the jar, or any other parts, in a microwave oven. Never store
foods or drinks in the jar.
Servicing
Thisappliancehasnouserserviceableparts.Anyservicebeyondthecleaning
describedintheCleaningsectionshouldbeperformedbyanauthorizedservice
facilityonly.Ifrepairsorreplacementpartsareneeded,contactOstertollfreeat
1-800-667-8623orvisitwww.oster.ca.
French_BLSTMB Series_16EFM1.indd 8-9 2/15/16 9:05 AM

11
10
Blending Tips
Liquids
Putliquidsintothejarrst,unlesstherecipesaysotherwise.Addmoreliquidif
ingredientsarenotblendingproperly.
Using the Filler Cap
Donotremovethelidwhileinuse.Instead,openthellercaptoaddsmaller
ingredients.
Ice Crushing
Without Liquid:usePulsebuttonuntilyouachievedesiredresults.
With Liquid:Adddesiredamountoficecubesandwateruntiliceoats.Blend
onHighuntilyouachievedesiredresultsthenstrainoffwater.
Working with Hot Foods or Liquids
WARNING: When you work with HOT FOODS, remove the filler cap to
vent steam. Tilt the lid away from you partially covering the opening. Keep
hands and other exposed skin away from the lid opening to prevent
possible burns.
WARNING:When you work with HOT LIQUIDS, remove the filler cap and
start at a low speed, and then gradually increase to a faster speed. Do not
add liquid over the 4 cup (1L) level. Always keep hands away from steam.
Ingredient Quantities
Useonlytheamountoffoodsuggestedintherecipes.Ifyouwantgreater
amounts,prepareinbatches.Usinglargeramountsmayoverloadandstrain
themotor.Youmightalsogetdifferentresultsfromthosedescribed.
Frequently Asked Questions
Why doesn’t the blender turn on?
•Makesurethebaseispluggedinanactivepowerreceptacle.
•Verifyblinkingbluelightisactiveafterpushingthepower( )button.
How can I prevent liquids from leaking out?
Checktoseethatthesealingringiscorrectlyassembledinbetween
thebladeandthejar.
Food Processor Accessory (Select Models Only)
Food Pusher–Usetosafelypush
ingredientsintoSlicing/Shredding
Disk.
Cover–Thefeedtubeallowsthe
additionofingredientswhileprocessing.
Slicing/Shredding Disk–Specially
designedforslicingandshredding.
CAUTION: Blade is sharp, handle
with care.
Blade Shaft–ForusewithSlicing/
ShreddingDisk.
S Blade–Speciallydesignedfor
choppingandmincing.Graspthe
plasticCenterHubwhenhandlingthe
Blade.
CAUTION: Blade is sharp, handle
with care.
Bowl–5-cupcapacityallowsforfast
processingofhard-to-chopfoods.
Adaptor–Transfersthepower
ofyourMotorBasetotheFood
ProcessorAccessory.
Before Using for the First Time–Afterunpacking,disassembleunitbeforeusing
forthersttime.
Washallparts(exceptAdaptor)inwarm,soapywater.
Rinseanddryimmediately.DONOTIMMERSEADAPTORINANYLIQUID.
ALLPARTSEXCEPTADAPTORARETOPRACKDISHWASHER-SAFE.
Cover
Slicing/Shredding
Disk
FoodPusher
Bowl
Adaptor
FlexibleSeal
MotorBase
BladeShaft
PlasticCenterHub
SBlade
French_BLSTMB Series_16EFM1.indd 10-11 2/15/16 9:05 AM

13
12
Assembling and Using Your Food Processor
1. Beforeassembly,makesureAdaptorisoperatingcorrectly.UnplugMotor
Baseduringassembly.
2. PlaceAdaptorinbowlandturncounterclockwisetolock.
3. PlaceBowlwithAdaptoronMotorBase.
To Chop or Mince
4. HoldSBladebytheplasticCenterHubandplaceoverpostofBowl.
Caution:Bladeisverysharp,handlecarefully.RotatetheSBladetomake
certainitisseatedonthepostasfarasitwillgo.AlwaysplaceSbladein
FoodProcessorbeforeaddingingredients.
5. PlacefoodinProcessingBowl.Foodtobeprocessedshouldalwaysbecut
into1-inch(2.5cm)pieces.
6. Usingalignmentmarksonthelid,placecoveronbowlandpressdown
rmlywhileturningcounterclockwisetolock.
DONOTOPERATEUNITUNLESSCOMPLETELYASSEMBLED
7. Turnuniton“ ”(SelectPulse,Low,orMedsettingontheMotorBase.)
ALWAYSHOLDFOODPROCESSORFIRMLYWITHONEHAND
WHENSTARTINGUNITANDWHENPROCESSING.Processuntil
desiredresultsareachievedbyrunningtheunitcontinuouslyorFast
Pulsing.FastPulsingisthetechniqueusedtocontrolthesizeofthefood
beingprocessedwiththeFoodProcessorAccessory.Pressandreleasethe
Pulsebuttonveryquickly.RefertoProcessingChartforpropertechniques,
quantitiesandendresults.
NOTE:Onlythe“FoodChop/Salsa”Pre-Programmedsettingisfunctional
whenFoodProcessorisattached.
To Slice or Shred
8. PlaceBladeShaftoverpost.PlaceSlicing/ShreddingDiskoverBladeShaft
withthebladeofyourchoicefacingup.Caution:Bladeisverysharp,handle
carefully.
9. Usingalignmentmarksonthelid,placecoveronbowlandpressdown
rmlywhileturningcounterclockwisetolock.
10.Loadthefeedtubewithingredientsbeforeturningthefoodprocessoron.
11.ResttheFoodPusherinthefeedtube.Turnuniton“ ”.(Selectmedium
speedsetting.)WhileholdingtheFoodPusherwithonehandandthefeed
tubeintheother,pushgentlydownontheFoodPusher.Alwaysusethe
FoodPushertoyieldmoreevenlyslicedorshreddedfoods.–NEVERUSE
YOURFINGERS.Whennished,turntheunitoff “”.
NOTE:Med-HighManualsettingsarerecommendedforslicingandshredding.
How To Disassemble
1. Turnunitoff( )andunplugMotorBase.
2. AlwayswaitfortheSBladeorSlicing/ShreddingDisktostopspinning.
3. RemoveFoodProcessorAccessoryfromMotorBase.
4. TurnCoverclockwisetoremovefromBowl.
5. RemoveSBladeorDiskcarefully.BecarefulnottoletBladeorDiskfallout
ofthecontainer.Thecuttingedgesareverysharp.Scrapeanyremaining
foodfromtheBladeandProcessingBowl.
6. UnlockBowlfromAdaptorbyturningBowlclockwise.
Cleaning
UnplugMotorBaseBeforeCleaning.
WARNING: Do Not Immerse Adaptor in Water.AlwaysRemoveAdaptor
fromprocessorBowlBeforecleaning.
KeepSBladeandDiskoutofthereachofchildren.StoretheSBladeandDiskin
theBowlorinaconvenient,safelocationwhennotinuse.ThisBladeandDisk
shouldbetreatedwiththesamecautionasasharpknife.
Removestainscausedbyprocessinglargeamountsofcarrotsorsimilar
vegetableswithbakingsoda.Rinsestainedpartsinwaterandsprinklewith
bakingsoda.Rubwithasoft,dampcloth.Rinseanddry.Donotuseabrasive
cleanersonanyparts.
Maintenance
Thisunitisdesignedwithasafetyinterlock.TheinterlockrequiresthattheCover
beinplacebeforethebladewillrotate.(Theinterlockdoesnotcontroloperation
oftheMotor.)Toensurethattheinterlockisoperatingcorrectly,holdtheAdaptor
androtatetheDriveShaftseveralturns.ThemetalStarDriveonthebottomofthe
AdaptorshouldNOTturn.Ifitdoesturn,DONOTUSE.Returntheunittoan
authorizedservicefacilityforrepair.DONOTUSETHEINTERLOCKFEATURE
ASASUBSTITUTEforturningthepowerunitoff“ ”andunpluggingthe
French_BLSTMB Series_16EFM1.indd 12-13 2/15/16 9:05 AM

15
14
powerunitbeforedisassemblingandcleaning.NeverputSBladeonAdaptor
withoutProcessorBowl.Donotoperateiftheexiblesealisdamagedor
missing.Thesafetyinterlockcouldbecomejammed.
Processing Tips
1. Cutallfruitsandvegetables,cookedmeats,sh,seafoodsandcheesesinto
pieces1inchorsmaller.
2. DonotexceedthequantitiesindicatedintheFoodProcessingChart.
3. AlwaysholdhandrmlyontheCoverwhenstartingandrunningMotor.
4. Donotprocesshotliquidsorfrozenfoods.
5. Donotprocesswholespices(exceptpeppercorns)suchasnutmegor
cinnamon.TheymaycausedamagetothesurfaceoftheProcessorBowl.
6. Processthehardestfoodsrst,usingonlyafewFastPulsestobegin
chopping.AddmoredelicatefoodsandcontinuetoprocessusingtheFast
Pulsetechnique.Theharderfoodswillcontinuetobechoppedalongwith
thesofterfoods.
7. ProcessingofParmesancheese,drieddatesorotherextremelyhardfoodsis
notrecommended.Ifaknifecannoteasilypiercethefood,itshouldNOTbe
processedintheFoodProcessorAccessory.
8. TheFoodProcessorAccessoryisnotdesignedtowhipcream,whipegg
whitesorprocessdough.Useastandardmixerforthosetasks.
9. IfliquidleaksfromCover,thereistoomuchliquidintherecipe.Adjustthe
liquidleveltopreventleakage.
10.Thetemperatureofcheesewillaffecthowitprocesses.Cheeseforspreads
shouldbeatroomtemperatureforasmooth,creamytexture.“Grated”
cheeseshouldberefrigeratorcold.
11.Large,harderpiecesoffoodcanbeprocessedwithseveralFastPulsesto
coarselychop.Thenprocesscontinuouslyforanetexture.
Onlythe“FoodChop/Salsa”Pre-ProgrammedsettingisfunctionalwhenFood
processorisattached.
To Convert a Recipe
1. Totaltheamountofdryandliquidingredients.Ifthetotalexceeds5cups,
decideiftherecipecanbemadeeasilyinbatches.Donotattempttoprocess
largerecipes.
2. Iftotalisunder1cup(250ml),processdryingredientsorthemostnely
choppedfoodsrst.
3. ThenaddremainingingredientsandcombinewithseveralFastPulsestomix
together.
Food Processing Chart
Food Cutting Blade Processing Method
Vegetables (chopped) - Celery,
Potatoes, Onions, Carrots, Cucumbers,
Zuchini, Squash, etc.
S-Blade Pulsetodesiredsize
Fruits (chopped) - Apples, Mangos,
Pineapple, Papayas, Tomatoes, Chiles,
Cranberries, olives (pitted) etc.
S-Blade Pulsetodesiredsize
Peppers (chopped) - green, red or
orange, jalepenos
S-Blade Pulsetodesiredsize
Roots (chopped) - Garlic, Ginger Root,
Turnips, etc.
S-Blade Pulsetodesiredsize
Nuts (chopped) - Almonds, Peanuts,
Pecans, Walnuts, etc.
S-Blade Pulsetodesiredsize
Herbs, stems removed (chopped) -
Parsley, Cilantro, Basil, Oregano,
Rosemary, Marjoram, etc.
S-Blade Pulsetodesiredsize
Vegetables (sliced) - Celery, Potatoes,
Carrots, Cucumbers, Zuchini, Squash,
etc.
SlicingDisk MediumSpeed
Vegetables (shredded) - Carrots,
Potatoes, Zuchini, Squash, etc.
ShreddingDisk MediumSpeed
Cheese (chopped) - Mozzarella,
Cheddar, Swiss, etc.
S-Blade Pulsetodesiredsize
Cheese (shredded) - Mozzarella,
Cheddar, Swiss, etc.
ShreddingDisk MediumSpeed
Crumbs - Cracker, Graham Cracker,
Bread (dried)
S-Blade MediumSpeed
Eggs, hard-boiled (chopped) S-Blade MediumSpeed
Meats, raw or cooked (chopped) S-Blade MediumSpeed
French_BLSTMB Series_16EFM1.indd 14-15 2/15/16 9:05 AM

17
16
Blend-N-Go®Smoothie Cup Accessory (Select Models Only)
A.Spillprooflid
B.24-oz.dishwasher-safe,BPA-freeTritanTMCupdesignvariesbasedonmodel
C.BladeAssembly:SealingRing,Blade,ThreadedCap
D.Blenderbase
Using Your Blend-N-Go® Cup With Your Oster ProTM 1200
Blender
Beforewashingensuretheblenderisoffandunplugged.Washallcomponents
exceptblenderbasewithsoapywaterwithasoftspongeandabottlebrush.Do
notuseabrasivecleansersorspongesforcleaning.Rinsewellanddry.Partsare
alsodishwashersafe.Donotblendhotliquids.
Place desired ingredients into smoothie cup according to the following order:
Liquids,freshingredients,frozenfruit,ice,yogurtandicecream.
(Cutallrmfruits,vegetablesandotherfoodsintopiecesnolargerthan1/2-inch
(1.25cm)by2inches(5.0cm).
• PlaceBladeintoThreadedJarBottomoradapter.
• Placesealingringoverbladeassembly.Carefullypressandtucksealingring
intolockinggroove.
• Placebladeassemblyintocup.(SeeFigure1)
• Turnclockwisetotighten.
• PlacecupassemblyontoBlenderbase.(SeeFigure2)
• Holdcupinposition.OperateBlenderaccordingtotheinstructionsinyour
BlenderUserManual.Blenduntildesiredconsistency.
• Removethebladeandsealingring.
• Placelidoncupandturnclockwisetotighten.
Enjoyyourblendeddrink!
A
B
C
D
CupA
CupB
Figure1 Figure2
French_BLSTMB Series_16EFM1.indd 16-17 2/15/16 9:05 AM

19
18
Recipes
Honey-Vanilla Blast
Makes1serving
1cupfatfreemilk 1cup(8oz.)fatfreevanillayogurt
¼cupproteinpowder 3chunksfrozenbanana,about1medium
2Tbsp.honey
1.Injar,placeingredientsinordergivenabove.
2.Coverjarwithlid.Presspower“ ”button,thenpress
“FrozenSmoothies”button.
3.Pourintotallglasstoserve.
Very Berry Smoothie
Makes1serving
1cuporangejuice ½cupvanillalowfatyogurt
1cupfrozenmixedberries 2frozenbananachunks,about1small
2Tbsp.Agave
1.Injar,placeingredientsinordergivenabove.
2.Coverjarwithlid.Presspower“ ”button,thenpress
“Green/FrozenSmoothies”button.
3.Pourintotallglasstoserve.
Fiery Red Salsa Recipe
Makes3cups
2largegarliccloves
1can(15oz.)wholetomatoes,drained
1mediumonion,cutinto¼(4pieces)
½cupcilantroleaves
1-4jalapenopeppers,quartered
½-1tsp.sugar
Salttotaste
1Tbsp.limejuice
1can (15oz.)wholetomatoes,drained
Tortillachipsforserving
1.Injar,placeingredients,excepttortillachips,inordergivenabove.(Note:
Placeonecanoftomatoesinaftergarlicclovesandsecondcanafterrestof
ingredientsareadded.Also,placeonioninmiddleofjartoavoidblockage.)
2.Coverjarwithlid.Presspower“ ”button,thenpress“FoodChop/Salsa”
button.
3.Pourintobowl;servewithtortillachips.
Peachy Applesauce
Makes1¼cups
1largeapple,pared,coredandquartered
1largepeach,pitted,peeledandquartered(Ifoutofseason,use2canned
peachhalves.)
2Tbsp.water
1.Insmallsaucepan,cookfruitsinwater5-8minutesoruntilverytender.
2.Injar,placefruitsandliquid.
3.Coverjarwithlid.Presspower“ ”button,thenpress“Pulse”button3or4
timesuntilsmooth.
4.Removefromjar;placeincoveredcontainers.
5.Chillorfreezeatonce.
Peachy Green Smoothie
Makes:2servings
1banana 1peach,stoneremoved
½avocado 1cupGreekyogurt
1cupice 1cupbabyspinach
½cupcoconutwater 1tablespoonhoneyoragave
½teaspoonvanillaextract
1.Placeallingredientsintothetallblenderjug.Securethelid.
2.BlendonHIGHspeeduntilalloftheingredientsareblended,orusethe
FrozenSmoothiesbuttonfunction.
3.Pourintoatallglass.Serve.
Banana Chai Thick Shake
Makes:3servings
4frozenbananas 3cupsskimmilkorcoconutwater
1cupice ½teaspoongroundcinnamon
½teaspoongroundturmeric ¼teaspoongroundcardamom
¼teaspoongroundginger ½teaspoongroundstaranise
Pinch sea salt
1.Placeallingredientsintothetallblenderjug.Securethelid.
2.BlendonHIGHspeeduntilalloftheingredientsareblended,orusethe
FrozenSmoothiesbuttonfunction.
3.Pourintoatallglass.Serve.
French_BLSTMB Series_16EFM1.indd 18-19 2/15/16 9:05 AM

21
20
3 Year Satisfaction Guarantee
Sunbeam Products, Inc. doing business as Jarden Consumer Solutions or if in Canada, Sunbeam Corporation
(Canada) Limited doing business as Jarden Consumer Solutions (collectively “JCS”) warrants that for a period of
three (3) years from the date of purchase, this product will be free from defects in material and workmanship.
JCS, at the Consumer’s sole option, will repair, or replace this product or any component of the product found to
be defective during the guarantee period. This guarantee is valid for the original retail purchaser from the date
of initial retail purchase and is not transferable. Keep the original sales receipt. Proof of purchase is required to
obtain satisfaction guarantee performance. JCS dealers, service centers, or retail stores selling JCS products do
not have the right to alter, modify or any way change the terms and conditions of this guarantee.
All Metal Drive Ten (10) Year Limited Warranty
JCS also warrants that for a period of ten (10) years from the date of purchase, the All Metal Drive base unit
metal coupling will be free from defects in material and workmanship. JCS, at its option, will repair or replace
the metal drive stud component of the All Metal Drive coupling if found to be defective during the warranty
period. Replacement will be made with a new or remanufactured product or component. If the product is
no longer available, replacement may be made with a similar product of equal or greater value. This is your
exclusive warranty. Do NOT attempt to repair or adjust any electrical or mechanical functions on this product.
This warranty does not cover damage resulting from any of the following: negligent use or misuse of the
product, use on improper voltage or current, use contrary to the operating instructions, disassembly,
repair or alteration by anyone other than JCS or an authorized JCS service center. Further, the warranty
does not cover: Acts of God, such as fire, flood, hurricanes and tornadoes.
This warranty is valid for the original retail purchaser from the date of initial retail purchase and is
not transferable. Keep the original sales receipt. Proof of purchase is required to obtain warranty
performance. JCS dealers, service centers, or retail stores selling JCS products do not have the right to
alter, modify or any way change the terms and conditions of this limited warranty.
What are the limits on JCS’ Liability?
JCS shall not be liable for any incidental or consequential damages caused by the breach of any
express, implied or statutory warranty or condition. Except to the extent prohibited by applicable law,
any implied warranty or condition of merchantability or fitness for a particular purpose is limited in
duration to the duration of the above limited warranty. JCS disclaims all other warranties, conditions or
representations, express, implied, statutory or otherwise. JCS shall not be liable for any damages of any
kind resulting from the purchase, use or misuse of, or inability to use the product including incidental,
special, consequential or similar damages or loss of profits, or for any breach of contract, fundamental
or otherwise, or for any claim brought against purchaser by any other party. Some provinces, states or
jurisdictions do not allow the exclusion or limitation of incidental or consequential damages or limitations
on how long an implied warranty lasts, so the above limitations or exclusion may not apply to you.
This limited warranty gives you specific legal rights, and you may also have other rights that vary from
province to province, state to state or jurisdiction to jurisdiction.
How to Obtain Satisfaction Guarantee and/or Limited Warranty Service
In the U.S.A.
If you have any question regarding this guarantee or limited warranty or would like to obtain guarantee
or limited warranty service, please call 1-800-334-0759 and a convenient service center address will be
provided to you.
In Canada
If you have any question regarding this guarantee or limited warranty or would like to obtain guarantee
or limited warranty service, please call 1-800-667-8623 and a convenient service center address will be
provided to you.
In the U.S.A., this guarantee and limited warranty is offered by Sunbeam Products, Inc. doing business
as Jarden Consumer Solutions located in Boca Raton, Florida 33431. In Canada, this guarantee and
limited warranty is offered by Sunbeam Corporation (Canada) Limited, located at 20 B Hereford Street,
Brampton, Ontario L6Y 0M1. If you have any other problem or claim in connection with this product,
please write to the Consumer Service Department.
PLEASE DO NOT RETURN THIS PRODUCT TO ANY OF THESE
ADDRESSES OR TO THE PLACE OF PURCHASE.
For inquiries regarding recycling and proper disposal of this product,
please contact your local waste management facility.
CONSIGNES IMPORTANTES
L’emploid’unmélangeurexigel’observationdeprécautionsfondamentales,notamment
dessuivantes:
• Lisezattentivementtouteslesinstructionsavantl’utilisation.
• Pourvousprotégerdeschocsélectriques,n’immergezjamaislecordon,lacheoule
socle-moteurdansl’eauoudanstoutautreliquide.
• Faitestoujoursfonctionnerl’appareilsurunesurfacepropre,plane,stableetsèche.Ne
leposezjamaissurunesurfacerecouverted’unenappeentissuouenplastique.
• ÉvitezTOUTcontactaveclecouteauetaveclespiècesquitournent.
• Gardezmainsetustensileshorsdurécipientdurantlefonctionnement,anderéduire
lesrisquesdeblessurescorporellesetdenepasendommagerlemélangeur.Utilisezune
spatuleaubesoinpourraclerlesparoisintérieures,maisuniquementlorsquelemoteur
estaurepos.
• Nefaitespasfonctionnerunappareildontlecordonoulacheestendommagé(e),qui
aprésentédesanomaliesdefonctionnement,esttombéouaétéabîméd’unemanière
quelconque.Retournezl’appareilaucentredeservicesleplusprocheandeluifaire
subirlesvérications,misesaupointouréparationsnécessaires.
• Lecouteauesttrèsacéré.Manipulez-leprudemment.
• Pourréduirelesrisquesdeblessurescorporelles,neplacezjamaislecouteausurle
socle-moteursansqu’ilnesoitconvenablementxéaurécipient.
• Poseztoujourslecouverclesurlerécipientavantdemettrelemélangeurenmarche.
• Méez-vousdelavapeurlorsquevousmélangezdesliquideschauds.Retirezle
bouchonmesureurducouvercleanquelavapeurpuisses’échapper.
• N’employezpasl’appareilenpleinair.
• Veillezàcequelecordond’alimentationnesoitpasencontactavecdessurfaces
chaudesetqu’ilnependepasauborddelatableouducomptoir.
• Débranchezlemélangeurquandilnesertpas,avantdemonteroudedémonter
toutepièceetavantdelenettoyer.Pourledéconnecter,éteignez-leenappuyantsur
l’interrupteur ( )puistirezdélicatementlachehorsdelaprisedecourant.
• Nelaissezjamaisl’appareilsanssurveillancequandilfonctionne.
• Redoublezdevigilancelorsquel’appareilestutilisépardesenfantsouprèsd’eux.
• Netraitezpasdeliquidesbouillantsdanslemélangeur.
• Lefabricantdéconseillevivementl’emploid’accessoires–bocauxordinairesouà
conservesouencorepiècesdetraitement–carceux-cipeuventcauserunrisquede
blessurescorporelles.
French_BLSTMB Series_16EFM1.indd 20-21 2/15/16 9:05 AM

23
22
Précautions supplémentaires pour le robot accessoire
•Veillezàcequelecouverclesoitsûrementbloquéavantd’employerl’appareil.
•N’essayezpasdeneutraliserledispositifdeverrouillageducouvercle.
•Nepoussezjamaislesalimentsduboutdesdoigts,servez-vousdupoussoir.
•Cetappareilcontientdespiècesenmouvement.Nemettezsurtoutpasvosdoigtsdans
letubed’alimentation.
•Leslamessonttranchantes.Agissezprudemment.
•Gardezmainsetustensilesàl’écartdeslamesducouteauoudesdisquespendant
letraitementdesalimentsand’évitertoutrisquedeblessurescorporellesgraveset
d’endommagementdurobot.Ilestpermisd’employerunespatule,maisuniquement
lorsquelerobotestaurepos.
CONSERVEZ CES INSTRUCTIONS
Cet appareil est réservé à l’usage domestique.
• Laconsommationmaximaleindiquéesurl’appareilestbaséesurl’accessoirequi
utiliseleplusd’énergie;d’autresaccessoirespeuventêtremoinsénergivores.
Instructions relatives au cordon d’alimentation
Observezcesinstructionsaupieddelalettrepourassureruneutilisationsansrisque.
• Cetappareilestéquipéd’unechepolariséeuniquementpourappareilsde120volts
et127volts.Cegenredechecomprendunebranchepluslargequel’autre.Lache
n’enfoncedanslesprisesdecourantpolariséesquedansunsens.Cettemesurede
sécuritéapourbutderéduirelesrisquesdechocélectrique.Silachen’enfonce
pasdanslaprisedecourant,demandezàunélectricienagrééderemplacerlaprise
désuète.N’essayezpasdeneutraliserlamesuredesécuritédelachepolariséeen
modiantcelle-cidequelquefaçonquecesoit.
• Essayezdeplacerlemélangeuraussiprèsquepossibledelaprisedecourantan
delimiterlesrisquesgénéralementattribuablesauxcordonslongs(possibilitéde
s’empêtrerlespiedsetdetrébucher,parexemple).
• Netirezpasbrusquementsurlecordon,nel’entortillezpasetneluifaitespassubir
demauvaistraitements.
• N’enroulezpaslecordond’alimentationautourducorpsdumélangeurdurantou
aprèsl’utilisation.
• N’employezpasuncordonprolongateuraveccetappareil.
Ce symbole a été placé à certains endroits de la notice d’emploi.
Il a pour but de vous aider à identifier aisément les instructions
auxquelles vous devez apporter une attention particulière.
Table des matières
Bienvenue ..................................................................................................................... 24
Familiarisez-vous avec l’appareil ................................................................................... 25
Mode d’emploi du ProMC 1200 Oster............................................................................. 26
Soins à apporter à l’appareil .......................................................................................... 28
Conseils astucieux de mélange ...................................................................................... 29
Foire aux questions........................................................................................................ 29
Robot culinaire accessoire (modèles choisis seul.) ......................................................... 30
Assemblage et emploi du robot culinaire accessoire.......................................................31
Conseils astucieux pour l’emploi du robot .....................................................................33
Tableau de transformation des aliments........................................................................ 34
Verre Blend-N-GoMD accessoire (modèles choisis seul.) ..................................................35
Emploi du verre Blend-N-GoMD avec le mélangeur ProMC 1200 OSTER ...................... 36
Garantie limitée..............................................................................................................39
French_BLSTMB Series_16EFM1.indd 22-23 2/15/16 9:05 AM

25
24
Bienvenue
Nousvousfélicitonsd’avoiracquisunmélangeurProMC1200OSTER.
CemélangeurProMCOstervavouspermettredepréparerdesublimessmoothies,
laitsfouettés,salsas,etbiend’autres,enappuyantsuruneseuletouche.Si
vousaveztouteobservationouquestion,oubiensivousdésirezobtenirde
plusamplesrenseignementsausujetdecetappareilgénial,n’hésitezpasànous
appelerau1800667-8623.
Cetappareilregroupelescaractéristiquesetavantagessuivants:
•untableaudecommandeconvivialquivouslaissechoisirentrelesréglages
préprogrammésetlescommandesmanuelles;
•uncouteauévoluéàsixlamesquiprocuremaintesoptionsde
transformationetdemélangedesaliments;
•unpuissantmoteurbidirectionquichangedesensderotationàdesvitesses
variéespourprocurerlesrésultatsoptimauxlorsquevouspréparezvos
spécialitésacclamées;
•descommandesmanuellesquivousfournissentlaexibiliténécessairepour
exécutervosrecettespersonnellesaveclemélangeur;etenn
•unebaseextralargeétudiéepourquelesalimentstombentfacilementaufond
durécipient,optimisantainsil’efcacitédumélange.
Familiarisez-vous avec le
mélangeur ProMC 1200 Oster
1. Bouchon mesureur de 60 mL (2 oz) –
permetd’ajouterdesingrédientsdurantle
fonctionnement.Ouvert,illaisseéchapperla
vapeurlorsdumélanged’alimentschauds.
2. Couvercle du récipient–scellelerécipient.
3. Récipient–de1,5L(6tasses)enverre
Boroclassrésistantauchocthermiqueet
lavableenmachineOUde2litres(8tasses),en
plastiqueTritanMCincassableetsansBPA.
Couteau–àverrouillagepourimmobilisation
aufondletédurécipient.Scellelecouteauau
récipient,assurantunfonctionnementsansfuites.
4. Joint d’étanchéité
5. Couteau – tourne dans un sens puis dans
l’autrelorsquelesréglagespréprogramméssont
sélectionnés.
6. Fond fileté du récipient à levier de blocage –
évolué,pourunassemblageaiséaurécipient.
7.Socle-moteur–retientfermementlerécipient.
Renfermeunmoteurpuissant,réversibleetà
vitessevariable.
8. Tableau de commande
a.Interrupteur ( )–metlemélangeuren
fonctionetl’arrête
b.Réglages préprogrammés : pour obtenir
desrésultatsparfaitsàl’aided’unetouche.
ChoisirleréglagevouluetsurveillerleProMC
1200Oster alorsqu’ilremplitefcacement
sesfonctions.Lemélangeurs’éteint
automatiquementenndecycle.
Touches
Smoothies Verts/Glacés
Hacher/Salsa
Laits Frappés
c. Commandes manuelles :choixde
basse,moyenneethautevitesses
d.Touche d’impulsions – appuyer
brièvementpourmélangerpar
impulsions,relâcherpourarrêter
e.Touche arrêt – appuyer pour annuler
toutcycleouprogramme
b
c
ad
e
1
2
3
4
5
6
7
8
French_BLSTMB Series_16EFM1.indd 24-25 2/15/16 9:05 AM

27
26
Mode d’emploi du ProMC 1200 Oster
Avantl’emploiinitial,séparezlecouvercle,lebouchonetlecouteaudurécipient.
Lavez-lesàl’eauchaudeoudanslepaniersupérieurdulave-vaisselle.Rincezetséchez.
Lecouteauestacéré,manipulez-leprudemment.
Assemblage du couteau
1.Posezlecouteaudanslefondletédurécipient.(Fig.1)
2.Placezlabaguedeblocagesurlecouteau.Poussez
délica-tementpourrentrerlabaguedanslarainure.(Fig.2)
3.Vériezquelabaguedeblocageestcomplètementet
uniformémentadaptéeetqu’ellemaintientlecouteaudans
lefondleté.Voyezl’assemblagecorrectàlag.3.
4. Assemblezl’ensemblefondetcouteauaurécipient.Tournezensenshoraire
pourl’immobiliser.Vériezleserrageavantl’utilisation.
REMARQUE :pourinstallerconvenablementleblocdecoupesurle
socle-moteur,assurez-vousquelelevierdeblocagetourneau-delàdespattes
antirotationdurécipientouduverreàsmoothie.(Fig.4)
5.Déposezlesingrédientsdanslerécipient.
6.Posezlecouverclepourvudubouchonmesureur.
7. Placezlerécipientsurlesocle-moteur.
8. Branchezlecordonsuruneprisedecourantalternatif
standardde120/127volts,60Hz.L’appareilestprêtet
vouspouvezcommenceràl’employer!
Utilisation des réglages préprogrammés
1. Appuyezsurl’interrupteur( )pourmettrel’appareilenfonction.Levoyant
desoustensionclignotera,signequel’appareilestprêt.Levoyantrestera
alluméalorsquelemoteurtourne.
2. Sélectionnezetappuyezsurlatoucheduréglagepréprogramméappropriée:
-«SmoothiesVerts/Glacés»
-«Hacher/Salsa»
-«LaitsFrappés»
3. Pourchangerlasélection,appuyezsurlatoucheArrêtpuissuruneautre
touchepréprogrammée(«LaitsFrappés»ou«Hacher»).
4. L’appareils’arrêteraautomatiquementàlanducycle.Notezquevous
pouvezappuyersurlatoucheArrêtpourannulerlecycleentouttemps.
Levoyantclignotantbleuindiquequelemélangeurestprêtàfonctionner.
5. Appuyezsurl’interrupteur( )pouréteindrel’appareil.Cetappareilest
programmépoursemettreautomatiquementhorstensions’ilnesertpas
pendantplusieursminutes,enquelcastouslesvoyantss’éteignent.
Fig.1
Fig.4
Fig.2
Baguede
blocage
Fondletédu
récipientàlevier
de blocage
Fig.3
Non! Oui!
Couteau
Emploi des commandes manuelles
Lescommandesmanuellescomprennent:
Bas
Moyen
Haut
Impulsions
Arrêt
Employezcescommandespourpréparervosrecettespersonnellesoubienpour
prolongerlemélangeàland’uncyclepréprogrammé.
1. Appuyezsurl’interrupteur( )pourlamiseenmarche.Levoyant
d’alimentationclignotera,signequel’appareilestsoustensionetprêt,et
resteraalluméalorsquelemoteurtourne.
2. Placezlesingrédientsdanslerécipient.
3. Posezlecouvercledotédesonbouchonmesureur.
Utilisation de la haute vitesse
1.Appuyezsurlatouche«Haut»pourmélangeràhautevitesse.
2.Appuyezsur«Arrêt»pourannulerl’opérationentouttemps.
3.Appuyezsurl’interrupteur( )pouréteindrel’appareil.
Utilisation de la vitesse moyenne
1.Appuyezsurlatouche«Moyen»pourmélangeràvitessemoyenne.
2.Appuyezsur«Arrêt»pourannulerl’opérationentouttemps.
3.Appuyezsurl’interrupteur( )pouréteindrel’appareil.
Utilisation de la vitesse basse
1.Appuyezsurlatouche«Bas»pourmélangeràbassevitesse.
2.Appuyezsur«Arrêt»pourannulerl’opérationentouttemps.
3.Appuyezsurl’interrupteur( )pouréteindrel’appareil.
Utilisation de la touche impulsions
1.Vériezquelevoyantbleuclignote,signequelemélangeurestsoustension.
2.Appuyezbrièvementsurlatouche«Impulsions».
3.Relâchezlatouched’impulsionspourarrêterletraitement.
4.Appuyezsurl’interrupteur ( ) pouréteindrel’appareil.
Utilisezlatouche«Impulsions»pourbroyerlesglaçonsouhacherlesaliments.
French_BLSTMB Series_16EFM1.indd 26-27 2/15/16 9:05 AM

29
28
Soins à apporter à l’appareil
En fin d’utilisation
1. Appuyezsurl’interrupteur( )pouréteindrelemélangeurpuisdébranchez
celui-ci.Levezlerécipienttoutdroitandelesortirdusocle-moteur,retirezle
couvercleetvidezlecontenudurécipient.
2. Servez-vous,sinécessaire,d’unespatuleencaoutchoucpourraclerlesaliments
quicollentauxparoisdurécipient.
Nettoyage
ATTENTION:lecouteauestacéré,manipulez-leprudemment.
Démontezsoigneusementlecouteaudufondletéentournantlefondletéen
sensantihoraire.Lecouvercledurécipient,lebouchonmesureuretlecouteau
résistentaulave-vaisselle–àconditiond’êtrelavésdanslepaniersupérieur–alors
quelabagued’étanchéitédeblocageestlavabledanslepanierinférieur.
Vouspouvezlaverlespiècesàl’eauchaudesavonneuse.
Rincez-lesàfondetasséchez-les.Passezunchiffon
humide,douxetpropresurlesocle-moteur.N’immergez
lesocle-moteurdansabsolumentaucunliquide.
Vériezlebonétatdespièceslorsduremontage.
TRUC:réglezlemélangeuràlavitessebasseou
moyennepuis,sansledémonter,faites-lefonctionner
pendant20à30secondesalorsqu’ilcontientdel’eau
savonneuse.Rincez-leensuiteàl’eauclaire.
Rangement
Remontezlemélangeurpourleranger.Laissezsoncouvercleentr’ouvertpourne
pasemprisonnerd’odeurs.
AVERTISSEMENT : Ne mettez ni le récipient ni d’autres pièces au micro-ondes.
Ne réfrigérez ni aliments ni boissons dans le récipient.
Réparations
Cetappareilnecontientpasdepiècesquepuisseréparerl’utilisateur.Tout
service,outrel’entretiendécritsouslarubriqueintitulée«Nettoyage»doit
uniquementêtreconéàuncentredeservicesagréé.Quanddesréparationsou
despiècesderechangesontnécessaires,communiquezsansfraisavecOsterau
1800667-8623oubienvisitezwww.oster.ca.
Conseils astucieux de mélange
Liquides
Àmoinsquelarecetten’indiquedefaireautrement,placezlesingrédients
liquidesenpremierdanslerécipient.Ajoutezduliquidesilesingrédientsnese
mélangentpasconvenablement.
Utilisation du bouchon mesureur
N’enlevezpaslecouvercleaucoursdufonctionnement.Ouvrezlebouchon
mesureurducouverclepourajouterdesingrédientsdepetitetailleaubesoin.
Broyage de la glace
Sans liquide :utilisezlatoucheImpulsionsselonlebesoin.
Avec liquide :mettezlesglaçonsvoulusetdel’eaujusqu’àcequelesglaçons
ottent.Broyezlaglaceaubesoin,àhautevitesse,puisvidezl’eau.
Mélange des aliments ou des liquides chauds
AVERTISSEMENT : enlevez le bouchon mesureur pour traiter des
ALIMENTS CHAUDS, afin que la vapeur s’échappe. Inclinez le couvercle
de façon à éloigner la vapeur de vous et à couvrir partiellement l’ouverture.
Gardez mains et peau nue hors de la trajectoire de la vapeur afin que celle-
ci ne risque pas de vous échauder.
AVERTISSEMENT : pour traiter des ALIMENTS CHAUDS, enlevez le
bouchon mesureur, amorcez le démarrage à petite vitesse puis augmentez
progressivement l’allure. Le niveau du liquide ne doit pas dépasser 1 litre
(4 tasses). Éloignez toujours vos mains de la trajectoire de la vapeur.
Quantités d’ingrédients
N’utilisezquelesquantitéssuggéréesdanslesrecettes.Siellesnesufsentpas,
préparezlevolumerequisenplusieursfois.Dépasserlesquantitésdonnéespeut
surchargerlemoteur,lefairepeineretrisquedemodierlesrésultats.
Foire aux questions
Pourquoi le mélangeur ne se met-il pas en marche ?
•Assurez-vousquelesocle-moteurestbranchésuruneprisefonctionnelle.
•Vériezquelevoyantbleuclignotequandvouspressezl’interrupteur( ).
Comment puis-je empêcher les liquides de fuir ?
Vériezpourvousassurerquelejointd’étanchéitéestconvenablementplacé
entrelecouteauetlerécipient.
French_BLSTMB Series_16EFM1.indd 28-29 2/15/16 9:05 AM

31
30
Robot culinaire accessoire (modèles choisis seul.)
Poussoir–efcacepourpousserles
alimentsversledisqueàtrancher/
déchiqueterentoutesécurité.
Couvercle–letubed’alimentation
permetd’ajouterdesingrédientsalors
quelerobotfonctionne.
Disque à trancher/déchiqueter –
spécialementconçupourfairedes
tranchesetdeslamentsuniformes.
ATTENTION : ce disque est
acéré, manipulez-le avec soin.
Axe des disques–s’emploieavecle
disqueàtrancheretdéchiqueter.
Couteau hacheur–spécialement
conçupourhacheretémincer.Tenir
l’arbre central de plastique pour le
manipuler.
ATTENTION : les lames sont
acérées, manipulez-le avec soin.
Bol–d’unecapacitéde1,15litre,
ilpermetdevitetransformerles
alimentsdifcilesàhacher.
Adaptateur–transfèrelapuissance
dusocle-moteuraurobotculinaire
accessoire.
Avant l’utilisation initiale–aprèssondéballage,démontezl’appareilavantde
vousenservirpourlatoutepremièrefois.
Laveztouteslespièces(saufl’adaptateur)àl’eauchaudesavonneuse.
Rincezetasséchez-lessansdélai.N’IMMERGEZL’ADAPTEURDANSAUCUN
LIQUIDE.OUTREL’ADAPTATEUR,TOUTESLESPIÈCESSONTLAVABLES
DANSLEPANIERSUPÉRIEURDULAVE-VAISSELLE.
Couvercle
Disqueàtrancher/
déchiqueter
Poussoir
Bol
Adaptateur
Jointexible
Socle-moteur
Axedesdisques
Arbrecentral
Couteau
hacheur
Assemblage et emploi du robot culinaire accessoire
1. Avantlemontage,assurez-vousquel’adaptateurfonctionneconvenablement.
Débranchezlesocle-moteurpourassemblerl’appareil.
2. Placezalorsl’adaptateurdanslebolpuistournez-leensensantihorairean
delebloquer.
3. Posezlebolmunidel’adaptateursurlesocle-moteur.
Hachage et émincés
4. Tenezlecouteauhacheurparsaprisecentraledeplastiqueetplacez-lesur
l’arbredubol.Attention:leslamessonttrèsacérées,manipulez-leavecsoin.
Faitestournerlecouteaupourvousassurerqu’ilestbienassujetti.Mettez
toujourslecouteauhacheurdanslerobotavantd’ajouterdesingrédients.
5. Déposezlesaliments,toujourscoupésendésde2,5cm(1po),danslebol.
6. Posezlecouverclesurlebol–utilisezlesrepèresdeconcordance–etappuyez
fermementtoutenletournantensensantihorairepourleverrouiller.
N’EMPLOYEZL’APPAREILQUETOTALEMENTASSEMBLÉ
7. Mettezlerobotenmarche( )(choisissezleréglageImpulsions,Bas
ouMoyensurlesocle-moteur.)TENEZTOUJOURSFERMEMENT
LEROBOTD’UNEMAINÀLAMISEENMARCHEETDURANT
L’UTILISATION.Traitezlesaliments,defaçoncontinueouparimpulsions,
jusqu’àcequelesrésultatsvousconviennent.Fairepressionpuisrelâchertrès
rapidementaideàcontrôlerlatextureetàéviterlaréductionenpurée.Voyez
letableaupourlesfaçonsdefaire,lesquantitésainsiquelesrésultats.
REMARQUE:seulleréglagepréprogrammé«Hacher/Salsa»est
fonctionnelàl’emploidurobotculinaire.
Tranchage et déchiquetage
8. Posezl’axedesdisquessurl’arbre.Placezledisqueàtrancher/déchiquetersur
l’axedesdisquesenorientantlafacedésiréeverslehaut.
Attention:ledisqueestacéré,manipulez-letrèsprudemment.
9. Posezlecouverclesurlebol–utilisezlesrepèresdeconcordance–etappuyez
fermementtoutenletournantensensantihorairepourleverrouiller.
10.Remplissezletubed’alimentationavantdemettrelerobotenmarche.
11.Placezlepoussoirdansletubed’alimentation.Faitesdémarrer le robot
(àlavitessemoyenne).Alorsquevoustenezlepoussoird’unemainetletube
French_BLSTMB Series_16EFM1.indd 30-31 2/15/16 9:05 AM

33
32
d’alimentationdel’autre,faiteslentementpressionsurlepoussoir.
Servez-voustoujoursdupoussoir,lesrésultatsserontplusuniformes.–NE
POUSSEZJAMAISDUBOUTDESDOIGTS.Éteignez alorsl’appareil.
REMARQUE:lesréglagesmanuelsMoyenetHautnesontpasconseilléspour
trancheretdéchiqueter.
Démontage
1. Éteignez l’appareilpuisdébranchezlesocle-moteur.
2. Attendeztoujoursquelecouteauhacheurouledisqueaitcessédetourner.
3. Séparezlerobotculinaireaccessoiredusocle-moteur.
4. Tournezlecouvercleensenshorairepourleretirerdubol.
5. Enlevezlecouteauhacheurouledisqueavecsoin.Veillezàcequelecouteau
ouledisquenetombepasdubol.Lesbordscoupantssonttrèsacérés.Raclez
lesmorceauxd’alimentsducouteauetduboldetravail.
6. Déverrouillezleboldel’adaptateurentournantlebolensenshoraire.
Nettoyage
Débranchezlesocle-moteuravantd’entreprendrelenettoyage.
AVERTISSEMENT : n’immergez pas l’adaptateur dans l’eau.Séparez
toujoursl’adaptateurdubolavantdecommencerànettoyerlerobot.
Gardezlecouteauhacheuretledisquehorsdelaportéedesenfants.Entre
utilisations,rangezlecouteauetledisquedanslebolouenlieusûr.Accordezle
mêmesoinaucouteauetaudisquequ’àvoscouteauxdecuisinebienaffûtés.
Éliminezlestachesprovenantdutraitementdegrossesquantitésdecarottesou
d’autreslégumesdecegenre,avecdubicarbonatedesoude.Rincezlespièces
tachéesàl’eauavantdelessaupoudrerdebicarbonatedesoude.Frottezavecun
chiffondouxethumide.Rincezetasséchez.N’utilisezpasdenettoyantsabrasifs.
Entretien
Cetaccessoirecomprendunverrouillagedesécurité–lecouvercledoitêtre
enplacepourquelecouteautourne.(Ceverrouillagenecontrôlepasle
fonctionnementdumoteur.)Pourvérierlebonfonctionnementduverrouillage,
faitestournerl’arbred’entraînementàplusieursreprisestoutentenant
l’adaptateur.L’entraînementenmétaldufonddel’adaptateurnedevraitPAS
tourner.S’iltourne,N’UTILISEZPASL’ACCESSOIRE.Portezl’appareilàun
centredeservicesagréépourlefaireréparer.N’employezpasceVERROUILLAGE
AULIEUD’ÉTEINDRE lemélangeuretdeledébrancheravantledémontage
etlenettoyage.Neplacezjamaislecouteauhacheursurl’adaptateursans
utiliserlebol.Nefaitespasfonctionnerl’appareilsilejointexibleestabîméou
manquant.Leverrouillagedesécuritérisqueraitdesecoincer.
Conseils astucieux pour l’emploi du robot
1. Coupezlesfruits,leslégumes,lesviandescuites,lepoisson,lesfruitsdemer
etlesfromagesendésd’auplus2,5cm(1po).
2. Nedépassezpaslesquantitéspréciséesautableaudetransformation.
3. Poseztoujoursfermementlamainsurlecouvercleàlamiseenmarcheet
pendantquelemoteurtourne.
4. Netraitezpasdeliquideschaudsoud’alimentscongelés.
5. Netravaillezpaslesépicesentières(outrelesgrainsdepoivre)–noixde
muscadeoucannelle,parexemple.Ellespourraientabîmerlasurfacedubol.
6. Traitezlesalimentslesplusfermesenpremier,enutilisantplusieurs
impulsionspourdébuterlehachage.Ajoutezlesingrédientsplusdélicats
encontinuantletravailparimpulsionsrapides.Lesalimentsfermes
bénécierontainsid’uneduréedehachagepluslonguequelesalimentsmous.
7. Traiterduparmesan,desdattessèchesoud’autresalimentsextrêmement
dursdecegenreestdéconseillé.Siunalimentestdifcileàtranspercerau
couteau,ilnedevraitPASêtretransformédanslerobotaccessoire.
8. Lerobotaccessoiren’estpasconçupourfouetterlacrème,monterlesblancs
d’œufsenneigeoumalaxerlespâtes–unbatteurestpréférablepourceci.
9. Siduliquidefuitsouslecouvercle,c’estquelarecettecontienttropde
liquide.Modiezlaquantitédeliquidepouréliminerlesfuites.
10.Latempératuredufromageaffecteletraitement.Lesfromagesàtartinades
devraientêtreàlatempératureambiantepouravoirunetexturecrémeuseet
onctueuse,ceuxàrâperdevraientêtrejustesortisduréfrigérateur.
11.Lesgrosmorceauxdurspeuventêtresoumisàplusieursimpulsionsrapides,
cequileshacheragrossièrement.Traitez-lesensuitedefaçoncontinuesivous
désirezunetextureplusne.
Seulleréglagepréprogrammé«Hacher/Salsa»estfonctionnelàl’emploidu
robotculinaire.
Conversion des recettes
1. Totalisezlesvolumesdesalimentssecsetdesliquides.Siletotaldépasse
1,25litre(5tasses),décidezsilarecettepeutêtrepréparéeenplusieursfois.
N’essayezpasdetravaillerdesplusgrossesquantités.
2. Siletotalestdemoinsde250mL(1tasse),traitezd’abordlesalimentssecs
ouceuxquidoiventêtrehachésleplusmenu.
3. Ajoutezalorslerestedesingrédientsetmélangezletoutenexécutant
plusieursimpulsionsrapides.
French_BLSTMB Series_16EFM1.indd 32-33 2/15/16 9:05 AM

35
34
Tableau de transformation des aliments
Aliments Utiliser Méthode
Légumes (hachés) - céleri, pommes de
terre, oignons, carottes, concombres,
courgettes, courges, etc.
Couteau
hacheur
Impulsionsjusqu’à
lataillevoulue
Fruits (hachés) - pommes, mangues,
ananas, papayes, tomates, chiles,
canneberges, olives (dénoyautées), etc.
Couteau
hacheur
Impulsionsjusqu’à
lataillevoulue
Poivrons (hachés) - verts, rouges,
jaunes ou orange, piments jalepenos
Couteau
hacheur
Impulsionsjusqu’à
lataillevoulue
Racines (hachées) - ail, gingembre,
navets, etc.
Couteau
hacheur
Impulsionsjusqu’à
lataillevoulue
Noix (hachées) - amandes, arachides,
pacanes, noix, etc.
Couteau
hacheur
Impulsionsjusqu’à
lataillevoulue
Herbes, sans tiges (hachées) - persil,
coriandre, basilic, origan, romarin,
marjolaine, etc.
Couteau
hacheur
Impulsionsjusqu’à
lataillevoulue
Légumes (tranchés) - céleri, pommes de
terre, carottes, concombres, courgettes,
courges, etc.
Disqueà
trancher
Vitessemoyenne
Légumes (en filaments) - courgettes,
carottes, pommes de terre, courges, etc.
Disqueà
déchiqueter
Vitessemoyenne
Fromages (hachés) - mozzarella,
cheddar, suisse, etc.
Couteau
hacheur
Impulsionsjusqu’à
lataillevoulue
Fromages (râpés en filaments) -
mozzarella, cheddar, suisse, etc.
Disqueà
déchiqueter
Vitessemoyenne
Chapelure - craquelins, biscuits
graham, pain (rassis)
Couteau
hacheur
Vitessemoyenne
Œufs, durs (hachés) Couteau
hacheur
Vitessemoyenne
Viandes, crues ou cuites (hachées) Couteau
hacheur
Vitessemoyenne
Verre à smoothie Blend-N-GoMD (modèles choisis seul)
A.Couvercleantigoutte
B.Verred’environ700mL(24oz)enTritanMCsansBPA,lavableenmachine
C.Ensembleducouteau:jointd’étanchéité,couteau,fondleté
D.Socledumélangeur
A
B
C
D
VerreA
TasseB
Figure1 Figure2
French_BLSTMB Series_16EFM1.indd 34-35 2/15/16 9:05 AM
Other manuals for PRO 1200
3
Table of contents
Languages:
Other Oster Blender manuals

Oster
Oster BLSTSE75 User manual

Oster
Oster PRO 1200 User manual

Oster
Oster XPERT Series User manual

Oster
Oster 4126 User manual

Oster
Oster BLSTCAG4551R User manual

Oster
Oster ICE SHAVING BLENDER User manual

Oster
Oster 6641 User manual

Oster
Oster BRLY07-Z00 User manual

Oster
Oster BLSTJJ-GT0 User manual

Oster
Oster BLSTMB-CT0-050 User manual

Oster
Oster 2612-049 User manual

Oster
Oster BLSTBKP-BR0-000 User manual

Oster
Oster 6800-6839 User manual

Oster
Oster BLSTAS User manual

Oster
Oster BEST02-E User manual

Oster
Oster BLSTMG-W00 User manual

Oster
Oster BLSTPB SERIES User manual

Oster
Oster 6710 User manual

Oster
Oster BLEND ACTIVE BLSTPP User manual

Oster
Oster WHIRLWIND User manual