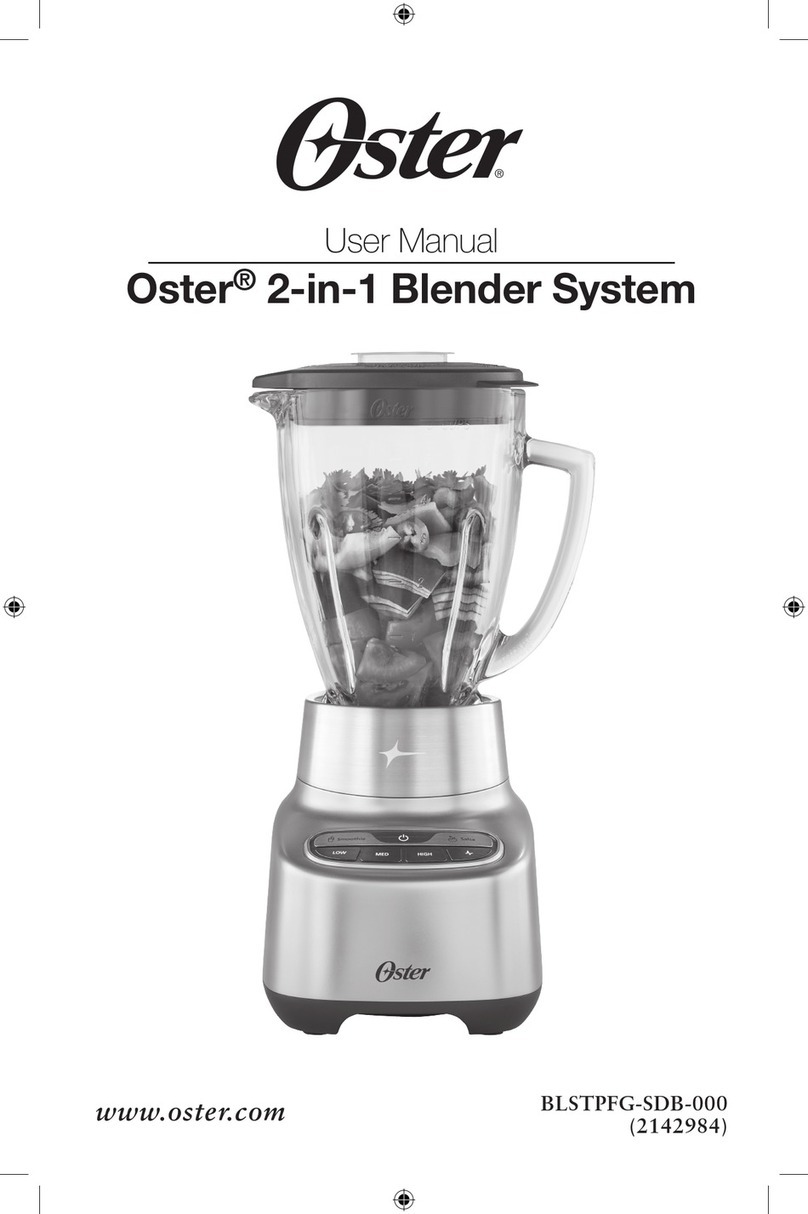
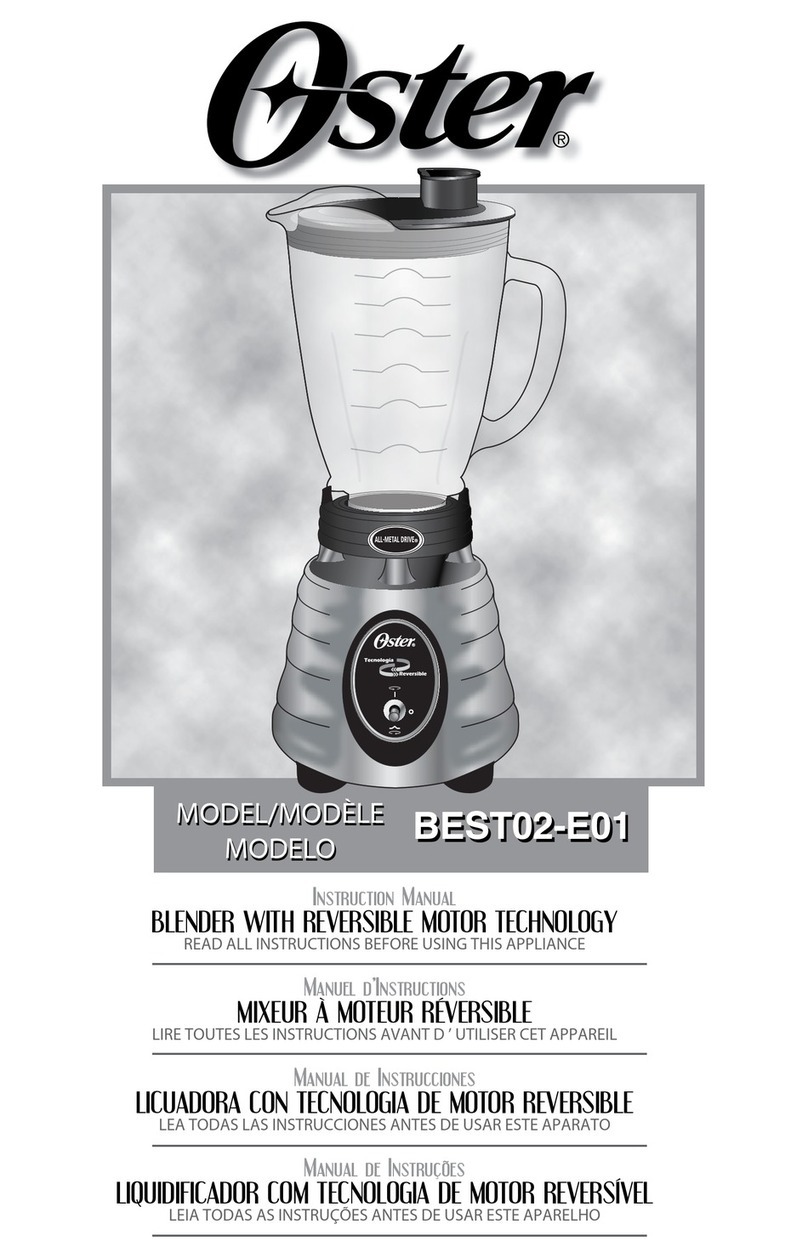
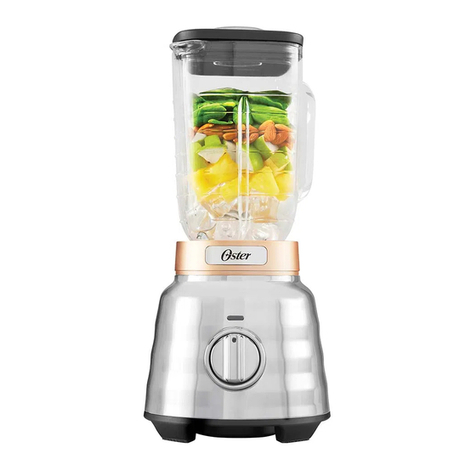
Oster BPST02-B-050 User manual

Instruction Manual
OSTER® PROFESSIONAL SERIES BLENDER
READ ALL INSTRUCTIONS BEFORE USING THIS APPLIANCE
Manuel d’Instructions
MIXEUR OSTER® SÉRIE PROFESSIONNELLE
LIRE TOUTES LES INSTRUCTIONS AVANT D ’ UTILISER CET APPAREIL
Manual de Instrucciones
LICUADORA OSTER® SERIE PROFESIONAL
LEA TODAS LAS INSTRUCCIONES ANTES DE USAR ESTE ARTEFACTO
Manual de Instruções
LIQUIDIFICADOR OSTER® SERIE PROFISSIONAL
LEIA TODAS AS INSTRUÇÕES ANTES DE USAR ESTE APARELHO
MODEL/MODÈLE
MODELO
MODEL/MODÈLE
MODELO BPST02-B-050
BPST02-B-050
ALL-METAL DRIVE
®
/
Pulse
Off

1
IMPORTANT SAFEGUARDS
When using electrical appliances, basic safety precautions should be followed, including
the following:
READ ALL INSTRUCTIONS BEFORE USE
• Unplugcordfromoutletwhennotinuseorbeforecleaning
• Toprotectagainstriskofelectricalshock,donotimmersethecord,plugormotorbase
in water or other liquids
• Donotletcordhangoveredgeoftableorcounterortouchhotsurfaces
• Neverleaveapplianceunattendedwheninuse
• Closesupervisionisnecessarywhenusednearchildren
• Avoidcontactwithmovingparts.Keephandsandutensilsoutofjarwhileblending
topreventpersonalinjuryordamagetotheblenderArubberspatulamaybeusedonly
when the blender is not running
• Thebladeissharp.Handlewithcare
• Alwaysputthelidonthejarbeforeoperatingtheblender
• Donotoperateanyappliancewithadamagedcordorplugoraftertheappliancemal
functionsorisdroppedordamagedinanymannerReturntheappliancetothenearest
AuthorisedApplianceServicecentreforexamination,repairorelectricalormechanical
adjustment
• Donotuseoutdoorsorforcommercialpurposes;thisapplianceisforhouseholduseonly
• Usethisapplianceforitsintendeduseasdescribedinthismanual
• Whenblendinghotliquids,removecentrepieceoftwo-piececover
• Toreducetheriskofinjury,neverplacecutter-assemblybladesonbasewithoutjar
properly attached
• Alwaysoperateonaflatsurface
• Unplugtheblenderwhenitisnotinuse,beforetakingofforputtingonpartsandbefore
cleaning
• Theuseofattachments,notmadebymanufacturer,includingcanningorordinaryjar
andprocessingassemblyparts,isnotrecommendedbySunbeamProducts,Inc.,
doingbusinessasJardenConsumerSolutions,andmaycauseriskofinjurytopersons
• Donotoperateblendercontinuouslyformorethan3minutes
THIS PRODUCT IS FOR HOUSEHOLD USE ONLY.
Themaximumratingmarkedontheproductisbasedontheattachmentthatdrawsthe
greatestload.Otherattachmentsmaydrawlesspower.
POWER CORD INSTRUCTIONS
Pleasefollowtheinstructionsbelowtoensurethesafeuseofthepowercord.
• DO NOTuseanextensioncordwiththisproduct
• DO NOT pull, twist or otherwise abuse the power cord
SAVE THESE INSTRUCTIONS

2
FITTING A REPLACEMENT PLUG
FOR U.K. AND IRELAND ONLY
Iftheplugisnotsuitableforthesocketoutletsinyourhome,itcanberemovedand
replacedbyaplugofthecorrecttype.Pleasereferto“Installationofaplug”below.
InstallationofaplugApplicabletoU.K.andIreland.
WARNING - THIS APPLIANCE MUST BE EARTHED.
NOTE:Iftheterminalsintheplugarenotmarkedorifyouareunsureorindoubtabout
theinstallationoftheplugpleasecontactaqualifiedelectrician.Ifa5A3-pinplugisfitted,
itmustbeanASTAapprovedplug,conformingtoBS1363standard.Replacement5A
fusesmustbeBSIorASTABS1362approved.
Thewiresinthemainsleadarecolouredassuch:
GREEN AND YELLOW - EARTH
BROWN - LIVE
BLUE - NEUTRAL
Pleasenotethatthecolourofthesemainswiresmaynotcorrespondwiththecolour
markingsthatidentifytheterminalsinyourplug.
Pleaseproceedasfollows:
ThewirewhichiscolouredGREEN AND YELLOWmustbeconnectedtotheterminal
whichismarkedwiththeletter“E”orbytheearthsymbolorcolouredGREEN or
GREEN AND YELLOW.
TheBROWNcolouredwiremustbeconnectedtotheterminal,whichismarkedwiththe
letter“L”oriscolouredRED.
TheBLUEcolouredwiremustbeconnectedtotheterminal,whichismarkedwiththe
letter“N”oriscolouredBLACK.
5 amp

3
A
A. FeederCapforaddingingredientswhileblending
B. LeakProofLid
C. 1.2litresDishwasherSafe/ScratchResistantGlassJar
D. SealingRingfortightseal
E. IceCrushBladepulverisesiceforsmoothfrozendrinks
F. ThreadedBottomCap
G. PowerfulMotorwithexclusiveALL-METALDRIVE™system
forextradurability
H. ControlPanel
DESCRIPTION OF THE APPLIANCE
C
H
E
D
G
F
B
H
/
Pulse
Off
CONTROL PANEL

4
USING YOUR BLENDER
Cleanblenderaccordingtotheinstructionsinthe“CleaningandStoringYourBlender”
section.
JAR ASSEMBLY
Turnjarupsidedownsothesmallopeningisatthetop.(Figure1)
Placesealingringoverjaropening.(Figure2)
Placebladeintojar.(Figure3)
Figure1 Figure2 Figure3
Figure4 Figure5
Placethreadedbottomcapoverbladeandturnclockwisetotighten.(Figure4)
Placejarassemblyontobase.(Figure5)
Placeingredientsintojar.
Placelidwithfeedercaponjar.
Plugthepowercord.

5
USING YOUR PROFESSIONAL SERIES BLENDER
Pushswitchuptoblendingredientstodesiredconsistency.
PushswitchtoI/Otostoptheblenderandturnblenderoff.
TousePULSE,pushswitchdownfordesiredlengthoftime.
ReleasePULSEandallowbladetostop.Repeatcycleasdesired.
IMPORTANT:Donotoperateblendercontinuouslyformorethan3minutes.
BLENDING TIPS
• Putliquidsinthejarfirst,unlessarecipesaysotherwise
• Crushing Ice:Crush6icecubesorapproximately2
cupsoficeatatime
• Donotremovethelidwhileinuse.Removefeedercap
toaddsmalleringredients(Figure6)
• Hot Foods:Openthefeedercaptoventsteam.Tilt
feedercapawayfromyou.Keephandsawayfromthe
coveropeningtopreventpossibleburns.Whenworking
withhotliquids,removefeedercapandstartblending
atalowspeedthenmovetoafasterspeed.Donotadd
liquidoverthe1Litrelevel
• Cutallfirmfruitsandvegetables,cookedmeats,fish
andseafoodintopiecesnolargerthan1.8cmto2.5cm. Figure6
Cutallkindsofcheesesintopiecesnolargerthan1.8cm

6
CLEANING AND STORING YOUR BLENDER
IMPORTANT: UNPLUG BEFORE CLEANING BASE and DO NOT
IMMERSE THE BLENDER BASE IN WATER OR ANY OTHER LIQUIDS.
Useadamp,softspongewithmilddetergenttocleantheoutsideoftheblenderbase.
Allpartsexceptfortheblenderbasearedishwashersafe.Placesealingringinbottom
basketofdishwasher.Youcanalsowashthepartsinwarm,soapywater.Rinseanddry.
EASY CLEAN
Pour0.7litresofwarmwaterintheblenderjar.Add1–2dropsofliquid
dishwashingdetergent.Blenddetergentfor10–15seconds.Emptyjarof
soapywaterintosink.Rinsejarthoroughlywithcleanwater.
NOTE:EasyCleanisnotasubstituteforregularcleaningdescribedabove.
Itisespeciallyimportanttodisassembleandthoroughlycleanyourblender
whenprocessingmilk,dairyproducts,meats,seafoodandeggs.
STORING YOUR BLENDER
Aftercleaning,reassemblebladetojarwithsealingringandcollar.
Storeblenderwithcoverajartopreventcontainerodour.

7
PROCESSING FOODS IN BLENDER
Food Processed
Quantity Unprocessed
Quantity Special
Instructions
Apples 200ml 250mlof2.5cmpieces Pulse2times
AppleJuice 375ml 1medium,peeled,cored,cut
intoeighths+250mlliquid Liquefycontinuously
Breadcrumbs 125ml 1slice,tornin8pieces Pulse1–4times
Cabbages,Red&
White
375ml 750mlof2.5cmpieces Chopcontinuouslyin2
–4cupswater.Drain.
Carrots 250ml
500ml 250ml
500ml Pulse2times
Pulse4timesin2-4
cupswater.Drain.
Celery 200ml 250mlof2.5cmpieces Pulse2–3times
Cheese,Cheddar 250ml 250mlof2.5cmpieces Pulse2times
Cheese,Swiss 250ml 250mlof2.5cmpieces Pulse5times
Cheese,Hardor
Semi-Hard 250ml 250mlof2.5cmpieces Gratecontinuously
Coconut 250ml 250mlof2.5cmpieces Gratecontinuously
CoffeeBeans 250ml 1cup250ml Grind45seconds
forpercolators&60
secondsfordrip.
Cookies,Wafer 125ml 10wafers Pulse3times
Crackers,Graham 125ml 8crackers Pulse3times
Cranberries,Fresh 200ml 250ml Pulse2times
DriedFruit Scant125ml
+120grams
flour
125ml Chopcontinuouslyfor
15seconds
Eggs,HardCooked 200ml 2eggsof2.5cmpieces Chopcontinuouslyfor
30seconds
Meat,Boneless,
Baked 250ml 250mlof2.5cmpieces Chopcontinuously
Nuts,Almonds,
Peanuts,Pecans,
Walnuts
250ml 250ml Pulse2–4times
Onions 375ml 750mlof2.5cmpieces Pulse1timein2-4
cupsofwater.Drain.
Peppers 150ml 250ml Pulse1time
Peppercorns 125ml 125ml Grindcontinuously
Nutmeg 15ml 3nuts,shellremoved Grindcontinuously
GingerRoot 50ml 2–3pieces2.5cmeach Grindcontinuously
NOTE:Sincefoodsvaryinsize,consistencyandfreshness,youmayneedtoaddor
subtractaprocessingtimefromthenumberstatedinthischart.

8
EUROPE GUARANTEE
•Pleasekeepyourreceiptasthiswillberequiredforanyclaimsunderthisguarantee.
•Thisapplianceisguaranteedfor2yearsafteryourpurchaseasdescribedinthis
document.
•Duringthisguaranteedperiod,ifintheunlikelyeventtheappliancenolongerfunctions
duetoadesignormanufacturingfault,pleasetakeitbacktotheplaceofpurchase,with
yourtillreceiptandacopyofthisguarantee.
•Therightsandbenefitsunderthisguaranteeareadditionaltoyourstatutoryrights,which
arenotaffectedbythisguarantee.OnlyHolmesProducts(Europe)Ltd.(“Holmes”)has
therighttochangetheseterms.
•Holmesundertakeswithintheguaranteeperiodtorepairorreplacetheappliance,orany
partofappliancefoundtobenotworkingproperlyfreeofchargeprovidedthat:
•youpromptlynotifytheplaceofpurchaseorHolmesoftheproblem;.and
•theappliancehasnotbeenalteredinanywayorsubjectedtodamage,misuse,
abuse,repairoralterationbyapersonotherthanapersonauthorisedbyHolmes.
•Faultsthatoccurthrough,improperuse,damage,abuse,usewithincorrectvoltage,
actsofnature,eventsbeyondthecontrolofHolmes,repairoralterationbyaperson
otherthanapersonauthorisedbyHolmesorfailuretofollowinstructionsforusearenot
coveredbythisguarantee.Additionally,normalwearandtear,including,butnotlimited
to,minordiscolorationandscratchesarenotcoveredbythisguarantee.
•Therightsunderthisguaranteeshallonlyapplytotheoriginalpurchaserandshallnot
extendtocommercialorcommunaluse.
•WasteelectricalproductsshouldnotbedisposedofwithHouseholdwaste.Please
recyclingandWEEEinformation.
HolmesProducts(Europe)Limited
1,FrancisGrove
London
SW194DT
UK

9
IMPORTANTES MESURES DE SECURITE
L’utilisationd’appareilsélectriquesrequiertcertainesprécautionsélémentairesd’emploi,enparticulier:
LIRE SOIGNEUSEMENT TOUTES LES INSTRUCTIONS AVANT D’UTILISER VOTRE CAFE-
TIERE
• Eteindreetdébranchervotrecafetièreaprèsusageetavantdelanettoyer.
• Pourévitertoutrisqued’électrocution,nepasplongerlecâbled’alimentation,laficheélectrique
oulabasedel’appareildansdel’eauoutoutautreliquide
• Nepaslaisserlecordonélectriquependresurlebordd’unetableoud’uncomptoir,nilemettre
encontactavecdessurfaceschaudes
• Nejamaislaisserl’appareilsanssurveillancependantsonusage.
• Ilestrecommandédesurveillervosenfantslorsquevousutilisezcetappareilàproximité.
• Evitertoutcontactaveclesélémentsenmouvement.Maintenirmainsetustensileshorsdu
récipientdurantlefonctionnementafinderéduirelesrisquesdeblessureetpournepasendommager
lemixeur.Vouspouvezutiliserunespatuleencaoutchouclorsquelemixeurn’estpasenservice.
• Lalameestcoupante.Utiliseravecprécaution.
• Toujoursmettrelecouverclesurlerécipientavantlamiseenmarche.
• Nepasutilisercetappareillorsquelecâbled’alimentationoulaficheélectriqueestendommagée,
nilorsquecetappareilnefonctionnepasnormalement,qu’ilesttombéouqu’ilasubiquelque
dommagequecesoit.Encasderéparation,veuillezretournercetappareiluniquementau
CentredeServiceautoriséleplusprochedechezvous.
• Nepasutiliseràl’extérieur,n’estpasdestinéàunusagecommercial;Cetappareilest
uniquementdestinéàunusagedomestique.
• Nepasseservirdecetappareilpourd’autresusagesqueceuxpourlesquelsilaétéconçu,tel
qu’ilestécritdanscemoded’emploi.
• Lorsquevousmélangezdesliquidesbrûlants,retirerlapiècecentraleducouvercle
• Pourévitertoutrisquedeblessure,nejamaismettreleslamessurlabasesansavoir
mislerécipientcorrectementenplace.
• Toujoursutilisersurunesurfaceplane
• Débranchezlemixeurquandilnesertpas,avantdemonteroudedémontertoutepièceetavant
delenettoyer.
• SunbeamProducts,Inc.,quifaitcommercesouslenomdeJardenConsumerSolutionsne
recommandepasl’utilisationdepièces,accessoiresourécipientsautresqueceuxfabriquéspar
ce fabricant, cela pourrait entraîner des risques de blessures corporelles
• Nepasutiliserl’appareildemanièrecontinuependantplusde3minutes
CET APPAREIL EST UNIQUEMENT DESTINE A USAGE DOMESTIQUE.
Lacapacitéélectriquemaximaledecetappareilestbaséesurl’accessoirequirequiertleplusde
capacité.Ilestpossiblequed’autresaccessoiresrequièrentmoins.
INSTRUCTIONS RELATIVES AU CORDON
D’ALIMENTATION
Veuillezsuivrelesinstructionsci-dessouspourassureruneutilisationentoutesécurité
ducordond’alimentation.
• NE PASvousservird’unerallongeaveccetappareil
• NE PAStirerbrusquementsurlecordon,nepasl’entortilleretnepaslemaltraiter
CONSERVER CES INSTRUCTIONS

10
A
A. Trémieàcouvercle-Permetd’ajouterdesingrédientsdurant
lefonctionnement
B. Couvercleétanche
C. Récipientd’unecapacitéde1,2litres,enverretrèsrésistant,va
aulave-vaisselle
D. Jointd’étanchéité
E. Lameàglaçon,pulvériselaglacepourdedélicieusesboissonsfrappées.
F. Couvercledufond
G. PuissantmoteuravecsystèmeexclusifALL-METALDRIVE™pourplus
dedurabilité
H. Tableaudecommande
DESCRIPTION DE L’APPAREIL
C
H
E
D
G
F
B
H
/
Pulse
Off
TABLEAU DE
COMMANDE

11
COMMENT UTILISER VOTRE MIXEUR
Pournettoyerlemixeur,vousreporteràlasection“CommentNettoyeretRangervotre
Mixeur”.
ASSEMBLAGE DU RECIPIENT
Retournerlerécipient,lapetiteembouchuresetrouveverslehaut.(Schéma1)
Placerlejointd’étanchéitésurl’embouchuredurécipient(Schéma2)
Mettrelalamedanslerécipient(Schéma3)
Schéma1 Schéma2 Schéma3
Schéma4 Schéma5
Placerleboutouvertducouvercledufondsurlalameettournerdanslesensdes
aiguillesd’unemontrepourserrer(Schéma4)
Poserlerécipientsurlabasemoteur(Schéma5)
Mettrelesingrédientsdanslerécipient.
Mettrelecouvercleaveclatrémiesurlerécipient.
Brancherlecordond’alimentation

12
COMMENT UTILISER VOTRE MIXEUR
SERIE PROFESSIONELLE
Pousserleboutonverslehautpourmélangerlesingrédientsjusqu’àconsistancedésirée.
PousserleboutonsurI/Opourarrêterlemixeuretl’éteindre.
PourutiliserlafonctionPULSE(impulsion),pousserleboutonverslebaspendantle
tempsdésiré.
RelâcherPULSE(impulsion)etattendrequelalames’arrête.Répétercecycleautantde
foisquevousledésirez.
IMPORTANT:Nepasutiliserlemixeurdemanièrecontinuependantplusde3minutes.
CONSEILS D’EMPLOI
• Verserlesliquidesdanslerécipientenpremier,àmoinsquelarecettevousindique
uneautrefaçon
• Pulvériser la glace:broie6glaçonsouapproximativement
2tassesdeglaceàlafois
• Nepasretirerlecouverclependantl’usage.Retirerla
trémiepourajouterdepluspetitsingrédients(Schéma6)
• Aliments chauds:Ouvrirlatrémiepourlaisser
échapperlapression.Nepasl’inclinerversvous.
Maintenirlesmainsloindel’ouverturepouréviter
depossiblebrûlures.Lorsquevoustravaillezavecdes
liquidestrèschauds,retirerlecapuchonetcommencer
àmélangeràpetitevitessepuisaccélérer.Nepas
ajouterplusdeliquidequeles4tassesindiquéesparle
niveau(1litre)
• Couperenmorceauxlesfruits,leslégumes,laviande,lepoissonetlesfruitsdemer
cuits.Nepasfairedemorceauxplusgrandsque1.8à2.5cm.Coupertouttypede
fromageenmorceauxpasplusgrandsque1.8cm
Schéma6

13
ENTRETIEN ET RANGEMENT DE VOTRE MIXEUR
IMPORTANT: DEBRANCHER AVANT DE NETTOYER LA BASE MOTEUR et NE PAS
PLONGER LA BASE DU MOTEUR DANS DE L’EAU OU TOUT AUTRE LIQUIDE.
Pournettoyerl’extérieurdelabase,essuyeravecuneépongedouceetsavonneuse.
Tousleséléments,àl’exceptiondelabase,sontrésistantsaulave-vaisselle.Mettrele
jointd’étanchéitédanslepanierinférieurdulave-vaisselle.Vouspouvezaussileslaverà
l’eautièdesavonneuse.Rinceretsécher.
NETTOYAGE FACILE
Verser0.7litred’eauchaudedansleboldumixeur.Ajouter1à2gouttesdeproduità
vaisselle.Mélangerledétergentpendant10à15secondes.Viderl’eausavonneusedu
récipientdansl’évier.Bienrinceràl’eauclaire.
REMARQUE:cetteméthodenesubstituepasunnettoyagerégulieretenprofondeur
commeceluidécritci-dessus.Ilestparticulièrementimportantdedémonteretnettoyer
soigneusementvotremixeurlorsquevousavezutilisédulait,desproduitslaitiers,dela
viande,desfruitsdemeroudesœufs
.
RANGEMENT
Apresl’avoirnettoyé,assemblerlalameaveclerécipient,lecouvercledufondetlejoint
d’étanchéité.Laisserlecouvercleouvertpourquelesodeursnerestentpasàl’intérieur.

14
COMMENT MELANGER LES ALIMENTS DANS
VOTRE MIXEUR
Aliments Quantité
mixée Quantité non mixée Instructions
particulières
Pommes 200ml 250mlenmorceauxde
2.5cm Impulsions:2fois
Jusdepomme 375ml 1p–moyenne-pelée,
évidée,coupéeenhuitet
250mldeliquide
Liquéfierencontinue
Miettesdepain 125ml 1tranche,en8morceaux Impulsions:1à4
fois
Chou,rougeet
blanc
375ml 750mlenmorceauxde
2.5cm Hacherencontinue
avec2-4tasses
d’eau.Egoutter.
Carottes 250ml
500ml 250ml
500ml Impulsions:2fois
Impulsions:4fois
avec2à4tasses
d’eau.
Egoutter
Céleri 200ml 250mlenmorceauxde
2.5cm Impulsions:2-3fois
Fromage,Cheddar 250ml 250mlenmorceauxde
2.5cm Impulsions:2fois
Fromage,Gruyère 250ml 250mlenmorceauxde
2.5cm Impulsions:5fois
Fromage,àpâte
dureousemidure 250ml 250mlenmorceauxde
2.5cm Râperencontinue
Noixdecoco 250ml 250mlenmorceauxde
2.5cm Râperencontinue
Grainsdecafé 250ml 1tassede250ml Moudre45secondes
pour percolateur et
60secondespour
cafetière
Galettes,gaufrette 125ml 10galettes Impulsions:3fois
Biscottes‘Graham’ 125ml 8biscottes Impulsions:3fois
Groseilles,Fraîches 200ml 250ml Impulsions:2fois
Fruitssecs 125mljuste 125ml Chopcontinuously
for15seconds

15
Aliments Quantité
mixée Quantité non mixée Instructions
particulières
Viande,désossée,
cuite
250ml 250mlenmorceauxde
2.5cm Hacherencontinue
Noix,amandes,
cacahuètes,noixde
pecans,noix
250ml 250ml Impulsions:2-4fois
Oignons 375ml 750mlenmorceauxde
2.5cm Impulsions:1fois
avec2à4tasses
d’eau
Poivrons 150ml 250ml Impulsions:1fois
Grainsdepoivre 125ml 125ml Moudreencontinue
Noixdemuscade 15ml 3noix,sansécorce Moudreencontinue
Gingembre 50ml 2-3morceauxde2.5cm Moudreencontinue
REMARQUE: Commelesalimentspeuventvarierentaille,consistanceetfraîcheur,il
estpossiblequevousayezàaugmenteroudiminuerletempsdemixageindiquédansle
tableauci-dessus
COMMENT MELANGER LES ALIMENTS DANS
VOTRE MIXEUR

16
GARANTIE EUROPE
• Veuillezconservervotreticketdecaisse,ilvousserademandélorsdetouteréclamation
sousgarantie.
• Cetappareilestgaranti2ansàpartirdeladated’achat,commeindiquédansleprésent
document.
• Danslecaspeuprobabled’unepannerésultantd’undéfautdeconceptionoude
fabricationaucoursdelapériodedegarantie,veuillezrapporterl’appareilaumagasinoù
vousl’avezachetéavecvotreticketdecaisseetunecopiedecettegarantie.
• Vosdroitsstatutairesnesontaucunementaffectésparcettegarantie.SeulHolmes
Products(Europe)Ltd.(«Holmes»)peutmodifiercesdispositions.
• Holmess’engageàréparerouremplacergratuitement,pendantlapériodedegarantie,
toutepiècedel’appareilquiserévèledéfectueusesousréserveque:
• VousavertissiezrapidementlemagasinouHolmesduproblème;et
• l’appareiln’aitpasétéaltérédequelquemanièrequecesoitouendommagé,utilisé
incorrectementouabusivement,oubienréparéoualtéréparunepersonneautre
qu’unepersonneagrééeparHolmesProductsEurope.
• Cettegarantienecouvrepaslesdéfautsliésàuneutilisationincorrecte,undommage,
uneutilisationabusive,l’emploid’unetensionincorrecte,lescatastrophesnaturelles,
lesévénementshorsducontrôledeHolmes,uneréparationouunealtérationparune
personneautrequ’unepersonneagrééeparHolmesoulenon-respectdesinstructions
d’utilisation.Deplus,cettegarantienecouvrepasnonplusl’usurenormale,ycompris,
maissanslimitation,lespetitesdécolorationsetéraflures.
• Cettegaranties’appliqueuniquementàl’acheteurd’origineetellen’étendaucundroità
toutepersonneacquérantl’appareilpourunusagecommercialoucommunal.
• Lesdéchetsd’équipementélectriquenedoiventpasêtremélangésauxordures
ménagères.Veuillezrecyclersivousenavezlapossibilité.
• Envoyez-nousunemailà[email protected]pourplusd’informationssurle
recyclageetladirectiveWEEE
HolmesProducts(Europe)Limited
1FrancisGrove
London
SW194DT
ReinoUnido

17
PRECAUCIONES IMPORTANTES
Cuandoseutilizacualquierartefactoeléctricosiempresedebenseguirprecaucionesbásicasde
seguridadparaevitarelriesgodeincendio,descargaeléctricay/olesiones,incluyendolassiguientes:
LEA TODAS LAS INSTRUCCIONES ANTES DE UTILIZAR SU ELECTRODOMESTICO.
• Desenchufeelcableeléctricodeltomacorrientecuandonoestéutilizandosulicuadoraoantes
delimpiarla
• Paraprotegersecontraelriesgodeunadescargaeléctrica,NOsumerjael
cable, el enchufe o el artefacto en agua u otros líquidos
• NOpermitaqueelcablecuelguedelbordedelamesaomostradoroqueentreencontactocon
superficies calientes
• Nuncadejeningúnartefactoeléctricodesatendidocuandoestéoperando
• Serequieresupervisióncuandoestésiendoutilizadoporniñosocercadeellos,asícomopor
personasincapacitadas.NOpermitaquelosniñoslautilicencomojuguete
• Mantengalasmanosylosutensiliosfueradelvasomientraslalicuadoraestéenfuncionamien-
to,parareducirelriesgodelesionespersonalesseverasy/odañosalalicuadora.Sepuede
utilizarunaespátuladegoma,peroúnicamentecuandolalicuadoranoestéfuncionando
• Lascuchillassonafiladas,manipúlelasconprecaución
• Siemprecoloquelatapadelvasoantesdeoperarlalicuadora
• NOopereningúnartefactoconuncordónoenchufedañado,despuésdequeelartefactohaya
falladoosisecaealsueloosedañadecualquierotramanera.RegreseelartefactoalCentro
deServicioAutorizadomáscercanoparaexaminarlo,repararlooparaajustarlomecánica
oeléctricamente
• NOlautilicealairelibreoparapropósitoscomerciales;esteartefactoesexclusivamentepara
usodoméstico
• NOutiliceesteartefactoparaotropropósitoquenoseaparaelqueestádescritoeneste
manual
• Allicuarlíquidoscalientes,retirelacopadeaccesoqueseencuentraenelmediodelatapa
• Parareducirelriesgodelesiones,nuncapongalascuchillasdelaunidaddecortesinqueel
vasoestécorrectamenteinstaladoenlabase
• Siempreoperelalicuadoraenunasuperficieplana
• Desconectelaunidaddeltomacorrientecuandonoestéenuso,antesdesacarocolocarac-
cesoriosyantesdelimpiarlo
• Elusodeaccesoriosnorecomendadosovendidosporelfabricantedelartefacto,incluyendoun
envaseovasoregularyaccesoriosparaprocesar,noesrecomendadoporSunbeamProducts
Inc.,operandobajoelnombredeJardenConsumerSolutions,ypuedecausarriesgosdedaños
corporales a las personas
• Nohagafuncionarsulicuadoracontinuamentepormásde3minutos
ESTA UNIDAD ESTA DISEÑADA SOLO PARA USO DOMESTICO.
Elvalormáximomarcadoenelproductoestábasadoenelaccesorioquelebrindalamáxima
cargaalartefacto.Otrosaccesoriospodríanproporcionarlemenospoder.
INSTRUCCIONES ESPECIALES PARA EL CABLE
Porfavorsigalassiguientesinstruccionesparaunusosegurodelcableeléctrico.
• NOutilicecablesdeextensiónconesteartefacto
• NOhalenituerzaelcableeléctrico
CONSERVE ESTAS INSTRUCCIONES

18
A
A.Copadeaccesoparaañadiringredientesensulicuadora
B.Tapaapruebadegoteos
C.Resistentevasodevidrioanti-rallasde1,25L(5tazas),óptimoparalavar
enlavaplatosautomático
D.Anillodegomaparasellar
E.Cuchillasdeaceroinoxidablequepulverizanelhielo
F.Roscainferiorparaelvaso
G.Poderosomotorconelexclusivosistema“MetalcontraMetal”paraunuso
profesionalymuchomásprolongado
H.Paneldecontrol
DESCRIPCION DEL ARTEFACTO
C
H
E
D
G
F
B
H
/
Pulse
Off
PANEL DE
CONTROL

19
INSTRUCCIONES DE OPERACION
Limpiesulicuadoradeacuerdoalasinstruccionesseñaladasenlasección“Limpiandoy
AlmacenandosuLicuadora”.
ENSAMBLAJE DEL VASO
Inviertaelvasodemaneraquelaaberturapequeñaquedehaciaarriba.(Figura1)
Coloqueelanillodegomaparasellarencimadelaaberturadelvaso.(Figura2)
Coloquelascuchillasenelvaso.(Figura3)
Figura1 Figura2 Figura3
Figura4 Figura5
Coloquelaroscainferiorparaelvasosobrelacuchillayelanillodegomaygírelaen
direcciónalasmanecillasdelreloj.(Figura4)
Coloqueelvasocontodaslaspiezasensambladasenlabase.(Figura5)
Coloquelosingredientesadentrodelvaso.
Coloquelatapaconlacopadeaccesoenelvaso.
Enchufeelcableeneltomacorriente.
Table of contents
Languages:
Other Oster Blender manuals

Oster
Oster 4123 Manual

Oster
Oster OSTERIZER 6640 User manual

Oster
Oster BLSTDG User manual

Oster
Oster BLSTEG7881C User manual

Oster
Oster BLSTAB-CB0 User manual

Oster
Oster PRO 1200 User manual

Oster
Oster Digital Blender User manual

Oster
Oster Designer Series User manual

Oster
Oster BLSTEG7805 SERIES User manual

Oster
Oster BLSTEG7827 Series User manual

Oster
Oster BLST120-BBK-073 User manual

Oster
Oster 6805-50 User manual

Oster
Oster BLST4090 User manual

Oster
Oster 2605 User manual

Oster
Oster 1791 User manual

Oster
Oster BLSTET User manual

Oster
Oster BSLTTG User manual

Oster
Oster BEST02-E01 User manual

Oster
Oster BLSTPEG-BD0-033 User manual

Oster
Oster OSTERIZER User manual