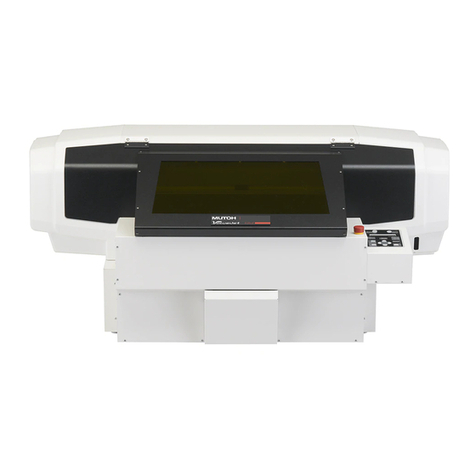
Ouring 3D TALK DS200 User manual

Jiangsu Ouring 3D Technology co.,Ltd
1
User Guide of 3D TALK DS200
Version:V3.0

Jiangsu Ouring 3D Technology co.,Ltd
2
Catalogue
1. Product Description.................................................................................................. 3
2. Product View……….................................................................................................... 5
3.Printer Preparation……………………….…………………………………………………………….…….…12
4. Software introduction…………………………………………………………………………………………19
5.Printing Process………………………………………………………………………….…………………….….45
6. Resin vat release film replacement instruction……………………….…………………………..48
7.Printer use instruction………………………………………………………………………………………….49
8.Warranty………………………………………………………………………………….………………………….52

Jiangsu Ouring 3D Technology co.,Ltd
3
1. Product Description
General
3DTALK-DS200 series printer is a high-tech digital 3D resin printer developed and
produced by Jiangsu Ouring 3D Technology Co., Ltd. (referred to as Ouring). Users of
3DTALK-DS200 are advised to read the product manual carefully before start. Ouring
reserves all rights. This manual is subject to upgrade without prior notice.
Precautions
Note: Do not allow children to operate the printer without adult supervision to avoid
injury.
Note: The printer should be placed on a horizontal table to avoid falling or causing
the resin flowing out from the vat.
Note: Do not place the printer in a damp or dusty environment, such as a bathroom
or transportation area.
Note: Please place and use the printer in a well ventilated environment. A small
amount of non-toxic odor will be produced during printing. Having a well-ventilated
area will ensure a more comfortable environment.
Note: Please lower the cabin door during printing. Do not use a metal blade to clean
the resin vat.
Note: To ensure the maximum print quality, please use original resin.

Jiangsu Ouring 3D Technology co.,Ltd
4
Note: Wear appropriate protective printer to avoid contact with resin. For example:
goggles, masks, protective gloves.
Note: Do not pour waste resin into the bottle and sink to avoid contaminating the
intact resin in the bottle and clogging the sewer, please place the waste resin in a
plastic bag and discard it in the sun after cured.
Note: For unrecoverable problems, please contact the factory after-sales staff or
sales representative.
Warning: Do not place objects on the top of the printer to avoid falling into the
printer and causing printing problems and safety hazards.
Warning: Keep the printer, resin, and alcohol away from fire.
Warning: Please use the power cord that comes with the printer, and ensure that the
power supply voltage is stable. The live, neutral, and ground wires are properly
connected properly, otherwise the printer may be damaged.
To ensure safety, kindly operate the printer carefully. Read and follow all safety
precautions described in the precautions.

Jiangsu Ouring 3D Technology co.,Ltd
5
2.Product View
USB connector
Touch screen
Open Handle
Screen button
Building plate
Resin vat

Jiangsu Ouring 3D Technology co.,Ltd
6
Spare Parts
Flat shovel X 1
Open end wrench
(6-7mm)
Hex wrench(2、2.5、3mm)
Protective gloves X 2 set
Protective glasses X 1
USB Drive X 1
Resin vat X 2
Cleaning Vat X 1
Resin Scraper X 1
Cleaning brush X 1
Sandpaper(80 mesh)X 2
Dental Model Resin
1000ml
Power socket

Jiangsu Ouring 3D Technology co.,Ltd
7
Pliers X1
Note:
The photos of accessories listed here should be based on the real accessories.
Performance Parameter
3D Technology LCD
Printer Size (L * W * H)= 525 * 460 * 725mm
Working Tem
Print Size
XY Resolution 75um 2560 X 1600px
Z-axis Resolution
0.05mm、0.1mm)
Light source 405nm UV LED
Interface USB
Control 5 inch touch screen
File format stl、.obj、amf、3mf etc
.zip
Resin vat
Cooling system Liquid cooling system
Sealing Dustproof, anti-static
0.6um(layer thickness suggested :0.016mm、0.025mm、
Detachable integrated resin vat
18℃~ 28℃
(X * Y * Z)= 192 * 120 X*188mm

Jiangsu Ouring 3D Technology co.,Ltd
8
Resin Professional Dental model resin, Dental Ortho Resin, Dental
Guide resin
Transfer
Power input
Environmental Requirements
Avoid placing the resin in the following environment: high temperature
environment, local heat source, oxidizing environment, freezing environment,
direct sunlight, ultraviolet radiation, inert gas coverage, dust environment.
The stability of print quality is affected by the heat and humidity, so please
ensure the proper operating conditions. (Temperature 18 - 28 ° C / humidity 40 -
80% RH)
Please place the printer in a clean office environment that meets the above
conditions.
In view of the size of the printer, please prepare a table top with a width of
≥500mm2 and a height of about 600mm.
One computer.(system version-Windows7 or above)
CPU - lnter i3 above
RAM - 4GB above
Graphics card – Nvdia series,1G and above,supporting OpenGL4.1)
Model cleaning alcohol (90% ~ 95%), alcohol vat, ultrasonic cleaner (optional),
UV curing box (optional) etc
Touch Screen Introduction
Boot Interface
In the [File] tab, select the print file stored in the printer and the inserted USB
disk of the printer for printing.
AC110/240V 50/60Hz 400W
USB drive, wifi

Jiangsu Ouring 3D Technology co.,Ltd
9
[Local file] is stored in the model print file of the printer. All files printed by the
printer will be stored in this location.
[Udisk file] After the USB disk is inserted into the printer, the print model file will
be recognized by the printer
Operate the related selected files by using the [Print],[Pause],[Stop], and
[Delete] buttons.
Set interface
[Network] controls the printer through the LAN. (Development tools are not
supported for use current now.)
[Language] Users can set the language version of the printer to a localized
language.
[Material Vat Clean] When there are many impurities in the bottom of the

Jiangsu Ouring 3D Technology co.,Ltd
10
printer resin vat, this function can be used to cure the resin at the bottom of the
vat, solidify the impurities and remove the cured resin.
[Operation Control] Controls the Z-axis of the printing build plate to move up &
down and return to zero.
Note:
The bottoming operation in Operation Control must confirm that there is no solid
impurities inside the printing build plate and resin vat. It can be operated after being
leveled
[Light Path Control]
[Water Cooled Switch] Manually turn on the water-cooling system of the printer
[Light board switch] manually open the LED light board
[Preset Image] Calibrate the light intensity pattern
[Full Screen Image] Check whether the screen is damaged or not
[Setting]
[Administrator Login] Enter the parameter login password: 123456
[Parameter] User can set the printing parameters in printer (draw “√” in
[Parameter Settings] and save, the model file will be printed according to the
parameters of this page, and the printing parameters set in the software will be
invalid.)
[Parts Replace] Count the use time of the lamp board and screen. When it needs to
be replaced, please click the corresponding button to time the parts.
[Light Calibration] Calibrates the light intensity of the light board.

Jiangsu Ouring 3D Technology co.,Ltd
11
About Interface
Display the model, hardware version, software version, and IP address of the
device
Dental Resin Introduction
Resin Mode
Color
Character
Dental
Application
Dental Model Resin
Beige
High precision, smooth
surface, no irritating odor
Prosthodontic
s
Dental Ortho Resin
Beige
High temperature
resistance 150 ° C, high
strength, high toughness,
matte surface, no irritating
odor, punchable
Orthodontics
Dental Guide Resin
Transparent
High transparency, high
strength, high toughness,
non-toxic treatment by
traditional means
Medical
Guiding

Jiangsu Ouring 3D Technology co.,Ltd
12
3.Printer Preparation
Printer installation
1.Take out the fixed strip and protective cotton of the printer from the packing box
and place the printer on the horizontal tabletop.
2.Open the printer compartment door and take out all the protection devices and
random accessories from the printer
3. Remove the protective film on the display screen
4. Wipe the new resin vat inside and outside with the wet wipes and dry it naturally.
Then mark the following figure and place the vat correctly in the printer
compartment (see the picture below).
5. Rotate the four positioning screws downwards to fix the vat to ensure that the vat
does not shake (see the picture below).

Jiangsu Ouring 3D Technology co.,Ltd
13
Build Plate Leveling
Note: When the model fails to print before the first printing and during the use of
printer, please perform the build plate leveling operation. If the printing work is
normal, you do not need to do this. When leveling the build plate, please make sure
that there are no materials, no impurities, and no objects in the vat to prevent the
falling printing build plate crushing the release film and other parts.
Follow the steps below to complete the build plate leveling:
Printer components introduction
(1) Locking handle
(2) Hand screw
(3) Locking screw
(4) Locating pin
(5) Printing build plate
1.Rotate the four locking screws on the Z-axis bracket through the tool wrench
counterclockwise and loosen them to the height of the screw as far as possible from
the bottom black bracket (see the picture below)

Jiangsu Ouring 3D Technology co.,Ltd
14
2. Manually rotate the four units hand screw on the Z-axis bracket counterclockwise
to the highest position (See below picture)
If the hand screw cannot be rotated counterclockwise, please hold the printing build
plate, loosen the locking handle and then try to rotate.
3. After the hand screw is rotated, please be sure to position each positioning pin
and the positioning hole, tighten the locking handle to make sure that the printing
build plate is not shaken.
Warning: Do not turn the locking handle counterclockwise to prevent the printing
build plate from falling off and damaging the printer.

Jiangsu Ouring 3D Technology co.,Ltd
15
4.Click the [Reset] button, when the printing build plate stops moving upwards, click
the [Bottom] button, the printing build plate can freely descend into the vat. (See the
picture below)
5.When the printing build plate is lowered into the vat, loosen the locking handle to
ensure that the printing build plate and the release film are fully fitted (see the figure
below)

Jiangsu Ouring 3D Technology co.,Ltd
16
6. Align the four positioning pins on the Z-axis bracket with the four positioning holes
on the printing build plate. (See below pictures)
7. Rotate the four units hand screw down to ensure that the printing build plate is
completely attached to the bottom surface of the vat without sloshing (see the
picture below).

Jiangsu Ouring 3D Technology co.,Ltd
17
8. Use hand to turn the locking handle clockwise to tighten it (see the picture below)
9. Use a tool wrench to rotate the four locking screws clockwise to tighten (see the
picture below)

Jiangsu Ouring 3D Technology co.,Ltd
18
10. Click once the arrow ▲above the [Reset] button, and then click the [Reset]
button to raise the build plate to the top of the printer, and finish the leveling.
Filling resin material
1. Shake the material inside the bottle before pouring it into the resin vat,to keep
the density of resin uniform
2. Make sure there is no obvious solid impurity in the vat before pouring the resin
material.
3. Wear the protective gloves, goggles, and mask, then pour the resin material into
the vat; (the amount of resin material should be poured according to the level mark
of the vat)

Jiangsu Ouring 3D Technology co.,Ltd
19
4. Keep the printer door closed, if there is any resin material in the vat.
Warning: When there is resin material in the vat, it is forbidden to open the
cabin door frequently to prevent daylight curing.
4.Software introduction
Software overview
The main function of the slicing software is to convert the model file into the slice
format required for 3D printer processing, it includes simple model editing functions
(such as scaling, rotation, mirror symmetry, model copying, etc.) and auxiliary
processing (such as automatic layout, automatic support, etc.) and other functions.

Jiangsu Ouring 3D Technology co.,Ltd
20
Sliced software homepage
Software installation process
1. Choose [Next] button
Table of contents
Other Ouring 3D Printer manuals
