manuals.online logo
Brands
  1. Home
  2. •
  3. Brands
  4. •
  5. Outdoor Furniture Plus
  6. •
  7. Outdoor Furnishing
  8. •
  9. Outdoor Furniture Plus Vinyl A-Frame Firmware update

Outdoor Furniture Plus Vinyl A-Frame Firmware update

FM - 84
Firmly tap bolts into pre-drilled
holes before tightening.
CORRECT INCORRECT
1 2 34 5
Use to measure bolts
HARDWARE PACKAGE
2 ⅜" x 7" Machine Bolts 2 ⁄" Washers
2 ⁄" x 5½" Machine Bolts 2 ⁄" Flange Nuts
20 ¼" x 4" Lag Bolts 20 ¼" Washers
4⅜" Washers 2 ⅜" NY Glides
2 ⅜" Nuts 2 Vinyl Hole Plugs
TOOLS NEEDED:
Hammer, ½" Wrench,
⁄" Wrench, ⁄" Wrench,
& Screw Gun
PACKAGE CONTENT
1 Top Beam 2 Long Leg Braces
4 Legs 4 Top Braces
2 Short Leg Braces 1 Hardware Package
¼" x 4"
Lag Bolts
Top Beam
To avoid personal injury or
damage to your A-Frame,
assembly requires two people.
!
Long Leg Brace
Short Leg
Brace
¼" x 4"
Lag Bolts
Leg
⁄" x 5½" Machine Bolts
¼" x 4" Lag Bolts
" x 5½" Machine Bolts
⅜" x 7"
Machine Bolt
See
Leg/Top Beam
Inset
Leg/Top Beam
Inset
Top Brace
Top Brace
#VAF920
Assembly Directions for
Vinyl A-Frame
FM - 85
Step #5
Step #6
Step #7
Fasten the Top Braces to the Top Beam using ⁄" x 5½"
Machine Bolts and ⁄" Washers & Flange Nuts.
Fasten the Short Leg Brace to the Top Brace
using ¼" x 4" Lag Bolts (and ¼" Washer). As
shown in the inset, ensure that the bottom of
the Short Brace is even with the bottom edge
of the Top Brace.
Install the NY Glides.
Fasten legs using ⅜"x 7" Machine Bolts (on both sides of
swing). Note: Two of the legs will have ve (5) predrilled
holes (see inset). Make sure one of these legs is located on
each end of structure.
Step #1 Step #2
Tighten Nuts using a ⅜" socket and cord-
less drill.
A. Line up Braces with the predrilled holes and fasten
using ¼" x 4" Lag Bolts with a Washer.
B. In the event that your A-Frame does not include a
Vinyl A-Frame Roof, insert the two Vinyl Hole Plugs into
the extra predrilled hole.
Step #3 Step #4
Stand up your A-Frame as shown.
To avoid personal injury or
damage to your A-Frame,
assembly requires two people.
!
Top Brace
Short Brace
¼" x 4"
Lag Bolts
FM - 86
1 2 34 5
Use to measure bolts
Assembly Directions for
Vinyl A-Frame Roof
HARDWARE PACKAGE
2 ⁄" x 2" Carriage Bolts 6 ¼" Washers
6 ¼" x 4" Lag Bolts 70 1½" Screws
2 ⁄" Flange Nuts 30 2" Screws
TOOLS
NEEDED:
Hammer,
Tape Measure,
½" Wrench,
⁄" Wrench,
& Screw Gun
PACKAGE CONTENT
2 Sides 2 Roof Braces
2 Center Supports 10 Narrow Roof Slats
2 Ends 11 Wide Roof Slats
4 Center Support Blocks 1 Hardware Package
3 Spacers
Model #VAR100
To avoid personal
injury or damage to
your A-Frame, assembly
requires two people.
!
Step #2
Step #3
Step #4
Step #1
Assemble perimeter framing of roof
using three (3) 2" screws at each corner.
en, place center supports within the
perimeter, align with predrilled holes,
and secure using 2" screws.
2" Screws
Side
End
Step #1
Center Support
Spacer
Step #2
Place the three (3) spacers in premarked
positions. Ensure that spacers are ush
with the top of the roof and secure by
driving 2" screws through the predrilled
pocket holes.
Pocket Holes
w/ 2" Screws
Spacer and Roof
must be flush
Step #3
Place 8" wide slats approximately 1⅛"
apart. Note that the slats should extend
¼" beyond the ends of frame and 1⅛"
beyond the front. Once in place, secure
using one (1) 1½" screw per end.
Step #4
en, place narrow slats over the 1⅛"
gap (per step #3) and secure using two
(2) 1½" screws per end.
¼" Overhang
1⅛" Overhang
1⅛" Gap
1½" Screw
1½" Screws
Wide Slats
Narrow Slats
FM - 87
Step #5
Once assembled and with the help of two people, carefully
lift roof on top of A-frame with the long end at the front
end of the unit.
en, fasten Roof Braces on the roof using a ⁄" x 2"
Carriage Bolt (both ends of roof).
To avoid personal injury or damage to your
A-Frame, assembly requires two people.
!
Step #5
⁄" x 2" Carriage Bolt
Roof Brace
Step #6 Step #6
Locate Support Blocks, center them, and secure to top
beam using 1½" screws.
Support Blocks
Step #7
First, fasten both Roof Braces to the A-Frame’s Legs using
¼" x 4" Lag Bolts at the predrilled locations.
Once secure, the Roof will be properly positioned to be
fastened to the A-frame. Accordingly, secure Roof to the
Center Beam using two (2) ¼" x 4" Lag Bolts on both
ends.
¼" x 4" Lag Bolt
Roof Brace
¼" x 4" Lag Bolts
Step #8
Your Roof is now installed and your A-frame is complete!
Step #7
Step #8

This manual suits for next models

1

Other Outdoor Furniture Plus Outdoor Furnishing manuals

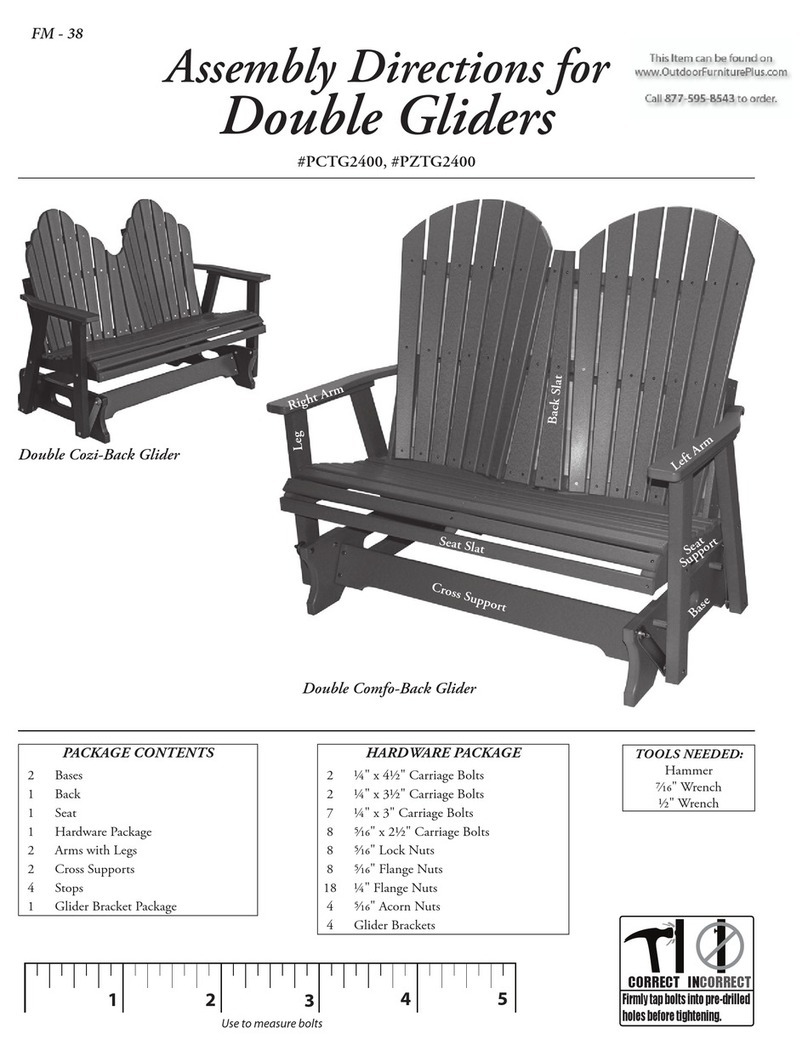
Outdoor Furniture Plus Double Cozi-Back Glider Firmware update

Outdoor Furniture Plus

Outdoor Furniture Plus Double Cozi-Back Glider Firmware update

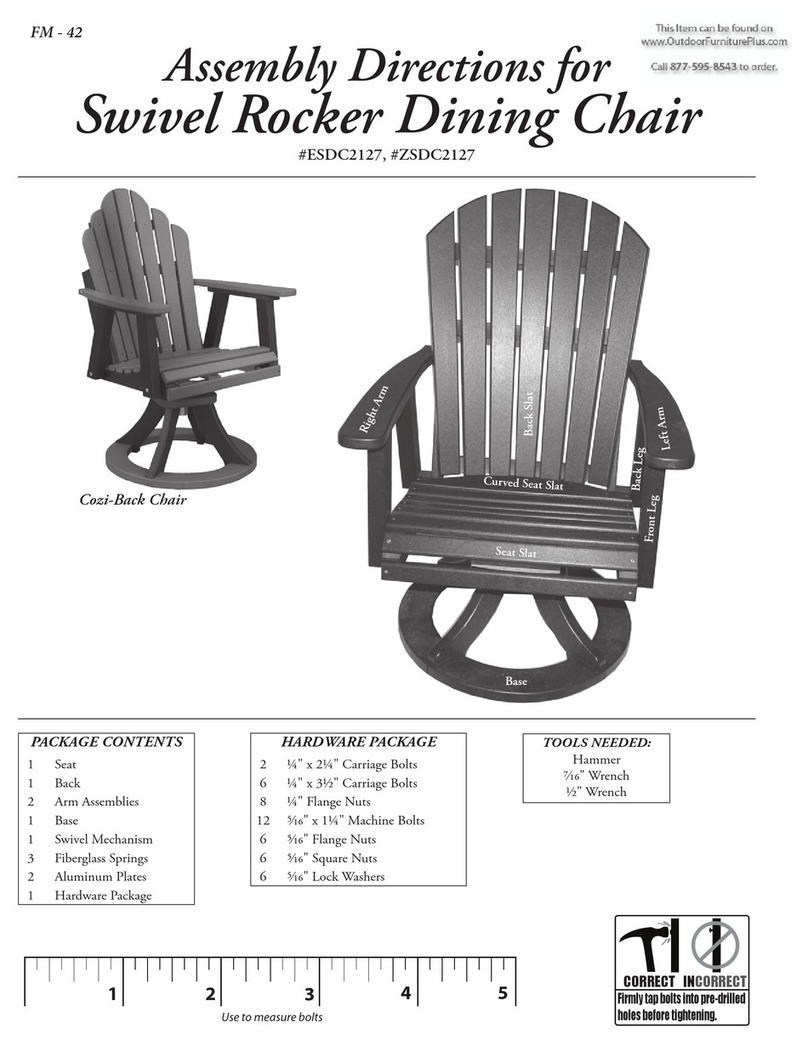
Outdoor Furniture Plus ESDC2127 Firmware update

Outdoor Furniture Plus

Outdoor Furniture Plus ESDC2127 Firmware update

Outdoor Furniture Plus PCTC2400 Firmware update

Outdoor Furniture Plus

Outdoor Furniture Plus PCTC2400 Firmware update

Outdoor Furniture Plus PECC2131 Firmware update

Outdoor Furniture Plus

Outdoor Furniture Plus PECC2131 Firmware update

Outdoor Furniture Plus Vinyl Swing Arbor Firmware update
Outdoor Furniture Plus

Outdoor Furniture Plus Vinyl Swing Arbor Firmware update

Popular Outdoor Furnishing manuals by other brands

siena GARDEN YOBAYA M39590 Assembly instruction

siena GARDEN

siena GARDEN YOBAYA M39590 Assembly instruction

Coopers of Stortford H311 Assembly instructions/Instructions for use

Coopers of Stortford

Coopers of Stortford H311 Assembly instructions/Instructions for use

Safavieh Outdoor Hadley Bench PAT5002 Assembly instructions

Safavieh Outdoor

Safavieh Outdoor Hadley Bench PAT5002 Assembly instructions

Outsunny A20-211 manual

Outsunny

Outsunny A20-211 manual

PHI VILLA PV-358 Use and care guide

PHI VILLA

PHI VILLA PV-358 Use and care guide

Sunjoy A104001400 Assembly instructions

Sunjoy

Sunjoy A104001400 Assembly instructions

Glasdon ADVOCATE SIDEWALK SIGN quick start guide

Glasdon

Glasdon ADVOCATE SIDEWALK SIGN quick start guide

Yardistry YM12941X Installation and operating instructions

Yardistry

Yardistry YM12941X Installation and operating instructions

Loll Designs PITCH installation instructions

Loll Designs

Loll Designs PITCH installation instructions

ZINUS ODDOC1-23B Assembly instruction

ZINUS

ZINUS ODDOC1-23B Assembly instruction

Home Accents TY555 + 560 -1511 Use and care guide

Home Accents

Home Accents TY555 + 560 -1511 Use and care guide

Sunjoy L-GZ375PST Assembly instructions

Sunjoy

Sunjoy L-GZ375PST Assembly instructions

real living 52577 Assembly instruction

real living

real living 52577 Assembly instruction

sweeek. EMILIA BS110R4 manual

sweeek.

sweeek. EMILIA BS110R4 manual

vita Athens Trellis Assembly instructions

vita

vita Athens Trellis Assembly instructions

Forest garden ULTIMA PERGOLA UPK01 quick start guide

Forest garden

Forest garden ULTIMA PERGOLA UPK01 quick start guide

tropitone Kenzo Series Assembly instructions

tropitone

tropitone Kenzo Series Assembly instructions

PREMIER POLYSTEEL Buddy Bench quick start guide

PREMIER POLYSTEEL

PREMIER POLYSTEEL Buddy Bench quick start guide

manuals.online logo
manuals.online logoBrands
  • About & Mission
  • Contact us
  • Privacy Policy
  • Terms and Conditions

Copyright 2025 Manuals.Online. All Rights Reserved.