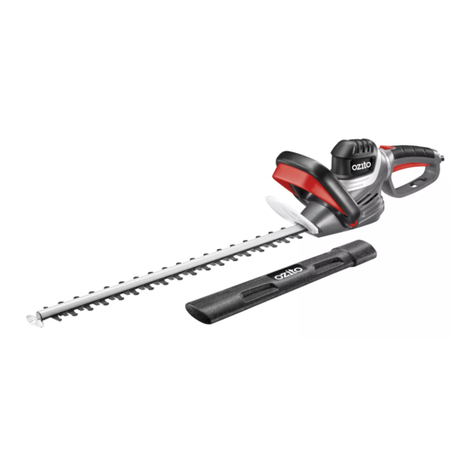
Ozito PLT-380 User manual

1
PETROL
LINE TRIMMER
25.4CC 2 Stroke
INSTRUCTION MANUAL
SPECIFICATIONS
Engine: 25.4cc 2-stroke
Power Output: 0.75kW (1HP)
Fuel & Oil Mix: 40:1
Fuel Tank Capacity: 0.45L
Max. No Load Speed: 7500/min
Cutting Width: 380mm
Weight: 5.7kg
PLT-380
WHAT’S IN THE BOX
ozito.com.au
Handle Assembly
Line Trimmer
Safety Guard
Shaft Screw
Line and Spool
Shoulder
Strap
Spark Plug
Wrench
Spanner
Fuel Mixture
Bottle
Lower Shaft
Spool Key

1
ONLINE MANUAL
Scan this QR Code with your
mobile device to take you to
the online manual.
1 Strap fastening eyelet
2 Recoil starter
3 Spark plug boot
4 Choke lever
5 Airlterhousingcover
6 Fuel tank
7 Throttle lock-off
8 Throttle lever
9 Ignition switch
10 Upper shaft
11 Forward handle
12 Shaft connecting piece
13 Shaft screw
14 Lower shaft
15 Fuel pump “primer”
16 Safety guard
17 Spool retainer screw
18 Spool
19 Line cutter blade
Assembly of the long handle
1. Remove the transport guard cap from
the lower shaft.
2. Carefully slide the lower shaft into the
connecting piece on the upper shaft.
When doing so, take care to ensure
that the drive shafts on the inside slide
into each other (turn the shafts gently,
if required) and that the lock on the
lower shaft latches securely into the
connecting piece.
3. Insert the shaft screw into the connecting piece
and tighten.
4. To dismantle, proceed in reverse order.
Fitting the safety guard
1. Slide the safety guard onto the
bottom of the lower shaft.
2. Screw the safety guard tightly in
position using the screw and locknut
supplied.
Line cutter protector
Thelinetrimmeristtedwithaprotectioncoveronthesafetyguardline
cutter. This cover must be removed before operating as the line will not
betrimmedtothecorrectlengthwhileitisstilltted.
KNOW YOUR PRODUCT ASSEMBLY
1. ASSEMBLING THE TRIMMER
PETROL LINE TRIMMER
7
12
9
14
16
17
WARNING! DO NOT START THE ENGINE UNTIL
THE LINE TRIMMER IS FULLY ASSEMBLED.
ACCESSORIES
20 Spark plug wrench
21 Open ended spanner
22 Fuel mixture bottle
23 Shoulder strap
24 Spool changing key
32 4 5 61
8
10
11
13
15
18
19
20 21 22 23 24

1
Fitting the forward handle
1. With the supplied spanner, remove the
nut and the fastening screw from the
forward handle.
2. Clip the forward handle onto
the upper shaft.
3. Insert the fastening screw through
the forward handle and then screw
it securely into the nut and tighten.
Fitting the spool
1. Insert the spool assembly onto
the end of the drive shaft.
2. Screw the retainer screw into
the end of the drive shaft in a
clockwise direction.
3. The spool comes locked
inside its cover.
Unlock the spool from the spool
cover by applying downward
pressure and turning the spool
slightly, it should spring out of
its locked position.
2. FORWARD HANDLE AND SPOOL
Fitting the shoulder strap
The shoulder strap is intended
to help you work safely and
ergonomically with the petrol line
trimmer.
Hook the shoulder strap into the
fastening eyelet.
Check that all moving parts move
smoothly before you start using the
machine. Check that all screws are
securely fastened and also check
all the safety devices.
Setting the cutting height
1. Slip the shoulder strap over your
shoulder.
2. Set the length of the shoulder
strap in such a way that the
cutting head runs parallel to the
ground. In order to establish the
optimum length of the shoulder
strap, you should then make a
few swinging movements without
starting the engine.
3. SHOULDER STRAP
WARNING! DO NOT USE ANY KIND OF METAL WIRE
OR METAL WIRE ENCASED IN PLASTIC IN THE LINE
SPOOL. THIS MAY CAUSE SERIOUS INJURIES TO THE
USER AND WILL VOID THE WARRANTY.
WARNING! ALWAYS USE THE STRAP WHEN
WORKING WITH THE LINE TRIMMER. ATTACH THE
STRAP AS SOON AS YOU HAVE STARTED THE ENGINE
AND IT IS RUNNING IN IDLE MODE. SWITCH OFF THE
ENGINE BEFORE YOU TAKE OFF THE SHOULDER
STRAP.
IMPORTANT: THE SAFETY GUARD MUST BE FITTED
BEFORE YOU WORK WITH THE CUTTING LINE.

1
Motor fuel: mix at 40:1 fuel to oil ratio
NOTE: Only use oil that is expressly labelled for use with air-cooled
2-stroke engines.
NOTE: Always transport and store fuels in an approved container
(supplied bottle is for mixing only).
1. Fill with unleaded petrol (91 octane) up
to fuel line (roughly 585ml).
2. Add 2-stroke oil up to oil line (roughly 15ml).
Shakesufcientlyforathoroughmix.
3. Fillthefueltankuptothellerneckwiththe
fuel mix.
Fuel tank capacity: 450ml
4. Fasten the fuel tank cap and clean any
spillage.
SETUP & PREPARATION
4. FUEL & OIL 5. STARTING & STOPPING
OPERATION
NOTE: Before starting up the line trimmer remove the line cutter transport
cover from the line cutter.
Starting the engine when COLD
Thelinetrimmeristtedwithaclutchthatwillallowtheenginetoidle
without the attachment turning. This prevents injuries while starting the
engine.
1. Set the line trimmer down on a hard, level surface.
2. Press the fuel pump (primer)
10 times.
4. Set the choke
lever to on
position “ ”.
5 Holdthelinetrimmerrmlyand
pull out the recoil starter until you
feelitstarttoresist.Pullrmlyon
the recoil starter 4 times. The line
trimmer should start.
6. Once the engine has started, move the choke lever
immediately to “ ” (choke off) and allow the line
trimmer to warm up for approx. 10 seconds.
7. Now depress the throttle lock and throttle
lever to run the line trimmer.
8. If the engine does not start up, repeat steps
4-6 above.
If after a few attempts it does not start, turn
thechokeofftopreventoodingandtry
pullingtherecoilstarterrmly.
WARNING! NEVER ATTEMPT TO FUEL THE LINE
TRIMMER IF THE FUEL SYSTEM COMPONENTS ARE
DAMAGED OR ARE LEAKING.
WARNING! ALLOW THE ENGINE TO COOL BEFORE
FUELLING. NEVER ATTEMPT TO REFUEL THE
ENGINE WHILE IT IS WARM OR STILL RUNNING.
WARNING! NEVER PLACE FLAMMABLE MATERIAL
CLOSE TO THE ENGINE MUFFLER.
3. Move the Ignition switch to “I”.
x10
x4
585ml
Regular
Unleaded
15ml
585ml
Regular
Unleaded
15ml
Pre-startup checks
1.Ensurethatthesafetyguard,shaftandforwardhandlearettedand
are secure.
2. Make sure that the carry strap is connected and adjusted to the correct
height
3.Ensurethatthereissufcientfuel/oilmixinthetankbeforestartingthe
engine.
WARNING! BE SURE TO STOP THE ENGINE BEFORE
REFUELLING. DO NOT SMOKE WHILE REFUELLING.
MOVE AT LEAST 3M AWAY FROM THE FUELLING POINT
BEFORE STARTING THE MOTOR.

1
PLT-380
6. CUTTING METHODS
Starting the engine when WARM
(If the line trimmer has not been switched off for more
than 15 – 20 minutes)
1. Leave the choke in the run “ ” (choke off)
position. Set the line trimmer down on a hard, level
surface.
2. Move the Ignition switch to “I”
3.Holdthelinetrimmerrmlyand
pull out the recoil starter until you
feelitstarttoresist.Pullrmlyon
the recoil starter. The line trimmer
should start after 1-2 tugs. If the line
trimmer does not start after 6 pulls,
repeat steps 1 – 6 of the procedure
for “Starting the engine when
COLD”.
Switching off the engine
Emergency Stop procedure:
If it becomes necessary to stop the line
trimmer immediately, set the Ignition
switch to “STOP”.
Normal procedure:
Let go of the throttle lever and wait until the
engine has changed to idling speed. Then set the
Ignition switch to “STOP”.
Extending the cutting line
To extend the cutting line, run the engine at full
speed and tap the line spool on the ground.
This will automatically extend the line. The line
cutter on the safety guard will cut the line to the
appropriate length.
NOTE: Do not hit the spool on concrete or hard
surfaces as this may result in damage
to the spool or cutting head.
If the line does not feed check that the
line is not jammed.
APPLICATIONS
Trimming
Swing the trimmer from side to side in a
scything motion. Always keep the line spool
parallel to the ground. Check the site and
decide what cutting height you require. Guide
and hold the line spool at the required height
to ensure that you cut evenly.
Low trimming and mowing
For mowing, you want to cut all the
vegetation down to the ground. To do this, set
the line spool at an angle of 30° to the right.
Place the handle in the required position.
Remember the increased risk of injury to the
user, watchers and animals and the danger
of damaging other items due to objects (for
example stones) being thrown out. Always cut
away from yourself. Never draw the trimmer
towards yourself.
Cutting along fences/foundations
When cutting, approach wire mesh fences, natural stone walls and
foundations slowly so that you can cut close to them without striking
the obstacle with the line. If, for example, the line strikes stones, stone
walls or foundations, it will wear or fray.
If the line strikes wire fencing it will break.
Trimming around trees
When trimming around tree trunks, approach slowly so that the line
does not strike the bark. Walk around the tree, cutting from left to right.
Approach grass or weeds with the tip of the line and tilt the cutting
head forwards slightly.
WARNING! TAKE EXTREME CARE DURING MOWING
WORK. WHEN DOING SUCH WORK KEEP A
DISTANCE OF 30 METERS BETWEEN YOURSELF AND
OTHER PEOPLE OR ANIMALS.
WARNING! DO NOT REMOVE ANY OBJECTS FROM
FOOTPATHS, ETC. USING THE LINE TRIMMER. THE
LINE TRIMMER IS A POWERFUL TOOL AND CAN THROW
SMALL STONES AND OTHER OBJECTS A DISTANCE OF
15 METERS OR MORE, CAUSING INJURIES AND DAMAGE
TO CARS, HOUSES AND WINDOWS.
30°
x2

Note: The line spool includes Ø2mm x
400mm general purpose line.
Replacing the cutting line
1. Unscrew the spool retainer screw in a counter-
clockwise direction and remove.
Ifthisprovesdifculttodobyhand,youcan
use the supplied spool key
2. Remove the spool and the spring from the
spindle. Remove the remaining cutting line
from the spool.
3. Hold the two halves of a new cutting line
together in the middle and place the loop in
one of the slots on the spool divider.
4. Wind the line with tension in a clockwise
direction, with the two halves being separated
by the spool divider. Wind up all of the line
down to the last 15cm of each end.
5. Fasten each of the ends of the line in
a slot on the opposite sides of the spool.
6. Fit the spring on the underside of the spool and
thread each of the ends of the line through one
of the eyelets in the spool holder.
7. Insert the spool in the spool holder. Make sure
that the spring slides over the spindle and does
not get stuck.
8. Press the spool into the spool holder with your
hand and use your other hand to fasten the
retainer knob tightly.
9. Give each end of the line a strong pull to pull
the line out of the slots.
10. Cut off all excess line to reduce it to
approx. 13 cm. This will reduce the load
on the engine when starting up and warming up.
MAINTENANCE
7. LINE REPLACEMENT
8. GENERAL MAINTENANCE
WARNING! BEFORE CLEANING YOUR LINE
TRIMMER OR CARRYING OUT ANY MAINTENANCE
PROCEDURE, MAKE SURE THAT THE ENGINE IS OFF
AND IS COOL. DISCONNECT THE SPARK PLUG TO
PREVENT ACCIDENTAL STARTING
Servicing the air lter
Soiledairltersreducetheengineoutputbystarvingairtothe
carburettor.Regularchecksarethereforeessential.Theairlter
should be checked after every 25 hours of use and cleaned if
necessary. If the air contains a lot of dust,
theairltershouldbecheckedmore
frequently.
1.Removetheairltercoverbypressing
the tab at the top and lifting the cover
off.
2.Removetheairlterandcleanitby
tapping or blowing it.
3. Assemble in reverse order.
Maintenance of the spark plug
1. Pull off the spark boot plug.
3. Check the spark plug for dirt and
grime after 10 hours of operation and
if necessary clean it with a copper wire
brush.
Spark plug sparking gap = 0.6mm.
Thereafter service the spark plug after
every 50 hours of operation.
4. Assemble in reverse order.
Sharpening the line cutter
1. The safety guard line cutter can
become blunt over time.
When you notice this, undo the two
screws holding the line cutter to the
safety guard.
2. Clamp the line cutter in a vise.
Sharpenthecutterwithaatleand
make sure that the angle of the cutting
edge is not altered in the process.
File in one direction only.
IMPORTANT: NEVER
CLEAN THE AIR
FILTER WITH PETROL OR
INFLAMMABLE SOLVENTS.
IMPORTANT: REMOVE ALL GRASS AND
WEED REMAINS AT REGULAR INTERVALS TO
PREVENT THE SHAFT TUBE OVERHEATING. GRASS
AND WEED REMAINS BECOME TRAPPED UNDER
THE SAFETY GUARD, AND THEY PREVENT THE
SHAFT TUBE RECEIVING ADEQUATE VENTILATION.
0.6mm
0.6mm
0.6mm
0.6mm
2. Remove the spark plug
with the supplied spark
plug wrench.

CARING FOR THE ENVIRONMENT
Tools that are no longer usable should not be disposed of with
household waste but in an environmentally friendly way. Please
recycle where facilities exist. Check with your local council
authority for recycling advice.
Recyclingpackagingreducestheneedforlandllandraw
materials. Reuse of recycled material decreases pollution in the
environment. Please recycle packaging where facilities exist.
Check with your local council authority for recycling advice.
Spare parts can be ordered from the Special Orders Desk
at your local Bunnings Warehouse.
For further information, or any parts not listed here, visit
www.ozito.com.au or contact Ozito customer service
Australia 1800 069 486
New Zealand 0508 069 486
E-mail: [email protected]
SPARE PARTS
DESCRIPTION OF SYMBOLS
cc Cubic Centimeters
no No load speed
/min Revolutions or reciprocation per minute
dB Decibel level
Read the manual prior to use
Wear safety boots
Wear safety gloves
Warning
Pull recoil starter to start motor
40:1 Fuel Oil mix ratio
Choke control on
Keep bystanders away
Thrown objects can cause
severe injury.
Extremely hot surface.
110
Sound pressure level
Don’t use metal blades
Wear safety glasses
Wear muffs
Do not expose to rain
Choke control off
Electrical Emissions Comformity (EMC)
Do not smoke.
TROUBLESHOOTING
FAULT POSSIBLE CAUSES TROUBLESHOOTING
The
machine
does not
start.
Correct starting procedure not
followed.
Follow the instructions
for starting.
Dirty or old fuel mix. Replace with clean fuel mix.
Dirty spark plug. Clean the spark plug and
adjust the electrode gap or
tanewsparkplug.
Incorrect carburettor setting. Contact an authorized
customer service outlet.
The
machine
starts but
does not
develop its
full output.
Incorrect choke lever setting. Set choke lever to “ ”
Dirtyorcloggedairlter. Cleantheairlter.
Incorrect carburettor setting. Contact an authorized
customer service outlet.
The engine
does
not run
smoothly
Incorrect electrode gap on the
spark plug.
Clean the spark plug and
adjust the electrode gap or
tanewsparkplug.
Incorrect carburettor setting. Contact an authorized
customer service outlet.
Engine
smokes
excessively
Incorrect fuel mix. Use 40 parts fuel to
1 part oil mix.
Incorrect carburettor setting Contact an authorized
customer service outlet.
Cleaning
• We recommend that you clean the device each time that you have
nishedusingit,withamoistclothandsomesoftsoap.Donotuse
cleaning agents or solvents; these could attack the plastic parts of
the line trimmer. Ensure that no water seeps into the device. Keep all
safety devices, air vents and the motor housing free of dirt and dust as
far as possible.
Storage (long term)
In order to avoid deposits forming on the interior of the carburettor, follow
these instructions:
1. Carry out all of the maintenance work and drain the fuel out of the tank.
2. When the fuel has been drained, start the engine and allow it to run at
idling speed until it stops. This will clean the remainder of the fuel out
of the carburettor.
3. Leave the machine to cool (approx. 5 minutes).
4. Remove the spark plug.
5. Place a teaspoon full of 2-stroke engine oil into the combustion
chamber. Pull the recoil starter several times carefully to wet the
internal components with the oil. Fit the spark plug again.
6. Store the machine in a cold, dry place where it is out of the reach of
ignitionsourcesandinammablesubstances.

This appliance is not intended for use by persons (including children) with reduced
physical, sensory or mental capabilities, or lack of experience and knowledge, unless
they have been given supervision or instruction concerning use of the appliance by a
person responsible for their safety.
• Never allow children or people unfamiliar with these instructions to use the line
trimmer.
• Avoid using the line trimmer, while people, especially children or pets, are nearby.
•Usethelinetrimmeronlyindaylightorgoodarticiallight.
• Never operate the line trimmer with damaged guards or without guards in place.
• Switch on the line trimmer only when the hands and feet are away from the cutting
head.
• Use only the manufacturer’s recommended replacement parts and accessories.
• Disconnect the spark plug from the line trimmer before carrying out maintenance or
cleaning work.
• Inspect and maintain the line trimmer regularly. Have the line trimmer repaired only
by an authorized repairer.
•Takecareagainstinjuryfromtheblade(s)ttedfortrimmingthecuttinglinelength.
After extending new cutting line, always return the line trimmer to its normal
operating position before switching on.
• Do not operate in a hazardous location. Such areas include where there is a risk of
explosion of petrol fumes, leaking gas or explosive dust.
•Donotoperateinaconnedarea.Exhaustgases,smokeorfumescouldreach
dangerous concentrations.
• Protect your tool. This line trimmer is NOT WEATHERPROOF and should not be
exposed to direct sunlight, high ambient temperature and damp, wet or high humidity
conditions.
• Do not smoke while refuelling. This is potentially dangerous as it may ignite the fuel
and cause an explosion.
• Take care not to spill fuel. When refuelling the line trimmer ensure that the motor
has been switched off. Prevent the spilling of fuel as this may also ignite with the hot
motor. Never refuel whilst the engine running.
• When not in use, store the line trimmer out of the reach of children.
• Face the cutting head away from yourself, other people and animals,especially
during operation.
• Disconnect the spark plug when changing spools or clearing grass from under
the guard.
• Disconnect the spark plug from the line trimmer before making any adjustments.
• Use both handles.
• Keep ventilation openings clear of debris. Keep handles dry, clean and free
of oil and grease.
• Keep your distance. The line trimmer emits exhaust fumes. Ensure bystanders keep
a safe distance.
• Ensure you use oil-mix fuel. Ensure that you mix 40 parts unleaded fuel to 1 part
2-stroke oil. If not, the engine will overheat and cause damage to your line trimmer.
• When using the trimmer, stones, pieces of metal and other objects can be thrown out
at high speed by the blade. The tool and guard are designed to reduce the danger.
However, the following special precautions should be taken:
- Wear safety glasses or other eye protection, gloves, long pants and suitable
footwear.
- Make sure that other people and pets are at least 5 metres away.
• Never reach underneath the line trimmer (the cutting line area) until it has completely
stopped and the power has been disconnected.
WARNING! When servicing, use only identical replacement parts. Use of any
other parts may create a hazard or cause product damage. To ensure safety
andreliability,allrepairsshouldbeperformedbyaqualiedservicetechnician.
WARNING!Thisapplianceisnotintendedforusebyyoungorinrmpersons
unless supervised by a responsible person to ensure that they can use the
appliance safely. Young children should be supervised to ensure that they do
not play with the appliance.
Read the whole manual carefully and make sure you know how to switch the tool off
in an emergency, before operating the tool.
Save these instructions and other documents supplied with this tool for future
reference.
WARNING! Read all safety warnings and all instructions. Failure to follow
thewarningsandinstructionsmayresultinelectricshock,reand/orserious
injury.
Save these instructions
RISK OF EXPLOSION OR FIRE
What can happen:
• Spilled petrol and its vapours can become ignited from cigarette sparks, electrical
arcing,exhaustgasesandhotenginecomponentssuchasthemufer.
•Heatwillexpandfuelinthetankwhichcouldresultinare.
•Operatingthetoolinanexplosiveenvironmentcouldresultinare.
•Muferexhaustheatcandamagepaintedsurfaces,meltanymaterialssensitiveto
heat (such as siding plastic, rubber or vinyl) and damage live plants. Keep hot tool
away from other objects.
• Improperly stored fuel could lead to accidental ignition. Fuel improperly secured
couldgetintothehandsofchildrenorotherunqualiedpersons.
How to prevent it:
• Shut off engine and allow it to cool before adding fuel to the tank.
•Usecarewhenllingthetanktoavoidspillingfuel.Movetoolawayfromfuelling
area before starting engine.
• Keep maximum fuel level 20mm below top of tank to allow for expansion.
• Operate and refuel in well ventilated areas free from obstructions.
•Storefuelinaapprovedcontainer(AS/NZS2906-1999)forpetrol.Storeina
secure location away from the work area. Make sure the container is clearly
marked “fuel”.
RISK TO BREATHING
What can happen:
• Breathing exhaust fumes can cause serious injury or death.
How to prevent it:
• Operate tool in a well ventilated area. Avoid enclosed areas.
• Never operate unit in a location occupied by other people or animals.
SAVE THESE INSTRUCTIONS
1) Work area
a)Keep work area clean and well lit. Cluttered and dark areas invite accidents.
b)
Do not operate petrol tools in explosive atmospheres, such as in the presence
of ammable liquids, gases, or dust. Power tools create sparks which may ignite
the dust or fumes.
c)Keep children and bystanders away while operating a petrol tool.
Distractions can cause you to lose control.
2) Personal safety
a)Stay alert, watch what you are doing and use common sense when operating
a petrol tool.Donotuseapowertoolwhileyouaretiredorundertheinuenceof
drugs, alcohol, or medication. A moment of inattention while operating power tools
may result in serious personal injury.
b)Use safety equipment. Always wear eye protection. Safety equipment such
as a dust mask, non-skid safety shoes, hard hat, or hearing protection used for
appropriate conditions will reduce personal injuries.
c)Remove any adjusting key or wrench before turning the tool on. A wrench or
a key that is left attached to a rotating part of the petrol tool may result in personal
injury.
d)Do not overreach. Keep proper footing and balance at all times. This enables
better control of the petrol tool in unexpected situations.
e)Dress properly. Do not wear loose clothing or jewellery. Keep your hair,
clothing and gloves away from moving parts. Loose clothes, jewellery or long hair
can be caught in moving parts.
f) If devices are provided for the connection of dust extraction and collection
facilities ensure that these are connected and properly used. Use of these
devices can reduce dust-related hazards.
3) Petrol tool use and care
a)Do not force the petrol tool. Use the correct petrol tool for your application.
The correct petrol tool will do the job better and safer at the rate for which it was
designed.
b)Do not use the petrol tool if the switch does not turn it on and off. Any petrol
tool that cannot be controlled with the switch is dangerous and must be repaired.
c)Turn tool off completely before making any adjustments, changing
accessories, or storing petrol tools. Such preventive safety measures reduce
the risk of starting the petrol tool accidentally. Hair can be caught in moving parts.
d)Store idle petrol tools out of the reach of children and do not allow persons
unfamiliar with the petrol tool or these instructions to operate the petrol tool.
Petrol tools are dangerous in the hands of untrained users.
e)Maintain petrol tools. Check for misalignment or binding of moving parts,
breakage of parts and any other condition that may affect the petrol tool’s
operation. If damaged, have the petrol tool repaired before use. Many accidents
are caused by poorly maintained petrol tools.
f) Keep cutting tools sharp and clean. Properly maintained cutting tools with sharp
cutting edges are less likely to bind and are easier to control.
g)Use the petrol tool, accessories and tool bits etc., In accordance with these
instructions and in the manner intended for the particular type of petrol tool,
taking into account the working conditions and the work to be performed.
Use of the petrol tool for operations different from intended could result in a
hazardous situation.
h)This appliance is not intended for use by persons (including children) with
reduced physical, sensory or mental capabilities, or lack of experience and
knowledge, unless they have been given supervision or instruction concerning use
of the appliance by a person responsible for their safety.
i) Children should be supervised to ensure that they do not play with the
appliance.
4) Service
a) Have your petrol tool serviced by a qualied repair personnel using only
identical replacement parts. This will ensure that the safety of the petrol tool is
maintained.
SAFETY INSTRUCTIONS FOR PETROL LINE TRIMMERS
SAFETY INSTRUCTIONS


IN ORDER TO MAKE A CLAIM UNDER THIS
WARRANTY YOU MUST RETURN THE PRODUCT
TO YOUR NEAREST BUNNINGS WAREHOUSE WITH
YOUR BUNNINGS REGISTER RECEIPT. PRIOR TO
RETURNING YOUR PRODUCT FOR WARRANTY
PLEASE TELEPHONE OUR CUSTOMER SERVICE
HELPLINE:
Australia 1800 069 486
New Zealand 0508 069 486
1 YEAR WARRANTY
Your product is guaranteed for a period of 12 months from
the original date of purchase. If a product is defective it will
be repaired in accordance with the terms of this warranty.
Warranty excludes consumable parts, for example:
filters, spark plugs, line spools and included accessories.
WARNING
The following actions will result in the warranty being void.
• Professional, Industrial or high frequency use.
• If the tool shows signs of damage or defects caused
by or resulting from abuse, accidents or alterations.
• Failure to perform maintenance as set out within the
instruction manual.
• If the tool is disassembled or tampered with in any way.
WARRANTY
TO ENSURE A SPEEDY RESPONSE PLEASE
HAVE THE MODEL NUMBER AND DATE OF
PURCHASE AVAILABLE. A CUSTOMER SERVICE
REPRESENTATIVE WILL TAKE YOUR CALL
AND ANSWER ANY QUESTIONS YOU MAY
HAVE RELATING TO THE WARRANTY POLICY
OR PROCEDURE.
OZITO Australia/New Zealand (Head Office) 1-23 Letcon Drive, Bangholme, Victoria, Australia 3175.
The benefits provided under this warranty are in addition
to other rights and remedies which are available to you at law.
Our goods come with guarantees that cannot be excluded
at law. You are entitled to a replacement or refund for a major
failure and for compensation for any other reasonably foreseeable
loss or damage. You are also entitled to have the goods repaired
or replaced if the goods fail to be of acceptable quality and the
failure does not amount to a major failure.
Generally you will be responsible for all costs associated with
a claim under this warranty, however, where you have suffered
any additional direct loss as a result of a defective product you
may be able to claim such expenses by contacting our customer
service helpline above.
0614
Table of contents
Other Ozito Trimmer manuals

Ozito
Ozito OZHT460A User manual

Ozito
Ozito LTP-200 User manual

Ozito
Ozito PXHTS-1840 User manual

Ozito
Ozito LTR-300 User manual

Ozito
Ozito PXCLTK-218U User manual

Ozito
Ozito PHT-550 User manual

Ozito
Ozito CGS-0036 User manual

Ozito
Ozito HTR-550 User manual

Ozito
Ozito LHT-018 User manual

Ozito
Ozito LTR-301 User manual

Ozito
Ozito LTR-630U User manual

Ozito
Ozito PXCPHTA-400 User manual

Ozito
Ozito PHT-410 User manual

Ozito
Ozito OZCLT18VA User manual

Ozito
Ozito OHT-018 User manual

Ozito
Ozito OZLT550WA User manual

Ozito
Ozito CGH-180K User manual

Ozito
Ozito OZLT550WA User manual

Ozito
Ozito PHT-410 User manual

Ozito
Ozito PXCHTS-018 User manual