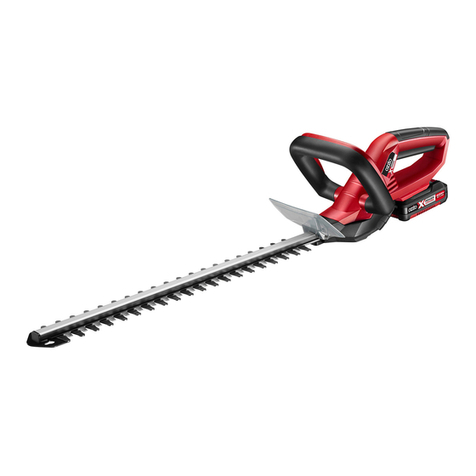
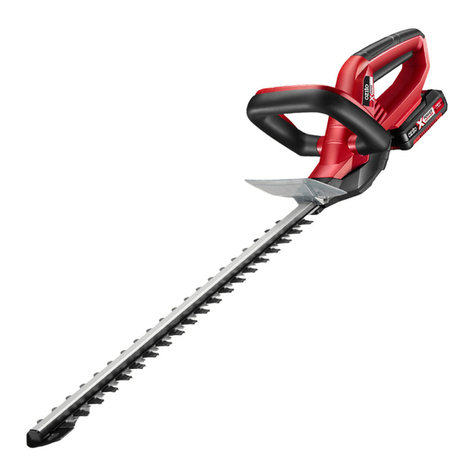
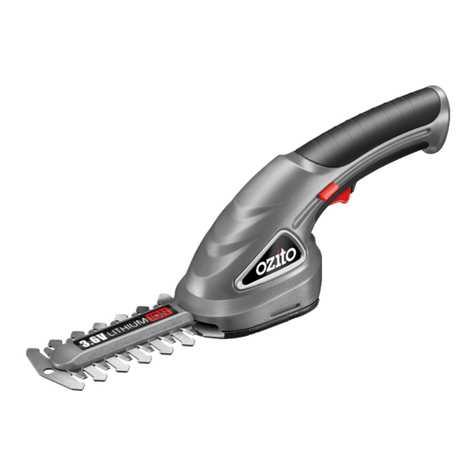
Ozito CGH-180K User manual

Cordless
Hedge Trimmer &
Grass Shear
18 Volt
Operation Manual
2 Year Replacement Warranty
CGH-180K
To view the full range visit: www.ozito.com.au
0209

3
SPECIFICATIONS - MODEL NO. CGH-180K
Hedge Trimer Blade Length: 250mm (10”)
Grass Shear Blade Width 95mm
No Load Speed: 1200 spm
Input Power: 18V
Blade Spacing: 8/15mm
Charge Time: 3-5 hours
Batteries Included: 1
Net Weight: 2.2 kg
Other Features: Safety Switch Lock Off Feature
Dual Action Hedge Trimmer Blade
Grass Shear Blade
Ergonomic Design
Quick Change Blade System
This Cordless Hedge Trimmer & Grass Shear has been designed to comply
with the following Australian / International Standards and any other
applicable standards referenced therein:
AS/NZS 3160: 1996 Approval and Test Specification – Hand held
electrical power tools.
AS/NZS 1044: Edition 2, 1995 Electrical motor operated and thermal
appliances for household and similar
purposes, electric tools and similar apparatus.
6
7
1
2
3
4
5
1. Grass Shear Blade
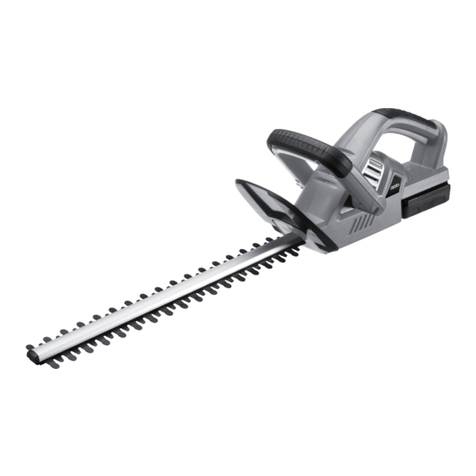
2. Hedge Trimmer Blade
3. Foliage Guard
4. Secondary Handle
5. Lock Off Button
6. Battery
7. On/Off Switch

INTRODUCTION
4
Congratulations on purchasing an Ozito Cordless
Hedge Trimmer & Grass Shear. We aim to provide
quality tools at an affordable price. We hope you will
enjoy using this tool for many years.
Your Ozito Cordless Hedge Trimmer & Grass Shear
CGH-180K has been designed for trimming hedges,
shrubs and grass around them. Also ideal for topiary
work. It is intended for DIY use only.
SAFETY INSTRUCTIONS
Warning! When using mains-powered tools, basic safety precautions,
including the following, should always be followed to reduce risk of fire,
electric shock, personal injury and material damage.
Read the whole manual carefully and make sure you know how to switch
the tool off, in an emergency, before operating the tool.
Save these instructions and other documents supplied with this machine
for future reference.
The electric motor has been designed for one voltage only. Always check
that the power supply corresponds to the voltage on the rating plate.
This tool is double insulated in accordance with EN 50144;
therefore no earth wire is required.
NOTE: Double insulation does not take the place of normal safety
precautions when operating this tool. The insulation system is for added
protection against injury resulting from a possible electrical insulation
failure within the tool.
Using an Extension Lead
Always use an approved extension lead suitable for the power input of
this tool. Before use, inspect the extension lead for signs of damage,
wear and ageing. Replace the extension lead if damaged or defective.
ELECTRICAL SAFETY

When using an extension lead on a reel, always unwind the lead completely.
Use of an extension lead not suitable for the power input of the tool or which
is damaged or defective may result in a risk of fire and electric shock.
1. Keep work areas clean. Cluttered areas and benches can cause accidents.
2. Consider work area environment. Do not expose your tool to high
humidity or rain. Do not use your tool in damp and wet conditions. Keep
the work area well lit. Do not use your tool where there is a risk of causing
fire or explosion, e.g. in the presence of flammable liquids and gases.
3. Keep children away. Do not allow children, visitors or animals to come
near the work area or to touch the tool or power lead.
4. Dress appropriately. Do not wear loose clothing or jewellery, as these
can be caught in moving parts. Preferably wear non-slip footwear when
working outdoors. Wear protective hair covering to keep long hair out of
the way.
5. Head protection. Always use safety glasses. Use a face or dust mask
whenever the operations may produce dust or flying particles. Wear ear
protection whenever the sound level seems uncomfortable.
6. Guard against electric shock. Prevent body contact with earthed
or grounded surfaces (e.g. pipes, radiators, cookers and refrigerators).
Electric safety can be further improved by using a high sensitivity
(30 mA/30 mS) residual current device (RCD).
7. Do not overreach. Keep proper footing and balance at all times.
8. Stay alert. Watch what you are doing. Use common sense.
Do not operate the tool when you are tired.
9. Secure work piece. Use clamps or a vice to hold the work piece;
it is safer as it frees both hands to operate the tool.
10. Connect dust extraction equipment. If devices are provided for
the connection of dust extraction and collection facilities, ensure
that these are connected and properly used.
11. Remove adjusting keys and wrenches. Always check that adjusting keys
and wrenches are removed from the tool before operating the tool.
12. Extension leads. Before use inspect the extension leads and replace if
damaged. When using the tool outdoors, only use extension leads
intended for outdoor use and marked accordingly. 5
ELECTRICAL SAFETY (cont.)
GENERAL

6
GENERAL (cont.)
13. Use appropriate tool. The intended use is described in this
instruction manual. Do not force small tools or attachments to do the
job of a heavy duty tool. The tool will do the job better and safer at
the rate for which it was intended. Do not force the tool.
Warning! The use of any accessory or attachment or performance
of any operation with this tool other than those recommended in this
instruction manual may present a risk of personal injury.
14. Check for damaged parts. Before use carefully check the tool and
power lead for damage. Check for misalignment and seizure of moving
parts, breakage of parts, damage to guards and switches and any other
conditions that may affect its operation. Ensure that the tool will
operate properly and perform its intended function. Do not use the tool
if any parts are damaged or defective. Do not use the tool if the switch
does not turn it on and off. Have any damaged or defective parts
repaired or replaced by an electrician or a power tool repairer. Never
attempt any repairs yourself.
15. Unplug the tool. Unplug the tool when it is not in use, before changing
any parts of the tool, accessories or attachments and before servicing.
16. Avoid unintentional starting. Do not carry the tool with a finger on
the on/off switch. Make sure the tool is switched off when plugged in.
17. Do not abuse the cord. Never carry the tool by its cord or pull it to
disconnect from the socket. Keep the cord away from heat, oil and
sharp edges.
18. Store idle tools. When not in use, tools should be stored in a dry,
locked up or high place, out of reach of children.
19. Maintain tools with care. Keep cutting tools sharp and clean for
better and safer performance. Follow the instructions for maintenance
and changing accessories. Keep handles and switches dry, clean and
free from oil and grease.
20. Have your tool repaired by an electrician or a power tool repairer.
This power tool complies with relevant safety requirements. To avoid
danger, electrical appliances must only be repaired by qualified
technicians using original spare parts; otherwise this may result in
considerable danger to the user.
21. Users. This appliance is not intended for use by young children
or infirmed persons without supervision.

GENERAL (cont.)
7
Young children should be supervised to ensure that they do not play
with this appliance.
22. Replacement of the supply cord. If the supply cord is damaged, it must
be replaced by an electrician or a power tool repairer in order to avoid
a hazard.
THIS MANUAL CONTAINS IMPORTANT SAFETY AND OPERATING
INSTRUCTIONS FOR YOUR BATTERY CHARGER.
Before using the charger, read all instructions and cautionary markings
on the charger, battery pack and product using the battery pack.
Danger! If the battery pack case is cracked or damaged, do not insert
into the charger. There is a danger of electric shock or electrocution.
•The longest life and best performance can be obtained if the battery
pack is charged when the air temperature is between 18 - 24° C. Do not
charge the battery pack in an air temperature below 10°C or above 40°C.
this is important and will prevent serious damage to the battery pack.
• Do not incinerate the battery pack even if it is seriously damaged or is
completely worn out. The battery can explode in a fire.
•Never attempt to open the battery pack for any reason. If the plastic
housing of the battery pack breaks or cracks, immediately discontinue
use and do not recharge.
Warning! Don’t allow any liquid to get inside charger. Electric shock may
result. To facilitate cooling of the battery pack after use, avoid placing the
charger or battery pack in a warm environment such as in a metal shed, or
an uninsulated trailer.
• This charger is not intended for any use other than charging rechargeable
batteries. Any other use may result in risk of fire, electric shock or electrocution.
•The charger and battery packs are specifically designed to work together.
DO NOT attempt to charge the battery pack with any charger other than
the one in this manual.
•The charger is ventilated through slots in the bottom of the housing. Do
not place any object on top of the charger or place the charger on a soft
surface that might block the ventilation slots and result in excessive
internal heat. Place the charger in a position away from any heat source.
ADDITIONAL SAFETY RULES FOR CHARGER & BATTERY PACKS

ADDITIONAL SAFETY RULES (cont.)
8
• To reduce risk of damage to the electric plug and cord, pull the plug
rather than the cord when disconnecting the charger.
• Make sure cord is located so that it will not be stepped on, tripped
over or otherwise subjected to damage or stress.
• An extension cord should not be used unless absolutely necessary.
Use of an improper extension cord could result in the risk of fire,
electric shock or electrocution.
• Do not operate charger if it has received a sharp blow, been dropped
or otherwise damaged in any way, take it to a power tool repairer.
• Do not disassemble charger, take it to a power tool repairer when
service or repair is required. Incorrect reassembling may result in a risk
of electric shock, electrocution or fire.
• To reduce risk of electric shock, unplug charger from the outlet before
attempting any cleaning. Removing the battery pack will not reduce
this risk.
•Never attempt to connect 2 chargers together.
• DO NOT store or use the tool and battery pack in locations where
the temperature may reach or exceed 40ºC (such as outside sheds
or metal buildings in summer.)
• The charger is designed to operate on standard household electrical
power (240 volts). Do not attempt to use it on any other voltage!
The length of charging time will depend on the type of work you are
doing. The battery with this tool has been designed to provide a maximum
trouble free life. However, like all batteries, it will eventually wear out.
To obtain the longest possible battery life, we suggest the following:
• Store and charge your battery in a cool area. Temperatures above
or below normal room temperature will shorten battery life.
•Never store batteries in a discharged condition. Recharge them
immediately after they are discharged.
• All batteries gradually lose their charge. The higher the temperature
the quicker they lose their charge. If you store your tool for long
periods of time without using it recharge the batteries every month or
two. This practice will prolong battery life.
BATTERY

9
Installing the Battery
1. Place battery into the rear of the trimmer. Align raised rib on the battery
with the groove in the rear of the tool. The battery will fit one way only.
2. Slide battery into the tool, make sure the latches on either side click into
place and the battery is secured to the tool before beginning operation.
Removing the Battery
1. Hold tool with one hand, with the other locate the 2 buttons on either
side of the battery.
2. Depress both buttons simultaneously and gently remove battery.
To charge the battery you will require the adaptor and the charging stand.
1. Plug the adaptor into the wall outlet and its barrel connector to the
charging stand.
When switched on the green light will engage, indicating that there is power.
2. Place the battery into the stand. The red light will also engage, indicating
battery is being charged.
NOTE: If lights on the charging stand fail to come on.
• Check barrel connector is securely installed to the stand.
•Check the adaptor is securely plugged into the wall outlet and is switched on.
• Check battery is firmly seated into the charging stand.
3. Press down on the battery to ensure battery contacts are engaging with
stand contacts.
4. The battery will take 3 – 5 hours to charge. This may vary up to 7 hours
due to the level of charge left in the battery and also the ambient
temperature.
5. After this period of time remove battery from the charging stand, turn off
the power outlet and disconnect the adaptor from the wall outlet.
Initial Charge
• Charge your battery for 8-12 hours then use it until it runs down and only
slowly operates the tool.
•Replace your battery pack into the charger and recharge for 8-12 hours again.
• Once again run your tool until only a small amount of charge remains.
• Repeat the above cycle 4 or 5 times, this should set the battery “memory”.
INSTALLING OR REMOVING THE BATTERY PACK
CHARGING THE BATTERY

Important Charging Notes
• The charger and battery pack may become warm to touch while
charging. This is a normal condition, and does not indicate a problem.
• Use the charger at normal room temperatures whenever possible. To
prevent overheating, do not cover the charger and do not charge the
battery pack in direct sunlight or near heat sources.
• If the battery pack does not charge properly:
1. Check current at receptacle by plugging in a lamp or other appliance.
2. Check to see if receptacle is connected to a light switch which
turns power off when you turn out the light.
3. Move charger and battery pack to a location where the
surrounding air temperature is approximately 18º- 24º C
4. If charging problems persist, take or send the tool, battery pack
and charger to an electrician or a power tool repairer.
1. Shear Blade – use to cut grass and hedges (where a finer touch is needed).
2. Hedge Blade – use to cut hedges.
3. Guard – protects operator from flying debris and the moving blades.
4. Handles – use both to hold the trimmer during operation.
5. Lock-off Button – resets and locks the switch off after the switch is
released to prevent accidentally starting the machine.
6. Battery – use to power the trimmer.
7. On/Off Switch – use for starting and stopping the trimmer.
8. Quick Release Knob – use to secure the shear and hedge blades to
the trimmer.
9. Adaptor – Supplies power to the stand.
10. Charging Stand – Holds and charges the battery.
11. Shear and Hedge Blade Covers – use to cover blades while not
in operation.
CHARGING THE BATTERY (cont.)
10
TOOL OPERATION

TOOL OPERATION (cont.)
The ON/OFF Switch
Before starting the trimmer, hold the handles with both hands and face the
cutting blade away from you.
To start the trimmer depress the lock-off button then squeeze the on/off
switch. Once switch is engaged the lock-off button can be released. The
lock-off button reduces the risk of accidental starting. To stop the trimmer,
simply release the switch.
Changing Blades
Your trimmer is equipped with a quick release blade changing knob making
the change between blades a fast and simple process.
Note: Before changing or making any adjustment to the blades be sure to
remove the battery.
To change the trimmer blades, simply unscrew and remove the quick release
knob. Remove the blade. To replace, carefully align blade ensuring it fits neatly
on the threaded rod and locating pin then simply screw the quick release knob
back into position. Make sure the quick release knob is firmly tightened to
ensure the blade is secured to the machine before commencing operation.
Operating Considerations
•Do not force the unit through dense growth. If the blades slow down,
then reduce your pace. Should the blades jam, release the trigger
immediately. Remove the battery and clear the blockage with a
screwdriver. Do not use fingers to free up jammed blades. Jammed
blades can release suddenly causing serious injury.
• Never touch the blade rail while in operation and be aware of sharp
edges even when the tool is not in use.
• Always ensure you are securely balanced with a free work area before
switching on the tool.
11

Shaping
The hedge should be trimmed to achieve a trapezoidal form, that is, it
should widen toward the bottom at both sides. This improves the
penetration of light to the lower extremities. A general guideline is
approximately 10 cm slant for each 1 metre of hedge height.
Cutting Sequence
First cut both sides, starting at the bottom and working to the top; this
prevents cuttings from falling into the area where you are still to work.
Trimming the Top
Where the branches have grown extremely long, cut back the
hedge in several stages. The shorter cuttings obtained are better
suited for composting.
General Information
When older hedges are to be cut back a substantial amount, use
pruning shears or some other device to trim thicker branches (that is
greater than 6mm diameter) to the desired length before starting work
with the hedge trimmer.
To shape precisely, run a taught line between the extreme edges of the
hedge and then trim along the length of the line.
Ensure that the blade does not come into contact with any object made
of hard material that could damage it, such as fencing wire or metallic
plant supports.
CAUTION! Always make sure the tool is switched off and the battery
pack is removed before attempting to perform inspections or maintenance.
• Never clean the tool with water and do not splash your tool with water.
•Store machine in a dry place.
•Keep ventilation slots of the trimmer clean at all times and prevent any
foreign matter from entering.
USEFUL TIPS
12
MAINTENANCE

MAINTENANCE (cont.)
• If the enclosure of the trimmer requires cleaning do not use solvents but
a moist soft cloth only.
• The blade rail should be cleaned and treated with light machine oil or
spray lubricant (such as WD40, CRC 5.56 or RP7) after each use. When a
job lasts for a longer period of time it is recommended that the blade rail
also be treated with spray lubricant at regular intervals during operation.
Blade Cleaning
For longest life and easiest trimming, blade cleaning should be performed if
sap and debris have built up, or if you live in an area where the soil is sandy.
Cleaning unusually heavy deposits may require removal of the blades.
We at Ozito, care about our environment and consider what we may do to
protect it. If you share that concern you may already be aware of the suggestions
below, if not please consider them as a small step in protecting our future.
Don’t throw your clippings into a rubbish bin where it will be disposed of in
landfill. You can dispose of the clippings on your compost heap, alternating
them with other garden material. Alternatively many communities provide a
public collection point where you can dispose of your garden waste in an
environmentally friendly manner.
The machine must be delivered in rigid packaging to avoid damage during
transportation. The packaging and the machine itself are manufactured from
recyclable materials and should be disposed of accordingly. The plastic
components of the machine are labelled. This facilitates sorting when the
machine is disposed of with your local recycling authority.
13
OUR ENVIRONMENT

14
CONTENTS
1 x Cordless Hedge Trimmer
& Grass Shear
1 x Hedge Trimmer Blade
1 x Grass Shear Blade
1 x 18V Battery
1 x Charging Stand & Adaptor
1 x Hedge Trimmer Blade Cover
1 x Grass Shear Blade Cover
1 x Screwdriver
1 x Kitbox
1 x Instruction Manual
OZITO INDUSTRIES PTY LTD
AUSTRALIA (Head Office)
1 - 23 Letcon Drive, Bangholme, Victoria, Australia 3175
Telephone: 1800 069 486
Facsimile: +61 3 9238 5588
Website: www.ozito.com.au

WARRANTY
THIS WARRANTY FORM AND CONFIRMED BUNNINGS REGISTER RECEIPT SHOULD
BE RETAINED BY THE CUSTOMER AT ALL TIMES
The warranty is only made available by returning the product to your nearest
Bunnings Warehouse with a confirmed Bunnings register receipt.
PURCHASED FROM:________________________________________________
DATE PURCHASED: ________________________________________________
2 YEAR REPLACEMENT WARRANTY
Your Ozito tool is guaranteed for a period of 24 months from the original date of
purchase and is intended for DIY (Do it yourself) use only.
WARNING
The following actions will result in the warranty being void.
• Professional, Industrial or high frequency use.
•If the tool has been operated on a supply voltage other than that specified on
the tool.
• If the tool shows signs of damage or defects caused by or resulting from abuse,
accidents or alterations.
•If the tool is disassembled or tampered with in any way.
Note: Warranty excludes consumable parts such as carbon brushes, discs, sanding
pads and other accessories.
YOUR WARRANTY FORM SHOULD BE RETAINED
BY YOU AT ALL TIMES.
SHOULD YOU HAVE ANY QUESTIONS PRIOR TO
RETURNING YOUR PRODUCT FOR WARRANTY OR
REPAIR PLEASE TELEPHONE OUR CUSTOMER
SERVICE HELPLINE:
Australia 1800 069 486
New Zealand 0508 069 486
TO ENSURE A SPEEDY RESPONSE PLEASE HAVE THE MODEL NUMBER
AND DATE OF PURCHASE AVAILABLE. AN OZITO CUSTOMER SERVICE
REPRESENTATIVE WILL TAKE YOUR CALL AND ANSWER ANY QUESTIONS
YOU MAY HAVE RELATING TO THE WARRANTY POLICY OR PROCEDURE.
Table of contents
Other Ozito Trimmer manuals

Ozito
Ozito OZLT550WA User manual

Ozito
Ozito LTR-529 User manual

Ozito
Ozito PXCGSS-018 User manual

Ozito
Ozito PXLTS-1830 User manual

Ozito
Ozito PXLTS-180 User manual

Ozito
Ozito PXCGTAS-018 User manual

Ozito
Ozito PXCLTK-018 User manual

Ozito
Ozito PXCLTS-0182 User manual

Ozito
Ozito PHT-410 User manual

Ozito
Ozito LTR-529U Installation instructions

Ozito
Ozito PXCPHTA-400 User manual

Ozito
Ozito HTE-550U User manual

Ozito
Ozito POWER XCHANGE PXCBLLTC-318 User manual

Ozito
Ozito OZLT550WA User manual

Ozito
Ozito HTL-072 User manual

Ozito
Ozito GTR-250 User manual

Ozito
Ozito LTR-630 User manual

Ozito
Ozito PXCLTK-218U User manual

Ozito
Ozito EPHT-500 User manual

Ozito
Ozito LTR-301 User manual