©2016 Pacic Accessory Corporation
www.pac-audio.com
Rev. 121216 Page 3
Pacific Accessory Corporation
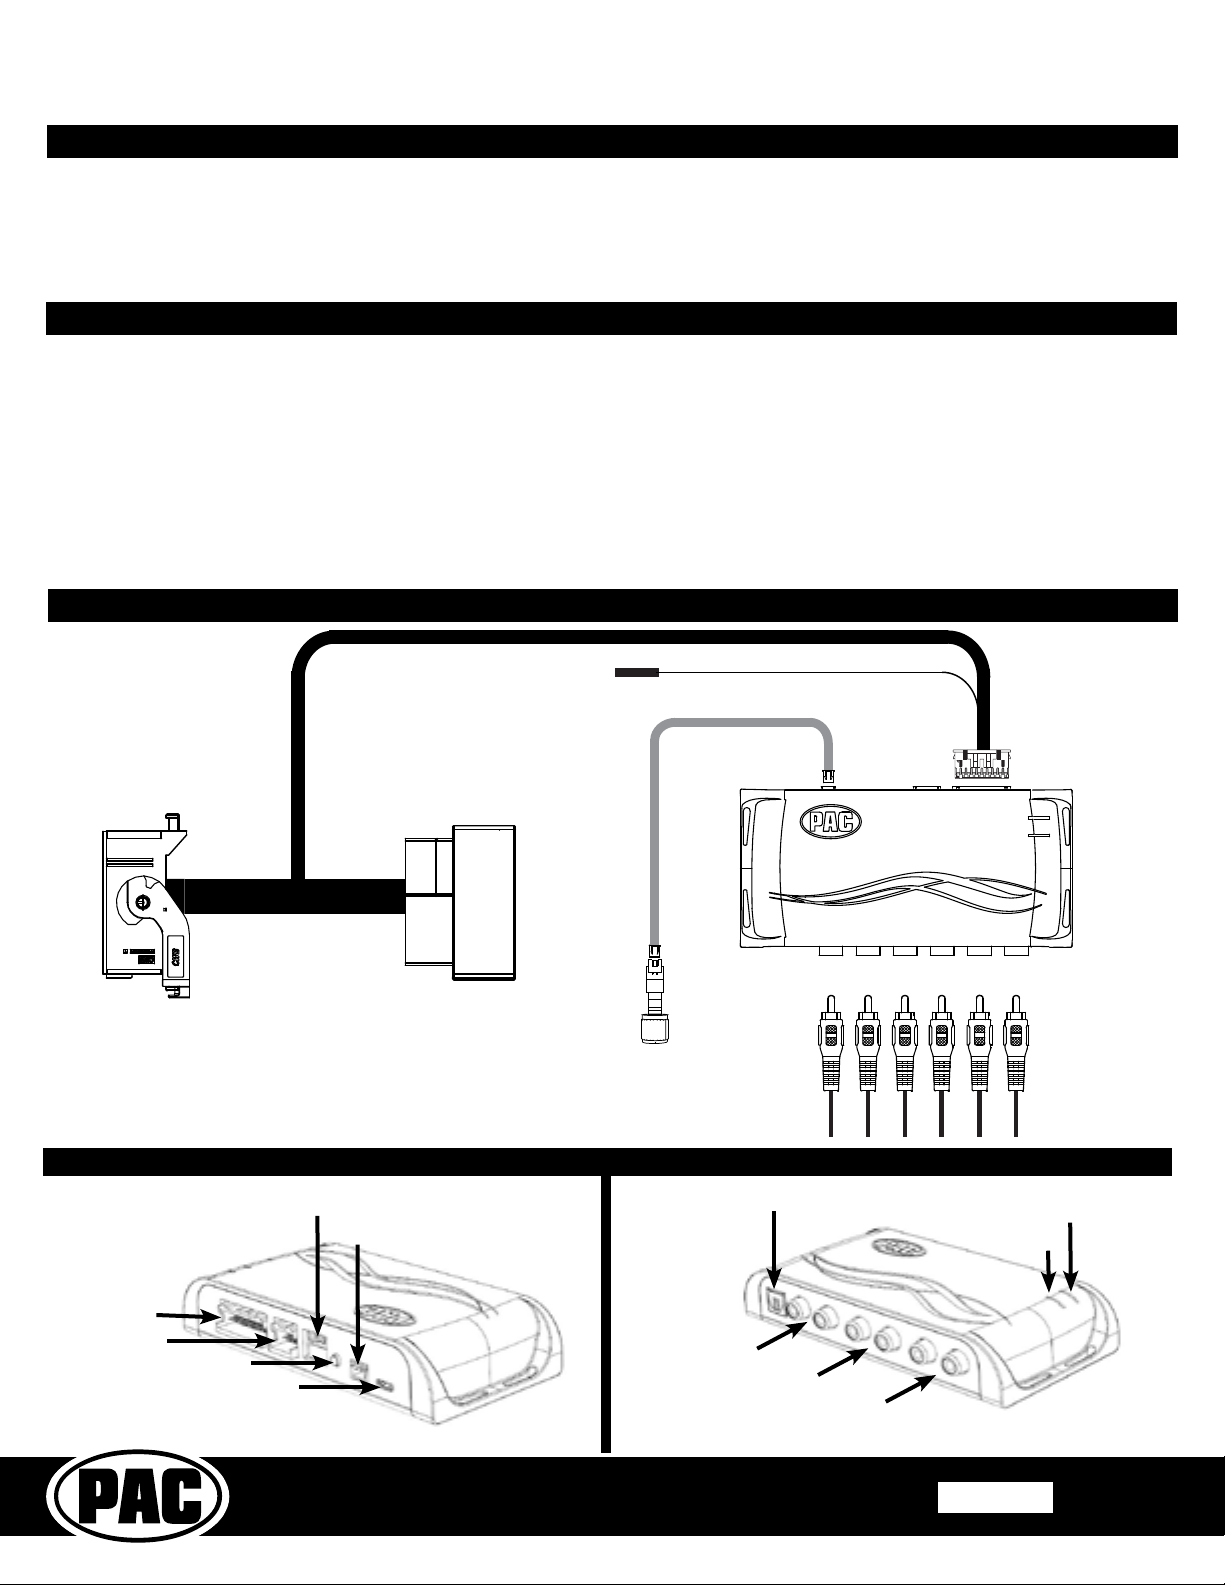
Amplier Integration Interface for
Chrysler / Dodge / Jeep / RAM
AP4-CH41
Restoring Factory Settings
You can restore the interface to factory default settings by pressing and holding the programming button on the side of the module
until the status LEDs start blinking red. Once the LEDs start blinking red, release the button.
This reset will restore the following settings to their factory defaults:
• Chime volume level
• Enable / Disable Factory Chimes
• Minimum volume level
• Enable / Disable factory EQ
• Factory EQ frequency
• Factory EQ Q factor
Testing and Verication (cont)
Manually Setting the Minimum Volume
If the minimum volume of the radio (factory radio volume level 1) is too loud, you can manually set the level of the minimum
volume using either the programming button on the side of the interface or the factory SWC. If you would like to set the
minimum volume using the AmpPRO app, please proceed to the AmpPRO App section on page 4.
PLEASE NOTE: Level control knob must be connected to module for either of the following methods.
Setting the minimum volume using the programming button
1. Start with the level control knob turned all the way down (counter-clockwise).
2. Set the amp gains to the desired level.
3. Set the volume on the factory radio to 1.
4. Press the programming button on the side of the interface twice.
5. LED 1 will turn amber and the chimes will begin beeping every ve seconds.
6. Turn the level control knob clockwise until the desired minimum volume level is reached.
7. You can now either press the programming button once or wait ten seconds to exit the settings.
Setting the minimum volume using the factory SWC
1. Start with the level control knob turned all the way down (counter-clockwise).
2. Set the amp gains to the desired level.
3. Set the volume on the factory radio to 1.
4. Press and hold the track up button on the factory SWC (Back left of steering wheel) for approximately ten seconds.
PLEASE NOTE: The radio will respond to the SWC commands during this process, this is normal and has no effect on the
AP4 operation.
5. LED 1 will turn amber and the chimes will begin beeping every ve seconds.
6. Turn the level control knob clockwise until the desired minimum volume level is reached.
7. You can now either press the programming button once or wait ten seconds to exit the settings.
Troubleshooting
1. Hiss at high amp gain - Set feature DIP switch 2 to the on (down) position to lower the output voltage of the AP4 to 4v. If you
still hear the hiss, lower your amp gains until the hiss is gone.
2. Cannot hear uConnect or nav voice - Use the volume knob while either of these voice prompts are active to adjust voice
volume. If you still do not hear voice prompts, be sure that the 10 pin connector is plugged in behind the radio.
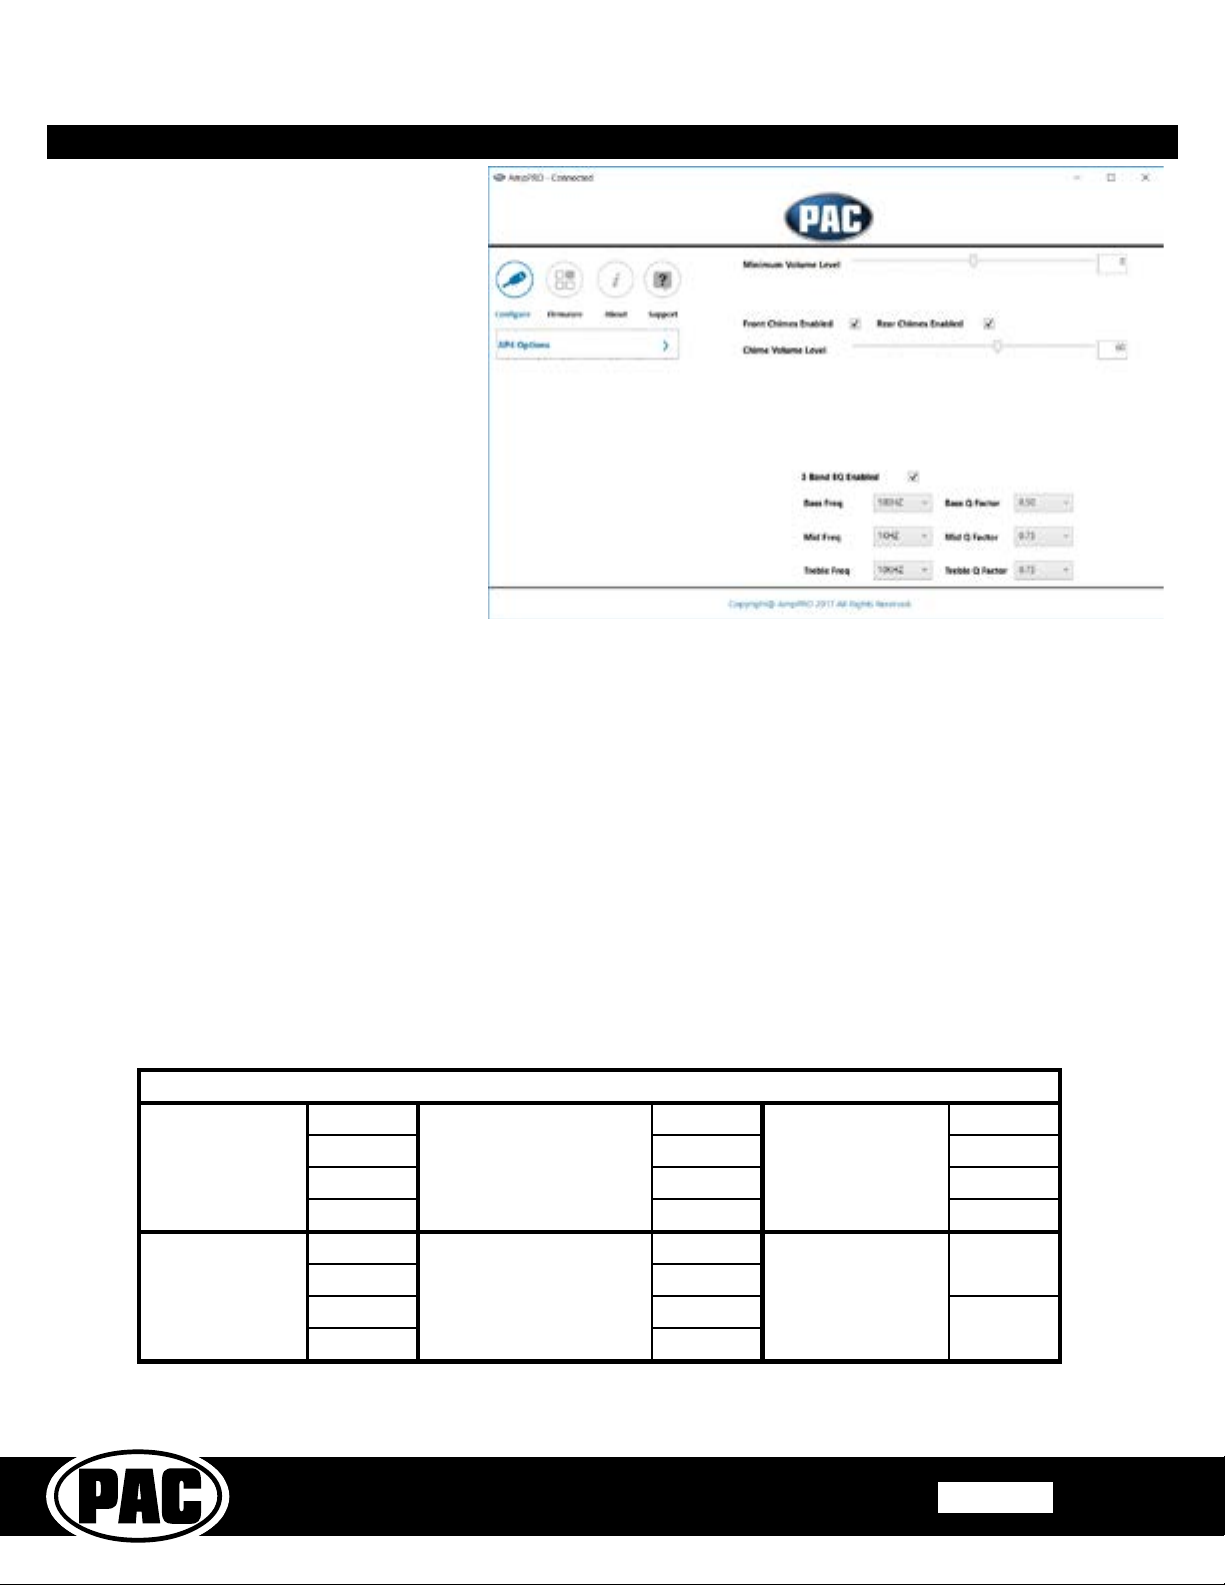
3. Cannot hear chimes - Set chime volume using process outlined in Setup and Conguration or using the AmpPRO application.
If you still do not hear chimes, be sure that you are using the remote output from the AP4 to turn on your aftermarket amplier.
4. Low volume setting on radio is too loud - Set minimum volume using process outlined in Setup and Conguration or using the
Amp PRO application.
Action / Color During Normal Operation
Solid Red Module Active
Solid Green Chime Volume Adjustment Mode
Solid Amber Minimum Volume Adjustment Mode
Rapid Blink Any Color DSP Activity
LED2 Blink Amber USB Connection Detected
LED Legend
LED 1


 User manual")