
©2017 PAC | PAC is a Power Brand of AAMP Global
www.pac-audio.com
Rev. 020717 Page 2
Pacific Accessory Corporation
Advanced Amplier Interface for
Select Chrysler / Dodge Vehicles
AP4-CH31
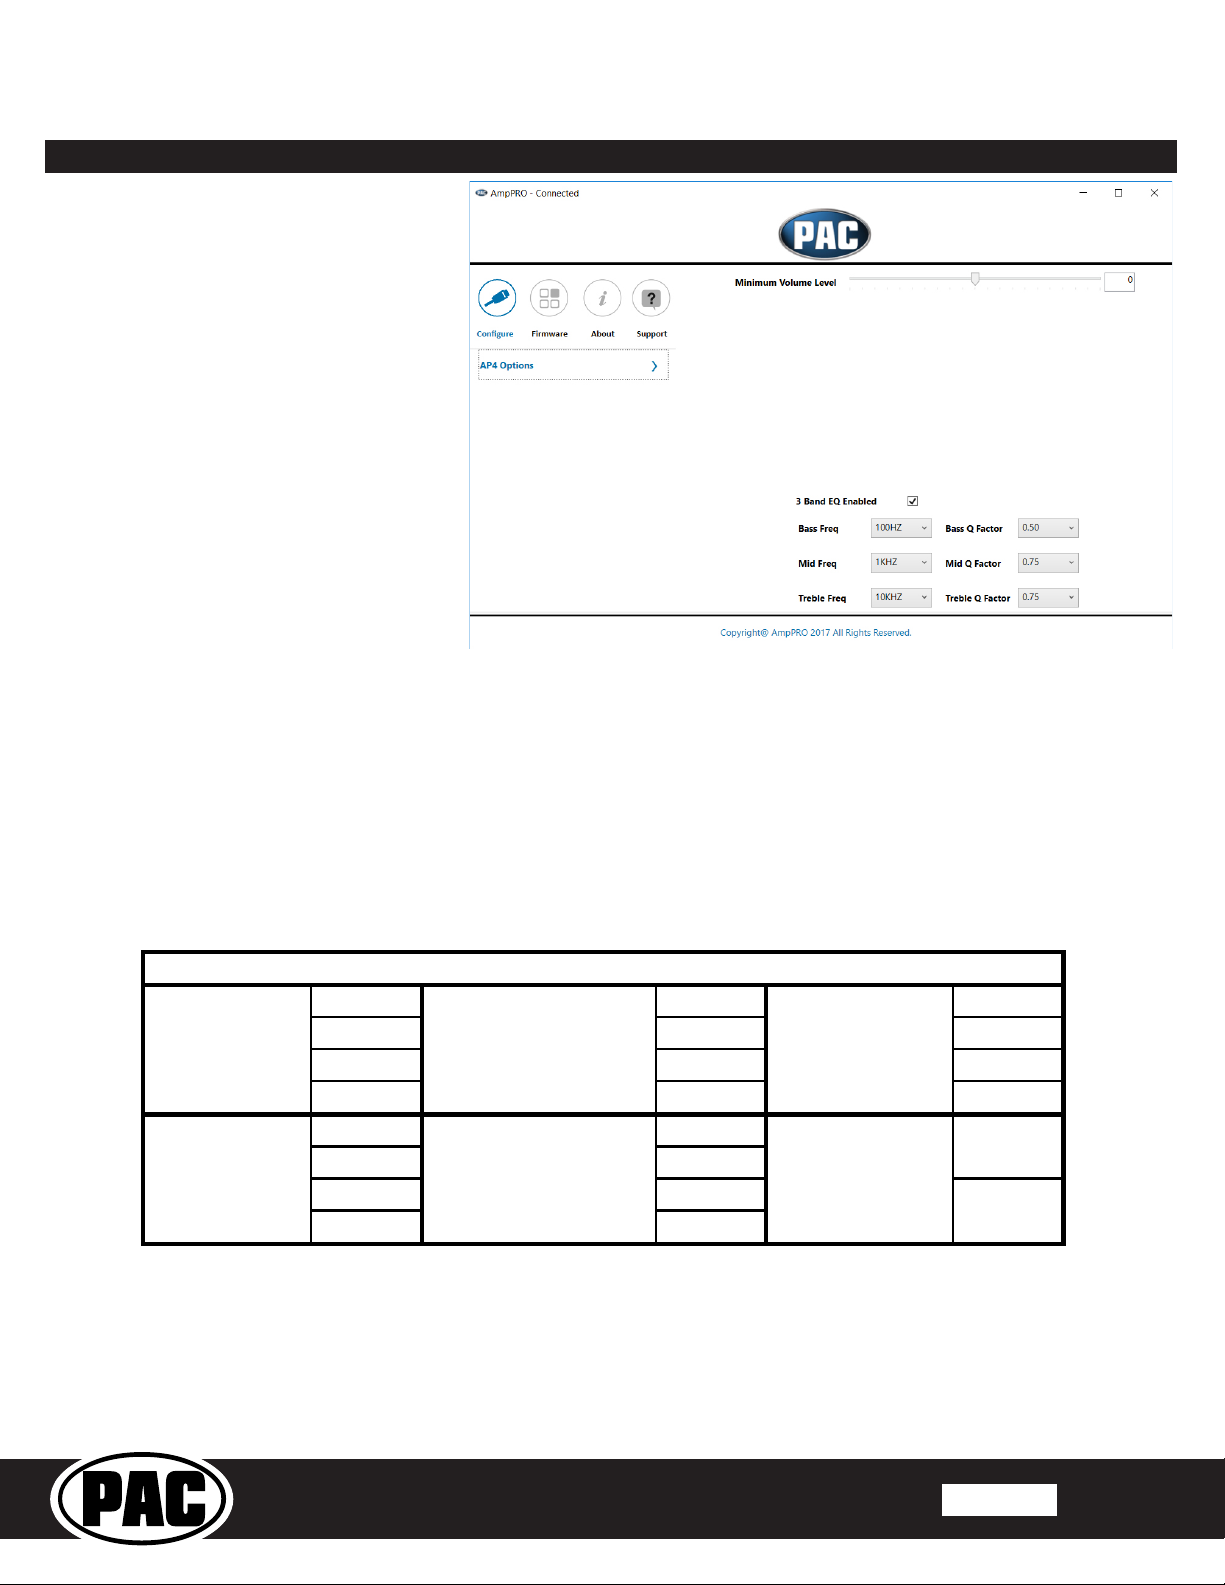
Setup and Conguration
1. Turn the ignition on. LED 1 on the interface will turn on and the +12v remote output will turn on.
2. Set the amp gain(s) to the desired level. We recommend using an oscilliscope and test tones to set the amp gain(s). Please
refer to the MECP Advanced study guide (p. 360) if you are unfamiliar with this process.
3. Check volume, balance, fade and EQ settings.
4. If you would like to adjust the minimum volume, do so using one of the methods outlined below. If you are happy with the
default level, no adjustment is necessary.
Manually Setting the Minimum Volume
If the minimum volume of the radio (factory radio volume level 1) is too loud, you can manually set the level of the minimum
volume using either the programming button on the side of the interface or the factory SWC. If you would like to set the
minimum volume using the AmpPRO PC app, please proceed to the AmpPRO PC app section on page 3.
PLEASE NOTE: Level control knob must be connected to module for either of the following methods.
Setting the minimum volume using the programming button
1. Start with the level control knob turned all the way down (counter-clockwise).
2. Set the amp gains to the desired level.
3. Set the volume on the factory radio to 1.
4. Press the programming button on the side of the interface once.
5. LED 1 will turn amber and the chimes will begin beeping every ve seconds.
6. Turn the level control knob clockwise until the desired minimum volume level is reached.
7. You can now either press the programming button once or wait ten seconds to exit the settings.
Setting the minimum volume using factory buttons
1. Start with the level control knob turned all the way down (counter-clockwise).
2. Set the amp gains to the desired level.
3. Set the volume on the factory radio to 1.
4. Press and hold the Enter / Browse button on the factory radio (middle button on right knob) for approximately ten seconds.
PLEASE NOTE: The radio may respond to the button press during this process, this is normal and has no effect on the AP4
operation.
5. LED 1 will turn amber and the chimes will begin beeping every ve seconds.
6. Turn the level control knob clockwise until the desired minimum volume level is reached.
7. You can now either press the programming button once or wait ten seconds to exit the settings.
Installation
1. Remove factory radio.
2. Disconnect the main 22-pin factory harness from radio.
3. Connect AmpPRO harness to vehicle harness.
4. Connect AmpPRO harness to factory radio.
5. Set any feature DIP switches that apply to your install.
a.Set DIP switch 1 on (down) to send all rear parking sensor chimes through the front channel. This should be used when
the vehicle is equipped with rear parking sensors and you are either using the TOSLINK output, or running all cabin
speakers off of the front outputs of the AP4.
b.Set DIP switch 2 on (down) to lower the RCA output voltage to 4v. Leave DIP switch 2 off (up) to keep the RCA output
voltage at 5v. See troubleshooting section on page 4 for more details.
c. DIP switches 3 and 4 are not used.
6. If you are using the APA-TOS1 (sold separately) refer to the instructions included with that product for its installation.
7. Connect the AmpPRO harness to the module.
8. Connect the level control knob to the module and install in an accessible location.
9. Connect the signal cables and remote input from the aftermarket amplier.
Rear Chime Path 5v / 4v Preout No Function No Function
1 2 3 4
Set DIP switches to the ON position to activate the corresponding features.
Set DIP switches to the OFF position for any features that are not desired.


 User manual")


