palintest Pooltest 25 Professional Plus User manual

1
INSTRUMENTS
_______________________________________________________________________________________
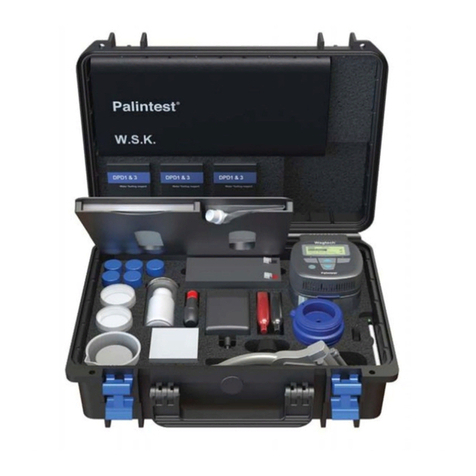
Portable test kits based on the Palintest Pooltest 25 Photometer are available in a
variety of formats including the Palintest Pooltest 25 MiniLab which contains the
equipment and reagents for pool testing in a moulded plastic work-tray. These kits are
supplied complete with reagents, or without reagents, for use with Palintest reagent
starter packs. The latter format enables the user to select the tests specifically needed.
For a full list of reagents available see Palintest literature and price lists.
USING THE POOLTEST 25 PROFESSIONAL PLUS KITS
BASIC PRINCIPLES
Tests are carried out on the pool water by adding the appropriate reagent tablet or
tablets to a test tube containing a sample of the water. A distinctive test colour is formed
and this is indicative of the concentration of the parameter being tested.
The Pooltest 25 Photometer is used to measure the colour formed in the test. Light is
passed through the sample, then through an optical filter onto a photodetector. The test
program selects different filters depending on the colour of the test solution.
When a measurement is being carried out, a 'BLANK' tube is first inserted into the
photometer. It is important to understand the meaning of the term 'BLANK' tube.
The 'BLANK' tube is a test tube containing pool water only. This tube is used to
compensate for any inherent colour in the pool water and automatically sets the instrument
for each test.
Once the photometer has been set, the 'SAMPLE' tube is then inserted into the
instrument. The 'SAMPLE' tube is the test tube containing the coloured test solution
prepared by adding the reagent tablets to the pool water sample in accordance with the
test instructions. After the sample tube has been inserted, the photometer will display
the test result in the form of a digital readout.
Different tests are carried out on the photometer by selecting the appropriate program or
Test number. When used in conjunction with a computer system the test numbers can be
selected automatically by the computer. The test instructions describe precisely how each
of the tests should be carried out. Some of the instructions will indicate that the sample
should be prepared in a certain way, or that the tablets should be added in a certain manner.
It is important to observe these instructions in order to obtain accurate results.
Note that certain of the tests are based on turbidity methods. In these tests the
photometer is used to measure the degree of cloudiness which forms in the test solution.
®
Test Kits
SP 725, SP 730
POOL.INST.44
Pooltest
25
Professional Plus

2
GETTING THE BEST RESULTS
To get the best results follow these simple guidelines :-
1 Read the test instructions carefully and carry out the tests precisely as instructed.
Become familiar with the instructions for each test.
2 Add the tablets to the sample in the manner described in the instructions. Crush
or allow to disintegrate as indicated. Use a separate crushing rod for each
tube. Do not shake the test tubes in order to dissolve the tablets.
3 Place cap on the test tube when the tablets have dissolved. For most tests it
does not matter if a few small undissolved particles remain, provided these have
settled to the bottom of the tube.
4 Before taking photometer readings ensure that the outside of the tube is clean
and dry. Use a tissue to wipe off any water drips or condensation.
5 Wash test tubes, caps and crushing rods thoroughly under a running tap after
use. Brush off any stains or deposits. Dry on a clean cloth or rinse with deionised
water before re-use.
6 Replace any test tubes which become scratched or permanently stained.
7 Use the light cap when working out of doors in strong sunlight.
CARRYING OUT THE TESTS RAPIDLY
When working in a pool shop or retail establishment, it is necessary to carry out
tests as quickly as possible so as to achieve a good commercial throughput of
samples. The following hints should help in developing a technique for carrying out
the tests rapidly. Once you are familiar with the individual test procedures it should
be possible to carry out a series of tests at the same time. The following procedure
should be adopted :-
1 Note the tests which are required to be carried out.
2 Prepare a sample tube for each of the tests according to the test instructions.
3 Add test tablets to each tube in the manner described. Crush or allow
to disintegrate as instructed. Cap the tubes.
4 Ensure that the tablets have properly dissolved then take the photometer
reading on each tube in turn.
Make sure that sufficient time has elapsed for those tests which require a standing
period. The preferable test sequence is to have tests which require a standing
period at the end of the series. In this way the standing period can be accounted for
by the time taken to perform the other tests.

3
DILUTING THE POOL WATER SAMPLE
When the test result is outside the concentration range of the test, the photometer
will display the '>>' symbol. In such cases it is necessary to dilute the pool water
and repeat the test. If the result is close to the top of the scale (eg chlorine above
4 mg/l on the Chlorine-Free/5 or Chlorine-Total/5 range, calcium hardness above
300 mg/l and cyanuric acid above 150 mg/l) and a more accurate result is required,
a dilution may be used to increase the sensitivity of the test :-
1 Take a Dilution Tube (PT 512) and fill to the x2 mark with pool water.
Make up to the ‘Deionised Water’ mark with deionised water. Replace the tube
cap and mix.
2 Carry out the test on the diluted sample in a 10 ml test tube as per the normal
test instructions.
3 Switch the photometer into SYSTEM mode, then select Dilution Factor ‘On’.
Press [OK] key to switch back into PHOTOMETER mode.
4 Take the photometer reading in the normal manner. Photometer display
sequence will ask for entry of dilution factor. Key in the factor '2'.
5 The test result displayed will represent the concentration in the original pool
water sample.
Samples may be diluted to a greater extent if necessary. Enter the dilution factor
appropriate to the dilution used. Note that it is not possible to dilute samples in the
pH test, or when working in Transmittance.
Note: The Chlorine/10 range may be used with the appropriate DPD-XF and DPD-XT
tablets to avoid sample dilution.
SAMPLE COLLECTION
The following points should be observed when taking water samples from the
pool. Take pool water samples from below the water surface. Collect in a clean
plastic bottle and fill to the neck so as to avoid unnecessary airspace.
The free chlorine, bromine or ozone levels may drop during sample storage. Other
parameters such as pH and alkalinity can also change. Samples should therefore
be tested as soon as possible after sample collection.
TEST INSTRUCTIONS
The following sections give test procedures for tests available for the water lab and
kits.
The test procedure headings show the photometer program number (‘Test’
number), the test name, the range of the test and the colour change which takes
place over the test range. For additional technical information on tests and test
methods see Palintest Photometer Test Instruction Manual (Zl PHOT AUTO),
available as an optional extra.
Test 1 FREE CHLORINE
4
Option 1: Range 0 - 5.00 mg/l (ppm) Colourless - Red
1 Rinse test tube with sample leaving two or three drops in the tube.
2 Add one DPD No1 tablet, crush tablet and then fill the test tube with sample to
the 10 ml mark. Mix to dissolve tablet and ensure any remaining particles have
settled.
3 Take photometer reading at immediately as result may drift on standing. Ensure
the display shows the Chlorine-Free/5 test is selected.
4 Retain test solution if Total Chlorine test required.
Test 1 FREE CHLORINE
Option 2: Range 0 - 10.0 mg/l (ppm) Colourless - Red
1 Rinse test tube with sample leaving two or three drops in the tube.
2 Add one DPD-XF tablet, crush tablet and then fill the test tube with sample to
the 10 ml mark. Mix to dissolve tablet and ensure any remaining particles have
settled.
3 Take photometer reading immediately, as result may drift on standing. Ensure
the display shows the Chlorine-Free/10 test is selected.
4 Retain test solution if Total Chlorine test required.
Test 2 TOTAL CHLORINE
Option 1: Range 0 - 5.00 mg/l (ppm) Colourless - Red
1 Carry out this test on the solution remaining from the Free Chlorine/5 test.
2 If any shock treatment chemicals have been added to the pool, add one DPD
Oxystop tablet, crush and mix to dissolve. This will prevent a response caused
by the shock treatment chemicals.
3 Add one DPD No 3 tablet, crush and mix to dissolve.
4 Stand for two minutes.
5 Take photometer reading. Ensure the display shows the Chlorine-Total/5 test is
selected.

5
Test 2 TOTAL CHLORINE
Option 2: Range 0 - 10.0 mg/l (ppm) Colourless - Red
1 Carry out this test on the solution remaining from the Free Chlorine test.
2 If any shock treatment chemicals have been added to the pool, add one DPD
Oxystop tablet, crush and mix to dissolve. This will prevent a response caused
by the shock treatment chemicals.
3 Add one DPD-XT tablet, crush and mix to dissolve.
4 Stand for two minutes.
5 Take photometer reading. Ensure display shows the Chlorine-Total/10 test is
selected.
To obtain COMBINED CHLORINE residual subtract Free Chlorine result from Total
Chlorine result :-
ie Combined Chlorine = Total Chlorine - Free Chlorine
Note: To assess the level of shock dose chemicals in the pool, request supplementary
instructions Phot 7.2.AUTO.
Test 3 BROMINE
Range 0 - 6.00 mg/l (ppm) Colourless - Red
1 Rinse test tube with sample leaving two to three drops in the tube.
2 Add one DPD No 1 tablet, crush tablet and then fill the test tube with sample to
the 10 ml mark. Mix to dissolve tablet and ensure any remaining particles have
settled.
3 Take photometer reading immediately, as result may drift on standing.
Note: To separate chlorine and bromine residuals, request supplementary
instructions Phot 5.1.AUTO.
Test 4 OZONE
Range 0 - 2.00 mg/l (ppm) Colourless - Red
1 Rinse test tube with sample leaving two to three drops in the tube.
2 Add one DPD No 4 tablet, crush tablet and then fill the test tube with sample to
the 10 ml mark. Mix to dissolve tablet and ensure any remaining particles have
settled.
3 Take photometer reading immediately.
This test also responds to chlorine and bromine. Pools using ‘ozone with chlorine’
treatment systems, or other combined treatments, requirea special testing
procedure. See separate leaflet.

6
Test 5 PHMB (POLYBIGUANIDE-BASED BIOCIDE)
Range 0 - 100 mg/l (ppm) Yellow - Green - Blue
PHMB is the generic name for various polybiguanide-based swimming pool biocides.
These biocides are normally sold under branded product names, for example
Baquacil* (Zeneca), Softswim* (Biolab), Revacil* (Mareva) and Nicosil* (NICO Norge).
Commercial products normally contain 20% active PHMB. This test has been
calibrated for the management of pools using commercial products of this strength.
A factor will need to be applied if products of a different strength are being used.
(*AII trade marks acknowledged).
1 Fill test tube with sample to the 10 ml mark.
2 Add one PHMB PHOT tablet, crush and mix to dissolve.
3 Take photometer reading immediately.
Test 6 pH VALUE
Range 6.8 - 8.4 Yellow - Red
1 Fill test tube with sample to the 10 ml mark.
2 Add one PHENOL RED tablet, crush and mix to dissolve.
3 Take photometer reading.
Test 7 ALKALINITY (TOTAL ALKALINITY)
Range 0 - 500 mg/l (ppm) Yellow - Green - Blue
1 Fill test tube with sample to the 10 ml mark.
2 Add one ALKAPHOT tablet, crush and mix thoroughly. Ensure all of the
particles have dissolved completely.
3 Stand for one minute.
4 Take photometer reading.

7
Test 8 CALCIUM HARDNESS
Note – see Test 34 for Calcium Hardness in Salt Water Pools
Range 0 - 500 mg/l (ppm) Violet - Orange
1 Fill test tube with sample to the 10 ml mark.
2 Add one CALCICOL No 1 tablet, crush and mix to dissolve.
3 Add one CALCICOL No 2 tablet, crush and mix to dissolve.
4 Stand for two minutes.
5 Take photometer reading.
Test 9 CYANURIC ACID
Range 0 - 200 mg/l (ppm) Clear - Cloudy
Use this test for chlorine-treated pools stabilised with cyanuric acid or using
'stabilised chlorine’ donors. Cyanuric acid is commonly referred to as 'Chlorine
Stabiliser’ or 'Pool Conditioner'.
1 Fill test tube with sample to the 10 ml mark.
2 Add one CYANURIC ACID tablet and allow to disintegrate for at least two
minutes. A cloudy solution indicates the presence of cyanuric acid.
3 Crush any remaining undissolved tablet, mix and then take photometer reading.
Use the light cap whilst taking reading.
Test 10 IRON
Range 0 - 1.00 mg/l (ppm) Colourless - Pink
1 Fill test tube with sample to the 10 ml mark.
2 Add one IRON LR tablet, crush and mix to dissolve.
3 Stand for one minute.
4 Take photometer reading.
Test 11 FREE COPPER
Range 0 - 5.00 mg/l (ppm) Colourless - Purple
Use this test for pools treated by copper/silver ion generators or treated with
uncomplexed forms of copper such as copper sulphate.
1 Fill test tube with sample to the 10 ml mark.
2 Add one COPPERCOL No 1 tablet, crush and mix to dissolve.
3 Take photometer reading.

8
Test 12 TOTAL COPPER
Range 0 - 5.00 mg/l (ppm) Colourless - Purple
Use this test for pools treated with chelated or complexed forms of copper.
Typically these compounds are used as algicides or winterising treatments.
1 Fill test tube with sample to the 10 ml mark.
2 Add one COPPERCOL No 1 tablet and one COPPERCOL No 2 tablet, crush
and mix to dissolve.
3 Take photometer reading.
Test 13 SALT (HIGH RANGE)
Range 0 - 10,000 mg/l (ppm) Clear - Cloudy
This test is used for testing the salt (sodium chloride) content of pools treated by
'salt chlorinators'.
1 Take a clean Sample Container (PT 510). Using the Measuring Syringe (PT 361)
add 0.5 ml of pool water. Fill to the 100 ml mark with deionised water, cap and
mix.
2 Fill test tube to the 10 ml mark with solution from the sample container.
3 Add one ACIDIFYING CD tablet, crush and mix to dissolve.
4 Add one CHLORIDOL tablet, and allow to disintegrate for at least two minutes.
A cloudy solution indicates the presence of salt.
5 Crush any remaining undissolved tablet, mix and then take photometer
reading. Use the light cap whilst taking reading.
Test 14 SULPHATE
Range 0 - 200 mg/l (ppm) Clear - Cloudy
1 Fill test tube with sample to the 10 ml mark.
2 Add one SULPHATE TURB tablet, crush and mix to dissolve. A cloudy
solution indicates the presence of sulphate.
3 Stand for five minutes then mix again.
4 Take photometer reading. Use the light cap whilst taking reading.

9
Test 15 CHLORIDE
Range 0 - 500 mg/l (ppm) Clear - Cloudy
1 Take a clean test tube. Using the Measuring Syringe (PT 361) add 1 ml of
pool water. Fill test tube to the 10 ml mark with deionised water.
2 Add one ACIDIFYING CD tablet, crush and mix to dissolve.
3 Add one CHLORIDOL tablet and allow to disintegrate for at least two minutes.
A cloudy solution indicates the presence of chloride.
4 Crush any remaining undissolved tablet, mix and then take photometer
reading. Use the light cap whilst taking reading.
Test 16 TOTAL HARDNESS
Range 0 - 500 mg/l (ppm) Pale Purple - Purple
1 Fill test tube with sample to the 10 ml mark.
2 Add one HARDICOL No 1 tablet, crush and mix to dissolve.
3 Add one HARDICOL No 2 tablet, crush and mix. Ensure all particles are dissolved.
4 Stand for two minutes
5 Take photometer reading.
Test 17 ALUMINIUM
Range 0 - 0.50 mg/l (ppm) Yellow - Pink
1 Fill test tube with sample to the 10 ml mark.
2 Add one ALUMINIUM No 1 tablet, crush and mix to dissolve.
3 Add one ALUMINIUM No 2 tablet, crush and mix gently to dissolve. Avoid vigorous
agitation.
4 Stand for five minutes.
5 Take photometer reading.

10
Test 18 NITRATE
Range 0 - 100 mg/l (ppm) Colourless - Red
1 Take a clean Nitratest Tube (PT 526). Using the Measuring Syringe (PT 361) add 1 ml
of sample. Fill the Nitratest Tube to the 20 ml mark with deionised water.
2 Add one level spoonful of NITRATEST POWDER and one NITRATEST
TABLET. Do not crush the tablet. Replace screw cap and shake tube well for
exactly one minute then allow contents to settle.
3 Then either -
Invert tube gently 2 or 3 times and then allow to stand for at least two minutes to
ensure complete settlement. Remove screw cap and wipe around top with a clean
tissue. Decant clear solution into test tube, filling to the 10 ml mark.
or
Using the Palintest Filtration Set (PT 600) filter a portion of the solution through a
GF/B filter paper into a test tube filling to the 10 ml mark.
4 Add one NITRICOL tablet, crush and mix to dissolve.
5 Stand for 10 minutes.
6 Take photometer reading.
Test 19 AMMONIUM
Range 0 - 1.00 mg/l (ppm) Yellow - Green
1 Fill test tube with sample to the 10 ml mark.
2 Add one AMMONIA No 1 tablet and one AMMONIA No 2 tablet, crush and mix
to dissolve.
3 Stand for 10 minutes.
4 Take photometer reading.
Test 20 PHOSPHATE
Range 0 - 4.00 mg/l (ppm) Colourless - Blue
1 Fill test tube with sample to the 10 ml mark.
2 Add one PHOSPHATE No 1 tablet, crush and mix to dissolve.
3 Add one PHOSPHATE No 2 tablet, crush and mix to dissolve.
4 Stand for 10 minutes.
5 Take photometer reading.

11
Test 21 MANGANESE
Range 0 - 0.030 mg/l (ppm) Colourless - Blue
This test should be carried out at 68°F ± 2°F (20°C ± 1°C).
1 Fill test tube with sample to the 10 ml mark.
2 Add one MANGANESE No 1 tablet, crush and mix to dissolve.
3 Add one MANGANESE No 2 tablet, crush and mix to dissolve.
4 Stand for exactly 20 minutes.
5 Take photometer reading.
Test 22 CHLORINE (HIGH RANGE)
Range 0 - 250 mg/l (ppm) Colourless - Brown
Use this test for checking chlorine levels in the event of overdosing of the pool, or
in situations where high doses of chlorine are used for disinfecting or cleaning of
associated water services.
1 Fill test tube with sample to the 10 ml mark.
2 Add one ACIDIFYING GP tablet and one CHLORINE HR tablet, crush and mix
to dissolve. Allow any undissolved particles to settle.
3 Take photometer reading.
Test 23 HYDROGEN PEROXIDE (HIGH RANGE)
Range 0 - 100 mg/l (ppm) Colourless - Brown
Use this test for checking hydrogen peroxide levels in pools treated with PHMB.
1 Fill test tube with sample to the 10 ml mark.
2 Add one ACIDIFYING PT tablet and one HYDROGEN PEROXIDE HR tablet,
crush and mix to dissolve.
3 Take photometer reading.
Tests 31/32/33 FREE CHLORINE, MONOCHLORAMINE AND DICHLORAMINE
Range 0 - 5 mg/l (ppm) Colourless – Red
Note: This test is only available in the 0 to 5 mg/l Cl range
The photometer has test calibrations for the separation of chlorine residuals into free
chlorine, monochloramine and dichloramine using DPD No 1, DPD No 2 and DPD No 3
tablets. The calculations necessary for calculating the monochloramine and dichlora-
mine results are carried out automatically by the photometer.

12
Test 34 CALCIUM HARDNESS in Salt Water Pools
Range 0 - 500 mg/l (ppm)) Violet - Orange
1 Fill test with sample to the 10 ml mark.
2 Add one CALCICOL No 1 tablet, crush and mix to dissolve.
3 Add one CALCICOL No 2 tablet, crush and mix to dissolve.
4 Stand for two minutes.
5 Take photometer reading.
Test 35 WATER BALANCE
To determine Water Balance Index using the Pooltest 25 Professional Plus, three tests
must be prepared and read using the Water balance test program :
Alkalinity (Alkaphot), Calcium Hardness (Calcicol) and pH (Phenol Red) tests are
required. Prepare the test solutions and proceed as follows :-
1 Select Test 35.
2 Carry out alkalinity test then select ‘Follow on’ from the OPTIONS menu at the
results screen.
3 Carry out the calcium hardness test then select ‘Follow-on’ from the OPTIONS
menu at the results screen.
4 Carry out the pH test then select ‘Follow-on’ from the OPTIONS menu at the
results screen.
5 The Water Balance Index is calculated and is displayed. Consult the chart
below for guidance.
NOTE: If any of the tests are out of range, the procedure is ended. If an incorrect
reading is taken part-way through the procedure, insert the correct tube then select
‘Read’ from the OPTIONS menu. The new reading will replace the former incorrect
value in the Water Balance Calculation:

13
Index Water Balance
Condition Recommendation
Below 9.6 Highly Corrosive
9.6 to 10.5 Corrosive
Increase pH to 7.5 - 7.8.
Increase Calcium Hardness to at least
50 mg/l.
Increase Total Alkalinity to 100 mg/l
or higher as necessary.
Retest Water Balance.
10.6 to 10.9 Acceptable Balance Retest water regularly.
11.0 to 11.2 Ideal Balance No action required.
11. 3 to 11.6
Acceptable Balance Retest water regularly.
11. 7 to 12.6
Scale Forming
Above 12.6 Highly Scale Forming
Decrease pH to 7.2 - 7.5.
Decrease
Total Alkalinity to 150 mg/l or
lower as necessary.
Retest Water Balance.
NOTES
1 The test has been calculated for an average heated swimming pool
(82°F, 28°C). For unheated swimming pools, subtract 0.1 from the index value
obtained, for high temperature pools and spas, add 0.1 to the index value
obtained.
2 Always keep the pH, Total Alkalinity and Calcium Hardness levels within the limits
recommended in pool operating instructions and chemical suppliers'
recommendations. Seek specialist advice if corrosion or scale formation is still
apparent even though the water is shown to be in a balanced condition.
TDS Test TOTAL DISSOLVED SOLIDS
Range 0 - 10,000 mg/l TDS Sensor (Optional Extra)
The total dissolved solids reading is taken using the TDS Sensor (PT 153/S). This
model is specially calibrated for swimming pool water.
1 Pour about 20 ml of pool water into the Sample Container (PT 510).
2 Remove protective cap from the end of the TDS Sensor. Turn on the sensor.
3 Dip the sensor into the water in the container.
4 Note the reading on the sensor display. Multiply this result by 100. The
result obtained represents the TDS content of the pool water in mg/l (ppm).
5 Remove the sensor, rinse probe in clean water. Switch off and replace cap.

14
CARE AND MAINTENANCE
Palintest Pooltest kits are designed to give long service and require very little
maintenance. The main requirement is to keep the components in a clean
condition. Spillages of test solutions should be wiped up immediately with a
damp cloth. In addition to routine cleaning, the test tubes and sample containers
should be washed periodically in warm soapy water.
COMPONENT RE-ORDER CODES
PT153/3 TDS Sensor
PT 745 Mains Adaptor
PT 746 Photometer-Computer Cable
PT 297 Lab Work-Tray
PT 361 Measuring Syringe, 1 ml
PT 500 De-Ion Pack Deionised Water Maker
PT 501 Test Tube Rack
PT 502 Crushing/Stirring Rods (Pack of 10)
PT 510 Sample Container, 10/50/100 ml plastic
PT 512 Dilution Tube
PT 595/5 Round Test Tubes, 10 ml glass (Pack of 5)
PT 518 Wash Bottle (for Deionised Water)
PT 525 Workplace Mat
PT 619 Packet Glassware Wipes
PT 663 Test Tube Brush
Palintest®, Alkaphot®Calcicol®, Chloridol, Coppercol®, Hardicol®, Nitratest and
Nitricol®are trademarks of Palintest Ltd.
V2-04/08
Table of contents
Other palintest Test Equipment manuals

palintest
palintest Ammonia Duo User manual

palintest
palintest Micro 800 User manual

palintest
palintest DigiPAsS User manual

palintest
palintest Kemio User manual

palintest
palintest Pooltest 3 User manual

palintest
palintest SKW 400 User manual

palintest
palintest Wagtech Potatest + User manual

palintest
palintest Pooltest 9 Bluetooth User manual