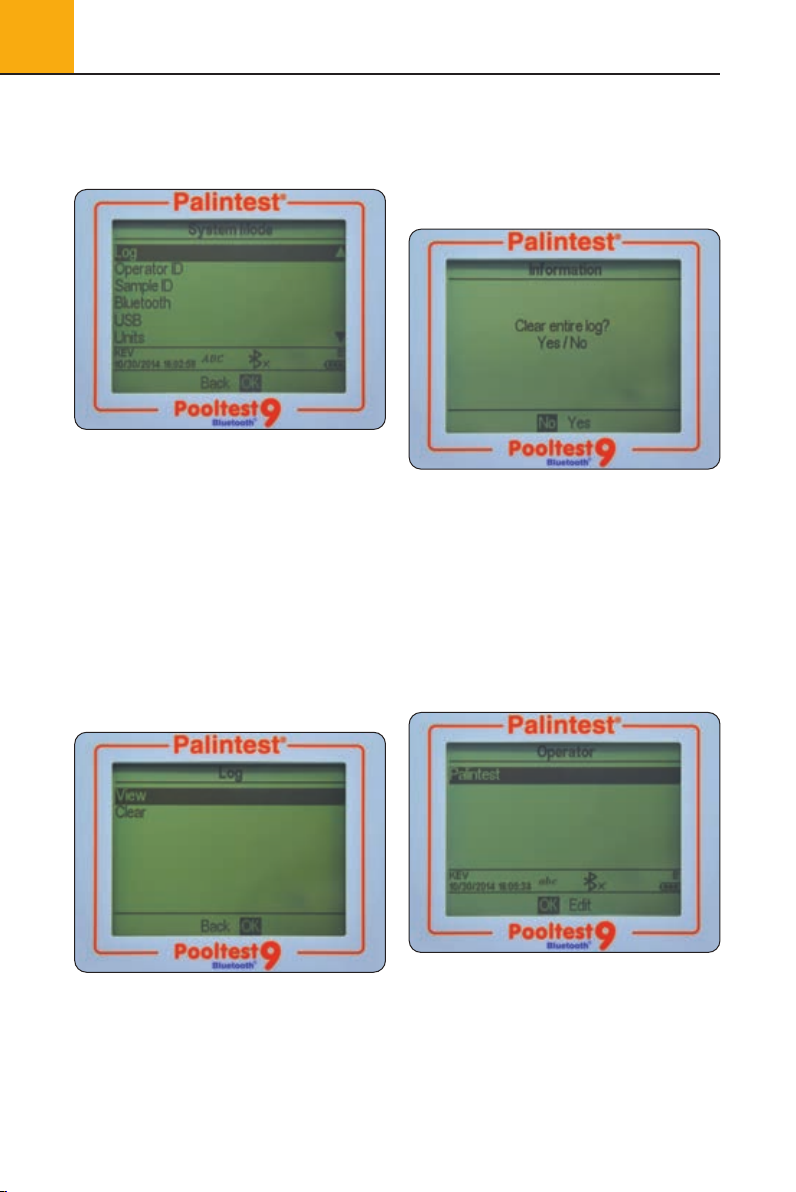
5System Mode
10
When the Sample ID is correct press the OK key to
create the ID and return to the Sample ID list. The
new Sample ID will be displayed in the Sample list.
Choose the Sample ID to be used by scrolling through
the list and pressing the OK key on the desired choice.
The instrument will return to the System menu.
To modify or delete an existing Sample ID, highlight
the ID and select Edit. Choose either Edit to modify
the existing entry or Delete to remove it from the list.
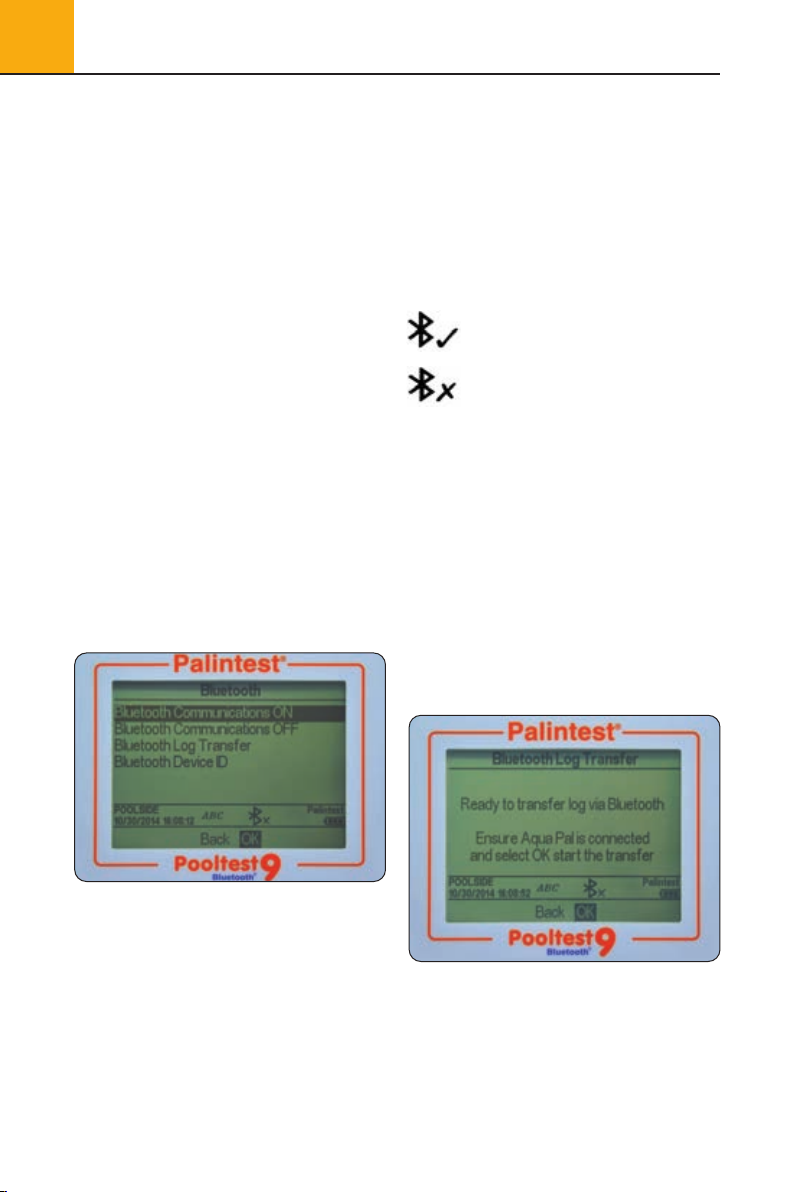
5.4 Bluetooth
The Pooltest 9 Bluetooth features the latest
Bluetooth 4.0 (also known as Bluetooth Low
Energy or Bluetooth SMART) for wireless
communication with external devices.
The Palintest Aqua Pal app provides seamless
data exchange with the Pooltest 9 Bluetooth,
data trend analysis and user-defined action
limits for key parameters.
Additional data management functionality is provided
by the Palintest Portal (www.palintestportal.com).
Uploaded data can be shared with colleagues
and customers within your User Group(s) and
integrated into customised reports. See Appendix
5 for more information on the Aqua Pal app and
the Palintest Portal.
There are four options available in the Bluetooth menu:
• Bluetooth Communications ON - activate the
Bluetooth and make the Pooltest 9 Bluetooth
visible for connection/pairing.
• Bluetooth Communications O
•
Bluetooth LogTransfer - transfer historical log data to
the Aqua Pal app when connected to a remote device
• Bluetooth Device ID - create a unique device
name for the Pooltest 9 Bluetooth to
discriminate between multiple connections
Bluetooth Communication On
Select this option to enable Bluetooth
communications allowing the instrument to be
paired with a suitable Bluetooth SMART enabled
device. Visit www.palintest.com\know for more
information regarding Bluetooth SMART devices.
The Bluetooth icon is shown in the Info Panel
when Bluetooth is enabled. Connection status
is shown as follows:
indicates Bluetooth is activated
and connected to an external device
indicates Bluetooth is activated
but the Pooltest 9 Bluetooth is not
connected to an external device
Bluetooth Communication Off
Selecting this option disables the Bluetooth
communications module. The Bluetooth icon
is not visible on the Info panel.
Bluetooth og Transfer
Selecting this option transfers all or a selected
group of results stored in the log to the paired
mobile device.
The Pooltest 9 Bluetooth will validate the paired
connection and confirm readiness to transfer.
Transferring selected data will require specification
of the result log window e.g. from result 40 to
result 100 to be transferred selectively.
Press OK to transfer the data log. The data will
transfer in series. Each data point is validated by
the Aqua Pal app prior to upload of the next.
Pooltest9Bl etooth_ZI INST 7009B EN 29/7/15 12:03 Page 10