manuals.online logo
Brands
  1. Home
  2. •
  3. Brands
  4. •
  5. Panasonic
  6. •
  7. Fan
  8. •
  9. Panasonic FV-10EGF1 User manual

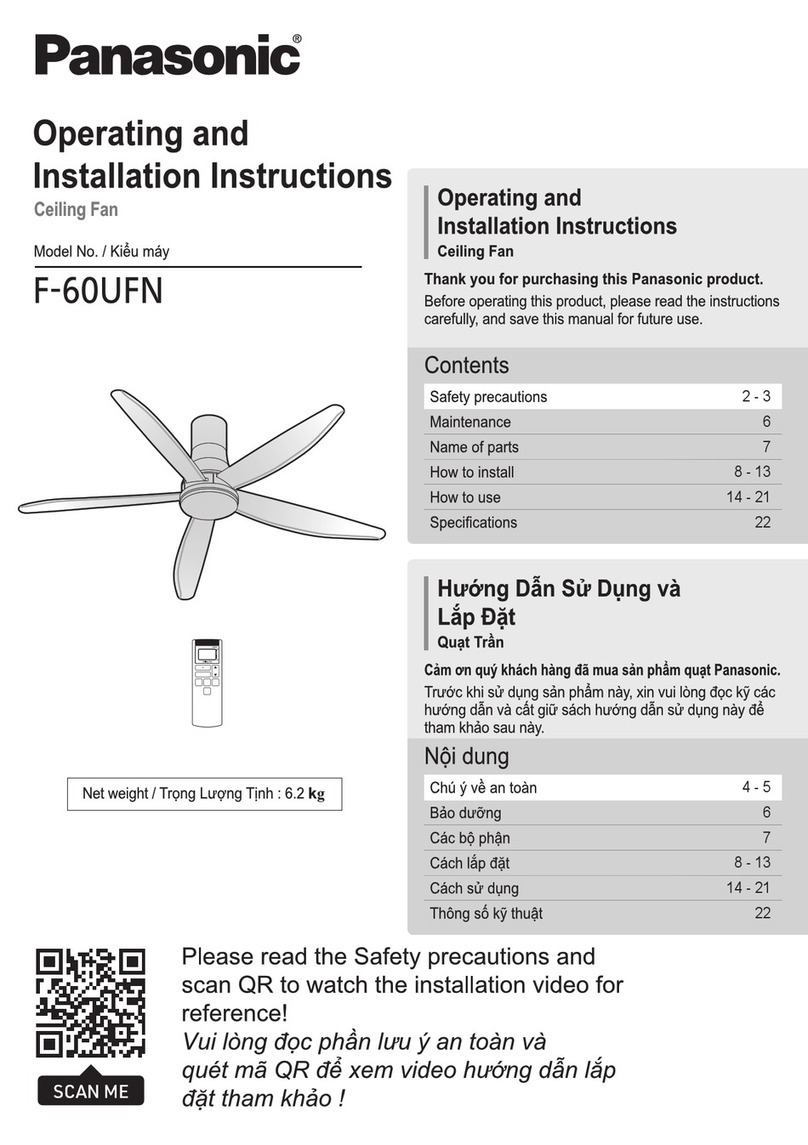
Panasonic FV-10EGF1 User manual

Installation and Operating
Instructions
Ventilating Fan
Model No.
Thank you very much for choosing Panasonic Ventilating Fan.
Please read these instructions carefully before attempting to Install, operate or service
the Panasonic Ventilating Fan. Failure to comply with instructions could result injury
and/or property damage. In that case the product shall not warrant them.
Please retain this booklet for future reference.
FV-10EGF1
FV-15EGF1
Hướng dẫn Lắp đặt và Vận hành
Quạt thông gió
Kiểu máy.
/ Mục lục
Contents
Hướng dẫn Ký hiệu
Hướng dẫn An toàn
Tên Bộ phận và Kích thước
Phụ kiện Đi kèm
Cách Lắp đặt
Vận hành
Bảo trì
Thông số
Cảm ơn bạn đã chọn Quạt thông gió Panasonic.
Vui lòng đọc kỹ hướng dẫn này trước khi Lắp đặt, vận hành hoặc sửa chữa Quạt
thông gió Panasonic. Không tuân thủ hướng dẫn có thể dẫn đến thương tích
và/hoặc hư hại tài sản. Trong trường hợp đó, sản phẩm sẽ không bảo hành.
Vui lòng giữ lại sách hướng dẫn này để tham khảo sau này.
9
9
11
Symbol Instructions Please Observe strictly
The following instructions should be strictly observed in order to prevent injury to the users and other people or damage
to property.
The degrees of injury or damage that can be occurred when the instructions are ignored and if the product is not
used properly have been classified and described by the following indications.
Types of instructions that should be observed have been classified and described by the following pictorial symbols.
This symbol indicates the item is “PROHIBITED” to do.
Those things shown in this column indicate that there is possibility of
causing death or serve injury.
Those things shown in this column indicate that there is possibility of
causing injury to the users or damage.
This symbol indicates the “COMPULSORY” item that must be followed
without failure.
Warning
Caution
This appliance is not intended for use by persons
(including children) with reduced physical, sensory
or mental capabilities, or lack of experience and
knowledge, unless they have been given supervision
or instruction concerning use of the appliance by a
person responsible for their safety.
Children should be supervised to ensure that
they do not play with the appliance.
If the supply cord is damaged, it must be replaced
by the manufacturer or its service agent or similarly
qualified person in order to avoid a hazard.
Warning
2
Hướng dẫn Ký hiệu Vui lòng Tuân thủ nghiêm ngặt
Hướng dẫn sau phải được tuân thủ nghiêm ngặt để phòng tránh thương tích cho người dùng và người khác hoặc để tránh
hư hại tài sản.
Mức độ thương tích hoặc hư hại có thể xảy ra khi bỏ qua hướng dẫn và nếu sản phẩm không được sử dụng đúng
cách đã được phân loại và mô tả theo các chỉ báo sau.
Cảnh báo
Cảnh báo
Cẩn trọng
Nội dung hiển thị tại cột này chỉ báo khả năng gây ra chết người hoặc thương
tích nặng.
Nội dung hiển thị tại cột này chỉ báo khả năng gây ra thương tích cho người
dùng hoặc gây hư hại.
Các loại hướng dẫn cần phải tuân thủ đã được phân loại và mô tả theo các ký hiệu hình ảnh sau.
Ký hiệu này chỉ báo mục "CẤM" thực hiện.
Ký hiệu này chỉ báo mục "BẮT BUỘC" phải tuân thủ.
Nếu dây nguồn bị hỏng, dây nguồn phải được thay
thế bởi nhà sản xuất hoặc đại lý dịch vụ hoặc người
có chuyên môn tương đương để tránh nguy hiểm.
Thiết bị này không dành cho người (bao gồm trẻ em)
thiểu năng về thể chất, cảm giác và tinh thần, hoặc
người thiếu kinh nghiệm và kiến thức, trừ khi họ đã
được giám sát hoặc hướng dẫn về việc sử dụng thiết bị
bởi người chịu trách nhiệm cho sự an toàn của họ.
Trẻ em phải được giám sát để đảm bảo rằng
trẻ không chơi với thiết bị.
Disconnect the power supply until blade is
stationary before cleaning and maintenance.
Ngắt nguồn điện tới khi cánh quạt dừng hẳn
trước khi vệ sinh và bảo trì.
Prohibit to install this fan where it could be directly
exposed to water or excess vapor. Product must be install on to the frame which is
enough strong, if the frame is not enough strong
it must be reinforced for it to be strong enough.
Do not use petrol, benzene, thinner or any other
such chemicals for cleaning the ventilation fan.
When this product no longer be used. It must not be
left in place but removed to prevent it from possibly
dropping.
Install this product securely.
This fan can not be mounted in outside of the
windows.
Do not allow water to contact electrical part
such as motor or switches.
This fan must be installed by qualified technician.
Otherwise, it is possible to drop down.
Do not immerse blade or other resin parts in hot
water over 60 C.
Do not install this product in places with excessive
oil fume.
Do not install this product in places with
excessive steam.
Prohibit to install this fan near cooking equipment.
Be sure to provide an appropriate opening for
air intake.
This product must be properly and reliably grounded.
Must not disassemble the unit for reconstruction.
It may cause fire or electric shock.
Do not spray or clean this product directly with water
or other liquid : Otherwise, a short circuit or an electric
shock may occur.
Use this product at the rated voltage and frequency
indicated on the name plate.
Make sure that its power switch is set to “OFF”
before you touch this product.
Otherwise, an electric shock may occur.
Do not switch this product on or off in case of gas
leakage : Otherwise, the electric spark may result
in an explosion.
Warning
3
Safety Instructions For service man
Hướng dẫn An toàn Dành cho thợ kỹ thuật
Cảnh báo
Sản phẩm này phải được tiếp địa đúng cách và ổn định.
Không được tháo thiết bị để lắp ráp lại.
Làm vậy có thể gây cháy hoặc điện giật.
Sử dụng sản phẩm này ở điện áp và tần số định
mức theo chỉ định trên bảng tên.
Đảm bảo rằng công tắc điện của quạt được chuyển
sang "TẮT" trước khi chạm vào sản phẩm.
Nếu không có thể xảy ra điện giật.
Không bật hoặc tắt sản phẩm này trong trường hợp
rò rỉ ga: Nếu không, tia lửa điện có thể gây nổ.
Không xịt vào hoặc vệ sinh sản phẩm này trực bằng
nước hoặc chất lỏng khác: Nếu không, đoản mạch hoặc
điện giật có thể xảy ra.
Caution
Cẩn trọng
Cấm lắp đặt quạt này ở nơi có khả năng tiếp xúc
trực tiếp với nước hoặc hơi nước quá nồng độ.
Không được gắn quạt này bên ngoài cửa sổ.
Không nhúng cánh quạt hoặc các bộ phận nhựa
trong nước nóng hơn 60 C.
Không để nước tiếp xúc với bộ phận điện như
động cơ hoặc công tắc.
Chỉ nhân viên kỹ thuật có chuyên môn mới được
lắp đặt quạt. Nếu không quạt có thể rơi xuống.
Cấm lắp đặt quạt này gần thiết bị nấu nướng.
Không lắp đặt sản phẩm này tại nơi có quá nhiều hơi dầu.
Phải lắp đặt sản phẩm vào khung đủ chắc, nếu khung
không đủ chắc, thì phải gia cố khung sao cho khung
đủ chắc.
Không dùng xăng, benzen, dung môi hay bất kỳ hóa
chất tương tự để vệ sinh quạt thông gió.
Khi không còn sử dụng sản phẩm này nữa.
Không được để chỗ cũ, mà phải tháo xuống để tránh
khả năng sản phẩm bị rơi.
Đảm bảo dành đủ không gian thoáng cho đường gió vào.
Lắp đặt sản phẩm này chắc chắn.
Không lắp đặt sản phẩm này tại nơi có quá nhiều
hơi nước.
Safety Instructions (Continued)
Installation regulation concerning local requirement should be fulfilled.
Use a device for disconnection from the supply, Which having a contact separation of at least 3mm in all poles
(switch), which must be incorporated in the fixed wiring in accordance with the local electrical wiring rules.
Precautions must be taken to avoid the back-flow of gas into the room from the open-flue of gas or other fuel-burning appliances.
This fan should be installed so that the metal parts of the product and mounting screw do not contact any metallic
members in the wall, such as metal laths, wire laths and metal plate. It is possible to cause fire harzards in case of leak.
Prohibit to install this fan in the cooling hood.
This fan should be installed so that the blades are more than 2.3m above the floor.
Malaysia market : This fan should be installed so that the blades are more than 2.5m above the floor.
Do not install the fan in the environment where rain hits directly.
Otherwise, it is possibility that water enter room inside.
Parts Name and Dimensions
Fan Duct sleeve
4
For service man
30 93
B
6
A
Terminal
Louver
Terminal box Fan body
Motor
C
D
45°
E
Installation hole 6xC
Installation hole 6 F
Supplied Accessories
The following accessories are provided with the ventilating fan in the package. When you unpack, check if the accessories are all
included. if not, please contact your dealer.
Installation and Operating Instructions
1 1
Screw for installing duct sleeve.
22
Screw for installing the fan body
32
No Appearance Name and Purpose Quantity
Caution
Cẩn trọng
Hướng dẫn An toàn (Tiếp) Dành cho thợ kỹ thuật
Phải tuân thủ quy định của địa phương liên quan đến việc lắp đặt.
Sử dụng một thiết bị để ngắt kết nối khỏi nguồn điện, thiết bị này phải có bộ phận cách ly tiếp xúc ít nhất 3mm
tại mọi cực (công tắc), phải được đấu kèm với dây diện cố định theo quy định đấu nối dây diện của địa phương.
Quạt phải được lắp đặt sao cho cánh quạt cao hơn mặt sàn 2,3m.
Đối với thị trường Malaysia : Quạt phải được lắp đặt sao cho cánh quạt cao hơn mặt sàn 2,5m.
Phải tuân theo các biện pháp phòng ngừa an toàn để tránh hút khí vào trong phòng từ nguồn ống khói đốt ga bên ngoài
hay từ các thiết bị đốt nhiên liệu khác.
Phải lắp đặt quạt sao cho các bộ phận kim loại của sản phẩm và ốc vít gắn không tiếp xúc với bất cứ bộ phận kim loại nào
trên tường như lưới kim loại, lưới dây điện hay tấm kim loại trong tường. Có khả năng gây ra hỏa hoạn nếu rò rỉ.
Nghiêm cấm lắp đặt quạt trong mui làm mát. Không lắp đặt quạt nơi mưa rơi trực tiếp.
Nếu không, nước có thể vào trong phòng.
Tên Bộ phận và Kích thước
Quạt Cực điện
Hộp cực điện
Màn chắn
Thân quạt
Động cơ
Lỗ lắp đặt 6xC
Lỗ lắp đặt ɸ 6
Unit : mm
Đơn vị: mm
A
Model B C D E F
12FV-15EGF1 230230 220 158 100
FV-10EGF1 113
176 177170 9.3 100
Kiểu máy
Phụ kiện Đi kèm
Các phụ kiện sau được kèm theo quạt thông gió trong hộp đựng. Khi mở hộp, hãy kiểm tra phụ tất cả phụ kiện đi kèm. Nếu không có,
vui lòng liên hệ đại lý của bạn.
Số thứ tự Hình dạng Tên và Mục đích sử dụng Số lượng
Hướng dẫn Lắp đặt và Vận hành
Ốc vít lắp đặt măng sông ống.
Ốc vít lắp đặt thân quạt.
Măng sông ống
How to Install For service man
Connect the power cord to the terminal according to wiring diagram and the local electrical wiring rules of fixed wiring.
2-1 Open the wiring cover and take off the cord clip. /
Terminal box Wiring cover
Cord clip
Raise the terminal for easy connecting.
1-1 Screws the duct sleeve to the wooden frame / wooden panel using two screws.
1. Duct sleeve installation
2. Power cord connection
5
Using wooden frame.
FV-10EGF1
FV-15EGF1
Model / G
120 - 130
165 - 175
Unit : mm
Dành cho thợ kỹ thuật
Cách Lắp đặt
Wall installation
Dùng khung gỗ
Louver
Fan body
Duct sleeve
Wooden Frame
30mm
25mm
G
Minimum
40mm
30mm
iniM
mum
mm04
Khung gỗ
Măng sông ống
Thân quạt
Màn chắn
Đơn vị : mm
Kiểu máy
1. Lắp đặt măng sông ống
2. Nối dây nguồn
Dùng hai ốc vít siết măng sông ống vào khung gỗ / tấm gỗ.
Duct sleeve
Măng sông ống
Duct sleeve
4X20mm screw
(Accessories)
Măng sông ống
Ốc vít ɸ 4X20mm
(Phụ kiện)
Note : “ UP” mark is setted the upper side.
IPX4 approval is based on installing this position.
Ký hiệu “UP” để chỉ báo cạnh trên.
Tiêu chuẩn IPX4 áp dụng dựa trên việc lắp đặt ở vị trí này.
Lưu ý :
Nối dây nguồn với cực theo sơ đồ đấu nối và quy định đấu nối dây điện của địa phương áp dụng cho việc cố định dây điện.
Mở nắp dây diện và tháo kẹp dây nguồn.
Hộp cực điện Nắp dây điện
Kẹp dây nguồn
Nâng cực điện để dễ dàng đấu nối.
Mở
How to Install (Continued) For service man
FV-10EGF1 FV-15EGF1
6
Power cord Power cord
Wiring power
cord shown
in the picture. Wiring power
cord shown
in the picture.
2-2 Connect the power cord according to the wiring diagram.
It must be connected with earth wire. (15-20mm longer than other lead wires.)
Replace the cord clip and the wiring cover. Secure with the cord clip and screw provided.
2-3 Wiring the power cord shown in the picture.
Screw for fixing cord clip
Terminal
Grounding
Note : Don’t loosen these screws.
Power cord
Power cord
It is required to use terminal
(Not included) that complies IEC 60998.
Make sure all connections are fastened
firmly after wiring is finished.
The all connections should be
accommodated in a suitable compartment.
Use a device for disconnection from the supply, which having a contact separation of at least 3mm in all poles
(switch), which must be incorporated in the fixed wiring in accordance with the local electrical wiring rules.
Spring plate
Copper wire Earth lead wire
Cord clip
Note : In order to avoid the dangers, it must be connected by qualified technician.
Dành cho thợ kỹ thuật
Cách Lắp đặt (Tiếp)
Nối dây nguồn theo sơ đồ đấu nối. Phải được đấu nối với dây tiếp địa. (dài hơn 15-20mm so với các dây dẫn khác.)
Lắp lại kẹp dây nguồn và nắp dây điện. Cố định bằng kẹp dây nguồn và ốc vít kèm theo.
Lưu ý : Để tránh nguy hiểm, chỉ kỹ thuật viên có chuyên môn mới được đấu nối.
Cực điện
Ốc vít cố định kẹp dây nguồn
Tiếp địa
Kẹp dây nguồn
Dây nguồn
Miếng đệm
lò xo
Dây đồng
Dây nguồn
Dây dẫn tiếp địa Power cord
(227IEC53 3x0.75mm )
Dây nguồn
(227IEC53 3x0,75mm )
2
Lưu ý : Không nới lỏng các ốc vít này. Cần thiết để sử dụng cực điện
(Không kèm theo) tuân theo tiêu chuẩn IEC 60998.
Đảm bảo rằng mọi kết nối được buộc chặt sau
khi hoàn tất công việc đấu nối.
Mọi phần đấu nối phải được đặt trong ngăn phù hợp.
Sử dụng một thiết bị để ngắt kết nối khỏi nguồn điện, thiết bị này phải có bộ phận cách ly tiếp xúc ít nhất 3mm tại mọi cực
(công tắc), phải được đấu kèm với dây diện cố định theo quy định đấu nối dây diện của địa phương.
Connect wiring / Đấu nối dây điện Power cord treatment / Xử lý dây nguồn
Wiring diagram / Sơ đồ đấu nối
Đấu nối dây nguồn theo hình minh họa.
Dây nguồn Dây nguồn
Đấu nối dây nguồn
theo hình minh họa. Đấu nối dây nguồn
theo hình minh họa.
GREEN / YELLOW
RED RED
BLACK
BLACK
134 C
WHITE L
N
L
N
THERMAL FUSE
(IN MOTOR)
DOUBLE POLE
SWITCH
(NOT INCLUDED)
CAPACITOR
How to Install (Continued) For service man
7
3. Fan body installation
3-1 Detach the louver.
3-2 Screw the fan body to the duct sleeve.
Note : Make sure that use screw to fix the fan body.
It may cause drop the fan body.
Louver Handle
3-3 Install the louver Louver holes
Louver
Projection
Hook Louver
Hook
Dành cho thợ kỹ thuật
Cách Lắp đặt (Tiếp)
3. Lắp đặt thân quạt
Tháo màn chắn.
This fan exhausts into the ceiling.
Install this fan so that exhaust air doesn’t blow to the other equipment, cord and wiring connection in ceiling.
Màn chắn Tay cầm
Dùng ốc vít siết thân quạt vào măng sông ống.
Lưu ý : Đảm bảo sử dụng ốc vít để cố định thân quạt.
Nếu không thân quạt có thể rơi xuống.
UP mark
Duct sleeve
4X12mm screw
(Accessories)
Fan body
Ốc vít ɸ4X12mm
(Phụ kiện)
Thân quạt
Ký hiệu UP
Măng sông ống
Lắp đặt màn chắn
1-1 Make appropriate hole in the ceiling
Lỗ gắn màn chắn
Màn chắn Màn chắn
Phần nhô
Móc Móc
1.
Caution
Cẩn trọng
Ceiling installation
1. Make a hole and wooden frame.
FV-10EGF1
FV-15EGF1
Model / A B
135 5
180 5
>125
>150
Unit : mm
Đơn vị : mm
Kiểu máy
How to Install (Continued) For service man
Dành cho thợ kỹ thuật
Cách Lắp đặt (Tiếp)
FV-10EGF1
FV-15EGF1
Model / C D
177
221
>250
>300
Kiểu máy
1-2 Build a wooden frame horizontally from the wooden keel.
1-3 Insert the duct sleeve into the hole.
1-4 Detach the louver.
2-1 Connect the power cord in accordance with page 5 - 6.
2-2 Screw the fan body to the duct sleeve.
Note : Make sure that use screw to fix the fan body.
It may cause drop the fan body.
Screw the duct sleeve to the
ceiling using two screws.
Wooden keel
Hole
Wooden Frame
Wooden Frame
Louver
Handle
4X20mm screw
for plug blot
(Accessories)
Ceiling
Ceiling
Duct sleeve
Duct sleeve
2. Fan body installation
2. Lắp đặt thân quạt
Duct sleeve
Up mark
Fan body
4X12mm screw
(Accessories)
8
5 - 6
Măng sông ống
Operation For user
Maintenance For user
Louver
Never use petrol, benzene ,thinner or any other such chemicals for cleaning the ventilating fan.
Fan body
When feeling cold by ventilation, turn off power switch.
Power switch
(Not Included)
OFF/ON switch
Ventilation
Stop OFF
ON
OFF/ON
switch
Blade
Caution
Thân quạt
Màn chắn
Vận hành Dành cho người dùng
Dành cho người dùng
Bảo trì
Cánh
quạt
Hãy tắt công tắc nguồn nếu thấy lạnh khi thông gió.
Công tắc nguồn
(Không kèm theo)
Công tắc TẮT/BẬT
Công tắc
TẮT/BẬT
TẮT
BẬT
Thông gió
Dừng
Cẩn trọng
Không được dùng xăng, benzen, dung môi hay bất kỳ hóa chất tương tự để vệ sinh quạt thông gió.
How to Install (Continued) For service man
Dành cho thợ kỹ thuật
Cách Lắp đặt (Tiếp)
Hook
Projection
Louver holes
Louver
2-3 Install the louver
Hook
Louver
9
Clean the louver surface as shown below.
Clean the dirt from louver, fan body and blade as shown below.
Maintenance (Continued) For user
10
Wipe the louver surface with a soft cloth or vacuum up the dust by cleaner.
The dirt condition depends on the environment.
Clean daily in case that the dust stands out.
Do not wipe the filter strongly. (It is possibility to be damaged.)
Do not allow water to contact electrical part
such as motor.
Do not take out the blade for cleaning.
Wear plastic gloves during cleaning may avoid accidents.
Once every one month
Once every three months
Remove the louver as shown in the figure.
(Please be careful of the falling dust etc.)
Rinse the louver with water, and then dry it with a soft dry cloth
or leave it air dry.
Do not immerse blade or other resin parts in hot
water over 60 C.
Caution
Dành cho người dùng
Bảo trì (Tiếp)
Cẩn trọng
Không để nước tiếp xúc với bộ phận điện
như động cơ.
Không nhúng cánh quạt hoặc các bộ phận nhựa
trong nước nóng hơn 60 C.
Không tháo cánh quạt ra để vệ sinh.
Đeo găng tay giấy bóng khi vệ sinh quạt có thể tránh được các tai nạn.
Mỗi tháng một lần Vệ sinh bề mặt màn chắn như hình bên dưới.
Dùng vải mềm lau bề mặt màn chắn hoặc dùng máy hút bụi để hút bụi.
Mức độ bám bụi phụ thuộc vào môi trường.
Vệ sinh hàng ngày nếu có nhiều bụi.
Không lau bộ lọc bằng lực mạnh. (Làm vậy có thể làm hỏng bộ lọc.)
Ba tháng một lần Vệ sinh bụi bẩn khỏi màn chắn, thân quạt và cánh quạt như hình bên dưới.
Tháo màn chắn như hình minh họa.
(Vui lòng chú ý bụi rơi xuống, v.v.) Dùng nước rửa xả màn chắn và sau đó dùng vải khô mềm để lau
khô hoặc hong khô.
Louver
Handle
Màn chắn
Tay cầm
11
Specification
Wipe the dust off the fan body with a soft cloth.
Finally, replace the louver.
After finishing maintenance, turn on the power switch.
After cleaning, replace the louver as shown in the figure.
1) Hang the louver on the hook and projections.
2) The louver should be completely cover the fan body.
Insulation Class : E, IP code : IPX4
Climate class : T
Type of Insulation : Functional Insulation
Maintenance (Continued) For user
Dành cho người dùng
Bảo trì (Tiếp)
Thông số
Dùng vải mềm lau sạch bụi trên thân quạt.
Cuối cùng, lắp lại màn chắn.
Sau khi vệ sinh, lắp lại màn chắn như hình minh họa.
1) Treo màn chắn vào móc và phần nhô.
2) Màn chắn phải che toàn bộ thân quạt.
Sau khi bảo trì xong, hãy bật công tắc nguồn.
Thân quạt
Louver holes
Louver
Hook
Projection
Màn chắn
Lỗ gắn màn chắn Phần nhô
Móc
Hook
Louver
Màn chắn
Móc
FV-10EGF1
FV-15EGF1
Exhaust
220 50 5.5 31.0
0.9
1.1
75
220 50 6.2 33.0155
230 50 5.9 31.075
230 50 6.6 33.0155
240 50 6.4 31.075
240 50 6.9 33.0155
Exhaust
Model Air
Direction
Voltage Frequency Air Volume Noise Net WeightPower
Consumption
Kiểu máy Hướng gió Điệp áp Tần số Tiêu thụ điện Lưu lượng gió Độ ồn Trọng lượng tịnh
Cấp cách điện: E, Mã IP: IPX4
Cấp khí hậu: T
Kiểu cách điện : Cách điện chức năng
10EGF1460 04

This manual suits for next models

1

Other Panasonic Fan manuals

Panasonic WhisperCeiling FV-15VQ3 User manual

Panasonic

Panasonic WhisperCeiling FV-15VQ3 User manual

Panasonic F-M14HW User manual

Panasonic

Panasonic F-M14HW User manual

Panasonic FV-17CU9 User manual

Panasonic

Panasonic FV-17CU9 User manual

Panasonic F-60FEN User manual

Panasonic

Panasonic F-60FEN User manual

Panasonic WhisperLite FV-08VQL5 User manual

Panasonic

Panasonic WhisperLite FV-08VQL5 User manual

Panasonic FY-25DSF2NET User manual

Panasonic

Panasonic FY-25DSF2NET User manual

Panasonic FV-0511VK2 User manual

Panasonic

Panasonic FV-0511VK2 User manual

Panasonic WhisperWelcome FV-05VFM2 User manual

Panasonic

Panasonic WhisperWelcome FV-05VFM2 User manual

Panasonic K14Y2 User manual

Panasonic

Panasonic K14Y2 User manual

Panasonic Whisper Green FV-08VKM1 User manual

Panasonic

Panasonic Whisper Green FV-08VKM1 User manual

Panasonic RG-C1315LA User manual

Panasonic

Panasonic RG-C1315LA User manual

Panasonic FV-0511VQL1 User manual

Panasonic

Panasonic FV-0511VQL1 User manual

Panasonic WhisperGreen FV-08VKM3 User manual

Panasonic

Panasonic WhisperGreen FV-08VKM3 User manual

Panasonic FY-150ZDY8 User manual

Panasonic

Panasonic FY-150ZDY8 User manual

Panasonic FV-1115VKL2 User manual

Panasonic

Panasonic FV-1115VKL2 User manual

Panasonic FV-05VS3 User manual

Panasonic

Panasonic FV-05VS3 User manual

Panasonic FV-08VRE1 User manual

Panasonic

Panasonic FV-08VRE1 User manual

Panasonic F-MN304 User manual

Panasonic

Panasonic F-MN304 User manual

Panasonic FV-20CUT1 User manual

Panasonic

Panasonic FV-20CUT1 User manual

Panasonic FV-07VF1 User manual

Panasonic

Panasonic FV-07VF1 User manual

Panasonic WhisperCeiling FV-15VQ4 User manual

Panasonic

Panasonic WhisperCeiling FV-15VQ4 User manual

Panasonic FV-10BAT1 User manual

Panasonic

Panasonic FV-10BAT1 User manual

Panasonic F-35TMH User manual

Panasonic

Panasonic F-35TMH User manual

Panasonic F-60WWK User manual

Panasonic

Panasonic F-60WWK User manual

Popular Fan manuals by other brands

Hunter 99127 user manual

Hunter

Hunter 99127 user manual

Ebmpapst R2E280-AE52-05-FAN operating instructions

Ebmpapst

Ebmpapst R2E280-AE52-05-FAN operating instructions

LEGRAND HPM Serene CF12AC4BWE instruction manual

LEGRAND

LEGRAND HPM Serene CF12AC4BWE instruction manual

tomado TFC7503W instruction manual

tomado

tomado TFC7503W instruction manual

enervent eWind Pegasos Operating and maintenance instructions

enervent

enervent eWind Pegasos Operating and maintenance instructions

Luminance Brands kathy ireland HOME CF930LBS00 owner's manual

Luminance Brands

Luminance Brands kathy ireland HOME CF930LBS00 owner's manual

Hinkley 980002 installation instructions

Hinkley

Hinkley 980002 installation instructions

Lifebreath Air Purifier 155ECM Operation and installation manual

Lifebreath

Lifebreath Air Purifier 155ECM Operation and installation manual

Kooper EOLO 2193269 User instructions

Kooper

Kooper EOLO 2193269 User instructions

Lasko 1844 operating manual

Lasko

Lasko 1844 operating manual

Brookstone MightyMax user guide

Brookstone

Brookstone MightyMax user guide

Malmbergs 99 930 08 instruction manual

Malmbergs

Malmbergs 99 930 08 instruction manual

Soleus Air FC1-15-30 owner's manual

Soleus Air

Soleus Air FC1-15-30 owner's manual

Ferroli 15 Installation and operation manual

Ferroli

Ferroli 15 Installation and operation manual

S&P PCD110X manual

S&P

S&P PCD110X manual

HIRED-HAND Super-Saver Bunsen Jet owner's manual

HIRED-HAND

HIRED-HAND Super-Saver Bunsen Jet owner's manual

Hunter 50008 installation manual

Hunter

Hunter 50008 installation manual

Teral CMF3-HOH instruction manual

Teral

Teral CMF3-HOH instruction manual

manuals.online logo
manuals.online logoBrands
  • About & Mission
  • Contact us
  • Privacy Policy
  • Terms and Conditions

Copyright 2025 Manuals.Online. All Rights Reserved.