manuals.online logo
Brands
  1. Home
  2. •
  3. Brands
  4. •
  5. Panasonic
  6. •
  7. Intercom System
  8. •
  9. Panasonic VL-MVN511 User manual

Panasonic VL-MVN511 User manual

1
2
D1
D2
3
4
D3
D4
5
6
R1
R2
7
8
R3
IN1
9
10
IN2
IN3
11IN4
12P1
13P2
Power
supply
Power
supply
DOORPHONE 1* DOORPHONE 2*
MAIN MONITOR
POWER SUPPLY UNIT
24 V DC
NP
NP
NP
NP
NP
NP
Electric lock
Electric lock
220-240 V AC Connection device
for option input
(A contact)
Terminal box
(4-conductor
wiring)
PBX*3
12 V AC/DC
12 V AC/DC
NP NP
RELAY BOX
A
B
C
D
E
F
G
R1
1
R2 R3
S2
1
S1 S4
2
S3
2
Key Features
•SmartphoneConnect:You can use your smartphone or tablet as a sub monitor to respond to visitors and unlock electric locks no matter where you are in the
home. You can also monitor doorphone images when you want to check the door entrance. Maximum of 4 supported smartphones/tablets can be connected.
* The main monitor must be on the same home Wi-Fi network as a smartphone/tablet (with the dedicated app installed).
* It is also necessary to run the dedicated app in order to receive visitor's calls on a smartphone/tablet.
* Compatible mobile devices: iPhone 5 and later and iPad (iOS 7.0 or later) / AndroidTM smartphones and tablets (Android 4.0 or later)
* Some mobile devices may not be compatible.
* For the latest information about the app and compatible devices, visit the following website. http://panasonic.net/pcc/support/intercom/smartphone/
•E-mailNotication: The main monitor can send e-mail with a time stamp and image of visitors to e-mail addresses registered in advance, enabling you to
check who has visited when you are outside the house (even when you are overseas).
When commercially available sensors (such as a re alarm, calling button, etc.) are connected to the main monitor, you can receive notications.
* To use this function, a main monitor with e-mail sender information registered must be connected to the internet.
* E-mail may not be able to be sent depending on the condition of the network.
•Wi-FiConnection: In addition to smartphones/tablets, the main monitor can also wirelessly connect to the Wi-Fi router for easy connections without a cable.
You can congure Wi-Fi settings using a simplied method (called WPS).
•ElectricLockReleaseSupport:The gate or door lock can be easily and quickly unlocked with either the main monitor or a mobile device such as a
smartphone/tablet, even from the second oor of the house.
•PictureRecordingFunction:The Main Monitor records the images of up to 400 (50 visitors, 8 shots per visitor).
•Wide-AngleCamera:Wide-angle lens covers approximately 170 degrees horizontally and 130 degrees vertically.
•VoiceChangeFunction:This function makes woman’s voice (higher keys) sounds like a man’s (lower keys).
•NightVision:Door Station is equipped with LED lights (illumination lamp). It enables the colour display of visitors at a distance of about 50 cm at night.
Wiring schematic diagram
Accessory Information Optional Accessories
VL-SVN511AZ
Video Intercom System
Door Station
(Doorphone)
CMOS 0.3 M pixels
VL-V555
(Surface mount)
Lobby Station
VL-V590
Door Station
(Doorphone)
CMOS 1.0 M pixels
VL-V554
(Surface mount)
VL-V554U
(Flash mount)
For the Door Station:
Mounting base × 1, Screw (4 mm x 12 mm) × 4,
Screw (3.8 mm x 20 mm) x 2, Name plate × 2, Hex wrench × 1
Relay Box and Related Items:
Relay box × 1, Cable binder × 1, Screw (4 mm x 40 mm) x 2
For the Main Monitor Station:
Mounting bracket × 1, Cable binder × 2, Screw (4 mm x 16 mm) x 2,
Power supply unit (VL-PS241) × 1, AC cable x 1, Cable binder x 1,
Screw (4 mm x 40 mm) x 2
Wire type and length
*1 Type: Single-pair cable with outer sheath (jacket)
Conductor: Copper solid
•
A certied power supply wiring has to be used with this equipment. The relevant national
installation and/or equipment regulations shall be considered. A certied power supply wiring
not lighter than ordinary polyvinyl chloride exible wiring according to IEC 60227 shall be used.
*2 When using an electric lock or a connection device for option input (A contact), select a
device that meets the following guidelines:
• Electric lock connection terminal (S1/S2, S3/S4):
– N/O dry closure contact
– 12 V AC/DC, less than 1 A
•
Connection device for option input (A contact) terminal (IN1/IN2/IN3/IN4):
– Input method: No-voltage contact
– Open-circuit voltage between terminals: DC 7 V or less
– Detection denite time: 0.1 second or more
– Short-circuit between terminals: 5 mA or less
– Resistance value: make: 500 Ω or less make, break: 15 KΩ or more
*3 Connectable PBX Model Numbers:
KX-TDA30/100/100D/200/600 series, KX-TDE100/200/600 series,
KX-NS300/500/700/1000 series
Please consult your dealer when connecting with a PBX.
*Flash mounting box (VL-MB554) is sold separately.
Up to 20 main monitors can be
connected.
*When you use an additional doorphone, the maximum number of the electric locks that can be connected
to the doorphone depends on the type of doorphone. Consult your dealer for further information.
Wiring run Wire type*1
Diameter Length (Max.)
Main monitor – Doorphone
(including lobby station) A
φ0.65 mm 22 AWG 100 m
φ1.0 mm 18 AWG 130 m
φ0.5 mm CAT 5 50 m
Main monitor – Power supply unit Bφ0.65 mm 22 AWG 10 m
φ1.0 mm 18 AWG 20 m
Power supply unit – AC power source C
φ1.2 mm - φ2.0 mm (17 AWG - 12 AWG)
No requirement
Main monitor – Relay box Dφ0.65 mm 22 AWG 100 m
φ1.0 mm 18 AWG 130 m
Relay box –Electric lock*2 E
φ0.5 mm - φ 1.2 mm (24 AWG - 17 AWG)
According to specication of connected device.
Main monitor – Connection device for option input (A contact)
*2
F
φ0.5 mm - φ 1.2 mm (24 AWG - 17 AWG)
According to specication of connected device.
Main monitor – PBX
Gφ0.65 mm CAT 3 or 22 AWG
100 m
NP: Non-polarised
Specications
VL-MVN511 VL-V555 VL-PS241 VL-RLY1
Model number and name Main Monitor Station (Main monitor) Door Station (Doorphone) Power Supply Unit
* indoor use only Relay Box
Dimensions
(mm)
Power source
Power supply unit (VL-PS241)
24 V DC, 0.5 A
Power supplied by the main monitor Input: 220-240 V AC, 0.2 A ( 50 / 60 Hz )
Output: 24 V DC, 0.6 A Power supplied by the main monitor
Power consumption Standby: Approx. 1.8 W
During operation: Approx. 10 W ---
Dimensions (H x W x D)
(Excluding protruding sections)
186 x 161 x 23.5 mm 169 x 118 x 30 mm 104 x 100 x 54 mm 92 x 78 x 38 mm
Weight 485 g 395 g 215 g 130 g
Operating environment Ambient temperature: Approx. 0 °C to +40 °C,
Relative humidity (non-condensing): up to 90 %
Ambient temperature: Approx. -15 °C to +55 °C,
Relative humidity (non-condensing): up to 90 %
(tested up to -20 °C)
Ambient temperature: Approx. 0 °C to +40 °C
Relative humidity (non-condensing): up to 90 %
Ambient temperature: Approx. 0 °C to +40 °C
Relative humidity (non-condensing): up to 90 %
Display
5-inch, wide colour / WQVGA (480 x 272 pixel)
---
Display Language
English
---
Talking method Hands-free ---
Frequency range Wi-Fi: (IEEE 802.11 b/g/n 2.4 GHz) ---
Viewing angle -Horizontally: Approx. 170°
Vertically: Approx. 130° - -
Installation method Wall mount (mounting bracket supplied) Surface mount (mounting base supplied)
* Optional ush mounting box is sold separately. Wall mount or attach to DIN rail Wall mount or attach to DIN rail
Minimum illuminance required
- 1 lx (within approx. 50 cm from the camera lens) - -
Lighting method - White coloured LED lights - -
IP rating / IK rating -IP54*1 / Compliant with IK07 - -
External material
Flame retardant ABS and PS resin Aluminium and ame retardant PC+PS resin Flame retardant PC+ABS resin Flame retardant ABS resin
*1 Water resistance is only assured if the Door Station is installed correctly according to the instructions in the Installation Guide, and appropriate water protection measures are taken.
Trademarks and registered trademarks
- Wi-Fi is a trademark or registered trademark of Wi-Fi Alliance.
- iPhone and iPad are trademarks of Apple Inc., registered in the U.S. and other countries.
- Android is a trademark of Google Inc.
- All other trademarks identified herein are the property of their respective owners.
Important
- Safety Precaution: carefully read the operating instructions and installation manual before using this product.
• The actual product may vary slightly from photograph.
• All pictures of the LCD display are simulated.
• Weights and dimensions are approximate.
• Design and Specifications are subject to change without notice.
• These products may be subject to export control regulations.
Installing the Doorphone
DISTRIBUTED BY :
MG-DHPL015EN 1510ITP/ZZZ-AZ1
Model Composition
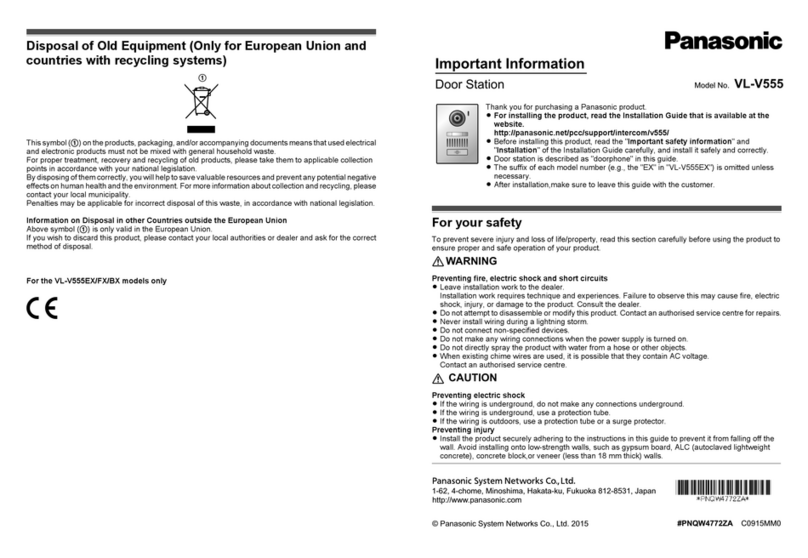
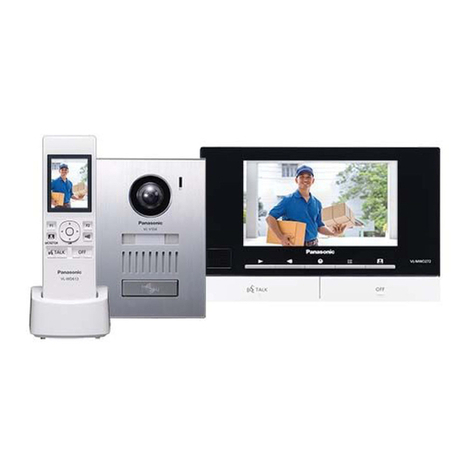
VL-SVN511AZ VL-MVN511 x 1, VL-V555 x 1
Screw x 2 Mounting base
(accessory)
Wire
(User supplied)
2mm Hex wrench
Screws (accessory) x 4
83.5 mm
Wall
Screws
Mounting
bracket Wall
Wire (User supplied)
83.5 mm
Installing the Power Supply Unit Installing the Relay Box
Front view Front view
Top view
Bottom View
Top view
Bottom View
Side View
Top View
DC Cable
AC IN connector
To the electric lock
Remove the screw
on the cable cover.
25 mm
7 mm
R1 R2 R3
1 2 R1 R2 R3
1 2
1 2
S1 S2 S3 S4
DC OUT
terminal
Cable binder
hole
Electric lock
terminal
Main monitor
terminal connector
DC cable
binder hole
button
When using mounting box
(option): VL-MB554
Screws (accessory) x 4
169 mm
186 mm
118 mm
161 mm
Mounting
base
Mounting
bracket
Main Monitor
43.1 mm
86.8 mm
83.5 mm
83.5 mm
Image range
Centre of the
door station
1450 mm
2100 mm
2500 mm
400 mm
500 mm
130°
170°
500 mm
From the main monitor
Installing the Main Monitor
•Installation Position
9 mm
Cable from the main monitor
7 mm
25 mm
Cable from the electric lock
100 mm
151 mm
37 mm
AC cable
DC cable
Remove the screw
on the cable cover.
100 78
104 92
118
161
169
186
54 38
30
23.5
Up to 2

Other manuals for VL-MVN511

1

This manual suits for next models

4

Other Panasonic Intercom System manuals

Panasonic VL-MW274 User manual

Panasonic

Panasonic VL-MW274 User manual

Panasonic VL1700 Owner's manual

Panasonic

Panasonic VL1700 Owner's manual

Panasonic VL-GM301A Operating instructions

Panasonic

Panasonic VL-GM301A Operating instructions

Panasonic VL-SWD273 User manual

Panasonic

Panasonic VL-SWD273 User manual

Panasonic VL-V591 User manual

Panasonic

Panasonic VL-V591 User manual

Panasonic VL-SWD275 Operating manual

Panasonic

Panasonic VL-SWD275 Operating manual

Panasonic VL-V700 User manual

Panasonic

Panasonic VL-V700 User manual

Panasonic VL-SWD501AZ User manual

Panasonic

Panasonic VL-SWD501AZ User manual

Panasonic VL-VN1500 User manual

Panasonic

Panasonic VL-VN1500 User manual

Panasonic KX-NTV150 User manual

Panasonic

Panasonic KX-NTV150 User manual

Panasonic VL-SVN511 Series User manual

Panasonic

Panasonic VL-SVN511 Series User manual

Panasonic VL-V900 User manual

Panasonic

Panasonic VL-V900 User manual

Panasonic VL-MWD275 User manual

Panasonic

Panasonic VL-MWD275 User manual

Panasonic VL-SWD272BX User manual

Panasonic

Panasonic VL-SWD272BX User manual

Panasonic VL-SW251BX User manual

Panasonic

Panasonic VL-SW251BX User manual

Panasonic KX-NS User manual

Panasonic

Panasonic KX-NS User manual

Panasonic VL-VC3500BX Technical manual

Panasonic

Panasonic VL-VC3500BX Technical manual

Panasonic VL-VN1800 User manual

Panasonic

Panasonic VL-VN1800 User manual

Panasonic VL-SVN511BX User manual

Panasonic

Panasonic VL-SVN511BX User manual

Panasonic VL-SWH705 Series User manual

Panasonic

Panasonic VL-SWH705 Series User manual

Panasonic VL-V591 Operating instructions

Panasonic

Panasonic VL-V591 Operating instructions

Panasonic VL-SV71 User manual

Panasonic

Panasonic VL-SV71 User manual

Panasonic VL-SW102BX User manual

Panasonic

Panasonic VL-SW102BX User manual

Panasonic LST 116 User manual

Panasonic

Panasonic LST 116 User manual

Popular Intercom System manuals by other brands

Commend Duetto EE 980 product manual

Commend

Commend Duetto EE 980 product manual

Byron SX304 instruction manual

Byron

Byron SX304 instruction manual

Valcom InformaCast VIP-9894-1-Finish-IC quick start guide

Valcom

Valcom InformaCast VIP-9894-1-Finish-IC quick start guide

2easy DMR11-D8 quick start guide

2easy

2easy DMR11-D8 quick start guide

ABB Welcome M M2303 user guide

ABB

ABB Welcome M M2303 user guide

2easy XT24 user manual

2easy

2easy XT24 user manual

Viking E-65-SS Technical manual

Viking

Viking E-65-SS Technical manual

Commax CIOT-1020M2 user manual

Commax

Commax CIOT-1020M2 user manual

Elvox 8015 Wiring instructions

Elvox

Elvox 8015 Wiring instructions

Laskomex CD-2000 Installation, operation & programming instructions

Laskomex

Laskomex CD-2000 Installation, operation & programming instructions

Bell System DAX manual

Bell System

Bell System DAX manual

Mircom 9500 Series Installation, programming, and troubleshooting manual

Mircom

Mircom 9500 Series Installation, programming, and troubleshooting manual

Commend GEC 880 user manual

Commend

Commend GEC 880 user manual

Cardo Systems FREECOM 1 Plus user manual

Cardo Systems

Cardo Systems FREECOM 1 Plus user manual

Comelit AUDIO KIT A MAX Technical manual

Comelit

Comelit AUDIO KIT A MAX Technical manual

golmar Soul kit quick guide

golmar

golmar Soul kit quick guide

Toa EXES-6000 CP-64 Installation handbook

Toa

Toa EXES-6000 CP-64 Installation handbook

strex SP112 user manual

strex

strex SP112 user manual

manuals.online logo
manuals.online logoBrands
  • About & Mission
  • Contact us
  • Privacy Policy
  • Terms and Conditions

Copyright 2025 Manuals.Online. All Rights Reserved.