manuals.online logo
Brands
  1. Home
  2. •
  3. Brands
  4. •
  5. Panasonic
  6. •
  7. Telephone System
  8. •
  9. Panasonic KX-TG5110M - 5.8 GHz DSS Expandable Cordless... User manual

Panasonic KX-TG5110M - 5.8 GHz DSS Expandable Cordless... User manual

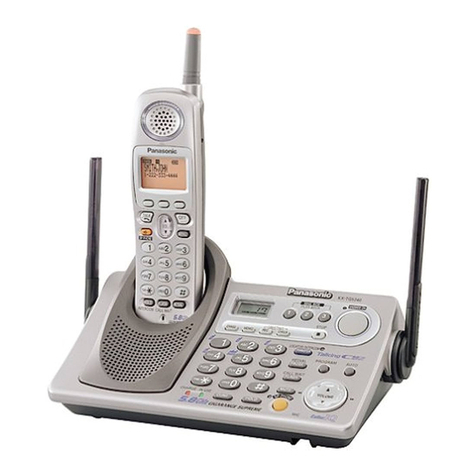
This document is a text description of the control panel layout for the product listed below.
The complete operating instructions are available online in PDF format from the Customer Support section of
www.panasonic.com.
If you need the operating instructions in an alternate format please contact Customer Support.
Model Number KX-TG5100/5110M
5.8GHz Expandable Cordless Phone System
Handset
With the handset facing you you will find the antenna. It is the narrow 2-inch long protrusion at the top right.
Just below the top of the front of the handset is a shallow oval concave. This is the earpiece. The smooth surface
below the earpiece is the display; its upper edge is defined by a small ridge in the center of the handset below the
earpiece.
Below the display are three soft keys. Each soft key is used to select the function shown on the display directly
above it. In the standby mode "PLAY" is above the right soft key and works as the message playback key.
During a conversation "PRIVACY" is displayed above the left soft key which works as the privacy key.
In the center below these keys is a round concave key called the Navigator key. This key has four active areas:
the 12 o’clock 3 o’clock 6 o’clock and 9 o’clock positions. The 12 and 6 o’clock positions serve as the UP and
DOWN keys respectively. They are also used to control the volume during a call. The 3 and 9 o’clock positions
are the right and left arrow keys respectively. These are used to enter the directory list. The 3 o’clock position is
often used as the "Yes" key during programming.
To the left of the Navigator key is a triangular button with a raised "nib" called the TALK button. The thin
button below the TALK button is the SPEAKERPHONE button. To the right of the Navigator key is another
triangular button with a raised "ridge". This is the OFF button. The thin button below the OFF button is the
HOLD button. The HOLD button serves as the INTERCOM or CLEAR button.
Below these buttons is the telephone keypad which is laid out in the conventional telephone arrangement with a
"nib" on the 5 button. Immediately below the keypad are three thin buttons. The left-most button is the
CONFERENCE or FUNCTION button. The middle one is the FLASH or CALL WAIT button. The right-most
button is the PAUSE or REDIAL button.
The small indentation just below the FLASH button is the microphone. The two metal ridges at the bottom of the
handset are the charge contacts.
With the handset still facing you you will find the headset jack on the left side of the handset parallel to the
SPEAKERPHONE button. It has a rubber cover that can be opened by pulling down and is not removable.
Finally on the reverse side of the handset is a circular textured area which is the speakerphone’s speaker.
Base unit
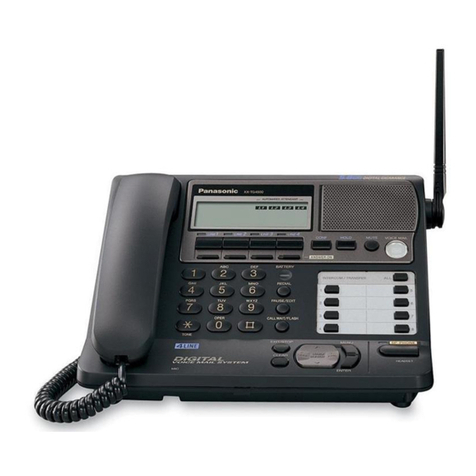
With the base unit facing you you will find antennas on the left and right sides of the unit. The antennas can be
easily rotated so that they always point upward whether the unit is placed on a desk or is wall-mounted.
The handset’s charging cradle is about 2 inches wide and 1 inch deep as is located on the lower left corner of the
unit. To the lower right of the charging cradle is the battery charge indicator light. The handset is placed in the
cradle with the handset's buttons facing the front of the base. The unit will beep when the handset is properly
placed in the cradle for charging. The rectangular textured area toward the back of the unit above the cradle is
the speaker.
To the right of the speaker is a smooth rectangular depression. This is the display.
Below the display is the telephone keypad. The keypad is laid out in the conventional telephone arrangement
with a "nib" on the 5 button. Below the keypad are 3 thin buttons. The left-most is the LOCATOR button and an
indicator light is to the left. The LOCATOR button also serves as the INTERCOM or TRANSFER button. The
middle button is the CONFERENCE button and the right-most button is the HOLD button.
To the right of these buttons you will find a larger button which is the DIGITAL SPEAKERPHONE button. It
has an indicator light above it and to the left. Above the DIGITAL SPEAKERPHONE button to the right of the
keypad are four thin buttons in a vertical row. The bottom button is the MUTE button with an indicator light to
the upper left. Above it is the FLASH or CALL WAIT button. Next is the PAUSE or REDIAL button. The top
button is the PRIVACY button.
To the right of the display is a row of three buttons. The left-most button is the GREETING button. Immediately
to the right is the similar-sized MEMO button. To the right of these buttons is a button shaped like a triangle
pointing left. This is the ANSWER ON button with an indicator light to the upper left.
Below the ANSWER ON button is a row of three round buttons. From left to right they are the MAILBOX 1
MAILBOX 2 and MAILBOX 3 buttons. Once the Answering System is activated these three buttons control
mailbox features such as recording and playing back messages.
Directly below the MAILBOX buttons is a large round concave key called the Navigator key. This key has four
active areas: the 12 o’clock 3 o’clock 6 o’clock and 9 o’clock positions. The 12 and 6 o’clock positions serve as
the UP and DOWN keys respectively. They are also used to control the volume during a call. The 3 and 9
o’clock positions are the right and left arrow keys respectively. These are used to enter the directory list. The 3
o’clock position is often used as the "Yes" key during programming.
To the upper left of the Navigator key is the STOP button. To the upper right is the FUNCTION or EDIT button.
Finally to the lower-left of the Navigator key is the ERASE button.
Charger unit (KX-TG5110 Users only)
The handset’s charging cradle is located in the center of the charger unit and has a single indicator light beneath
it. The charging cradle is about 2 inches wide and 1 inch deep. The handset is placed in this cradle with the
handset’s buttons facing the front of the charging cradle. The unit will beep when the handset is properly placed
in the cradle for charging.
PQQX13603YA May 26 2003

Other manuals for KX-TG5110M - 5.8 GHz DSS Expandable Cordless...

1

This manual suits for next models

2

Other Panasonic Telephone System manuals

Panasonic Easa-Phone VA-123210 User manual

Panasonic

Panasonic Easa-Phone VA-123210 User manual

Panasonic KX-TS560MX User manual

Panasonic

Panasonic KX-TS560MX User manual

Panasonic KX-TG6441T - Cordless Phone - Metallic User manual

Panasonic

Panasonic KX-TG6441T - Cordless Phone - Metallic User manual

Panasonic KX-TD612E User manual

Panasonic

Panasonic KX-TD612E User manual

Panasonic KX-TG5210M User manual

Panasonic

Panasonic KX-TG5210M User manual

Panasonic KX-TVM50 User manual

Panasonic

Panasonic KX-TVM50 User manual

Panasonic KX-TA1232 Use and care manual

Panasonic

Panasonic KX-TA1232 Use and care manual

Panasonic KX-TGP500 User manual

Panasonic

Panasonic KX-TGP500 User manual

Panasonic KX-TD1232NE Operating instructions

Panasonic

Panasonic KX-TD1232NE Operating instructions

Panasonic KX-TD612NE User manual

Panasonic

Panasonic KX-TD612NE User manual

Panasonic KXT3250 - Integrated Telephone System User manual

Panasonic

Panasonic KXT3250 - Integrated Telephone System User manual

Panasonic KX-TD816JT Operating instructions

Panasonic

Panasonic KX-TD816JT Operating instructions

Panasonic KX-TD6112E Specification sheet

Panasonic

Panasonic KX-TD6112E Specification sheet

Panasonic KX-TA1232 User manual

Panasonic

Panasonic KX-TA1232 User manual

Panasonic KX-TA624 Technical specifications

Panasonic

Panasonic KX-TA624 Technical specifications

Panasonic KX-TS105W User manual

Panasonic

Panasonic KX-TS105W User manual

Panasonic KX-TA1232 User manual

Panasonic

Panasonic KX-TA1232 User manual

Panasonic S-ICX User manual

Panasonic

Panasonic S-ICX User manual

Panasonic KX-TD816AL User manual

Panasonic

Panasonic KX-TD816AL User manual

Panasonic KX-TD816RUKX-TD1232RU Assembly instructions

Panasonic

Panasonic KX-TD816RUKX-TD1232RU Assembly instructions

Panasonic KX-TD612E Specification sheet

Panasonic

Panasonic KX-TD612E Specification sheet

Panasonic KX-T2375MXW User manual

Panasonic

Panasonic KX-T2375MXW User manual

Panasonic KX-TD816CE Installation and operating instructions

Panasonic

Panasonic KX-TD816CE Installation and operating instructions

Panasonic KX-TD816E User manual

Panasonic

Panasonic KX-TD816E User manual

Popular Telephone System manuals by other brands

AVM FRITZ!Box Fon WLAN 7340 Installation, configuration and operation

AVM

AVM FRITZ!Box Fon WLAN 7340 Installation, configuration and operation

Dukane SCR+ Operation manual

Dukane

Dukane SCR+ Operation manual

ESI 50L Administrator's manual

ESI

ESI 50L Administrator's manual

Vodavi Starplus Triad 1 System programming manual

Vodavi

Vodavi Starplus Triad 1 System programming manual

Tynetec Advent xt user guide

Tynetec

Tynetec Advent xt user guide

Speakerbus ALTO quick start guide

Speakerbus

Speakerbus ALTO quick start guide

AT&T DEFINITY user guide

AT&T

AT&T DEFINITY user guide

CallingSYS ZJ-66 user manual

CallingSYS

CallingSYS ZJ-66 user manual

Comdial DX-80 Installation and maintenance manual

Comdial

Comdial DX-80 Installation and maintenance manual

Toshiba Strata CIX LVMU Installation and programming guide

Toshiba

Toshiba Strata CIX LVMU Installation and programming guide

Walker Poets Installation and maintenance manual

Walker

Walker Poets Installation and maintenance manual

Bizfon 7000 Quick reference guide

Bizfon

Bizfon 7000 Quick reference guide

AMERICOM D0408 Attendant's guide

AMERICOM

AMERICOM D0408 Attendant's guide

3Com NBX V3000 Analog Upgrade information

3Com

3Com NBX V3000 Analog Upgrade information

Eela Audio EA816 user manual

Eela Audio

Eela Audio EA816 user manual

Poly VVX Series user guide

Poly

Poly VVX Series user guide

Yealink T48S Skype For Business Edition Startup guide

Yealink

Yealink T48S Skype For Business Edition Startup guide

3Com NBX 100 Administrator's guide

3Com

3Com NBX 100 Administrator's guide

manuals.online logo
manuals.online logoBrands
  • About & Mission
  • Contact us
  • Privacy Policy
  • Terms and Conditions

Copyright 2025 Manuals.Online. All Rights Reserved.