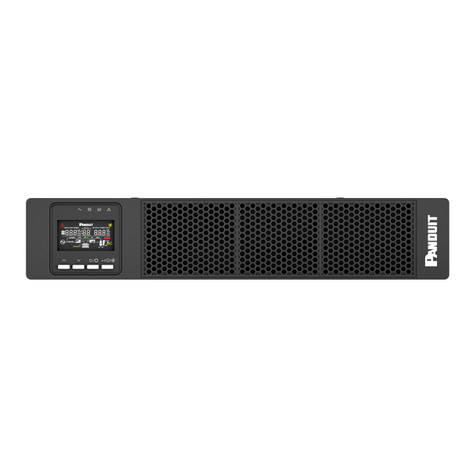
Panduit UPS00100DC User manual

Page 1of 46
IA-CD-0009
Rev: 07 09-2018
© Panduit Corp. 2018
UNINTERRUPTIBLE POWER SUPPLY (UPS)
USER MANUAL
UPS00100DC
IA-CD-0009 Rev. 07
English
NOTE: Throughout this document, the UPS00100DC (Uninterruptible Power Supply)
may also be referred to as “UPS”.
Email:
techsupport@panduit.com
EU Website:
www.panduit.com/emea
7
Technical Support:
Tel: 1-888-506-5400 ext. 83255
Panduit Europe • EMEA Service Center
Almelo, Netherlands
Tel: +31-546-580-452
Fax: +31-546-580-441
TO REDUCE RISK OF INJURY, THE USER
MUST READ THE USER MANUAL
Part No: UPS00100DC

USER MANUAL
UPS00100DC
© Panduit Corp. 2018
IA-CD-0009 Rev. 07 Page 2of 46
Table of Contents
1. INTRODUCTION...............................................................................................................................................................6
1.1. BACKGROUND .........................................................................................................................................................6
1.2. PURPOSE..................................................................................................................................................................7
1.3. EQUIPMENT OVERVIEW ..........................................................................................................................................7
1.4. OPTIONAL LOAD SENSE MODULE............................................................................................................................7
1.5. CABLE DETAILS.........................................................................................................................................................7
1.6. TERMS AND ABBREVIATIONS ..................................................................................................................................8
2. UPS GENERAL SPECIFICATIONS.......................................................................................................................................8
2.1. Model Part Number.................................................................................................................................................8
2.2. Input Power .............................................................................................................................................................8
2.3. Output Power ..........................................................................................................................................................8
2.4. Environmental .........................................................................................................................................................9
2.5. Compliance..............................................................................................................................................................9
2.6. Installation.............................................................................................................................................................10
2.7. Performance ..........................................................................................................................................................11
2.8. Indicators...............................................................................................................................................................11
2.9. Power Switch.........................................................................................................................................................11
2.10. Web User Interface .............................................................................................................................................11
2.11. Network Interface ...............................................................................................................................................11
2.12. Shipping and Storage...........................................................................................................................................11
2.13. Maintenance........................................................................................................................................................12
3. PRECAUTIONS AND GENERAL GUIDELINES ..................................................................................................................12
3.1. Safety Warnings.....................................................................................................................................................13
3.2. Electrical Safety Practices......................................................................................................................................14
3.3. Operation ..............................................................................................................................................................14
3.4. Personal Safety......................................................................................................................................................14
3.5. Service ...................................................................................................................................................................15
4. HARDWARE INSTALLATION ..........................................................................................................................................15
4.1. BACKGROUND .......................................................................................................................................................15
4.2. PRODUCT INSPECTION/Registration .....................................................................................................................15
4.3. OVERVIEW .............................................................................................................................................................15
4.4. HARDWARE INSTALL..............................................................................................................................................17
4.5. WIRING ..................................................................................................................................................................17
4.5.1. ON/OFF POWER SWITCH ..............................................................................................................................18

USER MANUAL
UPS00100DC
© Panduit Corp. 2018
IA-CD-0009 Rev. 07 Page 3of 46
4.6. DC POWER INPUT ..................................................................................................................................................19
4.7. SENSE INPUT..........................................................................................................................................................19
4.8. DC POWER OUTLET................................................................................................................................................19
4.9. GROUND ................................................................................................................................................................20
4.10. CON-CONTROL RELAY..........................................................................................................................................20
4.11. Status LEDs – Visual Indicators............................................................................................................................20
5. NETWORK INSTALLATION.............................................................................................................................................21
5.1. ETHERNET..............................................................................................................................................................21
5.2. WEB BROWSER INTERFACE (WBI) .........................................................................................................................21
5.3. CONNECTING TO THE UPS.....................................................................................................................................21
5.4. MODULE ................................................................................................................................................................22
5.4.1. Module Status...............................................................................................................................................22
5.4.2. Input, Volts and Input, Amps ........................................................................................................................23
5.4.3. Output, Volts and Output, Amps ..................................................................................................................23
5.4.4. Load Sense, Amps .........................................................................................................................................23
5.4.5. Uptime, HHHHHH:MM:SS.............................................................................................................................23
5.4.6. Temperature, deg C......................................................................................................................................23
5.4.7. State of Health..............................................................................................................................................23
5.4.8. Events ...........................................................................................................................................................24
5.5. USERNAME AND PASSWORD ................................................................................................................................26
5.6. SETTINGS ...............................................................................................................................................................27
5.6.1. MODEL ..........................................................................................................................................................27
5.6.2. RESET ............................................................................................................................................................27
5.6.3. SERIAL NUMBER............................................................................................................................................28
5.6.4. PASSWORD ...................................................................................................................................................28
5.6.5. USERNAME ...................................................................................................................................................29
5.6.6. FIRMWARE VERSION ....................................................................................................................................30
5.6.7. UPDATE.........................................................................................................................................................30
5.6.8. MAC ID..........................................................................................................................................................30
5.6.9. RESTORE........................................................................................................................................................30
5.6.10. LANGUAGE....................................................................................................................................................31
5.6.11. SNMP ............................................................................................................................................................32
5.6.11.1. IP (SNMP AGENT) PORT ................................................................................................................................33
5.6.11.2. SYSCONTACT or SYSLOCATION .....................................................................................................................34
5.6.11.3. SNMPv1 and SNMPv2C.................................................................................................................................35

USER MANUAL
UPS00100DC
© Panduit Corp. 2018
IA-CD-0009 Rev. 07 Page 4of 46
5.6.11.4. SNMPv3 ........................................................................................................................................................35
5.6.11.5. SNMP TRAPS (NOTIFICATIONS) ....................................................................................................................36
5.7. NETWORK ..............................................................................................................................................................37
5.8. CHARGE .................................................................................................................................................................39
5.8.1. CHARGE STATUS ...........................................................................................................................................39
5.8.2. CHARGE SPEED .............................................................................................................................................39
5.8.3. CHARGE POWER ...........................................................................................................................................40
5.8.4. CHARGE TIME ...............................................................................................................................................40
5.8.5. CHARGE LEVEL ..............................................................................................................................................40
5.8.6. HOLD TIME....................................................................................................................................................40
6. OPERATION...................................................................................................................................................................41
6.1. LOAD SUPPORT......................................................................................................................................................41
6.2. RESET .....................................................................................................................................................................41
6.3. RESTORING FACTORY DEFAULTS...........................................................................................................................41
6.4. GENERAL OPERATION............................................................................................................................................42
6.5. STATUS VIA PC .......................................................................................................................................................42
6.6. STATUS VIA PLC .....................................................................................................................................................42
7. TROUBLESHOOTING .....................................................................................................................................................44
7.1. LED STATUS INDICATORS.......................................................................................................................................44
7.1.1. MOD LED – Module Status Indicator............................................................................................................44
7.1.2. NET LED – Network Status Indicator.............................................................................................................45
7.1.3. CHG LED – Charge Status Indicator...............................................................................................................45
7.2 SNMP Traps ....................................................................................................................................................................46
Table of Figures
Figure 1: Front View of UPS....................................................................................................................................................6
Figure 2: Optional Load Sense Module...................................................................................................................................7
Figure 3: Product Label and Description ..............................................................................................................................10
Figure 4: UPS Front Panel Details .........................................................................................................................................16
Figure 5: Reset Button and Serial Number ...........................................................................................................................16
Figure 6: DIN Rail Installation ...............................................................................................................................................17
Figure 7: System Wiring Diagram .........................................................................................................................................18
Figure 8: UPS ON/OFF Switch Positions................................................................................................................................18
Figure 9: Module Web Page .................................................................................................................................................22
Figure 10: Even Log Web Page .............................................................................................................................................25
Figure 11: User Login Pop-up Window .................................................................................................................................26
Figure 12: Setting Web Page ................................................................................................................................................27
Figure 13: Reset Pop-up Window .........................................................................................................................................28

USER MANUAL
UPS00100DC
© Panduit Corp. 2018
IA-CD-0009 Rev. 07 Page 5of 46
Figure 14: Password Change Pop-up Window......................................................................................................................29
Figure 15: Username Change Pop-up Window ....................................................................................................................29
Figure 16: Firmware Update Pop-up Window......................................................................................................................30
Figure 17: Restore Pop-up Window .....................................................................................................................................31
Figure 18: Settings Web Page...............................................................................................................................................32
Figure 19: SNMP Configuration Web Page...........................................................................................................................33
Figure 20: SNMP IP Port Change Pop-up Window ...............................................................................................................33
Figure 21: SNMP Configuration Web Page (With IP Port Changed).....................................................................................34
Figure 22: SNMP System Pop-up Window............................................................................................................................35
Figure 23: SNMPv1/v2C Edit Pop-up Window......................................................................................................................35
Figure 24: SNMPv3 Edit Pop-up Window .............................................................................................................................36
Figure 25: SNMP Trap (Notification) Pop-up Window..........................................................................................................36
Figure 26: Network Web Page..............................................................................................................................................37
Figure 27: Device Name Change Pop-up Window................................................................................................................37
Figure 28: Network Settings Change Web Page...................................................................................................................38
Figure 29: Change Web Page................................................................................................................................................39
Figure 30: Charge Speed Change Pop-up Window...............................................................................................................40
Table of Tables
Table 1: Safety Warnings ......................................................................................................................................................13
Table 2: Relay Contact Status ...............................................................................................................................................20
Table 3: Module Status.........................................................................................................................................................22
Table 4: UPS Charge Status...................................................................................................................................................39
Table 5: UPS Charge Speed Power and Time........................................................................................................................39
Table 6: Estimated UPS Life Based on Temperature ............................................................................................................41
Table 7: UPS Module Status Indicator ..................................................................................................................................44
Table 8: UPS Network Status Indicators ...............................................................................................................................45
Table 9: UPS Charge Status Indicators..................................................................................................................................45
Table 10: UPS Status to SNMP Trap Mapping ......................................................................................................................46
NOTE: In the interest of higher quality and value, Panduit products are
continually being improved and updated.
Consequently, pictures may vary from the enclosed product.

USER MANUAL
UPS00100DC
© Panduit Corp. 2018
IA-CD-0009 Rev. 07 Page 6of 46
1. INTRODUCTION
1.1. BACKGROUND
The Uninterruptible Power Supply (UPS) is designed to provide backup power to a 24 VDC load in the event of
power dips or power outages. The unit utilizes Electrochemical Double-Layer Capacitor cells (EDLCs) as the
energy storage device to provide a long, maintenance-free operating life without the need for battery
replacement. The UPS accepts a 24 VDC input voltage1and provides a 24 VDC output voltage2to a load with a
maximum output power of 100W. A bank of twelve 350F EDLCs provide energy storage of approximately 9.3
kJ which can supply a 100W load for a run time of about 1 minute. The UPS may be used in a redundant power
supply system or a single supply system. In a redundant power supply system, the UPS monitors the power
delivered by a second supply to the load through an external sense resistor (sold separately). Operating status
and control are provided via a web server running on the UPS. This web server may be accessed via a web
browser running on a PC connected to the same network as the UPS. The ON/OFF switch may be used to turn
the UPS off which removes voltage from the terminals so that the unit is safe for installation or servicing
downstream equipment.
The UPS utilizes multiple EDLC cells in series to achieve the appropriate operating voltage of the UPS. Due to
small differences in cell capacitance and leakage current, it is possible to have different voltages on each of the
cells in the series stack. Each cell voltage is monitored to stay in a safe range. The UPS includes a
microcontroller that performs this “cell balancing” function by monitoring each of the twelve cell voltages and
adjusting these voltages to be consistent across the stack thus allowing the cells to all age at the same rate to
provide maximum life of the product and hold time to the load. The UPS also periodically measures the
capacitance of each cell. This information is used to calculate the energy storage capability (hold time) of the
UPS as well as the operating lifetime (State of Health) of the unit.
Figure 1: Front View of UPS
1Refer to the Input Power Section 2.2 for the details.
2Refer to the Output Power Section 2.3 for the details.

USER MANUAL
UPS00100DC
© Panduit Corp. 2018
IA-CD-0009 Rev. 07 Page 7of 46
1.2. PURPOSE
The purpose of this document is to provide the user with the information necessary to operate the UPS.
1.3. EQUIPMENT OVERVIEW
Box Contents:
•The Uninterruptible Power Supply box contains the following:
•Uninterruptible Power Supply (UPS) model number UPS00100DC
•This User Manual in three languages
•A UPS Performance Date Product Certificate
1.4. OPTIONAL LOAD SENSE MODULE
Please see the Load Sense Module UPS003LSM instruction manual for integrating the load sense module to
your system. Document number PA27224A01 is included with the LSM or on www.panduit.com. The schematic
in Figure 7 shows the wiring diagram for the system configuration with redundant power supplies and the LSM.
Figure 2 shows the Load Sense Module.
Figure 2: Optional Load Sense Module
1.5. CABLE DETAILS
•The UPS hardwire terminals can receive up to 12 AWG wiring, maximum. Consult with a qualified
electrician for appropriate wire gauge needed for the application.
•The network cable is a standard CAT5E Ethernet patch cord or greater.

USER MANUAL
UPS00100DC
© Panduit Corp. 2018
IA-CD-0009 Rev. 07 Page 8of 46
1.6. TERMS AND ABBREVIATIONS
•A: Ampere
•AWG: American Wire Gauge
•DC: Direct Current
•DHCP: Dynamic Host Configuration Protocol
•EDLC: Electrochemical (Electric) Double-Layer Capacitor
•EOL: End of Life
•EOSL: End of Service Life
•F: Farad
•LED: Light Emitting Diode
•LSM: Load Sense Module
•MAC: Media Access Control
•PC: Personal Computer
•PCB: Printed Circuit Board
•SOH: State of Health
•UPS: Uninterruptible Power Supply
•V: Volts
•VDC: Volts Direct Current
•W: Watts
•WBI: Web Browser Interface
2. UPS GENERAL SPECIFICATIONS
2.1. Model Part Number
•UPS00100DC - Panduit's 100-Watt Uninterruptible Power Supply
2.2. Input Power
•Voltage: 24.0 to 28.0 VDC
•Power Minimum: 24W with no load, charging on “slow charge” setting per Section 5.8.2
•Power Maximum: 156W with 100W load, charging on “fast charge” setting per Section 5.8.2
•Protection: Over-voltage shut down at 32 VDC. Maximum over-voltage is +50 VDC at 25°C ambient.
•Reverse voltage maximum is -50 VDC at 25°C ambient
CAUTION Never apply a voltage that exceeds the maximum over-voltage under any
circumstances.
2.3. Output Power
•Input present:
oVoltage: 24 VDC
oCurrent: 6.5A max.
o500 mV drop at 100W load
•Input not present:
oVoltage: 24 VDC pass through
o21.0 to 23.0 VDC charging Current: 4.5A pass-through
•4.55A charging at 22 VDC. Short-circuit rating: 6.1A to 7.7A

USER MANUAL
UPS00100DC
© Panduit Corp. 2018
IA-CD-0009 Rev. 07 Page 9of 46
2.4. Environmental
•Operating Temperature: -40 to +60°C
•Operating Humidity: 0 to 95% RH, non-condensing
•Operational Vibration: 2G at 10 to 500 Hz
•Operational Shock: 20G (11ms 3 bumps / direction, 18 bumps in total)
•Storage (non-operational) Temperature: -40 to +70°C
•Storage Humidity: 0 to 95% RH, noncondensing
2.5. Compliance
•FCC Title 47 CFR 15 Subpart B Emissions Class A
•CAN ICES-3(A)/NMB-3(A), ICES-003 Issue 5
•UL 508 and CSA-C22.2 No. 107.1-01 “Industrial Control Equipment”
•UL 60950-1, 2nd ed, 2014-10-14, CSA C22.2 No. 60950-1-07, 2nd ed, 2014-10
"Information Technology Equipment - Safety - Part 1: General Requirements"
•(Low-Voltage Directive*) IEC 60950-1:2005, A2:2013,
EN60950-1:2006+A11:2009+A1:2010+A12:2010+A2:2013
"Information Technology Equipment - Safety - Part 1: General Requirements"
•RoHS All materials and components used must meet the material restrictions of European Directive
2011/65/EU on the Restriction of Hazardous Substances
•IP20 per IEC 60529
•Hazardous Location:
oExTR Reference Number: US/UL/ExTR18.0001/00
oExTR Free Reference Number: 4788081819-18ATEX1992
oISA 12.12.01:2013, CSA C22.2 No. 213-1987M (R2013) “Standard for Nonincendive Electrical
Equipment for Use in Class I and II, Division 2, Groups A, B, C, and D and Class III, Divisions 1 and 2
Hazardous (Classified) Locations”
oIEC/EN 60079-15, 4th Edition (2010-01)
oIEC/EN 60079-0, 6th Edition (2011-06)
oIECEx: IECEx UL 18.0001X
oATEX: DEMKO 18 ATEX 1992X

USER MANUAL
UPS00100DC
© Panduit Corp. 2018
IA-CD-0009 Rev. 07 Page 10 of 46
Figure 3: Product Label and Description
NOTE: For use in Class I, Zone 2 environment, the UPS/LSM must be used in an enclosure certified for use in
Class I, Zone 2, Groups IIC. The equipment shall only be used in an area of not more than pollution degree 2, as
defined in IEC/EN 60664-1. The equipment shall be installed in an enclosure that provides a degree of
protection not less than IP 54 in accordance with IEC/EN 60079-15 (tool accessible). Transient protection shall
be provided that is set at a level not exceeding 140 % of the peak rated voltage value at the supply terminals to
the equipment. The enclosure must have a door or cover accessible only using a tool.
NOTE: This product is intended for use in a restricted location such as inside a machine, control cabinet,
enclosure, or similar structure. Restricted access can be provided by a door, cover, or similar physical means
that requires the use of tools, keys, or other secure methods to gain access. The level of security required
should determine the location, protection, and access methods. Not for use in a computer room as defined in
the Standard for the Protection of Information Technology Equipment, ANSI/NFPA 75.
2.6. Installation
•Top hat (DIN) rail EN 50022
•Width: 81 mm (3.2 in)
•Depth: 178 mm (7.0 in)
•Height: 145 mm (5.7 in)
•Weight: 5 lbs, max.
•Switch: Output On/Off, recessed
•Terminals: screw type, accepts 18 to 12 AWG, stranded/solid/terminated wire
•Control wiring is along the top edge.
oInput (INP 1+, INP 2-): Connection to the power source. Observe polarity when wiring.
oSense (SEN 3+, SEN 4-): Connection to the optional Load Sense Module. Observe polarity when wiring.
oOutput (OUT 5+, OUT 6-): Connection to the load. Observe polarity when wiring.
Model No. / Manufacture Date
Input / Output / Temp. Ratings
Conformances
Warnings
Approvals
MAC Address
Serial Number

USER MANUAL
UPS00100DC
© Panduit Corp. 2018
IA-CD-0009 Rev. 07 Page 11 of 46
•Alerting/Communication wiring is along the bottom edge of the UPS.
oControl Output: Isolated, SPST-NO (Form A) contact, rated 30 VDC at 1A maximum that may be
connected to an alarm. Contact will be closed when the output of the UPS is providing power.
oCommunications: RJ45 jack for Ethernet (10BaseT) communications.
2.7. Performance
•Hold Time: Typically, 1 minute ± 15% with a 100W load connected to the output terminals. The Hold Time
will vary depending on the State of Health of the UPS. The Hold Time is also affected by the load: a lighter
load will result in a longer Hold Time.
•Voltage Drop: 500 mV maximum from Input to Output when Input power is present.
•Output Transition Transient: 5 ms max, 18 to 23 VDC with a 100W load present (transient when
transitioning from pass through to UPS backup power).
•Ripple Voltage: 50 mVp-p max. over 20 Hz to 20 MHz.
•Charge Times:
oFast: 9 to 12 minutes at nominal 31.8W Input Power
oSlow: 11 to 15 minutes at nominal 22.5W Input Power
2.8. Indicators
•Module Status: per The EtherNet/IP Specification (Volume 2, Chapter 9 Section 4.3) – refer to Module
Status Indicator Section 7.1.1 for details.
•Network Status: per The EtherNet/IP Specification (Volume 2, Chapter 9 Section 4.4) – refer to Network
Status Indicator Section 7.1.2 for details.
•Charge Status – refer to Charge Status Indicator Section 7.1.3 for details.
2.9. Power Switch
•A toggle switch to enable and disable UPS operations – refer to ON/OFF POWER SWITCH Section 4.5.1 for
details.
2.10. Web User Interface
•IP Address: Dynamic by default: the UPS requires DHCP server on the same subnet to establish
communications. The UPS could be reconfigured to a Static IP Address. Refer to the Network Section 5.7 on
how to change this setting.
•Content (Available pages in the WBI):
oModule
oNetwork
oCharge
oSettings
2.11. Network Interface
•Protocol: Ethernet/IP, operating as a slave, Generic Profile
•Certification: ODVA
2.12. Shipping and Storage
NOTE: The UPS must be stored or shipped with the power switch turned ON
•Refer to ON/OFF POWER SWITCH Section 4.5.1 for removing the UPS from service and preparing it for
shipping or storage.

USER MANUAL
UPS00100DC
© Panduit Corp. 2018
IA-CD-0009 Rev. 07 Page 12 of 46
2.13. Maintenance
•State of Health (SOH) - Capacity remaining until End of Life
o20 years at 20°C maximum UPS ambient temperature
o5.8 years at 40°C maximum UPS ambient temperature
o1.8 years at 60°C maximum UPS ambient temperature
3. PRECAUTIONS AND GENERAL GUIDELINES
The basic condition for safe use and proper operation of the UPS is the knowledge and attention to the safety
information provided in this manual. The following safety information must be observed by all personnel working
with the UPS. All rules and instructions for the work place must be observed especially those pertaining to the
prevention of accidents.
The information and instructions contained in this document are not intended to be utilized as a substitute for
proper training and experience in the safe installation and operation of said product. Prior to installation, it is the
owner’s responsibility to consult with the appropriate local Authority Having Jurisdiction (AHJ) for all applicable
codes, permits, regulations, and standards.
This product, should only be installed and serviced by a licensed electrical contractor, or competent
technician that meets the following qualifications:
•Is thoroughly familiar with this product and the instructions for installation and operation.
•Is trained (accredited) in industry-accepted safe operating practices and procedures regarding identification
and mitigation of high and low-voltage hazards and situations.
•Is trained to identify and install appropriately-sized Branch Circuit Disconnect(s) with appropriately-sized
Branch-Circuit Protective Rating and Short-Circuit Current Rating (SCCR) before connecting any Panduit
product to the branch circuit.
•Is trained and authorized to energize, de-energize, clear, and ground power distribution equipment.
•Is trained in the care and use of PPE (personal protective equipment) including, but not limited to: arc-flash
protective clothing, safety glasses, face shield, hard hat, gloves, and non-conductive tools (clamp stick, hot
stick, etc.).
This symbol is used to call your attention to hazards or unsafe practices which could result in an
injury or property damage. The signal word, defined below, indicates the severity of the hazard.
The message after the signal word provides information for preventing or avoiding the hazard.
WARNING
Hazards which, if not avoided, COULD result in severe injury or death.
CAUTION Hazards or unsafe practices which, if not avoided, MAY result in injury or
property damage.

USER MANUAL
UPS00100DC
© Panduit Corp. 2018
IA-CD-0009 Rev. 07 Page 13 of 46
3.1. Safety Warnings
WARNING
•Read all safety warning and all instructions. Failure to follow the warnings and
instructions may result in electric shock, fire, and/or serious injury.
•Save all warnings and instructions for future reference.
Table 1: Safety Warnings
Panduit Corp. recommends the UPS be used with all installed safety features. Customer
assumes all liability for injury that could result from improper use of this UPS and
responsibility for all necessary training to ensure safe operation of this UPS.
•
FOR INSTALLATION AND USE BY TRAINED PERSONNEL ONLY.
•
IF ANY DAMAGE TO THE PRODUCT IS APPARENT OR SUSPECTED, DO NOT
USE THE PRODUCT. REFER PRODUCT TO QUALIFIED SERVICE PERSONNEL.
•
FCC WARNING: CHANGES OR MODIFICATIONSTO THE PRODUCT WILL VOID
THE USER’S AUTHORITY TO OPERATE THE PRODUCT.
•
USE RECOMMENDED ACCESSORIES. CONSULT THE OWNER’S MANUAL FOR
RECOMMENDED ACCESSORIES. THE USE OF IMPROPER ACCESSORIES MAY
CAUSE RISK OF INJURY TO PERSONS.
•
SUCCESSFUL AND SAFE OPERATION OF THIS EQUIPMENT IS DEPENDENT ON
PROPER HANDLING, STORAGE AND INSTALLATION.

USER MANUAL
UPS00100DC
© Panduit Corp. 2018
IA-CD-0009 Rev. 07 Page 14 of 46
3.2. Electrical Safety Practices
GROUNDING:
In the event of a malfunction or breakdown, grounding provides a path of least
resistance for electric current which reduces the risk of electrical shock.
Improper connection of the equipment grounding conductor can result in a risk of
electric shock. The conductor with insulation having an outer surface that is green (with
or without a yellow stripe) is the equipment-grounding conductor.
Check with a qualified electrician, or service personnel if the grounding instructions are
not completely understood or if in doubt as to whether the UPS is properly grounded.
Avoid body contact with earthed or grounded surfaces, such as pipes, radiators, ranges,
and refrigerators.
There is an increased risk of electric shock if your body is earthed or grounded.
3.3. Operation
WARNING
ONLY OPERATE THE UPS IN A CLEAN, DRY, INDOOR ENVIRONMENT.
DO NOT EXPOSE THE UPS TO RAIN OR WET CONDITIONS.
Water entering a UPS will increase the risk of electric shock.
KEEP AWAY FROM LIVE CIRCUITS:
•
Operating personnel must not remove covers.
•
Replacement of components and internal adjustments must be made by qualified
maintenance personnel.
•
Disconnect power when replacing components.
•
Dangerous voltages may exist even with the power removed.
•
To avoid injuries, always disconnect power and turn power switch to OFF.
•
Input connection to the product must remain accessible as a disconnect device.
•
DO NOT work on the product; connect or disconnect cables during periods of
lightning.
•
Provide wiring per national and local electrical codes.
3.4. Personal Safety
WARNING
•Use personal protective equipment. Safety glasses must be worn always by all
personnel when installing or uninstalling the UPS.

USER MANUAL
UPS00100DC
© Panduit Corp. 2018
IA-CD-0009 Rev. 07 Page 15 of 46
3.5. Service
Have your UPS serviced by a qualified repair personnel using only identical replacement parts.
Contact Panduit Customer Service and Technical Support at the following locations:
Customer Service
800-777-3300
Email: cs@panduit.com
General Technical Support
The information contained in this manual is based on experiences to date and is believed to be reliable. It is
intended as a Web Interface for use by personnel having technical skill at their own discretion and risk. We do
not guarantee favorable results or assume any liability in connection with its use. Dimensions contained herein
are for reference purposes only. For specific dimensional requirements consult the factory. This publication is not
to be taken as a license to operate under or a recommendation to infringe any existing patents.
4. HARDWARE INSTALLATION
4.1. BACKGROUND
The UPS is designed to be installed on a the EN 60715 NS35 DIN rail. Use of this product in other applications
is acceptable but other precautions may be required to allow for specific installations and are not covered in
this manual.
4.2. PRODUCT INSPECTION/Registration
Inspect the UPS for any visible signs of damage before installing. If damaged, please contact Panduit customer
support at 1-800-777-3300 or cs@panduit.com.
Please register your product to receive notification of firmware and product updates at:
https://pages.panduit.com/Product-Registration-Request.html
4.3. OVERVIEW
The physical connections3to the UPS are arranged on the top and bottom edge of the front panel on the unit.
The top edge of the unit contains the functional interfaces which includes the input voltage source connections
(INP 1+, INP 2-), the external sense resistor connections (SEN 3+, SEN 4-), the output voltage connections (OUT
5+, OUT 6-), and the chassis ground (GRD 7). The bottom edge of the unit contains the communication
interfaces which includes the control output relay connections (CON 8, CON 9) and the Ethernet connections
(‹…›10). The front panel also contains an ON/OFF power switch and three indicator LEDs. The front panel is
shown in Figure 4: UPS Front Panel Details. Refer to Figure 5 for the location of the reset button and serial
number.
3Make sure to observe the polarity of the connections between the Power Supply and UPS, between the LSM and UPS, and
between the Load and the UPS so they are properly connected.

USER MANUAL
UPS00100DC
© Panduit Corp. 2018
IA-CD-0009 Rev. 07 Page 16 of 46
Figure 4: UPS Front Panel Details
Figure 5: Reset Button and Serial Number

USER MANUAL
UPS00100DC
© Panduit Corp. 2018
IA-CD-0009 Rev. 07 Page 17 of 46
4.4. HARDWARE INSTALL
Figure 6: DIN Rail Installation
No minimum side-to-side spacing to other devices is required for proper operation of the UPS. However,
ensure there is ample space to cable components to protect the cabling integrity. Also ensure there is access
to the power switch, the LEDs, the reset button, and the Ethernet port on the underside of the device.
To install the UPS, place the module with the DIN rail guide on the top edge of the DIN rail and then snap it
downwards as shown in Figure 6: DIN Rail Installation. To remove the UPS, release the snap-on catch using a
standard screwdriver, tilt the unit up to detach the module from the bottom edge of the DIN rail as shown in
Figure 6: DIN Rail Installation then lift the unit off the top edge of the DIN rail.
4.5. WIRING
This product is intended to be hardwired at the customer site/location. It must be installed by a qualified
electrician in compliance with all local and national regulations.
NOTE: The UPS should be shipped with the power switch in the ON position. Ensure that the power switch is
in the OFF position before installation.
A typical configuration is where the UPS provides backup power to a load with redundant power source as
shown in Figure 7: System Wiring Diagram. The Primary Power Supply provides power to the load through the
optional load sense module (LSM). UPS SEN 3+ pin is connected to pin 3 of the LSM and UPS SEN 4- pin is
connected to pin 4 of the LSM.
Another configuration may be where the UPS provides backup power to a load with a single power source.
Using Figure 7: System Wiring Diagram to visualize this configuration, remove the Primary Power Supply, the
LSM and the associated wiring. Then relabel the Secondary Power Supply and the Secondary connection to
load as Primary. In this configuration no LSM is required and there will be no connections to the SEN pins on
the UPS.

USER MANUAL
UPS00100DC
© Panduit Corp. 2018
IA-CD-0009 Rev. 07 Page 18 of 46
Figure 7: System Wiring Diagram
Warning: A disconnect switch is required on the input circuit in accordance with the National Electric
Code, ANSI/NFPA 70.
4.5.1. ON/OFF POWER SWITCH
This toggle switch enables operation of the UPS when it is set to the “ON” position. When set to the
“OFF” position, the LEDs will be OFF and there will be no voltage present on any of the output (OUT)
terminals, making the UPS safe for installation or servicing downstream equipment.
Figure 8: UPS ON/OFF Switch Positions
1
0

USER MANUAL
UPS00100DC
© Panduit Corp. 2018
IA-CD-0009 Rev. 07 Page 19 of 46
It is recommended to discharge the cells before storage and/or transportation the UPS. The
recommended way of discharging these cells is to remove all connections to the UPS and then set the
UPS power switch to the “ON” position. NOTE: UPS LEDs will turn on and output voltage will be present
on the UPS output (OUT) terminals until the cells discharge below the working voltage. Leave the UPS in
a safe, controlled environment until the LEDs power off. It will take approximately one hour with no
load for the cells to drain below the working voltage. Once the LEDs turn off, it is now safe to place the
UPS into the appropriate packaging for storage or transport. NOTE: Store and/or transport the UPS
with the power switch in the “ON” position.
Note that when the toggle switch is in the “ON” position, voltage may still be present at the DC output
terminals even when the input terminals are disconnected from power. Do not attempt to make
connections to the terminals when the toggle switch is in the “ON” position.
Warning: A disconnect switch shall be provided by others for DC input circuit and shall be in accordance
with the National Electric Code, ANSI/NFPA 70.
Connect the conductors according to the wiring diagram on Figure 7: System Wiring Diagram. Consult
the Load Sense Module Instruction Manual before installing the Load Sense Module. Omit connections
to the optional Load Sense Module if redundant power connection is not used.
4.6. DC POWER INPUT
The two screw terminals above the legend marked “INP” are to be connected to an external DC power supply.
The terminal marked “+” is to be connected to the positive supply line from the power supply and the terminal
marked “-” is to be connected to the return or ground line4to the power supply.The input maximum voltage
should not be greater than 28 VDC.
The terminals are designed to accept 18 to 12 AWG (0.823 mm2to 3.31 mm2) wire. Torque terminal screws to
7 in-lbs. (0.7909 Nm). Ensure the proper local and national regulations are followed when selecting wiring
components with regards to the system configuration.
4.7. SENSE INPUT
The two terminals above the legend marked “SEN” are to be connected to the optional load sense module,
Panduit part number UPS0030LSM. The input voltage should not be greater than 28 VDC.
The terminals are designed to accept 18 to 12 AWG (0.823 mm2to 3.31 mm2) wire. Torque terminal screws to
7 in-lbs. (0.7909 Nm). Ensure the proper local and national regulations are followed when selecting wiring
components with regards to the system configuration.
4.8. DC POWER OUTLET
The two terminals above the legend marked “OUT” are to be connected to the load. The terminal marked “+”
is to be connected to the positive supply line to the load and the terminal marked “-” is to be connected to the
return or ground line5from the load. Note that the “-” terminal for the power input and power output are
connected internal to the UPS. The current draw from the UPS to the load should not be greater than 4.5 A.
The operating output voltage should not be greater than 28 VDC.
4This is may or may not be the same ground as the UPS chassis ground (GRD 7), depending on the system configuration.
5This may or may not be the same ground as the UPS chassis ground (GRD 7) depending on the system configuration.

USER MANUAL
UPS00100DC
© Panduit Corp. 2018
IA-CD-0009 Rev. 07 Page 20 of 46
The terminals are designed to accept 18 to 12 AWG (0.823 mm2to 3.31 mm2) wire. Torque terminal screws to
7 in-lbs. (0.7909 Nm). Insure the proper local and national regulations are followed when selecting wiring
components with regards to the system configuration.
4.9. GROUND
The terminal above the legend GND should be connected to the equipment ground.
4.10. CON-CONTROL RELAY
The two terminals below the legend “CON” provide a normally open, single-pole/single-throw (SPST-NO Form
A) relay contact. The contact shall be closed if output power is present and off if output power is not present.
This device offers added visibility through a separate communication channel (PLC, light stack, etc.). The status
of the relay follows the charge status indicator as shown in table below.
Table 2: Relay Contact Status
4.11. Status LEDs – Visual Indicators
There are three LEDs on the front panel of the UPS.
•MOD – represents the status of the Module (UPS), per the EtherNet/IP Adaptation of CIP, CIP Network Library
Standard, Volume 2
•NET – represent the status of the network connection to the UPS, per the EtherNet/IP Adaptation of CIP, CIP
Network Library Standard, Volume 2
•CHG – represents the charge status of the UPS
Refer to the Troubleshooting Section 7 for the details on these indicators.
Input Output Charge Status Control Output
0 VDC 0 VDC N/A Off
24 VDC 24 VDC pass through Charging On
24 VDC 24 VDC pass through Charged On
0 VDC 18-22 VDC backup Discharging On
0 VDC 0 VDC Discharged Off
Table of contents
Other Panduit UPS manuals

Panduit
Panduit smartzone U01N11L User manual

Panduit
Panduit SmartZone User manual

Panduit
Panduit smartzone 1-3KVA User manual

Panduit
Panduit smartzone 5-10KVA User manual

Panduit
Panduit UPS003024024015 User manual

Panduit
Panduit UPS003LSM User manual

Panduit
Panduit SmartZone User manual

Panduit
Panduit Smartzone U01N11V User manual

Panduit
Panduit UPS003LSM User manual
Popular UPS manuals by other brands

Huawei
Huawei UPS2000-G-6 kVA user manual

socomec
socomec ITYS 10 kVA Installation and operating manual

LEGRAND
LEGRAND KEOR SPE R/T Installation and user manual

Rockwell Automation
Rockwell Automation 1606-XLS240-UPS instruction manual

Siel
Siel SAFEPOWER-EVO-HF Series Installation and user manual

CyberPower
CyberPower 649532012855 Specification sheet